GBGB
Before use
(cautions for safety)
16
Before use
(cautions for safety)
17
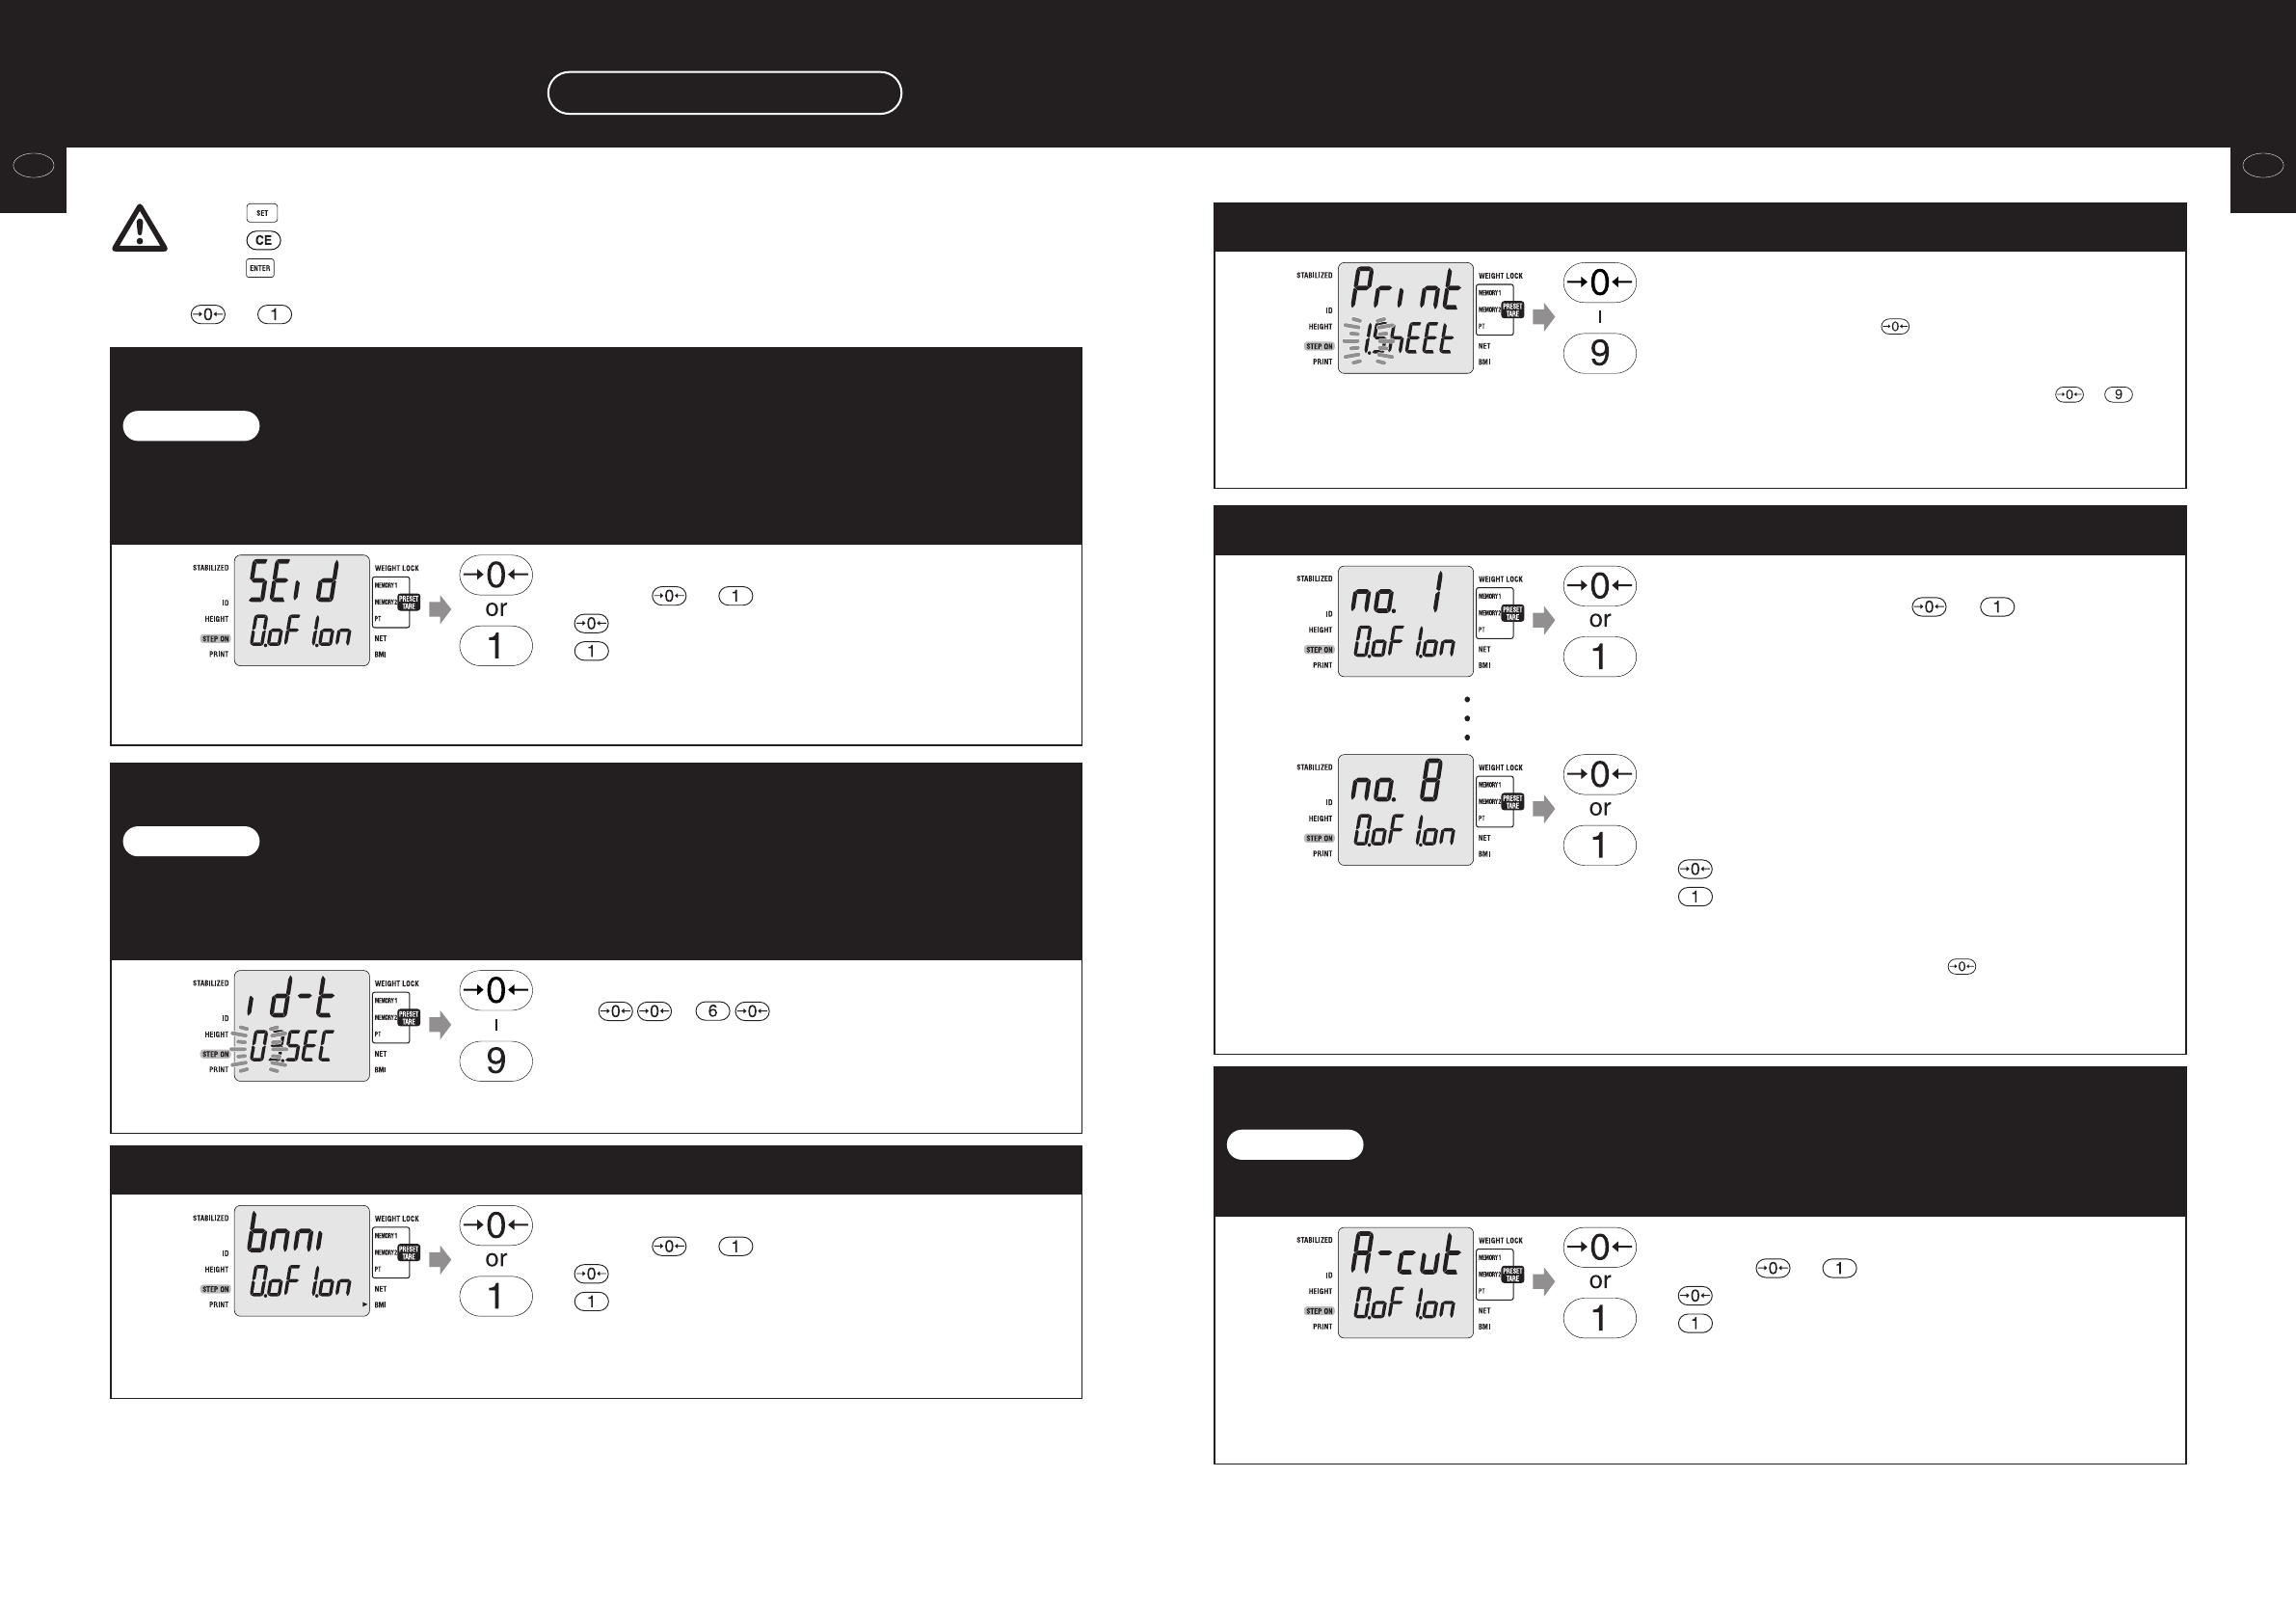
4: Set ON / OFF of the ID number
•ID is a identification number.
In the case that the users are controlled with identification numbers in a facility, etc., print out the ID and the weight at the same
time and the user can be judged later. The ID numbers of 0 – 9999999999 can be inputted. The ID increases +1 after
measurement, however, it can be changed with the numeric keys.
Note
5
5: Setting of the ID number checking time
•The ID number checking time is the displaying time of the ID before measurement.
The ID can be changed during this period. The time can be set in the range of 1 – 60 seconds with this equipment. And after the
setting time has passed, it automatically moves to the next step. And if the time is set to 0 seconds, it does not move to the next
step unless the ENTER key is pressed.
Note
6
Set the checking time of the ID number.
Input – with the numeric keys.
(When measuring, after the inputted seconds have passed, it
moves to the next step.)
After input, it moves to the next setting screen (BMI).
Various settings
How to set (continued)
6: Setting of the BMI
7
Set whether to display the BMI.
Input either or with the numeric key.
:Does not used the BMI.
:Used the BMI.
After input, it moves to the next setting screen (Setting of the
number of sheets to print).
7: Setting of the number of sheets to print
8
Set the number of sheets to print.
Input the number of sheets to print with the numeric key.
* In the case not to print, input (in this case, it skips the steps 9 and
10 and moves to the screen of step 11 “Setting of the weight lock
time”).
* Up to 9 sheets at maximum can be printed out. Input – .
After input, it moves to the next setting screen (print items or
weight lock time).
8: Setting of the print items
9
Set the print items.
For each number, input either or with the numeric
key.
no. 1: TANITA
no. 2: Model name
no. 3: Date and time
no. 4: ID number
no. 5: Height
no. 6: Weight and tare
no. 7: BMI
no. 8: BMI graph
: Does not print the item.
: Prints out the item.
* In the case that the number of sheets to print is set to 0 sheets in step 8,
this screen is not displayed.
* In the case that all the items are set to , the printer does not start-
up.
After input, it moves to the next setting screen (automatic cutting).
*On the or selection screen, the currently set side flashes.
9: Setting of automatic cutting
* The automatic cutting function is to cut the printed roll paper after every measurement. When it is OFF, it is convenient to store
without cutting the paper for every user.
Note
10
Set the automatic cutting.
Input either or with the numeric key.
:Does not automatically cut after printing.
: Automatically cuts after printing.
* In the case not to cut automatically, the number of sheets to print is
automatically set to 1 sheet.
After input, it moves to the next setting screen (weight lock
release function).
•Press to print the contents of the settings.
•Press to return to the measurement screen without changing the settings.
•Press to end the settings and return to the measurement screen.
Set ON / OFF of the ID number.
Input either or with the numeric key.
: ID number is not used.
: ID number is used.
After input, it moves to the next setting screen (ID number
checking time).