GBGB
How to use
(cautions for safety)
19
Before use
(cautions for safety)
18
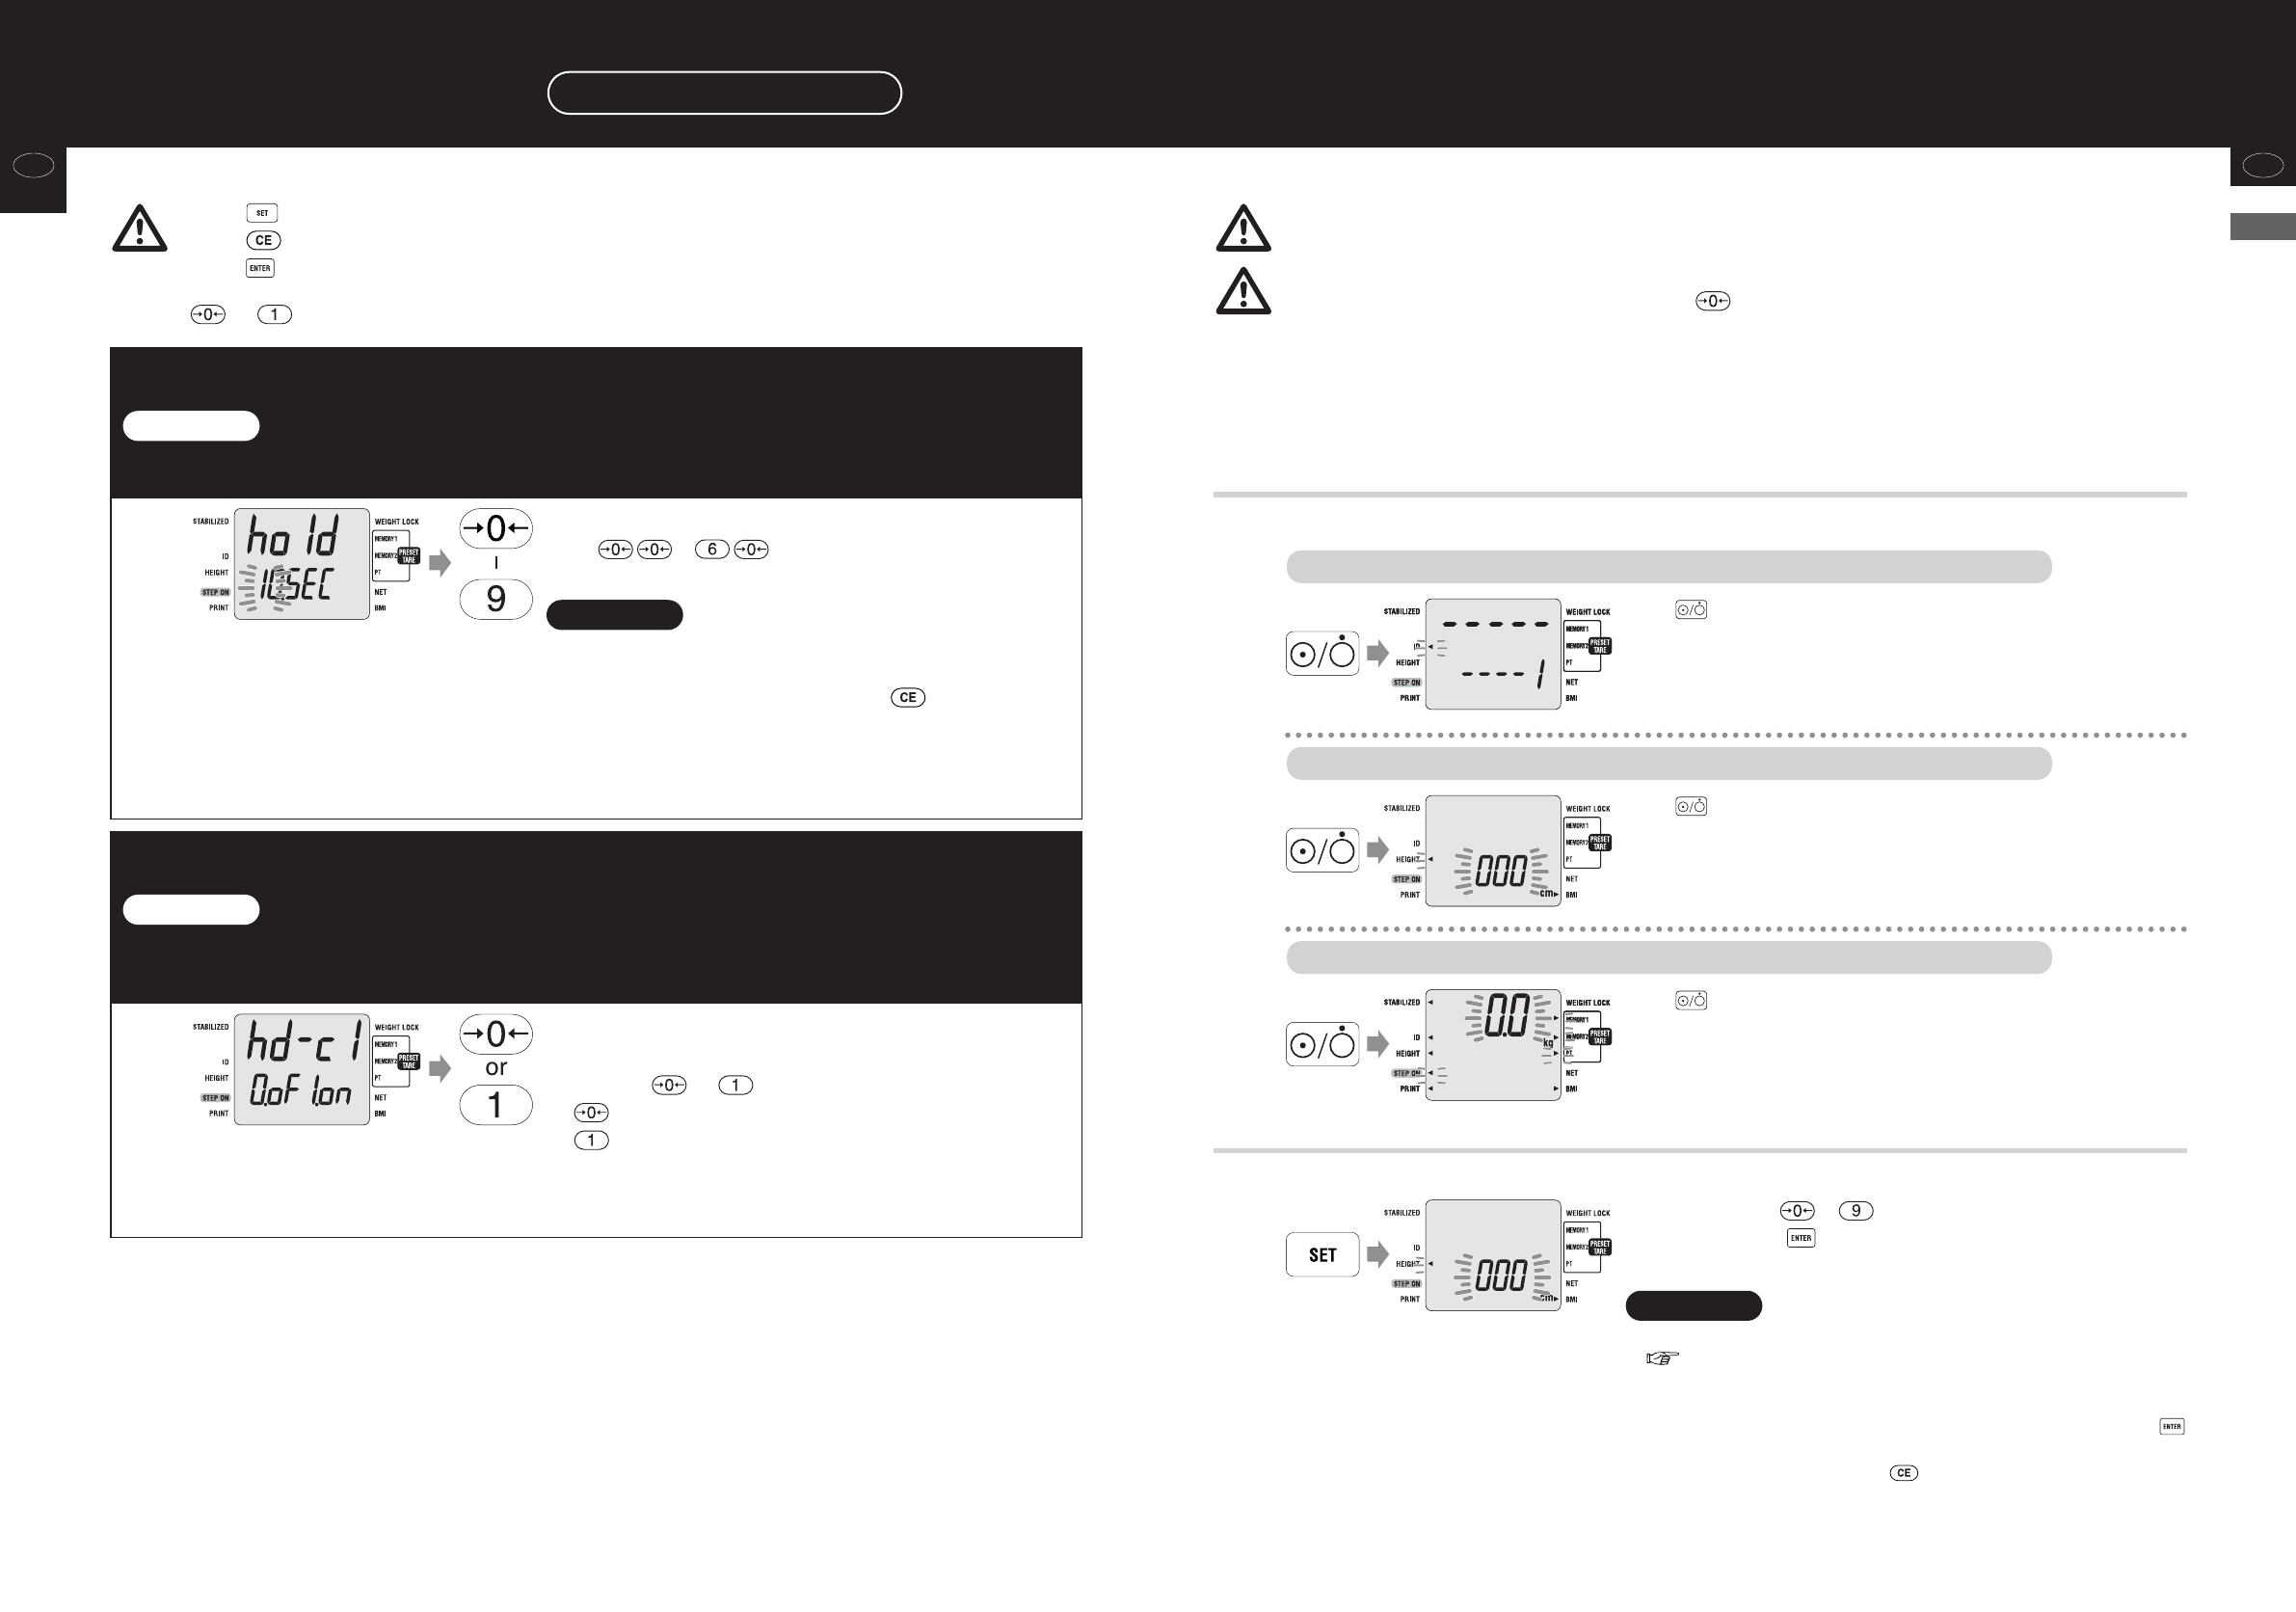
10: Setting of the weight lock time
•This is a function to fix the displayed contents on the screen for a certain period of time. This is valid only when it is set not to
print. (In a case other than that, this setting screen is not displayed.)
Note
11
11: Setting of the weight lock release function
• This is a function to detect the load again automatically when the measured value that is once weight lock after measurement
fluctuates +2 kg or more.
This is convenient for elderly or people who take longer to get on the Platform.
Note
12
Set the function to automatically release the
display fix.
Input either or with the numeric key.
:Does not release the weight lock automatically.
: Releases the weight lock automatically.
After input, it automatically returns to the measurement
screen.
Set the weight lock time.
Input – with the numeric keys.
* The input range is 0 – 60 seconds.
•Display is nothing shown when the number of printing set
as ‘ 0 ‘.
•Even if weight lock is effective, press and it moves to
the next measurement screen.
After input, it moves to the next setting screen (weight lock
release function)
Note
Various settings
How to set (continued)
*On the or selection screen, the currently set side flashes
.
•Refer to page 12 “About initial setting” for the initial settings.
*In the case that no effect of radio waves is given, a stable mark (
t
) lights up.
How to measure
2
Input by pressing – .
After input, press and it moves to the “3. Input the height”
screen.
• In the case that off is set in “Set ON / OFF of the ID number”
( page 16), this screen is not displayed.
• The ID number increases (+1) for every measurement. And once the power
is OFF, it starts from 0000000001.
• The ID number can be inputted in the range of 0 – 9999999999. When
is pressed during input, the non-inputted digits are filled with 0s.
• When the input is mistaken, press . The input is deleted.
Note
Input the ID number
•This explains the procedure when the printer function is turned on. Please be aware that the display may
be different if the number of printouts is set to .
•Do not wipe the equipment with corrosive chemicals (benzine, cleaner, etc.). Please use a neutral
detergent to clean the equipment.
•When the equipment has been transferred to any location where there is a temperature difference of
20˚C or more, wait for at least two hours before using it.
•In taking measurements, please keep the person away from the unit, who uses transmitters such as a
mobile phone avoid causing margin errors.
•Press to print the contents of the settings.
•Press to return to the measurement screen without changing the settings.
•Press to end the settings and return to the measurement screen.
1
Turn ON the power
ID number function is activate
ID number function is not activate and BMI mode is ON
Press .
After all display flashes, and the
t
to show the input instruction
of the ID flashes.
It moves to the step 4. (In the case that the clothing weight is not
input, it moves to the step 6.)
ID number and BMI mode are not activate
Press .
After all display flashes, and the
t
to show the input instruction
of the ID flashes.
It moves to the step 2.
Press .
After all display flashes, and the
t
to show the input instruction
of the height flashes.
It moves to the step 3.