GBGB
When necessary
(cautions for safety)
26
When necessary
(cautions for safety)
27
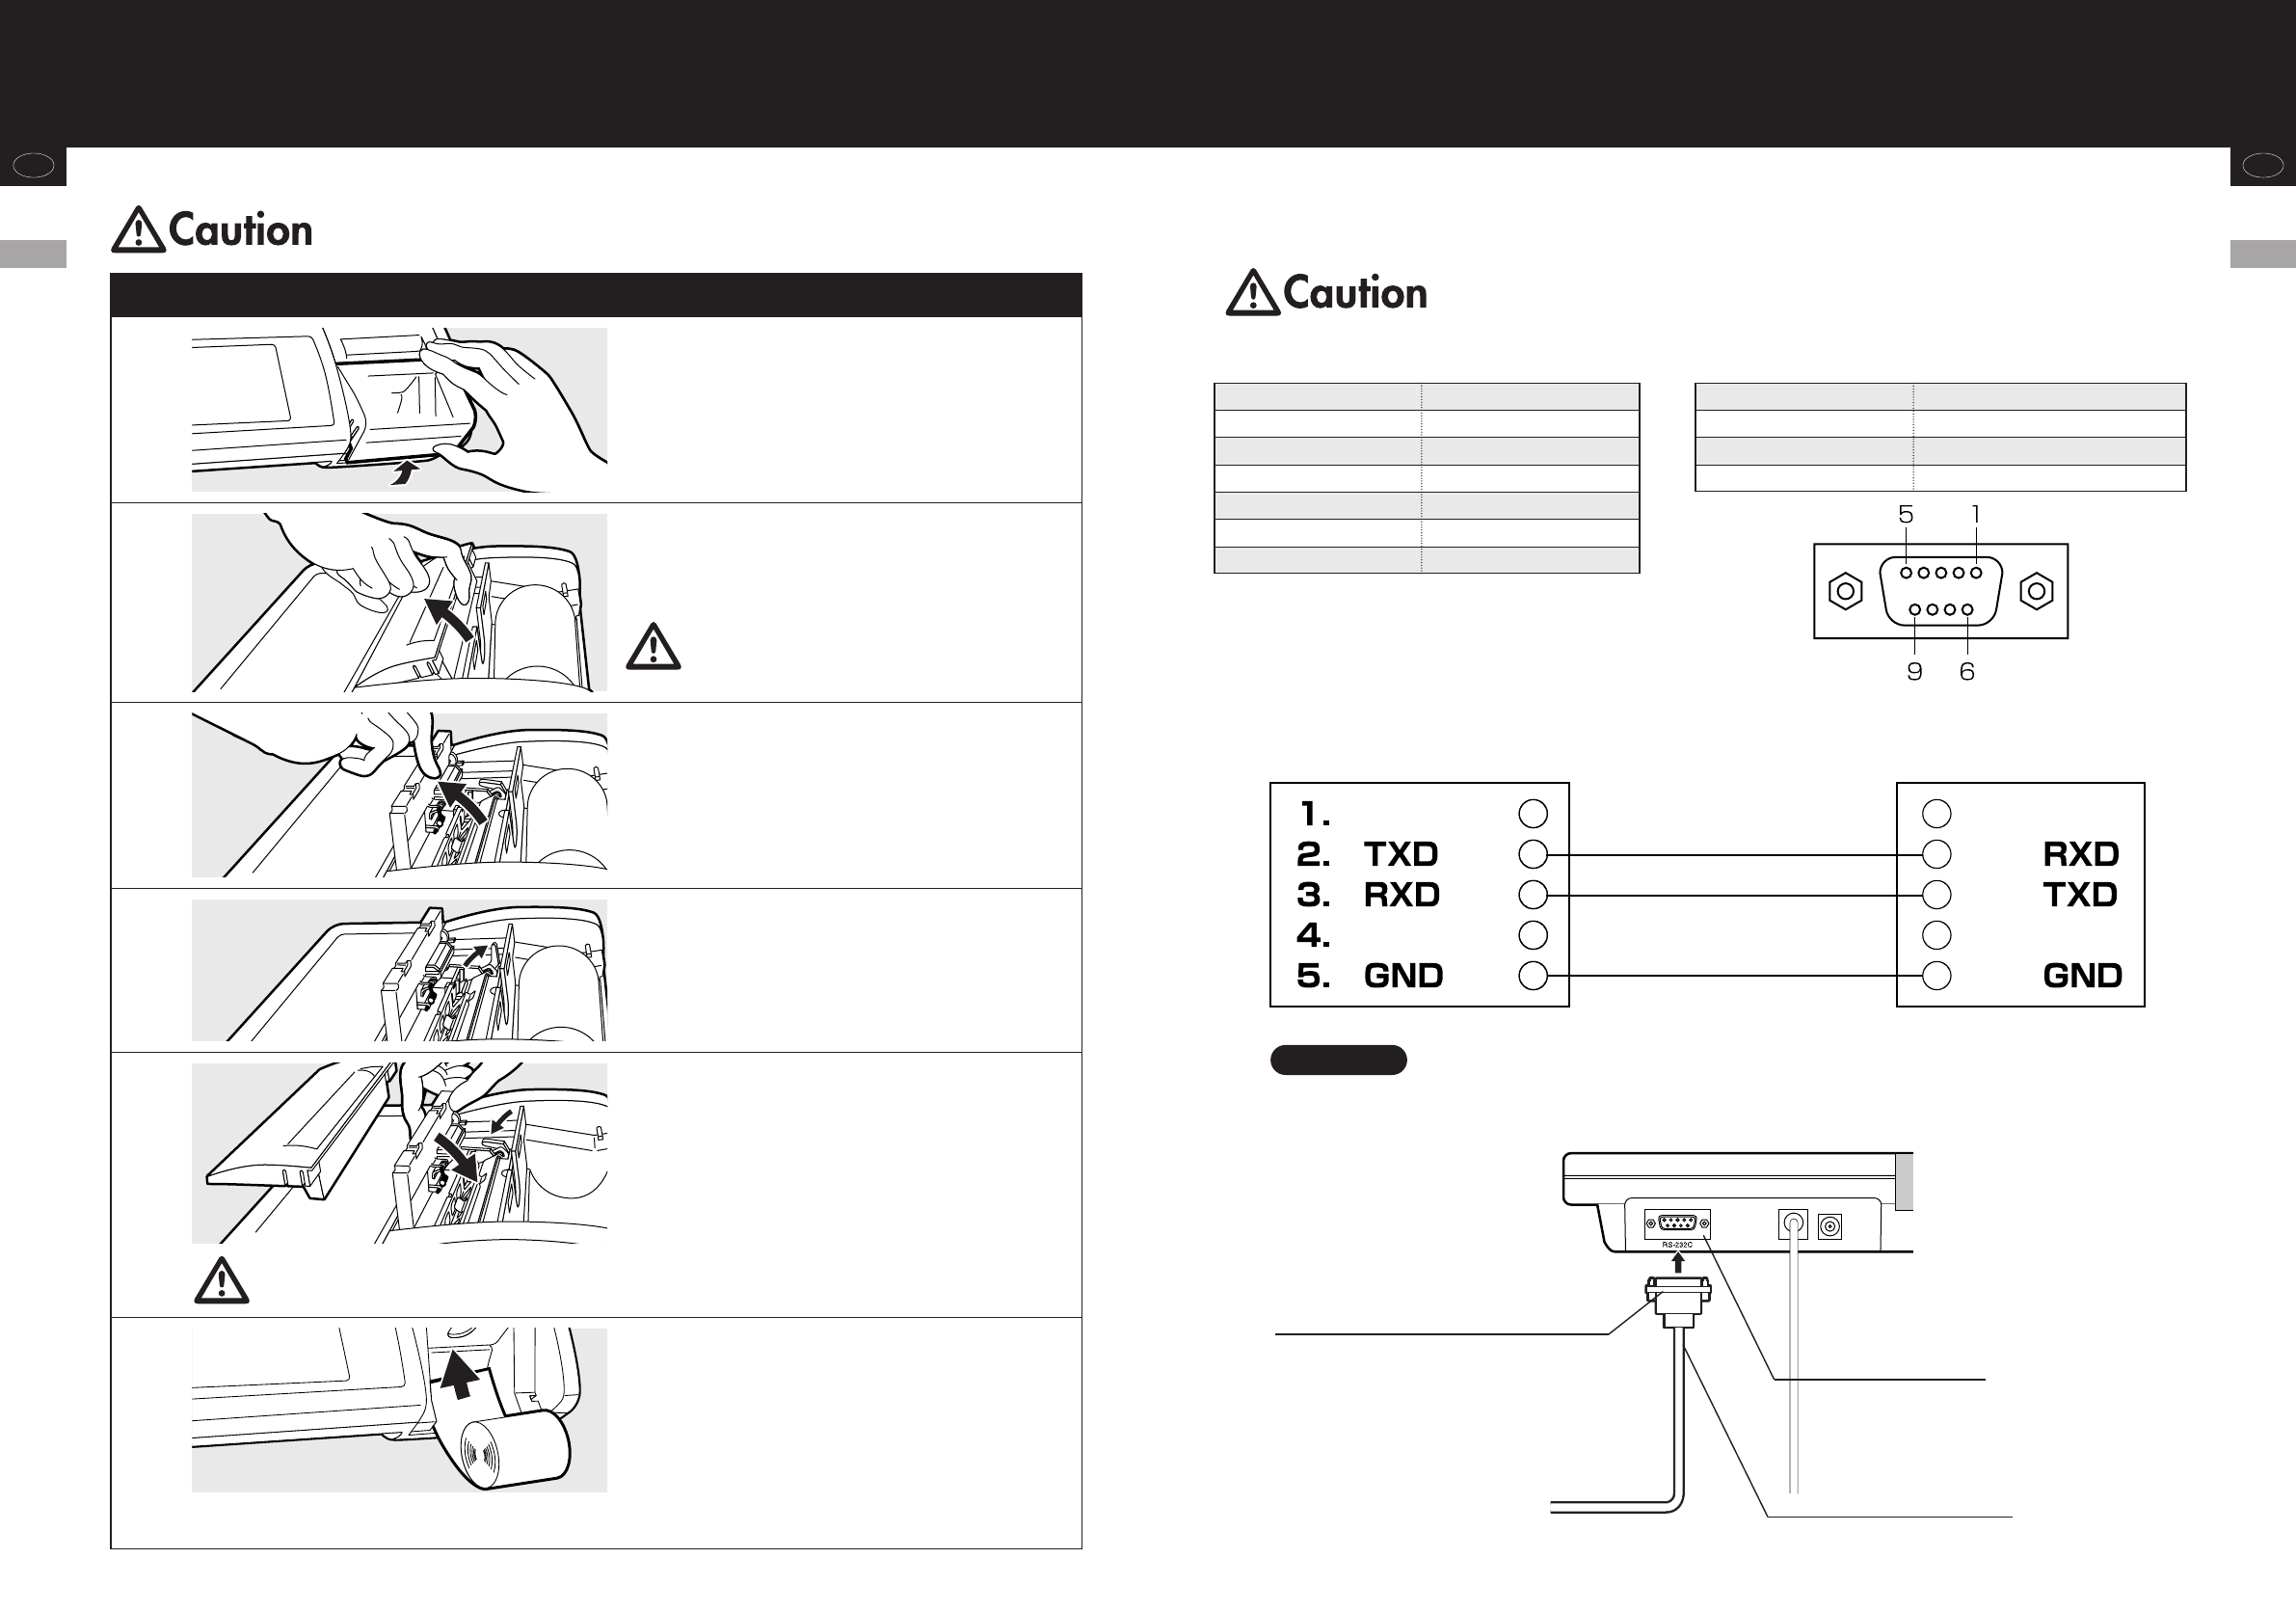
Clearing Paper Jams
1
Remove the Print roll paper cover.
If you lift up the Print roll paper cover from the back
of the Controller, it can be easily removed.
2
Remove the Printer Cover.
As shown in the illustration, from the front side of
the Controller, use a finger to lift up the Printer
Cover.
The Printer Cover is firmly fixed by catches.
Please make sure not to drop the Controller
when you remove the Printer Cover.
Failure to press down the Paper Release Lever will result in continuous feeding of the Print roll
paper without it being cut automatically.
3
Lift up the Automatic Cutter Unit.
From the front side of the Controller, lift up the
Automatic Cutter Unit with a finger.
4
5
6
Raise the Paper Release Lever and
remove the jammed paper.
Remove the Print roll paper and the jammed paper.
Return the Paper Release Lever, the
Automatic Cutter Unit and the Printer
Cover to the normal position.
Insert the catches of the Printer Cover into the guide
holes of the Controller and push it down slowly
while pressing the catches on both the left and right
hand sides until a click is heard.
Return the Print roll paper.
Return the Print roll paper by following the
procedure in page 11 “Loading the Print roll paper”.
Return the Print roll paper cover to the
proper position.
Press the Print roll paper cover down slowly as the
catches of the cover go into the guide holes. page 11.
Please pay careful attention to avoid injury from the sharp edge.
Please turn off the machine before clearing Paper jams.
RS-232C Interface Instructions
This section describes the interface for outputting the PW-630MA Wheelchair Scale measurement results as
RS-232C signals to personal computers and other external devices.
Connection example
Specifications
PW-630MA Personal computer or other device
Communication Standard EIA RS-232C Compatible
Communication Method Asynchronous Transmission
Signal speed 9600 baud
Data bit length 8 bits
Parity None
Stop bit 1 bit
Terminator CR+LF
•An RS-232C connector (D sub 9-pin female) is located in the lower centre on the back of the Controller.
•Use an RS-232C straight cable when connecting to a personal computer or other device.
Note
Signal lines and connection methods
Terminal number Signal name
2 TXD (data transmission)
3 RXD (data reception)
5 GND (ground)
D sub 9-pin female
RS-232C straight cable
RS-232C connector (D sub 9-pin male)
The PW-630MA is in full compliance with IEC60601-1 Safety Standard.
Only connect IEC60950 compliant computers to the PW-630MA.