USE
25
24 CONTROL
Baking tips
Oven levels
Depending on the height of the pastry or cookies,
place the baking sheet on the second or third
level from the bottom. Tins should be placed on a
rack on the first or second level from the bottom.
Tins are important
In particular in ovens with upper and lower
heating elements, the material from which the tin
is made is extremely important. The best tins are
made from black tin or are lined with a special
synthetic material: these tins absorb the heat the
quickest and can shorten the baking time.
How to test whether or not a cake is cooked
Prick a skewer into the cake at its thickest point
about 10 minutes before the end of the given
baking time. If the skewer remains dry and no
cake mixture sticks to it you can turn off the oven
and use the residual heat to let the cake cook
thoroughly.
The cake has not risen proper
Use less liquid next time, or set the oven to a
temperature 10 °C lower. You should adhere
exactly to the mixing times given in your cookery
book.
The cake has sunk in the middle
The cake has risen beautifully at the edges but
sunk in the middle. Do not grease the sides of the
cake tin. Loosen the cake carefully with a knife
after baking.
The cake is too dark on the top
Put the cake on a lower ridge in the oven, set a
lower temperature, bake the cake for a little
longer and, perhaps, use black baking tins.
The cake is too dark on the bottom
Put the cake on a higher ridge in the oven and
set a lower temperature.
The soufflé is much too dark on top
Remove the crust. Grill the top for a moment to
give a golden brown crust to the soufflé. Do not
use Parmesan cheese: this type of cheese
browns too quickly and will taste bitter. Next
time put the dish a little lower in the oven and set
the temperature 10 °C lower.
The biscuits stick to the baking sheet
Slide the baking sheet back into the oven for a
moment and then remove the biscuits
immediately.
The cake will not turn out of the tin
Carefully loosen the edge with a sharp knife.
Turn the tin upside down again and cover with a
cold, damp cloth a couple of times. Next time
grease and flour the tin well.
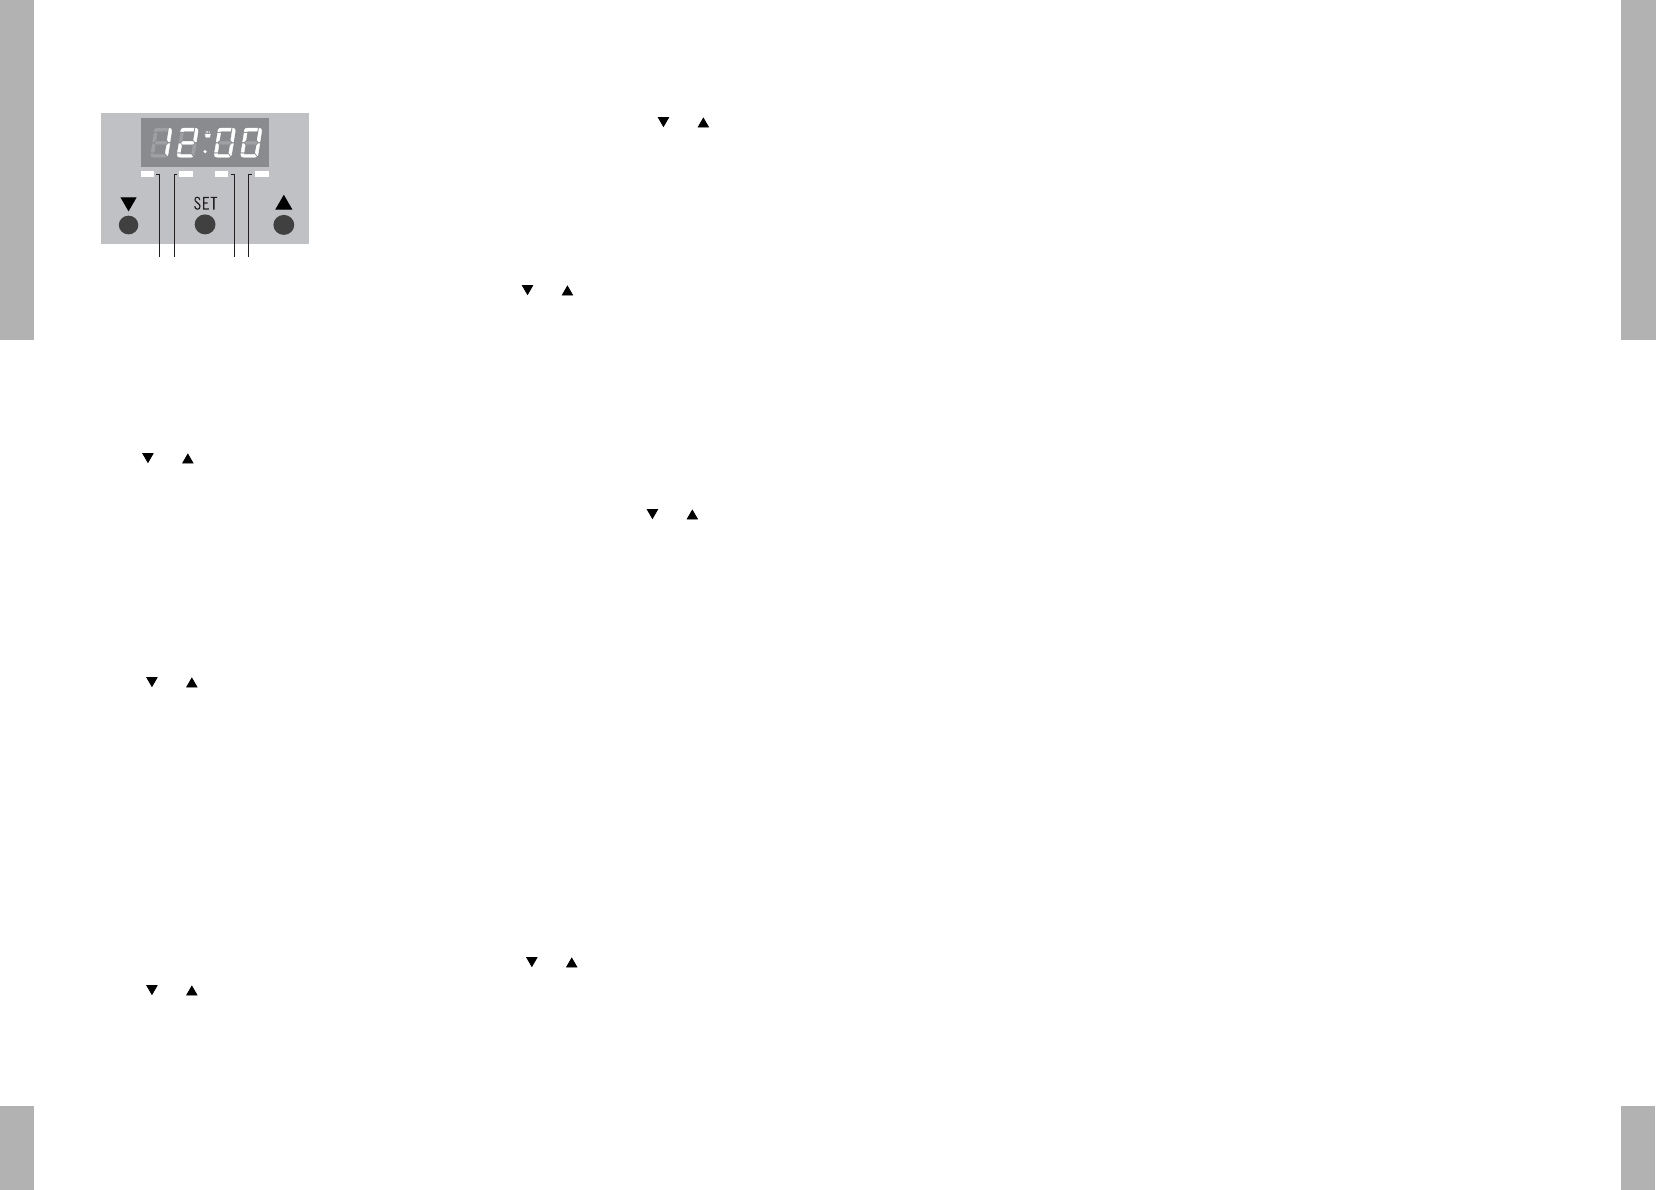
Electronic timer
After the appliance has been connected, or
when the power supply has been interrupted, the
display will show ‘12.00’. LED 4 is blinking (see
fig. 3). The time of day can be set.
Setting the time of day
■ Press key or until the correct time has
been reached. The set time will be stored in
the memory after 5 seconds. The LED goes
out.
Minute minder
■ Press ‘SET’ until LED 1 blinks (see fig. 3).
■ Press key or until the correct minute
minder time has been reached. The set time
will stay on the display. LED 1 lights up
steadily (see fig. 3).
The oven will give a signal when the minute
minder time has lapsed.
Setting the preparation time
■ Press ‘SET’ until LED 2 blinks (see fig. 3).
■ Press key or until the correct
preparation time has been reached. The set
time will be stored in the memory after 5
seconds. LED 2 goes out. The time of day will
be displayed.
■ The oven gives a signal when the preparation
time has lapsed and automatically switches
off. LED 2 is on. Press the key or to stop
the signal.
Setting the end time
■ Press ‘SET’ until LED 3 blinks (see fig. 3).
■ Press key or until the correct end time
has been reached. The set time will be
stored in the memory after 5 seconds. LED 3
lights up steadily. The time of day will be
displayed.
■ The oven gives a signal when the end time
has lapsed and automatically switches off.
LED 3 blinks. Press the key or to stop
the signal.
Switching on and off automatically
You can enter the preparation time and the end
time at which the dish must be ready. Then the
oven switches on and off automatically.
First set the preparation time (see setting the
preparation time) and then the end time (see
setting the end time).
LEDs 2 and 3 light up steadily (see fig. 3). The
time of day will be displayed. The oven gives a
signal when the set time has been reached and
automatically switches off.
Press the key or to stop the signal.
With the ‘SET’ key you can check the set values
during the process and adjust them, if
necessary.