691031
10
Verklein
Vergroot
Pagina terug
1/32
Pagina verder
VÍVOACTIVE
®
4/4S
Owner’s Manual
© 2018 Garmin Ltd. or its subsidiaries
All rights reserved. Under the copyright laws, this manual may not be copied, in whole or in part, without the written consent of Garmin. Garmin reserves the right to change or improve its
products and to make changes in the content of this manual without obligation to notify any person or organization of such changes or improvements. Go to www.garmin.com for current updates
and supplemental information concerning the use of this product.
Garmin
®
, the Garmin logo, ANT+
®
, Approach
®
, Auto Lap
®
, Auto Pause
®
, Edge
®
, and vívoactive
®
are trademarks of Garmin Ltd. or its subsidiaries, registered in the USA and other countries. Body
Battery
, Garmin AutoShot
, Connect IQ
, Garmin Connect
, Garmin Express
, Garmin Golf
, Garmin Move IQ
, Garmin Pay
, tempe
, TrueUp
, and Varia
are trademarks of Garmin Ltd. or
its subsidiaries. These trademarks may not be used without the express permission of Garmin.
Android
is a trademark of Google, Inc. Apple
®
, iPhone
®
, and iTunes
®
are trademarks of Apple Inc., registered in the U.S. and other countries. The BLUETOOTH
®
word mark and logos are owned
by the Bluetooth SIG, Inc. and any use of such marks by Garmin is under license. The Cooper Institute
®
, as well as any related trademarks, are the property of The Cooper Institute. Advanced
heartbeat analytics by Firstbeat. iOS
®
is a registered trademark of Cisco Systems, Inc. used under license by Apple Inc. WiFi
®
is a registered mark of Wi-Fi Alliance Corporation. Windows
®
is a
registered trademark of Microsoft Corporation in the United States and other countries. Other trademarks and trade names are those of their respective owners.
This product is ANT+
®
certified. Visit www.thisisant.com/directory for a list of compatible products and apps.
M/N: A03558, M/N: A03618
Table of Contents
Introduction.....................................................................1
Device Overview......................................................................... 1
Touchscreen Tips.................................................................. 1
Locking and Unlocking the Touchscreen.......................... 1
Using the Controls Menu....................................................... 1
Icons...................................................................................... 1
Setting Up Your Watch............................................................... 1
Smart Features............................................................... 1
Pairing Your Smartphone........................................................... 1
Connected Features................................................................... 2
Phone Notifications................................................................ 2
Enabling Bluetooth Notifications....................................... 2
Viewing Notifications......................................................... 2
Replying to a Text Message..............................................2
Receiving an Incoming Phone Call................................... 2
Managing Notifications...................................................... 2
Turning Off the Bluetooth Smartphone Connection.......... 2
Using Do Not Disturb Mode................................................... 2
Finding Your Phone............................................................... 3
Connect IQ Features.................................................................. 3
Downloading Connect IQ Features........................................ 3
Downloading Connect IQ Features Using Your Computer.... 3
WiFi Connected Features.......................................................... 3
Connecting to a WiFi Network.............................................. 3
Music............................................................................... 3
Connecting to a Third-Party Provider......................................... 3
Downloading Audio Content from a Third-Party Provider...... 3
Disconnecting from a Third-Party Provider............................ 3
Downloading Personal Audio Content........................................ 3
Connecting Bluetooth Headphones............................................ 4
Listening to Music....................................................................... 4
Music Playback Controls............................................................ 4
Garmin Pay..................................................................... 4
Setting Up Your Garmin Pay Wallet........................................... 4
Paying for a Purchase Using Your Watch.................................. 4
Adding a Card to Your Garmin Pay Wallet................................. 4
Managing Your Garmin Pay Wallet........................................4
Changing Your Garmin Pay Passcode....................................... 5
Safety and Tracking Features....................................... 5
Adding Emergency Contacts...................................................... 5
Adding Contacts......................................................................... 5
Turning Incident Detection On and Off....................................... 5
Requesting Assistance............................................................... 5
Heart Rate Features....................................................... 5
Wrist-based Heart Rate.............................................................. 5
Wearing the Device................................................................5
Tips for Erratic Heart Rate Data.............................................6
Viewing the Heart Rate Widget.............................................. 6
Setting an Abnormal Heart Rate Alert....................................6
Broadcasting Heart Rate to Garmin Devices......................... 6
Turning Off the Wrist-based Heart Rate Monitor................... 6
About Heart Rate Zones............................................................. 6
Setting Your Heart Rate Zones.............................................. 6
Heart Rate Zone Calculations................................................ 7
About VO2 Max. Estimates.........................................................7
Getting Your VO2 Max. Estimate........................................... 7
Pulse Oximeter........................................................................... 7
Getting Pulse Oximeter Readings..........................................7
Changing the Pulse Oximeter Tracking Mode....................... 7
Tips for Erratic Pulse Oximeter Data..................................... 7
Activity Tracking............................................................ 7
Auto Goal.................................................................................... 8
Using the Move Alert
.................................................................. 8
Sleep Tracking............................................................................ 8
Intensity Minutes......................................................................... 8
Earning Intensity Minutes.......................................................8
Garmin Move IQ™...................................................................... 8
Activity Tracking Settings............................................................8
Turning Off Activity Tracking.................................................. 8
Widgets........................................................................... 8
Viewing Widgets......................................................................... 9
Customizing the Widget Loop................................................ 9
About My Day............................................................................. 9
Health Stats Widget.................................................................... 9
Heart Rate Variability and Stress Level...................................... 9
Using the Stress Level Widget............................................... 9
Body Battery............................................................................... 9
Viewing the Body Battery Widget...........................................9
Tips for Improved Body Battery Data................................... 10
Menstrual Cycle Tracking......................................................... 10
Hydration Tracking....................................................................10
Using the Hydration Tracking Widget.................................. 10
Apps and Activities...................................................... 10
Starting an Activity.................................................................... 10
Tips for Recording Activities................................................ 10
Stopping an Activity.................................................................. 10
Adding a Custom Activity.......................................................... 10
Adding or Removing a Favorite Activity.................................... 10
Indoor Activities........................................................................ 11
Recording a Strength Training Activity.................................11
Calibrating the Treadmill Distance....................................... 11
Outdoor Activities......................................................................11
Going for a Run....................................................................11
Going for a Ride................................................................... 11
Viewing Your Ski Runs........................................................ 11
Going for a Pool Swim.............................................................. 11
Setting the Pool Size............................................................12
Swim Terminology............................................................... 12
Golfing...................................................................................... 12
Downloading Golf Courses.................................................. 12
Playing Golf..........................................................................12
Hole Information...................................................................12
Changing the Pin Location.............................................. 12
Viewing the Direction to the Pin...................................... 12
Viewing Layup and Dogleg Distances................................. 12
Viewing Hazards.................................................................. 12
Measuring a Shot with the Garmin AutoShot™ Feature...... 13
Keeping Score..................................................................... 13
Setting the Scoring Method............................................. 13
Tracking Golf Statistics................................................... 13
Recording Golf Statistics................................................. 13
Viewing Your Shot History................................................... 13
Viewing Your Round Summary............................................ 13
Ending a Round................................................................... 13
Garmin Golf App.................................................................. 13
Training......................................................................... 13
Setting Up Your User Profile.....................................................13
Fitness Goals....................................................................... 14
Workouts...................................................................................14
Starting a Workout............................................................... 14
Using Garmin Connect Training Plans.................................14
Adaptive Training Plans.................................................. 14
Starting Today's Workout................................................ 14
Viewing Scheduled Workouts......................................... 14
Personal Records..................................................................... 14
Viewing Your Personal Records.......................................... 14
Restoring a Personal Record............................................... 14
Table of Contents i
Clearing a Personal Record................................................. 14
Clearing All Personal Records............................................. 14
Navigation..................................................................... 15
Saving Your Location............................................................... 15
Deleting a Location.............................................................. 15
Navigating to a Saved Location................................................ 15
Navigating Back to Start........................................................... 15
Stopping Navigation................................................................. 15
Compass...................................................................................15
Calibrating the Compass Manually...................................... 15
History........................................................................... 15
Using History............................................................................ 15
Viewing Your Time in Each Heart Rate Zone...................... 15
Garmin Connect........................................................................16
Using the Garmin Connect App........................................... 16
Using Garmin Connect on Your Computer.......................... 16
Customizing Your Device............................................ 16
Changing the Watch Face........................................................ 16
Editing a Watch Face........................................................... 16
Creating a Custom Watch Face........................................... 16
Customizing the Controls Menu................................................17
Setting Up a Shortcut Control................................................... 17
Activities and App Settings....................................................... 17
Customizing the Data Screens............................................ 17
Alerts.................................................................................... 17
Setting an Alert................................................................18
Auto Lap...............................................................................18
Marking Laps Using the Auto Lap Feature..................... 18
Using Auto Pause®............................................................. 18
Using Auto Scroll................................................................. 18
Changing the GPS Setting................................................... 18
GPS and Other Satellite Systems................................... 18
Phone and Bluetooth Settings.................................................. 18
System Settings........................................................................ 19
Time Settings....................................................................... 19
Time Zones..................................................................... 19
Setting the Time Manually...............................................19
Setting an Alarm..............................................................19
Deleting an Alarm............................................................19
Starting the Countdown Timer........................................ 19
Using the Stopwatch....................................................... 19
Backlight Settings................................................................ 19
Changing the Units of Measure........................................... 19
Garmin Connect Settings..........................................................19
Wireless Sensors......................................................... 19
Pairing Your Wireless Sensors................................................. 20
Foot Pod................................................................................... 20
Calibrating Your Foot Pod....................................................20
Improving Foot Pod Calibration........................................... 20
Using an Optional Bike Speed or Cadence Sensor.................. 20
Calibrating Your Speed Sensor........................................... 20
Club Sensors............................................................................ 20
Situational Awareness.............................................................. 20
tempe........................................................................................ 20
Device Information....................................................... 20
Charging the Device................................................................. 20
Product Updates....................................................................... 21
Updating the Software Using the Garmin Connect App...... 21
Updating the Software Using Garmin Express.................... 21
Viewing Device Information...................................................... 21
Viewing E-label Regulatory and Compliance Information.... 21
Specifications............................................................................21
Battery Life Information........................................................ 21
Device Care.............................................................................. 21
Cleaning the Device
............................................................. 21
Changing the Bands................................................................. 22
Troubleshooting........................................................... 22
Is my smartphone compatible with my device?........................ 22
My phone will not connect to the device................................... 22
My headphones will not connect to the device......................... 22
My music cuts out or my headphones do not stay connected.. 22
My device is in the wrong language......................................... 22
My device does not display the correct time............................. 22
Maximizing Battery Life.............................................................22
Restarting the Device............................................................... 22
Restoring All Default Settings................................................... 23
Acquiring Satellite Signals........................................................ 23
Improving GPS Satellite Reception......................................23
Activity Tracking........................................................................23
My step count does not seem accurate............................... 23
The floors climbed amount does not seem accurate........... 23
Improving the Accuracy of Intensity Minutes and Calories.. 23
The temperature reading is not accurate.................................. 23
Getting More Information.......................................................... 23
Appendix....................................................................... 23
Data Fields................................................................................23
VO2 Max. Standard Ratings..................................................... 24
Wheel Size and Circumference................................................ 25
Symbol Definitions.................................................................... 25
Index.............................................................................. 26
ii Table of Contents
Introduction
WARNING
See the Important Safety and Product Information guide in the
product box for product warnings and other important
information.
Always consult your physician before you begin or modify any
exercise program.
Device Overview
Action button: Press to turn on the device.
Press to start and stop the activity timer.
Hold for 2 seconds to view the controls menu, including
device power.
Hold for 5 seconds to request assistance (Safety and
Tracking Features, page 5).
Back button: Press to return to the previous screen, except
during an activity.
During an activity, press to mark a new lap, start a new set or
pose, or advance to the next stage of a workout.
Hold to view a menu of device settings and options for the
current screen.
Touchscreen: Swipe up or down to scroll through widgets,
features, and menus.
Tap to select.
Swipe right to return to the previous screen.
During an activity, swipe right to view the watch face and
widgets.
From the watch face, swipe right to view the shortcut feature.
Touchscreen Tips
Drag up or down to scroll through lists and menus.
Swipe up or down to scroll quickly.
Tap to select an item.
From the watch face, swipe up or down to scroll through the
widgets on the device.
From a widget, tap to view additional widget screens, if
available.
During an activity, swipe up or down to view the next data
screen.
During an activity, swipe right to view the watch face and
widgets, and swipe left to return to the activity data fields.
Perform each menu selection as a separate action.
Locking and Unlocking the Touchscreen
You can lock the touchscreen to prevent inadvertent screen
touches.
1
Hold to view the controls menu.
2
Select .
The touchscreen locks and does not respond to touches until
you unlock it.
3
Hold any button to unlock the touchscreen.
Using the Controls Menu
The controls menu contains customizable shortcuts, such as
locking the touchscreen and turning the device off.
NOTE: You can add, reorder, and remove the shortcuts in the
controls menu (Customizing the Controls Menu, page 17).
1
From any screen, hold for 2 seconds.
2
Select an option.
Icons
A flashing icon means the device is searching for a signal. A
solid icon means the signal was found or the sensor is
connected.
Smartphone connection status
Heart rate monitor status
Foot pod status
LiveTrack status
Speed and cadence sensor status
Varia
bike light status
Varia bike radar status
tempe
sensor status
vívoactive alarm status
Setting Up Your Watch
To take full advantage of the vívoactive features, complete these
tasks.
Pair your smartphone with the Garmin Connect
app (Pairing
Your Smartphone, page 1).
Set up WiFi
®
networks (Connecting to a Wi
Fi Network,
page 3).
Set up music (Music, page 3).
Set up your Garmin Pay
wallet (Setting Up Your
Garmin Pay Wallet, page 4).
Set up safety features (Safety and Tracking Features,
page 5).
Smart Features
Pairing Your Smartphone
To set up the vívoactive device, it must be paired directly
through the Garmin Connect app, instead of from the Bluetooth
®
settings on your smartphone.
1
From the app store on your smartphone, install and open the
Garmin Connect app.
2
Select an option to enable pairing mode on your device:
If this is the first time you are setting up your device, press
to turn on the device.
If you previously skipped the pairing process or paired
your device with a different smartphone, hold , and
select > Pair Phone to manually enter pairing mode.
Introduction 1
3
Select an option to add your device to your Garmin Connect
account:
If this is the first device you have paired with the Garmin
Connect app, follow the on-screen instructions.
If you have already paired another device with the Garmin
Connect app, from the or menu, select Garmin
Devices > Add Device, and follow the on-screen
instructions.
Connected Features
Connected features are available for your vívoactive device
when you connect the device to a compatible smartphone using
Bluetooth technology. Some features require you to install the
Garmin Connect app on the connected smartphone. Go to
www.garmin.com/apps for more information. Some features are
also available when you connect your device to a wireless
network.
Phone notifications: Displays phone notifications and
messages on your vívoactive device.
LiveTrack: Allows friends and family to follow your races and
training activities in real time. You can invite followers using
email or social media, allowing them to view your live data on
a Garmin Connect tracking page.
Activity uploads to Garmin Connect: Automatically sends
your activity to your Garmin Connect account as soon as you
finish recording the activity.
Connect IQ
: Allows you to extend your device features with
new watch faces, widgets, apps, and data fields.
Software Updates: Allows you to update your device software.
Weather: Allows you to view current weather conditions and
weather forecasts.
Bluetooth sensors: Allows you to connect Bluetooth
compatible sensors, such as a heart rate monitor.
Find my phone: Locates your lost smartphone that is paired
with your vívoactive device and currently within range.
Find my device: Locates your lost vívoactive device that is
paired with your smarphone and currently within range.
Phone Notifications
Phone notifications require a compatible smartphone to be in
range and paired with the device. When your phone receives
messages, it sends notifications to your device.
Enabling Bluetooth Notifications
Before you can enable notifications, you must pair the vívoactive
device with a compatible smartphone (Pairing Your Smartphone,
page 1).
1
Hold .
2
Select > Phone > Notifications.
3
Select During Activity to set preferences for notifications
that appear when recording an activity.
4
Select a notification preference.
5
Select Not During Activity to set preferences for
notifications that appear when in watch mode.
6
Select a notification preference.
7
Select Timeout.
8
Select a timeout duration.
Viewing Notifications
1
From the watch face, swipe up or down to view the
notifications widget.
2
Select a notification.
3
Scroll to read the full notification.
4
Swipe up to view the notification options.
5
Select an option:
To act on the notification, select an action, such as
Dismiss or Reply.
The available actions depend on the type of notification
and your phone operating system. When you dismiss a
notification on your phone or the vívoactive device, it no
longer appears in the widget.
To return to the notification list, swipe right.
Replying to a Text Message
NOTE: This feature is available only for Android
smartphones.
When you receive a text message notification on your vívoactive
device, you can send a quick reply by selecting from a list of
messages. You can customize messages in the Garmin
Connect app.
NOTE: This feature sends text messages using your phone.
Regular text message limits and charges may apply. Contact
your mobile carrier for more information.
1
Swipe up or down to view the notifications widget.
2
Select a text message notification.
3
Swipe up to view the notification options.
4
Select Reply.
5
Select a message from the list.
Your phone sends the selected message as a text message.
Receiving an Incoming Phone Call
When you receive a phone call on your connected smartphone,
the vívoactive device displays the name or phone number of the
caller.
To accept the call, select .
NOTE: To talk to the caller, you must use your connected
smartphone.
To decline the call, select .
To decline the call and immediately send a text message
reply, select , and select a message from the list.
NOTE: This feature is available only if your device is
connected to an Android smartphone.
Managing Notifications
You can use your compatible smartphone to manage
notifications that appear on your vívoactive device.
Select an option:
If you are using an iPhone
®
device, go to the iOS
®
notifications settings to select the items to show on the
device.
If you are using an Android smartphone, from the Garmin
Connect app, select Settings > Smart Notifications.
Turning Off the Bluetooth Smartphone Connection
1
Hold to view the controls menu.
2
Select to turn off the Bluetooth smartphone connection on
your vívoactive device.
Refer to the owner's manual for your mobile device to turn off
Bluetooth wireless technology on your mobile device.
Using Do Not Disturb Mode
You can use do not disturb mode to turn off vibrations and the
display for alerts and notifications. This mode disables the
gesture setting (Backlight Settings, page 19). For example, you
can use this mode while sleeping or watching a movie.
To manually turn on or off do not disturb mode, hold , and
select .
To automatically turn on do not disturb mode during your
sleep hours, open the device settings in the Garmin Connect
app, and select Sounds & Alerts > Do Not Disturb During
Sleep.
2 Smart Features
Finding Your Phone
You can use this feature to help locate a lost smartphone that is
paired using Bluetooth wireless technology and currently within
range.
1
Hold .
2
Select .
Signal strength bars appear on the vívoactive screen, and an
audible alert sounds on your smartphone. The bars increase
as you move closer to your smartphone.
3
Press to stop searching.
Connect IQ Features
You can add Connect IQ features to your watch from Garmin
®
and other providers using the Connect IQ app. You can
customize your device with watch faces, data fields, widgets,
and apps.
Watch Faces: Allow you to customize the appearance of the
clock.
Data Fields: Allow you to download new data fields that present
sensor, activity, and history data in new ways. You can add
Connect IQ data fields to built-in features and pages.
Widgets: Provide information at a glance, including sensor data
and notifications.
Apps: Add interactive features to your watch, such as new
outdoor and fitness activity types.
Downloading Connect IQ Features
Before you can download features from the Connect IQ app, you
must pair your vívoactive device with your smartphone (Pairing
Your Smartphone, page 1).
1
From the app store on your smartphone, install and open the
Connect IQ app.
2
If necessary, select your device.
3
Select a Connect IQ feature.
4
Follow the on-screen instructions.
Downloading Connect IQ Features Using Your
Computer
1
Connect the device to your computer using a USB cable.
2
Go to apps.garmin.com, and sign in.
3
Select a Connect IQ feature, and download it.
4
Follow the on-screen instructions.
WiFi Connected Features
Activity uploads to your Garmin Connect account:
Automatically sends your activity to your Garmin Connect
account as soon as you finish recording the activity.
Audio content: Allows you to sync audio content from third-
party providers.
Software updates: Your device downloads and installs the
latest software update automatically when a WiFi connection
is available.
Workouts and training plans: You can browse for and select
workouts and training plans on the Garmin Connect site. The
next time your device has a WiFi connection, the files are
wirelessly sent to your device.
Connecting to a WiFi Network
You must connect your device to the Garmin Connect app on
your smartphone or to the Garmin Express
application on your
computer before you can connect to a WiFi network.
To sync your device with a third-party music provider, you must
connect to WiFi. Connecting the device to a WiFi network also
helps to increase the transfer speed of larger files.
1
Move within range of a WiFi network.
2
From the Garmin Connect app, select or .
3
Select Garmin Devices, and select your device.
4
Select General > Wi-Fi Networks > Add a Network.
5
Select an available WiFi network, and enter the login details.
Music
NOTE: This section is about three different music playback
options.
Third-party provider music
Personal audio content
Music stored on your phone
On a vívoactive device, you can download audio content to your
device from your computer or from a third-party provider, so you
can listen when your smartphone is not nearby. To listen to
audio content stored on your device, you must connect
headphones with Bluetooth technology.
You can also control music playback on your paired smartphone
using your device.
Connecting to a Third-Party Provider
Before you can download music or other audio files to your
compatible watch from a supported third-party provider, you
must connect to the provider using the Garmin Connect app.
1
From the Garmin Connect app, select or .
2
Select Garmin Devices, and select your device.
3
Select Music.
4
Select an option:
To connect to an installed provider, select a provider, and
follow the on-screen instructions.
To connect to a new provider, select Get Music Apps,
locate a provider, and follow the on-screen instructions.
Downloading Audio Content from a Third-Party
Provider
Before you can download audio content from a third-party
provider, you must connect to a WiFi network (Connecting to a
Wi
Fi Network, page 3).
1
Open the music controls widget.
2
Hold .
3
Select Music Providers.
4
Select a connected provider.
5
Select a playlist or other item to download to the device.
6
If necessary, select until you are prompted to sync with the
service, and select .
NOTE: Downloading audio content can drain the battery. You
may be required to connect the device to an external power
source if the battery is low.
Disconnecting from a Third-Party Provider
1
From the Garmin Connect app, select or .
2
Select Garmin Devices, and select your device.
3
Select Music.
4
Select an installed third-party provider, and follow the on-
screen instructions to disconnect the third-party provider from
your device.
Downloading Personal Audio Content
Before you can send your personal music to your device, you
must install the Garmin Express application on your computer
(www.garmin.com/express).
You can load your personal audio files, such as .mp3 and .aac
files, to a vívoactive device from your computer.
Music 3
1
Connect the device to your computer using the included USB
cable.
2
On your computer, open the Garmin Express application,
select your device, and select Music.
TIP: For Windows
®
computers, you can select and browse
to the folder with your audio files. For Apple
®
computers, the
Garmin Express application uses your iTunes
®
library.
3
In the My Music or iTunes Library list, select an audio file
category, such as songs or playlists.
4
Select the checkboxes for the audio files, and select Send to
Device.
5
If necessary, in the vívoactive list, select a category, select
the checkboxes, and select Remove From Device to remove
audio files.
Connecting Bluetooth Headphones
To listen to music loaded onto your vívoactive device, you must
connect headphones using Bluetooth technology.
1
Bring the headphones within 2 m (6.6 ft.) of your device.
2
Enable pairing mode on the headphones.
3
Hold .
4
Select > Music > Headphones > Add New.
5
Select your headphones to complete the pairing process.
Listening to Music
1
Open the music controls widget.
2
Connect your headphones with Bluetooth technology
(Connecting Bluetooth Headphones, page 4).
3
Hold .
4
Select Music Providers, and select an option:
To listen to music downloaded to the watch from your
computer, select My Music (Downloading Personal Audio
Content, page 3).
To control music playback on your smartphone, select
Phone.
To listen to music from a third-party provider, select the
name of the provider.
5
Select to open the music playback controls.
Music Playback Controls
Select to open the music playback controls.
Select to browse the audio files and playlists for the selected
source.
Select to adjust the volume.
Select to play and pause the current audio file.
Select to skip to the next audio file in the playlist.
Hold to fast forward through the current audio file.
Select to restart the current audio file.
Select twice to skip to the previous audio file in the playlist.
Hold to rewind through the current audio file.
Select to change the repeat mode.
Select to change the shuffle mode.
Garmin Pay
The Garmin Pay feature allows you to use your watch to pay for
purchases in participating stores using credit or debit cards from
a participating financial institution.
Setting Up Your Garmin Pay Wallet
You can add one or more participating credit or debit cards to
your Garmin Pay wallet. Go to garmin.com/garminpay/banks to
find participating financial institutions.
1
From the Garmin Connect app, select or .
2
Select Garmin Devices, and select your vívoactive device.
3
Select Garmin Pay > Create Your Wallet.
4
Follow the on-screen instructions.
Paying for a Purchase Using Your Watch
Before you can use your watch to pay for purchases, you must
set up at least one payment card.
You can use your watch to pay for purchases in a participating
store.
1
Hold .
2
Select .
3
Enter your four-digit passcode.
NOTE: If you enter your passcode incorrectly three times,
your wallet locks, and you must reset your passcode in the
Garmin Connect app.
Your most recently used payment card appears.
4
If you have added multiple cards to your Garmin Pay wallet,
swipe to change to another card (optional).
5
Within 60 seconds, hold your watch near the payment reader,
with the watch facing the reader.
The watch vibrates and displays a check mark when it is
finished communicating with the reader.
6
If necessary, follow the instructions on the card reader to
complete the transaction.
TIP: After you successfully enter your passcode, you can make
payments without a passcode for 24 hours while you continue to
wear your watch. If you remove the watch from your wrist or
disable heart rate monitoring, you must enter the passcode
again before making a payment.
Adding a Card to Your Garmin Pay Wallet
You can add up to ten credit or debit cards to your Garmin Pay
wallet.
1
From the vívoactive device page in the Garmin Connect app,
select Garmin Pay > .
2
Follow the on-screen instructions to enter the card
information and add the card to your wallet.
After the card is added, you can select the card on your watch
when you make a payment.
Managing Your Garmin Pay Wallet
You can view detailed information about each of your payment
cards, and you can suspend, activate, or delete a card. You can
also suspend or delete your whole Garmin Pay wallet.
4 Garmin Pay
NOTE: In some countries, participating financial institutions may
restrict the wallet features.
1
From the vívoactive device page in the Garmin Connect app,
select Garmin Pay > Manage Your Wallet.
2
Select an option:
To suspend a specific card, select the card, and select
Suspend.
The card must be active to make purchases using your
vívoactive device.
To temporarily suspend all cards in your wallet, select
Suspend Wallet.
You cannot pay using your vívoactive device until you
unsuspend at least one card using the app.
To unsuspend your suspended wallet, select Unsuspend
Wallet.
To delete a specific card, select the card, and select
Delete.
The card is completely deleted from your wallet. If you
want to add this card to your wallet in the future, you must
enter the card information again.
To delete all cards in your wallet, select Delete Wallet.
Your Garmin Pay wallet and all the card information
associated with it are deleted. You cannot pay using your
vívoactive device until you create a new wallet and add a
card.
Changing Your Garmin Pay Passcode
You must know your current passcode to change it. Your
passcode cannot be recovered. If you forget your passcode, you
must delete your wallet, create a new one, and reenter your card
information.
You can change the passcode required to access your
Garmin Pay wallet on your vívoactive device.
1
From the vívoactive device page in the Garmin Connect app,
select Garmin Pay > Reset Passcode.
2
Follow the on-screen instructions.
The next time you pay using your vívoactive device, you must
enter the new passcode.
Safety and Tracking Features
CAUTION
Incident detection and assistance are supplemental features and
should not be relied on as a primary method to obtain
emergency assistance. The Garmin Connect app does not
contact emergency services on your behalf.
The vívoactive device has safety and tracking features that must
be set up with the Garmin Connect app.
NOTICE
To use these features, you must be connected to the Garmin
Connect app using Bluetooth technology. You can enter
emergency contacts in your Garmin Connect account.
Assistance: Allows you to send an automated message with
your name, LiveTrack link, and GPS location to your
emergency contacts.
Incident detection: When the vívoactive device detects an
incident during an outdoor walk, run, or bike activity, the
device sends an automated message, LiveTrack link, and
GPS location to your emergency contacts.
LiveTrack: Allows friends and family to follow your races and
training activities in real time. You can invite followers using
email or social media, allowing them to view your live data on
a Garmin Connect tracking page.
Adding Emergency Contacts
Emergency contact phone numbers are used for the incident
detection and assistance features.
1
From the Garmin Connect app, select or .
2
Select Safety & Tracking > Incident Detection &
Assistance > Add Emergency Contact.
3
Follow the on-screen instructions.
Adding Contacts
You can add up to 50 contacts to the Garmin Connect app.
Contact emails can be used with the LiveTrack feature.
Three of these contacts can be used as emergency contacts
(Adding Emergency Contacts, page 5).
1
From the Garmin Connect app, select or .
2
Select Contacts.
3
Follow the on-screen instructions.
After you add contacts, you must sync your data to apply the
changes to your vívoactive device (Using the Garmin Connect
App, page 16).
Turning Incident Detection On and Off
Before you can enable incident detection on your device, you
must set up emergency contacts in the Garmin Connect app
(Adding Emergency Contacts, page 5). Your paired smartphone
must be equipped with a data plan and be in an area of network
coverage where data is available. Your emergency contacts
must be able to receive emails or text messages (standard text
messaging rates may apply).
1
From the watch face, hold .
2
Select > Safety & Tracking > Incident Detection.
3
Select an activity.
NOTE: Incident detection is available only for outdoor walk,
run, and bike activities.
When an incident is detected by your vívoactive device with
GPS enabled, the Garmin Connect app can send an automated
text message and email with your name and GPS location to
your emergency contacts. A message appears indicating your
contacts will be informed after 30 seconds have elapsed. You
can select Cancel before the countdown is complete to cancel
the message.
Requesting Assistance
Before you can request assistance, you must set up emergency
contacts (Adding Emergency Contacts, page 5).
1
Hold .
2
When you feel three vibrations, release the button to activate
the assistance feature.
The countdown screen appears.
TIP: You can select Cancel before the countdown is
complete to cancel the message.
Heart Rate Features
The vívoactive device has a wrist-based heart rate monitor and
is also compatible with chest heart rate monitors (sold
separately). You can view heart rate data on the heart rate
widget. If both wrist-based heart rate and chest heart rate data
are available when you start an activity, your device uses the
chest heart rate data.
Wrist-based Heart Rate
Wearing the Device
Wear the device above your wrist bone.
Safety and Tracking Features 5
NOTE: The device should be snug but comfortable. For more
accurate heart rate readings, the device should not move
while running or exercising. For pulse oximeter readings, you
should remain motionless.
NOTE: The optical sensor is located on the back of the
device.
See Tips for Erratic Heart Rate Data, page 6 for more
information about wrist-based heart rate.
See Tips for Erratic Pulse Oximeter Data, page 7 for more
information about the pulse oximeter sensor.
For more information about accuracy, go to garmin.com
/ataccuracy.
Tips for Erratic Heart Rate Data
If the heart rate data is erratic or does not appear, you can try
these tips.
Clean and dry your arm before putting on the device.
Avoid wearing sunscreen, lotion, and insect repellent under
the device.
Avoid scratching the heart rate sensor on the back of the
device.
Wear the device above your wrist bone. The device should
be snug but comfortable.
Wait until the icon is solid before starting your activity.
Warm up for 5 to 10 minutes and get a heart rate reading
before starting your activity.
NOTE: In cold environments, warm up indoors.
Rinse the device with fresh water after each workout.
Viewing the Heart Rate Widget
The heart rate widget displays your current heart rate in beats
per minute (bpm) and a graph of your heart rate. The graph
shows your recent heart rate activity, high and low heart rate,
and color-coded bars to indicate the time spent in each heart
rate zone (About Heart Rate Zones, page 6).
1
From the watch face, swipe to view the heart rate widget.
2
Tap the touchscreen to view your average resting heart rate
(RHR) values for the last 7 days.
Setting an Abnormal Heart Rate Alert
You can set the device to alert you when your heart rate
exceeds a certain number of beats per minute (bpm) after a
period of inactivity.
1
Hold .
2
Select > Wrist Heart Rate > Abnormal HR Alert >
Threshold.
3
Select a heart rate threshold value.
Each time you exceed the custom value, a message appears
and the device vibrates.
Broadcasting Heart Rate to Garmin Devices
You can broadcast your heart rate data from your vívoactive
device and view it on paired Garmin devices. For example, you
can broadcast your heart rate data to an Edge
®
device while
cycling.
NOTE: Broadcasting heart rate data decreases battery life.
1
Hold .
2
Select > Wrist Heart Rate.
3
Select an option:
Select Broadcast In Activity to broadcast heart rate data
during timed activities (Starting an Activity, page 10).
Select Broadcast to start broadcasting heart rate data
now.
4
Pair your vívoactive device with your Garmin ANT+
®
compatible device.
NOTE: The pairing instructions differ for each Garmin
compatible device. See your owner's manual.
Turning Off the Wrist-based Heart Rate Monitor
The default value for the Wrist Heart Rate setting is Auto. The
device automatically uses the wrist-based heart rate monitor
unless you pair a chest heart rate monitor to the device. Chest
heart rate data is only available during an activity.
NOTE: Disabling the wrist-based heart rate monitor also
disables your VO2 max. estimate, intensity minutes, the all-day
stress feature, and the wrist-based pulse oximeter sensor.
NOTE: Disabling the wrist-based heart rate monitor also
disables the on-wrist detection feature for Garmin Pay
payments, and you must enter a passcode before making each
payment (Garmin Pay, page 4).
1
Hold .
2
Select > Wrist Heart Rate > Status > Off.
About Heart Rate Zones
Many athletes use heart rate zones to measure and increase
their cardiovascular strength and improve their level of fitness. A
heart rate zone is a set range of heartbeats per minute. The five
commonly accepted heart rate zones are numbered from 1 to 5
according to increasing intensity. Generally, heart rate zones are
calculated based on percentages of your maximum heart rate.
Setting Your Heart Rate Zones
The device uses your user profile information from the initial
setup to determine your default heart rate zones. The device
has separate heart rate zones for running and cycling. For the
most accurate calorie data during your activity, you should set
your maximum heart rate. You can also set each heart rate
zone. You can manually adjust your zones on the device or
using your Garmin Connect account.
1
Hold .
2
Select > User Profile > Heart Rate Zones.
3
Select Default to view the default values (optional).
The default values can be applied to running and cycling.
4
Select Running or Cycling.
5
Select Preference > Set Custom.
6
Select Max. HR, and enter your maximum heart rate.
7
Select a zone, and enter a value for each zone.
6 Heart Rate Features
Heart Rate Zone Calculations
Zone % of
Maximum
Heart Rate
Perceived Exertion Benefits
1 50–60% Relaxed, easy pace,
rhythmic breathing
Beginning-level
aerobic training,
reduces stress
2 60–70% Comfortable pace,
slightly deeper
breathing, conversation
possible
Basic cardiovascular
training, good
recovery pace
3 70–80% Moderate pace, more
difficult to hold
conversation
Improved aerobic
capacity, optimal
cardiovascular training
4 80–90% Fast pace and a bit
uncomfortable, breathing
forceful
Improved anaerobic
capacity and
threshold, improved
speed
5 90–100% Sprinting pace,
unsustainable for long
period of time, labored
breathing
Anaerobic and
muscular endurance,
increased power
About VO2 Max. Estimates
VO2 max. is the maximum volume of oxygen (in milliliters) you
can consume per minute per kilogram of body weight at your
maximum performance. In simple terms, VO2 max. is an
indication of athletic performance and should increase as your
level of fitness improves.
On the device, your VO2 max. estimate appears as a number
and description. On your Garmin Connect account, you can view
additional details about your VO2 max. estimate, including your
fitness age. Your fitness age gives you an idea of how your
fitness compares with a person of the same gender and different
age. As you exercise, your fitness age can decrease over time.
VO2 max. data is provided by FirstBeat. VO2 max. analysis is
provided with permission from The Cooper Institute
®
. For more
information, see the appendix (VO2 Max. Standard Ratings,
page 24), and go to www.CooperInstitute.org.
Getting Your VO2 Max. Estimate
The device requires heart rate data and a timed, (up to 15
minutes) brisk walk or run to display your VO2 max. estimate.
1
Hold .
2
Select > User Profile > VO2 Max.
If you have already recorded a brisk walk or run outdoors,
your VO2 max. estimate may appear. The device displays
the date your VO2 max. estimate was last updated. The
device updates your VO2 max. estimate each time you
complete an outdoor walk or run of 15 minutes or longer. You
can manually start a VO2 max. test to get an updated
estimate.
3
To start a VO2 max. test, swipe up, and select Test Now.
4
Follow the on-screen instructions to get your VO2 max.
estimate.
A message appears when the test is complete.
Pulse Oximeter
The vívoactive device has a wrist-based pulse oximeter to
gauge the saturation of oxygen in your blood. Knowing your
oxygen saturation can help you determine how your body is
adapting to exercise and stress. Your device gauges your blood
oxygen level by shining light into the skin and checking how
much light is absorbed. This is referred to as SpO
2
.
On the device, your pulse oximeter readings appear as an SpO
2
percentage. On your Garmin Connect account, you can view
additional details about your pulse oximeter readings, including
trends over multiple days (Changing the Pulse Oximeter
Tracking Mode, page 7). For more information on pulse
oximeter accuracy, go to garmin.com/ataccuracy.
Getting Pulse Oximeter Readings
You can manually begin a pulse oximeter reading by viewing the
pulse oximeter widget. The accuracy of the pulse oximeter
reading can vary based on your blood flow, the device
placement on your wrist, and your stillness.
NOTE: You may need to add the pulse oximeter widget to the
widget loop.
1
While you are sitting or inactive, swipe up or down to view the
pulse oximeter widget.
2
Hold the arm wearing the device at heart level while the
device reads your blood oxygen saturation.
3
Keep still.
The device displays your oxygen saturation as a percentage,
and a graph of your pulse oximeter readings and heart rate
values for the last four hours.
Changing the Pulse Oximeter Tracking Mode
You can manually begin a pulse oximeter reading by viewing the
pulse oximeter widget.
1
Hold .
2
Select > Wrist Heart Rate > Pulse Ox > Tracking Mode.
3
Select an option:
To turn on measurements while you are inactive during
the day, select All Day.
NOTE: Turning on all-day tracking mode decreases
battery life.
To turn on continuous measurements while you sleep,
select During Sleep.
NOTE: Unusual sleep positions can cause abnormally low
sleep-time SpO2 readings.
To turn off automatic measurements, select Off.
Tips for Erratic Pulse Oximeter Data
If the pulse oximeter data is erratic or does not appear, you can
try these tips.
Remain motionless while the device reads your blood oxygen
saturation.
Wear the device above your wrist bone. The device should
be snug but comfortable.
Hold the arm wearing the device at heart level while the
device reads your blood oxygen saturation.
Use a silicone band.
Clean and dry your arm before putting on the device.
Avoid wearing sunscreen, lotion, and insect repellent under
the device.
Avoid scratching the optical sensor on the back of the device.
Rinse the device with fresh water after each workout.
Activity Tracking
The activity tracking feature records your daily step count,
distance traveled, intensity minutes, floors climbed, calories
burned, and sleep statistics for each recorded day. Your calories
burned includes your base metabolism plus activity calories.
The number of steps taken during the day appears on the steps
widget. The step count is updated periodically.
For more information about activity tracking and fitness metric
accuracy, go to garmin.com/ataccuracy.
Activity Tracking 7
Auto Goal
Your device creates a daily step goal automatically, based on
your previous activity levels. As you move during the day, the
device shows your progress toward your daily goal .
If you choose not to use the auto goal feature, you can set a
personalized step goal on your Garmin Connect account.
Using the Move Alert
Sitting for prolonged periods of time can trigger undesirable
metabolic state changes. The move alert reminds you to keep
moving. After one hour of inactivity, Move! and the red bar
appear. Additional segments appear after every 15 minutes of
inactivity. The device also vibrates if vibration is turned on
(System Settings, page 19).
Go for a short walk (at least a couple of minutes) to reset the
move alert.
Sleep Tracking
While you are sleeping, the device automatically detects your
sleep and monitors your movement during your normal sleep
hours. You can set your normal sleep hours in the user settings
on your Garmin Connect account. Sleep statistics include total
hours of sleep, sleep levels, and sleep movement. You can view
your sleep statistics on your Garmin Connect account.
NOTE: Naps are not added to your sleep statistics. You can use
do not disturb mode to turn off notifications and alerts, with the
exception of alarms (Using Do Not Disturb Mode, page 2).
Intensity Minutes
To improve your health, organizations such as the World Health
Organization recommend at least 150 minutes per week of
moderate intensity activity, such as brisk walking, or 75 minutes
per week of vigorous intensity activity, such as running.
The device monitors your activity intensity and tracks your time
spent participating in moderate to vigorous intensity activities
(heart rate data is required to quantify vigorous intensity). You
can work toward achieving your weekly intensity minutes goal by
participating in at least 10 consecutive minutes of moderate to
vigorous intensity activities. The device adds the amount of
moderate activity minutes with the amount of vigorous activity
minutes. Your total vigorous intensity minutes are doubled when
added.
Earning Intensity Minutes
Your vívoactive device calculates intensity minutes by
comparing your heart rate data to your average resting heart
rate. If heart rate is turned off, the device calculates moderate
intensity minutes by analyzing your steps per minute.
Start a timed activity for the most accurate calculation of
intensity minutes.
Exercise for at least 10 consecutive minutes at a moderate or
vigorous intensity level.
Wear your device all day and night for the most accurate
resting heart rate.
Garmin Move IQ
When your movements match familiar exercise patterns, the
Move IQ feature automatically detects the event and displays it
in your timeline. The Move IQ events show activity type and
duration, but they do not appear in your activities list or
newsfeed.
The Move IQ feature can automatically start a timed activity for
walking and running using time thresholds you set in the Garmin
Connect app. These activities are added to your activities list.
Activity Tracking Settings
Hold , and select > Activity Tracking.
Status: Turns off the activity tracking features.
Move Alert: Displays a message and the move bar on the
digital watch face and steps screen. The device also vibrates
to alert you.
Goal Alerts: Allows you to turn on and off goal alerts, or turn
them off only during activities. Goal alerts appear for your
daily steps goal, daily floors climbed goal, weekly intensity
minutes goal, and hydration goal.
Auto Activity Start: Allows your device to create and save
timed activities automatically when the Move IQ feature
detects you are walking or running. You can set the minimum
time threshold for running and walking.
Intensity Minutes: Allows you to set a heart rate zone for
moderate intensity minutes and a higher heart rate zone for
vigorous intensity minutes. You can also use the default
algorithm.
Turning Off Activity Tracking
When you turn off activity tracking, your steps, floors climbed,
intensity minutes, sleep tracking, and Move IQ events are not
recorded.
1
Hold .
2
Select > Activity Tracking > Status > Off.
Widgets
Your device comes preloaded with widgets that provide at-a-
glance information. Some widgets require a Bluetooth
connection to a compatible smartphone.
Some widgets are not visible by default. You can add them to
the widget loop manually (Customizing the Widget Loop,
page 9).
Body Battery
: Displays your current Body Battery level and a
graph of your Body Battery levels for the last several hours.
Calendar: Displays upcoming meetings from your smartphone
calendar.
Calories: Displays your calorie information for the current day.
Floors climbed: Tracks your floors climbed and progress
toward your goal.
Garmin coach: Displays scheduled workouts when you select a
Garmin coach training plan in your Garmin Connect account.
Golf: Displays golf information for your last round.
Health stats: Displays a dynamic summary of your current
health statistics. The measurements includes heart rate,
Body Battery level, stress, and more.
Heart rate: Displays your current heart rate in beats per minute
(bpm) and a graph of your heart rate.
History: Displays your activity history and a graph of your
recorded activities.
Hydration: Allows you to track the amount of water you
consume and the progress toward your daily goal.
Intensity minutes: Tracks your time spent participating in
moderate to vigorous activities, your weekly intensity minutes
goal, and progress toward your goal.
Last sport: Displays a brief summary of your last recorded
sport.
8 Widgets
Menstrual cycle tracking: Displays your current cycle. You can
view and log your daily symptoms.
Music controls: Provides music player controls for your
smartphone or on-device music.
My day: Displays a dynamic summary of your activity today. The
metrics include timed activities, intensity minutes, floors
climbed, steps, calories burned, and more.
Notifications: Alerts you to incoming calls, texts, social network
updates, and more, based on your smartphone notification
settings.
Pulse oximeter: Displays your most recent blood oxygen
saturation percentage and a graph of your readings.
Respiration: Your current respiration rate in breaths per minute
and seven-day average. You can do a breathing activity to
help you relax.
Steps: Tracks your daily step count, step goal, and data for
previous days.
Stress: Displays your current stress level and a graph of your
stress level. You can do a breathing activity to help you relax.
Weather: Displays the current temperature and weather
forecast.
Viewing Widgets
From the watch face, swipe up or down.
The device scrolls through the widget loop.
Tap the touchscreen to view additional screens for a widget.
Hold to view additional options and functions for a widget.
Customizing the Widget Loop
1
Hold .
2
Select > Widgets.
3
Select a widget.
4
Select an option:
Select Reorder to change the location of the widget in the
widget loop.
Select Remove to remove the widget from the widget
loop.
5
Select Add More.
6
Select a widget.
The widget is added to the widget loop.
About My Day
The My Day widget is a daily snapshot of your activity. This is a
dynamic summary that updates throughout the day. As soon as
you climb a flight of stairs or record an activity, it appears in the
widget. The metrics include recorded activities, intensity minutes
for the week, floors climbed, steps, calories burned, and more.
You can tap the touchscreen for an option to improve accuracy
or to view additional metrics.
Health Stats Widget
The Health Stats widget provides an at-a-glance view of your
health data. This is a dynamic summary that updates throughout
the day. The metrics include your heart rate, stress level, Body
Battery level, and respiration rate. You can tap the touchscreen
to view additional metrics.
Heart Rate Variability and Stress Level
Your device analyzes your heart rate variability while you are
inactive to determine your overall stress. Training, physical
activity, sleep, nutrition, and general life stress all impact your
stress level. The stress level range is from 0 to 100, where 0 to
25 is a resting state, 26 to 50 is low stress, 51 to 75 is medium
stress, and 76 to 100 is a high stress state. Knowing your stress
level can help you identify stressful moments throughout your
day. For best results, you should wear the device while sleeping.
You can sync your device with your Garmin Connect account to
view your all-day stress level, long-term trends, and additional
details.
Using the Stress Level Widget
The stress level widget displays your current stress level and a
graph of your stress level for the last several hours. It can also
guide you through a breathing activity to help you relax.
1
While you are sitting or inactive, swipe up or down to view the
stress level widget.
TIP: If you are too active for the watch to determine your
stress level, a message appears instead of a stress level
number. You can check your stress level again after several
minutes of inactivity.
2
Tap the touchscreen to view a graph of your stress level for
the last several hours.
Blue bars indicate periods of rest. Yellow bars indicate
periods of stress. Gray bars indicate times that you were too
active to determine your stress level.
3
To start a breathing activity, swipe up, and select .
Body Battery
Your device analyzes your heart rate variability, stress level,
sleep quality, and activity data to determine your overall Body
Battery level. Like a gas gauge on a car, it indicates your
amount of available reserve energy. The Body Battery level
range is from 0 to 100, where 0 to 25 is low reserve energy, 26
to 50 is medium reserve energy, 51 to 75 is high reserve energy,
and 76 to 100 is very high reserve energy.
You can sync your device with your Garmin Connect account to
view your most up-to-date Body Battery level, long-term trends,
and additional details (Tips for Improved Body Battery Data,
page 10).
Viewing the Body Battery Widget
The Body Battery widget displays your current Body Battery
level and a graph of your Body Battery level for the last several
hours.
1
Swipe up or down to view the Body Battery widget.
NOTE: You may need to add the widget to your widget loop
(Customizing the Widget Loop, page 9).
2
Tap the touchscreen to view a combined graph of your Body
Battery and stress level.
3
Swipe up to view your Body Battery data since midnight.
Widgets 9
Tips for Improved Body Battery Data
Your Body Battery level updates when you sync your device
with your Garmin Connect account.
For more accurate results, wear the device while sleeping.
Rest and good sleep charge your Body Battery.
Strenuous activity, high stress, and poor sleep can cause
your Body Battery to drain.
Food intake, as well as stimulants like caffeine, has no
impact on your Body Battery.
Menstrual Cycle Tracking
Your menstrual cycle is an important part of your health. You
can learn more and set up this feature in the Health Stats
settings of the Garmin Connect app.
Menstrual cycle tracking and details
Physical and emotional symptoms
Period and fertility predictions
Health and nutrition information
NOTE: If your vívoactive device doesn't have the menstrual
cycle tracking widget, you can download it from the Connect IQ
app.
Hydration Tracking
You can track your daily fluid intake, turn on goals and alerts,
and enter the container sizes you use most often. If you enable
automatic goals, your goal increases on the days when you
record an activity. When you exercise, you need more fluid to
replace the sweat lost.
Using the Hydration Tracking Widget
The hydration tracking widget displays your fluid intake and your
daily hydration goal.
1
Swipe up or down to view the hydration widget.
2
Press for each serving of fluid you consume (1 cup, 8 oz.,
or 250 mL).
3
Select a container to increase your fluid intake by the volume
of the container.
4
Hold to customize the widget.
5
Select an option:
To change the units of measure, select Units.
To enable dynamic daily goals that increase after
recording an activity, select Auto Goal.
To turn on hydration reminders, select Alerts.
To customize your container sizes, select Containers,
select a container, select the units of measure, and enter
the container size.
Apps and Activities
Your device includes a variety of preloaded apps and activities.
Apps: Apps provide interactive features for your device, such as
navigating to saved locations.
Activities: Your device comes preloaded with indoor and
outdoor activity apps, including running, cycling, strength
training, golfing, and more. When you start an activity, the
device displays and records sensor data, which you can save
and share with the Garmin Connect community.
For more information about activity tracking and fitness metric
accuracy, go togarmin.com/ataccuracy.
Connect IQ Apps: You can add features to your watch by
installing apps from the Connect IQ mobile app (Connect IQ
Features, page 3).
Starting an Activity
When you start an activity, GPS turns on automatically (if
required).
1
Press .
2
If this is the first time you have started an activity, select the
checkbox next to each activity to add to your favorites, and
select .
3
Select an option:
Select an activity from your favorites.
Select , and select an activity from the extended activity
list.
4
If the activity requires GPS signals, go outside to an area with
a clear view of the sky, and wait until the device is ready.
The device is ready after it establishes your heart rate,
acquires GPS signals (if required), and connects to your
wireless sensors (if required).
5
Press to start the activity timer.
The device records activity data only while the activity timer is
running.
Tips for Recording Activities
Charge the device before starting an activity (Charging the
Device, page 20).
Press to record laps, start a new set or pose, or advance
to the next workout step.
Swipe up or down to view additional data pages.
Stopping an Activity
1
Press .
2
Select an option:
To save the activity, swipe up.
To discard the activity, swipe down.
Adding a Custom Activity
You can create a custom activity and add it to the activity list.
1
Press .
2
Select > Add More.
3
Select an activity type to copy.
4
Select an activity name.
5
If necessary, edit the activity app settings (Activities and App
Settings, page 17).
6
When you are finished editing, select Done.
Adding or Removing a Favorite Activity
The list of your favorite activities appears when you press
from the watch face, and it provides quick access to the
activities you use most. The first time you press to start an
activity, the device prompts you to select your favorite activities.
You can add or remove favorite activities at any time.
1
Hold .
2
Select > Activities & Apps.
Your favorite activities appear at the top of the list with a gray
background. Other activities appear in the extended list with
a black background.
10 Apps and Activities
3
Select an option:
To add a favorite activity, select the activity, and select
Add Favorite.
To remove a favorite activity, select the activity, and select
Remove Favorite.
Indoor Activities
The vívoactive device can be used for training indoors, such as
running on an indoor track or using a stationary bike. GPS is
turned off for indoor activities.
When running or walking with GPS turned off, speed, distance,
and cadence are calculated using the accelerometer in the
device. The accelerometer is self-calibrating. The accuracy of
the speed, distance, and cadence data improves after a few
outdoor runs or walks using GPS.
TIP: Holding the handrails of the treadmill reduces accuracy.
You can use an optional foot pod to record pace, distance, and
cadence.
When cycling with GPS turned off, speed and distance are not
available unless you have an optional sensor that sends speed
and distance data to the device (such as a speed or cadence
sensor).
Recording a Strength Training Activity
You can record sets during a strength training activity. A set is
multiple repetitions (reps) of a single move.
1
Press .
2
Select Strength.
3
Press to start the activity timer.
4
Start your first set.
The device counts your reps. Your rep count appears when
you complete at least four reps.
TIP: The device can only count reps of a single move for
each set. When you want to change moves, you should finish
the set and start a new one.
5
Press to finish the set.
The watch displays the total reps for the set. After several
seconds, the rest timer appears.
6
If necessary, select Edit Weight, and edit the number of
reps.
TIP: You can also add the weight used for the set.
7
When you are done resting, press to start your next set.
8
Repeat for each strength training set until your activity is
complete.
9
After you complete your activity, press , and swipe up to
save the activity.
Calibrating the Treadmill Distance
To record more accurate distances for your treadmill runs, you
can calibrate the treadmill distance after you run at least 1.5 km
(1 mi.) on a treadmill. If you use different treadmills, you can
manually calibrate the treadmill distance on each treadmill or
after each run.
1
Start a treadmill activity (Starting an Activity, page 10), and
run at least 1.5 km (1 mi.) on the treadmill.
2
After you complete your run, press .
3
Check the treadmill display for the distance traveled.
4
Select an option:
To calibrate the first time, enter the treadmill distance on
your device.
To manually calibrate after the first-time calibration, swipe
up, select Calibrate & Save, and enter the treadmill
distance on your device.
Outdoor Activities
The vívoactive device comes preloaded with apps for outdoor
activities, such as running and biking. GPS is turned on for
outdoor activities. You can add apps using default activities,
such as cardio or rowing.
Going for a Run
Before you can use a wireless sensor for your run, you must pair
the sensor with your device (Pairing Your Wireless Sensors,
page 20).
1
Put on your wireless sensors, such as a foot pod or heart rate
monitor (optional).
2
Press .
3
Select Run.
4
When using optional wireless sensors, wait while the device
connects to the sensors.
5
Go outside, and wait while the device locates satellites.
6
Press to start the activity timer.
The device records activity data only while the activity timer is
running.
7
Start your activity.
8
Select to record laps (optional) (Marking Laps Using the
Auto Lap Feature, page 18).
9
Swipe up or down to scroll through data screens.
10
After you complete your activity, press , and swipe up to
save the activity.
Going for a Ride
Before you can use a wireless sensor for your ride, you must
pair the sensor with your device (Pairing Your Wireless Sensors,
page 20).
1
Pair your wireless sensors, such as a heart rate monitor,
speed sensor, or cadence sensor (optional).
2
Press .
3
Select Bike.
4
When using optional wireless sensors, wait while the device
connects to the sensors.
5
Go outside, and wait while the device locates satellites.
6
Press to start the activity timer.
The device records activity data only while the activity timer is
running.
7
Start your activity.
8
Swipe up or down to scroll through data screens.
9
After you complete your activity, press , and swipe up to
save the activity.
Viewing Your Ski Runs
Your device records the details of each downhill skiing or
snowboarding run using the auto run feature. This feature is
turned on by default for downhill skiing and snowboarding. It
automatically records new ski runs based on your movement.
The timer pauses when you stop moving downhill and when you
are on a chairlift. The timer remains paused during the chairlift
ride. You can start moving downhill to restart the timer. You can
view run details from the paused screen or while the timer is
running.
1
Start a skiing or snowboarding activity.
2
Swipe up or down to view details of your last run, your
current run, and your total runs.
The run screens include time, distance traveled, maximum
speed, average speed, and total descent.
Going for a Pool Swim
1
Press .
Apps and Activities 11
2
Select Pool Swim.
3
Select your pool size, or enter a custom size.
4
Press to start the activity timer.
5
Start your activity.
The device automatically records swim intervals and lengths.
6
Press when you rest.
The display inverts color, and the rest screen appears.
7
Press to restart the interval timer.
8
After you complete your activity, press to stop the activity
timer, and hold again to save the activity.
Setting the Pool Size
1
Press .
2
Select Pool Swim.
3
Swipe up.
4
Select Settings > Pool Size.
5
Select your pool size, or enter a custom size.
Swim Terminology
Length: One trip down the pool.
Interval: One or more consecutive lengths. A new interval starts
after a rest.
Stroke: A stroke is counted every time your arm wearing the
device completes a full cycle.
Swolf: Your swolf score is the sum of the time for one pool
length and the number of strokes for that length. For
example, 30 seconds plus 15 strokes equals a swolf score of
45. Swolf is a measurement of swimming efficiency and, like
golf, a lower score is better.
Golfing
Downloading Golf Courses
Before you play a course for the first time, you must download it
using the Garmin Connect app.
1
From the Garmin Connect app, select Download Golf
Courses > .
2
Select a golf course.
3
Select Download.
After the course finishes downloading, it appears in the list of
courses on your vívoactive device.
Playing Golf
Before you play a course for the first time, you must download it
using your smartphone (Downloading Golf Courses, page 12).
Downloaded courses are updated automatically. Before you play
golf, you should charge the device (Charging the Device,
page 20).
1
Press .
2
Select Golf.
3
Wait while the device locates satellites.
4
Select a course from the list of available courses.
5
Swipe up or down to scroll through the holes.
The device automatically transitions when you move to the
next hole.
Hole Information
The device calculates the distance to the front and back of the
green, and to the selected pin location (Changing the Pin
Location, page 12).
Current hole number
Distance to the back of the green
Distance to the selected pin location
Distance to the front of the green
Par for the hole
Map of the green
Changing the Pin Location
While playing a game, you can take a closer look at the green
and move the pin location.
1
Select the map.
A larger view of the green appears.
2
Swipe up or down to scroll through the pin locations.
indicates the selected pin location.
3
Press to accept the pin location.
The distances on the hole information screen are updated to
reflect the new pin location. The pin location is saved for only
the current round.
Viewing the Direction to the Pin
The PinPointer feature is a compass that provides directional
assistance when you are unable to see the green. This feature
can help you line up a shot even if you are in the woods or in a
deep sand trap.
NOTE: Do not use the PinPointer feature while in a golf cart.
Interference from the golf cart can affect the accuracy of the
compass.
1
Press .
2
Select .
The arrow points to the pin location.
Viewing Layup and Dogleg Distances
You can view a list of layup and dogleg distances for par 4 and 5
holes.
1
Press .
2
Select .
NOTE: Distances and locations are removed from the list as
you pass them.
Viewing Hazards
You can view distances to hazards along the fairway for par 4
and 5 holes. Hazards that affect shot selection are displayed
individually or in groups to help you determine the distance to
layup or carry.
1
From the hole information screen, press , and select .
12 Apps and Activities
The distances to the front and back of the nearest
hazard appear on the screen.
The hazard type is listed at the top of the screen.
The green is represented as a half circle at the top of
the screen. The line below the green represents the center
of the fairway.
Hazards are shown below the green in approximate
locations relative to the fairway.
2
Swipe to view other hazards for the current hole.
Measuring a Shot with the Garmin AutoShot
Feature
Your vívoactive device features automatic shot detection and
recording. Each time you take a shot along the fairway, the
device records your shot distance so you can view it later
(Viewing Your Shot History, page 13).
TIP: Automatic shot detection works best when you wear the
device on your leading wrist and make good contact with the
ball. Putts are not detected.
1
Begin playing a round.
When the device detects a shot, your distance from the shot
location appears in the banner at the top of the screen.
TIP: You can tap the banner to hide it for 10 seconds.
2
Walk or drive to your ball.
3
Hit your next shot.
The device records the distance of your last shot.
Keeping Score
1
While playing golf, press .
2
Select .
3
Swipe up or down to change holes.
4
Tap the center of the screen.
5
Select or to set the score.
Setting the Scoring Method
You can change the method the device uses to keep score.
1
Hold .
2
Select > Activities & Apps > Golf.
3
Select the activity settings.
4
Select Scoring > Scoring Method.
5
Select a scoring method.
About Stableford Scoring
When you select the Stableford scoring method (Setting the
Scoring Method, page 13), points are awarded based on the
number of strokes taken relative to par. At the end of a round,
the highest score wins. The device awards points as specified
by the United States Golf Association.
The scorecard for a Stableford scored game shows points
instead of strokes.
Points Strokes Taken Relative to Par
0 2 or more over
1 1 over
2 Par
3 1 under
Points Strokes Taken Relative to Par
4 2 under
5 3 under
Tracking Golf Statistics
When you enable statistics tracking on the device, you can view
your statistics for the current round (Viewing Your Round
Summary, page 13). You can compare rounds and track
improvements using the Garmin Golf
app.
1
Hold .
2
Select > Activities & Apps > Golf.
3
Select the activity settings.
4
Select Scoring > Stat Tracking.
Recording Golf Statistics
Before you can record statistics, you must enable statistics
tracking (Tracking Golf Statistics, page 13).
1
From the scorecard, tap the center of the screen.
2
Set the number of strokes taken, and select Next.
3
Set the number of putts taken, and select Done.
4
Select an option:
If your ball hit the fairway, select .
If your ball missed the fairway, select or .
Viewing Your Shot History
1
After playing a hole, press .
2
Select to view information for your last shot.
3
Select to view information about each shot for a hole.
Viewing Your Round Summary
During a round, you can view your score, statistics, and step
information.
1
Press .
2
Select .
Ending a Round
1
Press .
2
Select End.
3
Swipe up.
4
Select an option:
To save the round and return to watch mode, select Save.
To edit your scorecard, select Edit Score.
To discard the round and return to watch mode, select
Discard.
To pause the round and resume it at a later time, select
Pause.
Garmin Golf App
The Garmin Golf app allows you to upload scorecards from your
compatible Garmin device to view detailed statistics and shot
analyses. Golfers can compete with each other at different
courses using the Garmin Golf app. More than 41,000 courses
have leaderboards that anyone can join. You can set up a
tournament event and invite players to compete.
The Garmin Golf app syncs your data with your Garmin Connect
account. You can download the Garmin Golf app from the app
store on your smartphone.
Training
Setting Up Your User Profile
You can update your gender, birth year, height, weight, wrist,
and heart rate zone (Setting Your Heart Rate Zones, page 6)
Training 13
settings. The device uses this information to calculate accurate
training data.
1
Hold .
2
Select > User Profile.
3
Select an option.
Fitness Goals
Knowing your heart rate zones can help you measure and
improve your fitness by understanding and applying these
principles.
Your heart rate is a good measure of exercise intensity.
Training in certain heart rate zones can help you improve
cardiovascular capacity and strength.
If you know your maximum heart rate, you can use the table
(Heart Rate Zone Calculations, page 7) to determine the best
heart rate zone for your fitness objectives.
If you do not know your maximum heart rate, use one of the
calculators available on the Internet. Some gyms and health
centers can provide a test that measures maximum heart rate.
The default maximum heart rate is 220 minus your age.
Workouts
Your device can guide you through multiple-step workouts that
include goals for each workout step, such as distance, time,
reps, or other metrics. Your device includes several preloaded
workouts for multiple activities, including strength, cardio,
running, and biking. You can create and find more workouts and
training plans using Garmin Connect and transfer them to your
device.
You can create a scheduled training plan using the calendar in
Garmin Connect and send the scheduled workouts to your
device.
Starting a Workout
Your device can guide you through multiple steps in a workout.
1
Press .
2
Select an activity.
3
Swipe up.
4
Select Workouts.
5
Select a workout.
NOTE: Only workouts that are compatible with the selected
activity appear in the list.
6
Select Do Workout.
7
Press to start the activity timer.
After you begin a workout, the device displays each step of the
workout, step notes (optional), the target (optional), and the
current workout data. For strength, yoga, or Pilates activities, an
instructional animation appears.
Using Garmin Connect Training Plans
Before you can download and use a training plan from Garmin
Connect, you must have a Garmin Connect account (Garmin
Connect, page 16), and you must pair the vívoactive device
with a compatible smartphone.
1
From the Garmin Connect app, select or .
2
Select Training > Training Plans.
3
Select and schedule a training plan.
4
Follow the on-screen instructions.
5
Review the training plan in your calendar.
Adaptive Training Plans
Your Garmin Connect account has an adaptive training plan and
Garmin coach to fit your training goals. For example, you can
answer a few questions and find a plan to help you complete a 5
km race. The plan adjusts to your current level of fitness,
coaching and schedule preferences, and race date. When you
start a plan, the Garmin Coach widget is added to the widget
loop on your vívoactive device.
Starting Today's Workout
After you send a training plan to your device, the Garmin Coach
widget appears in your widget loop.
1
From the watch face, swipe to view the Garmin Coach
widget.
If a workout for this activity is scheduled for today, the device
shows the workout name and prompts you to start it.
2
Select a workout.
3
Select View to view the workout steps, and swipe right when
you are finished viewing the steps (optional).
4
Select Do Workout.
5
Follow the on-screen instructions.
Viewing Scheduled Workouts
You can view workouts scheduled in your training calendar and
start a workout.
1
Press .
2
Select an activity.
3
Swipe up.
4
Select Training Calendar.
Your scheduled workouts appear, sorted by date.
5
Select a workout.
6
Select an option:
To view the steps for the workout, select View.
To start the workout, select Do Workout.
Personal Records
When you complete an activity, the device displays any new
personal records you achieved during that activity. Personal
records include your fastest time over several typical race
distances and longest run, ride, or swim.
Viewing Your Personal Records
1
Hold .
2
Select History > Records.
3
Select a sport.
4
Select a record.
5
Select View Record.
Restoring a Personal Record
You can set each personal record back to the one previously
recorded.
1
Hold .
2
Select History > Records.
3
Select a sport.
4
Select a record to restore.
5
Select Previous > .
NOTE: This does not delete any saved activities.
Clearing a Personal Record
1
Hold .
2
Select History > Records.
3
Select a sport.
4
Select a record to delete.
5
Select Clear Record > .
NOTE: This does not delete any saved activities.
Clearing All Personal Records
1
Hold .
14 Training
2
Select History > Records.
NOTE: This does not delete any saved activities.
3
Select a sport.
4
Select Clear All Records > .
The records are deleted for that sport only.
Navigation
You can use the GPS navigation features on your device to
save locations, navigate to locations, and find your way home.
Saving Your Location
Before you can navigate to a saved location, your device must
locate satellites.
A location is a point that you record and store in the device. If
you want to remember landmarks or return to a certain spot, you
can mark a location.
1
Go to the place where you want to mark a location.
2
Press .
3
Select Navigate > Save Location.
After the device acquires GPS signals, the location
information appears.
4
Select Save.
5
Select an icon.
Deleting a Location
1
Press .
2
Select Navigate > Saved Locations.
3
Select a location.
4
Select Delete > .
Navigating to a Saved Location
Before you can navigate to a saved location, your device must
locate satellites.
1
Press .
2
Select Navigate > Saved Locations.
3
Select a location, and select Go To.
4
Press to start the activity timer.
5
Move forward.
The compass appears. The compass arrow points toward the
saved location.
TIP: For more accurate navigation, orient the top of the
screen toward the direction in which you are moving.
Navigating Back to Start
Before you can navigate back to start, you must locate satellites,
start the timer, and start your activity.
At any time during your activity, you can return to your starting
location. For example, if you are running in a new city, and you
are unsure how to get back to the trail head or hotel, you can
navigate back to your starting location. This feature is not
available for all activities.
1
Hold .
2
Select Navigation > Back to Start.
The compass appears.
3
Move forward.
The compass arrow points toward your starting point.
TIP: For more accurate navigation, orient your device toward
the direction in which you are navigating.
Stopping Navigation
To stop navigation and continue your activity, hold , and
select Stop Navigation.
To stop navigation and save your activity, press , and
swipe up.
Compass
The device has a 3-axis compass with automatic calibration.
The compass features and appearance change depending on
your activity, whether GPS is enabled, and whether you are
navigating to a destination.
Calibrating the Compass Manually
NOTICE
Calibrate the electronic compass outdoors. To improve heading
accuracy, do not stand near objects that influence magnetic
fields, such as vehicles, buildings, and overhead power lines.
Your device was already calibrated at the factory, and the
device uses automatic calibration by default. If you experience
irregular compass behavior, for example, after moving long
distances or after extreme temperature changes, you can
manually calibrate the compass.
1
Hold .
2
Select > Sensors > Compass > Start Calibration.
3
Follow the on-screen instructions.
TIP: Move your wrist in a small figure eight motion until a
message appears.
History
Your device stores up to 14 days of activity tracking and heart
rate monitoring data, and up to seven timed activities. You can
view your last seven timed activities on your device. You can
synchronize your data to view unlimited activities, activity
tracking data, and heart rate monitoring data on your Garmin
Connect account (Using the Garmin Connect App, page 16)
(Using Garmin Connect on Your Computer, page 16).
When the device memory is full, your oldest data is overwritten.
Using History
1
Hold .
2
Select History.
3
Select an option:
To view an activity from this week, select This Week.
To view an older activity, select Previous Weeks.
4
Select an activity.
5
Select an option:
Select Details to view additional information about the
activity.
Select Laps to view additional information about each lap.
Select Sets to view additional information about each
weight lifting set.
Select Intervals to view additional information about each
swim interval.
Select Time in Zone to view your time in each heart rate
zone.
Select Delete to delete the selected activity.
Viewing Your Time in Each Heart Rate Zone
Before you can view heart rate zone data, you must complete an
activity with heart rate and save the activity.
Viewing your time in each heart rate zone can help you adjust
your training intensity.
Navigation 15
1
Hold .
2
Select History.
3
Select an option:
To view an activity from this week, select This Week.
To view an older activity, select Previous Weeks.
4
Select an activity.
5
Select Time in Zone.
Garmin Connect
Your Garmin Connect account allows you to track your
performance and connect with your friends. It gives you the tools
to track, analyze, share, and encourage each other. You can
record the events of your active lifestyle, including runs, walks,
rides, swims, hikes, golf games, and more.
You can create your free Garmin Connect account when you
pair your device with your phone using the Garmin Connect app.
You can also create an account when you set up the Garmin
Express application (www.garmin.com/express).
Store your activities: After you complete and save a timed
activity with your device, you can upload that activity to your
Garmin Connect account and keep it as long as you want.
Analyze your data: You can view more detailed information
about your fitness and outdoor activities, including time,
distance, heart rate, calories burned, cadence, an overhead
map view, and pace and speed charts. You can view more
detailed information about your golf games, including
scorecards, statistics, and course information. You can also
view customizable reports.
NOTE: To view some data, you must pair an optional
wireless sensor with your device (Pairing Your Wireless
Sensors, page 20).
Track your progress: You can track your daily steps, join a
friendly competition with your connections, and meet your
goals.
Share your activities: You can connect with friends to follow
each other's activities or post links to your activities on your
favorite social networking sites.
Manage your settings: You can customize your device and
user settings on your Garmin Connect account.
Using the Garmin Connect App
After you pair your device with your smartphone (Pairing Your
Smartphone, page 1), you can use the Garmin Connect app to
upload all of your activity data to your Garmin Connect account.
1
Verify the Garmin Connect app is running on your
smartphone.
2
Bring your device within 10 m (30 ft.) of your smartphone.
Your device automatically syncs your data with the Garmin
Connect app and your Garmin Connect account.
Using Garmin Connect on Your Computer
The Garmin Express application connects your device to your
Garmin Connect account using a computer. You can use the
Garmin Express application to upload your activity data to your
Garmin Connect account and to send data, such as workouts or
training plans, from the Garmin Connect website to your device.
You can also install device software updates and manage your
Connect IQ apps.
1
Connect the device to your computer using the USB cable.
2
Go to www.garmin.com/express.
3
Download and install the Garmin Express application.
4
Open the Garmin Express application, and select Add
Device.
5
Follow the on-screen instructions.
Customizing Your Device
Changing the Watch Face
You can choose from several preloaded watch faces or use a
Connect IQ watch face that is downloaded to your device
(Connect IQ Features, page 3). You can also edit an existing
watch face (Editing a Watch Face, page 16) or create a new
one (Creating a Custom Watch Face, page 16).
1
From the watch face, hold .
2
Select Watch Face.
3
Swipe right or left to scroll through the available watch faces.
4
Tap the touchscreen to select the watch face.
Editing a Watch Face
You can customize the style and data fields for the watch face.
1
From the watch face, hold .
2
Select Watch Face.
3
Swipe right or left to scroll through the available watch faces.
4
Swipe up to edit a watch face.
5
Select an option to edit.
6
Swipe up or down to scroll through the options.
7
Select to select the option.
8
Tap the touchscreen to select the watch face.
Creating a Custom Watch Face
You can create a new watch face by selecting the layout, colors,
and additional data.
1
From the watch face, hold .
2
Select Watch Face.
3
Swipe left, and select .
4
Swipe up or down to scroll through the background options,
and tap the screen to select the displayed background.
5
Swipe up or down to scroll through the analog and digital
dials, and tap the screen to select the displayed dial.
6
Swipe up or down to scroll through the accent colors, and tap
the screen to select the displayed color.
7
Select each data field you want to customize, and select the
data to display in it.
A white border indicates the customizable data fields for this
dial.
8
Swipe left to customize the time markers.
9
Swipe up or down to scroll through the time markers.
10
Select .
The device sets the new watch face as your active watch
face.
16 Customizing Your Device
Customizing the Controls Menu
You can add, remove, and change the order of the shortcut
menu options in the controls menu (Using the Controls Menu,
page 1).
1
Hold .
The controls menu appears.
2
Hold .
The controls menu switches to edit mode.
3
Select the shortcut you want to customize.
4
Select an option:
To change the location of the shortcut in the controls
menu, select the location where you want it to appear, or
drag the shortcut to a new location.
To remove the shortcut from the controls menu, select .
5
If necessary, select to add a shortcut to the controls menu.
NOTE: This option is available only after you remove at least
one shortcut from the menu.
Setting Up a Shortcut Control
You can set up a shortcut to your favorite control, such as your
Garmin Pay wallet or the music controls.
1
From the watch face, swipe right.
2
Select an option:
If this is the first time you are setting up a shortcut, swipe
up, and select Setup.
If you previously set up a shortcut, hold , and select
Shortcut Settings.
3
Select a shortcut control.
When you swipe right from the watch face, the shortcut control
appears.
Activities and App Settings
These settings allow you to customize each preloaded activity
app based on your needs. For example, you can customize data
screens and enable alerts and training features. Not all settings
are available for all activity types.
Hold , select > Activities & Apps, select an activity, and
select the activity settings.
Accent Color: Sets the accent color of each activity to help
identify which activity is active.
Alerts: Sets the training alerts for the activity (Alerts, page 17).
Auto Lap: Sets the options for the Auto Lap
®
feature (Auto Lap,
page 18).
Auto Pause: Sets the device to stop recording data when you
stop moving or when you drop below a specified speed
(Using Auto Pause
®
, page 18).
Auto Run: Enables the device to detect ski runs automatically
using the built-in accelerometer.
Auto Scroll: Enables you to move through all of the activity data
screens automatically while the timer is running (Using Auto
Scroll, page 18).
Auto Set: Enables the device to start and stop exercise sets
automatically during a strength training activity.
Club Prompt: Displays a prompt that enables you to enter
which golf club you used after each detected shot.
Data Screens: Enables you to customize data screens and add
new data screens for the activity (Customizing the Data
Screens, page 17).
Driver Distance: Sets the average distance the golf ball travels
on your drive.
Edit Weight: Allows you to add the weight used for an exercise
set during a strength training or cardio activity.
Enable Videos: Enables instructive workout animations for a
strength, cardio, yoga, or Pilates activity. Animations are
available for pre-installed workouts and workouts
downloaded from Garmin Connect.
GPS: Sets the mode for the GPS antenna (Changing the GPS
Setting, page 18).
Pool Size: Sets the pool length for pool swimming.
Scoring Method: Sets the scoring method to stroke play or
Stableford scoring while playing golf.
Stat Tracking: Enables statistics tracking while playing golf.
Status: Enables or disables scorekeeping automatically when
you start a round of golf. The Always Ask option prompts you
when you begin a round.
Tournament Mode: Disables features that are not allowed
during sanctioned tournaments.
Vibration Alerts: Enables alerts that notify you to inhale or
exhale during a breathwork activity.
Customizing the Data Screens
You can customize data screens based on your training goals or
optional accessories. For example, you can customize one of
the data screens to display your lap pace or heart rate zone.
1
Hold .
2
Select > Activities & Apps.
3
Select an activity.
4
Select the activity settings.
5
Select Data Screens.
6
Select a data screen to customize.
7
Select one or more options:
NOTE: Not all options are available for all activities.
To adjust the style and number of data fields on each data
screen, select Layout.
To customize the fields on a data screen, select the
screen, and select Edit Data Fields.
To show or hide a data screen, select the toggle switch
next to the screen.
To show or hide the heart rate zone gauge screen, select
HR Zone Gauge.
Alerts
You can set alerts for each activity, which can help you to train
toward specific goals. Some alerts are available only for specific
activities. Some alerts require optional accessories, such as a
heart rate monitor or cadence sensor. There are three types of
alerts: event alerts, range alerts, and recurring alerts.
Event alert: An event alert notifies you once. The event is a
specific value. For example, you can set the device to alert
you when you burn a specified number of calories.
Range alert: A range alert notifies you each time the device is
above or below a specified range of values. For example, you
can set the device to alert you when your heart rate is below
60 beats per minute (bpm) and over 210 bpm.
Recurring alert: A recurring alert notifies you each time the
device records a specified value or interval. For example, you
can set the device to alert you every 30 minutes.
Alert Name Alert Type Description
Cadence Range You can set minimum and maximum
cadence values.
Calories Event,
recurring
You can set the number of calories.
Custom Event,
recurring
You can select an existing message or
create a custom message and select an
alert type.
Distance Recurring You can set a distance interval.
Customizing Your Device 17
Alert Name Alert Type Description
Heart Rate Range You can set minimum and maximum
heart rate values or select zone changes.
Pace Range You can set minimum and maximum
pace values.
Run/Walk Recurring You can set timed walking breaks at
regular intervals.
Speed Range You can set minimum and maximum
speed values.
Time Event,
recurring
You can set a time interval.
Setting an Alert
1
Hold .
2
Select > Activities & Apps.
3
Select an activity.
NOTE: This feature is not available for all activities.
4
Select the activity settings.
5
Select Alerts.
6
Select an option:
Select Add New to add a new alert for the activity.
Select the alert name to edit an existing alert.
7
If necessary, select the type of alert.
8
Select a zone, enter the minimum and maximum values, or
enter a custom value for the alert.
9
If necessary, turn on the alert.
For event and recurring alerts, a message appears each time
you reach the alert value. For range alerts, a message appears
each time you exceed or drop below the specified range
(minimum and maximum values).
Auto Lap
Marking Laps Using the Auto Lap Feature
You can set your device to use the Auto Lap feature to mark a
lap at a specific distance automatically. This feature is helpful for
comparing your performance over different parts of an activity
(for example, every 1 mile or 5 kilometers).
1
Hold .
2
Select > Activities & Apps.
3
Select an activity.
NOTE: This feature is not available for all activities.
4
Select the activity settings.
5
Select an option:
To turn the Auto Lap feature on or off, select the toggle
switch.
To adjust the distance between laps, select Auto Lap.
Each time you complete a lap, a message appears that displays
the time for that lap. The device also vibrates if vibration is
turned on (System Settings, page 19).
Using Auto Pause
®
You can use the Auto Pause feature to pause the timer
automatically when you stop moving or when your pace or
speed drops below a specified value. This feature is helpful if
your activity includes stop lights or other places where you need
to slow down or stop.
NOTE: The device does not record activity data while the timer
is stopped or paused.
1
Hold .
2
Select > Activities & Apps.
3
Select an activity.
NOTE: This feature is not available for all activities.
4
Select the activity settings.
5
Select Auto Pause.
6
Select an option:
NOTE: Not all options are available for all activities.
To pause the timer automatically when you stop moving,
select When Stopped.
To pause the timer automatically when your pace drops
below a specified value, select Pace.
To pause the timer automatically when your speed drops
below a specified value, select Speed.
Using Auto Scroll
You can use the auto scroll feature to cycle through all of the
activity data screens automatically while the timer is running.
1
Hold .
2
Select > Activities & Apps.
3
Select an activity.
NOTE: This feature is not available for all activities.
4
Select the activity settings.
5
Select Auto Scroll.
6
Select a display speed.
Changing the GPS Setting
For more information about GPS, go to www.garmin.com
/aboutGPS.
1
Hold .
2
Select > Activities & Apps.
3
Select the activity to customize.
4
Select the activity settings.
5
Select GPS.
6
Select an option:
Select Off to disable GPS for the activity.
Select On to enable the GPS satellite system.
Select GPS + GLONASS (Russian satellite system) for
more accurate position information in situations with poor
sky visibility.
Select GPS + GALILEO (European Union satellite
system) for more accurate position information in
situations with poor sky visibility.
NOTE: Using GPS and another satellite together can reduce
battery life more quickly than using GPS only (GPS and
Other Satellite Systems, page 18).
GPS and Other Satellite Systems
The GPS + GLONASS or GPS + GALILEO options offer
increased performance in challenging environments and faster
position acquisition than using GPS only. However, using GPS
and another satellite system together can reduce battery life
more quickly than using GPS only.
Phone and Bluetooth Settings
Hold , and select > Phone.
Status: Displays the current Bluetooth connection status and
allows you to turn Bluetooth technology on or off.
Notifications: The device turns smart notifications on and off
automatically based on your selections (Enabling Bluetooth
Notifications, page 2).
Connected Alerts: Alerts you when your paired smartphone
connects and disconnects.
Pair Phone: Connects your device with a compatible
smartphone equipped with Bluetooth technology.
Sync: Allows you to transfer the data between your device and
the Garmin Connect app.
18 Customizing Your Device
Stop LiveTrack: Allows you to stop a LiveTrack session while
one is in progress.
System Settings
Hold , and select > System.
Auto Lock: Automatically locks the touchscreen to prevent
inadvertent screen touches. You can press to unlock the
touchscreen.
Language: Sets the language of the device interface.
Time: Sets the time format and source for local time (Time
Settings, page 19).
Date: Allows you to manually set the date and date format.
Backlight: Sets the backlight mode, timeout, and brightness
(Backlight Settings, page 19).
Physio TrueUp: Allows your device to sync activities, history,
and data from other Garmin devices.
Vibration: Turns vibration on or off and sets the vibration
intensity.
Do Not Disturb: Turns on or off do not disturb mode.
Units: Sets the measurement units used to display data
(Changing the Units of Measure, page 19).
Data Recording: Sets how the device records activity data. The
Smart recording option (default) allows for longer activity
recordings. The Every Second recording option provides
more detailed activity recordings, but may require you to
charge the battery more frequently.
USB Mode: Sets the device to use media transfer mode or
Garmin mode when connected to a computer.
Reset: Allows you to reset the default settings or delete
personal data and reset the settings (Restoring All Default
Settings, page 23).
NOTE: If you have set up a Garmin Pay wallet, restoring
default settings also deletes the wallet from your device.
Software Update: Allows you to check for software updates.
About: Displays the unit ID, software version, regulatory
information, and license agreement.
Time Settings
Hold , and select > System > Time.
Time Format: Sets the device to show time in a 12-hour or a
24-hour format.
Time Source: Allows you to set the time manually or
automatically based on your paired mobile device.
Time Zones
Each time you turn on the device and acquire satellites or sync
with your smartphone, the device automatically detects your
time zone and the current time of day.
Setting the Time Manually
By default, the time is set automatically when the vívoactive
device is paired with a mobile device.
1
Hold .
2
Select > System > Time > Time Source > Manual.
3
Select Time, and enter the time of day.
Setting an Alarm
You can set multiple alarms. You can set each alarm to sound
once or to repeat regularly.
1
Hold .
2
Select Clocks > Alarms > Add Alarm.
3
Select Time, and enter a time.
4
Select Repeat, and select an option.
5
Select Label, and select a description for the alarm.
Deleting an Alarm
1
Hold .
2
Select Clocks > Alarms.
3
Select an alarm, and select Delete.
Starting the Countdown Timer
1
Hold .
2
Select Clocks > Timer.
3
Enter the time, and select .
4
Select .
Using the Stopwatch
1
Hold .
2
Select Clocks > Stopwatch.
3
Press to start the timer.
4
Press to restart the lap timer.
The total stopwatch time continues running.
5
Select to stop the timer.
6
Select an option:
To reset the timer, swipe down.
To save the stopwatch time as an activity, press , and
select .
To exit the stopwatch, press , and select .
Backlight Settings
Hold , and select > System > Backlight.
Mode: Sets the backlight to turn on when you interact with the
device, which includes receiving a notification or using the
buttons or touchscreen.
Brightness: Sets the brightness level of the backlight.
Timeout: Sets the length of time before the backlight turns off.
Gesture: Sets the backlight to turn on when you rotate your
wrist toward your body to view the device. You can use the
Only During Activity option to use this feature only during
timed activities. You can also adjust the gesture sensitivity to
turn on the backlight more or less often.
Changing the Units of Measure
You can customize units of measure for distance, pace and
speed, elevation, weight, height, and temperature.
1
From the watch face. hold .
2
Select > System > Units.
3
Select a measurement type.
4
Select a unit of measure.
Garmin Connect Settings
You can change your device settings from your Garmin Connect
account, using either the Garmin Connect app or the Garmin
Connect website. Some settings are available only using your
Garmin Connect account and cannot be changed on your
device.
From the Garmin Connect app, select or , select
Garmin Devices, and select your device.
From the devices widget in the Garmin Connect application,
select your device.
After customizing settings, sync your data to apply the changes
to your device (Using the Garmin Connect App, page 16, Using
Garmin Connect on Your Computer, page 16).
Wireless Sensors
Your device can be used with wireless ANT+ or Bluetooth
sensors. For more information about compatibility and
purchasing optional sensors, go to buy.garmin.com.
Wireless Sensors 19
Pairing Your Wireless Sensors
The first time you connect a wireless ANT+ or Bluetooth sensor
to your Garmin device, you must pair the device and sensor.
After they are paired, the device connects to the sensor
automatically when you start an activity and the sensor is active
and within range.
TIP: Some ANT+ sensors pair with your device automatically
when you start an activity with the sensor turned on and near
the device.
1
Move at least 10 m (33 ft.) away from other wireless sensors.
2
If you are pairing a heart rate monitor, put on the heart rate
monitor.
The heart rate monitor does not send or receive data until
you put it on.
3
Hold .
4
Select > Sensors > Add New.
5
Bring the device within 3 m (10 ft.) of the sensor, and wait
while the device pairs with the sensor.
After the device connects to the sensor, an icon appears at
the top of the screen.
Foot Pod
Your device is compatible with the foot pod. You can use the
foot pod to record pace and distance instead of using GPS when
you are training indoors or when your GPS signal is weak. The
foot pod is on standby and ready to send data (like the heart
rate monitor).
After 30 minutes of inactivity, the foot pod powers off to
conserve the battery. When the battery is low, a message
appears on your device. Approximately five hours of battery life
remain.
Calibrating Your Foot Pod
Before you can calibrate your foot pod, you must pair your
device with the foot pod (Pairing Your Wireless Sensors,
page 20).
Manual calibration is recommended if you know your calibration
factor. If you have calibrated a foot pod with another Garmin
product, you may know your calibration factor.
1
Hold .
2
Select > Sensors > Foot Pod > Cal. Factor.
3
Adjust the calibration factor:
Increase the calibration factor if your distance is too low.
Decrease the calibration factor if your distance is too high.
Improving Foot Pod Calibration
Before you can calibrate your device, you must acquire GPS
signals and pair your device with the foot pod (Pairing Your
Wireless Sensors, page 20).
The foot pod is self-calibrating, but you can improve the
accuracy of the speed and distance data with a few outdoor runs
using GPS.
1
Stand outside for 5 minutes with a clear view of the sky.
2
Start a running activity.
3
Run on a track without stopping for 10 minutes.
4
Stop your activity, and save it.
Based on the recorded data, the foot pod calibration value
changes, if necessary. You should not need to calibrate the
foot pod again unless your running style changes.
Using an Optional Bike Speed or Cadence
Sensor
You can use a compatible bike speed or cadence sensor to
send data to your device.
Pair the sensor with your device (Pairing Your Wireless
Sensors, page 20).
Set your wheel size (Calibrating Your Speed Sensor,
page 20).
Go for a ride (Going for a Ride, page 11).
Calibrating Your Speed Sensor
Before you can calibrate your speed sensor, you must pair your
device with a compatible speed sensor (Pairing Your Wireless
Sensors, page 20).
Manual calibration is optional and can improve accuracy.
1
Hold .
2
Select > Sensors > Speed/Cadence > Wheel Size.
3
Select an option:
Select Auto to automatically calculate your wheel size and
calibrate your speed sensor.
Select Manual, and enter your wheel size to manually
calibrate your speed sensor (Wheel Size and
Circumference, page 25).
Club Sensors
Your device is compatible with Approach
®
CT10 golf club
sensors. You can use paired club sensors to automatically track
your golf shots, including location, distance, and club type. See
the owner's manual for your club sensors for more information.
Situational Awareness
Your vívoactive device can be used with Varia smart bike lights
and rearview radar to improve situational awareness. See the
owner's manual for your Varia device for more information.
NOTE: You may need to update the vívoactive software before
pairing Varia devices (Updating the Software Using the Garmin
Connect App, page 21).
tempe
The tempe is an ANT+ wireless temperature sensor. You can
attach the sensor to a secure strap or loop where it is exposed
to ambient air, and therefore, provides a consistent source of
accurate temperature data. You must pair the tempe with your
device to display temperature data from the tempe.
Device Information
Charging the Device
WARNING
This device contains a lithium-ion battery. See the Important
Safety and Product Information guide in the product box for
product warnings and other important information.
NOTICE
To prevent corrosion, thoroughly clean and dry the contacts and
the surrounding area before charging or connecting to a
computer. Refer to the cleaning instructions in the appendix.
1
Plug the small end of the USB cable into the charging port on
your device.
20 Device Information
2
Plug the large end of the USB cable into a USB charging
port.
3
Charge the device completely.
Product Updates
On your computer, install Garmin Express (www.garmin.com
/express). On your smartphone, install the Garmin Connect app.
This provides easy access to these services for Garmin devices:
Software updates
Course updates
Data uploads to Garmin Connect
Product registration
Updating the Software Using the Garmin Connect App
Before you can update your device software using the Garmin
Connect app, you must have a Garmin Connect account, and
you must pair the device with a compatible smartphone (Pairing
Your Smartphone, page 1).
Sync your device with the Garmin Connect app (Using the
Garmin Connect App, page 16).
When new software is available, the Garmin Connect app
automatically sends the update to your device. The update is
applied when you are not actively using the device. When the
update is complete, your device restarts.
Updating the Software Using Garmin Express
Before you can update your device software, you must
download and install the Garmin Express application and add
your device (Using Garmin Connect on Your Computer,
page 16).
1
Connect the device to your computer using the USB cable.
When new software is available, the Garmin Express
application sends it to your device.
2
After the Garmin Express application finishes sending the
update, disconnect the device from your computer.
Your device installs the update.
Viewing Device Information
You can view the unit ID, software version, regulatory
information, and license agreement.
1
Hold .
2
Select > System > About.
Viewing E-label Regulatory and Compliance
Information
The label for this device is provided electronically. The e-label
may provide regulatory information, such as identification
numbers provided by the FCC or regional compliance markings,
as well as applicable product and licensing information.
Hold for 10 seconds.
Specifications
Battery type Rechargeable, built-in lithium-polymer
battery
vívoactive 4S battery life Up to 7 days in smartwatch mode
vívoactive 4 battery life Up to 8 days in smartwatch mode
Operating temperature
range
From -20º to 60ºC (from -4º to 140ºF)
Charging temperature
range
From 0º to 45ºC (from 32º to 113ºF)
Wireless frequencies 2.4 GHz @ 19 dBm nominal
13.56 MHz @ -44 dBm nominal
Water rating Swim, 5 ATM
1
Battery Life Information
The actual battery life depends on the features enabled on your
device, such as activity tracking, wrist-based heart rate,
smartphone notifications, GPS, and connected sensors.
vívoactive 4S
Battery Life
vívoactive 4 Battery
Life
Mode
Up to 7 days Up to 8 days Smartwatch mode with
activity tracking and 24/7
wrist-based heart rate
monitoring
Up to 6 hr. Up to 7.5 hr. Smartwatch mode with
music playback
Up to 15 hr. Up to 18 hr. GPS mode
Up to 5 hr. Up to 6 hr. GPS mode with music
playback
Up to 8 hr. Up to 9.5 hr. Activity mode with
workout animations
Up to 3.5 hr. Up to 4.5 hr. Activity mode with
workout animations and
music playback
Device Care
NOTICE
Avoid extreme shock and harsh treatment, because it can
degrade the life of the product.
Avoid pressing the keys under water.
Do not use a sharp object to clean the device.
Never use a hard or sharp object to operate the touchscreen, or
damage may result.
Avoid chemical cleaners, solvents, and insect repellents that can
damage plastic components and finishes.
Thoroughly rinse the device with fresh water after exposure to
chlorine, salt water, sunscreen, cosmetics, alcohol, or other
harsh chemicals. Prolonged exposure to these substances can
damage the case.
Do not store the device where prolonged exposure to extreme
temperatures can occur, because it can cause permanent
damage.
Cleaning the Device
NOTICE
Even small amounts of sweat or moisture can cause corrosion
of the electrical contacts when connected to a charger.
Corrosion can prevent charging and data transfer.
1
Wipe the device using a cloth dampened with a mild
detergent solution.
2
Wipe it dry.
After cleaning, allow the device to dry completely.
TIP: For more information, go to www.garmin.com/fitandcare.
1
The device withstands pressure equivalent to a depth of 50 m. For more information, go to www.garmin.com/waterrating.
Device Information 21
Changing the Bands
The device is compatible with standard quick-release bands.
The small watch has 18 mm wide bands, and the large watch
has 22 mm wide bands.
1
Slide the quick-release pin on the spring bar to remove the
band.
2
Insert one side of the spring bar for the new band into the
device.
3
Slide the quick-release pin, and align the spring bar with the
opposite side of the device.
4
Repeat steps 1 through 3 to change the other band.
Troubleshooting
Is my smartphone compatible with my
device?
The vívoactive device is compatible with smartphones using
Bluetooth wireless technology.
Go to www.garmin.com/ble for compatibility information.
My phone will not connect to the device
If your phone will not connect to the device, you can try these
tips.
Turn off your smartphone and your device, and turn them
back on again.
Enable Bluetooth technology on your smartphone.
Update the Garmin Connect app to the latest version.
Remove your device from the Garmin Connect app and the
Bluetooth settings on your smartphone to retry the pairing
process.
If you bought a new smartphone, remove your device from
the Garmin Connect app on the smartphone you intend to
stop using.
Bring your smartphone within 10 m (33 ft.) of the device.
On your smartphone, open the Garmin Connect app, select
or , and select Garmin Devices > Add Device to enter
pairing mode.
From the watch face, hold , and select > Phone > Pair
Phone.
My headphones will not connect to the
device
If your headphones were previously connected to your
smartphone using Bluetooth technology, they may connect to
your smartphone before connecting to your device. You can try
these tips.
Turn off Bluetooth technology on your smartphone.
Refer to the owner's manual for your smartphone for more
information.
Stay 10 m (33 ft.) away from your smartphone while
connecting headphones to your device.
Pair your headphones with your device (Connecting
Bluetooth Headphones, page 4).
My music cuts out or my headphones do not
stay connected
When using a vívoactive device connected to headphones using
Bluetooth technology, the signal is strongest when there is a
direct line of sight between the device and the antenna on the
headphones.
If the signal passes through your body, you may experience
signal loss or your headphones may become disconnected.
It is recommended to wear your headphones with the
antenna on the same side of your body as your vívoactive
device.
Since headphones vary by model, you can try moving the
watch to your other wrist.
My device is in the wrong language
You can change the device language selection if you have
accidently selected the wrong language on the device.
1
Hold .
2
Select .
3
Scroll down to the last item in the list, and select it.
4
Scroll down to the second item in the list, and select it.
5
Select your language.
My device does not display the correct time
The device updates the time and date when it syncs with your
smartphone or when the device acquires GPS signals. You
should sync your device to receive the correct time when you
change time zones, and to update for daylight saving time.
1
Hold , and select > System > Time.
2
Verify the Auto option is enabled.
3
Select an option:
Confirm that your smartphone displays the correct local
time, and sync your device to the smartphone (Using the
Garmin Connect App, page 16).
Start an outdoor activity, go outdoors to an open area with
a clear view of the sky, and wait while the device acquires
satellite signals.
The time and date are updated automatically.
Maximizing Battery Life
You can do several things to extend the life of the battery.
Reduce the display timeout (Backlight Settings, page 19).
Reduce the display brightness (Backlight Settings, page 19).
Turn off Bluetooth technology when you are not using
connected features (Turning Off the Bluetooth Smartphone
Connection, page 2).
Turn off activity tracking (Activity Tracking Settings, page 8).
Limit the smartphone notifications the device displays
(Managing Notifications, page 2).
Stop broadcasting heart rate data to paired Garmin devices
(Broadcasting Heart Rate to Garmin Devices, page 6).
Turn off wrist-based heart rate monitoring (Turning Off the
Wrist-based Heart Rate Monitor, page 6).
Turn off automatic pulse oximeter readings (Changing the
Pulse Oximeter Tracking Mode, page 7).
Restarting the Device
If the device stops responding, you may need to restart it.
NOTE: Restarting the device may erase your data or settings.
1
Hold for 15 seconds.
The device turns off.
22 Troubleshooting
2
Hold for one second to turn on the device.
Restoring All Default Settings
You can reset all of the device settings to the factory default
values. You should sync your device with the Garmin Connect
app to upload your activity data before you reset the device.
1
Hold .
2
Select > System > Reset.
3
Select an option:
To reset all of the device settings to the factory default
values and delete all user-entered information and activity
history, select Delete Data and Reset Settings.
NOTE: If you have set up a Garmin Pay wallet, this option
deletes the wallet from your device. If you have music
stored on your device, this option deletes your stored
music.
To reset all of the device settings to the factory default
values and save all user-entered information and activity
history, select Reset Default Settings.
Acquiring Satellite Signals
The device may need a clear view of the sky to acquire satellite
signals.
1
Go outdoors to an open area.
The front of the device should be oriented toward the sky.
2
Wait while the device locates satellites.
It may take 30–60 seconds to locate satellite signals.
Improving GPS Satellite Reception
Frequently sync the device to your Garmin Connect account:
Connect your device to a computer using the USB cable
and the Garmin Express application.
Sync your device to the Garmin Connect app using your
Bluetooth enabled smartphone.
Connect your device to your Garmin Connect account
using a WiFi wireless network.
While connected to your Garmin Connect account, the device
downloads several days of satellite data, allowing it to quickly
locate satellite signals.
Take your device outside to an open area away from tall
buildings and trees.
Remain stationary for a few minutes.
Activity Tracking
For more information about activity tracking accuracy, go to
garmin.com/ataccuracy.
My step count does not seem accurate
If your step count does not seem accurate, you can try these
tips.
Wear the device on your non-dominant wrist.
Carry the device in your pocket when pushing a stroller or
lawn mower.
Carry the device in your pocket when actively using your
hands or arms only.
NOTE: The device may interpret some repetitive motions,
such as washing dishes, folding laundry, or clapping your
hands, as steps.
The floors climbed amount does not seem accurate
Your device uses an internal barometer to measure elevation
changes as you climb floors. A floor climbed is equal to 3 m
(10 ft.).
Avoid holding handrails or skipping steps while climbing
stairs.
In windy environments, cover the device with your sleeve or
jacket as strong gusts can cause erratic readings.
Improving the Accuracy of Intensity Minutes and
Calories
You can improve the accuracy of these estimates by walking or
running outside for 15 minutes.
1
From the watch face, swipe to view the My Day widget.
2
Select !.
3
Follow the on-screen instructions.
The temperature reading is not accurate
Your body temperature affects the temperature reading for the
internal temperature sensor. To get the most accurate
temperature reading, you should remove the watch from your
wrist and wait 20 to 30 minutes.
You can also use an optional tempe external temperature
sensor to view accurate ambient temperature readings while
wearing the watch.
Getting More Information
Go to support.garmin.com for additional manuals, articles,
and software updates.
Go to buy.garmin.com, or contact your Garmin dealer for
information about optional accessories and replacement
parts.
Go to www.garmin.com/ataccuracy.
This is not a medical device. The pulse oximeter feature is
not available in all countries.
Appendix
Data Fields
Some data fields require ANT+ accessories to display data.
24-Hour Max.: The maximum temperature recorded in the last
24 hours.
24-Hour Min.: The minimum temperature recorded in the last
24 hours.
Average Cadence: Cycling. The average cadence for the
current activity.
Average Cadence: Running. The average cadence for the
current activity.
Average HR: The average heart rate for the current activity.
Average HR %Max.: The average percentage of maximum
heart rate for the current activity.
Average Lap Time: The average lap time for the current
activity.
Average Speed: The average speed for the current activity.
Average Swolf: The average swolf score for the current activity.
Your swolf score is the sum of the time for one length plus
the number of strokes for that length (Swim Terminology,
page 12).
Avg. Dist./Stk.: The average distance traveled per stroke during
the current activity.
Avg. Pace: The average pace for the current activity.
Avg. Stks./Len.: The average number of strokes per length
during the current activity.
Avg. Stroke Rate: The average number of strokes per minute
(spm) during the current activity.
Cadence: Cycling. The number of revolutions of the crank arm.
Your device must be connected to a cadence accessory for
this data to appear.
Cadence: Running. The steps per minute (right and left).
Appendix 23
Calories: The amount of total calories burned.
Dist. Per Stroke: The distance traveled per stroke.
Distance: The distance traveled for the current track or activity.
Elapsed Time: The total time recorded. For example, if you start
the timer and run for 10 minutes, then stop the timer for 5
minutes, then start the timer and run for 20 minutes, your
elapsed time is 35 minutes.
Elevation: The altitude of your current location above or below
sea level.
Floors Climbed: The total number of floors climbed up for the
day.
Floors Descended: The total number of floors climbed down for
the day.
Floors per Minute: The number of floors climbed up per minute.
Heading: The direction you are moving.
Heart Rate: Your heart rate in beats per minute (bpm). Your
device must be connected to a compatible heart rate monitor.
HR %Max.: The percentage of maximum heart rate.
HR Zone: The current range of your heart rate (1 to 5). The
default zones are based on your user profile and maximum
heart rate (220 minus your age).
Int. Dist./Stk.: The average distance traveled per stroke during
the current interval.
Int. Stks./Len.: The average number of strokes per length
during the current interval.
Int. Stroke Rate: The average number of strokes per minute
(spm) during the current interval.
Interval Distance: The distance traveled for the current interval.
Interval Lengths: The number of pool lengths completed during
the current interval.
Interval Pace: The average pace for the current interval.
Interval Swolf: The average swolf score for the current interval.
Interval Time: The stopwatch time for the current interval.
Int Strk Type: The current stroke type for the interval.
L. Int. Dist./Stk.: The average distance traveled per stroke
during the last completed interval.
L. Int. Stk. Type: The stroke type used during the last
completed interval.
L. Len. Stk. Rate: The average number of strokes per minute
(spm) during the last completed pool length.
L. Len. Stk. Type: The stroke type used during the last
completed pool length.
L. Len. Strokes: The total number of strokes for the last
completed pool length.
Lap Cadence: Cycling. The average cadence for the current
lap.
Lap Cadence: Running. The average cadence for the current
lap.
Lap Distance: The distance traveled for the current lap.
Lap HR: The average heart rate for the current lap.
Lap HR %Max.: The average percentage of maximum heart
rate for the current lap.
Lap Pace: The average pace for the current lap.
Laps: The number of laps completed for the current activity.
Lap Speed: The average speed for the current lap.
Lap Steps: The number of steps during the current lap.
Lap Time: The stopwatch time for the current lap.
Last Int. Swolf: The average swolf score for the last completed
interval.
Last Lap Cadence: Cycling. The average cadence for the last
completed lap.
Last Lap Cadence: Running. The average cadence for the last
completed lap.
Last Lap Dist.: The distance traveled for the last completed lap.
Last Lap HR: The average heart rate for the last completed lap.
Last Lap HR %Max.: The average percentage of maximum
heart rate for the last completed lap.
Last Lap Pace: The average pace for the last completed lap.
Last Lap Speed: The average speed for the last completed lap.
Last Lap Time: The stopwatch time for the last completed lap.
Last Len. Swolf: The swolf score for the last completed pool
length.
Last Length Pace: The average pace for your last completed
pool length.
Lengths: The number of pool lengths completed during the
current activity.
Maximum Speed: The top speed for the current activity.
Pace: The current pace.
Reps: During a strength training activity, the number of
repetitions in a workout set.
Respiration Rate: Your respiration rate in breaths per minute
(brpm).
Set Timer: During a strength training activity, the amount of time
spent in the current workout set.
Speed: The current rate of travel.
Steps: The number of steps during the current activity.
Stress: Your current stress level.
Stroke Rate: The number of strokes per minute (spm).
Strokes: The total number of strokes for the current activity.
Sunrise: The time of sunrise based on your GPS position.
Sunset: The time of sunset based on your GPS position.
Temperature: The temperature of the air. Your body
temperature affects the temperature sensor.
Time in Zone: The time elapsed in each heart rate or power
zone.
Time of Day: The time of day based on your current location
and time settings (format, time zone, daylight saving time).
Timer: The stopwatch time for the current activity.
Total Ascent: The total elevation distance ascended during the
activity or since the last reset.
Total Descent: The total elevation distance descended during
the activity or since the last reset.
Vertical Speed: The rate of ascent or descent over time.
VO2 Max. Standard Ratings
These tables include standardized classifications for VO2 max. estimates by age and gender.
Males Percentile 20–29 30–39 40–49 50–59 60–69 70–79
Superior 95 55.4 54 52.5 48.9 45.7 42.1
Excellent 80 51.1 48.3 46.4 43.4 39.5 36.7
24 Appendix
Males Percentile 20–29 30–39 40–49 50–59 60–69 70–79
Good 60 45.4 44 42.4 39.2 35.5 32.3
Fair 40 41.7 40.5 38.5 35.6 32.3 29.4
Poor 0–40 <41.7 <40.5 <38.5 <35.6 <32.3 <29.4
Females Percentile 20–29 30–39 40–49 50–59 60–69 70–79
Superior 95 49.6 47.4 45.3 41.1 37.8 36.7
Excellent 80 43.9 42.4 39.7 36.7 33 30.9
Good 60 39.5 37.8 36.3 33 30 28.1
Fair 40 36.1 34.4 33 30.1 27.5 25.9
Poor 0–40 <36.1 <34.4 <33 <30.1 <27.5 <25.9
Data reprinted with permission from The Cooper Institute. For more information, go to www.CooperInstitute.org.
Wheel Size and Circumference
Your speed sensor automatically detects your wheel size. If
necessary, you can manually enter your wheel circumference in
the speed sensor settings.
The tire size is marked on both sides of the tire. This is not a
comprehensive list. You can also measure the circumference of
your wheel or use one of the calculators available on the
internet.
Tire Size Wheel Circumference (mm)
20 × 1.75 1515
20 × 1-3/8 1615
22 × 1-3/8 1770
22 × 1-1/2 1785
24 × 1 1753
24 × 3/4 Tubular 1785
24 × 1-1/8 1795
24 × 1.75 1890
24 × 1-1/4 1905
24 × 2.00 1925
24 × 2.125 1965
26 × 7/8 1920
26 × 1-1.0 1913
26 × 1 1952
26 × 1.25 1953
26 × 1-1/8 1970
26 × 1.40 2005
26 × 1.50 2010
26 × 1.75 2023
26 × 1.95 2050
26 × 2.00 2055
26 × 1-3/8 2068
26 × 2.10 2068
26 × 2.125 2070
26 × 2.35 2083
26 × 1-1/2 2100
26 × 3.00 2170
27 × 1 2145
27 × 1-1/8 2155
27 × 1-1/4 2161
27 × 1-3/8 2169
29 x 2.1 2288
29 x 2.2 2298
29 x 2.3 2326
650 x 20C 1938
650 x 23C 1944
650 × 35A 2090
Tire Size Wheel Circumference (mm)
650 × 38B 2105
650 × 38A 2125
700 × 18C 2070
700 × 19C 2080
700 × 20C 2086
700 × 23C 2096
700 × 25C 2105
700C Tubular 2130
700 × 28C 2136
700 × 30C 2146
700 × 32C 2155
700 × 35C 2168
700 × 38C 2180
700 × 40C 2200
700 × 44C 2235
700 × 45C 2242
700 × 47C 2268
Symbol Definitions
These symbols may appear on the device or accessory labels.
WEEE disposal and recycling symbol. The WEEE symbol is
attached to the product in compliance with the EU directive
2012/19/EU on Waste Electrical and Electronic Equipment
(WEEE). It is intended to deter the improper disposal of this
product and to promote reuse and recycling.
Appendix 25
Index
A
accessories 19, 20, 23
activities 10, 11, 17
adding 10
custom 10
favorites 10
saving 10
starting 10
activity tracking 7, 8
alarms 17, 19
alerts 17, 18
heart rate 6
ANT+ sensors 19, 20
applications 2, 3, 5, 13
smartphone 1, 10
assistance 5
Auto Lap 18
Auto Pause 18
auto scroll 18
B
bands 22
battery
charging 20
life 21
maximizing 2, 22
bike sensors 20
Bluetooth sensors 19, 20
Bluetooth technology 2, 5, 18, 22
headphones 4, 22
Bluetooth Technology 3
Body Battery 9, 10
C
cadence
alerts 18
sensors 20
calendar 14
calibrating, compass 15
calorie, alerts 18
calories 23
charging 20
cleaning the device 21
clock 19
compass 12, 15
calibrating 15
computer 3
Connect IQ 3
contacts, adding 5
controls menu 17
countdown timer 19
courses
downloading 12
playing 12
selecting 12
customizing the device 17
cycling 11
D
data
storing 13, 16
transferring 13, 16
uploading 16
data fields 1, 3, 11, 17, 23
deleting
history 15
personal records 14
distance, alerts 18
dogleg 12
E
emergency contacts 5
F
foot pod 1, 20
G
Garmin Connect 1–3, 5, 14, 16, 19, 21
storing data 16
Garmin Express 3
updating software 21
Garmin Pay 4, 5
GLONASS 18
golf round, ending 13
GPS 1, 18
signal 23
green view, pin location 12
H
hazards 12
headphones 22
Bluetooth technology 4, 22
connecting 4
health stats 10
heart rate 1, 5, 6, 9
alerts 6, 18
monitor 6
pairing sensors 6
zones 6, 7, 14, 15
history 11, 15
sending to computer 13, 16
viewing 13
hydration 10
I
icons 1
incident detection 5
indoor training 11
intensity minutes 8, 23
intervals 12
K
keys 1, 21
L
laps 15
layup 12
lengths 12
license 21
LiveTrack 5
locations 15
deleting 15
locking, screen 1, 19
M
main menu, customizing 9
maps 15
measuring a shot 13
menstrual cycle 10
menu 1
music 1, 3
loading 3
playing 4
services 3
music controls 4
N
navigation 15
stopping 15
NFC 4
notifications 2
phone calls 2
text messages 2
O
oxygen saturation 7
P
pairing
ANT+ sensors 6
sensors 20
smartphone 1, 22
payments 4, 5
personal records 14
deleting 14
phone calls 2
pin location, green view 12
pool size
custom 12
setting 12
profiles, user 13
pulse oximeter 5, 7
R
replacement parts 22
resetting the device 22, 23
S
satellite signals 1, 23
saving activities 11
scorecard 13
scoring 13
screen 19
settings 7–9, 17–19, 23
shortcuts 1, 17
skiing
alpine 11
snowboarding 11
sleep mode 2, 8
smartphone 1, 3, 5, 8, 13, 22
applications 2, 3, 10
pairing 1, 22
snowboarding 11
software
updating 21
version 21
specifications 21
speed and cadence sensors 1, 20
statistics 13
stopwatch 19
storing data 13, 16
stress level 9
stress score 9
strokes 12
swimming 11
swolf score 12
system settings 19
T
tempe 20, 23
temperature 20, 23
text messages 2
time 19
alerts 18
settings 19
time of day 19, 22
time zones 19
timer 11
countdown 19
touchscreen 1
tracking 5, 7
training 2
calendar 14
pages 11
plans 14
treadmill 11
troubleshooting 6, 7, 10, 22, 23
U
unit ID 21
units of measure 19
updates, software 21
uploading data 16
USB 21
user profile 13
V
VO2 max. 7, 24
W
wallet 1, 4
watch face 1
watch faces 3, 16
wheel sizes 20, 25
Wi-Fi, connecting 3
WiFi, connecting 3
widgets 1, 3, 6–10
workouts 14
26 Index
Z
zones
heart rate 6
time 19
Index 27
support.garmin.com
September 2019
190-02553-00_0A
10

Hulp nodig? Stel uw vraag in het forum

Spelregels
1

Forum

Garmin-Vivoactive-4S
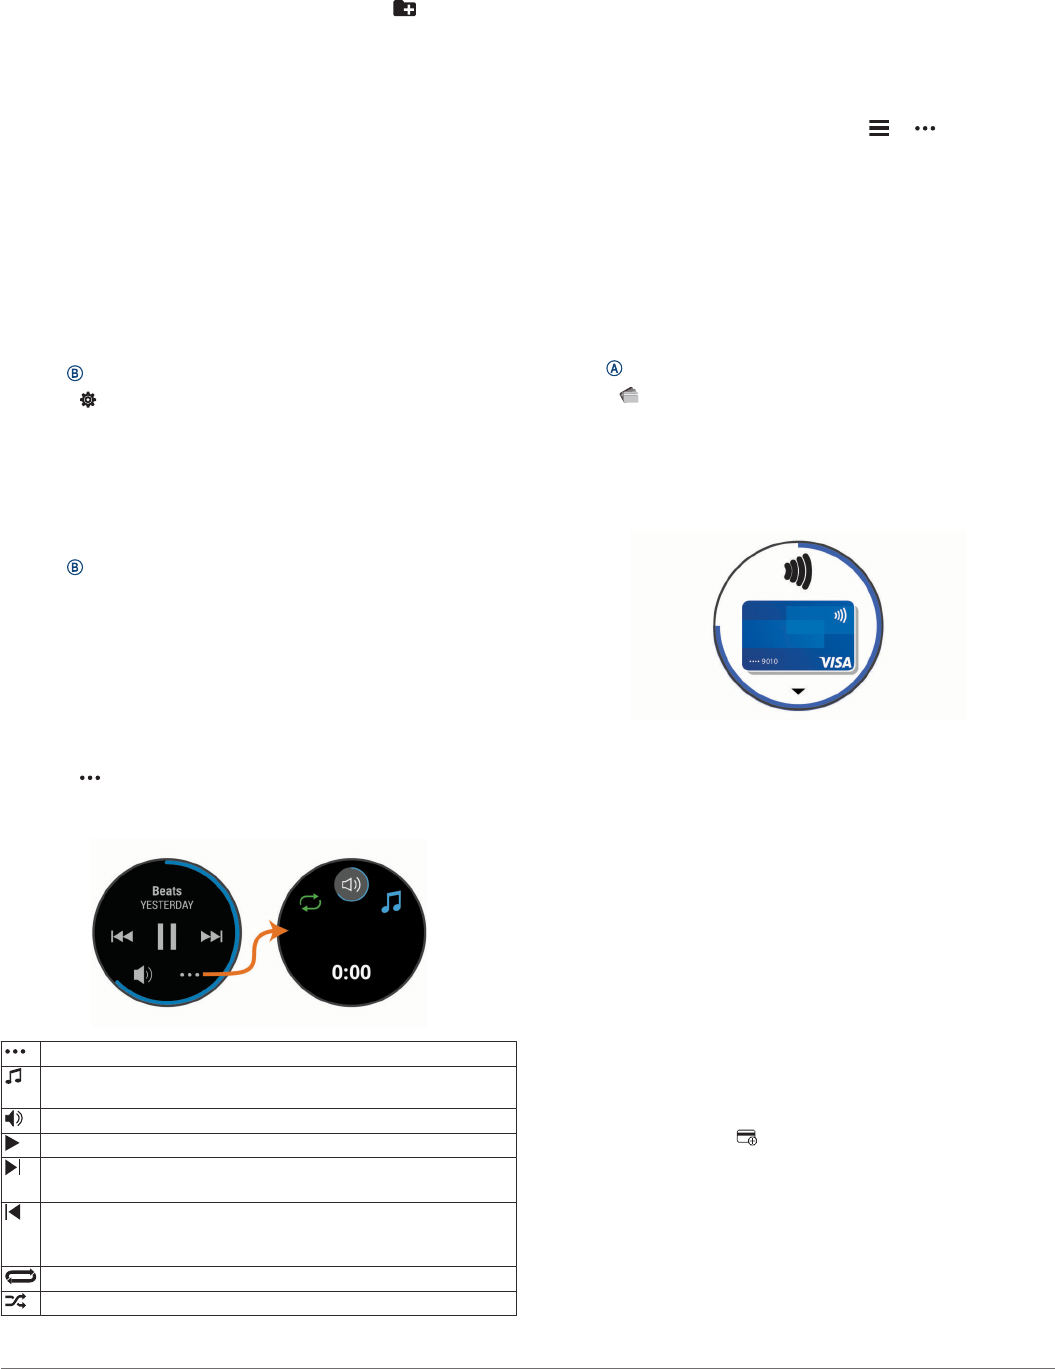
  • Ik verbind bluetooth oortjes met mijn vivoactive 4S. Maar het geluid staat heel hard en kan stiller gezet worden met de vivoactive. Bij het afspelen van het liedje kies is voor de 3 puntjes en dan kan het geluid aangepast worden. Je kunt luider en stiller selecteren maar door de oortjes blijft het even harde muziek...
    ( via de smartphone en laptop lukt het wel, dus het probleem ligt bij mijn vivoactive) Gesteld op 6-10-2024 om 13:13

    Reageer op deze vraag Misbruik melden
  • Ik krijg zelfs geen driehoekje meer te zien. Ook problemen na het zwemmen. Ik heb enkel zwart beeld…
    Ik krijg hem totaal niet meer opgestart. Heel jammer want horloge is amper 15 maanden oud. Gesteld op 16-8-2024 om 21:44

    Reageer op deze vraag Misbruik melden
  • Mijn vivoactive 4s is geeft zwart beeld na het verwijderen en weer installeren van Connect op min smartphone. hoe los ik dit op. toestel reageert nergen op. Gesteld op 1-7-2024 om 20:49

    Reageer op deze vraag Misbruik melden
  • Mijn Garmin vivo4s touchscreen werkt slecht. Het lukt bijna niet om in het bedieningsmenu te komen. Ik heb m al ge-reset maar dit heeft geen effect. Weet iemand hoe je het touchscreen kunt kalibreren? Gesteld op 16-6-2024 om 12:41

    Reageer op deze vraag Misbruik melden
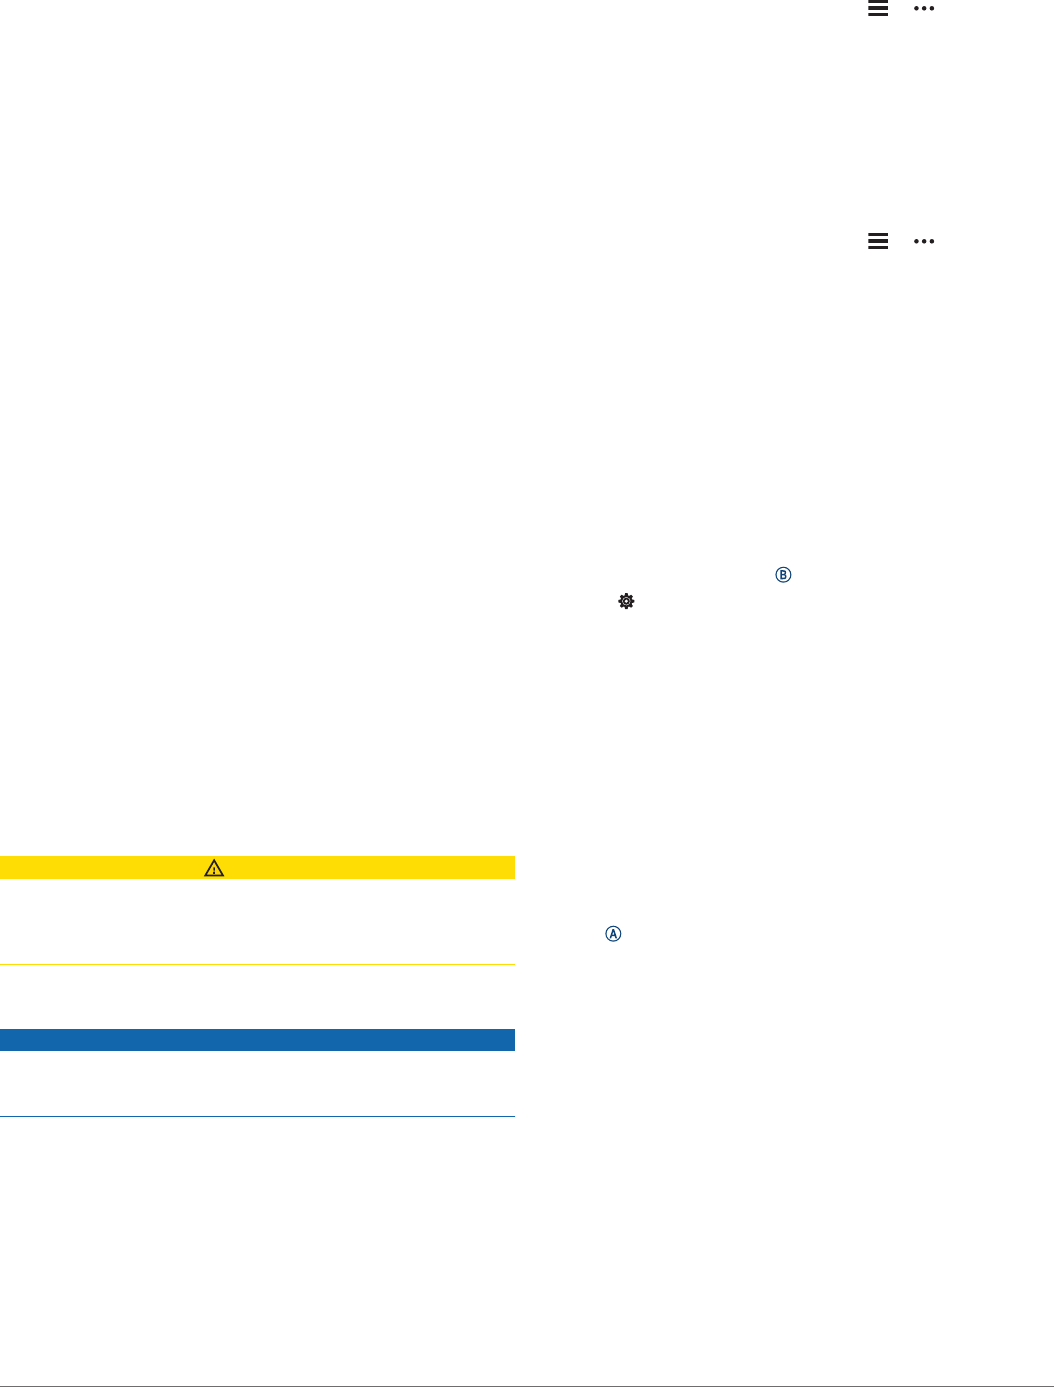
  • Hartslag in rust en hoog wordt niet meer weergegeven. Stress is ook verdwenen. Hoe krijg ik dit terug? Gesteld op 4-3-2024 om 21:44

    Reageer op deze vraag Misbruik melden
    • Ook mijn horloge is helemaal van slag na het zwemmen ,kan de icoontjes niet meer openen terwijl Ik wel berichten binnen krijg Geantwoord op 14-8-2024 om 22:35

      Waardeer dit antwoord Misbruik melden
  • Stress is bij mij verdwenen op horloge. Hoe plaats ik hem terug? Gesteld op 6-9-2023 om 17:15

    Reageer op deze vraag Misbruik melden
6
12
  • Wie weet waar ik koppelcode kan vinden om vivoactive 4s te verbinden met Garmin connect? Ik heb al eental keer dat verbinding met app verbroken is en ik me moet afmelden en opnieuw aanmelden. Gesteld op 13-1-2022 om 21:06

    Reageer op deze vraag Misbruik melden
  • mijn garmin vivo 4s blijft maar melding geven dat de nieuwe versie gedownload moet worden maar lukt steeds niet, wat moet ik doen?
    Gesteld op 8-11-2021 om 14:42

    Reageer op deze vraag Misbruik melden
  • Kan ik lettertype vergroten op mijn garmin vivoactive 4s Gesteld op 9-10-2021 om 19:56

    Reageer op deze vraag Misbruik melden
  • hoe zet ik bij het hardlopen gemiddeld tempo om in gemiddelde snelheid Gesteld op 19-9-2021 om 15:50

    Reageer op deze vraag Misbruik melden
  • Ik heb een vraag over garmin vivoactive 4s. Als ik hem start om te wandelen of fietsen en ik wil hem tussentijds stoppen ,dan moet ik hem opslaan. Dan kan ik hem niet herstarten klop dat? Gesteld op 11-8-2021 om 19:55

    Reageer op deze vraag Misbruik melden
  • Ik zie alleen een blauwe driehoek O mijn Garmin, wat moet ik doen? Gesteld op 13-6-2021 om 17:45

    Reageer op deze vraag Misbruik melden
18
24
  • Al je antwoord gevonden.? Geantwoord op 28-3-2021 om 20:36

    Waardeer dit antwoord Misbruik melden
  • horloge geeft alleen een blauwe driehoek in beeld, reageert nergens op. Toestel uitgezet en opnieuw opstarten helpt niet Gesteld op 14-1-2021 om 12:48

    Reageer op deze vraag Misbruik melden
  • Klik op deze LINK Geantwoord op 17-7-2021 om 03:39

    Waardeer dit antwoord (51) Misbruik melden
  • Soft reset uitvoeren. Horloge minimaal 1 uur laten opladen ook als dat niet wordt aangegeven dat het dient op te laden. Knopje rechtsboven 20 seconden ingedrukt houden. De blauwe driehoek verdwijnt dan. Vervolgs 1 seconde knopje rechtsboven weer indrukken, dan start het horloge weer op.
    zie Klik op deze LINK Geantwoord op 17-7-2021 om 03:47

    Waardeer dit antwoord (150) Misbruik melden
  • Als de blauwe driehoek terug blijft komen na reset, houdt dan de blauwe driehoek op het scherm 10-15 seconden vast, dat werkt dus ook Geantwoord op 13-9-2021 om 21:51

    Waardeer dit antwoord (95) Misbruik melden
  • Vivoactive 4s dood na zwemmen. Nou ja zwemmen……wat gepoedeld in het water voor ongeveer 20 minuten. Hij doet niets meer. Nog geen ruim 2 jaar heb ik hem pas en ook al eerder mee gezwommen.
    Geantwoord op 4-10-2022 om 18:59

    Waardeer dit antwoord (73) Misbruik melden
  • Hier ook na regelmatig gebruik met zwemmen, nu opeens een blauwe driehoek en wil de batterij niet meer opladen. Een soft reset en meerdere malen langdurig op de lader helpt niet.
    Horloge is ongeveer 2 a 3 jaar oud. Geantwoord op 29-3-2023 om 16:33

    Waardeer dit antwoord (91) Misbruik melden
  • Hier precies hetzelfde! Nav bovenstaande reacties ben ik bang dat het met water te maken heeft…maar bij aankoop bewust gekeken maar zwemmen. En als ik mij niet vergis was dit mogelijk?! Geantwoord op 8-9-2023 om 07:11

    Waardeer dit antwoord (21) Misbruik melden
  • Ik heb vandaag gezwommen en opeens verscheen er een blauwe driehoek en de horloge ging uit.
    Krijg hem ook niet meer opgestart ook niet na 1 uur in de oplader Geantwoord op 16-9-2023 om 20:47

    Waardeer dit antwoord (30) Misbruik melden
  • Hier sinds gisteren hetzelfde. Ook meer dan 8u aan de lader helpt niet. (ook 2 jaar oud) Geantwoord op 20-9-2023 om 13:06

    Waardeer dit antwoord (11) Misbruik melden
  • Ik heb exact hetzelfde. Ook na het zwemmen gebeurd. Geantwoord op 29-9-2023 om 12:32

    Waardeer dit antwoord (7) Misbruik melden
  • Hier ook hetzelfde, niemand nog een oplossing? Geantwoord op 11-10-2023 om 08:50

    Waardeer dit antwoord (12) Misbruik melden
  • Ik heb knopje rechtsboven 30 sec ingedrukt gehouden. Zag driehoekje verdwijnen. Na 30 sec nog volledig zwart beeld. Driehoekje verscheen weer na kort indrukken van knopje rechtsboven. En paar min later deed horloge het weer. Denk dat reset van 30 sec heeft geholpen Geantwoord op 14-10-2023 om 12:35

    Waardeer dit antwoord (19) Misbruik melden
  • Ik heb vandaag identiek hetzelfde, maar het horloge reageert niet meer, ook niet na opladen of drukken op de knoppen. De blauwe driehoek flikkert af en toe eens. Horloge bijna 3jr oud. Geantwoord op 24-10-2023 om 19:26

    Waardeer dit antwoord (32) Misbruik melden
  • Heb er sinds vandaag ook last van. Verschillende keren knopje rechtsboven langer dan 30 sec ingedrukt gehouden en blijf nu het aantal procent batterijen en de tijd zien. Vivoactive 4S gekoppeld aan Garmin express voor updates (versie 7.80) en gesynchroniseerd. Zo te zien werkt het weer gelukkig. Geantwoord op 25-10-2023 om 11:43

    Waardeer dit antwoord (10) Misbruik melden
  • Hier hetzelfde! Niet gezwommen, maar de batterij was helemaal leeg en toen lang aan de lader gelegd. Ik gebruikte het knopje links boven, hield deze lang ingedrukt tot het scherm zwart was. Toen nogmaals dezelfde knop ingedrukt gehouden, en toen ging ie weer aan. Heb een Garmin fenix 6, ong 3 jaar oud Geantwoord op 14-2-2024 om 22:30

    Waardeer dit antwoord (2) Misbruik melden
  • Ook hier sinds gisteren nog enkel een flikkerende blauwe driehoek als ik wil opstarten. Gebruik de Venu als zwemhorloge, meestal ongeveer 1 uur in het water. Het kan toch niet dat een merk als Garmin er gewoon mee wegkomt dat hun waterdichte watches, niet waterdicht zijn en dit probleem gewoon blijft negeren. Geantwoord op 18-2-2024 om 15:22

    Waardeer dit antwoord (6) Misbruik melden
  • Ik heb de knop links en rechtsboven tegelijk ingedrukt tot de blauwe driehoek verdween.
    Dit 2x herhaalt omdat de driehoek terug kwam. Daarna rechterknie ingedrukt houden waarna horloge op starten. Werkt weer. Geantwoord op 23-2-2024 om 18:28

    Waardeer dit antwoord (6) Misbruik melden
  • Bedankt voor al deze tips!
    Heb het rechterbovenknopje 20 s ingedrukt gehouden, dan verdween de driehoek.
    Na dien terug 1 a 2 sec op de rechterboven knop gedruk,
    driehoek kwam terug
    Dan op scherm driehoek vast gehouden tot mijn normaal scherm terug kwam.
    Het werkt terug. Oef! Geantwoord op 8-4-2024 om 09:06

    Waardeer dit antwoord (17) Misbruik melden
  • Even aan de computer hangen heeft bij mij geholpen. Geantwoord op 24-4-2024 om 21:12

    Waardeer dit antwoord (4) Misbruik melden
  • Ik heb de instructie van 8-4-24 gevolgd, en mijn horloge werkt nu ook weer. Geantwoord op 16-5-2024 om 08:33

    Waardeer dit antwoord (2) Misbruik melden
  • Al een paar dagen een driehoekje, opgeladen, leeg laten lopen, weer opgeladen, alle tips gevolgd, hou nu mijn vinger al 5 minuten op het driehoekje op t scherm, maar er gebeurt niks. Ben op vakantie, dus geen computer bij de hand. Wel gezwommen (zee, zwembad). Heb dit eerder gehad (ook op vakantie, maar toen deed ie t weer na een soft-reset. Geantwoord op 15-7-2024 om 10:21

    Waardeer dit antwoord (10) Misbruik melden
  • Voor ‘t eerst Fenix chronos gebruikt om te zwemmen wegens triathlonambities en nu idem als hierboven. Enkel nog blauwe driehoek. Quid? Resetten en 10min in lauw water hielpen 2x , nu niks meer Geantwoord op 14-8-2024 om 21:50

    Waardeer dit antwoord Misbruik melden
  • Hier hetzelfde! Na zwemmen, poedelen, in de zee. Blauwe driehoek verscheen en toen ging hij wel weer aan. Daarna in de auto weer uit en werd het horloge enorm warm. Kom hem niet meer vasthouden. Toen weer uit. Daarna niet meer aan te krijgen. Met helemaal niets. Wanneer ik ga opladen wordt hij weer heel erg warm. Dus dat doe ik ook maar niet. Ik heb mijn horloge pas vanaf december 2023. Nog oplossingen of ideeeen? Geen computer bij de hand ivm vakantie. Geantwoord op 19-8-2024 om 09:07

    Waardeer dit antwoord (1) Misbruik melden
  • Net ook blauwe driehoek weggekregen.
    Verschillende keren op de rechterbovenknop blijven duwen
    driehoek verdween en kwam terug.
    Nu ineens weer opgestart.

    Weet niet helemaal hoe t komt.
    OOk hier oef Geantwoord op 12-9-2024 om 14:23

    Waardeer dit antwoord (1) Misbruik melden
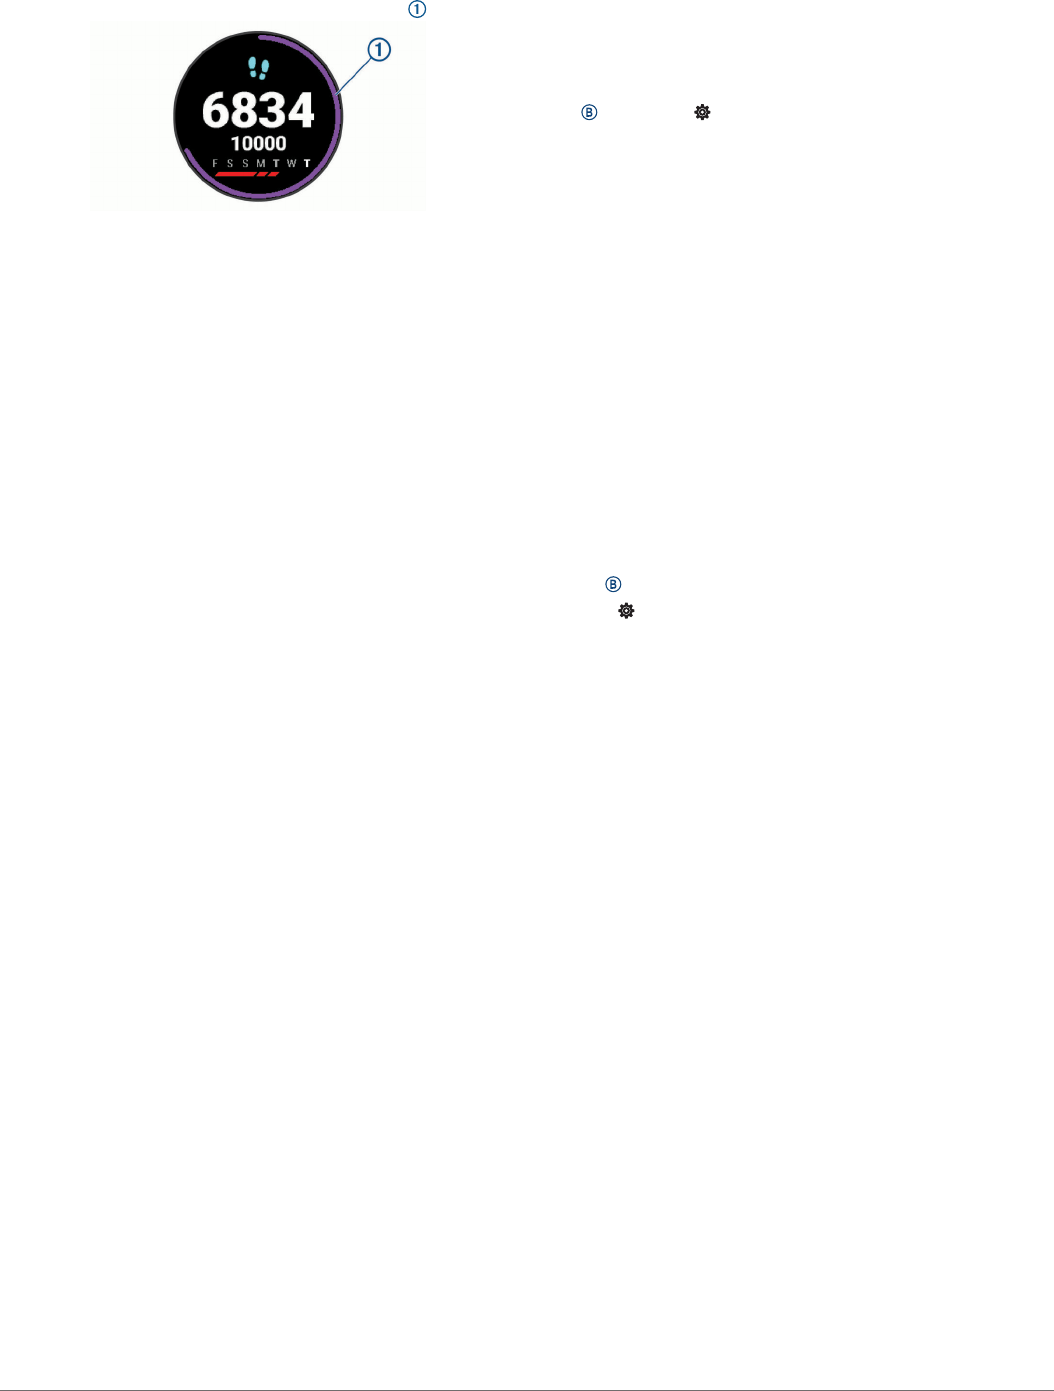
  • Ik krijg de hydratie widget niet meer op mijn horloge, staat wel op mijn telefoon. Bij instellingen - widgets - toevoegen staat deze er niet meer tussen. Wat te doen?
    Gesteld op 2-12-2020 om 14:39

    Reageer op deze vraag Misbruik melden
  • Mijn uurwerk maakt maar connectie met één van mijn draadloze oordopjes. De JBL oordopjes werken nochtans perfect met mijn smartphone dus het ligt niet aan de oordopjes. Gesteld op 24-11-2020 om 19:53

    Reageer op deze vraag Misbruik melden
  • ik krijg geen meldingen op mn horloge, whats app etc. Gesteld op 14-8-2020 om 09:26

    Reageer op deze vraag Misbruik melden
  • ik heb bij de favorieten de zaklamp ingeschakeld. Dit wil ik graag weer terugdraaien, maar weet niet hoe....
    Als ik dus nu mn wijzerplaat naar rechts beweeg heb ik de zaklampfunktie. Gesteld op 6-8-2020 om 20:10

    Reageer op deze vraag Misbruik melden
  • Ik heb dit probleem ook. Toevallig al in het bezit van de oplossing? Geantwoord op 14-4-2021 om 22:48

    Waardeer dit antwoord (14) Misbruik melden
  • Nog steeds niemand een antwoord heb ook get probleem! Geantwoord op 7-8-2021 om 18:30

    Waardeer dit antwoord (2) Misbruik melden
  • ik heb zelfde probleem Geantwoord op 6-9-2021 om 21:34

    Waardeer dit antwoord Misbruik melden
  • Bij Instellingen, Snelkoppelingen is de laatste optie Schakel uit. Dan heb je geen snelkoppeling meer naar je zaklamp Geantwoord op 7-9-2021 om 09:16

    Waardeer dit antwoord (17) Misbruik melden
  • Bij snelkoppelingen kies je er eentje die je wel wilt. Bijvoorbeeld portemonee. Als je dan de swipe beweging doet zal hij om de pincode vragen, of helderheid en dan krijg je het zonnetje te zien en kan je de helderheid aanpassen Geantwoord op 24-11-2021 om 17:20

    Waardeer dit antwoord (6) Misbruik melden
  • Onderste knop 2 seconden ingedrukt houden. Dan naar beneden scrollen en het tandwiel aanklikken. Dan snelkoppeling aanklikken. Naar beneden scrollen totdat je 'geen snelkoppeling' kunt kiezen Geantwoord op 20-1-2022 om 14:34

    Waardeer dit antwoord (14) Misbruik melden
  • Kan ik als ik een training van mijn garmin coach op die dag niet kan uitvoeren, die verplaatsen naar een latere dag? Tot hier toe is die training dan altijd al verdwenen. Gesteld op 22-7-2020 om 15:00

    Reageer op deze vraag Misbruik melden
30
  • IK HEB EEN VIVOACTIVE 4S EN DIE GEEFT AAN NIET MEER VERBONDEN WAT IS DE OPLOSSING OF OORZAAK Gesteld op 28-4-2020 om 16:01

    Reageer op deze vraag Misbruik melden
  • het lukt mij niet om mijn workout van mijn telefoon in mijn horloge te krijgen Gesteld op 30-3-2020 om 19:57

    Reageer op deze vraag Misbruik melden
  • mijn vivoactive 4s geeft aan I CLOUD bijna vol.
    nu wil ik deze opschonen maar hoe doe je dit.
    hoe kan ik de I CLOUD beheren Gesteld op 29-3-2020 om 10:23

    Reageer op deze vraag Misbruik melden
  • Als ik hardloop zie ik bij mijn tempo een heel hoog getal. Terwijl ik mijn garmin heb ingesteld op km. En metrisch. Ik wil graag zien hoe snel ik op dat moment loop.. zoals bij 6:00 min/km. Ik zie dit nu njet. Als ik na het lopen kijk op garmin connect geeft hij wel netjes de min/km aan die ik heb gelopen. Maar ik wil het graag live zien zodat ik mijn yempo kan aanpassen wanneer nodig
    Bedankt groetjes Bettie Gesteld op 8-1-2020 om 21:26

    Reageer op deze vraag Misbruik melden

Misbruik melden

Gebruikershandleiding.com neemt misbruik van zijn services uitermate serieus. U kunt hieronder aangeven waarom deze vraag ongepast is. Wij controleren de vraag en zonodig wordt deze verwijderd.

Product:

Bijvoorbeeld antisemitische inhoud, racistische inhoud, of materiaal dat gewelddadige fysieke handelingen tot gevolg kan hebben.

Bijvoorbeeld een creditcardnummer, een persoonlijk identificatienummer, of een geheim adres. E-mailadressen en volledige namen worden niet als privégegevens beschouwd.

Spelregels forum

Om tot zinvolle vragen te komen hanteren wij de volgende spelregels:

Belangrijk! Als er een antwoord wordt gegeven op uw vraag, dan is het voor de gever van het antwoord nuttig om te weten als u er wel (of niet) mee geholpen bent! Wij vragen u dus ook te reageren op een antwoord.

Belangrijk! Antwoorden worden ook per e-mail naar abonnees gestuurd. Laat uw emailadres achter op deze site, zodat u op de hoogte blijft. U krijgt dan ook andere vragen en antwoorden te zien.

Abonneren

Abonneer u voor het ontvangen van emails voor uw Garmin Vivoactive 4S bij:


U ontvangt een email met instructies om u voor één of beide opties in te schrijven.


Ontvang uw handleiding per email

Vul uw emailadres in en ontvang de handleiding van Garmin Vivoactive 4S in de taal/talen: Engels als bijlage per email.

De handleiding is 2,85 mb groot.


U ontvangt de handleiding per email binnen enkele minuten. Als u geen email heeft ontvangen, dan heeft u waarschijnlijk een verkeerd emailadres ingevuld of is uw mailbox te vol. Daarnaast kan het zijn dat uw internetprovider een maximum heeft aan de grootte per email. Omdat hier een handleiding wordt meegestuurd, kan het voorkomen dat de email groter is dan toegestaan bij uw provider.

Stel vragen via chat aan uw handleiding

Stel uw vraag over deze PDF

Andere handleiding(en) van Garmin Vivoactive 4S

Garmin Vivoactive 4S Gebruiksaanwijzing - Nederlands - 36 pagina's

Garmin Vivoactive 4S Gebruiksaanwijzing - Deutsch - 36 pagina's

Garmin Vivoactive 4S Gebruiksaanwijzing - Français - 36 pagina's


Uw handleiding is per email verstuurd. Controleer uw email

Als u niet binnen een kwartier uw email met handleiding ontvangen heeft, kan het zijn dat u een verkeerd emailadres heeft ingevuld of dat uw emailprovider een maximum grootte per email heeft ingesteld die kleiner is dan de grootte van de handleiding.

Er is een email naar u verstuurd om uw inschrijving definitief te maken.

Controleer uw email en volg de aanwijzingen op om uw inschrijving definitief te maken

U heeft geen emailadres opgegeven

Als u de handleiding per email wilt ontvangen, vul dan een geldig emailadres in.

Uw vraag is op deze pagina toegevoegd

Wilt u een email ontvangen bij een antwoord en/of nieuwe vragen? Vul dan hier uw emailadres in.


Info