16 17
Changing the ink cartridge
If you notice that print quality is deteriorating, it is time to change the ink cartridge. It is
always a good idea to have a spare new cartridge to hand.
1. Press the DOWN and ENTER keys simultaneously.You are now in Set Up mode.
2. Press repeatedly the UP or DOWN key (A2) until the Print Head symbol (
Q
R
)
appears on the left of the screen.
3. Take the printer out of the base station.
4. Press the ENTER key (A3).
The print head will move to a position where you can
replace it.
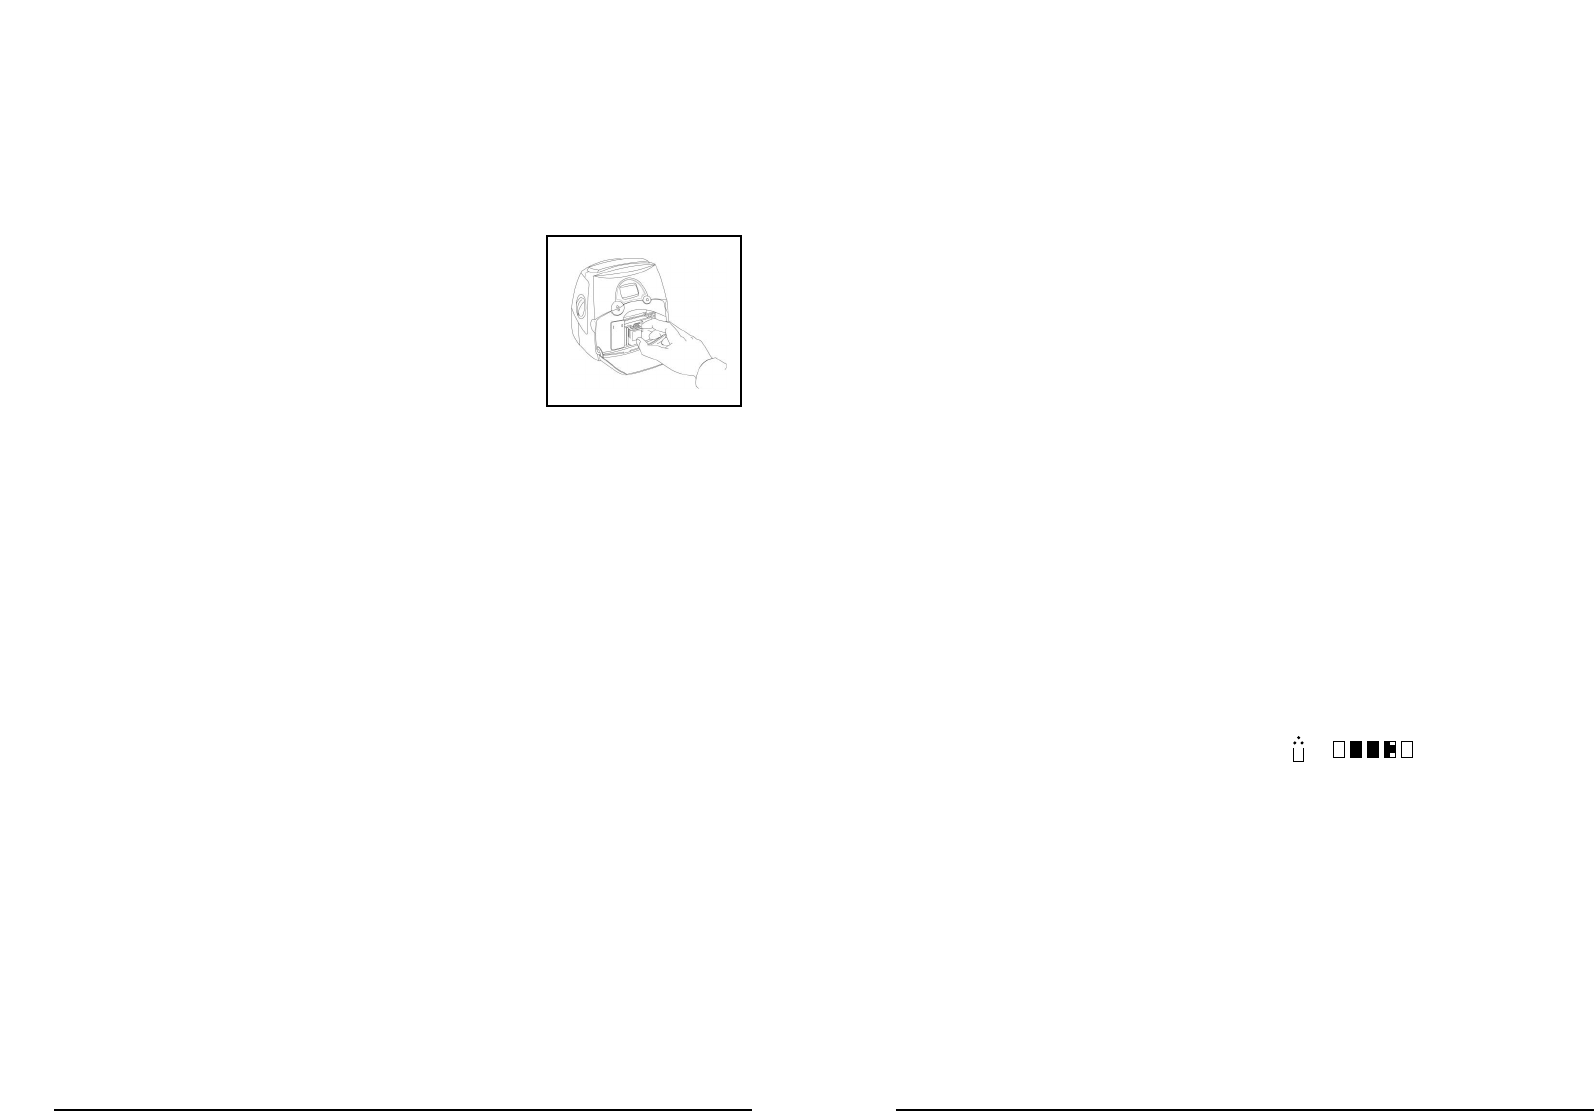
5. Open the StampManager door.
6. Remove the plastic tape from the ink cartridge, and
insert it as illustrated. Make sure the cartridge clicks
right back into the machine.
7. Press the ENTER key (A3).
The print head will return to the parking position.
8. Close the StampManager door, and put the printer
back into the base-station.
9. Press the PRINT bar (A4) to go back into Print mode.
Dymo
®
ink cartridges for the StampManager are available in three colours: black, red
and blue. If you want to use a different colour cartridge before your current cartridge is
used up, you must store the current cartridge in the special inkjet cartridge storage
unit (available as an accessory). This will prevent the cartridge ink drying up.
Cleaning the print head
Each time you place the printer on to the base station, it automatically cleans the print head.
Deep clean function
A thorough ‘Deep Clean’ function is also available. It is recommended you use this
function on a regular basis, and certainly when returning the StampManager to the
base station after prolonged use in remote mode, as dust can infiltrate the printer head.
1. Press the DOWN and ENTER keys simultaneously.You are now in Set Up mode.
2. Select the (
Q
R
Q
R
) display, and press ENTER.
3. The display will flash while the machine purges the print heads and gives them
a thorough clean. This will take around 15 seconds.
4. Press the PRINT bar (A4) to go back into Print mode.
Battery pack
The StampManager battery pack allows you to use the StampManager for completely
mobile use, without the need for a power outlet. The Battery Pack is available as an
accessory.
Note that although the printer can be used to print up to 600 stamps when in remote
mode, it is always advisable to return the StampManager to its base station as often
as possible. This not only conserves battery power, but also ensures that the print
head is regularly cleaned, or is protected from dust and from drying out when the
machine is not in use.
If you are not using a battery pack, it is important to keep the StampManager base
station connected to the mains, to avoid losing programmed data. Unplugging the sta-
tion will require a reset of all data (except language).
If you do have to unplug the base station for any reason, please ensure that the prin-
ter has been returned to the station before doing so.
Installing the battery pack
1. Disconnect the StampManager cable (B2), and remove the flap on the rear of
the casing.
2. Connect the battery pack to the white socket inside the StampManager.
3. Slide the battery pack fully inside the StampManager.
4. Close the flap.
Charging the batteries
1. Connect the power adaptor to the base station plug the adaptor’s power cord in
the wall outlet. The base station ‘power on’ light B1 will come on. Place the
printer on the base station to start charging the batteries. When the printer sta-
tus light (A5) comes OFF, the minimum work charge level has been reached.
2. With a minimum work charge level, you can program the date, hour and personal
stamps, and you can print up to 200 stamps with the StampManager printer
free from the base station. When you take the printer off the base station, only
1 level of the charge level symbol (C11) will be marked.
3. When the StampManager battery is fully charged (3 levels marked), you can
program date, hour and personal stamps, and print up to 600 stamps when the
printer is free from the base station. In practice, the number of stamps you can
print will depend on the amount of ink they require. For example, if you print
many stamps which have substantial dark backgrounds, the machine’s capacity
will be less. A full battery charge will take around 1,5 hour.
4. When the printer status light (A5) starts blinking, you can print only between
6 and 30 stamps before you will need to recharge.
5. When the printer status light goes ON, it is no longer possible to print. Data will
stay programmed as long as the symbols & on the LCD screen
are blinking alternating. After approximately 1 hour, the LCD screen displays
OFF, your programmed data (hour and date, personal stamps) will be lost.