ENGLISH
3
CAUTIONS ON HANDLING DISCS
Discs
Only the discs including the marks shown on page 5
can be played on the DVD-A11.
Note, however, that discs with special shapes (heart-
shaped discs, hexagonal discs, etc.) cannot be played
on the DVD-A11. Do not attempt to play such discs,
as they may damage the player.
Holding Discs
Avoid touching the surface of discs when loading and
unloading them.
Be careful not to get
fingerprints on the signal
surface (the side which
shines in rainbow colors).
Cleaning Discs
2 Fingerprints or dirt on the disc may lower sound and
picture quality or cause breaks in playback. Wipe off
fingerprints or dirt.
2 Use a commercially available disc cleaning set or a
soft cloth to wipe off fingerprints or dirt.
Wipe gently from the
middle outwards.
Do not wipe with a circular
motion.
NOTE:
• Do not use record spray or antistatic. Also do not
use volatile chemicals such as benzene or thinner.
Record
spray
Thinner
Benzene
Cautions on Handling Discs
• Do not get fingerprints, grease or dirt on discs.
• Be especially careful not to scratch discs when
removing them from their cases.
• Do not bend discs.
• Do not heat discs.
• Do not enlarge the center hole.
• Do not write on the labeled (printed) side with a ball-
point pen or a pencil.
• Water droplets may form on the surface if the disc is
moved suddenly from a cold place to a warm one. Do
not use a hairdryer, etc., to dry the disc.
Cautions on Storing Discs
• Always eject discs after playing them.
• Keep discs in their cases to protect them from dust,
scratches and warping.
• Do not put discs in the following places:
1. Places exposed to direct sunlight for long periods
of time
2. Humid or dusty places
3. Places exposed to heat from heaters, etc.
Cautions on Loading Discs
• Only load one disc at a time. Loading one disc on top
of another may result in damage or scratch the discs.
• Load 8 cm discs securely in the disc guide, without
using an adapter. If the disc is not properly loaded, it
may slip out of the guide and block the disc tray.
• Be careful not to let your fingers get caught when
the disc tray is closing.
• Do not place anything but discs in the disc tray.
• Do not load cracked or warped discs or discs that
have been fixed with adhesive, etc.
• Do not use discs on which the adhesive part of
cellophane tape or glue used to attach the label is
exposed, or discs with traces of tape or labels that
have been peeled off. Such discs may get stuck
inside the player, resulting in damage.
6
4
CONNECTIONS
• Read the manuals of all the components when
making connections.
• Keep the power supply cord unplugged until all
connections have been completed.
• If the power is on when connections are made,
noise may be generated and damage the speakers.
NOTES:
• Be sure to connect the left and right channels
properly, L (left) to L, R (right) to R.
• Plug the power supply cord securely into the power
outlet. Incomplete connection may result in noise.
• Binding the power supply cord together with
connection cords may result in humming or noise.
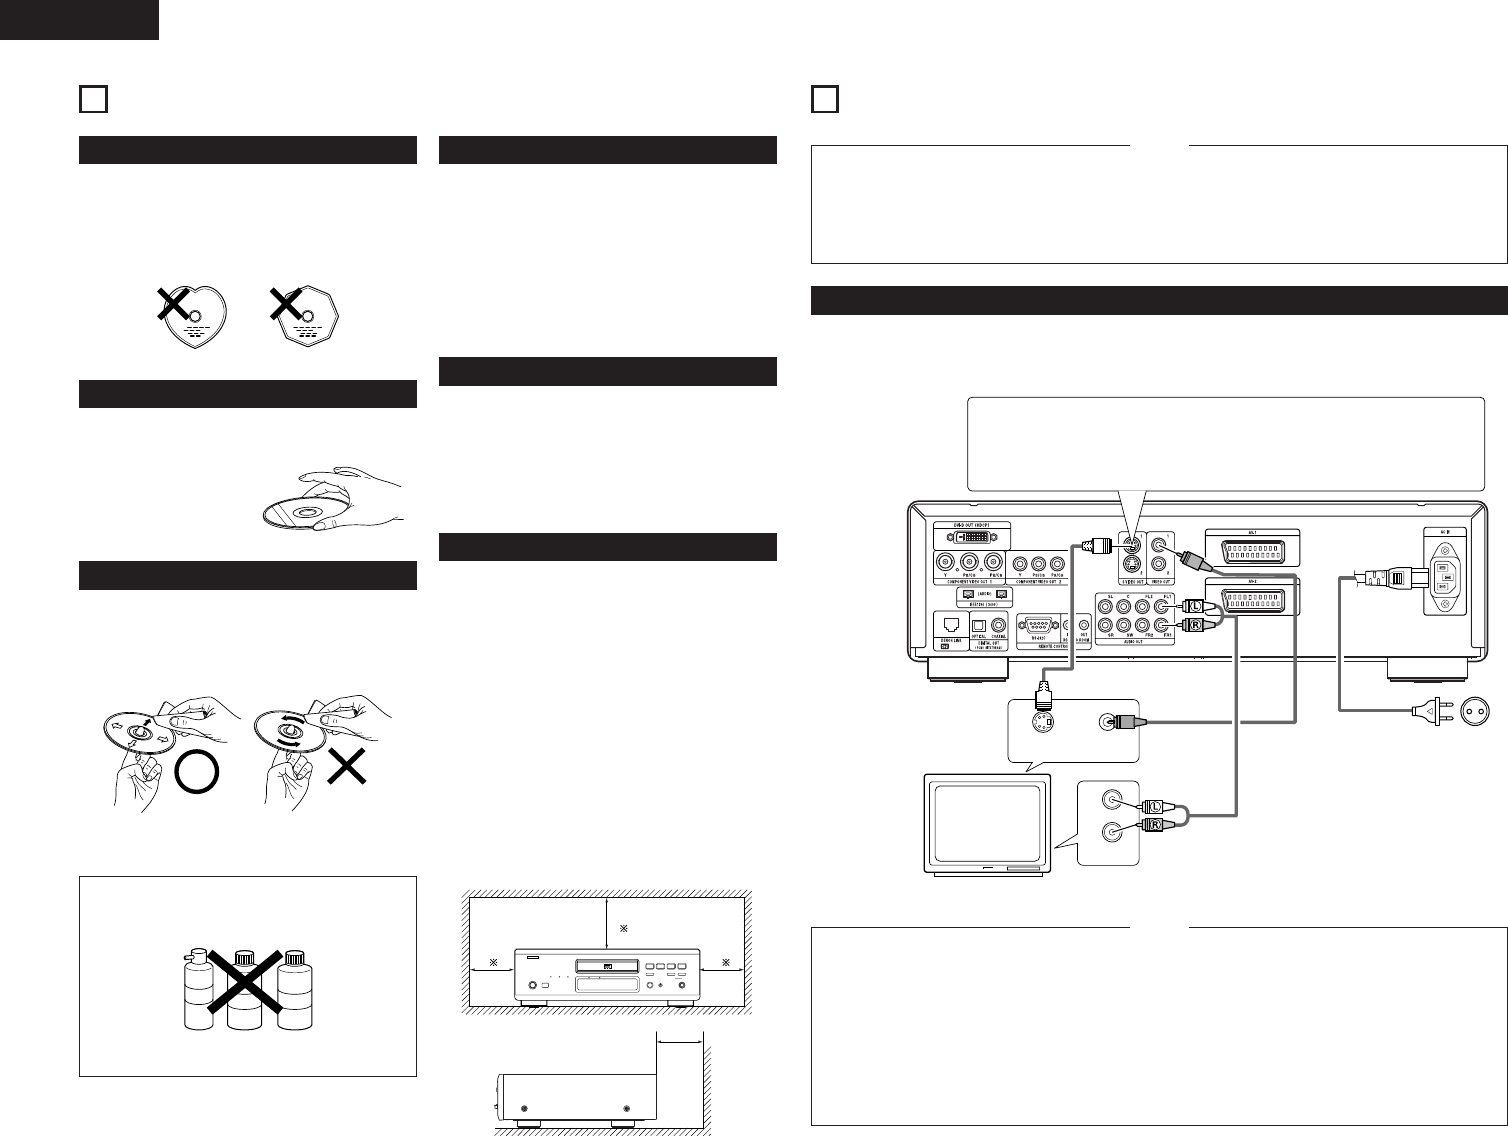
(1) Connecting to a TV
• Use the included audio video cord to connect the TV’s video input connector and audio input connectors to the
DVD-A11’s VIDEO OUT or S-VIDEO OUT and AUDIO OUT.
DVD-A11
S-Video output connector
The video signals are divided into color (C) and brightness (Y) signals, achieving a
clearer picture.
If the TV is equipped with an S-Video input connector, we recommend connecting it
to the DVD-A11’s S-Video output connector using a commercially available S-
Video connection cord.
To power outlet
TV
• Connect the DVD-A11’s video outputs to the TV
either directly or through an AV amplifier. Do not
connect it via a VCR (video cassette recorder).
Some discs contain copy prohibit signals. If such
discs are played via a VCR, the copy prohibit
system may cause disturbance in the picture.
• Set the “TV TYPE” in “VIDEO SETUP” in “SETUP“
to comply with your TV's video format. When the
TV is PAL formated, set to PAL. (See page 18.)
NOTES:
• To use with 2-channel audio output, set “2
CHANNEL” in “AUDIO CHANNEL” in “AUDIO
SETUP” in “SETUP” at the initial settings. (See
page 19.)
• Set the “TV ASPECT” in “VIDEO SETUP” in
“SETUP” to comply with your TV’s aspect. (See
page 18.)
• To use with video out or s-video output, set
“INTERLACED” in “VIDEO OUT” in “VIDEO
SETUP” in “SETUP” at the initial settings. (See
page 18.)
CAUTIONS ON INSTALLATION
For heat dispersal, leave at least 10 cm of space
between the top, back and sides of this unit and
the wall or other components.