70
Advanced Setup – Part 1 Advanced Setup – Part 1
ENGLISH
ENGLISH
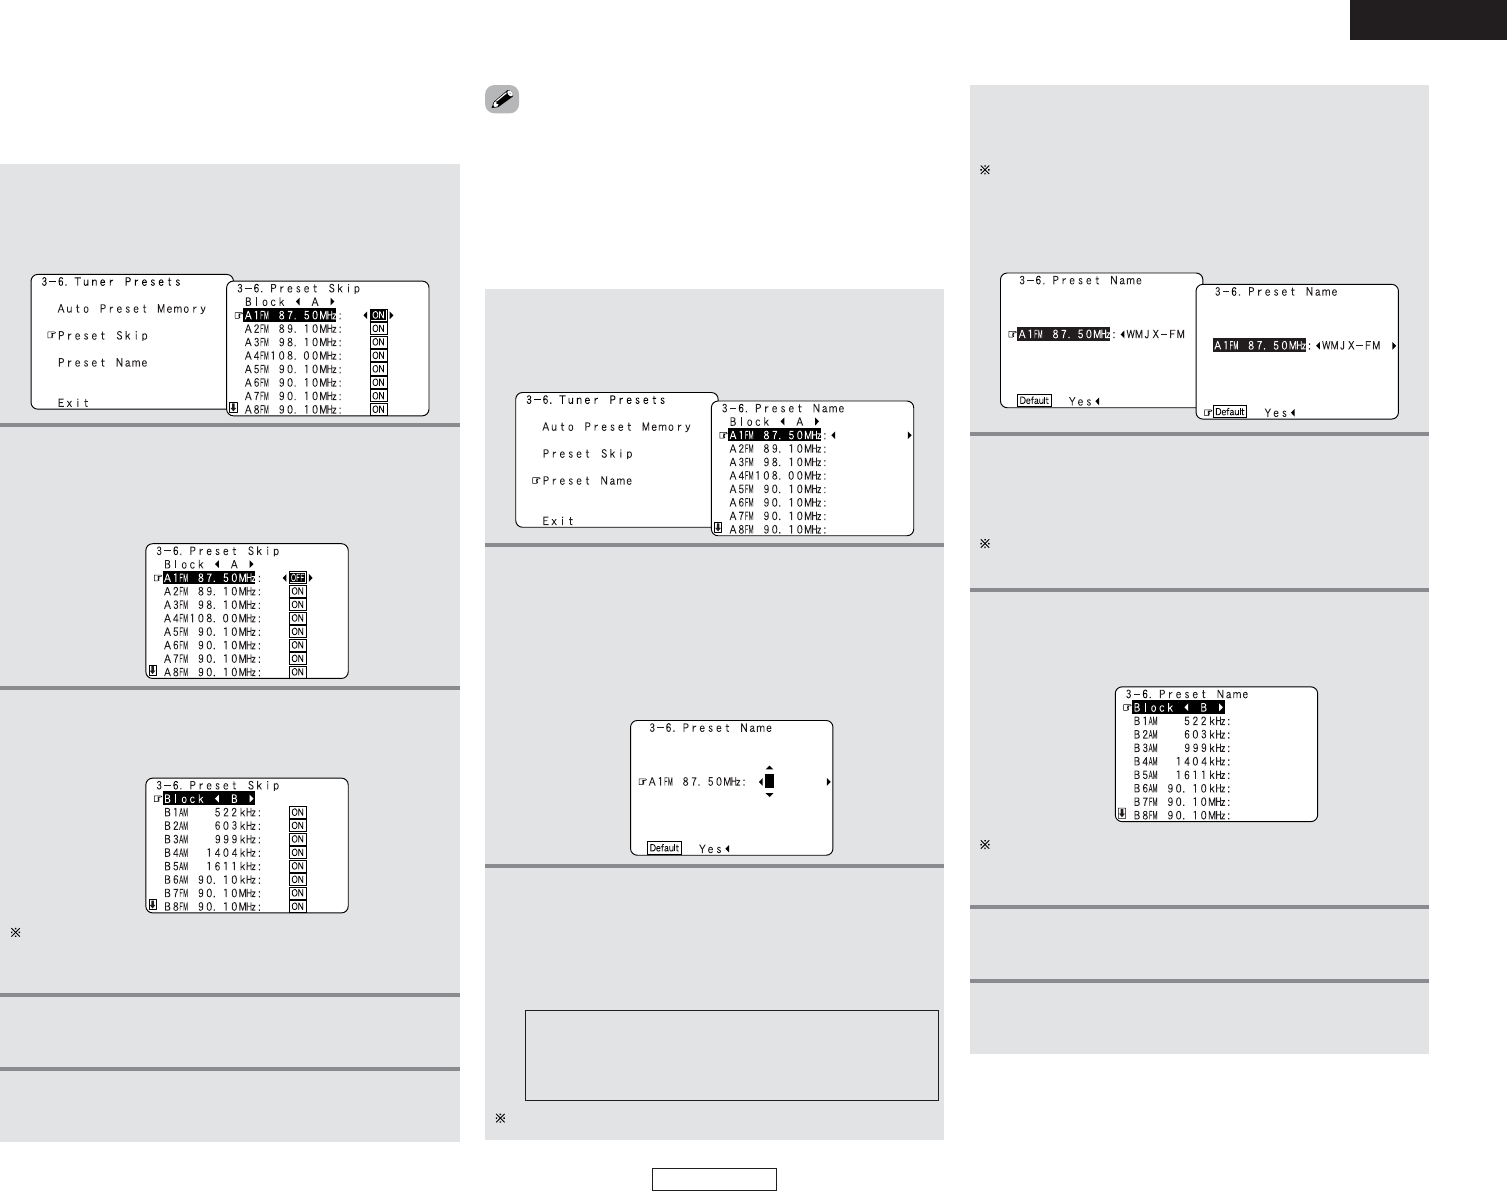
2 Preset Skip
When selecting preset channels pressing the CHANNEL + or –
button, it is possible to skip specific preset channels.
1
Press the CURSOR
DD
or
HH
button to select
“Preset Skip” at the “Tuner Presets” screen, then
press the ENTER button.
• The “Preset Skip ”screen appears.
3
When the CURSOR
HH
button is pressed at the
very bottom of the screen.
• The screen for the next preset memory block appears.
2
Press the CURSOR
DD
or
HH
button to select the
preset channel you want to skip, then press the
CURSOR
FF
or
GG
button to select “ON” or
“OFF”.
It is also possible to select the desired preset memory block
by selecting “Block” then pressing the CURSOR
FF
or
GG
button.
2 Preset Name
It is possible to input station names , etc., for preset channels.
These names are displayed on the front display and on the on
screen display.
1
Press the CURSOR
DD
or
HH
button to select
“Preset Name” at the “Tuner Presets” screen,
then press the ENTER button.
• The “Preset Name” screen appears.
Up to 8 characters can be input.
5
Press the ENTER button.
• The “Tuner Presets” screen reappears.
2
Press the CURSOR
DD
or
HH
button to select the
preset channel whose name you want to change,
then press the CURSOR
FF
or
GG
button.
• The screen switches to the character input screen.
Example: When “A1” is selected and the CURSOR
FF
or
GG
button is pressed
3
Press the CURSOR
FF
or
GG
button to move the
cursor (
22
) to the character, number, symbol or
punctuation mark you wish to input, and press
the CURSOR
DD
or
HH
button to select that
character.
4
Repeat steps 2 and 3.
AB C D E F G H I J K L M N O P Q R S T U V W X Y
Z a b c d e f g h i j k l m n o p q r s t u v w x y z 0 1 2
3 4 5 6 7 8 9
! ” # % & ’ ( )
*
+ , – . / : ; < = > ? @ [ \ ] (space)
4
Repeat step 3 to input the preset channel name.
To reset the preset channel name to the default value, press
the CURSOR
FF
or
GG
button to highlight the preset channel
display, then press the CURSOR
HH
button.
When “Yes” is selected for “Default”, the setting are
automatically reset to the default name.
5
Once all the characters have been input,
press the ENTER
button.
• The “Preset Name” screen reappears.
Use the same procedure to change other input source
names as well.
It is also possible to select the desired preset memory block
by selecting “Block” then pressing the CURSOR
FF
or
GG
button.
6
When the CURSOR
HH
button is pressed at the
very bottom of the screen.
• The screen for the next preset memory block appears.
7
Press the ENTER button.
• The “Tuner Presets” screen reappears.
8
Press the ENTER button to enter the setting.
• The “Audio Input Setup” menu reappears.
• Direct tuning is not possible when “Preset Skip” is set to
“OFF”.