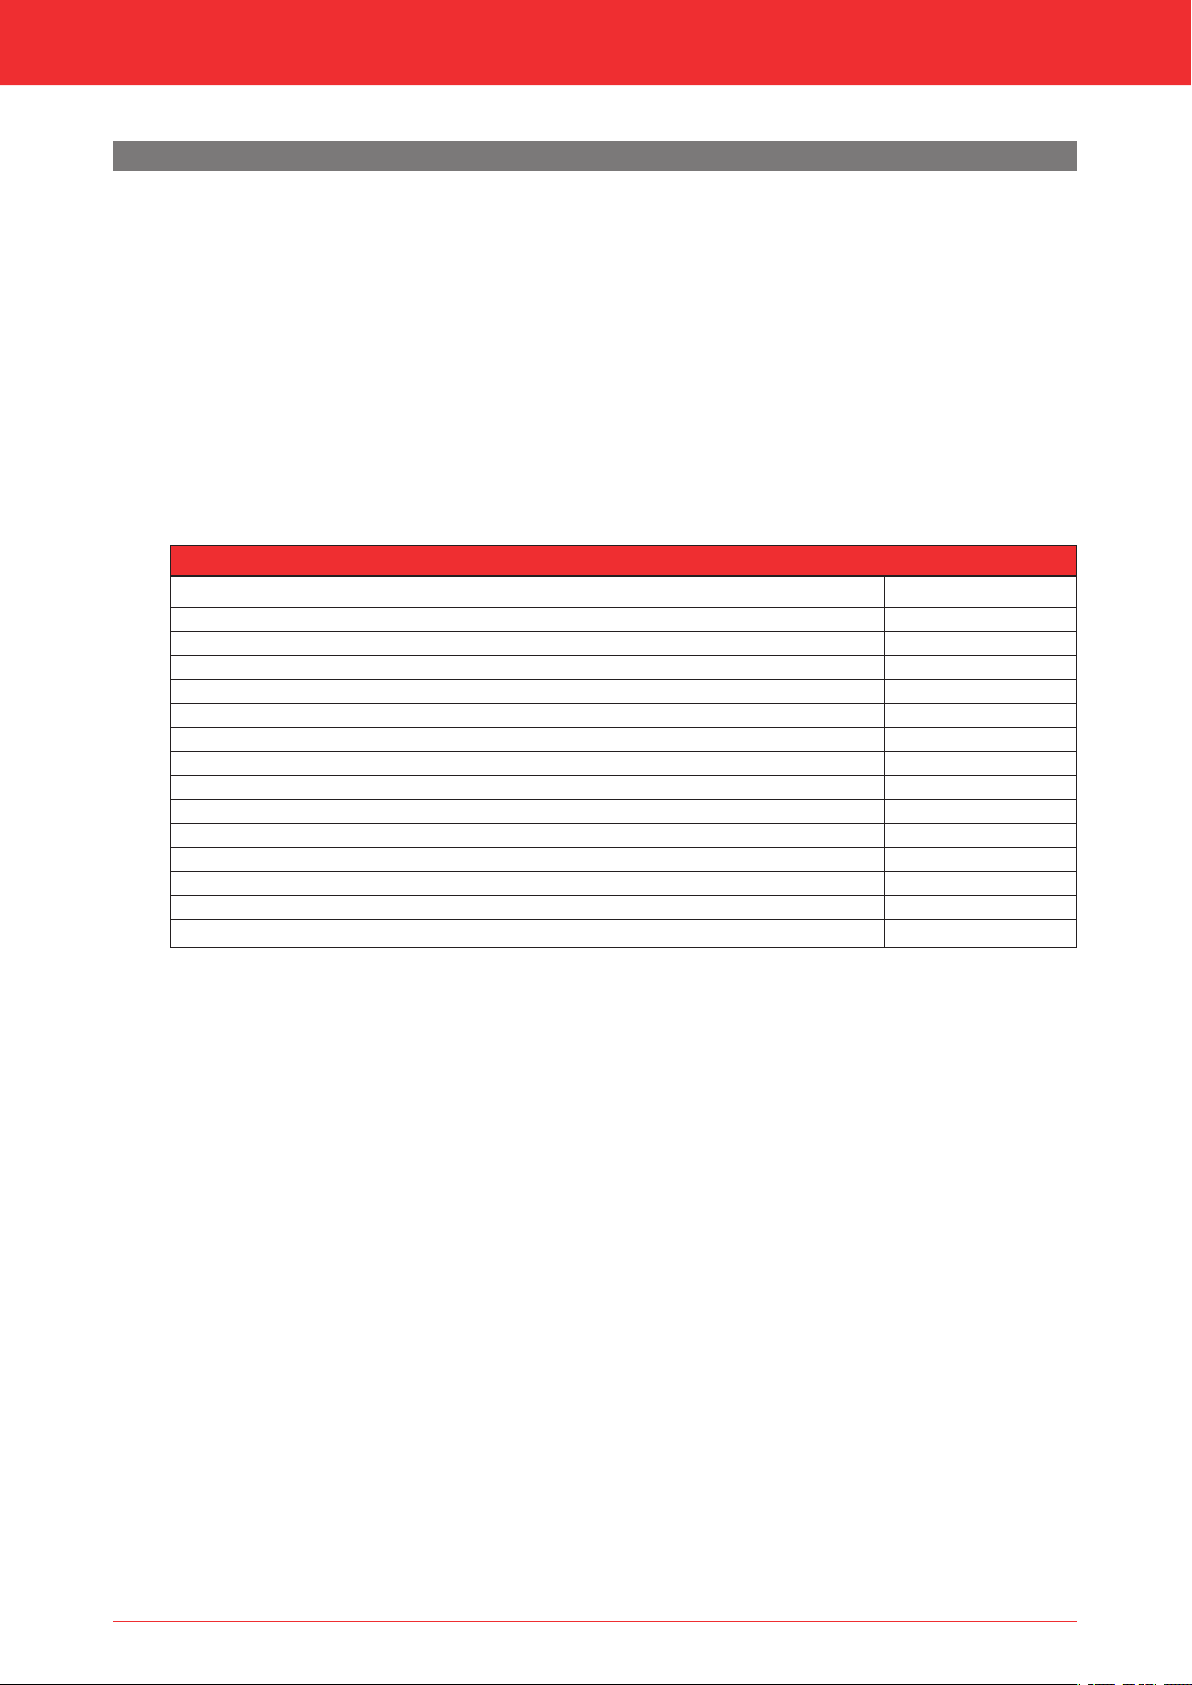
6. Preparation6.1 UnpackingNote the following items when removing the packaging:1Remove all packaging materials.1Remove all supplied components in, on and/or at the appliance.1Check the appliance and accessories for damages (during transport).1If necessary, contact your supplier.1Never install an appliance that is damaged!1Remove any screws that are used to fix the appliance to a platform or pallet.3The glass pane(s) is/are made of a ceramic material. Very small irregularities in the glass panes cannot be avoided, but are within the required quality standards.3Keep plastic bags away from children.Table 6-1 indicates which components should be available after removing the packaging.1Contact the supplier if you find that not all components have been supplied.1Packaging must be disposed of in accordance with the regulations.Installation manual86.2 Type of gasThe data plate indicates for which type of gas, gas pressure and for which country this appliance is intended.The data plate can be found on the appliance or can be attached to a chain to which it should remain attached.3Check whether the appliance is suitable for the type of gas and the gas pressure used at the location.6.2.1 Gas type conversionIn order to convert this appliance to a different type of gas, please contact DRU's service department and ask for the possibilities. The conversion should be performed by a recognised gas installer.6.3 Gas connectionPlace a gas tap in the gas pipe in accordance with the applicable regulations. The gas connection on the gas control islocated next to the receiver (fig. 6-2 (Gin)).3-Make sure there is no dirt in the gas pipes and connections.-No soldering may take place at the flexible gas hose(s), as this could cause leaks.The following requirements apply to the gas connection:-Use a gas pipe with the correct dimensions, so that no pressure loss can occur.-The gas tap must be approved (in the EU this will be the CE mark).-You should always be able to reach the gas tap.Table 6-1: Parts included with the deliveryPartInstallation manualUser manualWood set (including: chips, vermiculite and ash)Glowing Embers set (if applicable)Glow materialRestrictor slideAir inlet guide 2Remote controlMains cableControl hatchBack-up self-tapping screwKey bolt M8 (including: Hexagonal nut M8 and Washer M8)Compression fitting 15 mm x G3/8”Socket spanner 8 mmNumber1x1x1x1x1x1x1x1x1x1xnx4x1x1x
Gebruikershandleiding.com neemt misbruik van zijn services uitermate serieus. U kunt hieronder aangeven waarom deze vraag ongepast is. Wij controleren de vraag en zonodig wordt deze verwijderd.
Product:
Spelregels forum
Om tot zinvolle vragen te komen hanteren wij de volgende spelregels:
lees eerst de handleiding door;
controleer of uw vraag al eerder door iemand anders is gesteld;
probeer uw vraag zo duidelijk mogelijk te stellen;
heeft u een probleem en al geprobeerd om dit op te lossen, vermeld dit erbij aub;
heeft u een oplossing gekregen van een bezoeker dan horen wij dat graag in dit forum;
wilt u een reactie geven op een vraag of antwoord, gebruik dan niet dit formulier maar klik op de knop 'reageer op deze vraag';
uw vraag wordt direct op de website gezet; vermijd daarom persoonlijke gegevens in te vullen;
Belangrijk! Als er een antwoord wordt gegeven op uw vraag, dan is het voor de gever van het antwoord nuttig om te weten als u er wel (of niet) mee geholpen bent! Wij vragen u dus ook te reageren op een antwoord.
Belangrijk! Antwoorden worden ook per e-mail naar abonnees gestuurd. Laat uw emailadres achter op deze site, zodat u op de hoogte blijft. U krijgt dan ook andere vragen en antwoorden te zien.
Abonneren
Abonneer u voor het ontvangen van emails voor uw DRU Maestro 60 RCH bij:
nieuwe vragen en antwoorden
nieuwe handleidingen
U ontvangt een email met instructies om u voor één of beide opties in te schrijven.
Ontvang uw handleiding per email
Vul uw emailadres in en ontvang de handleiding van DRU Maestro 60 RCH in de taal/talen: Engels als bijlage per email.
De handleiding is 4.91 mb groot.
U ontvangt de handleiding per email binnen enkele minuten. Als u geen email heeft ontvangen, dan heeft u waarschijnlijk een verkeerd emailadres ingevuld of is uw mailbox te vol. Daarnaast kan het zijn dat uw internetprovider een maximum heeft aan de grootte per email. Omdat hier een handleiding wordt meegestuurd, kan het voorkomen dat de email groter is dan toegestaan bij uw provider.
Uw handleiding is per email verstuurd. Controleer uw email
Als u niet binnen een kwartier uw email met handleiding ontvangen heeft, kan het zijn dat u een verkeerd emailadres heeft ingevuld of dat uw emailprovider een maximum grootte per email heeft ingesteld die kleiner is dan de grootte van de handleiding.
Er is een email naar u verstuurd om uw inschrijving definitief te maken.
Controleer uw email en volg de aanwijzingen op om uw inschrijving definitief te maken
U heeft geen emailadres opgegeven
Als u de handleiding per email wilt ontvangen, vul dan een geldig emailadres in.
Uw vraag is op deze pagina toegevoegd
Wilt u een email ontvangen bij een antwoord en/of nieuwe vragen? Vul dan hier uw emailadres in.