12
10.3 Uploading Images
1. Switch to DSC Mode
Close
2b. Enchance resolution
2a. Capture all stored images
You are now able to enhance the resolution of your taken images by using the Digital Camera Manager.
Before you start to capture all stored images, a window will pop up and ask you if you want to convert all the
stored images to High Resolution (640x480) automatically.
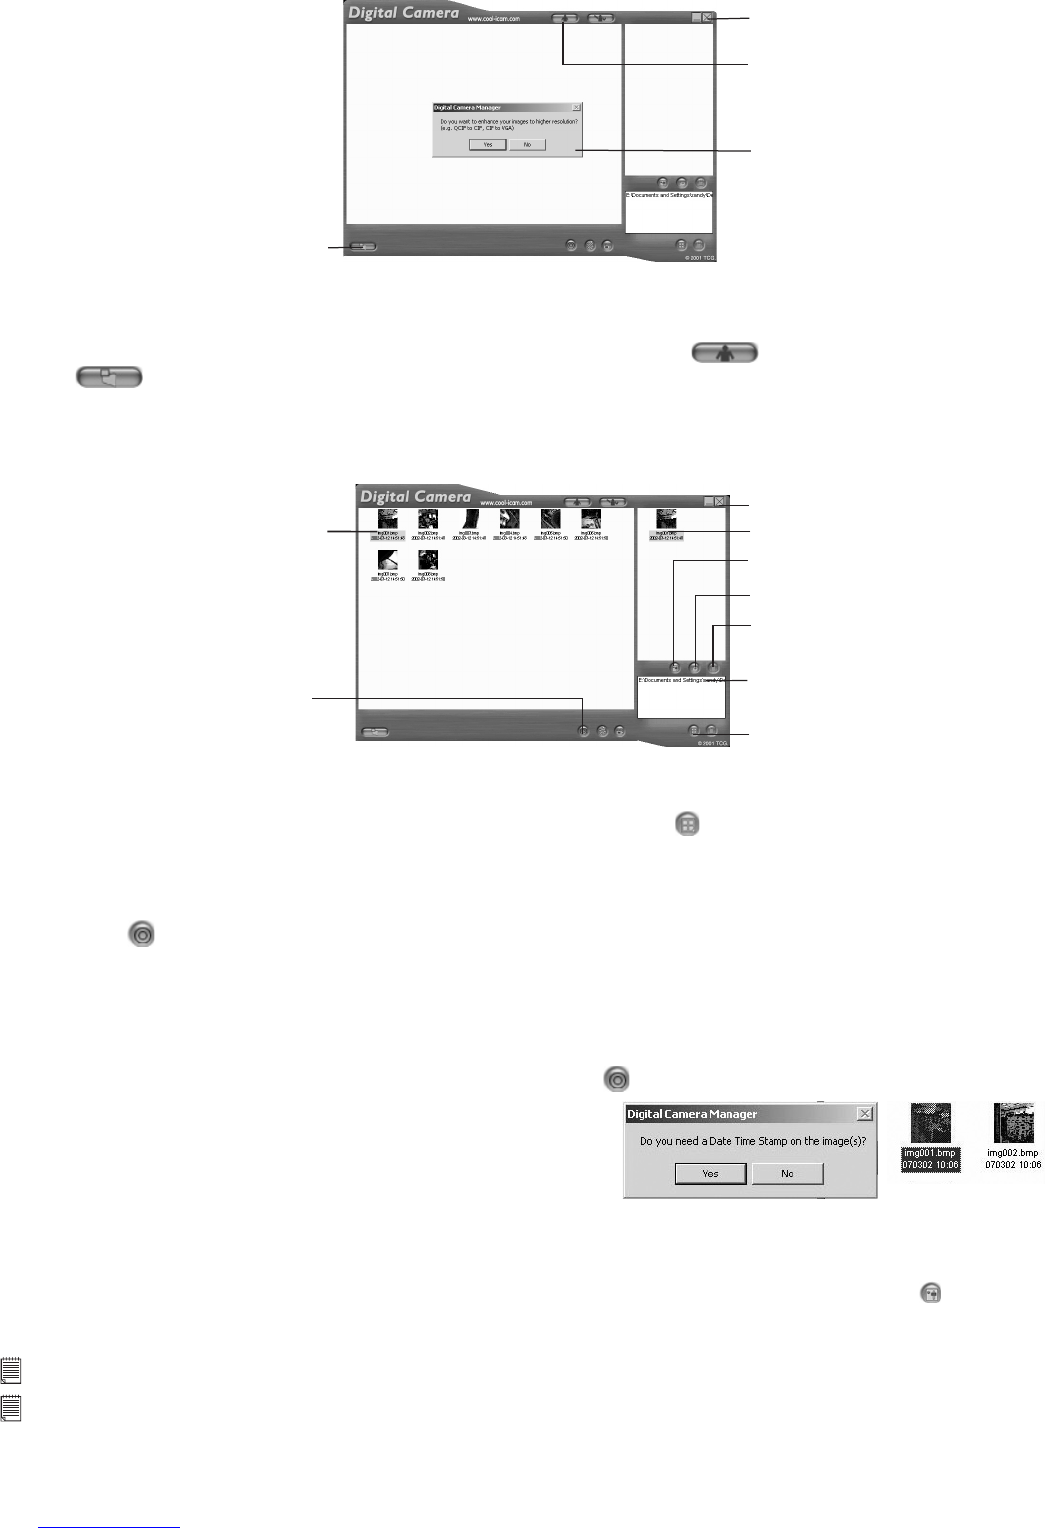
1. Switch the interface to DSC (Digital Still Camera) Mode by clicking the button.
2. Click to capture all images stored in your Micro C@m. A window will pop up and ask if you want to
convert all stored images to higher resolution (640 x 480 pixel).
• If you click “Yes”, images will convert from and to the following size:
Low Resolution: 176 x 144 pixels (QCIF) software enhanced to 352 x 288 pixel
High Resolution: 352 x 288 pixels (CIF) software enhanced to 640 x 480 pixel
• Select “Yes” or “No”.
Saved images(s)
Close
5. Select Album
4. Create New Album
6&7. Save the selected
image(s) into the album
3. Select wanted image(s)
Adjust image
E-mail saver image
Delete image(s)
3. All uploaded images will be shown on the left panel.
4. During your Digital Camera Manager installation a folder called “Album” has been automatically created
in the bottom right section of the Digital Camera Manager. Highlight the le called “C:/Windows/Desktop/
Album” in the bottom right hand corner. You can alternatively click to create a new album to hold your
images. Name the album and save it to wherever you want in your PC.
5. If you have already created an album and you want to save image(s) in, click on the album.
6. TO SAVE ONE IMAGE
• To save 1 particular image and put in the selected album, select the image by clicking the image once and
click the Save Still Image button.
• Your computer will prompt you by giving you the option to save the images with Date Time Stamp.
• If you choose yes, all the images name will be sufx with date and time.
• The selected image will appear on the right panel and it will be saved to the album you created and or
highlighted.
7. TO SAVE ALL IMAGES
• To save all images taken and put in the album, select all the images by holding the CTRL button down on
keyboard with the mouse click on each image and click the button.
• Your computer will prompt you by giving you the option to
save the images with Date Time Stamp.
• If you choose yes, all the images name will be sufx with date
and time.
• All the selected images will appear on the right panel and they will be saved to the album you created and
highlighted.
8. To Adjust an Image
You can adjust an image (brightness, contrast, etc.) by highlighting the image and clicking the button.
9. To retrieve images saved in an album, simply click the album and the images stored in the album will be
shown on the top right panel. Double click on image to view.
Important Notes:
Your images are also now retrievable from your desktop by clicking on the folder called “Album”.
Tips:
To quickly highlight all images hold down the CTRL and SHIFT key together and with the mouse click on the end images of
every row of images. This will quickly highlight every image in every row.