BASIC OPERATIONS PRIOR
TO SHOOTING
BASIC OPERATIONS
SIMPLE SHOOTING PROCEDURE
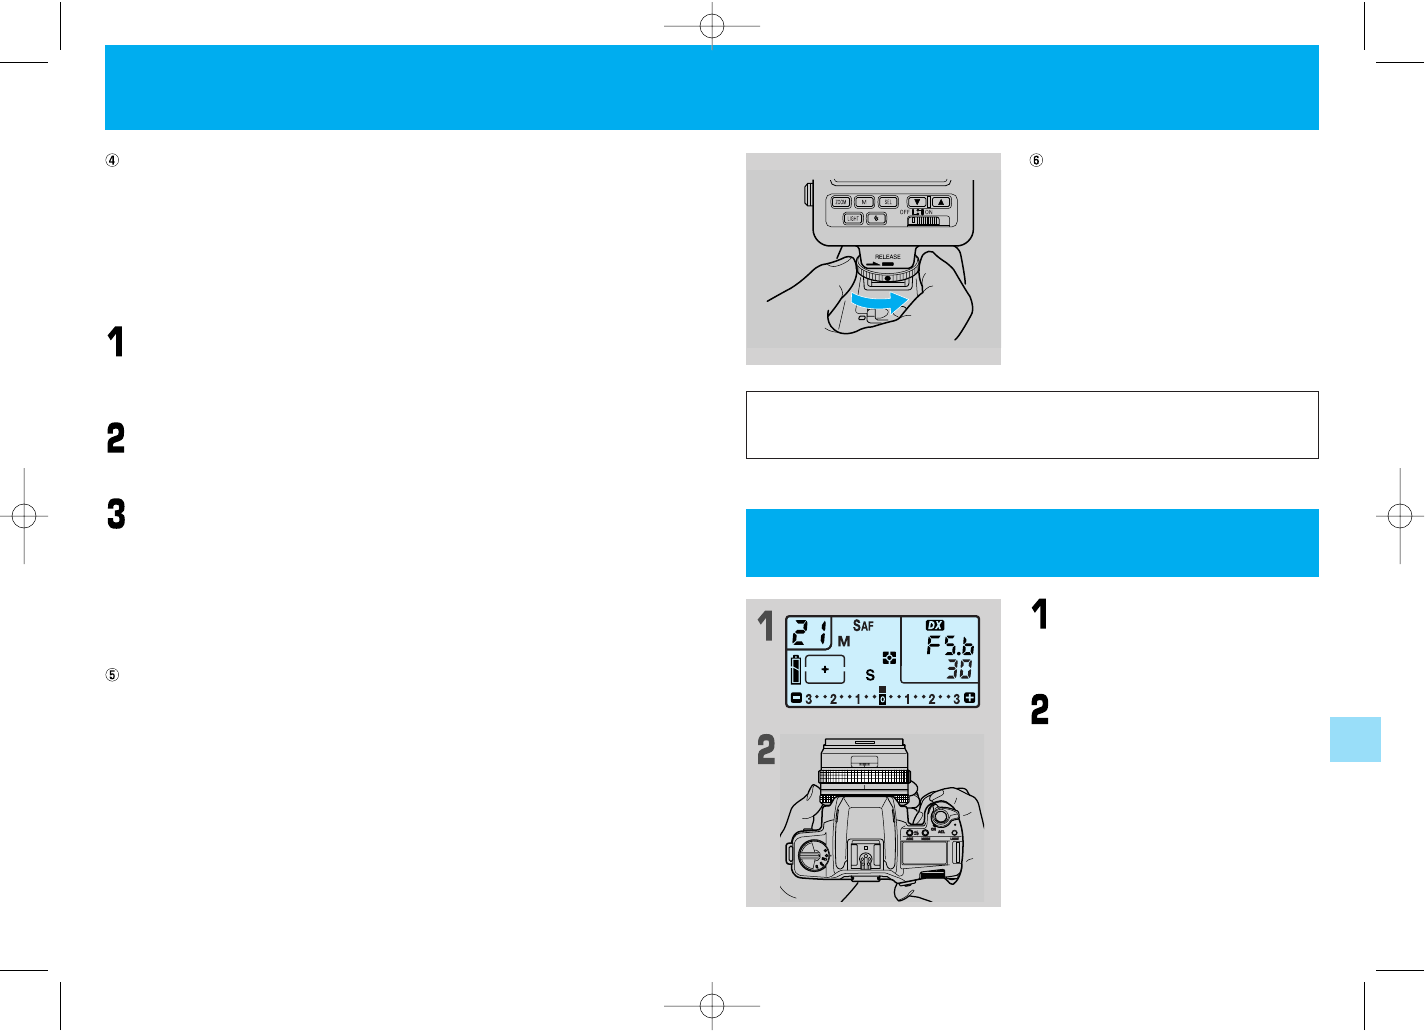
FOCUSING
SELECTING THE METERING MODE
APPLIED PHOTOGRAPHIC
TECHNIQUES
FLASH PHOTOGRAPHY
CUSTOM FUNCTIONS
REFERENCE
MAIN ACCESSORIES
6 7
Safety warnings ....................................................2
Cautions in Handling ............................................2
1. Fitting the strap and viewfinder shade
adapter............................................................14
2. Fitting the eye cup/diopter correction lens......15
1. Main switch .....................................................26
2. Shutter release button ....................................27
3. Position dial.....................................................28
Using the “ ”(green) setting on the
position dial.....................................................36
1. Selecting focus frames ...................................39
1. Types of metering modes and their features ..48
1. Autoexposure photography
<1. Taking photographs with the aperture
priority mode “Av” (aperture priority auto
exposure)> ...............................................51
<2. Taking photographs with shutter speed
priority settings “Tv” (shutter priority auto
exposure) mode> .....................................52
<3. Taking photographs in the program auto
mode “P” (program auto exposure)
mode> ......................................................53
1. Taking photographs using the internal flash ...72
2. Taking photographs using a Contax TLA flash..76
1. List of custom functions ..................................87
1. Basic information on photography ..................91
1. Contax Data back D-11...................................96
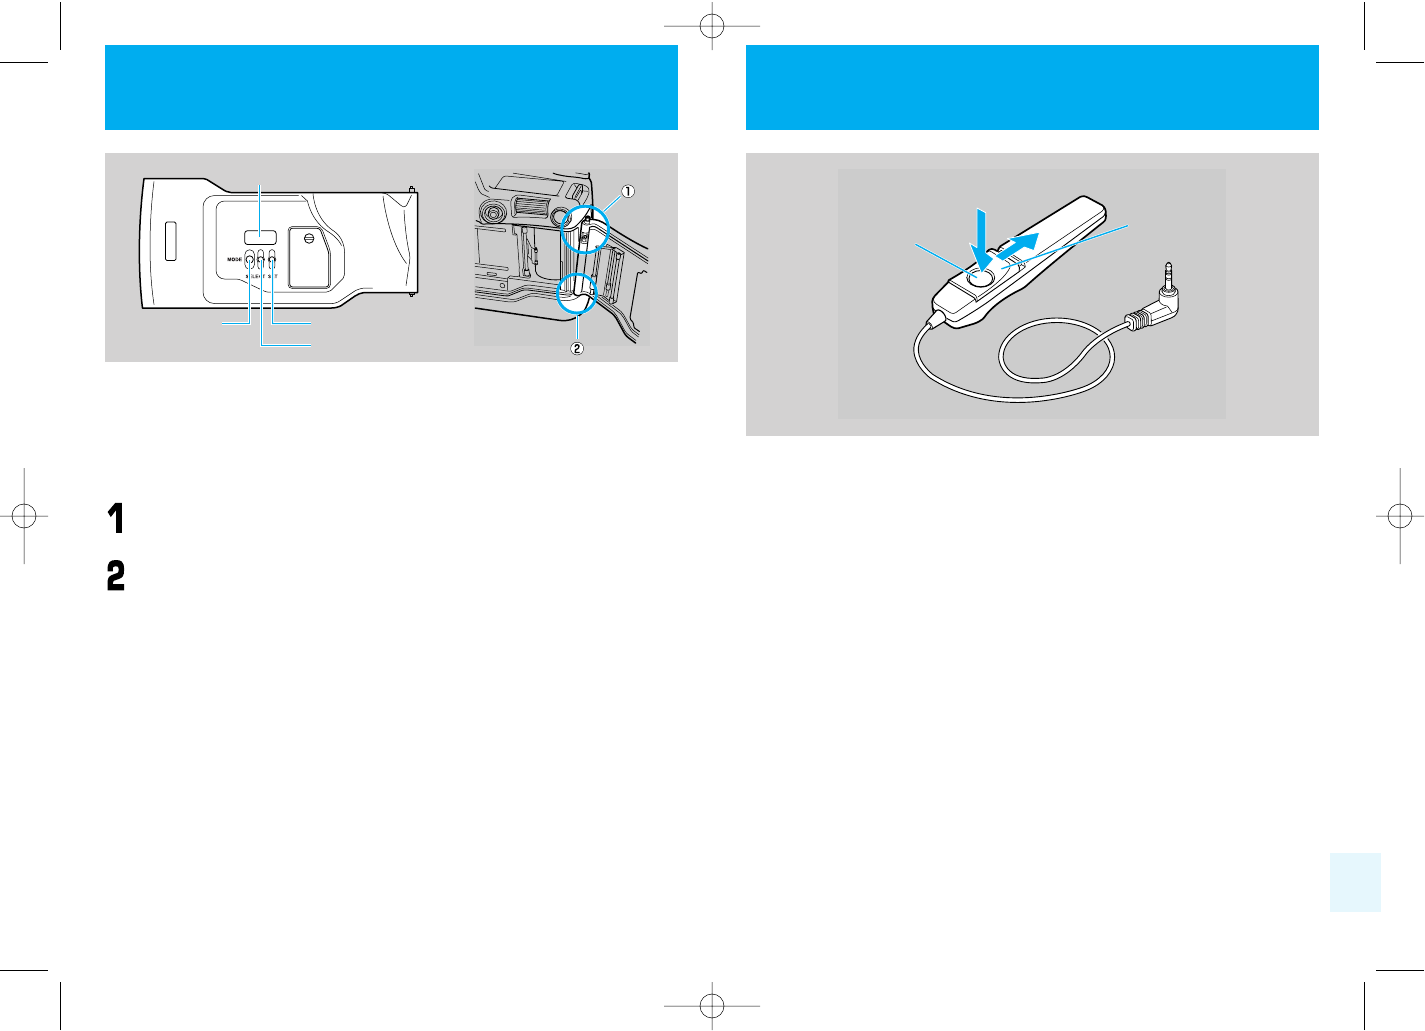
2. Contax Cable switch LA type..........................97
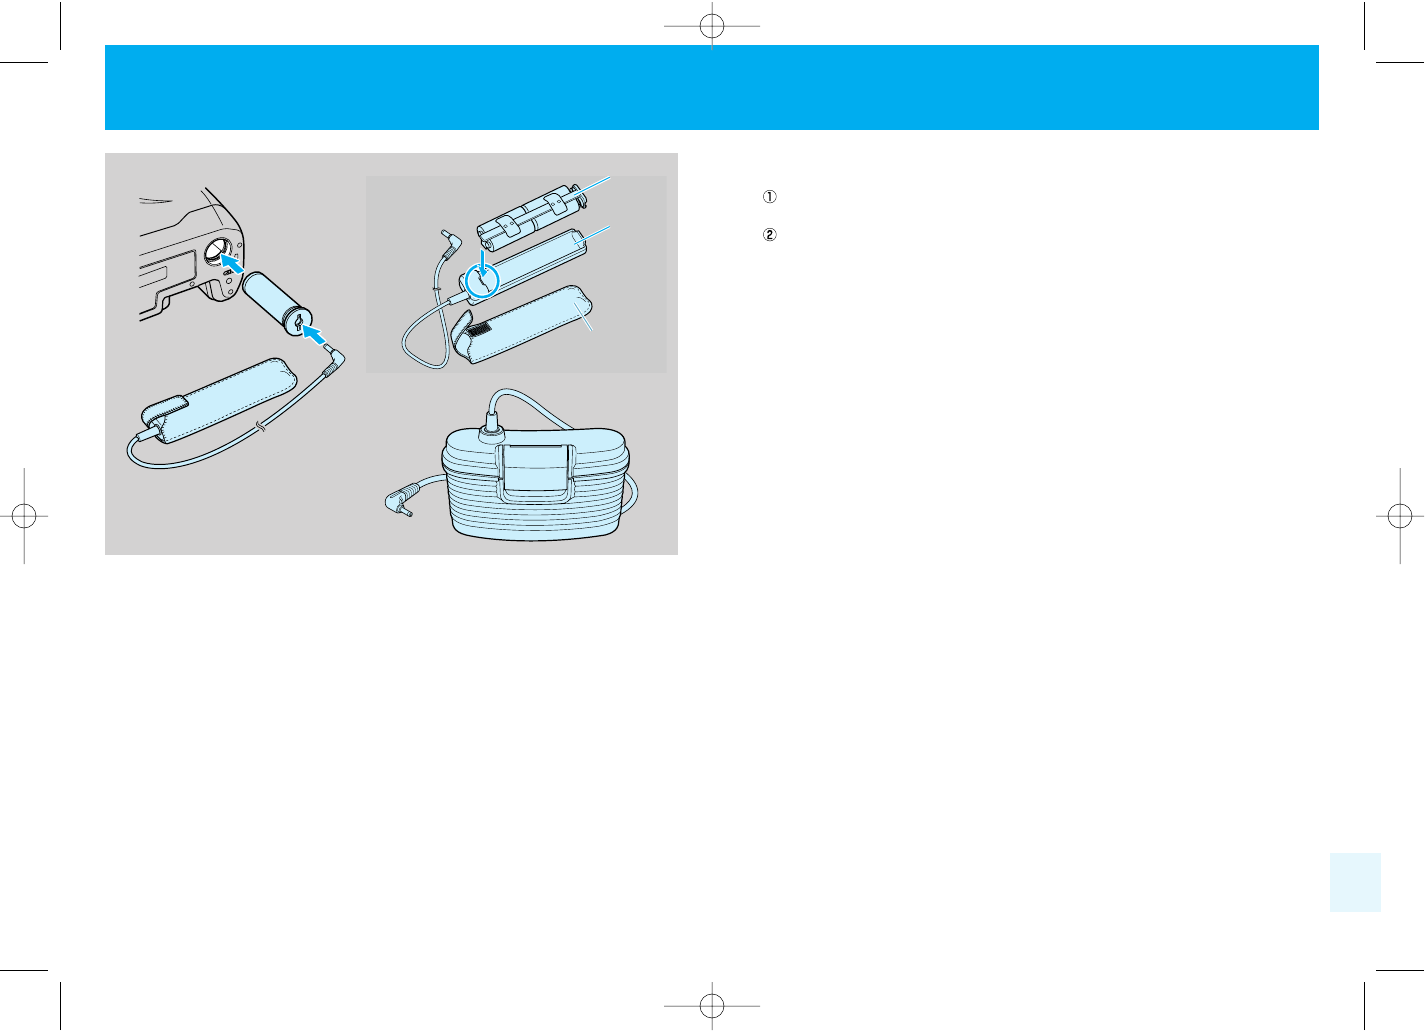
3. Contax Power pack P-8, P-8D........................98
Names of Parts........................................8
3. Inserting the batteries and checking
the battery power...............................16
4. Mounting and removing lenses..........18
5. Holding the camera............................19
4. F and R dials .....................................29
5. Mode button and mode details ..........30
6. Selecting the mode ............................31
2. Focusing in the autofocus mode .......40
2. Metering range...................................49
2. Manual exposure photography
<1. Taking photographs with the
exposure set manually “M”
(manual exposure) mode> ..........55
<2. Using the bulb exposure
mode> .........................................57
3. Taking photographs with exposure com-
pensation
<1. Setting exposure compensation
manually (with Av, Tv, P)>...........58
3. Taking photographs using other
flashes with the X contact..................81
2. Setting custom functions ...................89
2. Troubleshooting .................................92
4. Contax Power pack adapter GP-1...101
5. Contax Mount adapter NAM-1.........102
6. Contax Flexible case C-9 ................103
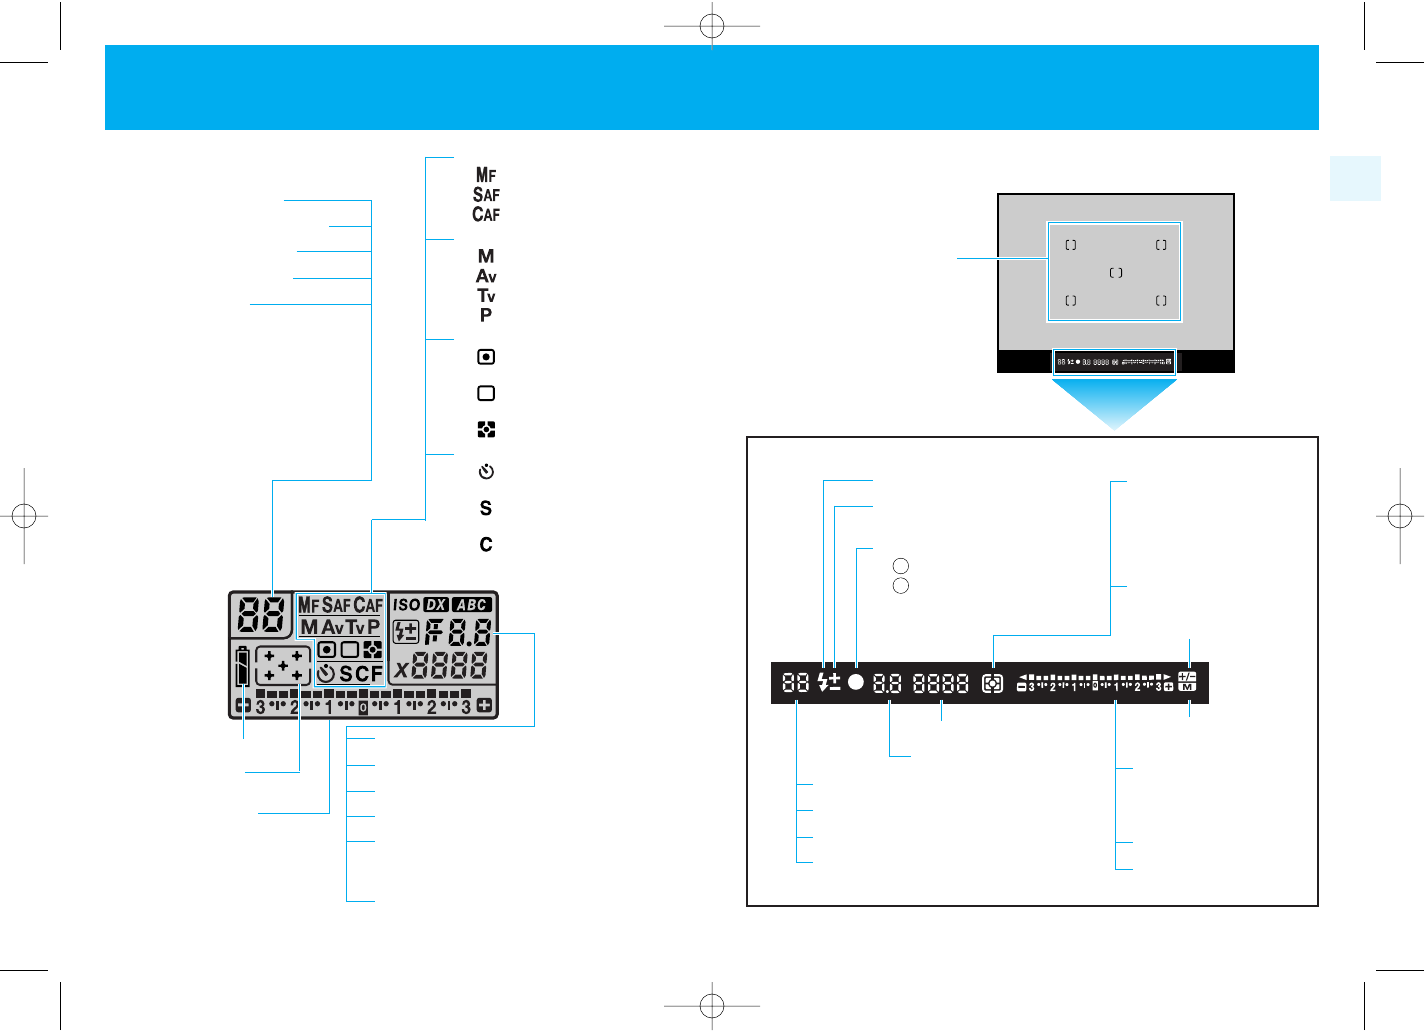
Display Panel and Viewfinder Display...10
6. Loading film .......................................20
7. Setting the film speed manually.........23
8. Removing film ....................................24
7. ABC/ button..................................33
8. Focus button ......................................33
9. Sync switch........................................33
4. Focusing manually.............................44
<2. Taking photographs with the AE
lock>............................................60
<3. Taking photographs with the
Exposure Autobracketing Expoure
Mode (ABC Exposure mode)> ....62
4. Using the selftimer .............................65
5. Date and time imprinting....................66
6. Checking the depth of field ................68
7. Cable switch socket ...........................69
8. Replacing the camera back ...............69
4. Flash photography techniques ..........82
3. Shutter speed and aperture value
display................................................94
Main specifications ..............................104
CONTENTS