574435
921
Verklein
Vergroot
Pagina terug
1/1049
Pagina verder
MG7500 series
Online Manual
Read Me First
Useful Functions Available on the Machine
Overview of the Machine
Printing
Copying
Scanning
Troubleshooting
English
Contents
Read Me First. . . . . . . . . . . . . . . . . . . . . . . . . . . . . . . . . . . . . . . . . . . . . . . . . . . 18
How to Use the Online Manual. . . . . . . . . . . . . . . . . . . . . . . . . . . . . . . . . . . . . . 19
Trademarks and Licenses. . . . . . . . . . . . . . . . . . . . . . . . . . . . . . . . . . . . . . . . . . 20
Search Tips. . . . . . . . . . . . . . . . . . . . . . . . . . . . . . . . . . . . . . . . . . . . . . . . . . . . . 24
Notes on Operation Explanations. . . . . . . . . . . . . . . . . . . . . . . . . . . . . . . . . . . . 26
Useful Functions Available on the Machine. . . . . . . . . . . . . . . . . . . . . . . . . . . . . 27
Connect Wirelessly with Ease in "Access Point Mode". . . . . . . . . . . . . . . . . . . . . . . . . . . 28
Print Photos Easily Using My Image Garden. . . . . . . . . . . . . . . . . . . . . . . . . . . . . . . . . . . 29
Create and Print Personalized Disc Labels (CD/DVD/BD) Easily and Beautifully. . . . . . . 31
Download a Variety of Content Materials. . . . . . . . . . . . . . . . . . . . . . . . . . . . . . . . . . . . . . 32
Print Items with Easy-PhotoPrint+ (Web Application). . . . . . . . . . . . . . . . . . . . . . . . . . . . . 33
Print Photos on Facebook Easily Using a Facebook App "Print Your Days". . . . . . . . . . . 34
Print/Scan by Placing a Smartphone over the Machine. . . . . . . . . . . . . . . . . . . . . . . . . . . 35
Connection Methods Available on the Machine. . . . . . . . . . . . . . . . . . . . . . . . . . . . . . . . . 37
Connection without Using an Access Point (Windows XP). . . . . . . . . . . . . . . . . . . . . . . . . . . . . . . . . . . 39
Restrictions. . . . . . . . . . . . . . . . . . . . . . . . . . . . . . . . . . . . . . . . . . . . . . . . . . . . . . . . . . . . . . . . . . . . . . . 42
Notice for Web Service Printing. . . . . . . . . . . . . . . . . . . . . . . . . . . . . . . . . . . . . . . . . . . . . 44
Use PIXMA Cloud Link. . . . . . . . . . . . . . . . . . . . . . . . . . . . . . . . . . . . . . . . . . . . . . . . . . . . 46
Using PIXMA Cloud Link from Your Printer. . . . . . . . . . . . . . . . . . . . . . . . . . . . . . . . . . . . . . . . . . . . . . . 47
Before Using PIXMA Cloud Link from Your Printer. . . . . . . . . . . . . . . . . . . . . . . . . . . . . . . . . . . . . 48
Preparing to Use PIXMA Cloud Link from Your Printer. . . . . . . . . . . . . . . . . . . . . . . . . . . . . . . . . . 49
Application Management. . . . . . . . . . . . . . . . . . . . . . . . . . . . . . . . . . . . . . . . . . . . . . . . . . . . . 52
Using PIXMA Cloud Link. . . . . . . . . . . . . . . . . . . . . . . . . . . . . . . . . . . . . . . . . . . . . . . . . . . . . . . . . 57
Cloud Windows. . . . . . . . . . . . . . . . . . . . . . . . . . . . . . . . . . . . . . . . . . . . . . . . . . . . . . . . . . . . 60
Cloud Troubleshooting. . . . . . . . . . . . . . . . . . . . . . . . . . . . . . . . . . . . . . . . . . . . . . . . . . . . . . . . . . . 63
Using PIXMA Cloud Link from Your Smartphone, Tablet, or Computer. . . . . . . . . . . . . . . . . . . . . . . . . 64
Before Using Canon Inkjet Cloud Printing Center. . . . . . . . . . . . . . . . . . . . . . . . . . . . . . . . . . . . . . 65
Requirements for Canon Inkjet Cloud Printing Center operation. . . . . . . . . . . . . . . . . . . . . . . 66
Preparations Before Using Canon Inkjet Cloud Printing Center. . . . . . . . . . . . . . . . . . . . . . . . . . . 68
Printing Your Printer registration ID. . . . . . . . . . . . . . . . . . . . . . . . . . . . . . . . . . . . . . . . . . . . . 76
Canon Inkjet Cloud Printing Center window. . . . . . . . . . . . . . . . . . . . . . . . . . . . . . . . . . . . . . 77
Using Canon Inkjet Cloud Printing Center. . . . . . . . . . . . . . . . . . . . . . . . . . . . . . . . . . . . . . . . . . . . 93
Adding a Printer. . . . . . . . . . . . . . . . . . . . . . . . . . . . . . . . . . . . . . . . . . . . . . . . . . . . . . . . . . . . . . . . 97
Troubleshooting Canon Inkjet Cloud Printing Center. . . . . . . . . . . . . . . . . . . . . . . . . . . . . . . . . . . 99
Printing with Google Cloud Print. . . . . . . . . . . . . . . . . . . . . . . . . . . . . . . . . . . . . . . . . . . . 101
Preparations for Printing with Google Cloud Print. . . . . . . . . . . . . . . . . . . . . . . . . . . . . . . . . . . . . . . . . 102
Printing from Computer or Smartphone with Google Cloud Print. . . . . . . . . . . . . . . . . . . . . . . . . . . . . 105
Printing from AirPrint Compliant Device. . . . . . . . . . . . . . . . . . . . . . . . . . . . . . . . . . . . . . 107
Checking Printer Information. . . . . . . . . . . . . . . . . . . . . . . . . . . . . . . . . . . . . . . . . . . . . . 112
Online Storage Integration Function. . . . . . . . . . . . . . . . . . . . . . . . . . . . . . . . . . . . . . . . . 114
How to Use Print from E-mail. . . . . . . . . . . . . . . . . . . . . . . . . . . . . . . . . . . . . . . . . . . . . . 115
Preparing to Use Print from E-mail. . . . . . . . . . . . . . . . . . . . . . . . . . . . . . . . . . . . . . . . . . . . . . . . . . . . 119
Timezone List. . . . . . . . . . . . . . . . . . . . . . . . . . . . . . . . . . . . . . . . . . . . . . . . . . . . . . . . . . . . . . . . . . . . . 122
Print Easily from a Smartphone or Tablet with PIXMA Printing Solutions. . . . . . . . . . . . 123
Printing with Windows RT. . . . . . . . . . . . . . . . . . . . . . . . . . . . . . . . . . . . . . . . . . . . . . . . . 124
Overview of the Machine. . . . . . . . . . . . . . . . . . . . . . . . . . . . . . . . . . . . . . . . . . 125
Safety Guide. . . . . . . . . . . . . . . . . . . . . . . . . . . . . . . . . . . . . . . . . . . . . . . . . . . . . . . . . . . 126
Safety Precautions. . . . . . . . . . . . . . . . . . . . . . . . . . . . . . . . . . . . . . . . . . . . . . . . . . . . . . . . . . . . . . . . . 127
Regulatory and Safety Information. . . . . . . . . . . . . . . . . . . . . . . . . . . . . . . . . . . . . . . . . . . . . . . . . . . . 128
Main Components and Basic Operations. . . . . . . . . . . . . . . . . . . . . . . . . . . . . . . . . . . . . 132
Main Components. . . . . . . . . . . . . . . . . . . . . . . . . . . . . . . . . . . . . . . . . . . . . . . . . . . . . . . . . . . . . . . . . 133
Front View. . . . . . . . . . . . . . . . . . . . . . . . . . . . . . . . . . . . . . . . . . . . . . . . . . . . . . . . . . . . . . . . . . . 134
Rear View. . . . . . . . . . . . . . . . . . . . . . . . . . . . . . . . . . . . . . . . . . . . . . . . . . . . . . . . . . . . . . . . . . . 136
Inside View. . . . . . . . . . . . . . . . . . . . . . . . . . . . . . . . . . . . . . . . . . . . . . . . . . . . . . . . . . . . . . . . . . 137
Operation Panel. . . . . . . . . . . . . . . . . . . . . . . . . . . . . . . . . . . . . . . . . . . . . . . . . . . . . . . . . . . . . . . 138
About the Power Supply of the Machine. . . . . . . . . . . . . . . . . . . . . . . . . . . . . . . . . . . . . . . . . . . . . . . . 140
Confirming that the Power Is On. . . . . . . . . . . . . . . . . . . . . . . . . . . . . . . . . . . . . . . . . . . . . . . . . . 141
Turning the Machine On and Off. . . . . . . . . . . . . . . . . . . . . . . . . . . . . . . . . . . . . . . . . . . . . . . . . . 142
Notice for the Power Plug/Power Cord. . . . . . . . . . . . . . . . . . . . . . . . . . . . . . . . . . . . . . . . . . . . . 144
Notice for Unplugging the Power Cord. . . . . . . . . . . . . . . . . . . . . . . . . . . . . . . . . . . . . . . . . . . . . 145
Using the Operation Panel. . . . . . . . . . . . . . . . . . . . . . . . . . . . . . . . . . . . . . . . . . . . . . . . . . . . . . . . . . . 146
Loading Paper / Originals. . . . . . . . . . . . . . . . . . . . . . . . . . . . . . . . . . . . . . . . . . . . . . . . . 151
Loading Paper. . . . . . . . . . . . . . . . . . . . . . . . . . . . . . . . . . . . . . . . . . . . . . . . . . . . . . . . . . . . . . . . . . . . 152
Paper Sources to Load Paper. . . . . . . . . . . . . . . . . . . . . . . . . . . . . . . . . . . . . . . . . . . . . . . . . . . . 153
Loading Small Size Paper. . . . . . . . . . . . . . . . . . . . . . . . . . . . . . . . . . . . . . . . . . . . . . . . . . . . . . . 155
Loading Large Size Paper. . . . . . . . . . . . . . . . . . . . . . . . . . . . . . . . . . . . . . . . . . . . . . . . . . . . . . . 159
Loading Envelopes. . . . . . . . . . . . . . . . . . . . . . . . . . . . . . . . . . . . . . . . . . . . . . . . . . . . . . . . . . . . 164
Media Types You Can Use. . . . . . . . . . . . . . . . . . . . . . . . . . . . . . . . . . . . . . . . . . . . . . . . . . . . . . 168
Paper Load Limit. . . . . . . . . . . . . . . . . . . . . . . . . . . . . . . . . . . . . . . . . . . . . . . . . . . . . . . . . . 171
Media Types You Cannot Use. . . . . . . . . . . . . . . . . . . . . . . . . . . . . . . . . . . . . . . . . . . . . . . . . . . . 173
Before Printing on Art Paper. . . . . . . . . . . . . . . . . . . . . . . . . . . . . . . . . . . . . . . . . . . . . . . . . . . . . 174
Printing Area. . . . . . . . . . . . . . . . . . . . . . . . . . . . . . . . . . . . . . . . . . . . . . . . . . . . . . . . . . . . . . . . . 176
Printing Area. . . . . . . . . . . . . . . . . . . . . . . . . . . . . . . . . . . . . . . . . . . . . . . . . . . . . . . . . . . . . 177
Other Sizes than Letter, Legal, Envelopes. . . . . . . . . . . . . . . . . . . . . . . . . . . . . . . . . . . . . . 178
Letter, Legal. . . . . . . . . . . . . . . . . . . . . . . . . . . . . . . . . . . . . . . . . . . . . . . . . . . . . . . . . . . . . . 179
Sizes for Art Paper. . . . . . . . . . . . . . . . . . . . . . . . . . . . . . . . . . . . . . . . . . . . . . . . . . . . . . . . . 180
Envelopes. . . . . . . . . . . . . . . . . . . . . . . . . . . . . . . . . . . . . . . . . . . . . . . . . . . . . . . . . . . . . . . 182
Printable Discs. . . . . . . . . . . . . . . . . . . . . . . . . . . . . . . . . . . . . . . . . . . . . . . . . . . . . . . . . . . . 183
Placing a Printable Disc. . . . . . . . . . . . . . . . . . . . . . . . . . . . . . . . . . . . . . . . . . . . . . . . . . . . . . . . . . . . . 184
Cautions When Printing on a Printable Disc. . . . . . . . . . . . . . . . . . . . . . . . . . . . . . . . . . . . . . . . . 185
Before Placing a Printable Disc. . . . . . . . . . . . . . . . . . . . . . . . . . . . . . . . . . . . . . . . . . . . . . . . . . . 186
Placing a Printable Disc. . . . . . . . . . . . . . . . . . . . . . . . . . . . . . . . . . . . . . . . . . . . . . . . . . . . . . . . . 187
Removing a Printable Disc. . . . . . . . . . . . . . . . . . . . . . . . . . . . . . . . . . . . . . . . . . . . . . . . . . . . . . 189
How to Detach / Attach the Disc Tray. . . . . . . . . . . . . . . . . . . . . . . . . . . . . . . . . . . . . . . . . . . . . . 191
Loading Originals. . . . . . . . . . . . . . . . . . . . . . . . . . . . . . . . . . . . . . . . . . . . . . . . . . . . . . . . . . . . . . . . . . 192
Loading Originals on the Platen Glass. . . . . . . . . . . . . . . . . . . . . . . . . . . . . . . . . . . . . . . . . . . . . 193
How to Load Originals for Each Function. . . . . . . . . . . . . . . . . . . . . . . . . . . . . . . . . . . . . . . . . . . 194
Originals You Can Load. . . . . . . . . . . . . . . . . . . . . . . . . . . . . . . . . . . . . . . . . . . . . . . . . . . . . . . . . 196
How to Detach / Attach the Document Cover. . . . . . . . . . . . . . . . . . . . . . . . . . . . . . . . . . . . . . . . 197
Inserting the Memory Card. . . . . . . . . . . . . . . . . . . . . . . . . . . . . . . . . . . . . . . . . . . . . . . . . . . . . . . . . . 198
Before Inserting the Memory Card. . . . . . . . . . . . . . . . . . . . . . . . . . . . . . . . . . . . . . . . . . . . . . . . . 199
Inserting the Memory Card. . . . . . . . . . . . . . . . . . . . . . . . . . . . . . . . . . . . . . . . . . . . . . . . . . . . . . 201
Removing the Memory Card. . . . . . . . . . . . . . . . . . . . . . . . . . . . . . . . . . . . . . . . . . . . . . . . . . . . . 203
Replacing an Ink Tank. . . . . . . . . . . . . . . . . . . . . . . . . . . . . . . . . . . . . . . . . . . . . . . . . . . 204
Replacing an Ink Tank. . . . . . . . . . . . . . . . . . . . . . . . . . . . . . . . . . . . . . . . . . . . . . . . . . . . . . . . . . . . . . 205
Checking the Ink Status from Your Computer. . . . . . . . . . . . . . . . . . . . . . . . . . . . . . . . . . . . . . . . . . . . 210
Checking the Ink Status. . . . . . . . . . . . . . . . . . . . . . . . . . . . . . . . . . . . . . . . . . . . . . . . . . . . . . . . . . . . . 211
Checking the Ink Status with the Touch Screen on the Machine. . . . . . . . . . . . . . . . . . . . . . . . . 212
Checking the Ink Status with the Ink Lamps. . . . . . . . . . . . . . . . . . . . . . . . . . . . . . . . . . . . . . . . . 213
Maintenance. . . . . . . . . . . . . . . . . . . . . . . . . . . . . . . . . . . . . . . . . . . . . . . . . . . . . . . . . . . 215
When Printing Becomes Faint or Colors Are Incorrect. . . . . . . . . . . . . . . . . . . . . . . . . . . . . . . . . . . . . 216
Maintenance Procedure. . . . . . . . . . . . . . . . . . . . . . . . . . . . . . . . . . . . . . . . . . . . . . . . . . . . . . . . . 217
Printing the Nozzle Check Pattern. . . . . . . . . . . . . . . . . . . . . . . . . . . . . . . . . . . . . . . . . . . . . . . . . 219
Examining the Nozzle Check Pattern. . . . . . . . . . . . . . . . . . . . . . . . . . . . . . . . . . . . . . . . . . . . . . 221
Cleaning the Print Head. . . . . . . . . . . . . . . . . . . . . . . . . . . . . . . . . . . . . . . . . . . . . . . . . . . . . . . . . 223
Cleaning the Print Head Deeply. . . . . . . . . . . . . . . . . . . . . . . . . . . . . . . . . . . . . . . . . . . . . . . . . . 225
Aligning the Print Head. . . . . . . . . . . . . . . . . . . . . . . . . . . . . . . . . . . . . . . . . . . . . . . . . . . . . . . . . 227
Aligning the Print Head Manually. . . . . . . . . . . . . . . . . . . . . . . . . . . . . . . . . . . . . . . . . . . . . . . . . . 229
Performing Maintenance from a Computer. . . . . . . . . . . . . . . . . . . . . . . . . . . . . . . . . . . . . . . . . . . . . . 234
Cleaning the Print Heads from Your Computer. . . . . . . . . . . . . . . . . . . . . . . . . . . . . . . . . . . . . . . 235
Aligning the Print Head Position from Your Computer. . . . . . . . . . . . . . . . . . . . . . . . . . . . . . . . . . 237
Aligning the Print Head Position Manually from Your Computer. . . . . . . . . . . . . . . . . . . . . . . . . . 239
Use Your Computer to Print a Nozzle Check Pattern. . . . . . . . . . . . . . . . . . . . . . . . . . . . . . . . . . 243
Cleaning the Machine. . . . . . . . . . . . . . . . . . . . . . . . . . . . . . . . . . . . . . . . . . . . . . . . . . . . . . . . . . . . . . 244
Cleaning the Exterior of the Machine. . . . . . . . . . . . . . . . . . . . . . . . . . . . . . . . . . . . . . . . . . . . . . . 245
Cleaning the Platen Glass and Document Cover. . . . . . . . . . . . . . . . . . . . . . . . . . . . . . . . . . . . . 246
Cleaning the Paper Feed Roller. . . . . . . . . . . . . . . . . . . . . . . . . . . . . . . . . . . . . . . . . . . . . . . . . . 247
Cleaning the Inside of the Machine (Bottom Plate Cleaning). . . . . . . . . . . . . . . . . . . . . . . . . . . . 249
Cleaning the Pad in the Cassette. . . . . . . . . . . . . . . . . . . . . . . . . . . . . . . . . . . . . . . . . . . . . . . . . 251
Changing the Machine Settings. . . . . . . . . . . . . . . . . . . . . . . . . . . . . . . . . . . . . . . . . . . . 252
Changing Machine Settings from Your Computer. . . . . . . . . . . . . . . . . . . . . . . . . . . . . . . . . . . . . . . . . 253
Changing the Print Options. . . . . . . . . . . . . . . . . . . . . . . . . . . . . . . . . . . . . . . . . . . . . . . . . . . . . . 254
Registering a Frequently Used Printing Profile. . . . . . . . . . . . . . . . . . . . . . . . . . . . . . . . . . . . . . . 255
Managing the Printer Power. . . . . . . . . . . . . . . . . . . . . . . . . . . . . . . . . . . . . . . . . . . . . . . . . . . . . 257
Reducing the Printer Noise. . . . . . . . . . . . . . . . . . . . . . . . . . . . . . . . . . . . . . . . . . . . . . . . . . . . . . 259
Changing the Printer Operation Mode. . . . . . . . . . . . . . . . . . . . . . . . . . . . . . . . . . . . . . . . . . . . . . 261
Changing the Machine Settings Using the Operation Panel. . . . . . . . . . . . . . . . . . . . . . . . . . . . . . . . . 263
Changing the Machine Settings Using the Operation Panel. . . . . . . . . . . . . . . . . . . . . . . . . . . . . 264
Print settings. . . . . . . . . . . . . . . . . . . . . . . . . . . . . . . . . . . . . . . . . . . . . . . . . . . . . . . . . . . . . . . . . 266
LAN settings. . . . . . . . . . . . . . . . . . . . . . . . . . . . . . . . . . . . . . . . . . . . . . . . . . . . . . . . . . . . . . . . . 268
Device user settings. . . . . . . . . . . . . . . . . . . . . . . . . . . . . . . . . . . . . . . . . . . . . . . . . . . . . . . . . . . 273
PictBridge print settings. . . . . . . . . . . . . . . . . . . . . . . . . . . . . . . . . . . . . . . . . . . . . . . . . . . . . . . . . 274
Language selection. . . . . . . . . . . . . . . . . . . . . . . . . . . . . . . . . . . . . . . . . . . . . . . . . . . . . . . . . . . . 277
Home screen background color. . . . . . . . . . . . . . . . . . . . . . . . . . . . . . . . . . . . . . . . . . . . . . . . . . . 278
Firmware update. . . . . . . . . . . . . . . . . . . . . . . . . . . . . . . . . . . . . . . . . . . . . . . . . . . . . . . . . . . . . . 279
Cassette settings. . . . . . . . . . . . . . . . . . . . . . . . . . . . . . . . . . . . . . . . . . . . . . . . . . . . . . . . . . . . . . 280
Reset setting. . . . . . . . . . . . . . . . . . . . . . . . . . . . . . . . . . . . . . . . . . . . . . . . . . . . . . . . . . . . . . . . . 281
About ECO settings. . . . . . . . . . . . . . . . . . . . . . . . . . . . . . . . . . . . . . . . . . . . . . . . . . . . . . . . . . . . 282
About Quiet setting. . . . . . . . . . . . . . . . . . . . . . . . . . . . . . . . . . . . . . . . . . . . . . . . . . . . . . . . . . . . 284
Using the Machine with the Access Point Mode. . . . . . . . . . . . . . . . . . . . . . . . . . . . . . . . . . . . . . 285
Setting Up the Card Slot as the Memory Card Drive of the Computer. . . . . . . . . . . . . . . . . . . . . . . . . 289
Setting Up the Card Slot as the Memory Card Drive of the Computer. . . . . . . . . . . . . . . . . . . . . 290
Information about Network Connection. . . . . . . . . . . . . . . . . . . . . . . . . . . . . . . . . . . . . . 292
Useful Information about Network Connection. . . . . . . . . . . . . . . . . . . . . . . . . . . . . . . . . . . . . . . . . . . 293
Default Values Set at Factory (Network). . . . . . . . . . . . . . . . . . . . . . . . . . . . . . . . . . . . . . . . . . . . 294
Connecting the Machine to the Computer Using a USB Cable. . . . . . . . . . . . . . . . . . . . . . . . . . . 295
When Detecting the Printers Have the Same Name during Setup. . . . . . . . . . . . . . . . . . . . . . . . 296
Connecting to Other Computer with LAN/Changing the Connection Method from USB to LAN. . 297
Printing Out Network Setting Information. . . . . . . . . . . . . . . . . . . . . . . . . . . . . . . . . . . . . . . . . . . 298
About Network Communication. . . . . . . . . . . . . . . . . . . . . . . . . . . . . . . . . . . . . . . . . . . . 301
Changing and Confirming Network Settings. . . . . . . . . . . . . . . . . . . . . . . . . . . . . . . . . . . . . . . . . . . . . 302
IJ Network Tool. . . . . . . . . . . . . . . . . . . . . . . . . . . . . . . . . . . . . . . . . . . . . . . . . . . . . . . . . . . . . . . 303
Changing the Settings in the Wireless LAN Sheet. . . . . . . . . . . . . . . . . . . . . . . . . . . . . . . . . . . . 304
Changing the WEP Detailed Settings. . . . . . . . . . . . . . . . . . . . . . . . . . . . . . . . . . . . . . . . . . . . . . 306
Changing the WPA/WPA2 Detailed Settings. . . . . . . . . . . . . . . . . . . . . . . . . . . . . . . . . . . . . . . . . 308
Changing the Settings in the Wired LAN Sheet. . . . . . . . . . . . . . . . . . . . . . . . . . . . . . . . . . . . . . . 311
Changing the Settings in the Admin Password Sheet. . . . . . . . . . . . . . . . . . . . . . . . . . . . . . . . . . 312
Monitoring Wireless Network Status. . . . . . . . . . . . . . . . . . . . . . . . . . . . . . . . . . . . . . . . . . . . . . . 313
Initializing the Network Settings of the Machine. . . . . . . . . . . . . . . . . . . . . . . . . . . . . . . . . . . . . . 316
Viewing the Modified Settings. . . . . . . . . . . . . . . . . . . . . . . . . . . . . . . . . . . . . . . . . . . . . . . . . . . . 317
Screens for Network Connection of IJ Network Tool. . . . . . . . . . . . . . . . . . . . . . . . . . . . . . . . . . . . . . . 318
Canon IJ Network Tool Screen. . . . . . . . . . . . . . . . . . . . . . . . . . . . . . . . . . . . . . . . . . . . . . . . . . . 319
Configuration Screen. . . . . . . . . . . . . . . . . . . . . . . . . . . . . . . . . . . . . . . . . . . . . . . . . . . . . . . . . . . 323
Wireless LAN Sheet. . . . . . . . . . . . . . . . . . . . . . . . . . . . . . . . . . . . . . . . . . . . . . . . . . . . . . . . . . . . 324
Search Screen. . . . . . . . . . . . . . . . . . . . . . . . . . . . . . . . . . . . . . . . . . . . . . . . . . . . . . . . . . . . . . . . 326
WEP Details Screen. . . . . . . . . . . . . . . . . . . . . . . . . . . . . . . . . . . . . . . . . . . . . . . . . . . . . . . . . . . 328
WPA/WPA2 Details Screen. . . . . . . . . . . . . . . . . . . . . . . . . . . . . . . . . . . . . . . . . . . . . . . . . . . . . . 329
Authentication Type Confirmation Screen. . . . . . . . . . . . . . . . . . . . . . . . . . . . . . . . . . . . . . . . . . . 330
PSK:Passphrase and Dynamic Encryption Setup Screen. . . . . . . . . . . . . . . . . . . . . . . . . . . . . . . 331
Setup Information Confirmation Screen. . . . . . . . . . . . . . . . . . . . . . . . . . . . . . . . . . . . . . . . . . . . . 332
Wired LAN Sheet. . . . . . . . . . . . . . . . . . . . . . . . . . . . . . . . . . . . . . . . . . . . . . . . . . . . . . . . . . . . . . 333
Admin Password Sheet. . . . . . . . . . . . . . . . . . . . . . . . . . . . . . . . . . . . . . . . . . . . . . . . . . . . . . . . . 334
Network Information Screen. . . . . . . . . . . . . . . . . . . . . . . . . . . . . . . . . . . . . . . . . . . . . . . . . . . . . 335
Access Control Sheet. . . . . . . . . . . . . . . . . . . . . . . . . . . . . . . . . . . . . . . . . . . . . . . . . . . . . . . . . . 336
Edit Accessible MAC Address Screen/Add Accessible MAC Address Screen. . . . . . . . . . . . . . . 340
Edit Accessible IP Address Screen/Add Accessible IP Address Screen. . . . . . . . . . . . . . . . . . . . 341
Other Screens of IJ Network Tool. . . . . . . . . . . . . . . . . . . . . . . . . . . . . . . . . . . . . . . . . . . . . . . . . . . . . 342
Canon IJ Network Tool Screen. . . . . . . . . . . . . . . . . . . . . . . . . . . . . . . . . . . . . . . . . . . . . . . . . . . 343
Status Screen. . . . . . . . . . . . . . . . . . . . . . . . . . . . . . . . . . . . . . . . . . . . . . . . . . . . . . . . . . . . . . . . 347
Connection Performance Measurement Screen. . . . . . . . . . . . . . . . . . . . . . . . . . . . . . . . . . . . . . 348
Maintenance Screen. . . . . . . . . . . . . . . . . . . . . . . . . . . . . . . . . . . . . . . . . . . . . . . . . . . . . . . . . . . 350
Network Setup of the Card Slot Screen. . . . . . . . . . . . . . . . . . . . . . . . . . . . . . . . . . . . . . . . . . . . . 351
Associate Port Screen. . . . . . . . . . . . . . . . . . . . . . . . . . . . . . . . . . . . . . . . . . . . . . . . . . . . . . . . . . 353
Network Information Screen. . . . . . . . . . . . . . . . . . . . . . . . . . . . . . . . . . . . . . . . . . . . . . . . . . . . . 354
Appendix for Network Communication. . . . . . . . . . . . . . . . . . . . . . . . . . . . . . . . . . . . . . . . . . . . . . . . . . 355
Using the Card Slot over a Network. . . . . . . . . . . . . . . . . . . . . . . . . . . . . . . . . . . . . . . . . . . . . . . 356
When the Printer Driver Is Not Associated with a Port. . . . . . . . . . . . . . . . . . . . . . . . . . . . . . . . . 358
About Technical Terms. . . . . . . . . . . . . . . . . . . . . . . . . . . . . . . . . . . . . . . . . . . . . . . . . . . . . . . . . 359
Restrictions. . . . . . . . . . . . . . . . . . . . . . . . . . . . . . . . . . . . . . . . . . . . . . . . . . . . . . . . . . . . . . . . . . 366
About Firewall. . . . . . . . . . . . . . . . . . . . . . . . . . . . . . . . . . . . . . . . . . . . . . . . . . . . . . . . . . . . . . . . 367
Tips for Ensuring Optimal Printing Quality. . . . . . . . . . . . . . . . . . . . . . . . . . . . . . . . . . . . 368
Useful Information about Ink. . . . . . . . . . . . . . . . . . . . . . . . . . . . . . . . . . . . . . . . . . . . . . . . . . . . . . . . . 369
Key Points to Successful Printing. . . . . . . . . . . . . . . . . . . . . . . . . . . . . . . . . . . . . . . . . . . . . . . . . . . . . 371
Be Sure to Check Paper Settings before Printing. . . . . . . . . . . . . . . . . . . . . . . . . . . . . . . . . . . . . . . . . 372
Be Sure to Set Cassette Paper Information after Loading Paper. . . . . . . . . . . . . . . . . . . . . . . . . . . . . 373
Canceling a Print Job. . . . . . . . . . . . . . . . . . . . . . . . . . . . . . . . . . . . . . . . . . . . . . . . . . . . . . . . . . . . . . . 374
Key to Enjoying Consistent Printing Quality. . . . . . . . . . . . . . . . . . . . . . . . . . . . . . . . . . . . . . . . . . . . . . 375
Precautions for Safe Transport of the Machine. . . . . . . . . . . . . . . . . . . . . . . . . . . . . . . . . . . . . . . . . . . 376
Legal Limitations on Use of Your Product and Use of Images. . . . . . . . . . . . . . . . . . . . . 378
Specifications. . . . . . . . . . . . . . . . . . . . . . . . . . . . . . . . . . . . . . . . . . . . . . . . . . . . . . . . . . 379
About the Administrator Password. . . . . . . . . . . . . . . . . . . . . . . . . . . . . . . . . . 383
Printing. . . . . . . . . . . . . . . . . . . . . . . . . . . . . . . . . . . . . . . . . . . . . . . . . . . . . . . 384
Printing from a Computer. . . . . . . . . . . . . . . . . . . . . . . . . . . . . . . . . . . . . . . . . . . . . . . . . 385
Printing with Application Software that You are Using (Printer Driver). . . . . . . . . . . . . . . . . . . . . . . . . 386
Printing with Easy Setup. . . . . . . . . . . . . . . . . . . . . . . . . . . . . . . . . . . . . . . . . . . . . . . . . . . . . . . . 387
Paper Settings on the Printer Driver and the Printer (Media Type). . . . . . . . . . . . . . . . . . . . 390
Paper Settings on the Printer Driver and the Printer (Paper Size). . . . . . . . . . . . . . . . . . . . 391
Various Printing Methods. . . . . . . . . . . . . . . . . . . . . . . . . . . . . . . . . . . . . . . . . . . . . . . . . . . . . . . . 392
Setting a Page Size and Orientation. . . . . . . . . . . . . . . . . . . . . . . . . . . . . . . . . . . . . . . . . . . 393
Setting the Number of Copies and Printing Order. . . . . . . . . . . . . . . . . . . . . . . . . . . . . . . . . 394
Setting the Stapling Margin. . . . . . . . . . . . . . . . . . . . . . . . . . . . . . . . . . . . . . . . . . . . . . . . . . 396
Execute Borderless Printing. . . . . . . . . . . . . . . . . . . . . . . . . . . . . . . . . . . . . . . . . . . . . . . . . 398
Fit-to-Page Printing. . . . . . . . . . . . . . . . . . . . . . . . . . . . . . . . . . . . . . . . . . . . . . . . . . . . . . . . 401
Scaled Printing. . . . . . . . . . . . . . . . . . . . . . . . . . . . . . . . . . . . . . . . . . . . . . . . . . . . . . . . . . . . 403
Page Layout Printing. . . . . . . . . . . . . . . . . . . . . . . . . . . . . . . . . . . . . . . . . . . . . . . . . . . . . . . 406
Tiling/Poster Printing. . . . . . . . . . . . . . . . . . . . . . . . . . . . . . . . . . . . . . . . . . . . . . . . . . . . . . . 408
Booklet Printing. . . . . . . . . . . . . . . . . . . . . . . . . . . . . . . . . . . . . . . . . . . . . . . . . . . . . . . . . . . 411
Duplex Printing. . . . . . . . . . . . . . . . . . . . . . . . . . . . . . . . . . . . . . . . . . . . . . . . . . . . . . . . . . . 413
Stamp/Background Printing. . . . . . . . . . . . . . . . . . . . . . . . . . . . . . . . . . . . . . . . . . . . . . . . . . 417
Registering a Stamp. . . . . . . . . . . . . . . . . . . . . . . . . . . . . . . . . . . . . . . . . . . . . . . . . . . . . . . 420
Registering Image Data to be Used as a Background. . . . . . . . . . . . . . . . . . . . . . . . . . . . . . 423
Setting Up Envelope Printing. . . . . . . . . . . . . . . . . . . . . . . . . . . . . . . . . . . . . . . . . . . . . . . . . 426
Printing on Postcards. . . . . . . . . . . . . . . . . . . . . . . . . . . . . . . . . . . . . . . . . . . . . . . . . . . . . . . 428
Displaying the Print Results before Printing. . . . . . . . . . . . . . . . . . . . . . . . . . . . . . . . . . . . . 430
Setting Paper Dimensions (Custom Size). . . . . . . . . . . . . . . . . . . . . . . . . . . . . . . . . . . . . . . 431
Editing the Print Document or Reprinting from the Print History. . . . . . . . . . . . . . . . . . . . . . 433
Changing the Print Quality and Correcting Image Data. . . . . . . . . . . . . . . . . . . . . . . . . . . . . . . . . 436
Setting the Print Quality Level (Custom). . . . . . . . . . . . . . . . . . . . . . . . . . . . . . . . . . . . . . . . 437
Printing a Color Document in Monochrome. . . . . . . . . . . . . . . . . . . . . . . . . . . . . . . . . . . . . . 439
Adjusting Tone. . . . . . . . . . . . . . . . . . . . . . . . . . . . . . . . . . . . . . . . . . . . . . . . . . . . . . . . . . . . 441
Specifying Color Correction. . . . . . . . . . . . . . . . . . . . . . . . . . . . . . . . . . . . . . . . . . . . . . . . . . 443
Optimal Photo Printing of Image Data. . . . . . . . . . . . . . . . . . . . . . . . . . . . . . . . . . . . . . . . . . 445
Adjusting Colors with the Printer Driver. . . . . . . . . . . . . . . . . . . . . . . . . . . . . . . . . . . . . . . . . 446
Printing with ICC Profiles. . . . . . . . . . . . . . . . . . . . . . . . . . . . . . . . . . . . . . . . . . . . . . . . . . . . 448
Interpreting the ICC Profile. . . . . . . . . . . . . . . . . . . . . . . . . . . . . . . . . . . . . . . . . . . . . . . . . . 451
Adjusting Color Balance. . . . . . . . . . . . . . . . . . . . . . . . . . . . . . . . . . . . . . . . . . . . . . . . . . . . 452
Adjusting Color Balance Using Sample Patterns (Printer Driver). . . . . . . . . . . . . . . . . . . . . 454
Adjusting Brightness. . . . . . . . . . . . . . . . . . . . . . . . . . . . . . . . . . . . . . . . . . . . . . . . . . . . . . . 458
Adjusting Intensity. . . . . . . . . . . . . . . . . . . . . . . . . . . . . . . . . . . . . . . . . . . . . . . . . . . . . . . . . 460
Adjusting Contrast. . . . . . . . . . . . . . . . . . . . . . . . . . . . . . . . . . . . . . . . . . . . . . . . . . . . . . . . . 462
Adjusting Intensity/Contrast Using Sample Patterns (Printer Driver). . . . . . . . . . . . . . . . . . . 464
Overview of the Printer Driver. . . . . . . . . . . . . . . . . . . . . . . . . . . . . . . . . . . . . . . . . . . . . . . . . . . . 468
Canon IJ Printer Driver. . . . . . . . . . . . . . . . . . . . . . . . . . . . . . . . . . . . . . . . . . . . . . . . . . . . . 469
How to Open the Printer Driver Setup Window. . . . . . . . . . . . . . . . . . . . . . . . . . . . . . . . . . . 470
Canon IJ Status Monitor. . . . . . . . . . . . . . . . . . . . . . . . . . . . . . . . . . . . . . . . . . . . . . . . . . . . 471
Checking the Ink Status from Your Computer. . . . . . . . . . . . . . . . . . . . . . . . . . . . . . . . . . . . 210
Canon IJ Preview. . . . . . . . . . . . . . . . . . . . . . . . . . . . . . . . . . . . . . . . . . . . . . . . . . . . . . . . . . 473
Deleting the Undesired Print Job. . . . . . . . . . . . . . . . . . . . . . . . . . . . . . . . . . . . . . . . . . . . . . 474
Instructions for Use (Printer Driver). . . . . . . . . . . . . . . . . . . . . . . . . . . . . . . . . . . . . . . . . . . . 475
Printer Driver Description. . . . . . . . . . . . . . . . . . . . . . . . . . . . . . . . . . . . . . . . . . . . . . . . . . . . . . . . 477
Quick Setup tab Description. . . . . . . . . . . . . . . . . . . . . . . . . . . . . . . . . . . . . . . . . . . . . . . . . 478
Main tab Description. . . . . . . . . . . . . . . . . . . . . . . . . . . . . . . . . . . . . . . . . . . . . . . . . . . . . . . 484
Page Setup tab Description. . . . . . . . . . . . . . . . . . . . . . . . . . . . . . . . . . . . . . . . . . . . . . . . . . 491
Maintenance tab Description. . . . . . . . . . . . . . . . . . . . . . . . . . . . . . . . . . . . . . . . . . . . . . . . . 503
Canon IJ Preview Description. . . . . . . . . . . . . . . . . . . . . . . . . . . . . . . . . . . . . . . . . . . . . . . . 509
Canon IJ XPS Preview Description. . . . . . . . . . . . . . . . . . . . . . . . . . . . . . . . . . . . . . . . . . . . 512
Canon IJ Status Monitor Description. . . . . . . . . . . . . . . . . . . . . . . . . . . . . . . . . . . . . . . . . . . 521
Updating the MP Drivers. . . . . . . . . . . . . . . . . . . . . . . . . . . . . . . . . . . . . . . . . . . . . . . . . . . . . . . . 524
Obtaining the Latest MP Drivers. . . . . . . . . . . . . . . . . . . . . . . . . . . . . . . . . . . . . . . . . . . . . . 525
Deleting the Unnecessary MP Drivers. . . . . . . . . . . . . . . . . . . . . . . . . . . . . . . . . . . . . . . . . . 526
Before Installing the MP Drivers. . . . . . . . . . . . . . . . . . . . . . . . . . . . . . . . . . . . . . . . . . . . . . 527
Installing the MP Drivers. . . . . . . . . . . . . . . . . . . . . . . . . . . . . . . . . . . . . . . . . . . . . . . . . . . . 528
Printing Using the Operation Panel of the Machine. . . . . . . . . . . . . . . . . . . . . . . . . . . . . 529
Printing Photo Data. . . . . . . . . . . . . . . . . . . . . . . . . . . . . . . . . . . . . . . . . . . . . . . . . . . . . . . . . . . . . . . . 530
Printing Photographs Saved on a Memory Card. . . . . . . . . . . . . . . . . . . . . . . . . . . . . . . . . . . . . . 531
About Advanced photo Menu. . . . . . . . . . . . . . . . . . . . . . . . . . . . . . . . . . . . . . . . . . . . . . . . . . . . 536
Printing Photo with Trimming. . . . . . . . . . . . . . . . . . . . . . . . . . . . . . . . . . . . . . . . . . . . . . . . . . . . . 537
Setting Items for Photo Printing Using the Operation Panel of the Machine. . . . . . . . . . . . . . . . . 539
Using Useful Display Functions. . . . . . . . . . . . . . . . . . . . . . . . . . . . . . . . . . . . . . . . . . . . . . . . . . . 542
Using the Slide Show Function. . . . . . . . . . . . . . . . . . . . . . . . . . . . . . . . . . . . . . . . . . . . . . . . . . . . . . . 544
Printing Photo While Viewing the Slide Show. . . . . . . . . . . . . . . . . . . . . . . . . . . . . . . . . . . . . . . . 545
Printing Template Forms Such As Lined Paper or Graph Paper. . . . . . . . . . . . . . . . . . . . . . . . . . . . . . 547
Printing Documents (PDF File) Saved on a Memory Card. . . . . . . . . . . . . . . . . . . . . . . . . . . . . . . . . . 550
About Disc Label Printing. . . . . . . . . . . . . . . . . . . . . . . . . . . . . . . . . . . . . . . . . . . . . . . . . . . . . . . . . . . . 553
Copying the Label Side of Disc. . . . . . . . . . . . . . . . . . . . . . . . . . . . . . . . . . . . . . . . . . . . . . . . . . . 554
Printing Photo from a Memory Card onto the Disc Label. . . . . . . . . . . . . . . . . . . . . . . . . . . . . . . 557
Printing with Web Service. . . . . . . . . . . . . . . . . . . . . . . . . . . . . . . . . . . . . . . . . . . . . . . . . 560
Notice for Web Service Printing. . . . . . . . . . . . . . . . . . . . . . . . . . . . . . . . . . . . . . . . . . . . . . . . . . . . . . . 561
Downloading and Printing Template Forms. . . . . . . . . . . . . . . . . . . . . . . . . . . . . . . . . . . . . . . . . . . . . . 562
Printing from a Digital Camera. . . . . . . . . . . . . . . . . . . . . . . . . . . . . . . . . . . . . . . . . . . . . 563
Printing Photographs Directly from a PictBridge (Wireless LAN) Compliant Device. . . . . . . . . . . . . . . 564
About PictBridge (Wireless LAN) Print Settings. . . . . . . . . . . . . . . . . . . . . . . . . . . . . . . . . . . . . . . . . . . 566
Paper setting for Printing. . . . . . . . . . . . . . . . . . . . . . . . . . . . . . . . . . . . . . . . . . . . . . . . . 569
Copying. . . . . . . . . . . . . . . . . . . . . . . . . . . . . . . . . . . . . . . . . . . . . . . . . . . . . . . 572
Making Copies. . . . . . . . . . . . . . . . . . . . . . . . . . . . . . . . . . . . . . . . . . . . . . . . . . . . . . . . . 573
Displaying the Preview Screen. . . . . . . . . . . . . . . . . . . . . . . . . . . . . . . . . . . . . . . . . . . . . . . . . . . . . . . 576
Setting Items for Copying. . . . . . . . . . . . . . . . . . . . . . . . . . . . . . . . . . . . . . . . . . . . . . . . . . . . . . . . . . . . 577
Reducing or Enlarging a Copy. . . . . . . . . . . . . . . . . . . . . . . . . . . . . . . . . . . . . . . . . . . . . 580
Two-Sided Copying. . . . . . . . . . . . . . . . . . . . . . . . . . . . . . . . . . . . . . . . . . . . . . . . . . . . . 582
About Special Copy Menu. . . . . . . . . . . . . . . . . . . . . . . . . . . . . . . . . . . . . . . . . . . . . . . . 584
Copying Thick Originals Such as Books. . . . . . . . . . . . . . . . . . . . . . . . . . . . . . . . . . . . . . . . . . . . . . . . 585
Copying without Borders. . . . . . . . . . . . . . . . . . . . . . . . . . . . . . . . . . . . . . . . . . . . . . . . . . . . . . . . . . . . 586
Copying Photos. . . . . . . . . . . . . . . . . . . . . . . . . . . . . . . . . . . . . . . . . . . . . . . . . . . . . . . . . . . . . . . . . . . 587
Copying Two Pages to Fit onto a Single Page. . . . . . . . . . . . . . . . . . . . . . . . . . . . . . . . . 589
Copying Four Pages to Fit onto a Single Page. . . . . . . . . . . . . . . . . . . . . . . . . . . . . . . . . 592
Scanning. . . . . . . . . . . . . . . . . . . . . . . . . . . . . . . . . . . . . . . . . . . . . . . . . . . . . . 595
Scanning from a Computer. . . . . . . . . . . . . . . . . . . . . . . . . . . . . . . . . . . . . . . . . . . . . . . . 596
Scanning with IJ Scan Utility. . . . . . . . . . . . . . . . . . . . . . . . . . . . . . . . . . . . . . . . . . . . . . . . . . . . . . . . . 597
What Is IJ Scan Utility (Scanner Software)?. . . . . . . . . . . . . . . . . . . . . . . . . . . . . . . . . . . . . . . . . 598
Starting IJ Scan Utility. . . . . . . . . . . . . . . . . . . . . . . . . . . . . . . . . . . . . . . . . . . . . . . . . . . . . . . . . . 600
Easy Scanning with Auto Scan. . . . . . . . . . . . . . . . . . . . . . . . . . . . . . . . . . . . . . . . . . . . . . . . . . . 601
Scanning Documents. . . . . . . . . . . . . . . . . . . . . . . . . . . . . . . . . . . . . . . . . . . . . . . . . . . . . . . . . . . 602
Scanning Photos. . . . . . . . . . . . . . . . . . . . . . . . . . . . . . . . . . . . . . . . . . . . . . . . . . . . . . . . . . . . . . 603
Scanning with Favorite Settings. . . . . . . . . . . . . . . . . . . . . . . . . . . . . . . . . . . . . . . . . . . . . . . . . . 604
Scanning Items Larger than the Platen (Image Stitch). . . . . . . . . . . . . . . . . . . . . . . . . . . . . . . . . 605
Scanning Multiple Items at One Time. . . . . . . . . . . . . . . . . . . . . . . . . . . . . . . . . . . . . . . . . . . . . . 609
Saving after Checking Scan Results. . . . . . . . . . . . . . . . . . . . . . . . . . . . . . . . . . . . . . . . . . . . . . . 612
Sending Scanned Images via E-mail. . . . . . . . . . . . . . . . . . . . . . . . . . . . . . . . . . . . . . . . . . . . . . . 615
Extracting Text from Scanned Images (OCR). . . . . . . . . . . . . . . . . . . . . . . . . . . . . . . . . . . . . . . . 618
IJ Scan Utility Screens. . . . . . . . . . . . . . . . . . . . . . . . . . . . . . . . . . . . . . . . . . . . . . . . . . . . . . . . . . 621
IJ Scan Utility Main Screen. . . . . . . . . . . . . . . . . . . . . . . . . . . . . . . . . . . . . . . . . . . . . . . . . . 622
Settings Dialog Box. . . . . . . . . . . . . . . . . . . . . . . . . . . . . . . . . . . . . . . . . . . . . . . . . . . . . . . . 624
Save Settings Dialog Box. . . . . . . . . . . . . . . . . . . . . . . . . . . . . . . . . . . . . . . . . . . . . . . . . . . 671
Image Stitch Window. . . . . . . . . . . . . . . . . . . . . . . . . . . . . . . . . . . . . . . . . . . . . . . . . . . . . . . 674
Scanning with Application Software that You are Using (ScanGear). . . . . . . . . . . . . . . . . . . . . . . . . . 679
What Is ScanGear (Scanner Driver)?. . . . . . . . . . . . . . . . . . . . . . . . . . . . . . . . . . . . . . . . . . . . . . 680
Scanning with Advanced Settings Using ScanGear (Scanner Driver). . . . . . . . . . . . . . . . . . . . . . 682
Starting ScanGear (Scanner Driver). . . . . . . . . . . . . . . . . . . . . . . . . . . . . . . . . . . . . . . . . . . 683
Scanning in Basic Mode. . . . . . . . . . . . . . . . . . . . . . . . . . . . . . . . . . . . . . . . . . . . . . . . . . . . 684
Scanning in Advanced Mode. . . . . . . . . . . . . . . . . . . . . . . . . . . . . . . . . . . . . . . . . . . . . . . . . 687
Scanning Multiple Documents from the ADF (Auto Document Feeder) in Advanced Mode. 689
Scanning Multiple Documents at One Time with ScanGear (Scanner Driver). . . . . . . . . . . 691
Correcting Images and Adjusting Colors with ScanGear (Scanner Driver). . . . . . . . . . . . . . . . . . 695
Correcting Images (Unsharp Mask, Reduce Dust and Scratches, Fading Correction, etc.). 696
Adjusting Colors Using a Color Pattern. . . . . . . . . . . . . . . . . . . . . . . . . . . . . . . . . . . . . . . . . 700
Adjusting Saturation and Color Balance. . . . . . . . . . . . . . . . . . . . . . . . . . . . . . . . . . . . . . . . 702
Adjusting Brightness and Contrast. . . . . . . . . . . . . . . . . . . . . . . . . . . . . . . . . . . . . . . . . . . . 704
Adjusting Histogram. . . . . . . . . . . . . . . . . . . . . . . . . . . . . . . . . . . . . . . . . . . . . . . . . . . . . . . . 706
Adjusting Tone Curve. . . . . . . . . . . . . . . . . . . . . . . . . . . . . . . . . . . . . . . . . . . . . . . . . . . . . . 710
Setting Threshold. . . . . . . . . . . . . . . . . . . . . . . . . . . . . . . . . . . . . . . . . . . . . . . . . . . . . . . . . . 713
ScanGear (Scanner Driver) Screens. . . . . . . . . . . . . . . . . . . . . . . . . . . . . . . . . . . . . . . . . . . . . . . 714
Basic Mode Tab. . . . . . . . . . . . . . . . . . . . . . . . . . . . . . . . . . . . . . . . . . . . . . . . . . . . . . . . . . . 715
Advanced Mode Tab. . . . . . . . . . . . . . . . . . . . . . . . . . . . . . . . . . . . . . . . . . . . . . . . . . . . . . . 723
Input Settings. . . . . . . . . . . . . . . . . . . . . . . . . . . . . . . . . . . . . . . . . . . . . . . . . . . . . . . . . . . . . 729
Output Settings. . . . . . . . . . . . . . . . . . . . . . . . . . . . . . . . . . . . . . . . . . . . . . . . . . . . . . . . . . . 732
Image Settings. . . . . . . . . . . . . . . . . . . . . . . . . . . . . . . . . . . . . . . . . . . . . . . . . . . . . . . . . . . . 735
Color Adjustment Buttons. . . . . . . . . . . . . . . . . . . . . . . . . . . . . . . . . . . . . . . . . . . . . . . . . . . 740
Preferences Dialog Box. . . . . . . . . . . . . . . . . . . . . . . . . . . . . . . . . . . . . . . . . . . . . . . . . . . . . 743
Scanner Tab. . . . . . . . . . . . . . . . . . . . . . . . . . . . . . . . . . . . . . . . . . . . . . . . . . . . . . . . . . . . . 744
Preview Tab. . . . . . . . . . . . . . . . . . . . . . . . . . . . . . . . . . . . . . . . . . . . . . . . . . . . . . . . . . . . . . 747
Scan Tab. . . . . . . . . . . . . . . . . . . . . . . . . . . . . . . . . . . . . . . . . . . . . . . . . . . . . . . . . . . . . . . . 749
Color Settings Tab. . . . . . . . . . . . . . . . . . . . . . . . . . . . . . . . . . . . . . . . . . . . . . . . . . . . . . . . . 750
Placing Items (When Scanning from a Computer). . . . . . . . . . . . . . . . . . . . . . . . . . . . . . . . . . . . 752
Adjusting Cropping Frames (ScanGear). . . . . . . . . . . . . . . . . . . . . . . . . . . . . . . . . . . . . . . . . . . . 755
General Notes (Scanner Driver). . . . . . . . . . . . . . . . . . . . . . . . . . . . . . . . . . . . . . . . . . . . . . . . . . 759
Useful Information on Scanning. . . . . . . . . . . . . . . . . . . . . . . . . . . . . . . . . . . . . . . . . . . . . . . . . . . . . . . 761
Adjusting Cropping Frames in the Image Stitch Window. . . . . . . . . . . . . . . . . . . . . . . . . . . . . . . . 762
Resolution. . . . . . . . . . . . . . . . . . . . . . . . . . . . . . . . . . . . . . . . . . . . . . . . . . . . . . . . . . . . . . . . . . . 763
Data Formats. . . . . . . . . . . . . . . . . . . . . . . . . . . . . . . . . . . . . . . . . . . . . . . . . . . . . . . . . . . . . . . . . 765
Color Matching. . . . . . . . . . . . . . . . . . . . . . . . . . . . . . . . . . . . . . . . . . . . . . . . . . . . . . . . . . . . . . . . 766
IJ Network Scanner Selector EX Menu and Setting Screen. . . . . . . . . . . . . . . . . . . . . . . . . . . . . . . . . 767
Uninstalling IJ Network Scanner Selector EX. . . . . . . . . . . . . . . . . . . . . . . . . . . . . . . . . . . . . . . . 770
Other Scanning Methods. . . . . . . . . . . . . . . . . . . . . . . . . . . . . . . . . . . . . . . . . . . . . . . . . . . . . . . . . . . . 771
Scanning with WIA Driver. . . . . . . . . . . . . . . . . . . . . . . . . . . . . . . . . . . . . . . . . . . . . . . . . . . . . . . 772
Scanning Using the Control Panel (Windows XP Only). . . . . . . . . . . . . . . . . . . . . . . . . . . . . . . . . 776
Placing Items (When Scanning from a Computer). . . . . . . . . . . . . . . . . . . . . . . . . . . . . . . . . . . . . . . . . 778
Scanning from the Operation Panel of the Machine. . . . . . . . . . . . . . . . . . . . . . . . . . . . . 780
Forwarding Scanned Data to the Computer Using the Operation Panel of the Machine. . . . . . . . . . . 781
Attaching the Scanned Data to E-mail Using the Operation Panel of the Machine. . . . . . . . . . . . . . . . 786
Setting Items for Scanning Using the Operation Panel of the Machine. . . . . . . . . . . . . . . . . . . . . . . . . 789
Network Scan Settings. . . . . . . . . . . . . . . . . . . . . . . . . . . . . . . . . . . . . . . . . . . . . . . . . . . . . . . . . . . . . . 791
Selecting a Response to Commands from the Operation Panel Using IJ Scan Utility. . . . . . . . . . . . . 795
Troubleshooting. . . . . . . . . . . . . . . . . . . . . . . . . . . . . . . . . . . . . . . . . . . . . . . . . 799
Problems with Network Communication. . . . . . . . . . . . . . . . . . . . . . . . . . . . . . . . . . . . . . 800
Problems with the Machine While Using with Network. . . . . . . . . . . . . . . . . . . . . . . . . . . . . . . . . . . . . 801
The Machine Stopped Working Suddenly. . . . . . . . . . . . . . . . . . . . . . . . . . . . . . . . . . . . . . . . . . . 802
Ink Remaining Level Is Not Displayed on Printer Status Monitor of the Machine. . . . . . . . . . . . . 806
Printing Speed Is Slow. . . . . . . . . . . . . . . . . . . . . . . . . . . . . . . . . . . . . . . . . . . . . . . . . . . . . . . . . . 807
Cannot Use the Card Slot via Network. . . . . . . . . . . . . . . . . . . . . . . . . . . . . . . . . . . . . . . . . . . . . 808
Cannot Mount the Card Slot. . . . . . . . . . . . . . . . . . . . . . . . . . . . . . . . . . . . . . . . . . . . . . . . . 809
Cannot Access to the Card Slot Because of Some Security Settings on the Computer. . . . 811
Cannot Use the Card Slot. . . . . . . . . . . . . . . . . . . . . . . . . . . . . . . . . . . . . . . . . . . . . . . . . . . 814
Cannot Use the Machine on Replacing an Access Point or Changing Its settings. . . . . . . . . . . . 815
Cannot Detect a Machine on a Network. . . . . . . . . . . . . . . . . . . . . . . . . . . . . . . . . . . . . . . . . . . . . . . . 816
Cannot Detect the Machine When Setting up Network Communication. . . . . . . . . . . . . . . . . . . . 817
Cannot Detect the Machine during Wireless LAN Setup: Check 1. . . . . . . . . . . . . . . . . . . . 818
Cannot Detect the Machine during Wireless LAN Setup: Check 2. . . . . . . . . . . . . . . . . . . . 819
Cannot Detect the Machine during Wireless LAN Setup: Check 3. . . . . . . . . . . . . . . . . . . . 820
Cannot Detect the Machine during Wireless LAN Setup: Check 4. . . . . . . . . . . . . . . . . . . . 821
Cannot Detect the Machine during Wireless LAN Setup: Check 5. . . . . . . . . . . . . . . . . . . . 822
Cannot Detect the Machine during Wireless LAN Setup: Check 6. . . . . . . . . . . . . . . . . . . . 823
Cannot Detect the Machine during Wired LAN Setup: Check 1. . . . . . . . . . . . . . . . . . . . . . 824
Cannot Detect the Machine during Wired LAN Setup: Check 2. . . . . . . . . . . . . . . . . . . . . . 825
Cannot Detect the Machine during Wired LAN Setup: Check 3. . . . . . . . . . . . . . . . . . . . . . 826
Cannot Detect the Machine during Wired LAN Setup: Check 4. . . . . . . . . . . . . . . . . . . . . . 827
Cannot Detect the Machine during Wired LAN Setup: Check 5. . . . . . . . . . . . . . . . . . . . . . 828
Cannot Detect the Machine during Wired LAN Setup: Check 6. . . . . . . . . . . . . . . . . . . . . . 829
The Machine Cannot Be Detected in the Wireless LAN. . . . . . . . . . . . . . . . . . . . . . . . . . . . . . . . 830
The Machine Cannot Be Detected in the Wired LAN. . . . . . . . . . . . . . . . . . . . . . . . . . . . . . . . . . 832
Other Problems with Network. . . . . . . . . . . . . . . . . . . . . . . . . . . . . . . . . . . . . . . . . . . . . . . . . . . . . . . . 833
Forgot an Access Point Name, SSID, or a Network Key. . . . . . . . . . . . . . . . . . . . . . . . . . . . . . . . 834
The Message Is Displayed on the Computer Screen During Setup. . . . . . . . . . . . . . . . . . . . . . . 835
The Administrator Password Set to the Machine Was Forgotten. . . . . . . . . . . . . . . . . . . . . . . . . 836
Checking Information about the Network. . . . . . . . . . . . . . . . . . . . . . . . . . . . . . . . . . . . . . . . . . . . 837
Packets Are Sent Steadily. . . . . . . . . . . . . . . . . . . . . . . . . . . . . . . . . . . . . . . . . . . . . . . . . . . . . . . 839
Date Modified of Files Changes When Saving Them on the Memory Card over Network. . . . . . 840
How to Restore the Machine's Network Settings to Factory Default. . . . . . . . . . . . . . . . . . . . . . . 841
Problems with Printing. . . . . . . . . . . . . . . . . . . . . . . . . . . . . . . . . . . . . . . . . . . . . . . . . . . 842
Printing Does Not Start. . . . . . . . . . . . . . . . . . . . . . . . . . . . . . . . . . . . . . . . . . . . . . . . . . . . . . . . . . . . . 843
Paper Jams. . . . . . . . . . . . . . . . . . . . . . . . . . . . . . . . . . . . . . . . . . . . . . . . . . . . . . . . . . . . . . . . . . . . . . 846
Paper Does Not Feed Properly/"No Paper" Error Occurs. . . . . . . . . . . . . . . . . . . . . . . . . . . . . . . . . . . 847
Cannot Print on the Disc Label. . . . . . . . . . . . . . . . . . . . . . . . . . . . . . . . . . . . . . . . . . . . . . . . . . . . . . . 849
Cannot Print Properly with Automatic Duplex Printing. . . . . . . . . . . . . . . . . . . . . . . . . . . . . . . . . . . . . . 851
Copying/Printing Stops Before It Is Completed. . . . . . . . . . . . . . . . . . . . . . . . . . . . . . . . . . . . . . . . . . . 852
Problems with Printing Quality. . . . . . . . . . . . . . . . . . . . . . . . . . . . . . . . . . . . . . . . . . . . . 853
Print Results Not Satisfactory. . . . . . . . . . . . . . . . . . . . . . . . . . . . . . . . . . . . . . . . . . . . . . . . . . . . . . . . 854
Cannot Print to End of Job. . . . . . . . . . . . . . . . . . . . . . . . . . . . . . . . . . . . . . . . . . . . . . . . . . . . . . . 856
Part of the Page Is Not Printed. . . . . . . . . . . . . . . . . . . . . . . . . . . . . . . . . . . . . . . . . . . . . . . . . . . 857
No Printing Results/Printing Is Blurred/Colors Are Wrong/White Streaks. . . . . . . . . . . . . . . . . . . 858
Lines Are Misaligned. . . . . . . . . . . . . . . . . . . . . . . . . . . . . . . . . . . . . . . . . . . . . . . . . . . . . . . . . . . 861
Line Does Not Print or Prints Partially. . . . . . . . . . . . . . . . . . . . . . . . . . . . . . . . . . . . . . . . . . . . . . 862
Image Does Not Print or Prints Partially. . . . . . . . . . . . . . . . . . . . . . . . . . . . . . . . . . . . . . . . . . . . 863
Printed Paper Curls or Has Ink Blots. . . . . . . . . . . . . . . . . . . . . . . . . . . . . . . . . . . . . . . . . . . . . . . 864
Paper Is Smudged/Printed Surface Is Scratched. . . . . . . . . . . . . . . . . . . . . . . . . . . . . . . . . . . . . 865
Back of the Paper Is Smudged. . . . . . . . . . . . . . . . . . . . . . . . . . . . . . . . . . . . . . . . . . . . . . . . . . . 868
Vertical Lines Are Printed on the Sides of the Printout. . . . . . . . . . . . . . . . . . . . . . . . . . . . . . . . . 869
Colors Are Uneven or Streaked. . . . . . . . . . . . . . . . . . . . . . . . . . . . . . . . . . . . . . . . . . . . . . . . . . . 870
Ink Is Not Ejected. . . . . . . . . . . . . . . . . . . . . . . . . . . . . . . . . . . . . . . . . . . . . . . . . . . . . . . . . . . . . . . . . . 872
Problems with Scanning. . . . . . . . . . . . . . . . . . . . . . . . . . . . . . . . . . . . . . . . . . . . . . . . . . 873
Problems with Scanning. . . . . . . . . . . . . . . . . . . . . . . . . . . . . . . . . . . . . . . . . . . . . . . . . . . . . . . . . . . . 874
Scanner Does Not Work. . . . . . . . . . . . . . . . . . . . . . . . . . . . . . . . . . . . . . . . . . . . . . . . . . . . . . . . 875
ScanGear (Scanner Driver) Does Not Start. . . . . . . . . . . . . . . . . . . . . . . . . . . . . . . . . . . . . . . . . . 876
Error Message Appears and the ScanGear (Scanner Driver) Screen Does Not Appear. . . . . . . 877
Cannot Scan Multiple Items at One Time. . . . . . . . . . . . . . . . . . . . . . . . . . . . . . . . . . . . . . . . . . . 878
Cannot Scan Properly with Auto Scan. . . . . . . . . . . . . . . . . . . . . . . . . . . . . . . . . . . . . . . . . . . . . . 879
Slow Scanning Speed. . . . . . . . . . . . . . . . . . . . . . . . . . . . . . . . . . . . . . . . . . . . . . . . . . . . . . . . . . 880
"There is not enough memory." Message Is Displayed. . . . . . . . . . . . . . . . . . . . . . . . . . . . . . . . . 881
Computer Stops Operating during Scanning. . . . . . . . . . . . . . . . . . . . . . . . . . . . . . . . . . . . . . . . . 882
Scanner Does Not Work after Upgrading Windows. . . . . . . . . . . . . . . . . . . . . . . . . . . . . . . . . . . . 883
Scanned Image Does Not Open. . . . . . . . . . . . . . . . . . . . . . . . . . . . . . . . . . . . . . . . . . . . . . . . . . 884
Scan Results Not Satisfactory. . . . . . . . . . . . . . . . . . . . . . . . . . . . . . . . . . . . . . . . . . . . . . . . . . . . . . . . 885
Scan Quality (Image Displayed on the Monitor) Is Poor. . . . . . . . . . . . . . . . . . . . . . . . . . . . . . . . 886
Scanned Image Is Surrounded by Extra White Areas. . . . . . . . . . . . . . . . . . . . . . . . . . . . . . . . . . 887
Cannot Scan at the Correct Size. . . . . . . . . . . . . . . . . . . . . . . . . . . . . . . . . . . . . . . . . . . . . . . . . . 888
Position or Size of the Image Cannot be Detected Correctly When Scanning from the Operation
Panel. . . . . . . . . . . . . . . . . . . . . . . . . . . . . . . . . . . . . . . . . . . . . . . . . . . . . . . . . . . . . . . . . . . . . . . 889
Item Is Placed Correctly, but the Scanned Image Is Slanted. . . . . . . . . . . . . . . . . . . . . . . . . . . . 890
Scanned Image Is Enlarged (Reduced) on the Computer Monitor. . . . . . . . . . . . . . . . . . . . . . . . 891
Software Problems. . . . . . . . . . . . . . . . . . . . . . . . . . . . . . . . . . . . . . . . . . . . . . . . . . . . . . . . . . . . . . . . . 892
13
The E-mail Client You Want to Use Does Not Appear in the Screen for Selecting an E-mail Client. .
. . . . . . . . . . . . . . . . . . . . . . . . . . . . . . . . . . . . . . . . . . . . . . . . . . . . . . . . . . . . . . . . . . . . . . . . . . . . 893
Problems with the Machine. . . . . . . . . . . . . . . . . . . . . . . . . . . . . . . . . . . . . . . . . . . . . . . . 894
The Machine Cannot Be Powered On. . . . . . . . . . . . . . . . . . . . . . . . . . . . . . . . . . . . . . . . . . . . . . . . . . 895
The Machine Turns Off Unintentionally. . . . . . . . . . . . . . . . . . . . . . . . . . . . . . . . . . . . . . . . . . . . . . . . . 896
Cannot Connect to Computer with a USB Cable Properly. . . . . . . . . . . . . . . . . . . . . . . . . . . . . . . . . . . 897
Cannot Communicate with the Machine with USB Connection. . . . . . . . . . . . . . . . . . . . . . . . . . . . . . . 898
The Display on the Touch Screen Cannot Be Seen At All. . . . . . . . . . . . . . . . . . . . . . . . . . . . . . . . . . . 899
An Unintended Language Is Displayed on the Touch Screen. . . . . . . . . . . . . . . . . . . . . . . . . . . . . . . . 900
Cannot Remove a Memory Card. . . . . . . . . . . . . . . . . . . . . . . . . . . . . . . . . . . . . . . . . . . . . . . . . . . . . . 901
Print Head Holder Does Not Move to the Position for Replacing. . . . . . . . . . . . . . . . . . . . . . . . . . . . . . 902
Printer Status Monitor Is Not Displayed. . . . . . . . . . . . . . . . . . . . . . . . . . . . . . . . . . . . . . . . . . . . . . . . . 903
If the Output Tray Extension Comes Off. . . . . . . . . . . . . . . . . . . . . . . . . . . . . . . . . . . . . . . . . . . . . . . . 904
Cannot Print/Scan from NFC Compliant Device. . . . . . . . . . . . . . . . . . . . . . . . . . . . . . . . . . . . . . . . . . 905
Problems with Installation/Downloading. . . . . . . . . . . . . . . . . . . . . . . . . . . . . . . . . . . . . . 906
Cannot Install the MP Drivers. . . . . . . . . . . . . . . . . . . . . . . . . . . . . . . . . . . . . . . . . . . . . . . . . . . . . . . . 907
Easy-WebPrint EX Does Not Start Up or Easy-WebPrint EX Menu Does Not Appear. . . . . . . . . . . . . 909
How to Update MP Drivers in Network Environment. . . . . . . . . . . . . . . . . . . . . . . . . . . . . . . . . . . . . . . 910
Uninstalling IJ Network Tool. . . . . . . . . . . . . . . . . . . . . . . . . . . . . . . . . . . . . . . . . . . . . . . . . . . . . . . . . 911
About Errors/Messages Displayed. . . . . . . . . . . . . . . . . . . . . . . . . . . . . . . . . . . . . . . . . . 912
If an Error Occurs. . . . . . . . . . . . . . . . . . . . . . . . . . . . . . . . . . . . . . . . . . . . . . . . . . . . . . . . . . . . . . . . . . 913
A Message Is Displayed. . . . . . . . . . . . . . . . . . . . . . . . . . . . . . . . . . . . . . . . . . . . . . . . . . . . . . . . . . . . 914
Error Message Appears on a PictBridge (Wireless LAN) Compliant Device. . . . . . . . . . . . . . . . . . . . . 920
If You Cannot Resolve the Problem. . . . . . . . . . . . . . . . . . . . . . . . . . . . . . . . . . . . . . . . . 922
Support Code List. . . . . . . . . . . . . . . . . . . . . . . . . . . . . . . . . . . . . . . . . . . . . . . 923
Support Code List (When Paper Is Jammed). . . . . . . . . . . . . . . . . . . . . . . . . . . . . . . . . . 925
1300. . . . . . . . . . . . . . . . . . . . . . . . . . . . . . . . . . . . . . . . . . . . . . . . . . . . . . . . . . . . . . . . . . . . . . . . . . . . 926
1304. . . . . . . . . . . . . . . . . . . . . . . . . . . . . . . . . . . . . . . . . . . . . . . . . . . . . . . . . . . . . . . . . . . . . . . . . . . . 927
1311. . . . . . . . . . . . . . . . . . . . . . . . . . . . . . . . . . . . . . . . . . . . . . . . . . . . . . . . . . . . . . . . . . . . . . . . . . . . 930
1312. . . . . . . . . . . . . . . . . . . . . . . . . . . . . . . . . . . . . . . . . . . . . . . . . . . . . . . . . . . . . . . . . . . . . . . . . . . . 933
1313. . . . . . . . . . . . . . . . . . . . . . . . . . . . . . . . . . . . . . . . . . . . . . . . . . . . . . . . . . . . . . . . . . . . . . . . . . . . 935
1315. . . . . . . . . . . . . . . . . . . . . . . . . . . . . . . . . . . . . . . . . . . . . . . . . . . . . . . . . . . . . . . . . . . . . . . . . . . . 938
1316. . . . . . . . . . . . . . . . . . . . . . . . . . . . . . . . . . . . . . . . . . . . . . . . . . . . . . . . . . . . . . . . . . . . . . . . . . . . 941
Paper Is Jammed inside the Machine. . . . . . . . . . . . . . . . . . . . . . . . . . . . . . . . . . . . . . . . . . . . . . . . . . 944
In Other Cases. . . . . . . . . . . . . . . . . . . . . . . . . . . . . . . . . . . . . . . . . . . . . . . . . . . . . . . . . . . . . . . . . . . . 947
1001. . . . . . . . . . . . . . . . . . . . . . . . . . . . . . . . . . . . . . . . . . . . . . . . . . . . . . . . . . . . . . . . . 948
1002. . . . . . . . . . . . . . . . . . . . . . . . . . . . . . . . . . . . . . . . . . . . . . . . . . . . . . . . . . . . . . . . . 949
1007. . . . . . . . . . . . . . . . . . . . . . . . . . . . . . . . . . . . . . . . . . . . . . . . . . . . . . . . . . . . . . . . . 950
1008. . . . . . . . . . . . . . . . . . . . . . . . . . . . . . . . . . . . . . . . . . . . . . . . . . . . . . . . . . . . . . . . . 951
1200. . . . . . . . . . . . . . . . . . . . . . . . . . . . . . . . . . . . . . . . . . . . . . . . . . . . . . . . . . . . . . . . . 952
1250. . . . . . . . . . . . . . . . . . . . . . . . . . . . . . . . . . . . . . . . . . . . . . . . . . . . . . . . . . . . . . . . . 953
1253. . . . . . . . . . . . . . . . . . . . . . . . . . . . . . . . . . . . . . . . . . . . . . . . . . . . . . . . . . . . . . . . . 954
1254. . . . . . . . . . . . . . . . . . . . . . . . . . . . . . . . . . . . . . . . . . . . . . . . . . . . . . . . . . . . . . . . . 955
1255. . . . . . . . . . . . . . . . . . . . . . . . . . . . . . . . . . . . . . . . . . . . . . . . . . . . . . . . . . . . . . . . . 956
1256. . . . . . . . . . . . . . . . . . . . . . . . . . . . . . . . . . . . . . . . . . . . . . . . . . . . . . . . . . . . . . . . . 957
1257. . . . . . . . . . . . . . . . . . . . . . . . . . . . . . . . . . . . . . . . . . . . . . . . . . . . . . . . . . . . . . . . . 958
1310. . . . . . . . . . . . . . . . . . . . . . . . . . . . . . . . . . . . . . . . . . . . . . . . . . . . . . . . . . . . . . . . . 959
1401. . . . . . . . . . . . . . . . . . . . . . . . . . . . . . . . . . . . . . . . . . . . . . . . . . . . . . . . . . . . . . . . . 960
1403. . . . . . . . . . . . . . . . . . . . . . . . . . . . . . . . . . . . . . . . . . . . . . . . . . . . . . . . . . . . . . . . . 961
1405. . . . . . . . . . . . . . . . . . . . . . . . . . . . . . . . . . . . . . . . . . . . . . . . . . . . . . . . . . . . . . . . . 962
1410. . . . . . . . . . . . . . . . . . . . . . . . . . . . . . . . . . . . . . . . . . . . . . . . . . . . . . . . . . . . . . . . . 963
1411. . . . . . . . . . . . . . . . . . . . . . . . . . . . . . . . . . . . . . . . . . . . . . . . . . . . . . . . . . . . . . . . . 964
1412. . . . . . . . . . . . . . . . . . . . . . . . . . . . . . . . . . . . . . . . . . . . . . . . . . . . . . . . . . . . . . . . . 965
1413. . . . . . . . . . . . . . . . . . . . . . . . . . . . . . . . . . . . . . . . . . . . . . . . . . . . . . . . . . . . . . . . . 966
1414. . . . . . . . . . . . . . . . . . . . . . . . . . . . . . . . . . . . . . . . . . . . . . . . . . . . . . . . . . . . . . . . . 967
1415. . . . . . . . . . . . . . . . . . . . . . . . . . . . . . . . . . . . . . . . . . . . . . . . . . . . . . . . . . . . . . . . . 968
1600. . . . . . . . . . . . . . . . . . . . . . . . . . . . . . . . . . . . . . . . . . . . . . . . . . . . . . . . . . . . . . . . . 969
1660. . . . . . . . . . . . . . . . . . . . . . . . . . . . . . . . . . . . . . . . . . . . . . . . . . . . . . . . . . . . . . . . . 970
1680. . . . . . . . . . . . . . . . . . . . . . . . . . . . . . . . . . . . . . . . . . . . . . . . . . . . . . . . . . . . . . . . . 971
1681. . . . . . . . . . . . . . . . . . . . . . . . . . . . . . . . . . . . . . . . . . . . . . . . . . . . . . . . . . . . . . . . . 972
1683. . . . . . . . . . . . . . . . . . . . . . . . . . . . . . . . . . . . . . . . . . . . . . . . . . . . . . . . . . . . . . . . . 973
1684. . . . . . . . . . . . . . . . . . . . . . . . . . . . . . . . . . . . . . . . . . . . . . . . . . . . . . . . . . . . . . . . . 974
1688. . . . . . . . . . . . . . . . . . . . . . . . . . . . . . . . . . . . . . . . . . . . . . . . . . . . . . . . . . . . . . . . . 975
1700. . . . . . . . . . . . . . . . . . . . . . . . . . . . . . . . . . . . . . . . . . . . . . . . . . . . . . . . . . . . . . . . . 976
1701. . . . . . . . . . . . . . . . . . . . . . . . . . . . . . . . . . . . . . . . . . . . . . . . . . . . . . . . . . . . . . . . . 977
1710. . . . . . . . . . . . . . . . . . . . . . . . . . . . . . . . . . . . . . . . . . . . . . . . . . . . . . . . . . . . . . . . . 978
1711. . . . . . . . . . . . . . . . . . . . . . . . . . . . . . . . . . . . . . . . . . . . . . . . . . . . . . . . . . . . . . . . . 979
1830. . . . . . . . . . . . . . . . . . . . . . . . . . . . . . . . . . . . . . . . . . . . . . . . . . . . . . . . . . . . . . . . . 980
1850. . . . . . . . . . . . . . . . . . . . . . . . . . . . . . . . . . . . . . . . . . . . . . . . . . . . . . . . . . . . . . . . . 981
1851. . . . . . . . . . . . . . . . . . . . . . . . . . . . . . . . . . . . . . . . . . . . . . . . . . . . . . . . . . . . . . . . . 982
1855. . . . . . . . . . . . . . . . . . . . . . . . . . . . . . . . . . . . . . . . . . . . . . . . . . . . . . . . . . . . . . . . . 983
1856. . . . . . . . . . . . . . . . . . . . . . . . . . . . . . . . . . . . . . . . . . . . . . . . . . . . . . . . . . . . . . . . . 984
1857. . . . . . . . . . . . . . . . . . . . . . . . . . . . . . . . . . . . . . . . . . . . . . . . . . . . . . . . . . . . . . . . . 985
1858. . . . . . . . . . . . . . . . . . . . . . . . . . . . . . . . . . . . . . . . . . . . . . . . . . . . . . . . . . . . . . . . . 986
1872. . . . . . . . . . . . . . . . . . . . . . . . . . . . . . . . . . . . . . . . . . . . . . . . . . . . . . . . . . . . . . . . . 987
1873. . . . . . . . . . . . . . . . . . . . . . . . . . . . . . . . . . . . . . . . . . . . . . . . . . . . . . . . . . . . . . . . . 988
2111. . . . . . . . . . . . . . . . . . . . . . . . . . . . . . . . . . . . . . . . . . . . . . . . . . . . . . . . . . . . . . . . . 989
2112. . . . . . . . . . . . . . . . . . . . . . . . . . . . . . . . . . . . . . . . . . . . . . . . . . . . . . . . . . . . . . . . . 992
2121. . . . . . . . . . . . . . . . . . . . . . . . . . . . . . . . . . . . . . . . . . . . . . . . . . . . . . . . . . . . . . . . . 995
2122. . . . . . . . . . . . . . . . . . . . . . . . . . . . . . . . . . . . . . . . . . . . . . . . . . . . . . . . . . . . . . . . . 996
2500. . . . . . . . . . . . . . . . . . . . . . . . . . . . . . . . . . . . . . . . . . . . . . . . . . . . . . . . . . . . . . . . . 997
2700. . . . . . . . . . . . . . . . . . . . . . . . . . . . . . . . . . . . . . . . . . . . . . . . . . . . . . . . . . . . . . . . . 998
4100. . . . . . . . . . . . . . . . . . . . . . . . . . . . . . . . . . . . . . . . . . . . . . . . . . . . . . . . . . . . . . . . . 999
4101. . . . . . . . . . . . . . . . . . . . . . . . . . . . . . . . . . . . . . . . . . . . . . . . . . . . . . . . . . . . . . . . 1000
4103. . . . . . . . . . . . . . . . . . . . . . . . . . . . . . . . . . . . . . . . . . . . . . . . . . . . . . . . . . . . . . . . 1001
5011. . . . . . . . . . . . . . . . . . . . . . . . . . . . . . . . . . . . . . . . . . . . . . . . . . . . . . . . . . . . . . . . 1002
5012. . . . . . . . . . . . . . . . . . . . . . . . . . . . . . . . . . . . . . . . . . . . . . . . . . . . . . . . . . . . . . . . 1003
5100. . . . . . . . . . . . . . . . . . . . . . . . . . . . . . . . . . . . . . . . . . . . . . . . . . . . . . . . . . . . . . . . 1004
5101. . . . . . . . . . . . . . . . . . . . . . . . . . . . . . . . . . . . . . . . . . . . . . . . . . . . . . . . . . . . . . . . 1005
5200. . . . . . . . . . . . . . . . . . . . . . . . . . . . . . . . . . . . . . . . . . . . . . . . . . . . . . . . . . . . . . . . 1006
5400. . . . . . . . . . . . . . . . . . . . . . . . . . . . . . . . . . . . . . . . . . . . . . . . . . . . . . . . . . . . . . . . 1007
5B00. . . . . . . . . . . . . . . . . . . . . . . . . . . . . . . . . . . . . . . . . . . . . . . . . . . . . . . . . . . . . . . . 1008
5B01. . . . . . . . . . . . . . . . . . . . . . . . . . . . . . . . . . . . . . . . . . . . . . . . . . . . . . . . . . . . . . . . 1009
5B10. . . . . . . . . . . . . . . . . . . . . . . . . . . . . . . . . . . . . . . . . . . . . . . . . . . . . . . . . . . . . . . . 1010
5B11. . . . . . . . . . . . . . . . . . . . . . . . . . . . . . . . . . . . . . . . . . . . . . . . . . . . . . . . . . . . . . . . 1011
5C00. . . . . . . . . . . . . . . . . . . . . . . . . . . . . . . . . . . . . . . . . . . . . . . . . . . . . . . . . . . . . . . . 1012
5C20. . . . . . . . . . . . . . . . . . . . . . . . . . . . . . . . . . . . . . . . . . . . . . . . . . . . . . . . . . . . . . . . 1013
6000. . . . . . . . . . . . . . . . . . . . . . . . . . . . . . . . . . . . . . . . . . . . . . . . . . . . . . . . . . . . . . . . 1014
6001. . . . . . . . . . . . . . . . . . . . . . . . . . . . . . . . . . . . . . . . . . . . . . . . . . . . . . . . . . . . . . . . 1015
6003. . . . . . . . . . . . . . . . . . . . . . . . . . . . . . . . . . . . . . . . . . . . . . . . . . . . . . . . . . . . . . . . 1016
6500. . . . . . . . . . . . . . . . . . . . . . . . . . . . . . . . . . . . . . . . . . . . . . . . . . . . . . . . . . . . . . . . 1017
6502. . . . . . . . . . . . . . . . . . . . . . . . . . . . . . . . . . . . . . . . . . . . . . . . . . . . . . . . . . . . . . . . 1018
6800. . . . . . . . . . . . . . . . . . . . . . . . . . . . . . . . . . . . . . . . . . . . . . . . . . . . . . . . . . . . . . . . 1019
6801. . . . . . . . . . . . . . . . . . . . . . . . . . . . . . . . . . . . . . . . . . . . . . . . . . . . . . . . . . . . . . . . 1020
6900. . . . . . . . . . . . . . . . . . . . . . . . . . . . . . . . . . . . . . . . . . . . . . . . . . . . . . . . . . . . . . . . 1021
6901. . . . . . . . . . . . . . . . . . . . . . . . . . . . . . . . . . . . . . . . . . . . . . . . . . . . . . . . . . . . . . . . 1022
6902. . . . . . . . . . . . . . . . . . . . . . . . . . . . . . . . . . . . . . . . . . . . . . . . . . . . . . . . . . . . . . . . 1023
6910. . . . . . . . . . . . . . . . . . . . . . . . . . . . . . . . . . . . . . . . . . . . . . . . . . . . . . . . . . . . . . . . 1024
6911. . . . . . . . . . . . . . . . . . . . . . . . . . . . . . . . . . . . . . . . . . . . . . . . . . . . . . . . . . . . . . . . 1025
6920. . . . . . . . . . . . . . . . . . . . . . . . . . . . . . . . . . . . . . . . . . . . . . . . . . . . . . . . . . . . . . . . 1026
6921. . . . . . . . . . . . . . . . . . . . . . . . . . . . . . . . . . . . . . . . . . . . . . . . . . . . . . . . . . . . . . . . 1027
6930. . . . . . . . . . . . . . . . . . . . . . . . . . . . . . . . . . . . . . . . . . . . . . . . . . . . . . . . . . . . . . . . 1028
6931. . . . . . . . . . . . . . . . . . . . . . . . . . . . . . . . . . . . . . . . . . . . . . . . . . . . . . . . . . . . . . . . 1029
6932. . . . . . . . . . . . . . . . . . . . . . . . . . . . . . . . . . . . . . . . . . . . . . . . . . . . . . . . . . . . . . . . 1030
6933. . . . . . . . . . . . . . . . . . . . . . . . . . . . . . . . . . . . . . . . . . . . . . . . . . . . . . . . . . . . . . . . 1031
6934. . . . . . . . . . . . . . . . . . . . . . . . . . . . . . . . . . . . . . . . . . . . . . . . . . . . . . . . . . . . . . . . 1032
6935. . . . . . . . . . . . . . . . . . . . . . . . . . . . . . . . . . . . . . . . . . . . . . . . . . . . . . . . . . . . . . . . 1033
6936. . . . . . . . . . . . . . . . . . . . . . . . . . . . . . . . . . . . . . . . . . . . . . . . . . . . . . . . . . . . . . . . 1034
6937. . . . . . . . . . . . . . . . . . . . . . . . . . . . . . . . . . . . . . . . . . . . . . . . . . . . . . . . . . . . . . . . 1035
6938. . . . . . . . . . . . . . . . . . . . . . . . . . . . . . . . . . . . . . . . . . . . . . . . . . . . . . . . . . . . . . . . 1036
6940. . . . . . . . . . . . . . . . . . . . . . . . . . . . . . . . . . . . . . . . . . . . . . . . . . . . . . . . . . . . . . . . 1037
6941. . . . . . . . . . . . . . . . . . . . . . . . . . . . . . . . . . . . . . . . . . . . . . . . . . . . . . . . . . . . . . . . 1038
6942. . . . . . . . . . . . . . . . . . . . . . . . . . . . . . . . . . . . . . . . . . . . . . . . . . . . . . . . . . . . . . . . 1039
6943. . . . . . . . . . . . . . . . . . . . . . . . . . . . . . . . . . . . . . . . . . . . . . . . . . . . . . . . . . . . . . . . 1040
6944. . . . . . . . . . . . . . . . . . . . . . . . . . . . . . . . . . . . . . . . . . . . . . . . . . . . . . . . . . . . . . . . 1041
6945. . . . . . . . . . . . . . . . . . . . . . . . . . . . . . . . . . . . . . . . . . . . . . . . . . . . . . . . . . . . . . . . 1042
6946. . . . . . . . . . . . . . . . . . . . . . . . . . . . . . . . . . . . . . . . . . . . . . . . . . . . . . . . . . . . . . . . 1043
6950. . . . . . . . . . . . . . . . . . . . . . . . . . . . . . . . . . . . . . . . . . . . . . . . . . . . . . . . . . . . . . . . 1044
6B20. . . . . . . . . . . . . . . . . . . . . . . . . . . . . . . . . . . . . . . . . . . . . . . . . . . . . . . . . . . . . . . . 1045
B202. . . . . . . . . . . . . . . . . . . . . . . . . . . . . . . . . . . . . . . . . . . . . . . . . . . . . . . . . . . . . . . . 1046
B203. . . . . . . . . . . . . . . . . . . . . . . . . . . . . . . . . . . . . . . . . . . . . . . . . . . . . . . . . . . . . . . . 1047
B204. . . . . . . . . . . . . . . . . . . . . . . . . . . . . . . . . . . . . . . . . . . . . . . . . . . . . . . . . . . . . . . . 1048
C000. . . . . . . . . . . . . . . . . . . . . . . . . . . . . . . . . . . . . . . . . . . . . . . . . . . . . . . . . . . . . . . . 1049
Read Me First
Notes on Online Manual Usage
How to Print
Notes on Online Manual Usage
Reproduction, diversion or copying of any text, photo or image published in the Online Manual
(hereinafter referred to as "this guide"), in whole or in part, is prohibited.
In principle, Canon shall change or delete the contents of this guide without prior notice to customers.
In addition, Canon may suspend or stop the disclosure of this guide due to unavoidable reasons.
Canon shall not be liable for any damage suffered by customers as a result of changes in or deletion
of information in this guide, or suspension/stoppage of disclosure of this guide.
Although the contents of this guide have been prepared with utmost care, please contact the service
center if you find any incorrect or missing information.
In principle, the descriptions in this guide are based on the product at the time of its initial sale.
This guide does not disclose the manuals of all the products sold by Canon. See the manual supplied
with the product when using a product that is not described in this guide.
How to Print
Use the print function of your Web browser to print this guide.
To set to print background colors and images, follow the steps below.
Note
In Windows 8, print in the desktop version.
In Internet Explorer 9, 10, or 11
1. Select (Tools) > Print > Page setup....
2. Select the Print Background Colors and Images checkbox.
In Internet Explorer 8
1. Press the Alt key to display the menus.
Alternatively, from Tools, select Toolbars > Menu Bar to display the menus.
2. Select Page Setup... from the File menu.
3. Select the Print Background Colors and Images checkbox.
In Mozilla Firefox
1. Press the Alt key to display the menus.
Alternatively, click Firefox, then select Menu Bar from the right arrow of Options to display the
menus.
2. Select Page Setup... from the File menu.
3. Select the Print Background (colors & images) checkbox in Format & Options.
In Google Chrome
1. Select (Chrome Menu) > Print....
2. Select the Background colors & images checkbox in Options.
18
How to Use the Online Manual
Symbols Used in This Document
Warning
Instructions that, if ignored, could result in death or serious personal injury caused by incorrect
operation of the equipment. These must be observed for safe operation.
Caution
Instructions that, if ignored, could result in personal injury or material damage caused by incorrect
operation of the equipment. These must be observed for safe operation.
Important
Instructions including important information. To avoid damage and injury or improper use of the
product, be sure to read these indications.
Note
Instructions including notes for operation and additional explanations.
Basic
Instructions explaining basic operations of your product.
Note
Icons may vary depending on your product.
Touch-enabled Device Users
For touch actions, you need to replace "right-click" in this document with the action set on the operating
system. For example, if the action is set to "press and hold" on your operating system, replace "right-click"
with "press and hold."
19
Trademarks and Licenses
Microsoft is a registered trademark of Microsoft Corporation.
Windows is a trademark or registered trademark of Microsoft Corporation in the U.S. and/or other
countries.
Windows Vista is a trademark or registered trademark of Microsoft Corporation in the U.S. and/or other
countries.
Internet Explorer is a trademark or registered trademark of Microsoft Corporation in the U.S. and/or
other countries.
Mac, Mac OS, AirPort, Safari, Bonjour, iPad, iPhone and iPod touch are trademarks of Apple Inc.,
registered in the U.S. and other countries. AirPrint and the AirPrint logo are trademarks of Apple Inc.
IOS is a trademark or registered trademark of Cisco in the U.S. and other countries and is used under
license.
Google Cloud Print, Google Chrome, Android, Google Play and Picasa are either registered trademarks
or trademarks of Google Inc.
Adobe, Photoshop, Photoshop Elements, Lightroom, Adobe RGB and Adobe RGB (1998) are either
registered trademarks or trademarks of Adobe Systems Incorporated in the United States and/or other
countries.
Photo Rag is a trademark of Hahnemühle FineArt GmbH.
Bluetooth is a trademark of Bluetooth SIG, Inc., U.S.A. and licensed to Canon Inc.
Note
The formal name of Windows Vista is Microsoft Windows Vista operating system.
Copyright (c) 2003-2004, Apple Computer, Inc. All rights reserved.
Redistribution and use in source and binary forms, with or without modification, are permitted provided
that the following conditions are met:
1. Redistributions of source code must retain the above copyright notice, this list of conditions and the
following disclaimer.
2. Redistributions in binary form must reproduce the above copyright notice, this list of conditions and
the following disclaimer in the documentation and/or other materials provided with the distribution.
3. Neither the name of Apple Computer, Inc. ("Apple") nor the names of its contributors may be used to
endorse or promote products derived from this software without specific prior written permission.
THIS SOFTWARE IS PROVIDED BY APPLE AND ITS CONTRIBUTORS "AS IS" AND ANY EXPRESS
OR IMPLIED WARRANTIES, INCLUDING, BUT NOT LIMITED TO, THE IMPLIED WARRANTIES OF
MERCHANTABILITY AND FITNESS FOR A PARTICULAR PURPOSE ARE DISCLAIMED. IN NO
EVENT SHALL APPLE OR ITS CONTRIBUTORS BE LIABLE FOR ANY DIRECT, INDIRECT,
INCIDENTAL, SPECIAL, EXEMPLARY, OR CONSEQUENTIAL DAMAGES (INCLUDING, BUT NOT
LIMITED TO, PROCUREMENT OF SUBSTITUTE GOODS OR SERVICES; LOSS OF USE, DATA, OR
PROFITS; OR BUSINESS INTERRUPTION) HOWEVER CAUSED AND ON ANY THEORY OF
LIABILITY, WHETHER IN CONTRACT, STRICT LIABILITY, OR TORT INCLUDING NEGLIGENCE OR
OTHERWISE) ARISING IN ANY WAY OUT OF THE USE OF THIS SOFTWARE, EVEN IF ADVISED OF
THE POSSIBILITY OF SUCH DAMAGE.
Apache License
Version 2.0, January 2004
http://www.apache.org/licenses/
TERMS AND CONDITIONS FOR USE, REPRODUCTION, AND DISTRIBUTION
20
1. Definitions.
"License" shall mean the terms and conditions for use, reproduction, and distribution as defined by
Sections 1 through 9 of this document.
"Licensor" shall mean the copyright owner or entity authorized by the copyright owner that is granting
the License.
"Legal Entity" shall mean the union of the acting entity and all other entities that control, are controlled
by, or are under common control with that entity. For the purposes of this definition, "control" means
(i) the power, direct or indirect, to cause the direction or management of such entity, whether by
contract or otherwise, or (ii) ownership of fifty percent (50%) or more of the outstanding shares, or (iii)
beneficial ownership of such entity.
"You" (or "Your") shall mean an individual or Legal Entity exercising permissions granted by this
License.
"Source" form shall mean the preferred form for making modifications, including but not limited to
software source code, documentation source, and configuration files.
"Object" form shall mean any form resulting from mechanical transformation or translation of a Source
form, including but not limited to compiled object code, generated documentation, and conversions to
other media types.
"Work" shall mean the work of authorship, whether in Source or Object form, made available under
the License, as indicated by a copyright notice that is included in or attached to the work (an example
is provided in the Appendix below).
"Derivative Works" shall mean any work, whether in Source or Object form, that is based on (or
derived from) the Work and for which the editorial revisions, annotations, elaborations, or other
modifications represent, as a whole, an original work of authorship. For the purposes of this License,
Derivative Works shall not include works that remain separable from, or merely link (or bind by name)
to the interfaces of, the Work and Derivative Works thereof.
"Contribution" shall mean any work of authorship, including the original version of the Work and any
modifications or additions to that Work or Derivative Works thereof, that is intentionally submitted to
Licensor for inclusion in the Work by the copyright owner or by an individual or Legal Entity
authorized to submit on behalf of the copyright owner. For the purposes of this definition, "submitted"
means any form of electronic, verbal, or written communication sent to the Licensor or its
representatives, including but not limited to communication on electronic mailing lists, source code
control systems, and issue tracking systems that are managed by, or on behalf of, the Licensor for
the purpose of discussing and improving the Work, but excluding communication that is
conspicuously marked or otherwise designated in writing by the copyright owner as "Not a
Contribution."
"Contributor" shall mean Licensor and any individual or Legal Entity on behalf of whom a Contribution
has been received by Licensor and subsequently incorporated within the Work.
2. Grant of Copyright License. Subject to the terms and conditions of this License, each Contributor
hereby grants to You a perpetual, worldwide, non-exclusive, no-charge, royalty-free, irrevocable
copyright license to reproduce, prepare Derivative Works of, publicly display, publicly perform,
sublicense, and distribute the Work and such Derivative Works in Source or Object form.
3. Grant of Patent License. Subject to the terms and conditions of this License, each Contributor hereby
grants to You a perpetual, worldwide, non-exclusive, no-charge, royalty-free, irrevocable (except as
stated in this section) patent license to make, have made, use, offer to sell, sell, import, and
otherwise transfer the Work, where such license applies only to those patent claims licensable by
such Contributor that are necessarily infringed by their Contribution(s) alone or by combination of
21
their Contribution(s) with the Work to which such Contribution(s) was submitted. If You institute patent
litigation against any entity (including a cross-claim or counterclaim in a lawsuit) alleging that the
Work or a Contribution incorporated within the Work constitutes direct or contributory patent
infringement, then any patent licenses granted to You under this License for that Work shall terminate
as of the date such litigation is filed.
4. Redistribution. You may reproduce and distribute copies of the Work or Derivative Works thereof in
any medium, with or without modifications, and in Source or Object form, provided that You meet the
following conditions:
1. You must give any other recipients of the Work or Derivative Works a copy of this License; and
2. You must cause any modified files to carry prominent notices stating that You changed the files;
and
3. You must retain, in the Source form of any Derivative Works that You distribute, all copyright,
patent, trademark, and attribution notices from the Source form of the Work, excluding those
notices that do not pertain to any part of the Derivative Works; and
4. If the Work includes a "NOTICE" text file as part of its distribution, then any Derivative Works that
You distribute must include a readable copy of the attribution notices contained within such
NOTICE file, excluding those notices that do not pertain to any part of the Derivative Works, in at
least one of the following places: within a NOTICE text file distributed as part of the Derivative
Works; within the Source form or documentation, if provided along with the Derivative Works; or,
within a display generated by the Derivative Works, if and wherever such third-party notices
normally appear. The contents of the NOTICE file are for informational purposes only and do not
modify the License. You may add Your own attribution notices within Derivative Works that You
distribute, alongside or as an addendum to the NOTICE text from the Work, provided that such
additional attribution notices cannot be construed as modifying the License.
You may add Your own copyright statement to Your modifications and may provide additional or
different license terms and conditions for use, reproduction, or distribution of Your modifications,
or for any such Derivative Works as a whole, provided Your use, reproduction, and distribution of
the Work otherwise complies with the conditions stated in this License.
5. Submission of Contributions. Unless You explicitly state otherwise, any Contribution intentionally
submitted for inclusion in the Work by You to the Licensor shall be under the terms and conditions of
this License, without any additional terms or conditions. Notwithstanding the above, nothing herein
shall supersede or modify the terms of any separate license agreement you may have executed with
Licensor regarding such Contributions.
6. Trademarks. This License does not grant permission to use the trade names, trademarks, service
marks, or product names of the Licensor, except as required for reasonable and customary use in
describing the origin of the Work and reproducing the content of the NOTICE file.
7. Disclaimer of Warranty. Unless required by applicable law or agreed to in writing, Licensor provides
the Work (and each Contributor provides its Contributions) on an "AS IS" BASIS, WITHOUT
WARRANTIES OR CONDITIONS OF ANY KIND, either express or implied, including, without
limitation, any warranties or conditions of TITLE, NON-INFRINGEMENT, MERCHANTABILITY, or
FITNESS FOR A PARTICULAR PURPOSE. You are solely responsible for determining the
appropriateness of using or redistributing the Work and assume any risks associated with Your
exercise of permissions under this License.
8. Limitation of Liability. In no event and under no legal theory, whether in tort (including negligence),
contract, or otherwise, unless required by applicable law (such as deliberate and grossly negligent
acts) or agreed to in writing, shall any Contributor be liable to You for damages, including any direct,
indirect, special, incidental, or consequential damages of any character arising as a result of this
License or out of the use or inability to use the Work (including but not limited to damages for loss of
22
goodwill, work stoppage, computer failure or malfunction, or any and all other commercial damages
or losses), even if such Contributor has been advised of the possibility of such damages.
9. Accepting Warranty or Additional Liability. While redistributing the Work or Derivative Works thereof,
You may choose to offer, and charge a fee for, acceptance of support, warranty, indemnity, or other
liability obligations and/or rights consistent with this License. However, in accepting such obligations,
You may act only on Your own behalf and on Your sole responsibility, not on behalf of any other
Contributor, and only if You agree to indemnify, defend, and hold each Contributor harmless for any
liability incurred by, or claims asserted against, such Contributor by reason of your accepting any
such warranty or additional liability.
END OF TERMS AND CONDITIONS
23
Enter keywords in the search window and click (Search).
You can search for target pages in this guide.
Search Tips
You can search for target pages by entering keywords in the search window.
Note
The displayed screen may vary.
When searching from this page or the "Home" page without entering your product's model name or your
application's name, all products supported by this guide will be considered for the search.
If you want to narrow down the search results, add your product's model name or your application's
name to the keywords.
Searching for Functions
Enter your product's model name and a keyword for the function you want to learn about
Example: When you want to learn how to load paper
Enter "(your product's model name) load paper" in the search window and perform a search
Troubleshooting Errors
Enter your product's model name and a support code
Example: When the following error screen appears
Enter "(your product's model name) 1000" in the search window and perform a search
24
Note
The displayed screen varies depending on your product.
Searching for Application Functions
Enter your application's name and a keyword for the function you want to learn about
Example: When you want to learn how to print collages with My Image Garden
Enter "My Image Garden collage" in the search window and perform a search
Searching for Reference Pages
Enter your model name and a reference page title*
* You can find reference pages more easily by entering the function name as well.
Example: When you want to browse the page referred to by the following sentence on a scanning
procedure page
Refer to "Color Settings Tab" for your model from Home of the Online Manual for details.
Enter "(your product's model name) scan Color Settings Tab" in the search window and perform a
search
25
Notes on Operation Explanations
In this guide, most of the operations are described based on the windows displayed when Windows 8.1
operating system (called Windows 8.1 below) or Windows 8 operating system (called Windows 8 below) is
used.
26
Useful Functions Available on the Machine
Connect Wirelessly with Ease in "Access Point Mode"
Print Photos Easily Using My Image Garden
Create and Print Personalized Disc Labels (CD/DVD/BD) Easily and Beautifully
Download a Variety of Content Materials
Print Items with Easy-PhotoPrint+ (Web Application)
Print Photos on Facebook Easily Using a Facebook App "Print Your Days"
Print/Scan by Placing a Smartphone over the Machine
Connection Methods Available on the Machine
Notice for Web Service Printing
Use PIXMA Cloud Link
Printing with Google Cloud Print
Printing from AirPrint Compliant Device
Checking Printer Information
Online Storage Integration Function
How to Use Print from E-mail
Print Easily from a Smartphone or Tablet with PIXMA Printing Solutions
Printing with Windows RT
27
Connect Wirelessly with Ease in "Access Point Mode"
The machine supports "access point mode" in which you can connect to the machine wirelessly from a
computer or smartphone even in an environment without an access point or wireless LAN router.
Switch to "access point mode" with simple steps to enjoy scanning and printing wirelessly.
When you use the machine with the access point mode, be sure to specify the access point name of the
machine and the security setting in advance.
Using the Machine with the Access Point Mode
28
Print Photos Easily Using My Image Garden
Organize Images Easily
In My Image Garden, you can register the names of people and events to photos.
You can organize photos easily as you can display them not only by folder but also by calendar, event,
and person. This also allows you to find the target photos easily when you search for them later on.
<Calendar View>
<People View>
Display Recommended Items in Slide Shows
Based on the information registered to photos, Quick Menu automatically selects the photos on your
computer and creates recommended items such as collages and cards. The created items appear in slide
shows.
If there is an item you like, you can easily print it in just two steps.
1. In Image Display of Quick Menu, select the item you want to print.
2. Print the item with My Image Garden.
29
Place Photos Automatically
Delightful items are created easily as the selected photos are placed automatically according to the
theme.
Other Various Functions
My Image Garden has many other useful functions.
Refer to "What You Can Do with My Image Garden" for details.
30
Create and Print Personalized Disc Labels (CD/DVD/BD) Easily and
Beautifully
Print without a Computer
You can enjoy disc label printing easily even without using a computer.
Refer to "About Disc Label Printing" for details.
Create Items with Applications and Print Them
Use My Image Garden to combine your favorite photos with preset themes to create and print
personalized disc labels.
Refer to "Printing Disc Labels (CD/DVD/BD)" for details.
31
Download a Variety of Content Materials
CREATIVE PARK
A "printing materials site" where you can download all the printing materials for free.
Various types of content such as seasonal cards and paper crafts that can be made by assembling paper
parts are provided.
It is easily accessible from Quick Menu.
CREATIVE PARK PREMIUM
A service where customers using models that support PREMIUM Contents can download exclusive
printing materials.
PREMIUM Contents can be downloaded easily via My Image Garden. Downloaded PREMIUM Contents
can be printed directly with My Image Garden.
To download PREMIUM Contents, make sure that genuine Canon ink tanks/ink cartridges are installed for
all colors on a supported printer.
Note
The designs of PREMIUM Contents provided in this page are subject to change without prior notice.
32
Print Items with Easy-PhotoPrint+ (Web Application)
You can easily create and print personalized items such as calendars and collages, anytime and anywhere,
by simply accessing Easy-PhotoPrint+ on the web from a computer or tablet.
By using Easy-PhotoPrint+, you can create items in the latest environment without going through the trouble
of installation.
Moreover, you can use various photos for your item through integration with social networks such as
Facebook, or with online storage, web albums, etc.
Refer to "Easy-PhotoPrint+ Guide" for details.
33
Print Photos on Facebook Easily Using a Facebook App "Print
Your Days"
Use Print Your Days to collect Facebook photos of memories of parties and travel, recent activity of your
family and friends, your hobbies, etc., then create and print a work of art.
Print Your Days is available from the Print Your Days Facebook page.
34
Print/Scan by Placing a Smartphone over the Machine
The machine supports NFC (Near Field Communication), a short-range wireless communication technology.
By placing an NFC-enabled Android smartphone over the NFC mark on the operation panel of the machine,
you can print photos and documents saved on the smartphone or scan items placed on the platen of the
machine.
Before Using the NFC Function on the Machine
Download and install "PIXMA Printing Solutions".
Download free from Google Play.
Important
May not be available depending on your country or region.
The application can be downloaded for free; however, Internet connection fees apply.
Printing with the NFC Function
1.
Start "PIXMA Printing Solutions".
2. Select Photo Print or Document Print.
3. Select the photo or document you want to print, then set the paper size, etc. as needed.
4. Place the smartphone over the machine.
Printing starts.
Important
If printing does not start, change the position over which to place the smartphone.
Scanning with the NFC Function
1. Place the item on the platen of the machine.
2. Start "PIXMA Printing Solutions".
35
3. Select Scan, then set the item size, etc. as needed.
4. Place the smartphone over the machine.
Scanning starts.
Important
If scanning does not start, change the position over which to place the smartphone.
Troubleshooting
Cannot Print/Scan from an NFC-enabled Device
36
Connection Methods Available on the Machine
The following connection methods are available on the machine.
Wireless Connection
With an access point
Without an access point
Wired Connection
USB Connection
Wireless Connection
There are two methods for connecting the printer to your device (such as a smartphone). One method is
to connect using an access point, and the other method is to connect without using an access point.
The two connection methods cannot be used at the same time.
If you have an access point (or wireless network router), it is recommended that you use the method
described in Connection Using an Access Point.
When connecting another device while a device is already connected to the printer, connect it using the
same connection method as the connected device.
If you connect using a different connection method, the connection to the device in use will be disabled.
Connection Using an Access Point
Connect the printer and a device using an access point.
Connection methods vary depending on the access point type.
You can change network settings such as the SSID and security protocol on the printer.
37
When the connection between a device and an access point is completed and (Wi-Fi icon) is
displayed in the device's screen, you can connect the device to the printer using the access point.
Connection without Using an Access Point
Connect the printer and a device without using an access point. Connect a device and the printer
directly using the printer's access point mode function.
When establishing a connection in access point mode, Internet connection may become unavailable.
In that case, web services for the printer cannot be used.
If you connect a device connected to the Internet via an access point to the printer that is in access
point mode, the connection between the device and access point will be disabled. In that case, the
connection of the device may switch to a mobile data connection automatically depending on your
device. Transmission fees for connecting to the Internet using a mobile data connection apply.
In access point mode, you can connect up to five devices at the same time. If you try to connect a
sixth device while five devices are already connected, an error will appear.
If an error appears, disconnect a device that does not use the printer, then configure settings again.
Network settings such as the SSID and security protocol can be changed on the printer.
When Using Windows XP:
Connection without Using an Access Point (Windows XP)
Restrictions
(Appears in a new window)
Wired Connection
Connect the printer and a hub or router with an Ethernet cable. Prepare an Ethernet cable.
USB Connection
Connect the printer and a computer with a USB cable. Prepare a USB cable.
38
Connection without Using an Access Point (Windows XP)
Restrictions
(Appears in a new window)
1.
If the HOME button (A) on the printer is lit, touch the HOME button.
2.
Flick the screen left or right, then tap the Setup.
3.
Flick the screen up or down, then tap Device settings.
4. Tap LAN settings.
5. Tap Change LAN.
39
6. Tap Access point mode active.
7.
Check the SSID displayed in the printer screen.
8.
Tap Details, check the Password (network key), then tap OK.
You will use the SSID and Password (network key) in the subsequent steps.
9. Tap OK.
10. Right-click the Wireless Network Connection icon in the notification area of the taskbar
on the computer, then select View Available Wireless Networks.
40
11. Select the network name (SSID) you want to use, then click Connect.
12.
Enter the Password (Network key), then click Connect.
13.
When connection is complete, click Back until the screen below appears.
Proceed with the setup.
41
Restrictions
When connecting another device while a device (such as a smartphone) is already connected to the
printer, connect it using the same connection method as the connected device.
If you connect using a different connection method, the connection to the device in use will be disabled.
Connection Using a Wired Network cannot be performed on printers that do not support a wired
connection.
Connection Using an Access Point
Make sure that a device and an access point (or wireless network router) are connected. For details
on how to check the settings, refer to the manual supplied with the access point or contact its
manufacturer.
As for a device already connected to the printer without using an access point, reconnect it via an
access point.
The configuration, router functions, setup procedures and security settings of the network device vary
depending on your system environment. For details, refer to the manual of your network device or
contact its manufacturer.
Check if your device supports IEEE802.11n (2.4 GHz), IEEE802.11g or IEEE802.11b.
If your device is set to the "IEEE802.11n only" mode, WEP or TKIP cannot be used as a security
protocol. Change the security protocol for your device to something other than WEP and TKIP or
change the setting to something other than "IEEE802.11n only."
The connection between your device and the access point will be temporarily disabled while changing
the setting. Do not operate the screen of this guide until the setup is complete.
For office use, consult your network administrator.
Take added care when connecting to a network that is not protected with security measures, as there
is a risk of disclosing data such as your personal information to a third party.
Connection without Using an Access Point
Important
If you connect a device connected to the Internet via an access point to the printer that is in access
point mode, the connection between the device and access point will be disabled. In that case, the
connection of the device may switch to a mobile data connection automatically depending on your
device. When you connect to the Internet using a mobile data connection, charges may apply
depending on your contract.
When you connect a device and the printer in access point mode, the connection information will
be saved to Wi-Fi settings. The device may be connected to the printer automatically even after
disconnecting it or connecting it to another access point.
You cannot connect to an access point and the printer that is in access point mode at the same
time. If you have an access point, it is recommended that you use the access point to connect to
the printer.
To prevent automatic connection to the printer that is in access point mode, change the
connection mode after using the printer, or set not to connect automatically in the Wi-Fi settings
of the device.
For details on how to change the settings of a device, refer to the manual supplied with the
device or contact its manufacturer.
42
When connecting a device and the printer in access point mode, Internet connection may become
unavailable. In that case, web services for the printer cannot be used.
In access point mode, you can connect up to five devices at the same time. If you try to connect a
sixth device while five devices are already connected, an error will appear.
If an error appears, disconnect a device that does not use the printer, then configure settings again.
Devices connected to the printer in access point mode cannot communicate with each other.
Firmware updates for the printer are not available while using the access point mode.
When a device has been connected to the printer without using an access point and you want to set it
up again using the same connection method, disconnect it first. Disable the connection between the
device and printer in the Wi-Fi setting screen.
Connection Using a Wired Network
This printer cannot be used over wireless and wired connections at the same time.
When using a router, connect the printer and a device to the LAN side (same network segment).
43
Notice for Web Service Printing
When Using Web Service
Canon does not guarantee the continuity and reliability of the web services provided, the availability of
site access, or permission to download the materials.
Canon may at any time update, change, or delete the information provided through the web service,
or may suspend or discontinue the service without prior notice. Canon shall not be held responsible
for any damages resulting from such actions.
In no event shall Canon be liable for any damages whatsoever resulting from the use of the web
services.
User registration is necessary before using the photo sharing site.
When you use the photo sharing site, observe the conditions of use of the site and use the service
within your own responsibility.
All or part of the web service may not be available depending on the country or region you live in.
Depending on your network environment, some functions on web service are not available. Even if
they are available, it may take a while to print or display the contents, or communication may be
interrupted while operation is in progress.
When you use web service, your machine's name, information of your region or country, your selected
language, and what kind of service you use (e.g. photo sharing site) are sent to and saved in our
server. Canon is unable to identify specific customers using this information.
Your login name and password for the photo sharing site are saved in the machine's memory (not
encrypted).
If you hand over the machine to anyone or dispose of it, delete your login name and password from
the machine's memory in advance.
The account information will be sent to Canon Inc. server (located in Japan), then forwarded to the
service provider's server.
Canon handles your account information as follows:
Your account information will be used in personal identification process of the selected service.
Canon will not provide your account information to any third party without your consent, except for
sending to the service provider or providing based on laws and regulations.
After the conclusion of non-disclosure agreement, Canon may deposit your account information to
the contractor to achieve the purpose of use.
Canon endeavors to secure the safety of your account information.
It is at your option to enter and send your account information. However, the service that requires
to enter your account information is not available unless you enter and send it.
Your account information does not remain in Canon Inc. server. At the latest, it will be deleted
when you have disconnected your printer from LAN.
For details, contact a Canon-authorized sales representative in the country or region you live in.
Copyrights and Rights of Publicity
When printing from the photo sharing site:
Observe the conditions of use of the photo sharing site when you use photos on the site.
It is unlawful to reproduce or edit the copyrighted work of another person without permission from the
copyright holder, except for personal use, use within the home, or other use within the limited scope
as defined by the copyright. Additionally, reproducing or editing photographs of people may infringe
on Rights of Publicity.
44
When printing downloaded template forms:
1. The copyright of each material (photos, illustrations, logos, or documents: hereinafter referred to as
"the materials") provided on the web template printing service belongs to their respective owners.
Issues pertaining to Rights of Publicity may arise regarding the use of any of people or characters
displayed on the web template printing service.
Except as otherwise permitted (please see "2" below), copying, modifying or distributing all or a
portion of any of the materials contained on the web template printing service without prior consent of
the respective rights (Rights of Publicity and Copyright) holder is strictly prohibited.
2. All of the materials provided on the web template printing service can be freely used for personal and
non-commercial purposes.
45
Use PIXMA Cloud Link
By using PIXMA Cloud Link, you can connect your printer to a cloud service, such as CANON iMAGE
GATEWAY, Evernote, or Twitter, and use the following functions without using a computer:
Print images from a photo-sharing service
Print documents from a data management service
Save scanned images to a data management service.
Use Twitter to report the printer status, such as no paper or low ink levels.
In addition, you can use various functions by adding and registering apps that are linked with various cloud
services.
Using PIXMA Cloud Link from Your Printer
Using PIXMA Cloud Link from Your Smartphone, Tablet, or Computer
Important
In certain countries, PIXMA Cloud Link may not be available or the available apps may be different.
Some apps require that you have an account before you use those apps. For such apps, please set up
an account beforehand.
To find out which models support PIXMA Cloud Link check the Canon homepage.
The screen display may change without prior notice.
46
Using PIXMA Cloud Link from Your Printer
Before Using PIXMA Cloud Link from Your Printer
Preparing to Use PIXMA Cloud Link from Your Printer
Using PIXMA Cloud Link
Cloud Troubleshooting
47
Before Using PIXMA Cloud Link from Your Printer
First, check the following content:
Precautions
If you plan to use the web service to print documents, be sure to check these precautions beforehand.
Network environment
The printer must be connected to a LAN and to the Internet.
If your printer is not connected to a LAN, see here and set one up.
For information on the LAN and Internet settings, see the manual of your network devices or contact the
manufacturer.
Important
The user will bear the cost of Internet access.
Preparing to Use PIXMA Cloud Link from Your Printer
Copyright c 1991-2013 Unicode, Inc. All rights reserved. Distributed under the Terms of Use in http://
www.unicode.org/copyright.html.
This software is based in part on the work of the Independent JPEG Group.
THE BASIC LIBRARY FUNCTIONS
Written by: Philip Hazel
Email local part: ph10
Email domain: cam.ac.uk
University of Cambridge Computing Service, Cambridge, England.
Copyright (c) 1997-2008 University of Cambridge All rights reserved.
THE "BSD" LICENCE
Redistribution and use in source and binary forms, with or without modification, are permitted provided that
the following conditions are met:
* Redistributions of source code must retain the above copyright notice, this list of conditions and the
following disclaimer.
* Redistributions in binary form must reproduce the above copyright notice, this list of conditions and the
following disclaimer in the documentation and/or other materials provided with the distribution.
* Neither the name of the University of Cambridge nor the name of Google Inc. nor the names of their
contributors may be used to endorse or promote products derived from this software without specific prior
written permission.
THIS SOFTWARE IS PROVIDED BY THE COPYRIGHT HOLDERS AND CONTRIBUTORS "AS IS" AND
ANY EXPRESS OR IMPLIED WARRANTIES, INCLUDING, BUT NOT LIMITED TO, THE IMPLIED
WARRANTIES OF MERCHANTABILITY AND FITNESS FOR A PARTICULAR PURPOSE ARE
DISCLAIMED. IN NO EVENT SHALL THE COPYRIGHT OWNER OR CONTRIBUTORS BE LIABLE FOR
ANY DIRECT, INDIRECT, INCIDENTAL, SPECIAL, EXEMPLARY, OR CONSEQUENTIAL DAMAGES
(INCLUDING, BUT NOT LIMITED TO, PROCUREMENT OF SUBSTITUTE GOODS OR SERVICES; LOSS
OF USE, DATA, OR PROFITS; OR BUSINESS INTERRUPTION) HOWEVER CAUSED AND ON ANY
THEORY OF LIABILITY, WHETHER IN CONTRACT, STRICT LIABILITY, OR TORT (INCLUDING
NEGLIGENCE OR OTHERWISE) ARISING IN ANY WAY OUT OF THE USE OF THIS SOFTWARE, EVEN
IF ADVISED OF THE POSSIBILITY OF SUCH DAMAGE.
48
Preparing to Use PIXMA Cloud Link from Your Printer
Follow the steps described below to register the printer information to the cloud service server.
1. Check that the printer is connected to the Internet
2. From the printer home screen, select Cloud
3.
When the registration completed screen appears, select OK
4.
On the confirmation screen, select Next
5.
In the License agreement and Privacy statement windows, read the statements, and then
select Agree if you agree
<License agreement>
<Privacy statement>
49
Note
If you select Disagree, a confirmation screen of canceling the user information registration
appears. If you select Yes, the user information registration is canceled, and you return to the
Home screen.
Even if you select Disagree, you can still use this service by selecting Agree from the registration
screen later.
You can print the displayed information by pressing the Start button.
6.
On the Time zone screen, select the time closest to your region, and then select Next
7.
In the time zones list, select the region closest to you
For some regions, a screen for applying the daylight saving time setting may appear.
8. When a message appears notifying that the app is now available, select Open list
50
The registration of printer information is completed, and a list of apps is displayed.
See here for the description of the apps list screen.
After you complete the registration, you can print photos and documents that have been uploaded to apps
on the linked cloud service and add/delete/sort apps.
Using PIXMA Cloud Link
51
Application Management
This section explains how to add, delete, and sort apps.
Add apps
You can add your favorite apps to the printer.
Follow the steps described below to add apps.
1.
From the printer home screen, select Cloud
2.
On the cloud's Main screen, select Add/delete
3.
Select Register apps
4.
From the list, select the category of the app
5. From the displayed apps list, select the app that you want to register
52
Note
Description of displayed icons
: Can be used with genuine Canon ink.
6.
Select Register
The registration is completed and the app is added to the apps list.
To register another app, repeat the procedure from step 5.
To end the app registration, select Back and return to the cloud's Main screen.
Important
Some apps may require a linked app account before you can use the app. If this is the case, set up
an account beforehand.
Delete apps
You can delete unnecessary apps from the apps list.
Follow the steps described below to delete apps.
1. From the printer home screen, select Cloud
2. On the cloud's Main screen, select Add/delete
53
3. Select Delete registered apps
4.
From the apps list, select the app that you want to delete
Note
Description of displayed icons
: Cannot be used because it is not yet released, not available in your region, or does not
support your model.
: Can be used with genuine Canon ink.
5.
Select Delete
When the deletion is finished, the app will be deleted from the apps list on the main screen.
To delete another app, repeat the procedure from step 4.
To end the app deletion, select Back and return to the cloud's Main screen.
Sort apps
You can sort apps displayed on the apps list.
Follow the steps described below to sort apps.
1. From the printer home screen, select Cloud
54
2. On the cloud's Main screen, select Add/delete
3.
Select Sort
4.
On the apps list, select the app that you want to sort
Note
Description of displayed icons
: Cannot be used because it is not yet released, not available in your region, or does not
support your model.
: Can be used with genuine Canon ink.
5. Use / buttons to move the app
6. Select Done
55
Sorting is complete.
To continue the sorting, repeat the procedure from step 4.
To end the sorting, select Back and return to the cloud's Main screen.
56
Using PIXMA Cloud Link
This section introduces the photo printing procedure by using CANON iMAGE GATEWAY as an example.
Important
The available functions differ depending on the app.
The printing procedure differs depending on the app.
You need to get the account and register photo and other data beforehand.
The following file formats can be printed: jpg, jpeg, pdf, docx, doc, xlsx, xls, pptx, ppt, and rtf.
The file formats that can be printed differ depending on the app.
Before you print, check that printer is on and is connected to the network. Then start.
Note
You can use CANON iMAGE GATEWAY to print jpg and jpeg file formats.
1.
On the Main screen, select the app to be used
2.
Enter the information according to the instructions on the authentication screen, and then
select Log in
Important
Some apps may not be fully displayed in the display area. If this is the case, scroll up, down, right,
and left to change the display area.
: Visible area
The Login screen may vary between apps.
After logging in, you may be asked from an external service to agree to use their app. Agree if you
are using the app.
3. In the displayed album list, select the album of your choice
57
4.
In the displayed image list, select the image that you want to print, and then select Next
5.
Make the necessary print settings, and then select Color
A message that indicates the completion of issuing print job appears, and printing starts.
To continue printing, select Continue, and perform the operation from Step 3.
To end the printing, select Apps. The screen returns to the apps list screen.
Important
If a print job is not printed within 24 hours after the print job is issued, the print job will expire and cannot
be printed.
With premium apps that limit the number of print jobs, print jobs that cannot be printed due to expiration
and other reasons are also included in the print count.
58
Note
To leave a usage history of this service, from the Home window on the operation panel, select
Setup -> Web service setup -> Web service connection setup -> IJ Cloud Printing Center
setup -> History setting for this service -> Save.
Cloud Troubleshooting
59
Cloud Windows
This section describes the Main screen of Cloud and the services available on the Main screen.
About the Main screen
When using the Cloud function, follow the steps described below first and display the Main screen.
When you select Cloud from the printer home screen, the cloud's Main screen appears.
You can use areas shown below to perform various functions, including printing photos and documents,
and adding, starting, and managing apps.
(1) Display area
(2) Add/delete button
(3) Manage button
Important
Some apps may require you to have an account before using the app. If this is the case, get the
account beforehand.
After selecting the app, some apps may not be fully displayed in the display area. If this is the case,
scroll up, down, right, and left to change the display area.
: Visible area
The app is not displayed if it is not yet released, or if the language not available in your region is
selected in the display language setting.
(1) Display area
The display changes based on the menu you select.
Immediately after the cloud's Main screen appears, a list of the registered apps appears.
To start an app, select the app that you want to use on the list.
60
Note
Description of displayed icons
: Cannot be used because it is not yet released, not available in your region, or does not support
your model.
: Can be used with genuine Canon ink.
(2) Add/delete button
Use this button to add, delete, and sort apps.
Register apps
Select this to add your favorite apps.
See here for details on how to add apps
Delete apps
Select this to delete registered apps.
See here for details on how to delete apps
Sort
Select this to sort the apps list.
See here for details on how to sort the apps list
(3) Manage button
Use this button to manage jobs, log out of an app, show the license agreement and privacy statement,
and set the time zone.
61
Manage jobs
From the Status list window, you can check the status of a job.
Settings
Select this to set the Time zone.
Select your region on the list. For some regions, you can set whether or not to apply the daylight saving
time setting.
Important
If you cannot find your region on the list, select the one closest to your region.
Legal information
This shows the License agreement and Privacy statement.
Press the Start button to print the displayed information.
Log out of all apps
You can log out at the same time from all apps that you are logged into.
Note
Some apps may not allow you to log out when you are logged on. If you want to log in with a
different account, you need to use this function to log out first.
Once you log out, you need to log in again. You may lose the settings with some apps.
62
Cloud Troubleshooting
If you cannot print
Check the following if you cannot print.
Check that the printer is connected to the Internet.
Check that the printer is connected to a LAN and the LAN environment is connected to the Internet.
Check that no error message is displayed on the printer's LCD monitor.
If the problem is not resolved, use the printer driver from your computer to perform the print job and
check whether the data can be printed normally on the printer.
If you still cannot print, see the troubleshooting page for your model on the Home of the Online
Manual.
Note
With a wireless LAN connection, after the printer is turned on, it may take several minutes before
communication is possible. Check that your printer is connected to the wireless network, and wait a
while before you start printing.
If the printer is not turned on or is not connected to the Internet, and consequently a print job is not
processed within 24 hours after it was submitted, the print job is automatically canceled. If this
happens, check the printer power and the Internet connection, and then re-submit the print job.
63
Using PIXMA Cloud Link from Your Smartphone, Tablet, or
Computer
Before Using Canon Inkjet Cloud Printing Center
Preparations Before Using Canon Inkjet Cloud Printing Center
Using Canon Inkjet Cloud Printing Center
Adding a Printer
Troubleshooting Canon Inkjet Cloud Printing Center
64
Before Using Canon Inkjet Cloud Printing Center
Canon Inkjet Cloud Printing Center is a service that links with the cloud function of the printer and allows you
to perform operations such as registering and managing apps from your smartphone or tablet device, and
checking the print status, print error, and ink status of the printer. You can also print app photos and
documents from your smartphone or tablet.
First, check the following content:
Precautions
If you plan to use the web service to print documents, be sure to check these precautions beforehand.
Printer specification
Check that Canon Inkjet Cloud Printing Center supports the printer.
Network environment
The printer must be connected to a LAN and to the Internet.
Important
The user will bear the cost of Internet access.
Operating requirements
For computers, smartphones, and tablet devices, see "Requirements for Canon Inkjet Cloud Printing
Center operation".
Important
This service may not be available in certain countries or regions. Also even if the service is available,
there are apps that cannot be used in certain regions.
Preparations Before Using Canon Inkjet Cloud Printing Center
65
Requirements for Canon Inkjet Cloud Printing Center operation
Computer
CPU x86 or x64 1.6 GHz or higher
RAM 2 GB or higher
Monitor display
Resolution 1024 x 768 pixels or higher
Number of display colors 24 bits (true-color) or higher
OS Browser
Windows XP SP3 or later
Internet Explorer 8*
Mozilla Firefox
Google Chrome
Windows Vista SP1 or later
Internet Explorer 8*, 9
Mozilla Firefox
Google Chrome
Windows 7
Internet Explorer 8*, 9, 10
Mozilla Firefox
Google Chrome
Windows 8
Internet Explorer 10
Mozilla Firefox
Google Chrome
Windows 8.1
Internet Explorer 11
Mozilla Firefox
Google Chrome
Mac OS X v10.6-OS X Mavericks v10.9 Safari 5.1, 6, 7
* When you use Internet Explorer 8, the web pages may not display correctly. Canon recommends that
you upgrade to Internet Explorer 9 or later, or use another browser.
Smartphone or tablet
OS Browser Resolution
iOS 5.1 or later
OS standard browser
320 x 480 (HVGA) or higher
Android 2.3.3 or later 480 x 800 (HVGA) or higher
*Android3.x is not supported.
Important
On the browser you are using, enable JavaScript and cookies.
If you use the zoom function or change the font size on your browser, the web pages may not display
correctly.
If you use the translation function of Google Chrome, the web pages may not display correctly.
If you use a proxy server outside of your country, the service may not be able to determine the correct
region.
66
In an in-house network environment, the 5222 port must be released. For confirmation instructions,
contact the network administrator.
67
Preparations Before Using Canon Inkjet Cloud Printing Center
To use the Canon Inkjet Cloud Printing Center, you need to follow the steps described below and register
the user information.
Print registration information from the printer
1.
From the home window, select Setup -> Web service setup -> Web
service connection setup -> IJ Cloud Printing Center setup -> Register with this
service
2.
In the registration confirmation window, Select Yes
3.
In the print settings, select the display language
4. Follow the instructions displayed in the window, and print the URL of the authentication
site and the Printer registration ID
Set A4 size or Letter size plain paper and select OK.
The authentication URL and Printer registration ID are printed.
68
Note
You will use this printed page in the next step.
Important
The operation to complete the registration should be done within 60 minutes.
Access the URL on the printed page, and then enter the e-mail address and
other necessary information
Important
Do not use the Back button of the web browser while an operation is processing. The screen may not
transition properly.
1.
Use the web browser on your PC, smartphone, tablet, or other devices to access the
authentication URL
69
2.
On the Login screen, select Create new account
3.
Enter the E-mail address and Printer registration ID of the printer's owner, and then
select OK
The registration page URL is sent to the e-mail address entered.
70
Important
There are character restrictions for the e-mail address, as shown below.
You can use up to 255 alphanumeric characters consisting of single-byte characters and
symbols (!#$%&'*+/=?^_{}|~.-@).
Multibyte characters cannot be used.
You will get an error if the e-mail address you enter contains a character that cannot be
used.
If you registered a different e-mail address by mistake, you can cancel the registration by going
to the printer's Home screen and selecting Setup (or by pressing the Setup button on the
operation panel) -> Web service setup -> Connection setup -> IJ Cloud Printing Center
setup (IJCloudPrintingCtr) -> Delete from this service.
You may not be able to receive the notification if you are using a spam filter. If you have a
setting to receive only the e-mails from certain domains, be sure to change the setting to allow
receiving e-mails from "noreply@mail.cs.c-ij.com".
There will be no error display even if you could not receive the e-mail because of the spam filter
setting or if you entered an incorrect e-mail address.
Access the URL in the e-mail, register the information, and complete the
user registration
1. When an e-mail with the subject "Information on Canon Inkjet Cloud Printing Center" is
sent to the e-mail address that you entered, select the URL
2. In the License agreement and Privacy statement windows of Canon Inkjet Cloud
Printing Center, read the statements, and select Agree if you agree
71
3.
In the user information entry screen, enter your Password, and select Next
Enter your password for logging in to the Canon Inkjet Cloud Printing Center.
72
Important
There are character restrictions for the Password, as shown below.
The password needs to be between 8 and 32 characters long, using single-byte
alphanumeric characters and symbols (!"#$%&'()*+,-./:;<=>?@[\]^_`{|}~). (Alphabets are
case-sensitive)
4.
Enter the User name
Enter the name that identifies the user.
Important
The User name entry field has the following character restrictions:
73
The password needs to be between 1 and 20 characters long, using single-byte
alphanumeric characters and symbols (!"#$%&'()*+,-./:;<=>?@[\]^_`{|}~). (Alphabets are
case-sensitive)
5. Specify the Time zone setting, and select Next
Select your region on the list. If you cannot find your region on the list, select the one closest to your
region.
Apply daylight saving time
This appears only when there is a daylight saving time in the Time zone that you selected.
Select whether or not to apply the daylight saving time.
6.
Enter the Security code and select Done
Enter the code for authenticating the user.
74
Important
The Security code entry field has the following character restrictions:
Single-byte numbers
The registration is complete. A registration completion message is displayed.
When you select the OK button in the message, the login screen is displayed.
Enter the registered e-mail address and password, and log in to the Canon Inkjet Cloud Printing Center.
Using Canon Inkjet Cloud Printing Center
75
Printing Your Printer registration ID
To add a printer by using Canon Inkjet Cloud Printing Center, you will need a Printer registration ID.
From the operation panel of this printer, print the URL of the authentication site and your Printer
registration ID. The procedure is as follows:
1.
Check that the printer is connected to the Internet
Important
To use this function, you must connect this printer to the Internet.
2.
From the home window, select Setup -> Web service setup -> Web service
connection setup -> IJ Cloud Printing Center setup -> Register with this service
3.
In the registration confirmation window, Select Yes
4.
In the print settings, select the display language
5. Follow the instructions displayed in the window, and print the URL of the authentication site
and your Printer registration ID
When you set A4 size or Letter size plain paper and select OK, the authentication site URL and your
Printer registration ID are printed.
Important
The operation to complete the registration should be done within 60 minutes.
76
Canon Inkjet Cloud Printing Center window
This section describes the Canon Inkjet Cloud Printing Center screens that are displayed on your
smartphone, tablet device, or computer.
Description of the Login screen
Description of the Main screen
Description of the Login screen
This section provides the description of the Login screen of Canon Inkjet Cloud Printing Center.
Important
You have 5 tries to enter your password. If you fail, you will not be able to log in for about the next
hour.
You remain logged in for an hour after the last access.
Language
Select the language you will be using.
E-mail address
Enter the e-mail address that you entered in the user registration.
Important
The e-mail address is case-sensitive. Make sure the case is correct.
Password
Enter the password that you entered in the user registration.
Keep login info
When you select the check box, the login screen is skipped for 14 days since the last day that the
service screen was accessed.
Reset password from here
Select this if you forgot the password.
Reset your password by following the instructions on the screen.
77
Create new account
A new registration will be added to the Canon Inkjet Cloud Printing Center.
For a new registration, you need the Printer registration ID.
System requirements
This displays the system requirements for the Canon Inkjet Cloud Printing Center.
Help/legal notices (smartphone and tablet devices only)
The description of the Canon Inkjet Cloud Printing Center screen and various reminders are
displayed.
Software license info
The licensing information of Canon Inkjet Cloud Printing Center is displayed.
About this service
This displays the descriptions of this service.
Description of the Main screen
When you log in to the Canon Inkjet Cloud Printing Center, the Main screen appears.
With this service, the functions available to Standard user of the printer are different from those available
to the printer Administrator.
Standard user can only use the functions marked by an asterisk (*).
You can use areas shown below to start*, add, and manage apps.
If you are using a smartphone or a tablet, you can also print photos and documents.
If you are using a smartphone or tablet
If you are using a PC
If you are using a smartphone or tablet
(1) Left context menu
78
(2) Printer name area
(3) Right context menu
(4) Display area
(5) Menu area
(1) Left context menu
When you select , the Mng. printer screen of the Manage users screen appears.
For general users, the Select printer screen appears.
Mng. printer screen (Select printer screen)
From the Mng. printer screen (Select printer screen), you can check*and update* printer information
registered to the Canon Inkjet Cloud Printing Center, change printer names, delete printers, add
printers, and copy apps.
Check the printer information*
The registered printer name is displayed.
indicates the currently selected printer.
indicates that an error occurred on the printer.
Display update date/time of the printer information*
79
This displays the date and time the printer information was last updated.
refreshes the information.
Copy apps
Select this to copy apps added in the selected printer to another printer.
When you select , the screen shown below appears.
Set the Destination printer and the Source printer. Then select OK.
Change the printer name
When you select , a screen to change the printer name appears.
Follow the instructions on the screen to change the name.
Note
The printer name entry has the following character limitation:
Up to 128 characters
Delete printers
When you select , the printer is deleted from the Canon Inkjet Cloud Printing Center.
When transferring the ownership of the printer, select Clear the information saved on the printer.
Add printers
Select this to add printers to be used in the Canon Inkjet Cloud Printing Center.
You need a Printer registration ID to add a printer.
Note
Up to 16 printers are guaranteed to operate for each e-mail address.
80
Manage users screen
From the Manage users screen, you can check user information registered to the Canon Inkjet Cloud
Printing Center, delete users, add users, and change the Administrator and Standard user settings.
User deletion
Select the check box of the user to be deleted, and select Delete.
However, you cannot delete yourself. To delete yourself, cancel your membership from the user
information screen.
Adding a user
Select Add user. The user registration screen appears.
Changing Administrator and Standard user settings
You can change the privileges of the Administrator and Standard users.
(2) Printer name area
The registered name of the printer selected is displayed.
The Administrator can change the printer name.
(3) Right context menu
When you select , the context menu appears.
The information displayed depends on the menu currently selected in the menu area.
The symbol indicates that there is a new unread notice.
81
Sort
This displays the screen to sort registered apps.
You can use the buttons to change the display order of apps. When you finish sorting,
press the Done button to confirm the order.
Latest notices*
This displays the latest notices. The symbol indicates that there is a new unread notice.
User information*
This displays the User information screen.
You can change the registered e-mail address, password, language, time zone, and other settings.
82
Help/legal notices*
The description of the Canon Inkjet Cloud Printing Center screen and various reminders are
displayed.
Log out*
This opens the Log out screen of the Canon Inkjet Cloud Printing Center.
(4) Display area
The display changes based on the menu you select.
(5) Menu area
The following 4 menu buttons are displayed:
Apps*
This displays the list of registered apps in the Display area.
Config
This displays the Register apps screen in the Display area.
The display can be toggled between Registered and Search apps.
The Registered screen lists registered apps.
You can check the information of these apps or deregister them.
83
On the Search apps screen, the apps that you can register by using the Canon Inkjet Cloud
Printing Center are displayed by category.
When you select , the details of the app are displayed.
When you select / , you can choose to register or unregister the app.
Note
Description of displayed icons
: Cannot be used because it is not yet released, not available in your region, or does
84
not support your model.
: Can be used with genuine Canon ink.
Properties*
This screen displays the status of the printer that is currently selected.
You can check how much ink is remaining or details about an error that occurred. You can also
access the ink purchasing site and the Online Manual.
Important
The Properties displayed may differ from the actual status at the display time, depending on
the printer status.
Manage jobs*
This screen displays the print status and the print history.
You can check the print status by looking at Status list, and the print history by looking at History.
You can also cancel print jobs and delete history information.
To cancel or delete a job, select that job and then select Cancel or Delete.
If you are using a PC
(1) Mng. printer (Select printer) button
(2) Manage users button
(3) Printer name area
(4) Menu area
85
(5) Notices area
(6) Information area
(7) Global navigation area
(8) Display area
(1) Mng. printer (Select printer) button
When you select the Mng. printer (Select printer) button, the Mng. printer (Select printer) screen
appears.
From the Mng. printer screen (Select printer screen), you can check*and update* printer information
registered to the Canon Inkjet Cloud Printing Center, change printer names, delete printers, add
printers, and copy apps.
Check the printer information*
The registered printer name is displayed.
indicates the currently selected printer.
indicates that an error occurred on the printer.
86
Display update date/time of the printer information*
This displays the date and time the printer information was last updated.
refreshes the information.
Change the printer name
When you select , a screen to change the printer name appears.
Follow the instructions on the screen to change the name.
Note
The printer name entry has the following character limitation:
Up to 128 characters
Delete printers
When you select , the printer is deleted from the Canon Inkjet Cloud Printing Center.
When transferring the ownership of the printer, select Clear the information saved on the printer.
Add printers
Select this to add printers to be used in the Canon Inkjet Cloud Printing Center.
You need a Printer registration ID to add a printer.
Note
Up to 16 printers are guaranteed to operate for each e-mail address.
Copy apps
Select this to copy apps added in the selected printer to another printer.
When you select , the screen shown below appears.
87
Set the Destination printer and the Source printer. Then select OK.
(2) Manage users button
When you select the Manage users button, the Manage users screen appears.
From the Manage users screen, you can check user information registered to the Canon Inkjet Cloud
Printing Center, delete users, add users, and change the Administrator and Standard user settings.
User deletion
Select the check box of the user to be deleted, and select Delete.
However, you cannot delete yourself. To delete yourself, cancel your membership from the user
information screen.
Adding a user
Select Add user. The user registration screen appears.
Changing Administrator and Standard user settings
You can change the privileges of the Administrator and Standard users.
(3) Printer name area
The registered name of the printer selected is displayed.
The Administrator can use the Mng. printer functions to change the printer name.
(4) Menu area
The following 4 menu buttons are displayed:
88
Sort (Apps)
This displays the list of registered apps in the Display area.
Drag the app to change the order.
When you finish sorting, press the Set sort order button and confirm the order.
Config
This displays the Register apps screen in the Display area.
The display can be toggled between Registered and Search apps.
The Registered screen lists registered apps.
You can check the information of these apps or deregister them.
On the Search apps screen, the apps that you can register by using the Canon Inkjet Cloud
Printing Center are displayed by category.
89
When you select , the details of the app are displayed.
When you select / , you can choose to register or unregister the app.
Note
Description of displayed icons
: Cannot be used because it is not yet released, not available in your region, or does
not support your model.
: Can be used with genuine Canon ink.
Properties*
This screen displays the status of the printer that is currently selected.
You can check how much ink is remaining or details about an error that occurred. You can also
access the ink purchasing site and the Online Manual.
Important
The Properties displayed may differ from the actual status at the display time, depending on
the printer status.
Manage jobs*
This screen displays the print status and the print history.
You can check the print status by looking at Status list, and the print history by looking at History.
You can also cancel print jobs and delete history information.
To cancel or delete a job, select that job and then select Cancel or Delete.
90
(5) Notices area
This displays the latest notice. Nothing is displayed in this area if there is no notice.
When you select Notice list, you can display up to 40 items.
(6) Information area
This display other information, including the privacy statement and other companies' licensing
information.
(7) Global navigation area
The User information*, Instructions*, and Log out* buttons are displayed.
Press the User information to change the settings.
(8) Display area
The display changes based on the menu you select.
91
92
Using Canon Inkjet Cloud Printing Center
When the user registration is completed, you can log in to the Canon Inkjet Cloud Printing Center and use
the service.
1. From your PC, smartphone, or tablet, access the service login URL (http://cs.c-ij.com/)
2.
On the Login screen, enter the E-mail address and Password, and then select Log in
Important
The e-mail address and password are case-sensitive. Make sure the case is correct.
E-mail address
Enter the e-mail address that you entered in the user registration.
Password
Enter the password that you entered in the user registration.
Keep login info
When you select the check box, the login screen is skipped for 14 days since the last day that the
service screen was accessed.
Important
If you fail to log in five straight times, you will not be able to login again for an hour.
You remain logged in for an hour after the last access.
The service may not function properly if you log in from multiple devices at the same time.
After logging in, you can use useful services such as adding/managing apps that work in conjunction with
this product's cloud functionality and checking the ink status.
For screen descriptions and operation instructions, see "Canon Inkjet Cloud Printing Center window".
Printing procedure
This section introduces the photo printing procedure by using CANON iMAGE GATEWAY as an example.
93
Important
The available functions differ depending on the app.
The printing procedure differs depending on the app.
You need to get the account and register photo and other data beforehand.
The following file formats can be printed: jpg, jpeg, pdf, docx, doc, xlsx, xls, pptx, ppt, and rtf.
The file formats that can be printed differ depending on the app.
Before you print, check that printer is on and is connected to the network. Then start.
This is available if you are using a smartphone or tablet.
Note
You can use CANON iMAGE GATEWAY to print jpg and jpeg file formats.
1.
On the Main screen, select the app to be used
2.
Enter the information according to the instructions on the authentication screen, and then
select Log in
3.
In the displayed album list, select the album of your choice
94
4.
In the displayed image list, select the image that you want to print, and then select Next
5. Make the necessary print settings, and then select Print
95
6.
A print job completion message appears, and printing starts
To continue printing, select Continue, and perform the operation from Step 3.
To end the printing, select Apps. The screen returns to the apps list screen.
Important
If a print job is not printed within 24 hours after the print job is issued, the print job will expire and
cannot be printed.
With premium apps that limit the number of print jobs, print jobs that expire and cannot be printed are
also included in the print count.
Adding a Printer
96
Adding a Printer
With one account, you can use the Canon Inkjet Cloud Printing Center services on multiple printers.
The procedure for adding a printer is as follows:
1. Print the registration information from the printer to be added
2.
From the browser on your smartphone, tablet, or computer, access the authentication site
URL
3.
Select Add printer
4. When the confirmation message is displayed, select OK
5. Enter your Printer registration ID, and select OK
97
Note
When you access the service from Remote UI, the Printer registration ID is entered
automatically.
6.
Enter the Password for the account you obtained beforehand, and select OK
Printer addition is completed.
If a printer added message is not displayed, follow the instructions on the displayed screen.
Troubleshooting Canon Inkjet Cloud Printing Center
98
Troubleshooting Canon Inkjet Cloud Printing Center
If an app cannot be installed
If the registered app is not in the Apps list
If the information is not updated when you press the Update button
If you do not receive the registration e-mail
Printing starts on its own even if you do not do anything
If you are unable to log in correctly even after entering the correct password in iOS or Mac
If an app cannot be installed
Check the country or region where the printer was purchased.
If the printer is taken outside the country or region where it was purchased, apps cannot be installed.
If the registered app is not in the Apps list
Check the display language of Canon Inkjet Cloud Printing Center.
If the display language is switched to a language that does not support an app, the app will not be
displayed in the apps list but will continue to be registered.
If you switch back to the target language of the app, it will be displayed in the apps list and you will be
able to start, register, or unregister the app.
If the information is not updated when you press the Update button
Because the Properties screen requires network connection with this product, the information may not be
reflected immediately. Please wait awhile, and then try updating the information again.
If the information is still not updated, then check that the product is connected to the Internet.
If you do not receive the registration e-mail
You may have entered a different e-mail address during the user registration of Canon Inkjet Cloud
Printing Center.
On the printer's Home screen, select Setup -> Web service setup -> Web service
connection setup -> IJ Cloud Printing Center setup -> Delete from this service to delete the service
registration.
After resetting the printer, repeat the user registration of Canon Inkjet Cloud Printing Center from the
beginning.
Printing starts on its own even if you do not do anything
A third party may be able to illegally use the Canon Inkjet Cloud Printing Center services.
On the printer's Home screen, select Setup -> Web service setup -> Web service
connection setup -> IJ Cloud Printing Center setup -> Delete from this service to delete the service
registration.
After resetting the printer, repeat the user registration of Canon Inkjet Cloud Printing Center from the
beginning.
99
If you are unable to log in correctly even after entering the correct
password in iOS or Mac
If you are using iOS or Mac, and the password contains the ¥ symbol, enter a backslash instead. For
instructions on entering a backslash, see the OS help.
100
Printing with Google Cloud Print
The printer is compatible with Google Cloud Print™ (Google Cloud Print is a service provided by Google
Inc.).
By using Google Cloud Print, you can print from anywhere with applications or services supporting Google
Cloud Print.
1.
Preparations for Printing with Google Cloud Print
2.
Printing from Computer or Smartphone with Google Cloud Print
Important
LAN connection with the printer and Internet connection are required to register the printer and to print
with Google Cloud Print. Internet connection fees apply.
This function may not be available depending on the country or region you live in.
101
Preparations for Printing with Google Cloud Print
To print with Google Cloud Print, you need to get Google account and register the printer with Google Cloud
Print in advance.
Getting Google Account
If you already have Google account, register the printer.
Registering the Printer with Google Cloud Print
Getting Google Account
First, get your Google account in order to register the printer with Google Cloud Print.
Access to Google Cloud Print with the web browser on the computer or the mobile device, then register
the required information.
* The screen above may change without prior notice.
Registering the Printer with Google Cloud Print
Register the printer with Google Cloud Print.
The authentication procedure using the web browser on the computer or the mobile device is required in
the process of registering. Because the authentication URL is printed from printer when the authentication
process is performed, prepare A4 or Letter-sized plain paper.
Important
LAN connection with the printer and Internet connection are required to register the printer and to
print with Google Cloud Print. Internet connection fees apply.
If the printer's owner changes, delete the printer from Google Cloud Print.
1. Make sure that the printer is turned on
102
2. From the Home screen, select Setup
3. Select Web service setup -> Connection setup -> Google Cloud Print setup ->
Register with Google Cloud Print
Note
If you have already registered the printer with Google Cloud Print, the confirmation message to
re-register the printer is displayed.
4.
When the confirmation screen to register the printer is displayed, select Yes
5.
Select a display language on the print setting screen of Google Cloud Print
The confirmation message to print the authentication URL is displayed.
6.
Load A4 or Letter-sized plain paper, then select OK
The authentication URL is printed.
7.
Ensure that the authentication URL is printed, select Yes
8.
Perform the authentication process using the web browser on the computer or the mobile
device
Access to the URL using the web browser on the computer or the mobile device and perform the
authentication process following the on-screen instructions.
Note
Perform the authentication process with your Google account which you have gotten in
advance.
9.
When the message that the registration is complete is displayed on the LCD of the
printer, select OK
When authentication process is complete properly, the registration items are displayed. When
authentication process is complete, you can print the data with Google Cloud Print.
When authentication process is not complete properly and the error message is displayed, select OK.
When the confirmation message to print the authentication URL is displayed, print the authentication
URL, then perform the authentication process on the computer again.
Deleting the Printer from Google Cloud Print
If the printer's owner changes or if you want to re-register the printer, delete the printer from Google Cloud
Print by following the steps below.
1. Make sure that the printer is turned on
2. From the Home screen, select Setup
103
3. Select Web service setup -> Connection setup -> Google Cloud Print setup ->
Delete from Google Cloud Print
4. When the confirmation screen to delete the printer is displayed, select Yes
104
Printing from Computer or Smartphone with Google Cloud Print
When you send print data with Google Cloud Print, the printer receives the print data and prints it
automatically if the printer is turned on.
When printing from a smartphone, tablet, computer, or other external device by using Google Cloud Print,
load paper into the printer in advance.
Sending the Print Data with Google Cloud Print
1.
Make sure that the printer is turned on
Note
If you want to send the print data from an outside location, turn on the printer in advance.
2.
Send print data from your smartphone, tablet, or computer
The figure below is an example of when printing from the web browser corresponding with Google
Cloud Print. The screen differs depending on the applications or services supporting Google Cloud
Print.
When the preparation for printing with Google Cloud Print is complete and when the printer is turned
on, the printer receives the print data and prints it automatically.
Note
Depending on the communication status, it may take a while to print the print data or the printer may
not receive the print data.
While printing with Google Cloud Print, the printing may be canceled depending on the printer's
status, such as when the printer is being operated or an error has occurred. To resume printing,
check the printer's status, then print with Google Cloud Print again.
For print settings:
If you select the media type other than plain paper or if you select the paper size other than A4/
Letter/B5/A5-size, the print data is printed in single-sided even when you select the duplex print
setting. (* The paper size differs depending on the model of your printer. For information about
105
the supported paper sizes, go to the Online Manual home page, and refer to the "Cannot Print
Properly with Automatic Duplex Printing" for your model.)
If you select plain paper as media type or if you select B5/A5-size as paper size, the print data is
printed with border even when you select the borderless print setting.
The print results may differ from the print image depending on the print data.
Depending on the device sending the print data, you may not select the print settings when
sending the print data with Google Cloud Print.
When you want to print from Google Cloud Print immediately
When the printer cannot receive the print data, or you want to start printing immediately, you can check
whether there is a print job on the Google Cloud Print and start printing manually.
Follow the steps below.
Important
Depending on your printer model, this function may not be available.
1.
Make sure that the printer is turned on
2.
From the Home screen, select Setup
3.
Select Web service inquiry
Note
If you have not registered the printer with Google Cloud Print, Web service inquiry is not
displayed.
Register the printer with Google Cloud Print.
4.
Select Print from Google Cloud Print
The confirmation screen to check is displayed.
5.
Select Yes
If there is the print data, the printer receives the print data and prints it.
106
Printing from AirPrint Compliant Device
This document explains how to use AirPrint to print wirelessly from your iPad, iPhone and iPod touch to a
Canon printer.
AirPrint enables you to print photos, email, Web pages and documents from your Apple device directly to
your printer without installing a driver.
Checking Your Environment
First, check your environment.
AirPrint Operation Environment
To use AirPrint, you will need one of the following Apple devices running the latest version of iOS:
iPad (all models)
iPhone (3GS or later)
iPod touch (3rd generation or later)
Network Environment
The Apple device (iPad, iPhone, or iPod touch) and this printer must be connected to the same Wi-Fi
network or connected in AP mode.
Printing with AirPrint
1. Check that this printer is turned on and the Apple device and this printer is connected to
the LAN or connected in AP mode.
2.
From the app of your Apple device, tap the operation icon to display the menu options.
107
"Printer cover
open"
Close the operation panel on the machine.
"Waste tank
full"/"Ink absorber
full"
The ink absorber is nearly full.
Check the Support Code on the touch screen and take the appropriate action to resolve the error.
Support Code List
"No ink"/"Ink
cassette error"
The ink tank is not installed. Install the ink tank.
Replacing an Ink Tank
The ink tank is not compatible with this machine.
Printing cannot be executed because the ink tank is not compatible with this machine.
Install an appropriate ink tank.
If you want to cancel printing, touch the machine's Stop button.
Replacing an Ink Tank
If the lamp on the ink tank is flashing, ink may have run out.
Check the Support Code on the touch screen and take the appropriate action to resolve the
error.
Support Code List
"Ink Error" An ink tank that was once empty is installed.
Check the Support Code on the touch screen and take the appropriate action to resolve the error.
Support Code List
"Hardware Error" The ink tank cannot be recognized. (The lamp on the ink tank is off.)
Replace the ink tank.
Replacing an Ink Tank
"Printer error" An error requiring servicing may have occurred.
Turn off the machine, and unplug the power cord of the machine from the power supply.
Plug the machine back in and turn the machine back on.
If the problem is not resolved, contact the service center.
921
921

Hulp nodig? Stel uw vraag in het forum

Spelregels
2

Forum

Canon-PIXMA-MG7550
6
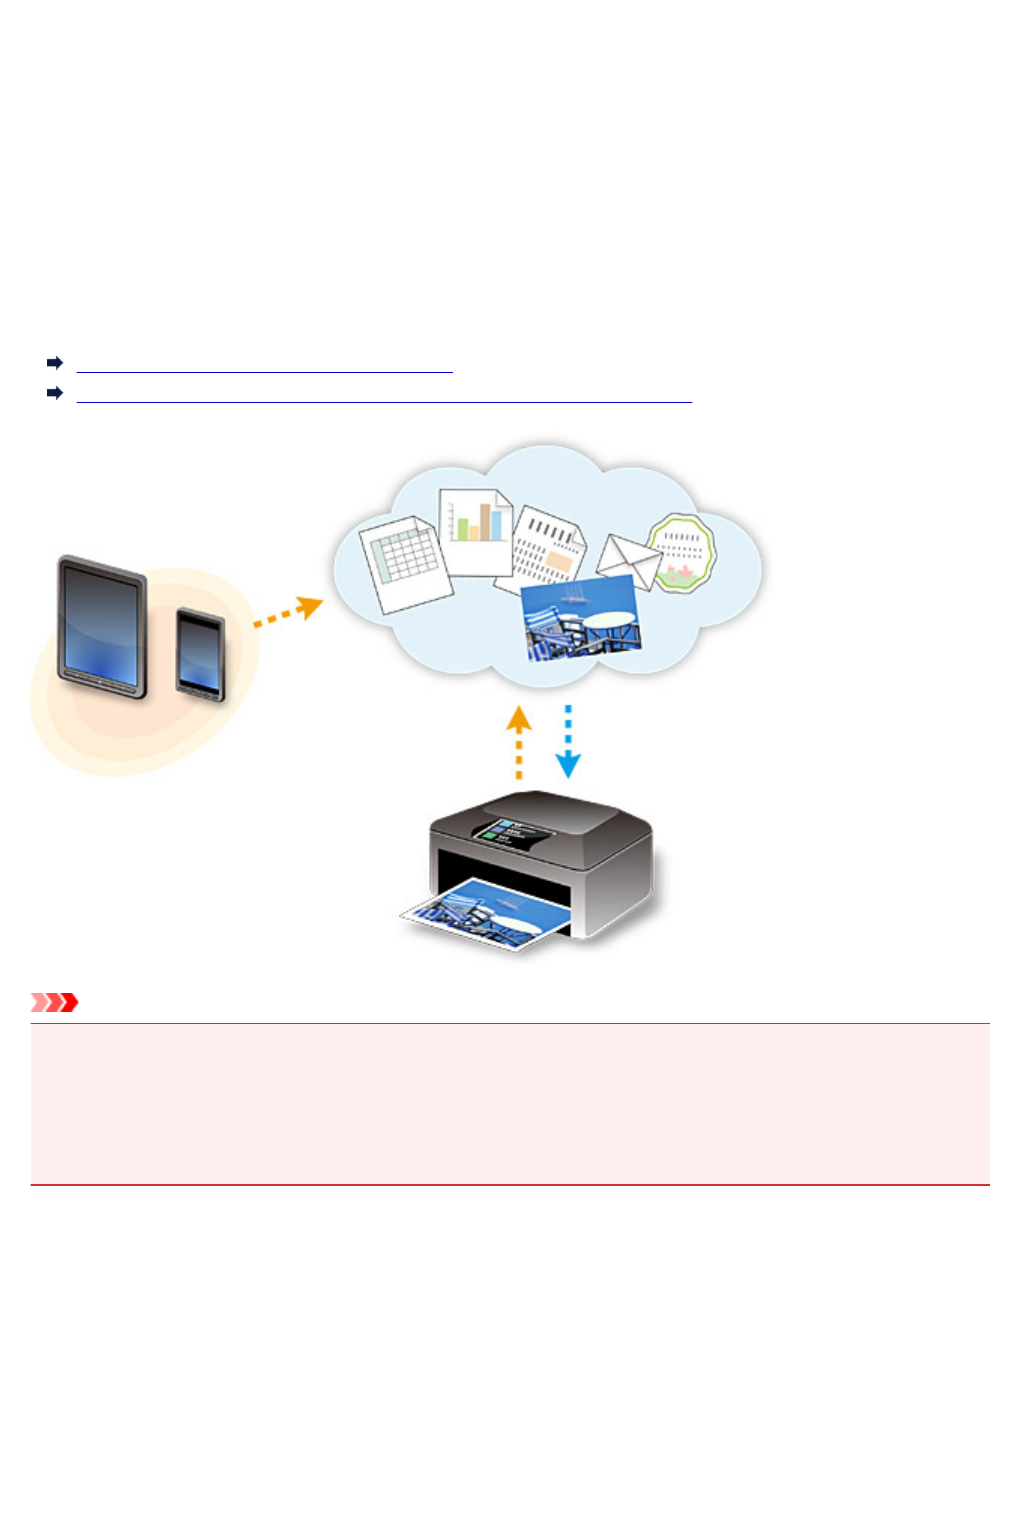
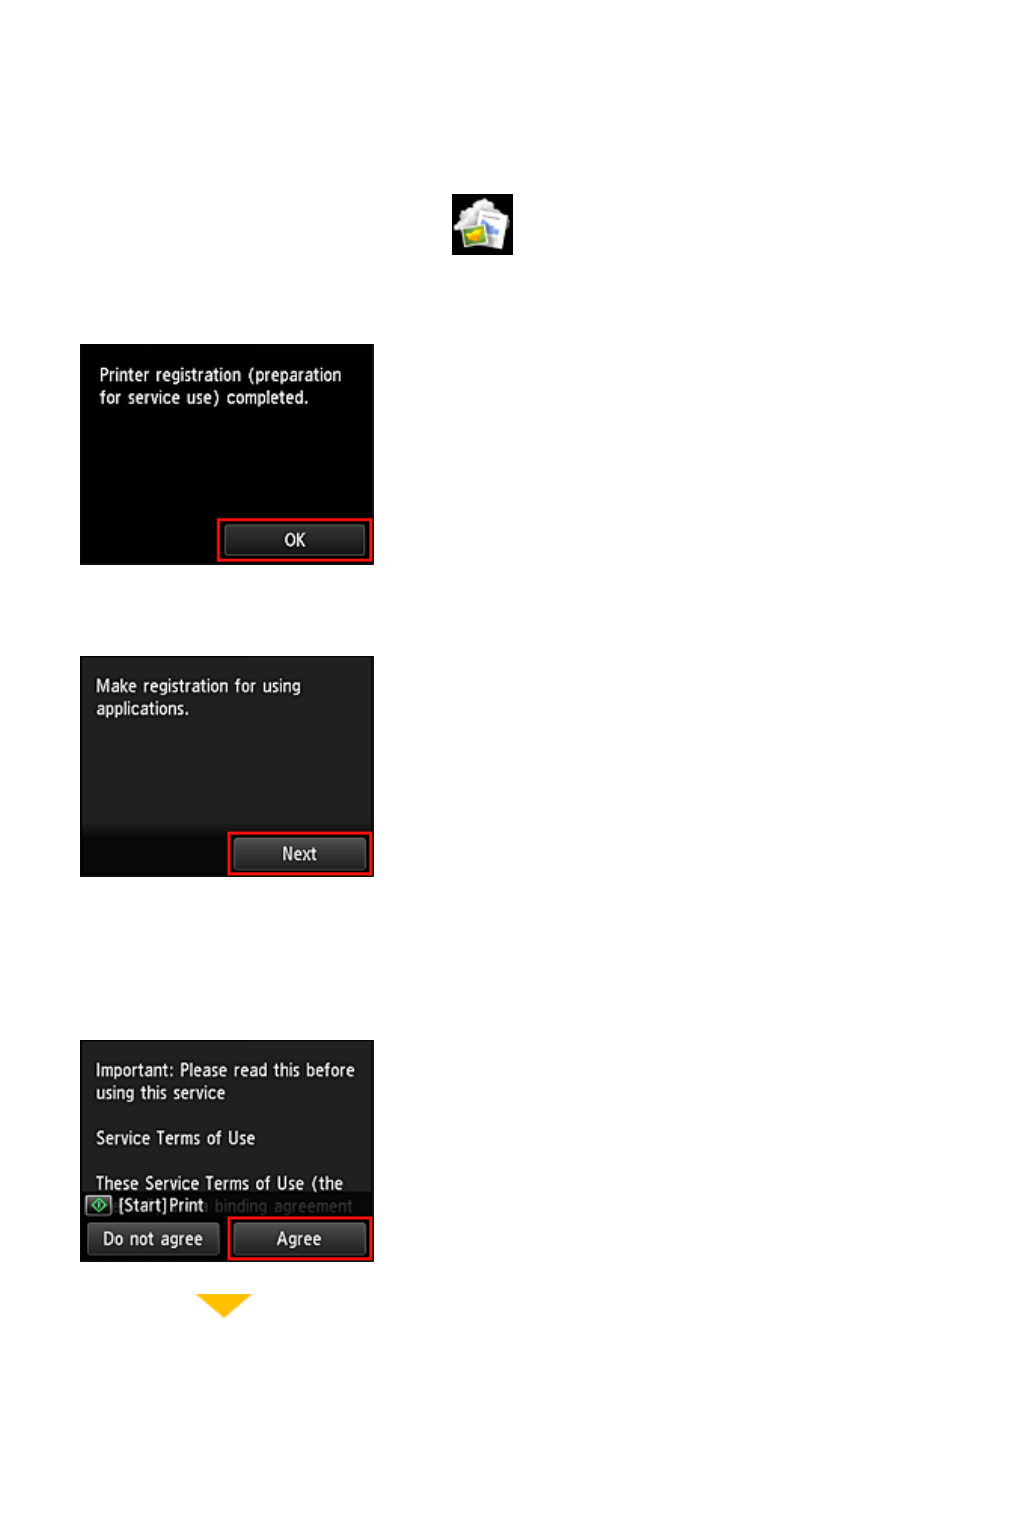
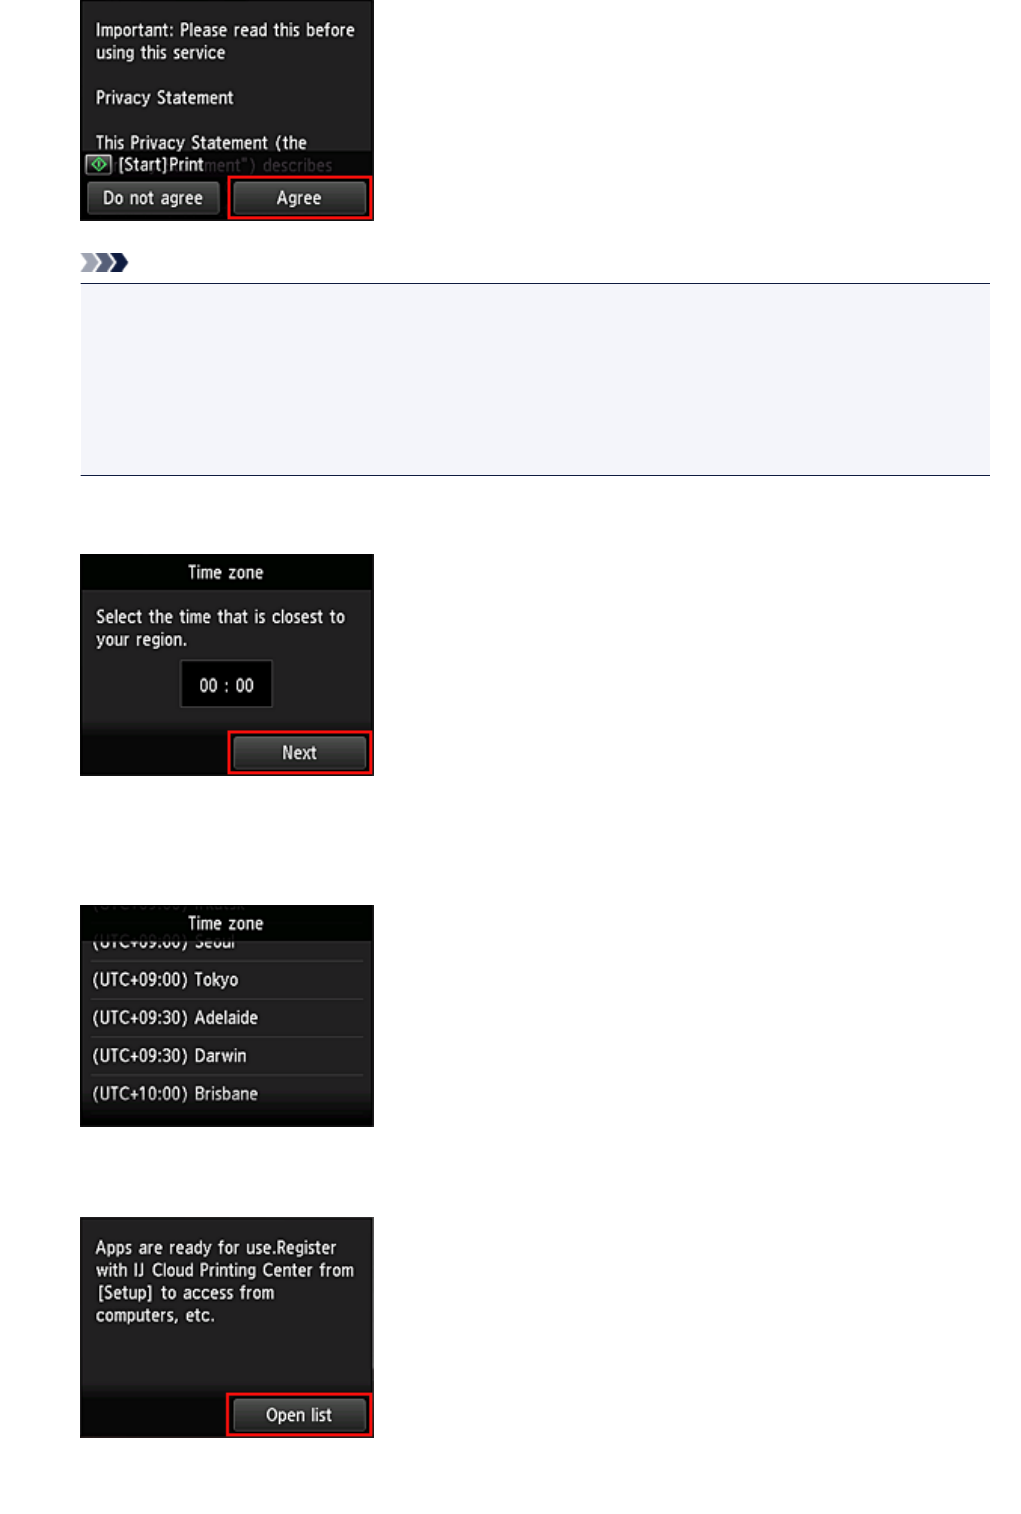
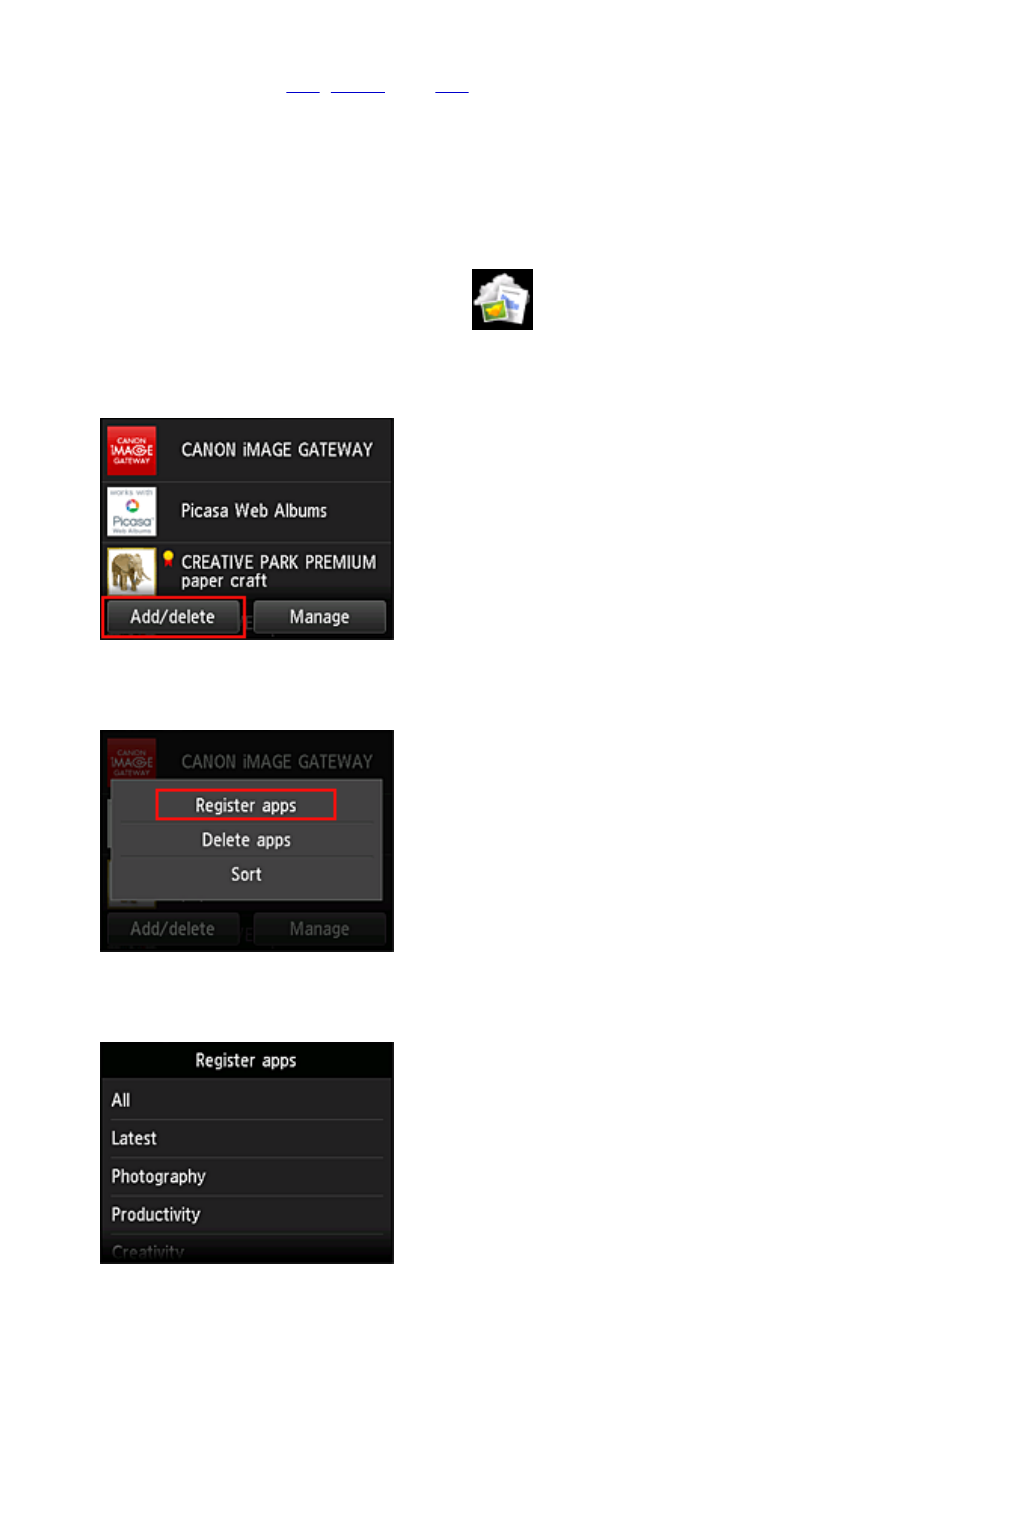
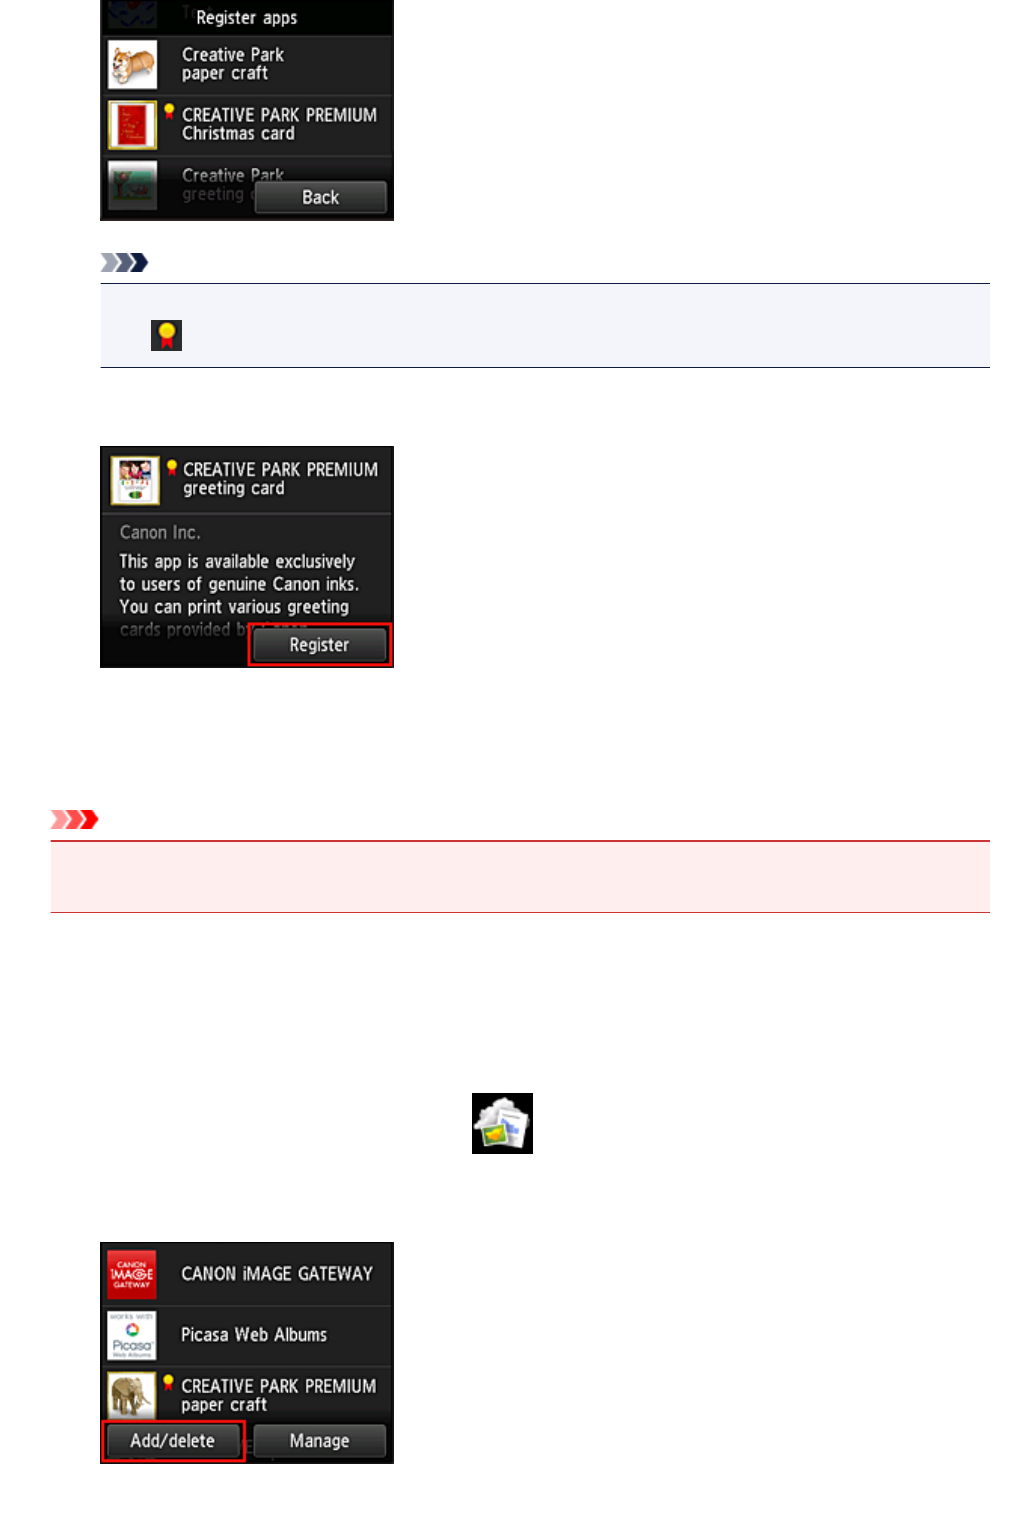
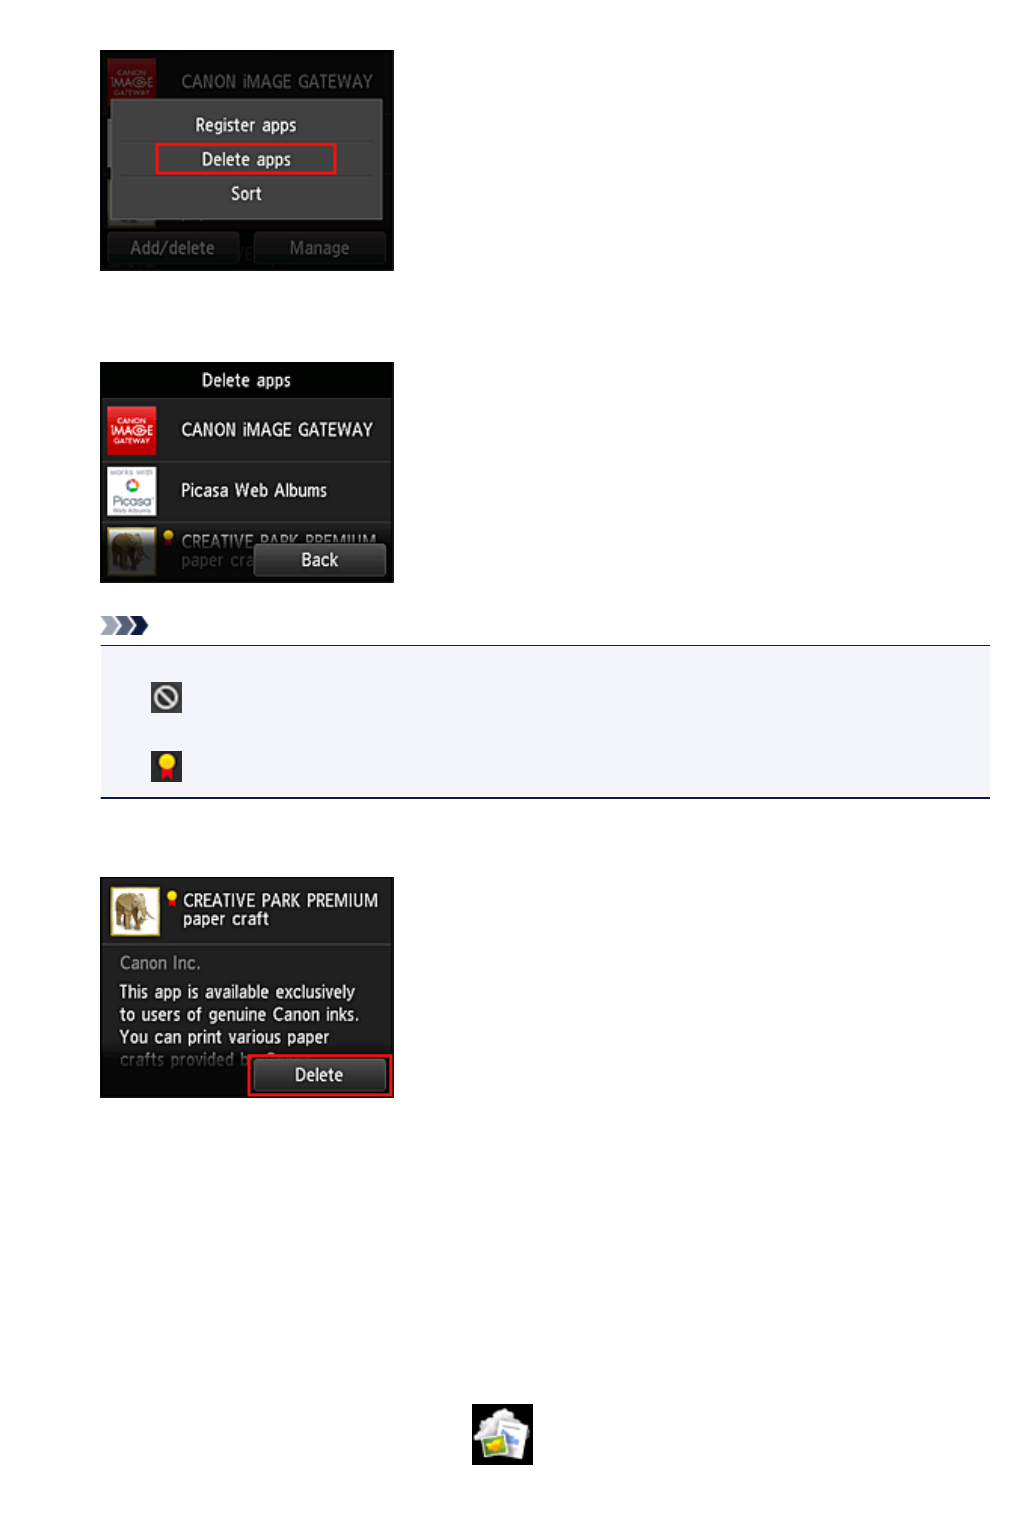
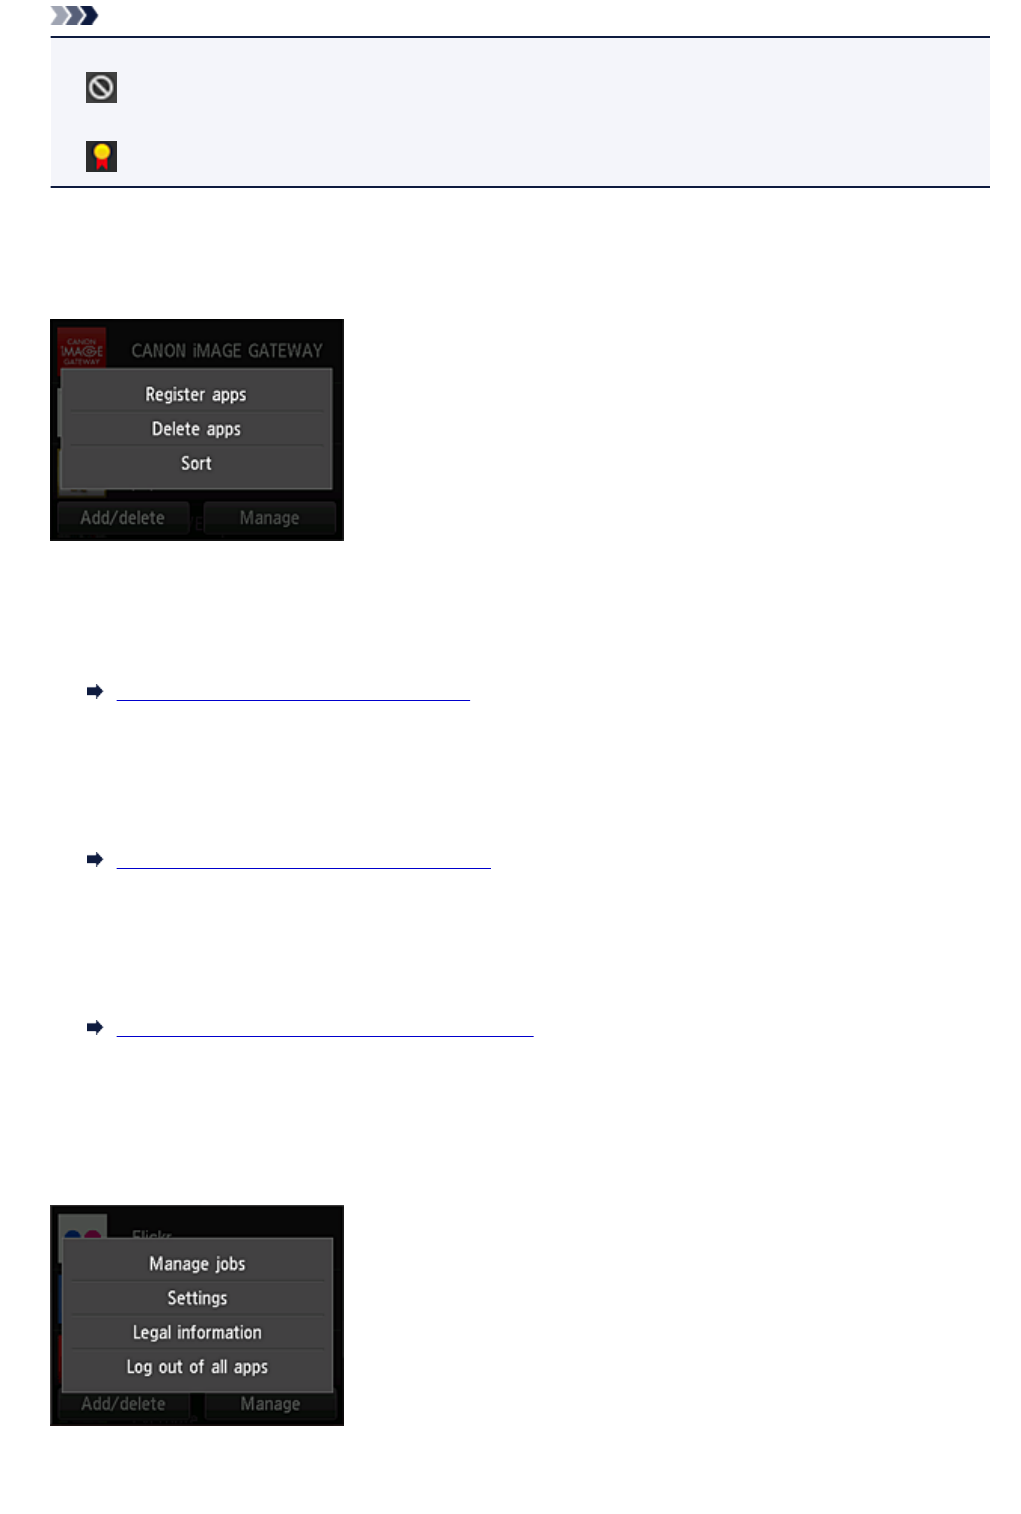
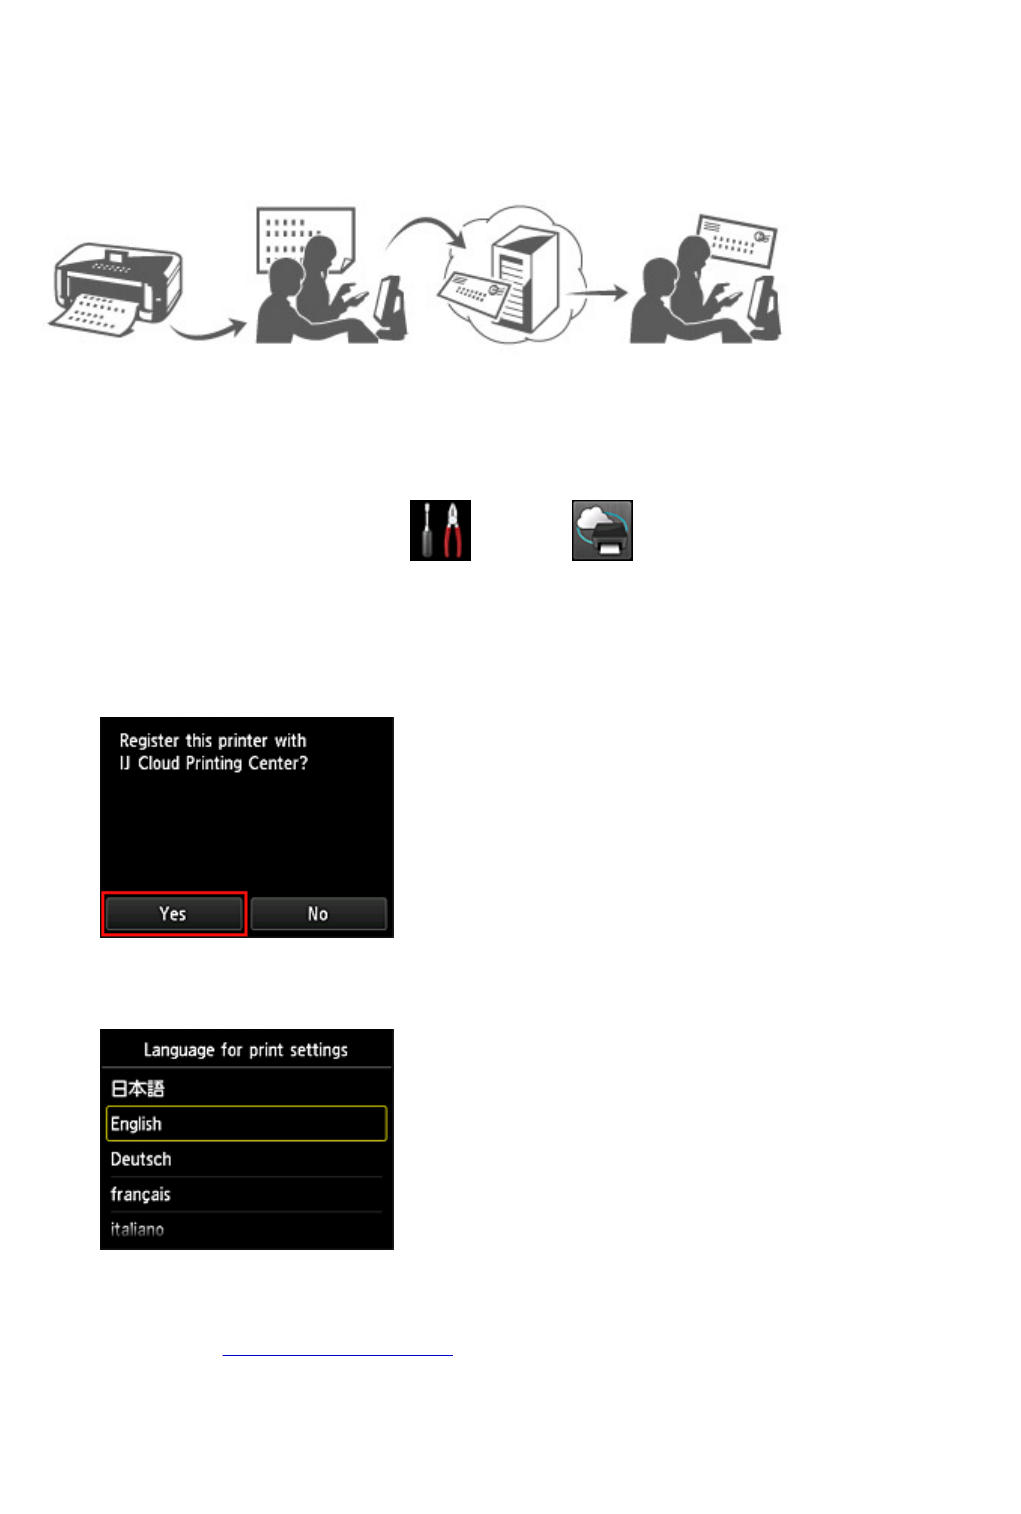
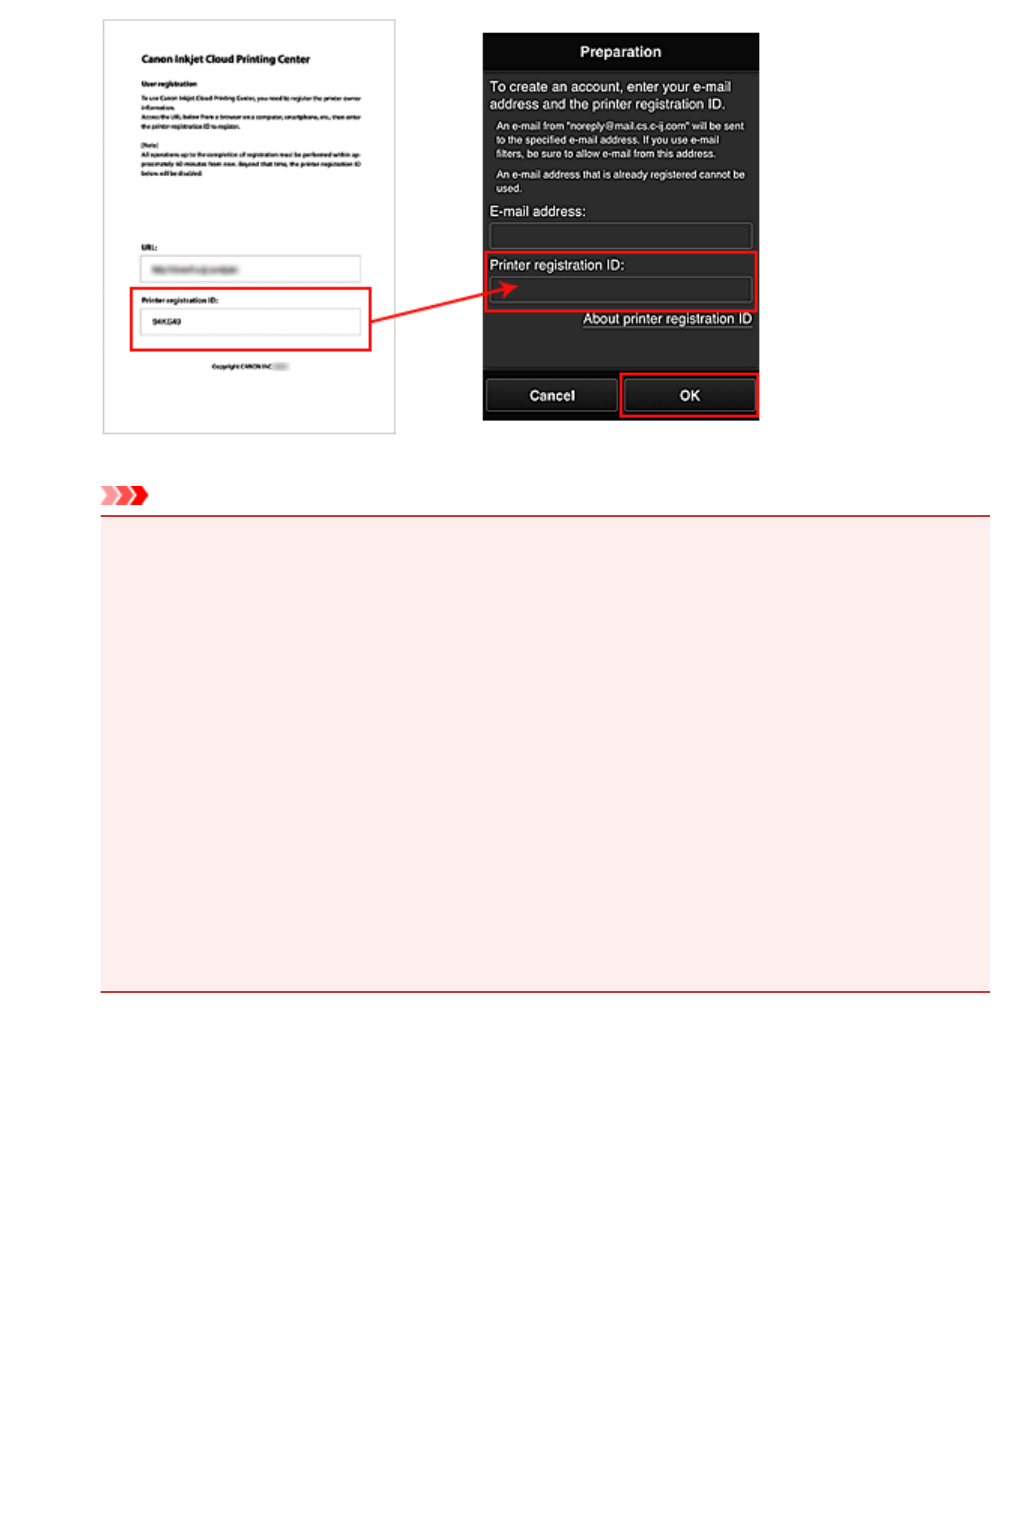
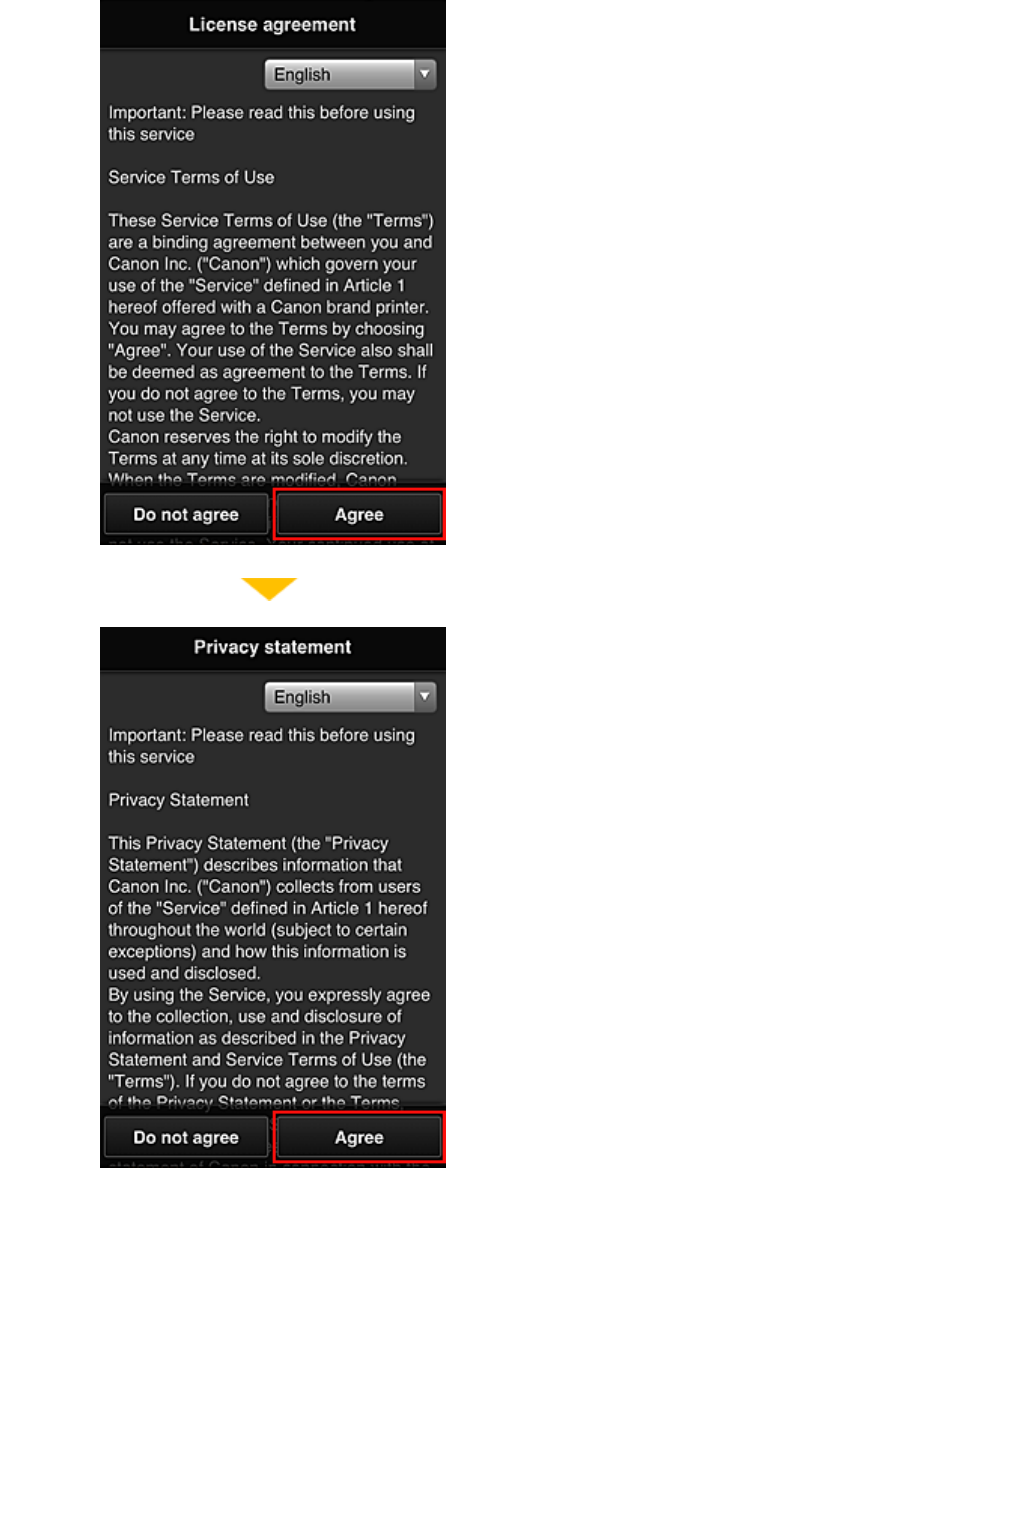
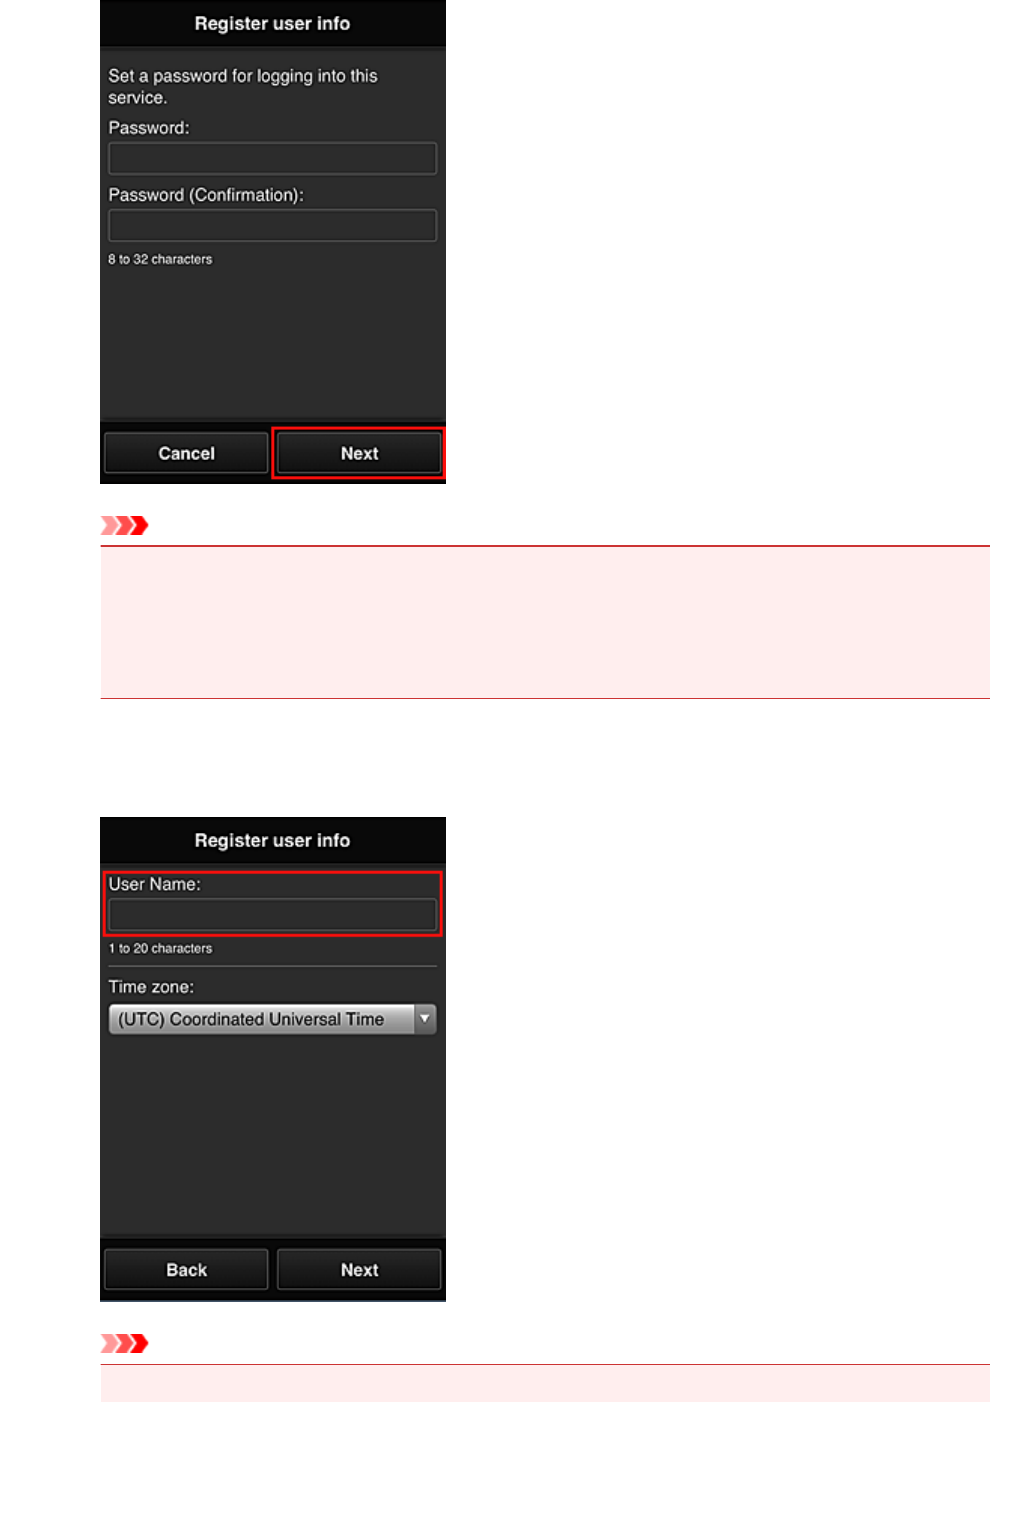
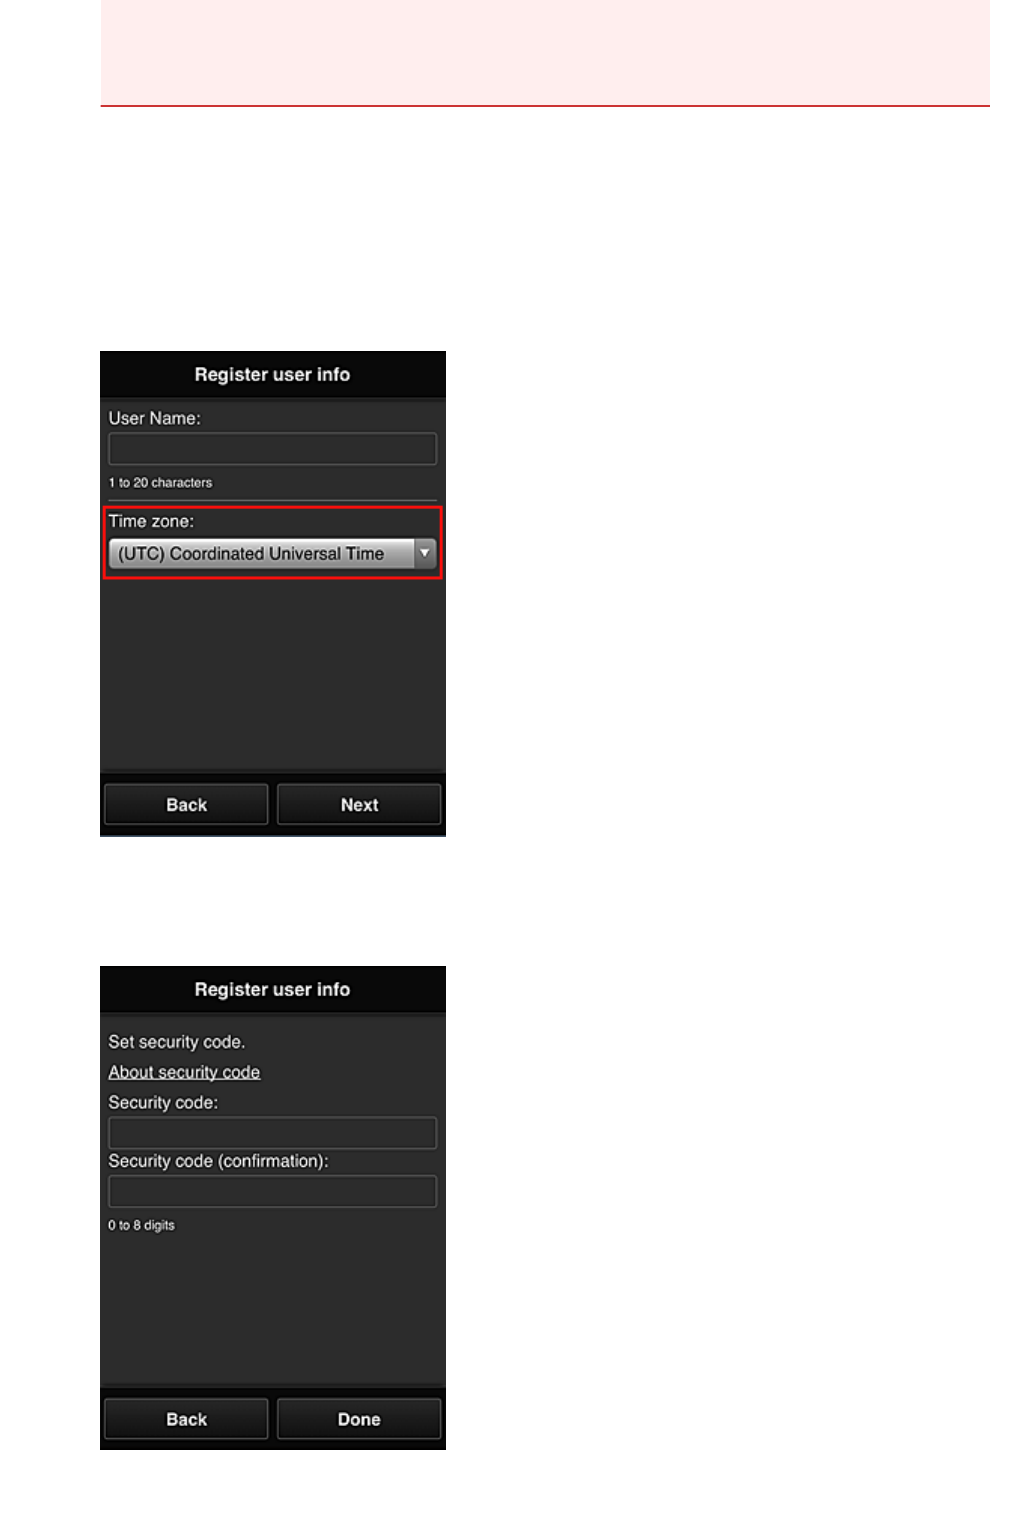
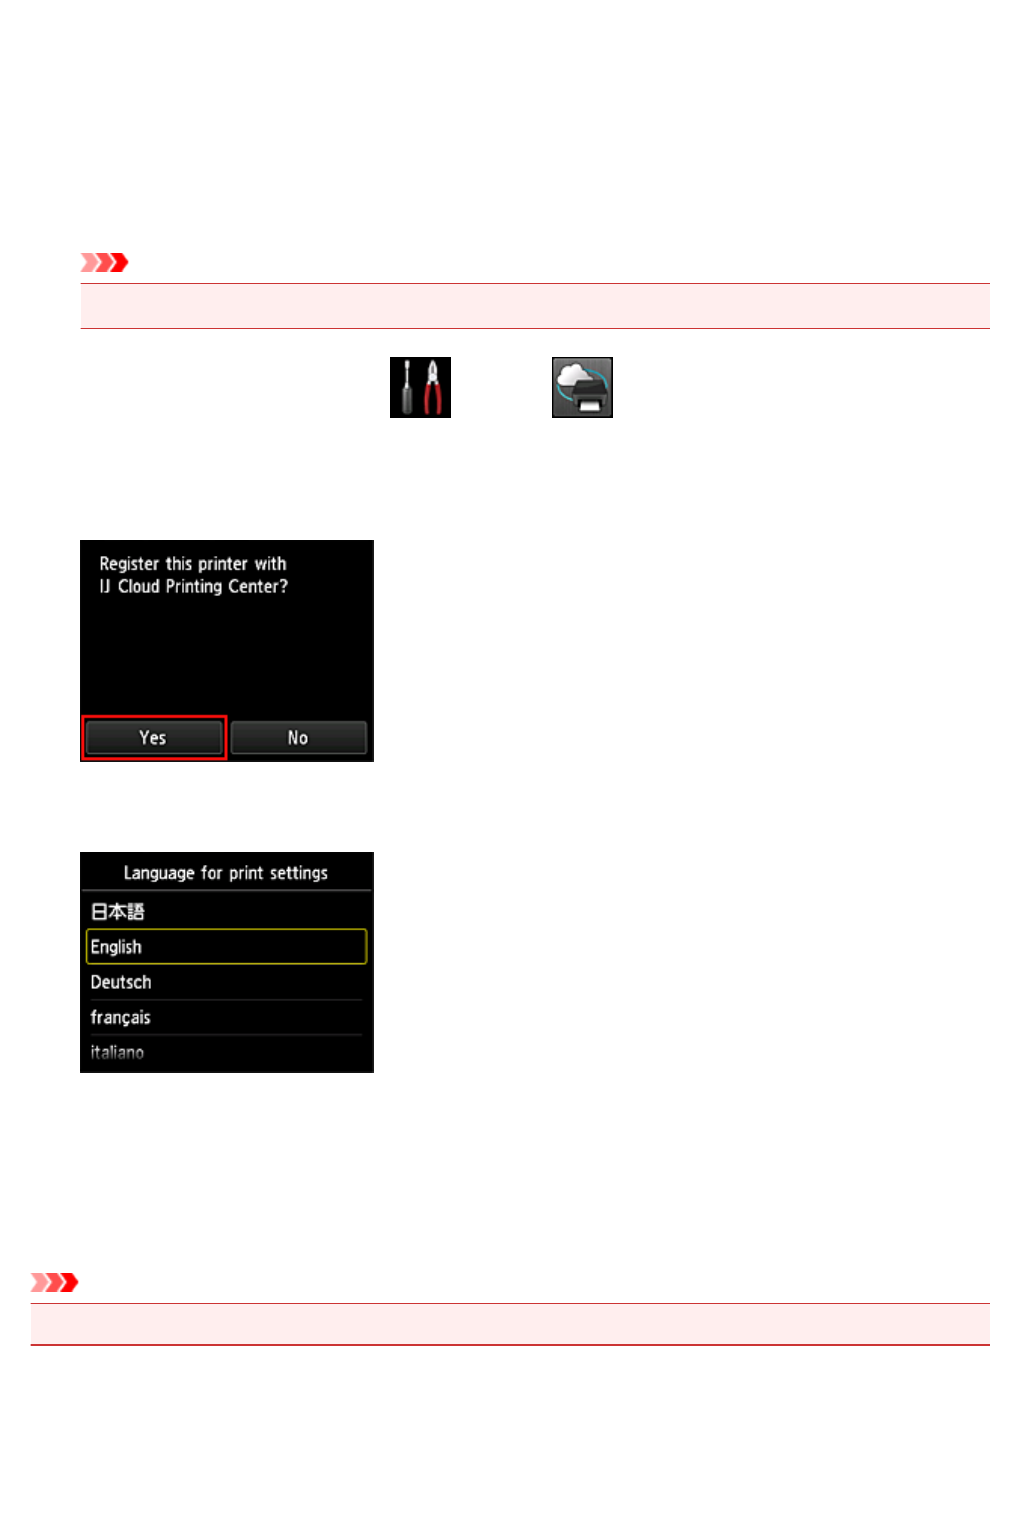
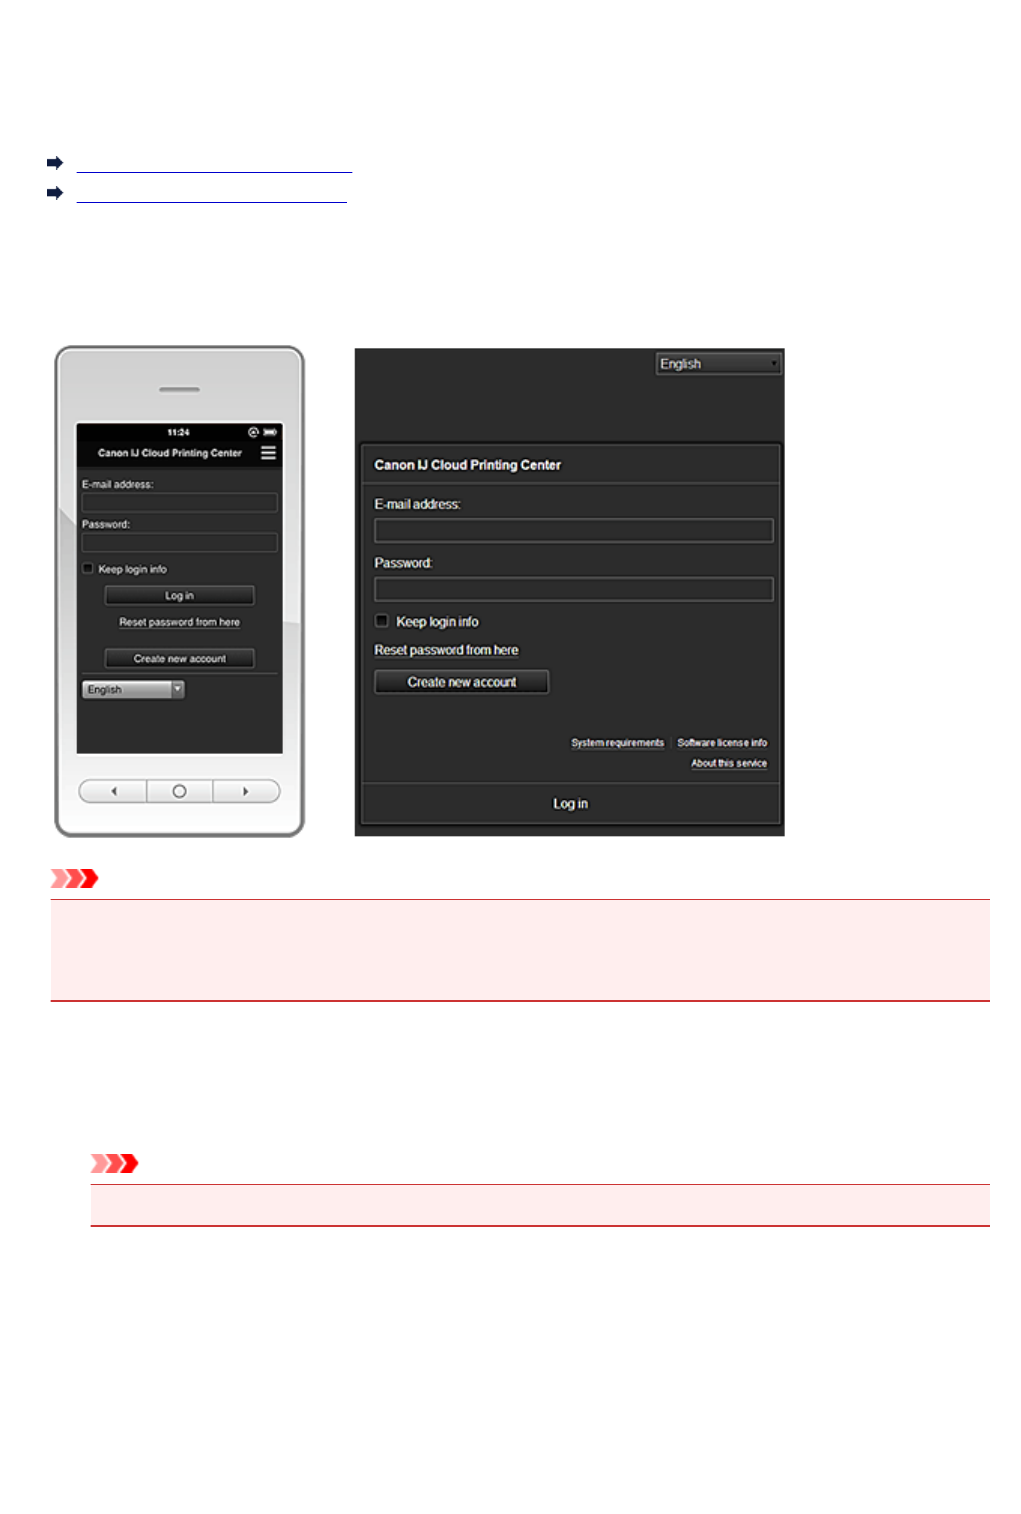
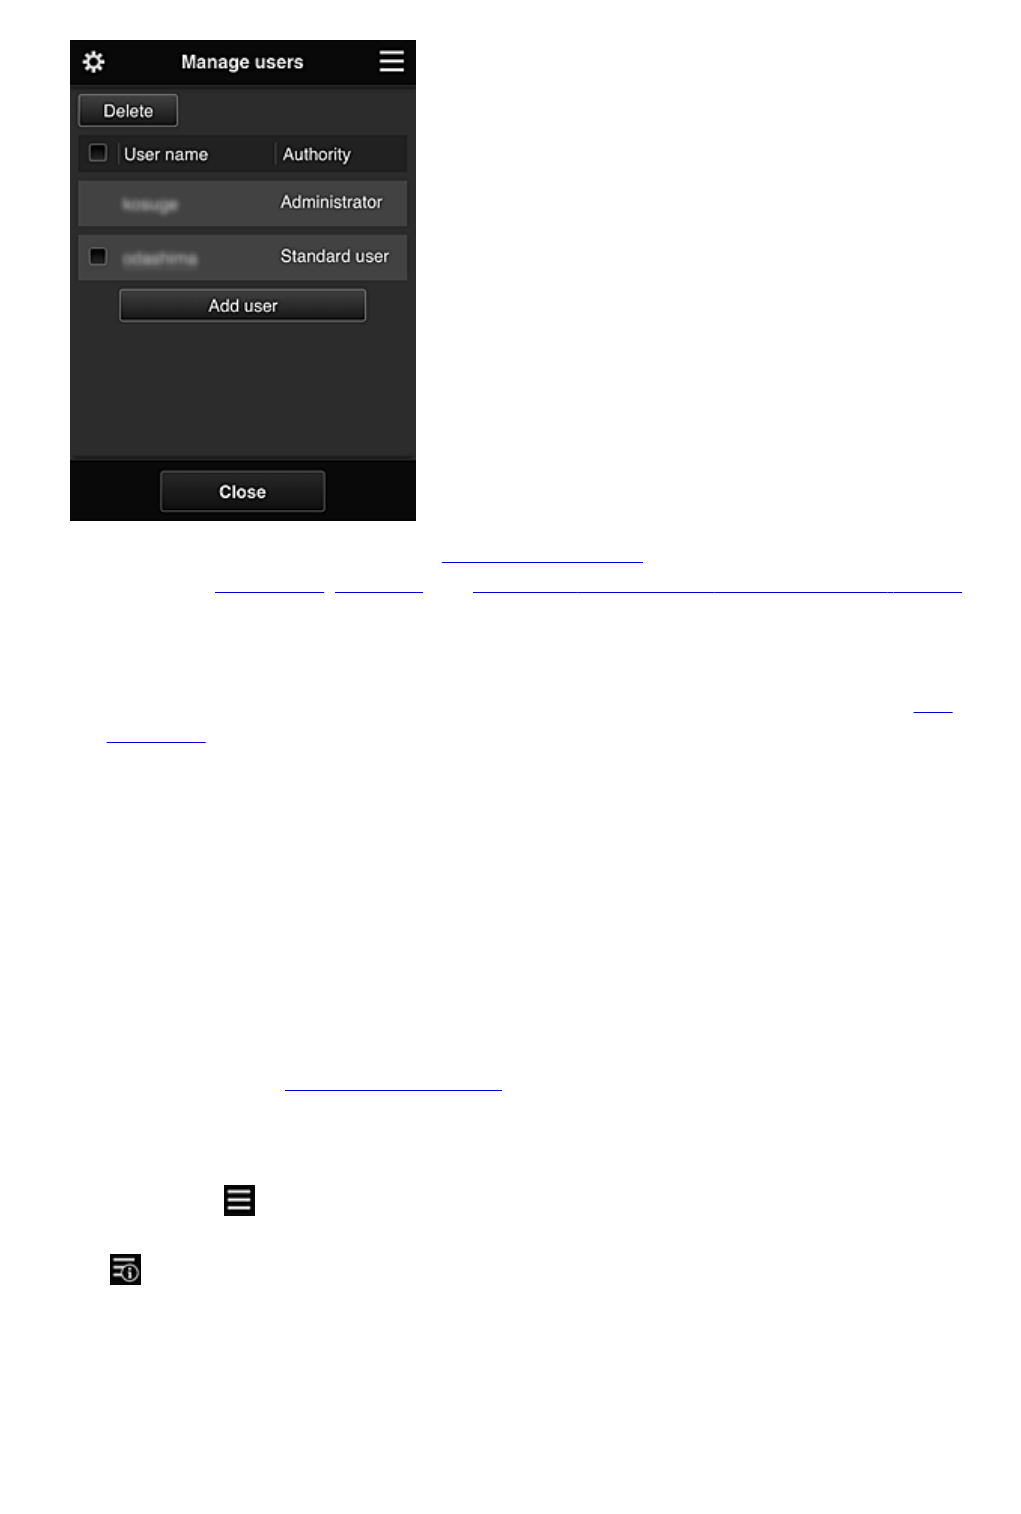
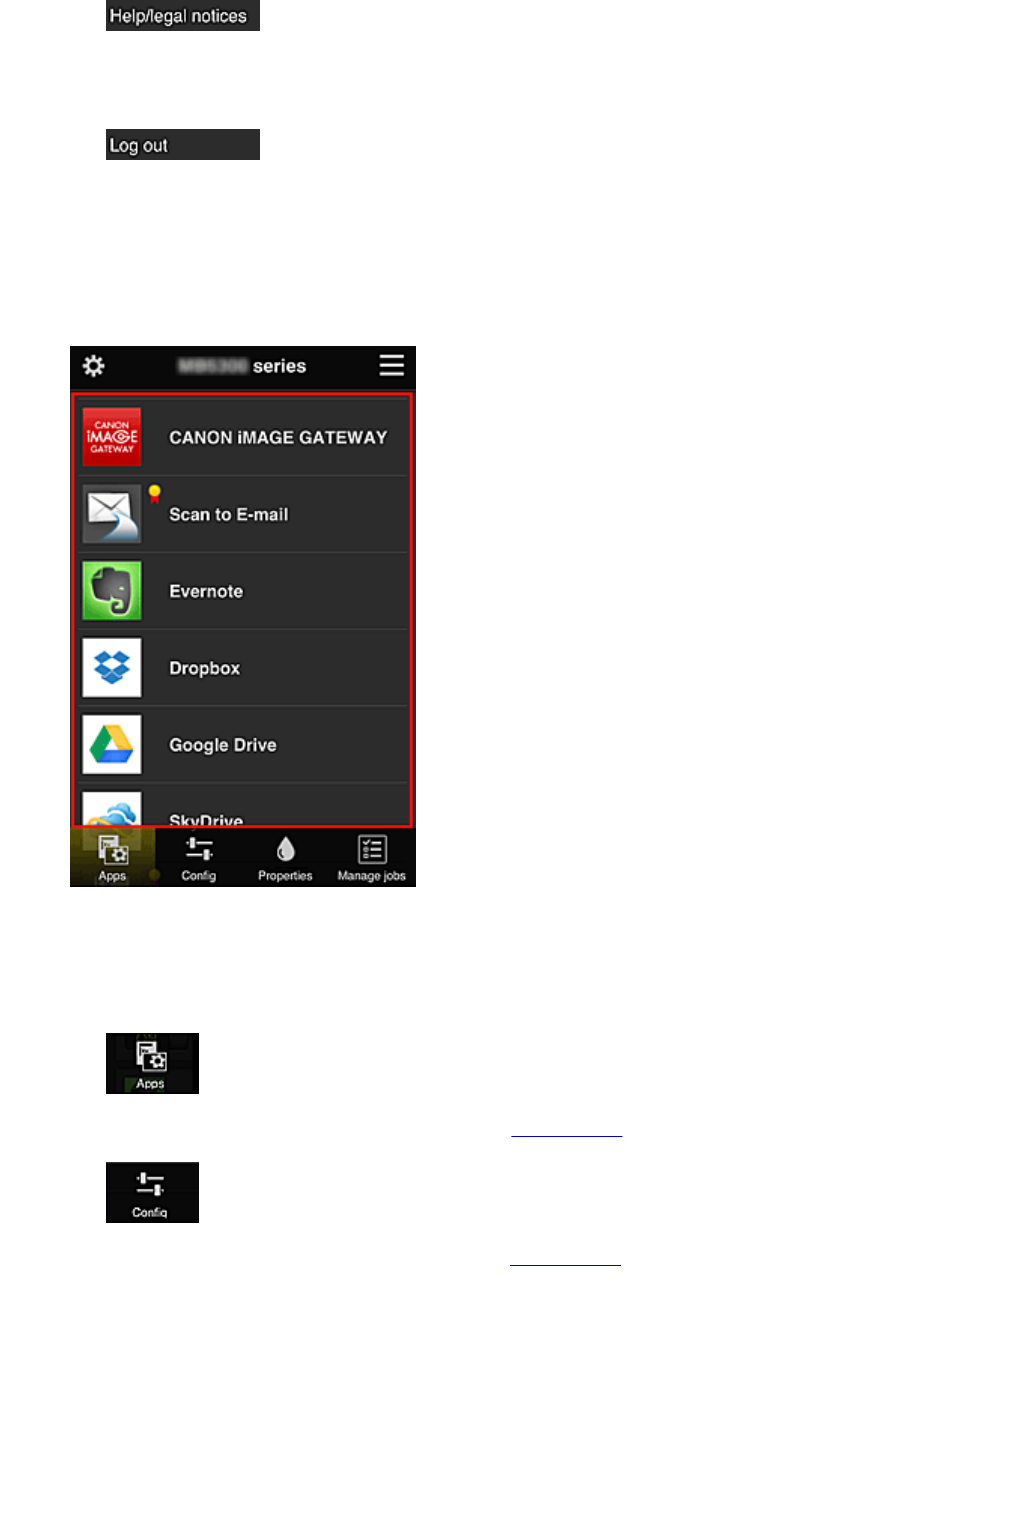
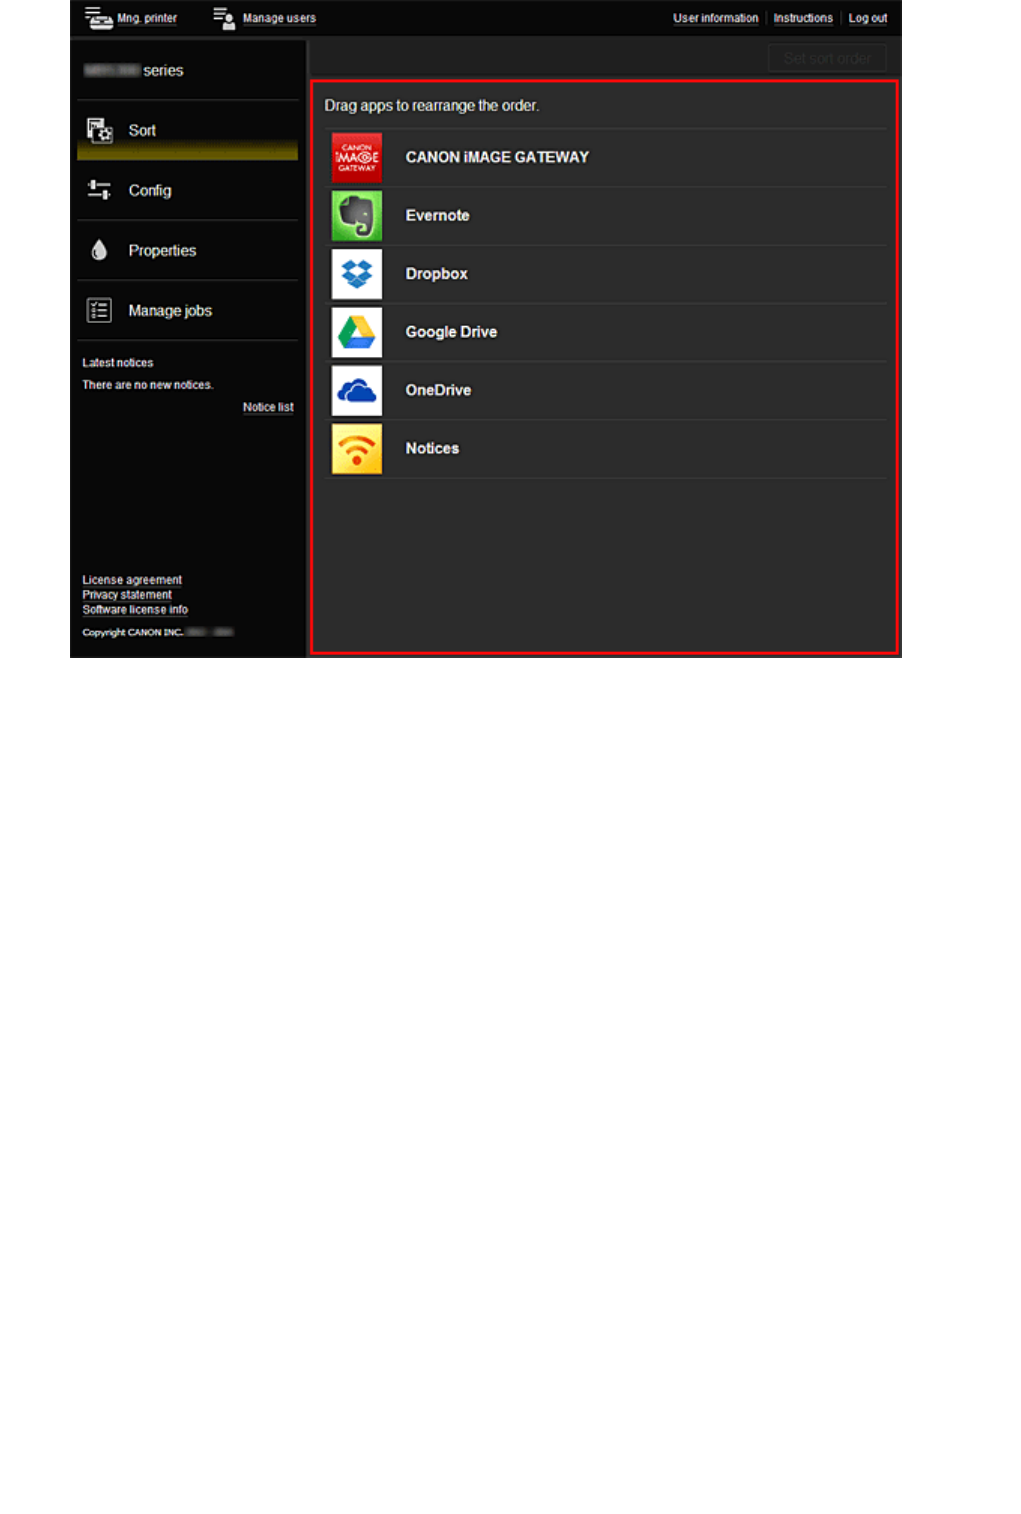
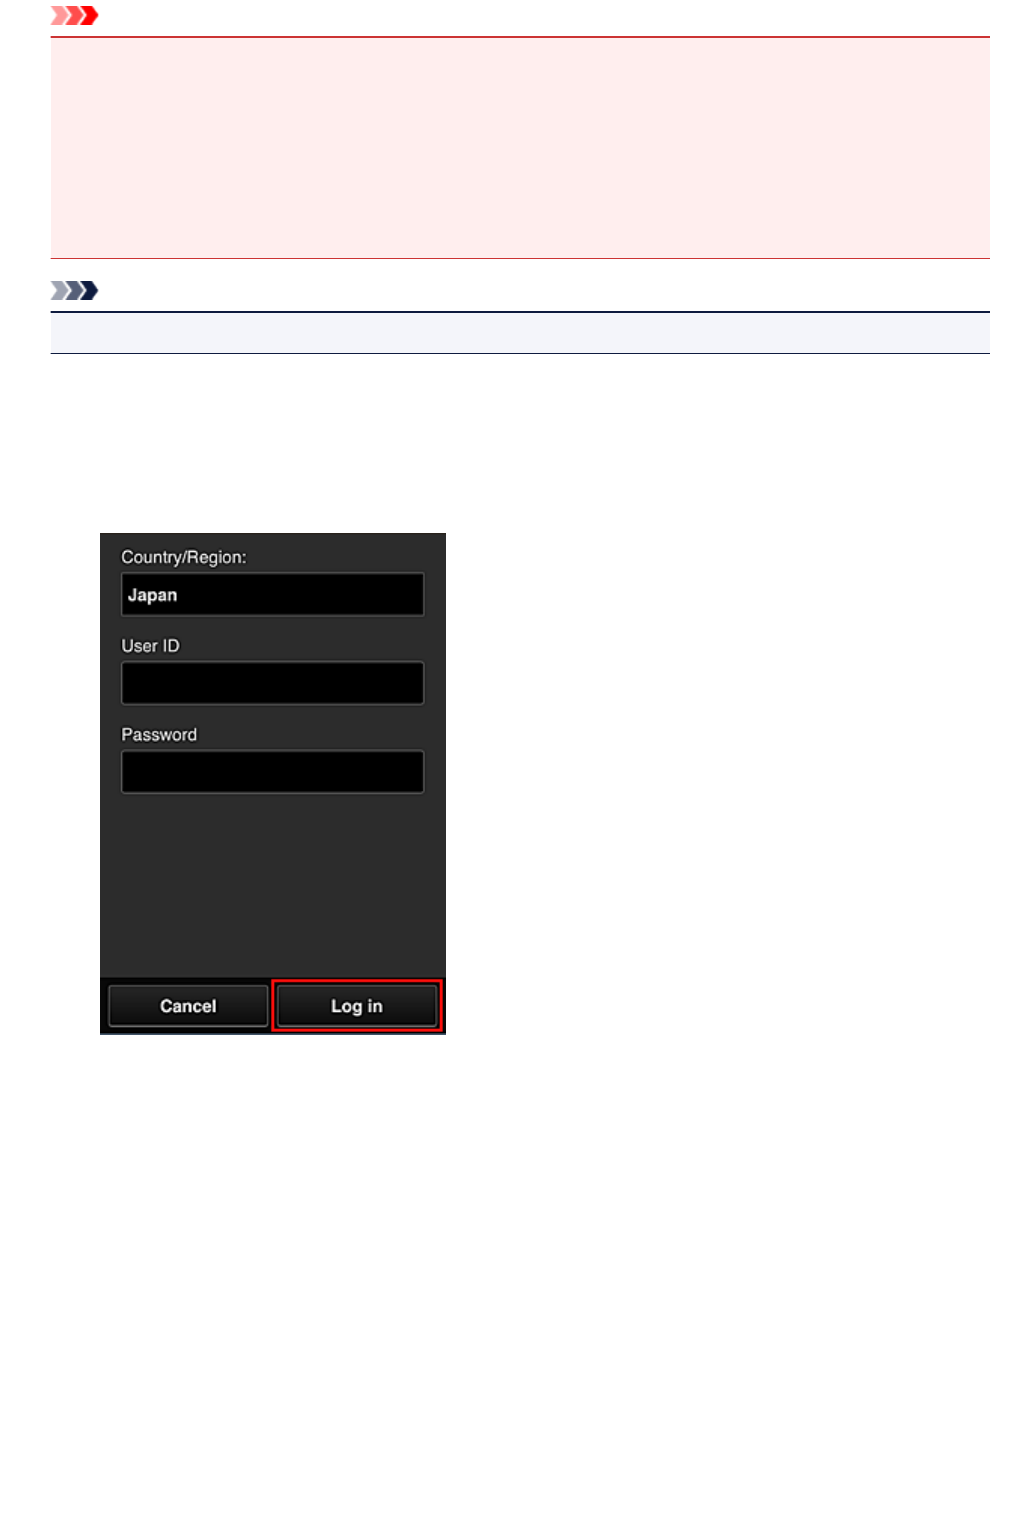
  • Hoe registreer ik me bij Canon Inkjet Cloud Printing Center voor het gebruik van de app? Gesteld op 20-6-2022 om 20:39

    Reageer op deze vraag Misbruik melden
  • Hallo,
    print test scherm af ,maar kan geen facturen afprinten!!!!! Gesteld op 12-6-2022 om 08:43

    Reageer op deze vraag Misbruik melden
  • Probleem herkenbaar is het n fabrieksfout als er zoveel problemen zijn???? Gesteld op 6-6-2022 om 16:30

    Reageer op deze vraag Misbruik melden
  • Ook wij hebben al enige tijd last van dit probleem met de printer. Hopelijk komt er snel een oplossing vanuit Canon. Heel vreemd dat er zoveel printers met hetzelfde probleem zijn. Gesteld op 3-6-2022 om 09:53

    Reageer op deze vraag Misbruik melden
    • Na wat zoeken op het net kwam ik deze post tegen:

      I called Canon, this happened Tuesday to a whole lot of people. Here is the solution:

      SOLUTION: After a 1:57 hold time with Canon customer service.... I have the solution! (and that was 2 hours, not 2 minutes) If this is happening to you it is very easily fixed. [Removed per forum guidelines] Although I wish I could sell it to make up for my 2 + hours of time. Here is what you need to do to fix it:

      Completely unplug your router and then turn on your printer (it won't stay on if your router is because of a linking problem with the router, that we are going to fix.) So this is the step-by-step for the MG6620 and probably those models with similar menus, but whatever model you have just try to get to your DNS Server Setup. That is where the setting is that needs manually changed. So for the MG6620:

      On the menu swipe to Setup, then find Web Service Setup then DNS Server Setup. Select Manual. Press each set of numbers and change them all to 000 except the last set. That needs to be 001. So your DNS will look like this: 000.000.000.001 Click OK, then click No.

      That's it. You should be good to print.

      You are welcome! Too bad someone at Canon doesn't just post this somewhere. Would've save a lot of people a lot of headaches, I'm sure.

      Klik op deze LINK
      Ik heb het geprobeerd en de printer doet het weer. Hopelijk hebben anderen hier ook succes mee.
      Geantwoord op 3-6-2022 om 22:56 Geantwoord op 3-6-2022 om 22:58

      Waardeer dit antwoord (4) Misbruik melden
  • Deze link dus: Klik op deze LINK Geantwoord op 3-6-2022 om 23:00

    Waardeer dit antwoord (2) Misbruik melden
  • Dit is dé oplossing. Hartelijk dank. Ik heb de printer bedraad aangesloten op het netwerk. Het verwijderen van de kabel was voldoende om de printer aan te laten blijven, zodat ik niet de router uit hoefde te zetten. Met wifi zou je op de router dus ook de wifi even uit kunnen zetten, dan blijft de printer aan en kun je de instellingen aanpassen op de beschreven wijze.
    Canon krijgt een onvoldoende voor de ondersteuning van dit probleem. Geantwoord op 6-6-2022 om 13:25

    Waardeer dit antwoord Misbruik melden
  • Heb ook zelfde probleem met m'n printer Pixma MG7550. Bij aanzetten, licht touchscreen even aan, dan enkel Canon in het venster en blijft de aan/uit-knop knipperen. Je hoort de rolletjes draaien en dan valt printer uit Gesteld op 2-6-2022 om 18:04

    Reageer op deze vraag Misbruik melden
    • Als je deze kan blokkeren, start hij op en kan je weer printen:
      DNS:
      dtv-p.c-ij.com
      pdisp01.c-wss.com
      (Iig bij mij stond de canon printer deze twee entries te proberen)

      Heb zelfde printer en had zelfde probleem. Geantwoord op 2-6-2022 om 18:48

      Waardeer dit antwoord Misbruik melden
  • Ik heb hulp gekregen van Canon via het telefoonnummer 02 620 01 97. Er is een tijdelijke oplossing met een verbinding met printerkabel tussen printer en PC. Men zou mij een mail sturen als Canon de problemen opgelost heeft en een Wifi verbinding opnieuw mogelijk is. Geantwoord op 2-6-2022 om 20:56

    Waardeer dit antwoord (2) Misbruik melden
  • Beste, in de vele tips en antwoorden die ik ontving, heb ik volgende geprobeerd en het werkt! Bedankt aan diegene die me die gouden tip heeft bezorgd. Volg deze stappen om je MG7550 opnieuw aan de praat te krijgen:
    1) router/modem uitschakelen (probleem ligt blijkbaar bij connectie met wifi)
    2) printer aan
    3) op printerscherm swipen naar Instellen
    4) selecteer vervolgens Webservice instellen
    5) kies DNS server instellen
    6) dan Handmatig instellen
    7) Adres primaire server aanpassen naar: 000.000.000.001 + ok
    8) op vraag of je een secundaire server wil instellen, nee antwoorden.
    Hopelijk lukt dit bij velen eveneens. Succes Geantwoord op 5-6-2022 om 08:05

    Waardeer dit antwoord (4) Misbruik melden
  • Solution: 02-06-2022

    DNS problem: probeer/try blocking these 2 dns requests from printer: (MG7550)
    dtv-p.c-ij.com
    pdisp01.c-wss.com Gesteld op 2-6-2022 om 15:36

    Reageer op deze vraag Misbruik melden
12
  • Ter aanvulling:
    Ligt eraan of je in staat bent bepaalde dns queries te blokkeren. Ik draai zelf mijn eigen dns server icm pihole, dus ik zie dat de printer requests stuurt naar bovenstaande entries. Ik heb deze via pihole geblokkeerd. En hij start nu gewoon op zonder die power cycle en ik kan gewoon printen via wifi.
    Geen idee waarom mijn printer contact zoekt met deze zo te zien canon( denk Ik) adressen maar deze entries zijn niet meer te resolven:
    Name: dtv-p.c-ij.com
    Address: 0.0.0.0
    Name: dtv-p.c-ij.com
    Address: ::

    Name: pdisp01.c-wss.com
    Address: 0.0.0.0
    Name: pdisp01.c-wss.com
    Address: ::

    Hopelijk ben je in staat hetzelfde te doen. Anders is het wachten tot canon dit oplost als ze het al gevonden hebben :) Geantwoord op 2-6-2022 om 17:10

    Waardeer dit antwoord Misbruik melden
  • ter aanvulling...logisch dat ze niet te resolven zijn want ik heb ze geblokkeerd haha :) Maar daar zit het probleem dus..zit iets niet lekker met dns. Geantwoord op 2-6-2022 om 17:14

    Waardeer dit antwoord Misbruik melden
  • Zelfde probleem, net geconstateerd op 02-06-2022
    Zet mijn printer aan, canon komt even in beeld, hoor de papier rolletjes en klep gaat open. Maar daarna gaat hij weer uit. Goed om te weten dat het een algemeen probleem is en bekend bij Canon. Gesteld op 2-6-2022 om 13:10

    Reageer op deze vraag Misbruik melden
  • Heb een printer mc 7550 maar deze schakel zichzelf automatisch uit ,wil wel graag printen.
    Wat kan ik doen.
    Ik heb mijn printer van thuis meegenomen maar het zelfde probleem. Gesteld op 2-6-2022 om 12:02

    Reageer op deze vraag Misbruik melden
  • Ook ik heb sinds 31-05-2022 dit probleem. Houdbaarheidsdatum verstreken? Gesteld op 1-6-2022 om 14:02

    Reageer op deze vraag Misbruik melden
    • Het probleem is blijkbaar dat de printer geen connectie kan maken met het netwerk. Aan de printer zelf hoef je niets te doen. Gewoon de modem of router terug opstarten en dan geeft de printer dat de vorige keer de printer fout werd afgesloten. Op OK drukken en alles werkt weer normaal. Geantwoord op 2-6-2022 om 12:30

      Waardeer dit antwoord Misbruik melden
  • Dit hebben wij gisteren geprobeerd maar het probleem blijft bestaan. Geantwoord op 2-6-2022 om 12:48

    Waardeer dit antwoord Misbruik melden
  • Ik heb hetzelfde probleem als hier beschreven staat.
    Gesteld op 1-6-2022 om 12:20

    Reageer op deze vraag Misbruik melden
  • Ook mijn printer het zelfde probleem sinds 02.06.22 witte lamp knippert gaat dan weer uit
    Had em al bijna in de kliko gegooid Geantwoord op 4-6-2022 om 18:35

    Waardeer dit antwoord Misbruik melden
  • Mijn MG7550 valt steeds uit, direct nadat ik hem heb ingeschakeld. Heel af en toe blijft hij even aan, en dan zie ik nog net de melding dat de stekker uit het stopcontact zou zijn gehaald voordat het apparaat was uitgeschakeld. Gesteld op 31-5-2022 om 10:50

    Reageer op deze vraag Misbruik melden
    • Ik heb dezelfde klacht c.q. probleem dat is gisteren begonnen.
      Daarvoor heb ik al weken het probleem dat de klep open zou staan maar daar is nog steeds geen oplossing voor gemeld. Heeft dit soms te maken met updates?? Geantwoord op 31-5-2022 om 11:25

      Waardeer dit antwoord Misbruik melden
  • Ook ik heb sinds vanmorgen dit probleem. Als ik mijn MG7550 aanzet gaan even alle touch knoppen aan, verschijnt het woord Canon op het scherm, gaat de papierklep open, knippert het aan/uit lampje nog even en daarna schakelt de printer zichzelf weer uit. Geantwoord op 31-5-2022 om 13:40

    Waardeer dit antwoord Misbruik melden
  • Als toevoeging op mijn vorige antwoord. Ik heb mijn router/modem opnieuw opgestart en daarna de printer weer opgestart. Nu start de printer wel door en geeft na een tijdje de melding dat de printer de vorige keer niet correct was uitgeschakeld. Nadat ik op OK heb gedrukt lijkt alles te werken. Echter het afdrukken van een test pagina lukt noch niet. Geantwoord op 31-5-2022 om 14:08

    Waardeer dit antwoord (7) Misbruik melden
  • Als toevoeging op mijn vorige antwoorden. De printer start op als de router/modem uitstaat, dus zonder wifi. Echter na het opstarten van de router/modem kan geen verbinding met de printer gemaakt worden. Opnieuw verbinden via WPS-knop indrukken op de router/modem laat de printer weer vastlopen. Het probleem lijkt bij de wifi van de printer te liggen. Geantwoord op 31-5-2022 om 15:36

    Waardeer dit antwoord (4) Misbruik melden
  • ook ik ervaar dit probleem sinds vandaag 31/05/2022 met mijn MG7550.
    Dat is toch wel bizar. Het lijkt dat er een datum in het apparaat is ingesteld dat de printer vandaag uitvalt? Geantwoord op 31-5-2022 om 16:23

    Waardeer dit antwoord (9) Misbruik melden
  • Hier exact hetzelfde probleem, zoals hieboven beschreven. hiervoor geen enkele klachten gehad. Hoop op een oplossing Geantwoord op 31-5-2022 om 17:16

    Waardeer dit antwoord (2) Misbruik melden
  • Merkwaardig, ook ik heb hetzelfde probleem op dezelfde dag als meerdere anderen. Geantwoord op 31-5-2022 om 21:42

    Waardeer dit antwoord (1) Misbruik melden
  • Hier net hetzelfde. Spooky! Geantwoord op 31-5-2022 om 22:31

    Waardeer dit antwoord Misbruik melden
  • Ook hier sinds 01-05-2022 hetzelfde probleem. Printer valt steeds uit.
    Geantwoord op 1-6-2022 om 08:13

    Waardeer dit antwoord (1) Misbruik melden
  • Op 01 juni ' heb ik mijn router/modem opnieuw opgestart en daarna de printer weer opgestart. Nu start de printer wel door en geeft na een tijdje de melding dat de printer de vorige keer niet correct was uitgeschakeld. Nadat ik op OK heb gedrukt lijkt alles te werken' zoals al gezegd MAAR is zeer traag geworden! Geantwoord op 1-6-2022 om 08:48

    Waardeer dit antwoord (1) Misbruik melden
  • Het probleem is gekend bij Canon en er wordt gewerkt aan een oplossing. Geantwoord op 1-6-2022 om 11:21

    Waardeer dit antwoord (5) Misbruik melden
  • Ik heb net hetzelfde probleem, printer valt steeds opnieuw uit. Zeer vervelend, hopelijk komt Canon snel met een oplossing Geantwoord op 1-6-2022 om 12:17

    Waardeer dit antwoord Misbruik melden
  • Probleem is bekend bij Canon, oorzaak weten zij nog niet. Ik heb hem nu werkend via USB. Via netwerk met geen mogelijkheid. Canon gaf ook aan om via Direct netwerk te printen. Geantwoord op 1-6-2022 om 13:16

    Waardeer dit antwoord Misbruik melden
  • Ik merk vandaag dat ik hetzelfde probleem heb. Echter met de USB aansluiting heb ik toch nog steeds het zelfde probleem. Geantwoord op 1-6-2022 om 19:29

    Waardeer dit antwoord Misbruik melden
  • Vanaf vandaag ook precies hetzelfde probleem. Lijkt op datum error in firmware. Geantwoord op 1-6-2022 om 19:37

    Waardeer dit antwoord Misbruik melden
  • zelfde probleem, hopelijk eentje met een oplossing... Geantwoord op 2-6-2022 om 20:44

    Waardeer dit antwoord Misbruik melden
  • Na wat zoeken op het net kwam ik deze post tegen:

    I called Canon, this happened Tuesday to a whole lot of people. Here is the solution:

    SOLUTION: After a 1:57 hold time with Canon customer service.... I have the solution! (and that was 2 hours, not 2 minutes) If this is happening to you it is very easily fixed. [Removed per forum guidelines] Although I wish I could sell it to make up for my 2 + hours of time. Here is what you need to do to fix it:

    Completely unplug your router and then turn on your printer (it won't stay on if your router is because of a linking problem with the router, that we are going to fix.) So this is the step-by-step for the MG6620 and probably those models with similar menus, but whatever model you have just try to get to your DNS Server Setup. That is where the setting is that needs manually changed. So for the MG6620:

    On the menu swipe to Setup, then find Web Service Setup then DNS Server Setup. Select Manual. Press each set of numbers and change them all to 000 except the last set. That needs to be 001. So your DNS will look like this: 000.000.000.001 Click OK, then click No.

    That's it. You should be good to print.

    You are welcome! Too bad someone at Canon doesn't just post this somewhere. Would've save a lot of people a lot of headaches, I'm sure.

    Klik op deze LINK
    Ik heb het geprobeerd en de printer doet het weer. Hopelijk hebben anderen hier ook succes mee. Geantwoord op 3-6-2022 om 22:56

    Waardeer dit antwoord (2) Misbruik melden
  • Wat een prima post.
    Ik had het zelfde probleem. Nooit gedacht dat bij het "booten" van de printer, wifi in de weg kon zitten. Het leek op een lokaal probleem.
    Router uitgezet. Printer herstart. Genoemde fix toegepast. En voila Printing again.
    Dank, groet Edwin Geantwoord op 4-6-2022 om 18:00

    Waardeer dit antwoord Misbruik melden
  • kan iemand stap voor stap uitleggen in Nederlands hoe deze fix kan uitgevoerd worden aub?
    oa. hoe kom ik bij de DNS Server Setup? enz.
    dank alvast van een niet computer specialist. Geantwoord op 7-6-2022 om 12:50

    Waardeer dit antwoord Misbruik melden
  • 1) zet de printer uit
    2) haal de netwerkkabel uit de printer.
    3) start de printer (zonder netwerkconnectie)
    4) selecteer via het menu van de printer (via het display) "instellingen" dan "webservice instellen" dan "DNS service intellen" dan "handmatige intelling" dan wijzigen naar " 000.000.000.001 " dan "OK" en als laatse "Neen". Geantwoord op 7-6-2022 om 13:24

    Waardeer dit antwoord Misbruik melden

Misbruik melden

Gebruikershandleiding.com neemt misbruik van zijn services uitermate serieus. U kunt hieronder aangeven waarom deze vraag ongepast is. Wij controleren de vraag en zonodig wordt deze verwijderd.

Product:

Bijvoorbeeld antisemitische inhoud, racistische inhoud, of materiaal dat gewelddadige fysieke handelingen tot gevolg kan hebben.

Bijvoorbeeld een creditcardnummer, een persoonlijk identificatienummer, of een geheim adres. E-mailadressen en volledige namen worden niet als privégegevens beschouwd.

Spelregels forum

Om tot zinvolle vragen te komen hanteren wij de volgende spelregels:

Belangrijk! Als er een antwoord wordt gegeven op uw vraag, dan is het voor de gever van het antwoord nuttig om te weten als u er wel (of niet) mee geholpen bent! Wij vragen u dus ook te reageren op een antwoord.

Belangrijk! Antwoorden worden ook per e-mail naar abonnees gestuurd. Laat uw emailadres achter op deze site, zodat u op de hoogte blijft. U krijgt dan ook andere vragen en antwoorden te zien.

Abonneren

Abonneer u voor het ontvangen van emails voor uw Canon PIXMA MG7550 bij:


U ontvangt een email met instructies om u voor één of beide opties in te schrijven.


Ontvang uw handleiding per email

Vul uw emailadres in en ontvang de handleiding van Canon PIXMA MG7550 in de taal/talen: Engels als bijlage per email.

De handleiding is 16,91 mb groot.


U ontvangt de handleiding per email binnen enkele minuten. Als u geen email heeft ontvangen, dan heeft u waarschijnlijk een verkeerd emailadres ingevuld of is uw mailbox te vol. Daarnaast kan het zijn dat uw internetprovider een maximum heeft aan de grootte per email. Omdat hier een handleiding wordt meegestuurd, kan het voorkomen dat de email groter is dan toegestaan bij uw provider.

Stel vragen via chat aan uw handleiding

Stel uw vraag over deze PDF

Andere handleiding(en) van Canon PIXMA MG7550

Canon PIXMA MG7550 Gebruiksaanwijzing - Nederlands - 1092 pagina's

Canon PIXMA MG7550 Gebruiksaanwijzing - Deutsch - 1107 pagina's

Canon PIXMA MG7550 Snelstart handleiding - Alle talen - 4 pagina's


Uw handleiding is per email verstuurd. Controleer uw email

Als u niet binnen een kwartier uw email met handleiding ontvangen heeft, kan het zijn dat u een verkeerd emailadres heeft ingevuld of dat uw emailprovider een maximum grootte per email heeft ingesteld die kleiner is dan de grootte van de handleiding.

Er is een email naar u verstuurd om uw inschrijving definitief te maken.

Controleer uw email en volg de aanwijzingen op om uw inschrijving definitief te maken

U heeft geen emailadres opgegeven

Als u de handleiding per email wilt ontvangen, vul dan een geldig emailadres in.

Uw vraag is op deze pagina toegevoegd

Wilt u een email ontvangen bij een antwoord en/of nieuwe vragen? Vul dan hier uw emailadres in.


Info