755246
44
Verklein
Vergroot
Pagina terug
1/44
Pagina verder
[1] CLX-CodeLoxx: Installation Operation Manual: V01 - (Art.-No. 800050)
Installation and operating instructions for the following CodeLoxx versions:
CLX-LA-S/SP, CLX-LB-SP, CLX-LHZ-SP, CLX-LA-RP, CLX-LA-AFP and CLX-LA-EF/EFP
CLX-LCA-S/SP, CLX-LCA-AFP and CLX-LCA-EF/EFP
CLX-LPxA-S/SP, CLX-LPxB-SP, CLX-LPxHZ-SP, CLX-LPxA-RP, CLX-LPxA-AFP &
CLX-LPxA-EF/EFP, including PANIC & security versions
Contents:
Preliminary remarks 3
Technical data 4
General operation with media 5
1. Installation 7
2. Double knob cylinder scope of delivery 7
3. Tool set scope of delivery 8
4. Codeloxx double knob cylinder installation 8
5. Fitting to the door thickness 10
6. Dismantling the telescopic axis 12
7. Codeloxx half cylinder scope of delivery 13
8. Installing the Codeloxx half cylinder 14
9. Fitting to the door thickness 15
10. Registering CLX with FE, AEBasic or FR 17
11. Deleting CLX from FE, AEBasic or FR 19
12. Showing the reception strength of FE, AEBasic or FR 20
13. Malfunctions of FE, AEBasic or FR 20
14. Programming 21
15. Creating the programming key 21
16. Changing the standard opening time 23
17. Creating new authorisations 24
18. Deleting individual authorisations 28
19. Deleting all authorisations 30
[2] CLX-CodeLoxx: Installation Operation Manual: V01 - (Art.-No. 800050)
20. Operation 31
20.1 Operating from outside 31
20.2 Operating from outside using the digit ring 31
20.3 Time blocking 31
20.4 Operating from inside 31
20.5 Manual activation of permanent access 32
20.6 Manual deactivation of permanent access 32
20.7 Time-controlled activation/deactivation of permanent access 34
21. Using the “special key for guard duty” 36
22. Switching between ARMED/DISARMED with evaluation units 37
23. Possible acknowledgments 40
24. Additional functions with AEBasic 43
25. Changing the battery 43
26. Eliminating possible malfunctions 44
27. Restrictive conditions 44
[3] CLX-CodeLoxx: Installation Operation Manual: V01 - (Art.-No. 800050)
Preliminary remarks:
We are delighted that you have chosen our CodeLoxx double knob cylinder. The CodeLoxx has a modular
construction and can be adapted to various door thicknesses.
Please read this manual carefully and thoroughly before installation.
If you gave us length measurements when ordering, your CodeLoxx will be delivered fully assembled. If no length
measurements were given, the CodeLoxx double cylinder will be delivered in A: 30, I: 30 and the CodeLoxx half
cylinder in A: 30, I: 10.
The CLX-Z-WS tool set is not supplied. It must be ordered separately (Order No. 501480).
The ABUS double knob cylinder CodeLoxx standard can be programmed either with a locking medium
(programming key) or using PC software (ABUS Seccor Key Manager). This manual primarily deals with the
programming key version. The additional function “time-controlled arming/disarming of permanent
access” (ZAAP see 4.6) is programmed with the ABUS Seccor Key Manager.
General information and battery advice:
This product meets the requirements of applicable European and national guidelines. Conformity has been
established and the relevant statements and documents are kept on file by the manufacturer. To maintain this
state of affairs and ensure safe operation, the user must follow these assembly instructions. The product should
not be changed or modified. Finger contact with the board should also be avoided.
ABUS Security-Center GmbH & Co. KG accepts no liability for loss or damage due indirectly or directly to these
instructions or any damage alleged to have been caused due to them. The contents of these instructions may be
altered without prior notice.
Battery advice:
The unit is powered with DC via a 3V lithium battery that is included in the delivery. When inserting the battery,
ensure the polarity is correct. To ensure long life and to prevent fire and injury, comply with the following
instructions:
Under the Battery Disposal Regulation, the disposal of batteries in household waste is prohibited. They
must be handed in at designated collection points.
Batteries may not be exposed to direct sunlight or other heat sources or stored in places exposed to very
high temperatures.
Keep batteries away from children.
These batteries are not rechargeable.
Batteries must not be dismantled, pierced or otherwise damaged. They must not be burned, come into
contact with water or be short circuited.
If batteries are replaced, take note of temperature details specified by the manufacturer.
[4] CLX-CodeLoxx: Installation Operation Manual: V01 - (Art.-No. 800050)
Technical data:
Additional functions: Permanent access, timed switching-on and off of permanent access
(ZAAP - only with SP electronics, not possible with AFP or EF/P;
Opening duration: adjustable between 6 or 12 seconds.
Scope of delivery: Double knob cylinder or half cylinder, installation-operating manual, battery CR2.
Accessories required: ABUS chip key, CLX-Z-WS tool set
Optional accessories: PELT, ESE, SKM with TG-SKM, CLX-Z-WS tool set (see general accessories)
Recording and Optional: Recording of the last 1,000 events; 30 week profiles,
time function: 6 locked day profiles
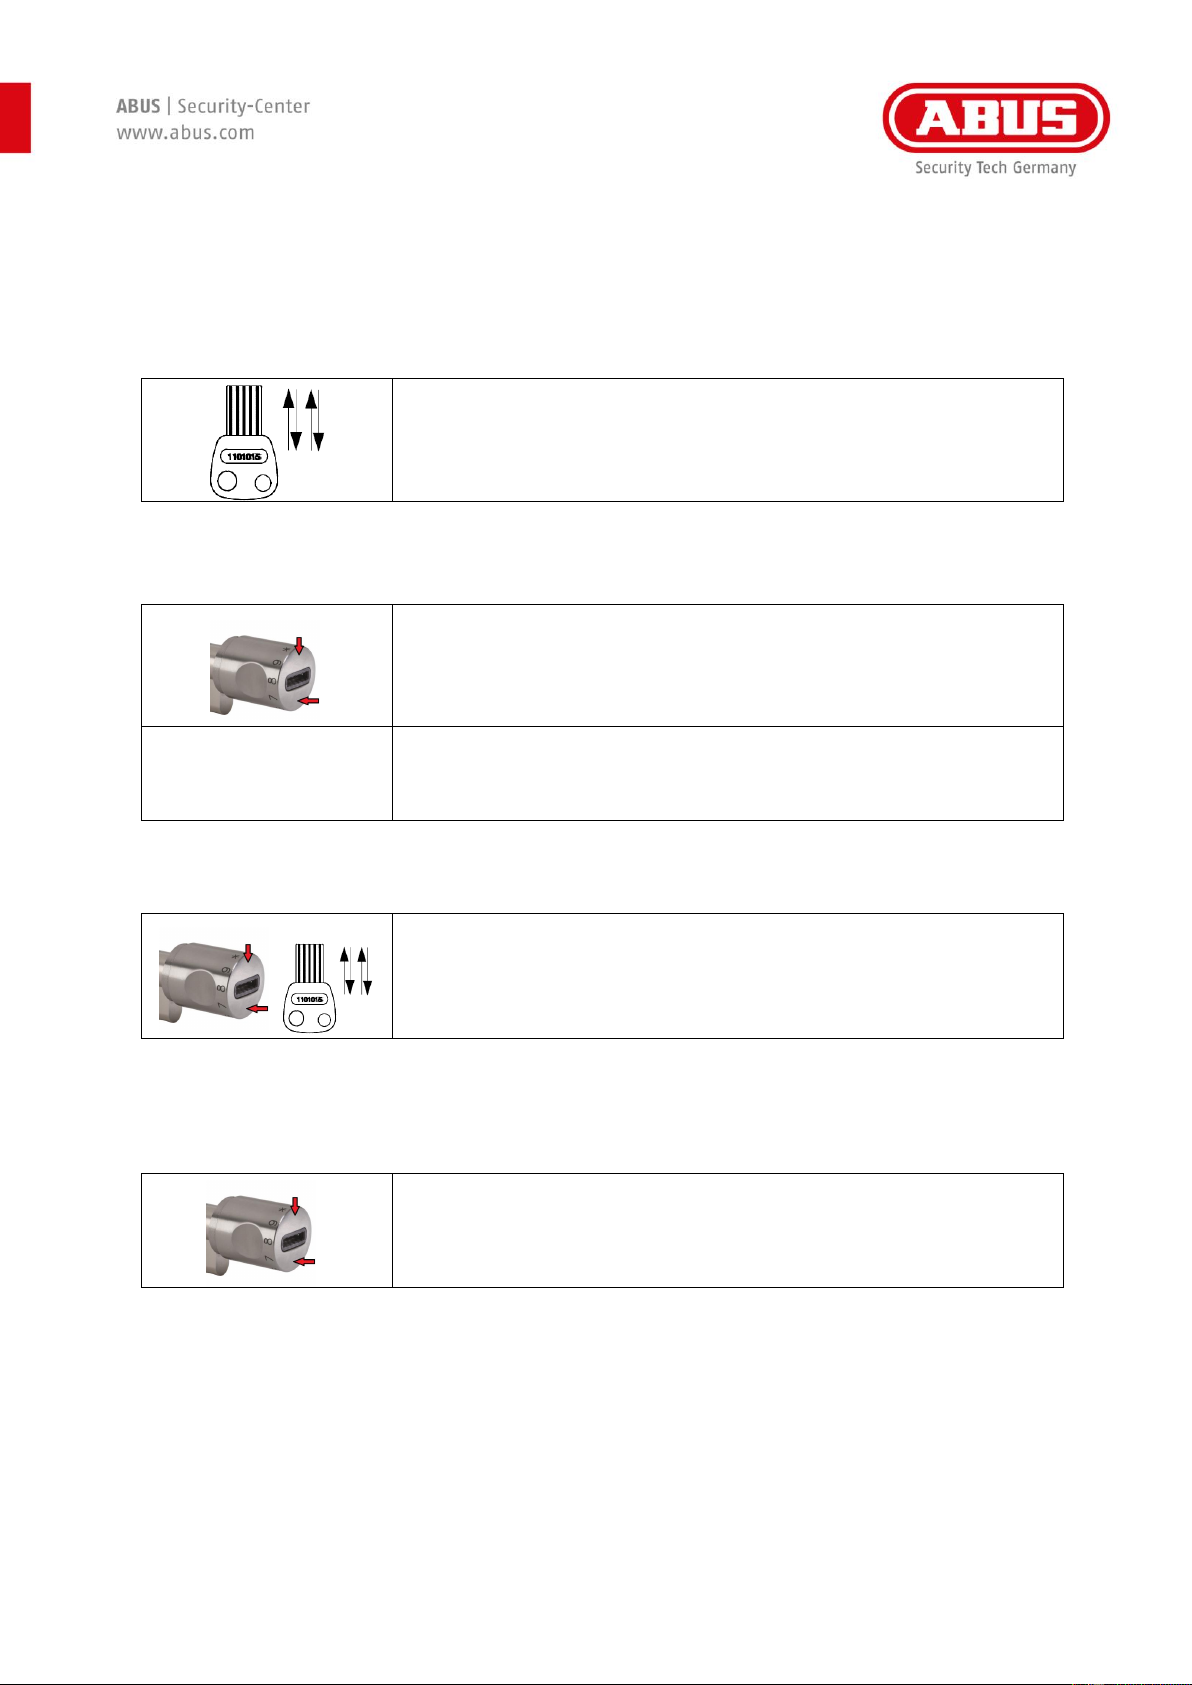
Locking media: ABUS chip key, the Proximity tag and Proximity card from our company can also be
used as locking media. We assume no liability for the use of other media.
Range of application: Doors with PZ mortise locks, multi-point locks,
Panic locks (approved for the free-running of the locking nose). If a defined locking lug
position is required, please use the CLX-PANIC or a ZL).
Max. Number of media: 511 authorisations
Programming: Via programming key and/or PELT or SKM with TG-SKM
(see general accessories)
Power supply: 3 Volt lithium battery CR2 (approx. 60,000 / approx. 50,000 (AFP, EF/EFP, RP)
openings);
Emergency power supply ESE or PELT (see general accessories)
Operating conditions: External: -20 °C to +60 °C / IP43 or IP42 for CLX-LCA
Internal: -10 °C to +60 °C / IP44 or IP 43 with readers on both sides and half
cylinder.
Dimensions Diameter 30 mm, length 39 mm
of outer knob:
Dimensions Diameter 33 mm, length 45 mm, (reader both sides) 64 mm
of inner knob:
Material: Stainless steel knobs
Standard length: Min. external 30mm/ internal 30mm, length in 5mm increments.
Factory settings: The systems are delivered in a coupled state in order to make it easier to
position the cam during installation. Only after initialisation, programming with a
locking medium and performance of the first locking procedure will the system
switch to free-running mode.
[5] CLX-CodeLoxx: Installation Operation Manual: V01 - (Art.-No. 800050)
General operation with media
1. ABUS chip key (ACS)
To operate, the ABUS chip key is inserted into the reader module (reading slot on the outer
knob) and taken out again.
The ABUS chip key is reversible; the plug-in direction is variable.
Important: Operation approval only occurs after the key has been removed.
2. Proximity / Hitag1 / Hitag2 transponder:
To operate using a Proximity / Hitag1 / Hitag2 transponder, touch the centre of the reading
module with the transponder. During programming: Place the transponder on the reading
module on the outer knob.
A rapidly blinking green light confirms the reading of a valid locking medium. The locking
medium must be removed from the reading module (at least 100 mm distance) before
further reading can be started. During the coupled period no other reading with a locking
medium is possible.
Throughout the operating instructions, the insertion and removal of the chip key - as well as the
presentation and removal of the transponder - is indicated by the word “present”.
Every input of a valid locking medium produces an approval for 6 or 12 seconds: during this time
the door can be unlocked and opened. The system then goes back to the free-running state.
For further functions you require a recording system, the transfer device and the
SKM software:
Recording function, setting the time,
Defining time limitations,
Automated changeover to summer/winter time
Time-controlled activation/deactivation of permanent access (ZAAP)
[6] CLX-CodeLoxx: Installation Operation Manual: V01 - (Art.-No. 800050)
Valid locking media include:
1. ABUS chip key:
Every chip key is unique, is equipped with a set code from the factory and is protected from being copied and
rewritten.
2. Proximity / Hitag1 / Hitag2 transponder: (not permitted for use in a VdS installation)
A Proximity / Hitag1 / Hitag2 transponder is a contactless locking medium, equipped with a set code.
NOTE: Keys and locking media should always be kept safe so that only authorised persons have access to
them. If you lose the key, follow the steps outlined in this manual immediately so that third-party use of the lost
key can be avoided.
3. CODE input with a digit ring: A valid authorisation can be created with a 4, 5 or 6 digit code on the CodeLoxx
with digit ring (a 6 digit code must be used in a VdS environment).
NOTE: Select codes that cannot be found out by trial and error. Avoid:
Several of the same digits (e.g. 3333, 8888 etc.)
Digit chains that arise due to keypad arrangement
Common codes (e.g. 4711, 0815 etc.)
Numeric sequences (e.g. 1234, 6789 etc.)
Birthdates (e.g. 280769 for 28th July 1969)
Write the code down and keep the document safe
Check the code several times before shutting the door to make sure you do not get shut
out.
There are 511 memory spaces available. Each memory space can store a locking medium or code. Locking
media and codes can be used on their own or as combination codes.
The following describes the operation of the first two locking media types. Later in the manual, examples of the
operation of the ABUS chip key will be described. Operation with Proximity / Hitag1 / Hitag2 transponders occurs
analogously. Operation with code input is described in 4.2.
NOTE: Please keep a distance of 5cm between the knobs when storing CodeLoxx with Proximity additional
equipment. These can activate each other’s reading units and thus prematurely discharge the battery.
[7] CLX-CodeLoxx: Installation Operation Manual: V01 - (Art.-No. 800050)
1. The installation of all versions of CodeLoxx electronic double knob cylinders and half cylinders
2. Scope of delivery CodeLoxx double knob cylinder (example total length 70 a: 40/ i: 30)
With extension set CLX-Z-V-10
1. Inner cap
2. Mounting disk
3. Battery
4. Inside of cylinder
4a. Handle bolts
5. Adapter bolts base unit
6. Fore-end screw
7. Grub screw cylinder body
8. ZL adapter
9. Complete CLX cam
10. Cylinder extension 10 mm
11. Adapter housing external
12. Cylinder external side (exposed side during attempted break-ins)
13. Adapter bolts 10 mm
14. Fixing washer
14a. Fixing washer VdS
15. External knob
15a retainer ring
16. Telescopic axis
16a. Battery holder
16b. Axis section (exposed side during attempted break-ins)
17. Cylinder extension 10 mm
18. Adapter
Scope of service extension set CLX-Z-V-10
[8] CLX-CodeLoxx: Installation Operation Manual: V01 - (Art.-No. 800050)
3. Scope of delivery tool set (must be ordered separately):
A. Opening key inner cap
B. Allen key
C. Hook spanner for half cylinder
4. Codeloxx double knob cylinder installation:
CodeLoxx in as-delivered condition
External knob (15) and inner cap (1) are installed.
The battery (3) has not yet been inserted.
The CodeLoxx in this example is delivered in a length of
40/30
The closing cam is coupled to prevent accidental entrapment
Dismantling the external knob
In order to insert the CodeLoxx double knob cylinder into the lock, the
external knob (15) must be dismantled:
Loosen the grub screws on the retainer ring
Rotate the retainer ring (15a) until you can see the first grub screw.
Now loosen the screw with the Allen key (B). The screw cannot be fully
unscrewed. Once a screw touches the retainer ring, turn it in a
clockwise direction. The retainer ring cannot turn in the opposite
direction. Loosen the other two grub screws using this same method.
To do this, the retainer ring (15a) must be turned 120° each time until
the next grub screw becomes visible. Now the external knob (15) can
be removed.
Dismantled external knob
External knob (15) fully dismantled.
[9] CLX-CodeLoxx: Installation Operation Manual: V01 - (Art.-No. 800050)
Reset
Contact plate
[10] CLX-CodeLoxx: Installation Operation Manual: V01 - (Art.-No. 800050)
To be considered when installing CLX-LCA:
For proper operation you must ensure that the cam locking nose of the CLX double cylinder is not held
under pressure by the spring tension of the mortise lock during the opening process. In rare
combinations of the CLX double knob cylinder and mortise lock there can be tension between the cam
locking nose and screening of the axis after pressing the CLX-LCA, whereby the coupling pin of the
axis is prevented from decoupling. We therefore recommend testing this during installation and,
where necessary, turning the knob one quarter towards the closing direction after the opening process.
This results in the relaxation of the individual components and allows the CLX double knob cylinder to
decouple. The CLX-LCA can also be rebuilt on-site without screening to ensure decoupling. An adapter
piece without ball bearings will need to be used on the outside for the modification. (Optional
accessories: CLX-Z-A-A1).
5. Assembling CodeLoxx: Fitting the cylinder body to the door thickness (This example uses a CodeLoxx
of extended total length 80 a:40/i:40)
Dismantling the external knob (15)
Dismantle the external knob (15) as described in 4.2.
Dismantle the external side of the cylinder (12)
First, unscrew the cylinder body grub screw (7) with the Allen key (A).
The outer side of the cylinder (12) can be removed and extension is
possible.
Even when only the inside of the cylinder (4) is extended (as in this
example), the outer side must first be removed.
[11] CLX-CodeLoxx: Installation Operation Manual: V01 - (Art.-No. 800050)
Dismantle the ZL adapter (8) and cam (9)
Before an extension of the inside of the cylinder (4) can take place, the
ZL adapter (8) must be removed from the inside (4). To do this, remove
the inside of the cylinder (4) from the ZL adapter (8) using the Allen key
(A). The ZL adapter (8) and cam (9) can be removed from the
telescopic axis (16 in the direction of the arrow) using a turning motion.
You can now extend the inside of the cylinder (4).
Dismantling adapter bolt base unit (5)
Firstly, remove the screwed on adapter bolt base unit (5) from the inside
of the cylinder (4).
Assembling 10 mm adapter bolts (18)
In this second step, the 10 mm adapter bolts (18) from the extension set
must be screwed in on the inside of the cylinder (4).
Internal extension of the CodeLoxx
The inside of the cylinder (4) must now be screwed together with the
suitable 10 mm cylinder extension (17) and the ZL adapter (8) using the
Allen key (B) (analogous to disassembly).
Assembling the outer side of the cylinder (12)
To extend the outer side of the cylinder (12) to 40 mm (the delivered
state in this example), you must slide the relevant 10 mm cylinder
extension (17) onto the telescopic axis (16).
Assembling the outer side of the cylinder
In the next step you need to plug the adapter housing (11) onto the
suspended 10 mm cylinder extension (17). Now the fixing plate (14)
must be inserted between the adapter housing (11) and the axis end
(see photo). In the next step, the outer side of the cylinder (12) with the
mounted 10 mm adapter bolts (17) can be inserted onto the already
assembled cylinder. Now the successively assembled parts can be
fixed to the ZL adapter (8) using grub screws (7) (as in disassembly
5.2).
The CodeLoxx with digit ring (LCA) follows the same assembly steps as
the standard assembly of the outer side of the cylinder (12), with one
small difference: Only by slightly turning the end of the axis (16b) when
attaching the outer side of the cylinder (12) will the ball bearing snap
into place in the outer side of the cylinder (12).
[12] CLX-CodeLoxx: Installation Operation Manual: V01 - (Art.-No. 800050)
Please note when assembling VdS BZ+ systems:
Assembling the outer side of the cylinder VdS BZ+
In the case of axis version Vds BZ+, both the fixing disks (14a) are
placed into the outer side of the cylinder (12) (see photo) before the
cylinder outer side is inserted onto the already assembled cylinder. Now
the successively assembled parts can be fixed to the ZL adapter (8)
using grub screws (7) (as in disassembly 5.2).
Assembling the external knob (15)
Finally, the external knob (15) is fixed on again. Proceed as described
in point 4.4.
6. Dismantling the telescopic axis
For maintenance and cleaning work or for replacing the entire telescopic axis, proceed as follows.
Assembling the telescopic axis (16)
To dismantle the telescopic axis (16) you must first dismantle the
external knob (15) and the outer side of the cylinder (12). The
telescopic axis (16) can then be pulled from the ZL adapter (8) in the
direction of arrow 2. It is important to note that the handle bolts (4a)
must be pulled upwards with the Allen key (B) (leveraged, see arrow 1).
Follow the same procedure when reassembling the axis (16). This
disassembly process is only required when replacing the entire
telescopic axis.
1
2
2x
Photo VdS BZ+
[13] CLX-CodeLoxx: Installation Operation Manual: V01 - (Art.-No. 800050)
7. Scope of delivery CodeLoxx half cylinder CLX-LHZ-S / SP and CLX-LPxHZ-S / SP
Scope of delivery CodeLoxx half cylinder (example total length 40 - a: 30/ i: 10) + extension set CLX-Z-VH-10
1. Cylinder axis with electronics and CR2 lithium battery holder
2. External knob
3. Mounting disk
4. Outer side of cylinder
5. Coupling housing (component of the CLX-Z-VH-10 extension set)
6. ZL adapter
7. Complete CLX cam
8. Adapter extension (component of the CLX-Z-VH-10 extension set)
9. Adapter bolts (component of the CLX-Z-VH-10 extension set)
10. Fore-end screw
[14] CLX-CodeLoxx: Installation Operation Manual: V01 - (Art.-No. 800050)
8. Installing the Codeloxx half cylinder
CodeLoxx half cylinder as delivered
The external knob and half cylinder are already installed.
Disassembly of the external knob (2) is required to insert the
battery.
The cam is coupled when delivered. This only decouples after
the first authorised closure.
Dismantling the external knob
Loosen the retainer ring
Turn the mounting disk (3) anti-clockwise with the hook
spanner from the tool set (CLX-Z-WS).
Pay attention to the cable. The cable must not be detached to
insert the CR2 lithium battery. When inserting the battery,
ensure the polarity is correct. The polarity is shown on the
sticker on the battery holder. The contact plate is the positive
pole.
Note:
The initialisation (initial start-up) is carried out in the same way as for the CodeLoxx double knob cylinder. Please
see point 15 of these instructions. Please refer to the instruction manual for details.
Assembling the external knob (2)
Pay special attention to the cable. The plug connection must be
attached. The cable must not be pinched.
Turn the mounting disk in a clockwise direction on the external
knob using the hook spanner.
[15] CLX-CodeLoxx: Installation Operation Manual: V01 - (Art.-No. 800050)
9. Codeloxx half cylinder: Fitting the cylinder body to the door thickness
(this example uses a CodeLoxx of extended length a: 40/i: 10)
A base rate for dismantling on 30/10 mm is available (Art.-No. CLX-Z-VH-00).
Dismantling the Codeloxx half cylinder
Loosen the grub screws in the ZL adapter
Couple the cylinder with an authorised locking medium. (Creating
a locking medium can be found in point 17 of these instructions)
As long as the Codeloxx half cylinder is coupled, remove the ZL
adapter
Replace the adapter bolts (9) and coupling housing (5) with the
adapter bolts and coupling housing from the extension set CLX-Z-
VH-[mm]
Slide open the adapter extension (8)
Put the individual parts together
Assembly
Tighten the grub screws
Inspection
Check the Codeloxx half cylinder with an authorised locking
medium before installing it into a lock or key switch.
Note:
In certain assembly situations it might be necessary to use the Codeloxx half cylinder without a knob at first.
There exists the option to completely remove the axis.
[16] CLX-CodeLoxx: Installation Operation Manual: V01 - (Art.-No. 800050)
Disassembly for special situations
On the opening on the front of the cylinder outer side, pull
the locking bolt down using the wire hook from the tool set
You can now pull out the entire cylinder shaft.
For assembly, pull the locking bolt on the front of the
cylinder outer side down using the wire hook from the tool
set.
Inspection
Check the Codeloxx half cylinder with an authorised
locking medium before installing it into a lock or key
switch. (Creating a locking medium can be found in point
17 of these instructions)
Notes:
- The VdS version of the cylinder is provided with standard anti-drill protection on the outside of the
cylinder, as well as with anti-drill protection on the cylinder shaft.
- Profile cylinder with pulling protection - VdS BZ+
[17] CLX-CodeLoxx: Installation Operation Manual: V01 - (Art.-No. 800050)
Doors in danger of break-in are protected by a profile cylinder with a VdS-approved burglar-resistant
doorplate of class B or C. These doorplates conform to DIN 18 257 classes ES 2 or ES 3.
- The body of the cylinder must not stick out more than 3mm from the burglar-resistant protective rosette
or doorplate once it has been assembled. Adjustments to door thicknesses are obligatory.
- Only cylinders from the VdS series are marked as such and approved for such applications. There is
also a difference in the assembly procedure.
- The Codeloxx half cylinder is not suitable for installation in safety-relevant doors or entrances.
10. Registering the systems with wireless receiver FE for AE255F, evaluation unit AEBasic or wireless
remote unit FR.
The CLX door systems (CLX-xx-AFP, CLX-xx-EF/P or CLX-xx-RP) are factory-set to stand-alone service. A
logging-in procedure to the FE, AEBasic or FR must be carried out. Each door system must be registered
individually.
Authorised locking media must also be saved in the evaluation unit for the arming and disarming switching
function in connection with the AE255F evaluation unit. Please see point 15 of these instructions for notes on how
to create the programming key.
10.1 Radio channel selection
Please refer to the relevant sections of instructions for FE (AE255F), AEB or FR.
Carry out a new registration of the registered CLX when changing the radio channel.
10.2 Registration of FE (AE255F), AEBasic or radio remote unit FR
Function FE / AEB /
FR
Control
element
Operation
Display
1. Start menu
Button T1
press x 1
LED D1 blinks for max. 60 s
The registration described under 10.3 must be carried out whilst D1 is flashing.
[18] CLX-CodeLoxx: Installation Operation Manual: V01 - (Art.-No. 800050)
10.3 Registering CLX with FE (AE255F), AEBasic or FR
1. Present the programming key x1.
2. A slowly flashing green signal indicates “ready for programming”.
3. Insert the programming key and leave it in.
4. A slowly flashing red signal will come on.
5. This is then followed by a solid red light.
6. Whilst this red light is on:
Remove the programming key.
Display FE, AEBasic or FR
Display
Meaning
LED D1 is lit up
Registration successful
LED D1 is still flashing
Registration unsuccessful. Reduce the distance between CLX and
FE, AEBasic or FR. Perform the registration again
LEDs D1 and D7 are lit up
The memory for the FE, AEBasic or FR door systems is full. Log out
individual systems.
GREEN
RED
RED
[19] CLX-CodeLoxx: Installation Operation Manual: V01 - (Art.-No. 800050)
11. Deleting registered CLX from FE (AE255F), AEBasic or radio remote unit FR
11.1 Deregistration
Function FE / AEB /
FR
Control
element
Operation
Display
1. Start menu
Button T1
press x 3
LED D4 blinks for max. 60
s
The logging out method described under 11.2 must be carried out whilst D4 is flashing.
11.2 Logging out CLX from FE (AE255F), AEBasic or radio remote unit FR
1. Present the programming key x1.
2. A slowly flashing green signal indicates “ready for programming”.
3. Insert the programming key and leave it in.
4. A slowly flashing red signal will come on.
5. This is then followed by a solid red light.
6. Whilst this red light is on:
Remove the programming key.
GREEN
RED
RED
[20] CLX-CodeLoxx: Installation Operation Manual: V01 - (Art.-No. 800050)
Display for FE (AE255F), AEBasic or FR
Display FE/ AEBasic / FR
Meaning
LED D4 is lit up for 20 s
Deregistration successful
LED D4 is still flashing
Deregistration unsuccessful. Reduce the distance between CLX and
FE, AEBasic or FR. Perform the logging out process again.
12. Show reception strength
The reception strength can be shown to check the radio link between the CLX and FE (AE255F), AEBasic or FR.
(Creating a locking medium can be found in point 17 of these instructions)
Function FE, AEBasic
or FR
Control element
Operation
Display
1. Start menu
Button T2
press x 1
LED D1 - D8 blinks for
max. 60 s
2. Show
reception strength
Valid locking medium,
registered door system
(remote only rotate the
outer knob)
Present the locking
medium
The LEDs D1 - D8 might
light up.
The more LEDs that light
up, the stronger the
reception signal
Secure data transfer is only possible if there is a sustained exclusion of outside interference on a
frequency of 868 MHz.
13. Malfunctions
Malfunction that occurs
Acknowledgment on
CLX
Cause
Standard negative
9x red flashing
No arming/disarming permission.
Special negative
9x red flashing,
pause, 1x red flash
Feedback EMZ does not de-energise during disarming
switching attempt. No radio connection to AEB.
3x red flashing
After 10/15 s
No EMZ feedback during arming switching attempt.
5x red flashing
Blocking magnet / bolt contact is not active
LED D8 (AEBasic, FE, FR)
flashes
-/-
Disturbance in the radio link
External source of disturbance for the radio signal
Defect in the door system’s radio transmitter circuit
board
[21] CLX-CodeLoxx: Installation Operation Manual: V01 - (Art.-No. 800050)
13.1 Actions to take in the case of radio link disturbance
In case of a power failure at the FE or AEBasic, interruption of the radio link or lack of feedback from EMA/EMZ, it
can be necessary to carry out an emergency opening.
This requires a special negative acknowledgment (see 26. Malfunctions).
In the case of the radio remote unit, this means that valid locking media can also be opened by interrupted radio
links.
The EMA/EMZ can be switched to armed. A transfer of the EMA/EMZ state to the coupled door
system does not take place. There is the risk of triggering an alarm.
Procedure:
Present an authorised locking medium during the pause in the special negative acknowledgment. Repeat this
process eight times. After the eighth time, the door system couples for a pre-set coupling period of 6 or 12
seconds.
14. Programming
15. Creating the programming key (Initial start-up)
The valid programming key must be created before locking media can be programmed.
The entire authorisation memory is deleted when creating a new programming key.
Any ABUS chip key can be used as a programming key. It is also possible to create a programming key from a
transponder. However, it is always recommended you use an ABUS chip key as a programming key. Only one
programming key can be created per cylinder. A programming key should be suitably labelled and kept secure.
1. Disassembling the inner cap
Dismantle the cap of the inner knob. Fix the mounting disk onto its
notch and unscrew the inner cap using the opening key.
If you are using a double knob cylinder with readers on both sides
or a half cylinder, please carefully remove the cable from the plug.
Follow this procedure during other times you need to
assemble/disassemble the product. Make sure that the cap plug is
inserted again before completing installation.
2. Insert the battery
Swivel the contact plate to the side. The positive pole of the CR2
battery is shown on the contact plate. Insert the battery and close
the contact plate again.
[22] CLX-CodeLoxx: Installation Operation Manual: V01 - (Art.-No. 800050)
3. Initialisation
The black plastic battery holder has 3 vertical grooves: there is an
opening at the end of the narrowest groove - under this you will find
the RESET button (see arrow in the picture). To initialise the
CodeLoxx, press the reset button with the rounded side of the Allen
key (B) for at least 6 seconds.
4. Display readiness
Confirmation of initialisation is shown by a rapid red/green flashing
light. This display goes off after approx. 6 seconds if no action is
taken.
5. Creating the programming key
As long as the display continues, present any key. The flashing will
then cease.
This key is now set up as a new programming key.
6. Label the programming key
Label the new programming key with a sticker marked “Prog”.
You can now reinstall the cap of the inner knob.
16. Changing the default opening time (6 or 12 seconds)
The standard opening time is automatically set to 6 seconds with each initialisation.
The opening time can manually be changed to 12 seconds (e.g. for the operation of a multi-point lock).
Process of changing to a 12 second opening time
[23] CLX-CodeLoxx: Installation Operation Manual: V01 - (Art.-No. 800050)
1. Disassembling the inner cap
Dismantle the cap of the inner knob. Fix the mounting disk onto its
notch and screw the inner cap downwards using the opening key.
2. Present the programming key once.
3. A slowly flashing green light blinks for 6 seconds.
Whilst this light is on: Perform step 4.
4. Press the RESET button quickly
Procedure as described in picture 2: it must only be pressed for a short
time - less than 1 second - to avoid unwanted initialisation.
The flashing immediately stops.
5. Assembling the inner cap
When you enter a valid authorisation the system will now always be set to a duration of 12 seconds.
If desired, you can reset the opening time to 6 seconds by following the same steps as you took to change it to 12
seconds.
17. Creating new authorisations
17.1 Creation of a new locking medium
GREEN
[24] CLX-CodeLoxx: Installation Operation Manual: V01 - (Art.-No. 800050)
1. Present the programming key x1
2. A slowly flashing green signal indicates “ready for programming”
3. Whilst this flashing continues, present any new locking medium 1 time.
The flashing stops.
17.2 Creation of a new locking medium with additional function “permanent access“
1. Insert the programming key and leave it in.
2. Whilst the slow green light flashes: wait.
3. This is then followed by a solid red light.
4. Whilst this red light is on:
Remove the programming key.
5. Present any new locking medium 1 time.
(This should not already be programmed as a standard locking
medium!)
The continuous light stops.
GREEN
GREEN
RED
[25] CLX-CodeLoxx: Installation Operation Manual: V01 - (Art.-No. 800050)
17.3 Creation of a new code (LCA)
General note “CLX with digit ring“(CLX-LCA):
The CLX-LCA is marked with 10 digits (0-9) and a symbol on the outer knob.
The digits 0-9 are required for code input.
The symbol stands for the “stop function”. This allows you to cancel code input. The “stop” procedure
is confirmed by a double, red flashing signal.
Turn the knob to enter the desired number. The digit selected is the one in the uppermost position. Make
sure the cylinder is kept horizontal. We recommend installation in the door before inputting a code.
Operation takes place by quickly pressing the knob; this is then confirmed by a short, green, one-time
blinking signal.
Pressing any digit for longer (at least 2 seconds) will end the code input (with the exception of the *
symbol). Before the code can be re-entered you must wait
6 seconds or alternatively press the * symbol.
1. Present the programming key.
2. A slowly flashing green signal indicates it is ready for programming.
3. Select the first digit of the code:
Turn to the desired number so that it is in the uppermost position.
Press the knob once. A simple green flashing signal confirms the input.
Repeat this step for the following digits. Codes with 4 - 6 digits are
permissible.
4. The programming procedure is ended by pressing any digit for at least
2 s (with the exception of the symbol). A green light flashes twice
to confirm successful programming.
GREEN
GREEN
[26] CLX-CodeLoxx: Installation Operation Manual: V01 - (Art.-No. 800050)
Check the input with a function test on an open door to prevent accidentally being locked out.
17.4 Creation of a new combination code “Code + locking medium” with PELT or CLX-LCA
You will need a professional input device with reader + keypad (PELT) with a programming cable for individual
deletion (PKE) to carry out the following processes. Combination codes can be created with ABUS chip keys or
Proximity / Hitag1 / Hitag2 transponders.
It is recommended that for every key created according to 17.1 and 17.2, an additional combination code is also
created. This has the advantage of allowing you to individually delete any lost keys later on if required. (This is
done with the help of the keypad codes that you created together with the key as a combination code).
Use a 4 to 5-digit keypad code for each key.
Keep a record of the combination codes created. Record the key, the code and the user, e.g. line by line in a
table.
Insert the programming cable’s (PKE) connector into the Sub-D plug of the PELT and the attached chip key of the
PKE into the reading slit of the CodeLoxx.
Perform the following processes on the professional input unit (PELT):
1. First, press the ‘on’ button on the PELT and keep this pressed
throughout.
2. Put the programming key into the PELT reading slit 1 time.
3. Green flashing signal
“Ready for programming”: slow green flashing
4. Whilst the blinking signal continues, enter the new keypad code on the
PELT keypad: choose 4 to 5 digits; when you press the first button the
flashing stops.
Present the desired combination code locking medium in the PELT
reading slit 1 time (*1)
(*1) You will need a Proximity adapter module (AM-Prox) to create combination codes with transponders.
Combination codes CLX-LCA
A combination code can be programmed directly using the digit ring on CodeLoxx with digit ring models (CLX-
LCA-xx):
GREEN
[27] CLX-CodeLoxx: Installation Operation Manual: V01 - (Art.-No. 800050)
Programming is identical to point 17.3 - with the following exception:
Completion of the programming process occurs by inserting the key into the reader of the CLX-LCA.
Not by pressing any digit for a longer period.
17.5 Creating a “special key for guard duty” (only in combination with an AE255F)
A special key can be created for guard duty. This does not open the door system unless an alarm goes off.
Use only the ABUS Seccor Key Manager Software for this function.
The following functions can be carried out using the special key for guard duty:
In the DISARMED state: Switch to ARMED
In the EXTERNAL ARMED state and an alarm is triggered: Switch to DISARMED
In the INTERNAL ARMED state and an alarm is triggered: Switch to DISARMED
17.6 Create a code for a silent alarm (only in conjunction with keyboard ET/ELT and evaluation unit
AE255F)
If a CLX is operated on an AE255F evaluation unit, a silent alarm can be triggered using the code keypad.
To do so, a special 6-digit code must be specially created.
Use only the ABUS Seccor Key Manager Software for this function.
18. Deleting individual authorisations
18.1 Locking media available
1. Present the programming key x2.
2. This is followed by a red flashing signal.
“Ready to delete”: rapid red blinking.
3. As long as this blinking continues: present once the locking medium to
be deleted.
RED
[28] CLX-CodeLoxx: Installation Operation Manual: V01 - (Art.-No. 800050)
18.2 Code available (CLX-LCA)
1. Present the programming key x2.
2. This is followed by a red flashing signal.
“Ready to delete”: rapid red blinking.
3. The flashing signal stops after you enter the first digit of the code that is
to be deleted.
Input the other digits of the code.
4. The deletion procedure is ended by pressing any digit for longer (at
least 2 s)
(with the exception of the symbol).
18.3 Locking media not available (e.g. lost)
Individual deletion with the professional input unit (PELT) or with CLX-LCA.
You can delete a lost key individually with the PELT if you created it with an additional combination “deletion
code” in accordance with 17.4. A CodeLoxx with Digit Ring (CLX-LCA-xx) does not require PELT.
Deletion procedure:
Insert the PKE cable’s connector into the Sub-D plug of the PELT. Slide the attached chip key of the PKE
programming cable into the reading slit of the CodeLoxx. The following processes are performed on the PELT.
1. First, press the ‘on’ button on the PELT and keep this pressed
throughout.
2. Insert the programming key into the PELT reading slit 2x.
3. This is followed by a red flashing signal - “ready for deletion” - for 6
seconds: rapid red blinking.
GREEN
RED
RED
[29] CLX-CodeLoxx: Installation Operation Manual: V01 - (Art.-No. 800050)
4. As long as this flashing continues:
Enter the keypad code (combination code) of the lost locking medium
into the keypad of the PELT.
When you press the first button the flashing stops.
5. Press the “PROG” button on the PELT.
The lost locking medium has now been deleted.
Inspection: If you want to check whether the locking medium has really been deleted: Repeat the above deletion
process. When you press the “PROG” button you will see a short green acknowledgement signal. This is
evidence that both the locking medium and the combination code have been deleted. If you do not see a green
acknowledgement signal, repeat the deletion process.
19. Deleting all authorisations
19.1 Deleting all locking media
1. Present the programming key x3.
2. Red, 6-second-long sustained light: “Deletion warning”.
3. Present the programming key again.
Continuous light goes out.
Now all the locking media aside from the created individual codes, combination codes and the programming key
have been deleted. You can delete all media and the programming key by initialising the CodeLoxx (see
programming)
RED
[30] CLX-CodeLoxx: Installation Operation Manual: V01 - (Art.-No. 800050)
19.2 Deleting all codes with CLX-LCA or PELT
1. Present the programming key x3.
2. Red, 6-second-long sustained light: “Deletion warning”.
3. Briefly pressing a digit once will delete all codes.
Deleting the codes does not delete any keys. Keys which were created along with a combination
code in accordance with 17.4 cannot be individually deleted after carrying out “Delete all codes”, but
they are still authorised. They must be individually deleted according to 18.1.
20. Operation
External Internal
20.1 Operating from outside
Possible with all valid created locking media.
Unlock / open from outside / lock from outside
1. Insert the valid locking medium or hold up to the reader.
2. After the insertion or presentation of the locking medium:
Rapid green blinking.
RED
GREEN
[31] CLX-CodeLoxx: Installation Operation Manual: V01 - (Art.-No. 800050)
3. Remove or pull out the locking medium.
The system will be coupled for 6 or 12 seconds.
Open the door lock with the external knob.
20.2 Operating from outside using the digit ring (CLX-LCA)
Turn to the desired number so that it is in the uppermost position. The first number of the code is confirmed by a
one-time, short pressing of the knob. Enter the other digits in the same way. Once the 4-6 digits of the code have
been entered, the system will be coupled for 6 or 12 seconds.
20.3 Time blocking
The system will be locked for 10 minutes after 10 unsuccessful entry attempts. If entered incorrectly again, the
system will again be locked for 10 minutes. The time block can be cancelled using a valid key or the programming
key. The timed closure is signalled by a slowly flashing red light. The timed closure can be cancelled with a valid
locking medium. The programming key interrupts the timed closure so that one-time entry is possible. See details
in the error descriptions at the end of the manual.
20.4 Operating from inside
The door can always be locked or unlocked with the internal knob. Exception: Model CLX-XxxX-LB with readers
on both sides. Using this from the inside is described in 20.1.
20.5 Manual activation of permanent access
The manual activation of permanent access is only possible with keys that were awarded the additional function
of “permanent access” during programming. See 17.2
1. Insert the key and leave it in
(Hold up the transponder and keep it up)
2. During this process:
rapid green blinking
3. This is then followed by a red light after 6 seconds. The CodeLoxx
cylinder couples.
4. Whilst the CodeLoxx cylinder is coupled, remove the locking medium
and present 1 more time
GREEN
RED
[32] CLX-CodeLoxx: Installation Operation Manual: V01 - (Art.-No. 800050)
5. A green light acknowledges the activation of permanent access
The system remains in an OPEN state: It can be permanently locked and unlocked.
20.6 Manual deactivation of permanent access
1. Insert the key
(Hold up the transponder)
2. Green light
3. Remove the locking medium
4. As soon as the green light goes off:
Insert the locking medium for a 2nd time
(Hold up the transponder)
5. Green light
6. Remove the locking medium
7. As soon as the green light goes off: Insert the locking medium for a 3rd
time
(Hold up the transponder)
8. Green light
GREEN
GREEN
GREEN
GREEN
[33] CLX-CodeLoxx: Installation Operation Manual: V01 - (Art.-No. 800050)
9. Remove the locking medium
The system goes into free-running mode. Permission for locking or unlocking is required.
Example of manual activation:
At 8am a locking medium with permanent authorisation is used for activation, at 6pm a locking medium with
permanent authorisation is used for deactivation. See 20.6
CodeLoxx cylinder with coupled cam
User identification with locking medium
Time 10:00 pm 12:00 pm 2:00 am 4:00 am 6:00 am 8:00 am 10:00 am 12:00 pm 2:00 pm 4:00 pm 6:00 pm
Legend
Cylinder cam coupled
Cylinder cam decoupled, cylinder inactive
Identification and manual unlocking
Note: After manual deactivation, a subsequent ZAAP time profile is not carried out when using the SKM software
and two active ZAAP time profiles on one calendar day. The manual shutdown of permanent access takes
precedence.
20.7 Time-controlled activation/deactivation of permanent access (ZAAP)
Only possible with recording standard systems and CLX-LA/LPxA/LCA (SP). A time profile can be stored in the
locking system using the ZAAP additional function. During this time permanent access turns on for a time set out
in the time profile. This function can only be set using the ABUS Seccor Key Manager (SKM).
When editing a door (installing a new door or updating
an existing door) there is a tick next to the “Recording
function/time profile function” in the door properties.
You can also tick the box for “Automatic
arming/disarming of permanent access”.
A weekly profile is necessary and must be created in
SKM beforehand (see SKM operating instructions). You
can select individual days on which arming/disarming
does not take place using the locked day profile.
It is advisable to record your own weekly profile for the
ZAAP additional function.
[34] CLX-CodeLoxx: Installation Operation Manual: V01 - (Art.-No. 800050)
Activating ZAAP on the locking system:
The activation of ZAAP is only possible within a time profile that has been set using ABUS Seccor Key Manager.
The activation within the time interval only starts when the locking system is operated with a valid authorisation.
The release of the locking system occurs as usual. After one-time operation, permanent access is activated until
the end of the time interval. At the end of the interval, the deactivation of permanent access occurs automatically.
Example: The active ZAAP time profile begins at 4am, an authorised locking medium is only presented at 8am.
Therefore, the coupling of the double knob cylinder only occurs at 8am. The active ZAAP time profile ends at
6pm, the cylinder decouples.
CodeLoxx cylinder with coupled cam
Permanent access programmed
from 4:00 am until 6:00 pm
Manual unlocking by user
Time 10:00 pm 12:00 pm 2:00 am 4:00 am 6:00 am 8:00 am 10:00 am 12:00 pm 2:00 pm 4:00 pm 6:00 pm 8:00 pm
Legend
Cylinder cam coupled
Time zone when permanent access is pre-programmed
Time zone when permanent access is not pre-programmed
Identification and manual unlocking
Automatic locking of the system
Example: The active ZAAP time profile begins at 4am, an authorised locking medium is only presented at 8am.
Therefore, the coupling of the double knob cylinder only occurs at 8am. At 4pm the ZAAP time profile is
deactivated with a locking medium which has the permanent access option. The system decouples.
CodeLoxx cylinder with coupled cam
Permanent access programmed
from 4:00 am until 6:00 pm
Manual unlocking by user
Time 10:00 pm 12:00 pm 2:00 am 4:00 am 6:00 am 8:00 am 10:00 am 12:00 pm 2:00 pm 4:00 pm 6:00 pm
Legend
Cylinder cam coupled
Time zone when permanent access is pre-programmed
Time zone when permanent access is not pre-programmed
Identification and manual unlocking
Automatic locking of the system
Manual activation of ZAAP outside of the set time profile:
Permanent access can be activated outside of the selected time profile.
The first activation occurs with the manual activation of permanent access (see 4.4)
The timed shutdown of permanent access occurs after the end of the next valid time interval or at the
end of a day.
[35] CLX-CodeLoxx: Installation Operation Manual: V01 - (Art.-No. 800050)
Manual deactivation within a set ZAAP time profile:
Permanent access within a valid time interval can be deactivated.
Deactivation occurs in the same way as deactivation of permanent access (see 4.5).
If there is a second ZAAP time profile on the same calendar day, this will no long be activated. The
manual shutdown of permanent access takes precedence.
WARNING:
If permanent access is manually deactivated within a time interval, re-activation is not possible with
the simple operation of a valid authorisation. Re-activation of permanent access is only possible
through manual activation. This renewed activation results in permanent access after the end of the
time interval being automatically turned off.
Restriction:
If two consecutive ZAAP time profiles are programmed over midnight, the renewed presentation of an authorised
locking medium may be necessary. It is also possible that the ZAAP function will remain active over midnight.
This depends on the behaviour of the system clock.
CodeLoxx cylinder with coupled cam
Permanent access programmed
from 6:00 pm until 12:00 pm
and from 12:00 am until 6:00 am
Manual unlocking by user
Time 10:00 am 12:00 am 2:00 pm 4:00 pm 6:00 pm 8:00 pm 10:00 pm 12:00 pm 2:00 am 4:00 am 6:00 am
Legend
Cylinder cam coupled
Time zone when permanent access is pre-programmed
Time zone when permanent access is not pre-programmed
Identification and manual unlocking
Automatic locking of the system
21. Using the “special key for guard duty” on CLX (only with AE255F) - only with SKM
The following functions can be carried out using the special key for guard duty:
In the DISARMED state: Switch to ARMED.
1. Present the guard duty key x2.
In the EXTERNAL ARMED state and an alarm is triggered: Switch to DISARMED.
In the INTERNAL ARMED state and an alarm is triggered: Switch to DISARMED.
1. Present the valid locking medium.
[36] CLX-CodeLoxx: Installation Operation Manual: V01 - (Art.-No. 800050)
22. Switching to ARMED, DISARMED, opening with ABUS evaluation units
Switching to DISARMED and opening is possible with any valid locking medium. The locking medium must also
be authorised in the evaluation unit when using AE255F.
If the burglar alarm centre (EMZ) switches to DISARMED after the end of authorisation input, this will be
confirmed by a short period of green flashing (= positive acknowledgement). This positive acknowledgement can
take place immediately after the end of input or - depending on the EMZ - after up to 10 seconds of delay.
Now the system is unlocked for 6 seconds (for multi-door applications without EMZ state feedback, the unlocking
only occurs after a delay interval set out in the configuration of the AEBasic). No adjustment of the delay period is
possible when using AE255F.
Various operating modes and special functions are possible depending on the configurations and products used.
Please refer to the instructions for evaluation devices AEBasic or AE255F.
22.1 Switching to ARMED or DISARMED with CLX and evaluation unit AE255F or AEBasic.
The CLX can be operated with a locking medium or 6-digit code.
Switch to DISARMED
1. Present the locking medium x1.
2. EMZ switches to DISARMED.
Green light as positive acknowledgement.
Switch to ARMED
1. Present the locking medium x1.
2. Green light
CLX couples, it can be locked (lock contact).
3. Present the locking medium 1 more time.
4. Red light
EMZ is switched to ARMED.
RED
GREEN
GREEN
[37] CLX-CodeLoxx: Installation Operation Manual: V01 - (Art.-No. 800050)
22.2 Switching to ARMED or DISARMED. Operating with CLX-LCA and evaluation unit AE255F or AEBasic
Switch to DISARMED with keypad code (Jumper A set on AE255F)
1. Enter the valid 6-digit code.
Switch to DISARMED with combination code (Jumper A set on AE255F)
1. Enter the valid 4 or 5-digit code.
2. Present a valid ABUS chip key. This must have been created with the
input code.
Switch to DISARMED with ABUS chip key (Jumper B/C set on AE255F)
1. Present the valid locking medium.
Switch to DISARMED with Code + ABUS chip key (Jumper SG5 set on AE255F)
1. Enter the valid 6-digit code.
2. Present a valid ABUS chip key.
[38] CLX-CodeLoxx: Installation Operation Manual: V01 - (Art.-No. 800050)
Switch to ARMED
Firstly, lock the door system.
Switch to ARMED with ABUS chip key
1. Present the locking medium x2.
Switch to ARMED with code
1. Enter the valid 6-digit code.
2. Wait 1 s then press the button.
Switch to ARMED with combination code
1. Enter the valid 4 or 5-digit code.
2. Present a valid ABUS chip key x2. This must have been created with the
input code. Waiting time between presenting the key 1 - 4 s.
22.3 Switch to INTERNAL ARMED (only with AE255F and SKM)
Firstly, lock the door system. With the special code INTERNAL ARMED you cannot switch to DISARMED.
1. Input the 6-digit special code INTERNAL ARMED.
Switch to INTERNAL DISARMED (only with AE255F)
To switch to INTERNAL DISARMED, use the same procedure as you would to switch to ARMED.
[39] CLX-CodeLoxx: Installation Operation Manual: V01 - (Art.-No. 800050)
22.4 Trigger silent alarm and switch to DISARMED (only with AE255F)
To set off a silent alarm, this must first have been created as a special code in the evaluation unit. Please refer to
the instructions for evaluation devices.
Trigger silent alarm (Jumper A set on AE255F)
1. Enter in the “Silent alarm” special code.
Trigger silent alarm (Jumper SG5 set on AE255F)
1. Enter in the “Silent alarm” special code.
2. Present a valid ABUS chip key within 4 seconds.
Trigger silent alarm when DISARMED
Trigger silent alarm
1. Input the 6-digit “Silent alarm” special code on the ET or ELT keypad.
23. Possible acknowledgements
Positive acknowledgement switching to ARMED/DISARMED
1. EMZ switches to DISARMED.
Brief green light as positive acknowledgement.
1. EMZ switches to ARMED.
Red light for 2 seconds as positive acknowledgement.
Possible 10x red flashing as negative acknowledgement after attempt to switch to DISARMED
RED
GREEN
[40] CLX-CodeLoxx: Installation Operation Manual: V01 - (Art.-No. 800050)
Meaning: The authorisation entered is not valid for DISARMING.
Possible special negative acknowledgement after attempt to switch to DISARMED
1. 9 red flashing signals, 3 - 10 seconds of delay after the end of input.
2. 4 second pause
1 more red flashing signal
Possible meaning of this special negative acknowledgement:
CLX has no connection to AEBasic or AE255F evaluation units.
EMZ is not DISARMED.
If such a negative acknowledgement is signalled, the CLX can be opened after presenting an authorised locking
medium 8 times - regardless of the status of the evaluation unit (possibly also causing an alarm to be
triggered). The locking medium must be presented in the 4 second pause after the 10th blinking signal. The CLX
can be opened again after the 8th time.
If the locking medium is presented too late during this emergency opening action (if you are already seeing the
red flashing signal after the 4 second pause), the locking medium must again be presented 8 times.
Possible 3x red flashing as negative acknowledgement after attempt to switch to ARMED
3x
3 times red flashing up to 10 seconds after end of input.
Possible cause: No feedback from the EMA/EMZ.
Possible 5x red flashing as negative acknowledgement after attempt to switch to ARMED
RED
RED
RED
RED
[41] CLX-CodeLoxx: Installation Operation Manual: V01 - (Art.-No. 800050)
5x
5 times red flashing immediately after the end of input.
Possible cause: EMA/EMZ not ready for switching to ARMED (block
magnet). Check the ARMED switching conditions within the property.
Possible 7x red flashing as negative acknowledgement after attempt to switch to ARMED
7x
7 times red flashing immediately after the end of input.
Possible cause: EMA/EMZ not ready for switching to ARMED (lock
contact). Check the ARMED switching conditions within the property.
Possible 10x flashing as negative acknowledgement after attempt to switch to ARMED
10x
9 times red flashing immediately after the end of input or up to 10
seconds after the end of input.
Possible cause: Not specified. Contact your dealer.
Possible special negative acknowledgement after attempt to switch to ARMED
9x
1. 9 red flashing signals, 3 - 10 second delay after the end of input,
followed by a 4 second pause.
1x
2. 1 more red flash.
Possible meaning:
CLX has no connection to the evaluation unit
RED
RED
RED
RED
RED
[42] CLX-CodeLoxx: Installation Operation Manual: V01 - (Art.-No. 800050)
24. Additional functions with AEBasic
24.1 Locking function
If the installer sets the operating mode “locking function” in the AEBasic configuration, the CLX-AFP is connected
to an externally locking system via the AEBasic. As long as the external locking system is active, the CLX-AFP
remains locked. In this locked state, even valid inputs are not allowed access. Locking is signalled on the CLX-
AFP by a red light flashing 3 times.
24.2 Switching function
If the installer sets the operating mode “switching function” during AEBasic configuration, the switching function
on the AEBasic will be activated by any valid input parallel to the door opening.
24.3 Combination switching function + locking
If the installer sets the operating mode “switching function + locking” during AEBasic configuration, the switching
function on the AEBasic will be activated by any valid input - as long as no lock is applied - parallel to the door
opening. As long as the externally locking system is active, the CLX-AFP remains locked. In this locked state,
even valid inputs do not allow access or activate the switching function. Locking is signalled on the CLX-AFP by a
red light flashing 3 times.
25. Changing the battery
The CodeLoxx cylinder is powered by a CR2 lithium battery.
This is sufficient for up to 60,000 openings (50,000 in remote or alarm versions) under optimal conditions.
The electronics check the battery status during every valid authorisation input. If this drops below a threshold
value, a red/green light will flash three times before opening. It will not be possible to open the door until the
flashing signal has stopped. At first this warning signal will only occur sporadically as the stress state initially
oscillates around the threshold value. The warning signal will occur after every valid input if the threshold value is
consistently not met.
All saved keys and codes are preserved during battery change. However, errors related to the time and date may
occur.
The time must therefore be reset in systems with time and recording functions.
To do this, use the update function of the SKM software and the transfer device (TG-SKM-EN).
[43] CLX-CodeLoxx: Installation Operation Manual: V01 - (Art.-No. 800050)
26. Elimination of possible malfunctions
27. Restrictive conditions
The CodeLoxx double knob cylinder can be used in profile cylinder locks.
The CodeLoxx has a freely turning cam. It may only be used in conjunction with panic locks that require
the free-running of the cam (usually these are multi-point locking systems with panic function).
The modular principle allows for a gradual adjustment to door thicknesses in 5mm intervals. The
extension kits are available in DIY lengths up to max. door thickness 90mm, external max. 55mm,
internal max. 50mm. For details please see our price list. Lengths for door thicknesses 95-120mm and
125-150mm are only available factory assembled.
The following special lengths can also only be ordered from the factory:
TS 90, A: 30, I: 60 mm; TS 90, A: 35, I: 55 mm
The following special lengths cannot be delivered:
Malfunction
encountered
Possible cause
Action
Permanent access cannot be
turned on with the use of a
permanent access-authorised
locking medium
Locking medium is already
a standard key
Delete the locking medium
individually: see page 5, section 2.1
then recreate the key according to
1.2
The individual deletion of a lost
locking medium
(without software / with PELT)
is not possible
The locking medium
failed to be created
with an additional combination code
according to
1.3
Deletion of all locking media
according to section 3. Then
recreate existing locking media
- and do so according to 1.1 (or 1.2)
and also create a combination code
with each locking medium
according to 1.3 (with PELT)
A red/green flashing light comes
on three times after valid
authorisation input. Door operation
is only possible after the flashing
signal.
Battery empty warning
Replace battery
The transfer device is not
transferring any
data to the
CodeLoxx
Version of the transfer device is
too old
The connection cable is defective
There is no data in the TG transfer
device
Update the transfer device with the
newest version.
Exchange the connection cable
Reload the transfer device
Red flashing every 2 seconds,
no code input possible
Timed lockout after multiple
inputting of an incorrect code
Operate 1x with an authorised key
or programming key
[44] CLX-CodeLoxx: Installation Operation Manual: V01 - (Art.-No. 800050)
TS 85, A: 30, I: 55 mm; TS 115, A: 30, I: 85mm; TS 145, A: 30, I: 115 mm;
TS 150, A: 30, I: 120 mm; TS150, A: 35, I: 115 mm
Only one extension kit must be used on both the external and internal areas.
The CodeLoxx double knob cylinder with digit ring (LCA) is protected against moisture. However, it must
not be installed in areas directly exposed to rain. Freezing water can impair the function of the turning
mechanism for code input.
The CodeLoxx with digit ring (LCA) has a position sensor. Installation in glass doors at a twisted angle of
90° is not possible. The numbers and symbols on the knob would look off-centre due to the mechanical
grid and would not permit accurate operation.
Installing the CodeLoxx with digit ring (LCA) on ships/vehicles is not possible.
The CodeLoxx with digit ring (LCA) is protected against moisture. However, it must not be installed in
areas directly exposed to rain.
Freezing water can impair the function of the turning mechanism for code input.
Disposal
Devices with this symbol must not be disposed of with household waste. Dispose of the product
according to statutory requirements at the end of its lifespan.
Please contact your dealer or dispose of the product at a communal collection point for electronic
waste.
ABUS Security-Center GmbH & Co KG.
Linker Kreuthweg 5
86444 Affing
Germany
Please contact your dealer with technical queries and for technical support.
44

Hulp nodig? Stel uw vraag in het forum

Spelregels
1

Forum

Abus-CLX-CodeLoxx

Misbruik melden

Gebruikershandleiding.com neemt misbruik van zijn services uitermate serieus. U kunt hieronder aangeven waarom deze vraag ongepast is. Wij controleren de vraag en zonodig wordt deze verwijderd.

Product:

Bijvoorbeeld antisemitische inhoud, racistische inhoud, of materiaal dat gewelddadige fysieke handelingen tot gevolg kan hebben.

Bijvoorbeeld een creditcardnummer, een persoonlijk identificatienummer, of een geheim adres. E-mailadressen en volledige namen worden niet als privégegevens beschouwd.

Spelregels forum

Om tot zinvolle vragen te komen hanteren wij de volgende spelregels:

Belangrijk! Als er een antwoord wordt gegeven op uw vraag, dan is het voor de gever van het antwoord nuttig om te weten als u er wel (of niet) mee geholpen bent! Wij vragen u dus ook te reageren op een antwoord.

Belangrijk! Antwoorden worden ook per e-mail naar abonnees gestuurd. Laat uw emailadres achter op deze site, zodat u op de hoogte blijft. U krijgt dan ook andere vragen en antwoorden te zien.

Abonneren

Abonneer u voor het ontvangen van emails voor uw Abus CLX-CodeLoxx bij:


U ontvangt een email met instructies om u voor één of beide opties in te schrijven.


Ontvang uw handleiding per email

Vul uw emailadres in en ontvang de handleiding van Abus CLX-CodeLoxx in de taal/talen: Engels als bijlage per email.

De handleiding is 1,63 mb groot.


U ontvangt de handleiding per email binnen enkele minuten. Als u geen email heeft ontvangen, dan heeft u waarschijnlijk een verkeerd emailadres ingevuld of is uw mailbox te vol. Daarnaast kan het zijn dat uw internetprovider een maximum heeft aan de grootte per email. Omdat hier een handleiding wordt meegestuurd, kan het voorkomen dat de email groter is dan toegestaan bij uw provider.

Stel vragen via chat aan uw handleiding

Stel uw vraag over deze PDF

Andere handleiding(en) van Abus CLX-CodeLoxx

Abus CLX-CodeLoxx Installatiehandleiding - Deutsch - 52 pagina's


Uw handleiding is per email verstuurd. Controleer uw email

Als u niet binnen een kwartier uw email met handleiding ontvangen heeft, kan het zijn dat u een verkeerd emailadres heeft ingevuld of dat uw emailprovider een maximum grootte per email heeft ingesteld die kleiner is dan de grootte van de handleiding.

Er is een email naar u verstuurd om uw inschrijving definitief te maken.

Controleer uw email en volg de aanwijzingen op om uw inschrijving definitief te maken

U heeft geen emailadres opgegeven

Als u de handleiding per email wilt ontvangen, vul dan een geldig emailadres in.

Uw vraag is op deze pagina toegevoegd

Wilt u een email ontvangen bij een antwoord en/of nieuwe vragen? Vul dan hier uw emailadres in.


Info