10
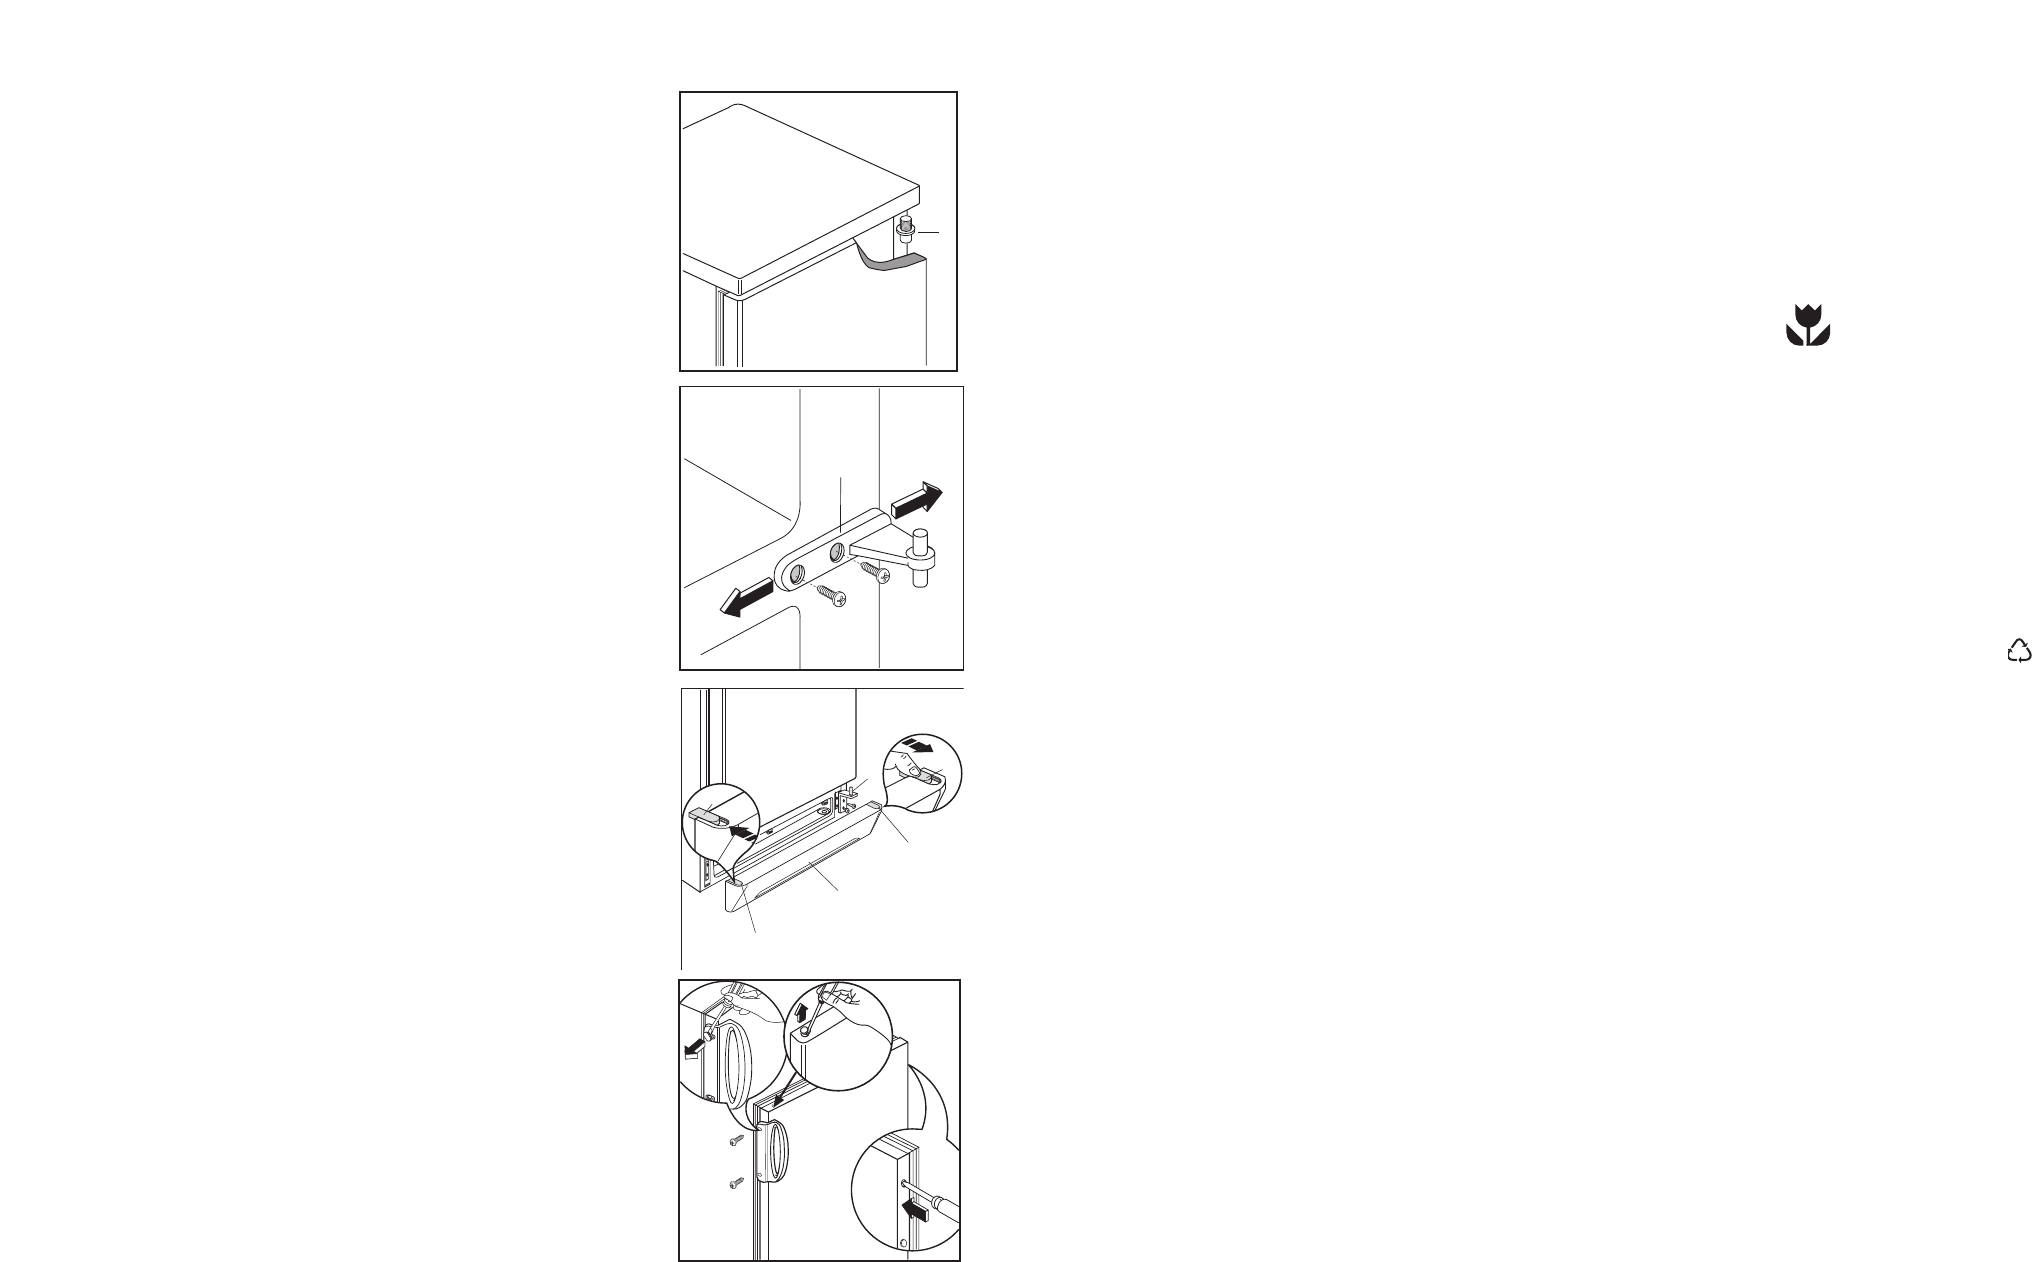
Türanschlagwechsel
Netzstecker unbedingt aus der Steckdose ziehen!
Den Wechsel auf folgende Weise ausführen:
1. Entlüftungsgitter (D) abnehmen.
2. Unteres Scharnier (E) abnehmen.
3. Untere Tür vom mittleren Scharnier (H) abheben
und Scharnier abschrauben.
4. Obere Tür vom oberen Stift (G) abnehmen.
5. Nachdem Sie die Stöpsel entternt haben, die auf
der gegenüberliegenden Seite wieder
einzusetzen sind, nehmen Sie den oberen Stift
ab und montieren Sie ihn an der
gegenüberliegenden Seite.
6. Obere Tür wieder einsetzen. Mittleres Scharnier
an gegenüberliegende Seite montieren.
7. Untere Tür wieder einsetzen.
8. Unteres Scharnier (E) auf gegenüberliegende
Türseite montieren und mittels der vorher
entnommenen Schrauben befestigen. Abdeckung
(F) vom Entlüftungsgitter (D) herausschieben und
auf gegenüberliegende Seite montieren.
9. Entlüftungsgitter wieder einsetzen.
10.Griffe abnehmen und auf gegeüberliegenden
Seite befestigen. Mit einem Senkstift die
Plastikstöpsel auf der gegenüberliegenden Seite
des Griffes durchlöchern. Mit dem im Beipack
enthaltenen Plastikstöpseln, die freibliebenen
Löcher abdecken.
Zur Ausrichtung der Türen kann man auf das
mittlere Scharnier wirken.
Das mittlere Scharnier ist nach dem Lösen der
beiden Schrauben mit Hilfe einer Vorrichtung
horizontal regulierbar.
Achtung
Vergewissern Sie sich nach Ausführung des
Anschlagwechsels der Türen, daß alle
Schrauben fest angezogen sind und überprüfen
Sie auch, ob die Magnetdichtung am Möbel
perfekt anliegt. Bei einer niedrigen
Raumtemperatur (z.B. im Winter) kann es
vorkommen, dass die Dichtung nicht perfekt am
Schrank haftet. Die Wiederherstellung der
Dichtung erfolgt automatisch nach gewisser
Zeit. Wollen Sie aber diesen Prozess
beschleunige, so genögt es die Dichtung mit
einem Fön zu erwärmen.
35
Contents
Warnings 34
Use 36
Cleaning the interior 36
Operation 36
Temperature regulation 36
Fresh food refrigeration 36
Freezing fresh food 36
Storage of frozen food 36
Thawing 36
Ice pack 36
Ice-cube production 37
Ambient switch 37
Movable shelves 37
Positioning the door shelves 37
Hints 37
Hints for refrigeration 37
Hints for freezing 38
Hints for storage of frozen food 38
Maintenance 38
Periodic cleaning 38
Periods of no operation 38
Interior light 38
Defrosting 39
Customer service and spare parts 39
Installation 40
Location 40
Rear spacers 40
Electrical connection 40
Changing the opening direction of the doors 41
which may cause it to explode, resulting in
damage to the appliance. Do not use a
mechanical device or any artificial means to
speed up the thawing process other than those
recommended by the manufacturer. Never use
metal objects for cleaning your appliance as it
may get damaged.
Installation
• During normal operation, the condenser and
compressor at the back of the appliance heat up
considerably. For safety reasons, minimum
ventilation must be as shown in the instructions.
Attention: keep ventilation openings clear of
obstruction.
• Care must be taken to ensure that the appliance
does not stand on the electrical supply cable.
Important: if the supply cord is damaged, it must
be replaced by a special cord or assembly availa-
ble from the manufacturer or its service agent.
• If the appliance is transported horizontally, it is
possible that the oil contained in the compressor
flows in the refrigerant circuit. It is advisable to
wait at least two hours before connecting the
appliance to allow the oil to flow back in the
compressor.
• There are working parts in this product which
heat up. Always ensure that there is adequate
ventilation as a failure to do this will result in
component failure and possible food loss. See
installation instructions.
• Parts which heat up should not be exposed.
Wherever possible the back of the product
should be against a wall.
Environment
Protection
This appliance does not contain gasses which
could damage the ozone layer, in either its
refrigerant circuit or insulation materials. The
appliance shall not be discarded together with
the urban refuse and rubbish. Avoid damaging
the cooling unit, especially at the rear near the
heat exchanger. Information on your local
disposal sites may be obtained from municipal
authorities. The materials used on this appliance
marked by the symbol are recyclable.