This product utilizes batteries or an external power supply (adapter).
DO NOT connect this product to any power supply or adapter other
than one described in the manual, on the name plate, or specifically
recommended by Yamaha.
WARNING:
Do not place this product in a position where anyone could
walk on, trip over, or roll anything over power or connecting cords of any
kind. The use of an extension cord is not recommended! If you must use an
extension cord, the minimum wire size for a 25’ cord (or less) is 18 AWG.
NOTE: The smaller the AWG number, the larger the current handling
capacity. For longer extension cords, consult a local electrician.
This product should be used only with the components supplied or; a
cart, rack, or stand that is recommended by Yamaha. If a cart, etc., is
used, please observe all safety markings and instructions that accom-
pany the accessory product.
SPECIFICATIONS SUBJECT TO CHANGE:
The information contained in this manual is believed to be correct at
the time of printing. However, Yamaha reserves the right to change or
modify any of the specifications without notice or obligation to update
existing units.
This product, either alone or in combination with an amplifier and
headphones or speaker/s, may be capable of producing sound levels
that could cause permanent hearing loss. DO NOT operate for long
periods of time at a high volume level or at a level that is uncomfort-
able. If you experience any hearing loss or ringing in the ears, you
should consult an audiologist.
IMPORTANT: The louder the sound, the shorter the time period before
damage occurs.
Some Yamaha products may have benches and / or accessory
mounting fixtures that are either supplied with the product or as
optional accessories. Some of these items are designed to be dealer
assembled or installed. Please make sure that benches are stable and
any optional fixtures (where applicable) are well secured BEFORE
using.
Benches supplied by Yamaha are designed for seating only. No other
uses are recommended.
NOTICE:
Service charges incurred due to a lack of knowledge relating to how a
function or effect works (when the unit is operating as designed) are
not covered by the manufacturer’s warranty, and are therefore the
owners responsibility. Please study this manual carefully and consult
your dealer before requesting service.
ENVIRONMENTAL ISSUES:
Yamaha strives to produce products that are both user safe and envi-
ronmentally friendly. We sincerely believe that our products and the
production methods used to produce them, meet these goals. In keep-
ing with both the letter and the spirit of the law, we want you to be
aware of the following:
Battery Notice:
This product MAY contain a small non-rechargeable battery which (if
applicable) is soldered in place. The average life span of this type of bat-
tery is approximately five years. When replacement becomes necessary,
contact a qualified service representative to perform the replacement.
This product may also use “household” type batteries. Some of these
may be rechargeable. Make sure that the battery being charged is a
rechargeable type and that the charger is intended for the battery being
charged.
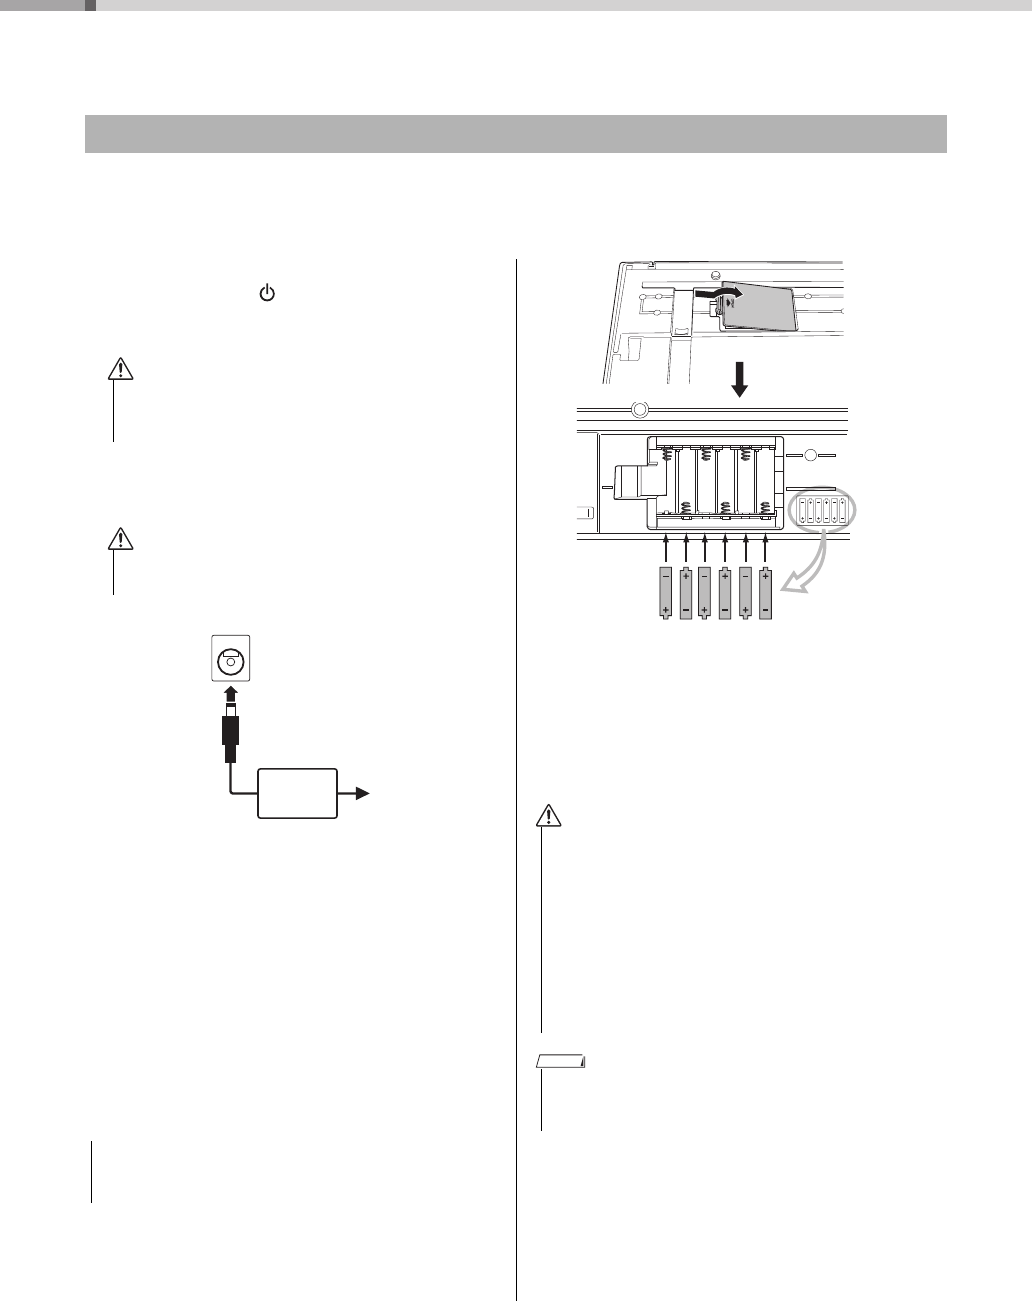
When installing batteries, never mix old batteries with new ones, and
never mix different types of batteries. Batteries MUST be installed cor-
rectly. Mismatches or incorrect installation may result in overheating and
battery case rupture.
Warning:
Do not attempt to disassemble, or incinerate any battery. Keep all bat-
teries away from children. Dispose of used batteries promptly and as
regulated by the laws in your area. Note: Check with any retailer of
household type batteries in your area for battery disposal information.
Disposal Notice:
Should this product become damaged beyond repair, or for some rea-
son its useful life is considered to be at an end, please observe all
local, state, and federal regulations that relate to the disposal of prod-
ucts that contain lead, batteries, plastics, etc. If your dealer is unable
to assist you, please contact Yamaha directly.
NAME PLATE LOCATION:
The name plate is located on the bottom of the product. The model
number, serial number, power requirements, etc., are located on this
plate. You should record the model number, serial number, and the
date of purchase in the spaces provided below and retain this manual
as a permanent record of your purchase.
Model
Serial No.
Purchase Date
PLEASE KEEP THIS MANUAL
92-BP (bottom)
1. IMPORTANT NOTICE: DO NOT MODIFY THIS UNIT!
This product, when installed as indicated in the instructions con-
tained in this manual, meets FCC requirements. Modifications not
expressly approved by Yamaha may void your authority, granted by
the FCC, to use the product.
2. IMPORTANT: When connecting this product to accessories and/
or another product use only high quality shielded cables. Cable/s
supplied with this product MUST be used. Follow all installation
instructions. Failure to follow instructions could void your FCC
authorization to use this product in the USA.
3. NOTE: This product has been tested and found to comply with the
requirements listed in FCC Regulations, Part 15 for Class “B” digital
devices. Compliance with these requirements provides a reason-
able level of assurance that your use of this product in a residential
environment will not result in harmful interference with other elec-
tronic devices. This equipment generates/uses radio frequencies
and, if not installed and used according to the instructions found in
the users manual, may cause interference harmful to the operation
of other electronic devices. Compliance with FCC regulations does
not guarantee that interference will not occur in all installations. If
this product is found to be the source of interference, which can be
determined by turning the unit “OFF” and “ON”, please try to elimi-
nate the problem by using one of the following measures:
Relocate either this product or the device that is being affected by
the interference.
Utilize power outlets that are on different branch (circuit breaker or
fuse) circuits or install AC line filter/s.
In the case of radio or TV interference, relocate/reorient the
antenna. If the antenna lead-in is 300 ohm ribbon lead, change the
lead-in to co-axial type cable.
If these corrective measures do not produce satisfactory results,
please contact the local retailer authorized to distribute this type of
product. If you can not locate the appropriate retailer, please con-
tact Yamaha Corporation of America, Electronic Service Division,
6600 Orangethorpe Ave, Buena Park, CA90620
The above statements apply ONLY to those products distributed by
Yamaha Corporation of America or its subsidiaries.
* This applies only to products distributed by YAMAHA CORPORATION OF AMERICA.(class B)
FCC INFORMATION (U.S.A.)
PSR-E233/YPT-230 Owner’s Manual
4
PRECAUTIONS
PLEASE READ CAREFULLY BEFORE PROCEEDING
* Please keep this manual in a safe place for future reference.
WARNING
Always follow the basic precautions listed below to avoid the possibility of serious injury or even death from electrical shock, short-
circuiting, damages, fire or other hazards. These precautions include, but are not limited to, the following:
•Do not place the power cord near heat sources such as heaters or radiators, and
do not excessively bend or otherwise damage the cord, place heavy objects on it,
or place it in a position where anyone could walk on, trip over, or roll anything
over it.
•Only use the voltage specified as correct for the instrument. The required voltage
is printed on the name plate of the instrument.
•Use the specified adaptor (page 42) only. Using the wrong adaptor can result in
damage to the instrument or overheating.
•Check the electric plug periodically and remove any dirt or dust which may have
accumulated on it.
•This instrument contains no user-serviceable parts. Do not open the instrument
or attempt to disassemble or modify the internal components in any way. If it
should appear to be malfunctioning, discontinue use immediately and have it
inspected by qualified Yamaha service personnel.
•Do not expose the instrument to rain, use it near water or in damp or wet
conditions, or place containers on it containing liquids which might spill into any
openings. If any liquid such as water seeps into the instrument, turn off the power
immediately and unplug the power cord from the AC outlet. Then have the
instrument inspected by qualified Yamaha service personnel.
•Never insert or remove an electric plug with wet hands.
•Do not put burning items, such as candles, on the unit.
A burning item may fall over and cause a fire.
•Always replace all batteries at the same time. Do not use new batteries together
with old ones.
•Do not mix battery types, such as alkaline batteries with manganese batteries, or
batteries from different makers, or different types of batteries from the same
maker, since this can cause overheating, fire, or battery fluid leakage.
•Do not tamper with or disassemble batteries.
•Do not dispose of batteries in fire.
•Do not attempt to recharge batteries that are not intended to be charged.
•Keep batteries away from children.
•If the batteries do leak, avoid contact with the leaked fluid. If the battery fluid
should come in contact with your eyes, mouth, or skin, wash immediately with
water and consult a doctor. Battery fluid is corrosive and may possibly cause loss
of sight or chemical burns.
•Always make sure all batteries are inserted in conformity with the +/- polarity
markings. Failure to do so might result in overheating, fire, or battery fluid
leakage.
•When the batteries run out, or if the instrument is not to be used for a long time,
remove the batteries from the instrument to prevent possible leakage of the battery
fluid.
•When one of the following problems occur, immediately turn off the power switch
and disconnect the electric plug from the outlet. (If you are using batteries,
remove all batteries from the instrument.) Then have the device inspected by
Yamaha service personnel.
• The power cord or plug becomes frayed or damaged.
• It emits unusual smells or smoke.
• Some object has been dropped into the instrument.
• There is a sudden loss of sound during use of the instrument.
CAUTION
Always follow the basic precautions listed below to avoid the possibility of physical injury to you or others, or damage to the
instrument or other property. These precautions include, but are not limited to, the following:
•Do not connect the instrument to an electrical outlet using a multiple-connector.
Doing so can result in lower sound quality, or possibly cause overheating in the
outlet.
•When removing the electric plug from the instrument or an outlet, always hold the
plug itself and not the cord. Pulling by the cord can damage it.
•Remove the electric plug from the outlet when the instrument is not to be used for
extended periods of time, or during electrical storms.
•Do not place the instrument in an unstable position where it might accidentally
fall over.
•Before moving the instrument, remove all connected cables.
•When setting up the product, make sure that the AC outlet you are using is easily
accessible. If some trouble or malfunction occurs, immediately turn off the power
switch and disconnect the plug from the outlet. Even when the power switch is
turned off, electricity is still flowing to the product at the minimum level. When
you are not using the product for a long time, make sure to unplug the power cord
from the wall AC outlet.
•Use only the stand specified for the instrument. When attaching the stand or rack,
use the provided screws only. Failure to do so could cause damage to the internal
components or result in the instrument falling over.
•Before connecting the instrument to other electronic components, turn off the
power for all components. Before turning the power on or off for all components,
set all volume levels to minimum.
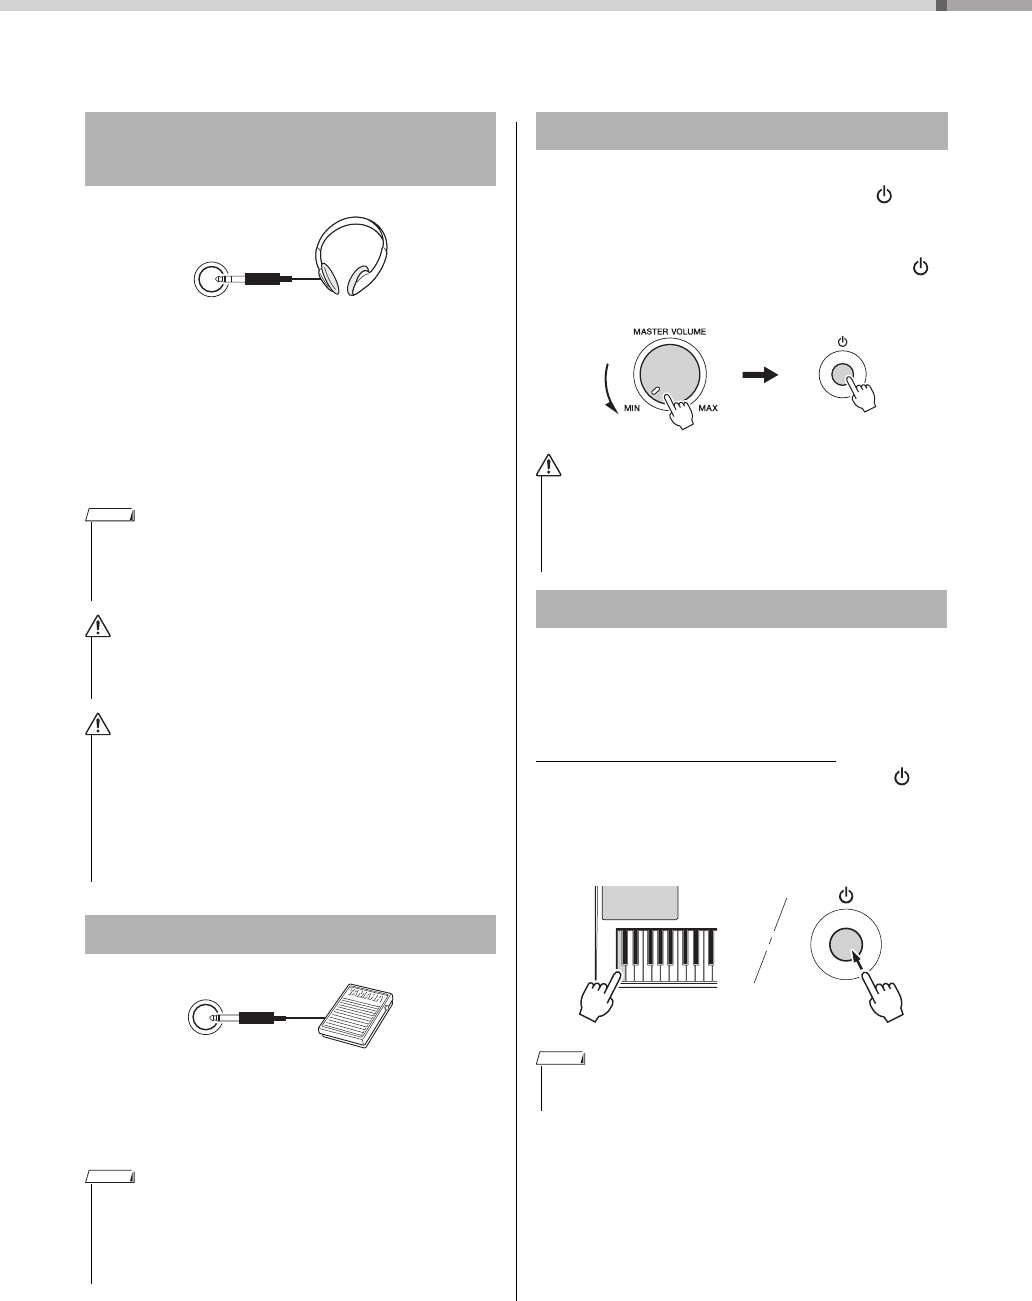
•Be sure to set the volumes of all components at their minimum levels and
gradually raise the volume controls while playing the instrument to set the desired
listening level.
•Do not insert a finger or hand in any gaps on the instrument.
•Never insert or drop paper, metallic, or other objects into the gaps on the panel or
keyboard. This could cause physical injury to you or others, damage to the
instrument or other property, or operational failure.
•Do not rest your weight on, or place heavy objects on the instrument, and do not
use excessive force on the buttons, switches or connectors.
•Do not use the instrument/device or headphones for a long period of time at a
high or uncomfortable volume level, since this can cause permanent hearing loss.
If you experience any hearing loss or ringing in the ears, consult a physician.
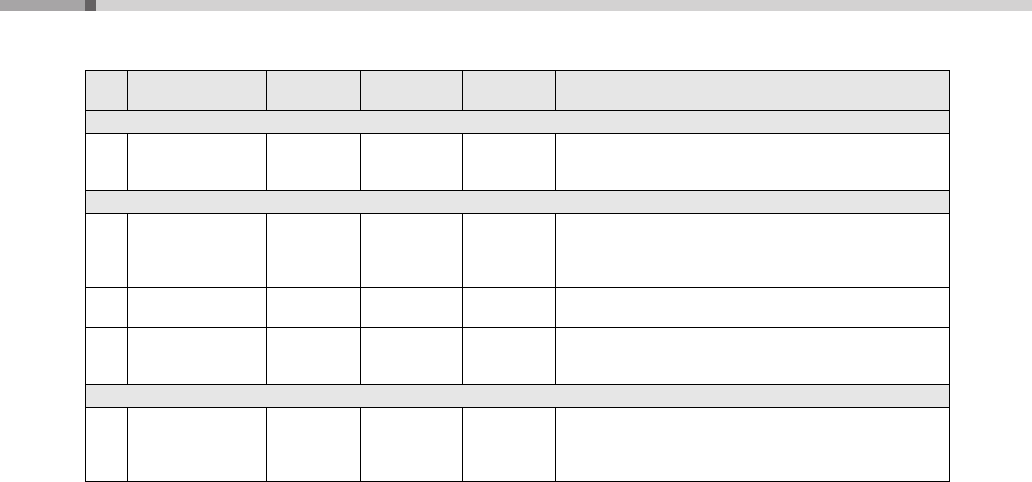
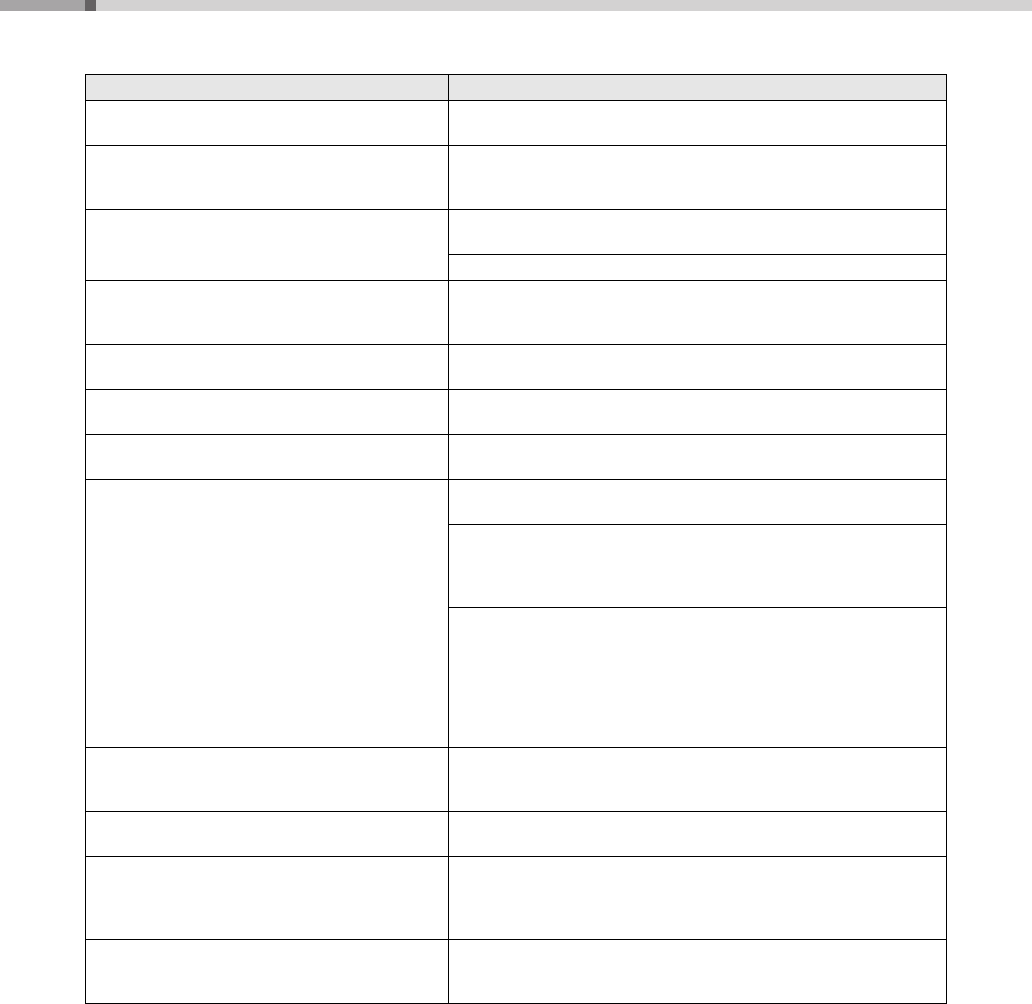
Power supply/AC power adaptor
Do not open
Water warning
Fire warning
Battery
If you notice any abnormality
Power supply/AC power adaptor
Location
Connections
Handling caution
DMI-3 1/2
PSR-E233/YPT-230 Owner’s Manual
5
Always turn the power off when the instrument is not in use.
Even when the power switch is in standby status, electricity is still flowing to the instrument at the minimum level. When you are not using the instrument for a long time, make
sure you unplug the power cord from the wall AC outlet.
Make sure to discard used batteries according to local regulations.
NOTICE
To avoid the possibility of malfunction/damage to the product, damage to data, or damage to other property, follow the
notices below.
Handling and Maintenance
•Do not use the instrument in the vicinity of a TV, radio, stereo equipment, mobile phone, or other electric devices. Otherwise, the instrument, TV, or radio
may generate noise.
•Do not expose the instrument to excessive dust or vibrations, or extreme cold or heat (such as in direct sunlight, near a heater, or in a car during the day)
to prevent the possibility of panel disfiguration, damage to the internal components or unstable operation. (Verified operating temperature range: 5° –
40°C, or 41° – 104°F.)
•Do not place vinyl, plastic or rubber objects on the instrument, since this might discolor the panel or keyboard.
•When cleaning the instrument, use a soft, dry cloth. Do not use paint thinners, solvents, cleaning fluids, or chemical-impregnated wiping cloths.
About copyrights
•Copying of the commercially available musical data including but not limited to MIDI data and/or audio data is strictly prohibited except for your personal
use.
•This product incorporates and bundles computer programs and contents in which Yamaha owns copyrights or with respect to which it has license to use
others’ copyrights. Such copyrighted materials include, without limitation, all computer software, style files, MIDI files, WAVE data, musical scores and
sound recordings. Any unauthorized use of such programs and contents outside of personal use is not permitted under relevant laws. Any violation of
copyright has legal consequences. DON’T MAKE, DISTRIBUTE OR USE ILLEGAL COPIES.
About functions/data bundled with the instrument
•Some of the preset songs have been edited for length or arrangement, and may not be exactly the same as the original.
About this manual
•The illustrations and LCD screens as shown in this manual are for instructional purposes only, and may appear somewhat different from those on your
instrument.
•The company names and product names in this manual are the trademarks or registered trademarks of their respective companies.
Yamaha cannot be held responsible for damage caused by improper use or modifications to the instrument, or data that is lost or destroyed.
DMI-3 2/2
PSR-E233/YPT-230 Owner’s Manual
6
This instrument has the following documents and instructional materials.
Included Documents
Owner’s Manual (this book)
Online Materials (Downloadable from the web)
The following instructional materials are available for downloading from the Yamaha website.
066Close Your Hands, Open Your Hands (J.J. Rousseau)
067The Cuckoo (Traditional)
068O du lieber Augustin (Traditional)
069London Bridge (Traditional)
CHORD LESSON
070Bill Bailey (Won’t You Please Come Home) (H. Cannon)
071When Irish Eyes Are Smiling (E.R. Ball)
072Down by the Riverside (Traditional)
073When the Saints Go Marching In (Traditional)
074Frühlingsstimmen (J. Strauss II)
075Camptown Races (S.C. Foster)
076Little Brown Jug (Joseph Winner)
077Loch Lomond (Traditional)
078Oh! Susanna (S.C. Foster)
079Greensleeves (Traditional)
080Aura Lee (G. Poulton)
081Silent Night (F. Gruber)
082The Danube Waves (I. Ivanovici)
083Twinkle Twinkle Little Star (Traditional)
084Close Your Hands, Open Your Hands (J.J. Rousseau)
085The Cuckoo (Traditional)
086O du lieber Augustin (Traditional)
087London Bridge (Traditional)
088American Patrol (F.W. Meacham)
089Beautiful Dreamer (S.C. Foster)
090Battle Hymn of the Republic (Traditional)
091Home Sweet Home (H. Bishop)
092
Valse Des Fleurs (From “The Nutcracker”)
(P.I. Tchaikovsky)
093Aloha Oe (Q. Liliuokalani)
094I’ve Been Working On The Railroad (Traditional)
095My Darling Clementine (Traditional)
096Auld Lang Syne (Traditional)
097Grandfather’s Clock (H.C. Work)
098Amazing Grace (Traditional)
099My Bonnie (H.J Fulmer)
100Yankee Doodle (Traditional)
101Joy to the World (G.F. Händel)
102Ave Maria (F. Schubert)
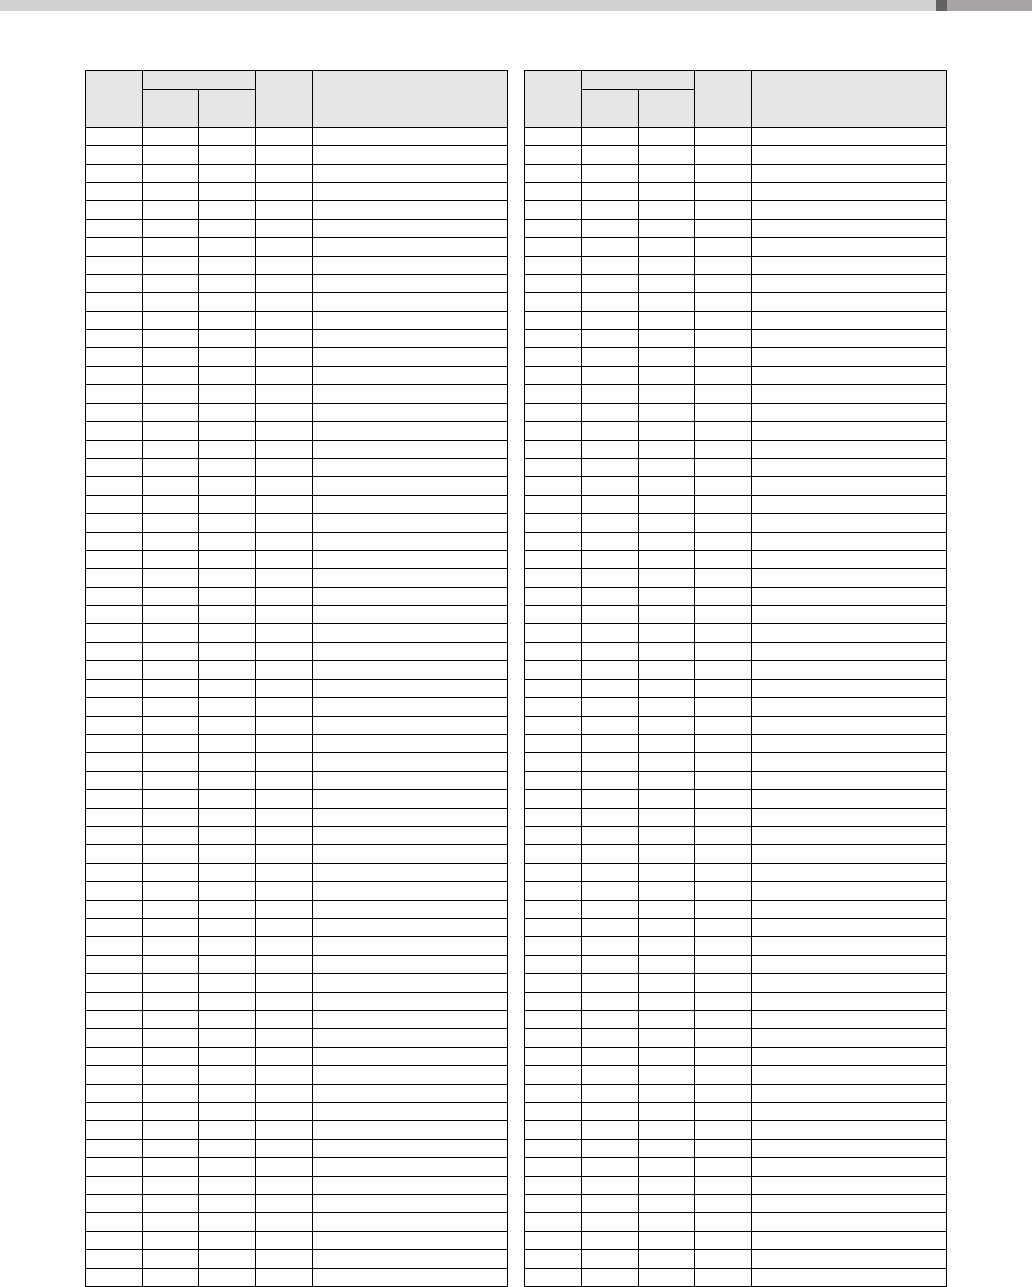
Song No.Song Name
• Some songs have been edited for length or for ease in learning, and may not be exactly the same as the original.
• A song book (free downloadable scores) is available that includes scores for all internal songs (excepting Songs 1–3). To obtain the Song Book, complete
the user registration at the following website.
https://member.yamaha.com/myproduct/regist/
PSR-E233/YPT-230 Owner’s Manual
40
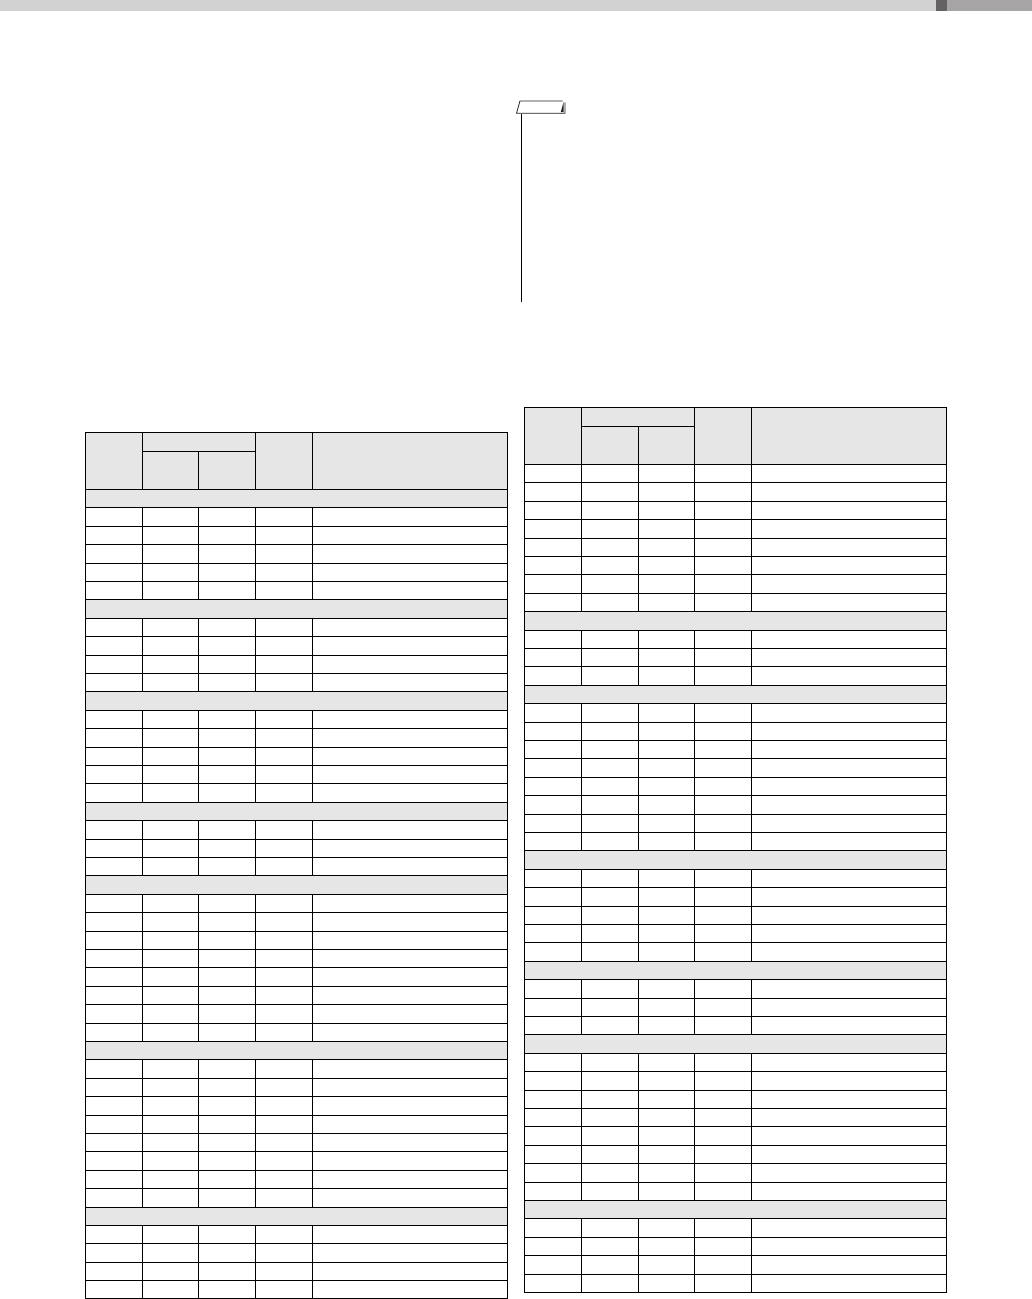
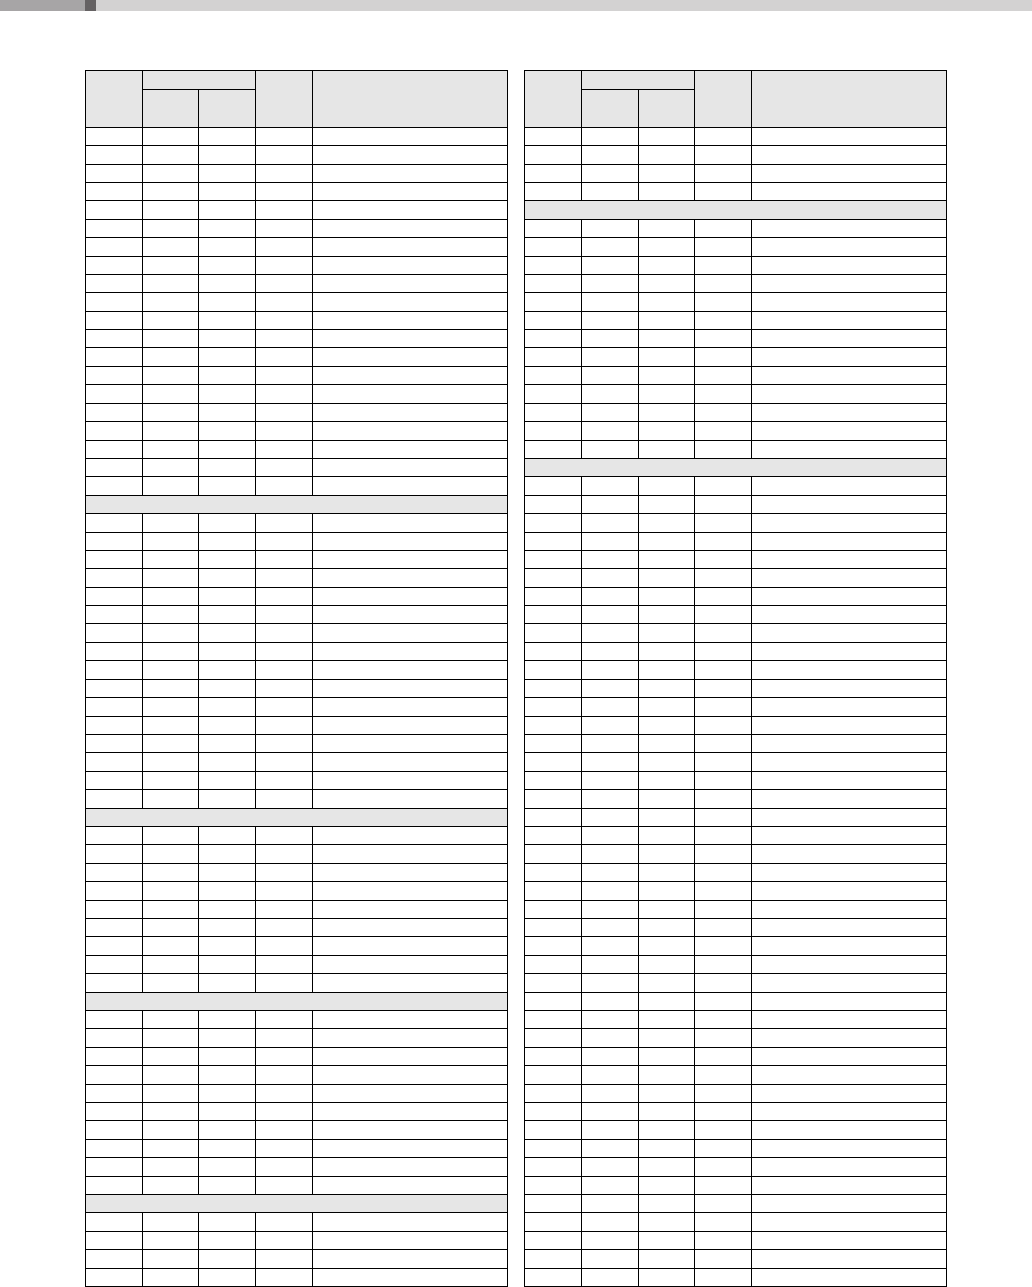
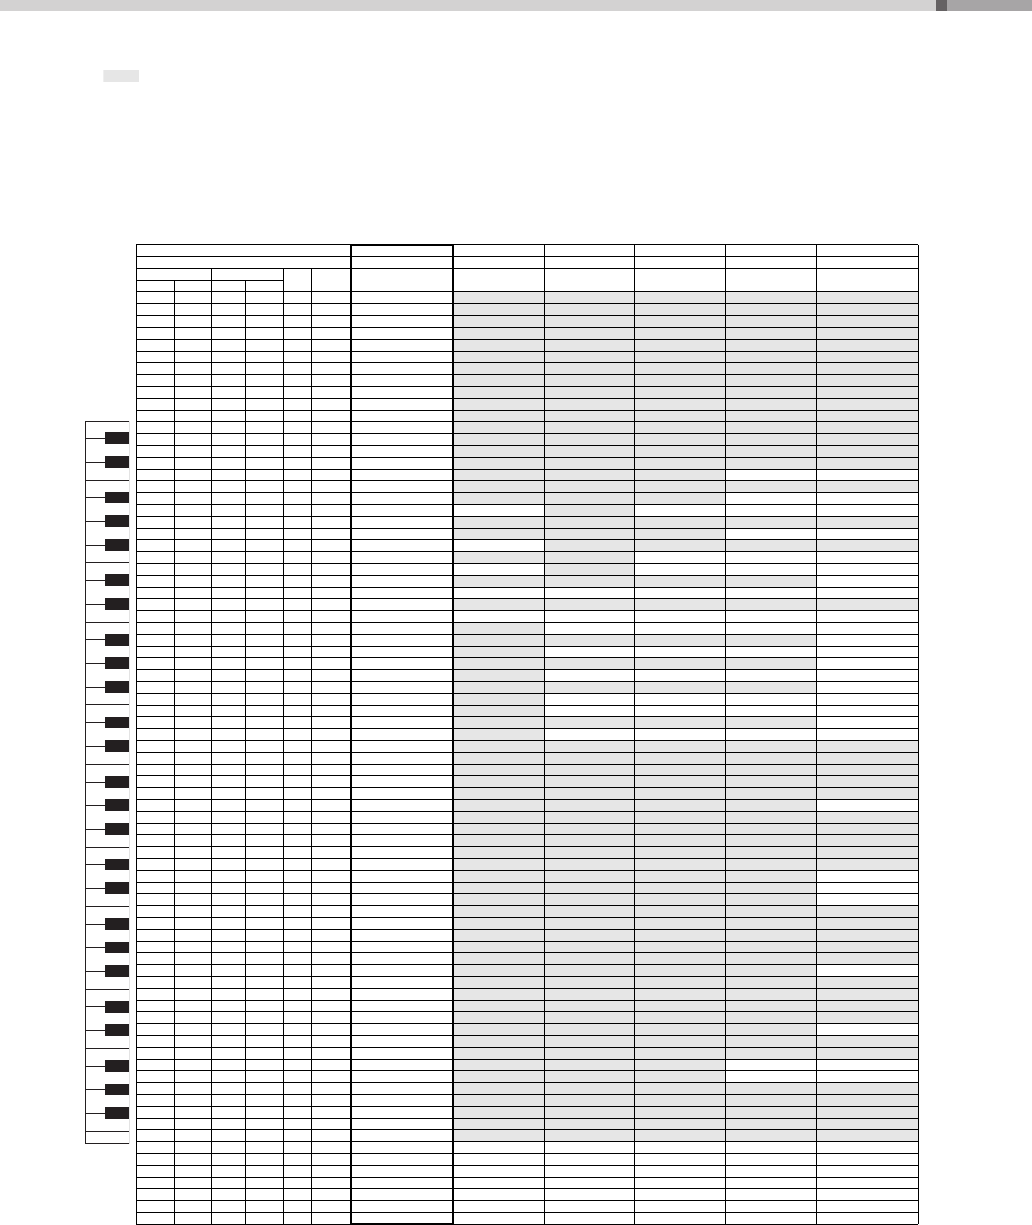
Style List
Style No.Style Name
8Beat
0018BeatModern
00260'sGtrPop
0038BeatAdria
00460's8Beat
0058Beat
006OffBeat
00760'sRock
008HardRock
009RockShuffle
0108BeatRock
16Beat
01116Beat
012PopShuffle
013GuitarPop
01416BtUptempo
015KoolShuffle
016HipHopLight
Ballad
017PianoBallad
018LoveSong
0196/8ModernEP
0206/8SlowRock
021OrganBallad
022PopBallad
02316BeatBallad
Dance
024EuroTrance
025Ibiza
026SwingHouse
027Clubdance
028ClubLatin
029Garage1
030Garage2
031TechnoParty
032UKPop
033HipHopGroove
034HipShuffle
035HipHopPop
Disco
03670'sDisco
037LatinDisco
038SaturdayNight
039DiscoHands
Swing&Jazz
040BigBandFast
041BigBandBallad
042JazzClub
043Swing1
044Swing2
045Five/Four
046Dixieland
047Ragtime
R&B
048Soul
049DetroitPop
0506/8Soul
051CrocoTwist
052Rock&Roll
053ComboBoogie
0546/8Blues
Country
055CountryPop
056CountrySwing
057Country2/4
058Bluegrass
Latin
059BrazilianSamba
060BossaNova
061Forro
062Tijuana
063Mambo
064Salsa
065Beguine
066Reggae
Ballroom
067VienneseWaltz
068EnglishWaltz
069Slowfox
070Foxtrot
071Quickstep
072Tango
073Pasodoble
074Samba
075ChaChaCha
076Rumba
077Jive
Trad&World
078USMarch
0796/8March
080GermanMarch
081PolkaPop
082OberPolka
083Tarantella
084Showtune
085ChristmasSwing
086ChristmasWaltz
087ScottishReel
Waltz
088SwingWaltz
089JazzWaltz
090CountryWaltz
091OberWalzer
092Musette
Style No.Style Name
Pianist
093Stride
094PianoSwing
095Arpeggio
096Habanera
097SlowRock
0988BeatPianoBallad
0996/8PianoMarch
100PianoWaltz
Style No.Style Name
PSR-E233/YPT-230 Owner’s Manual
41
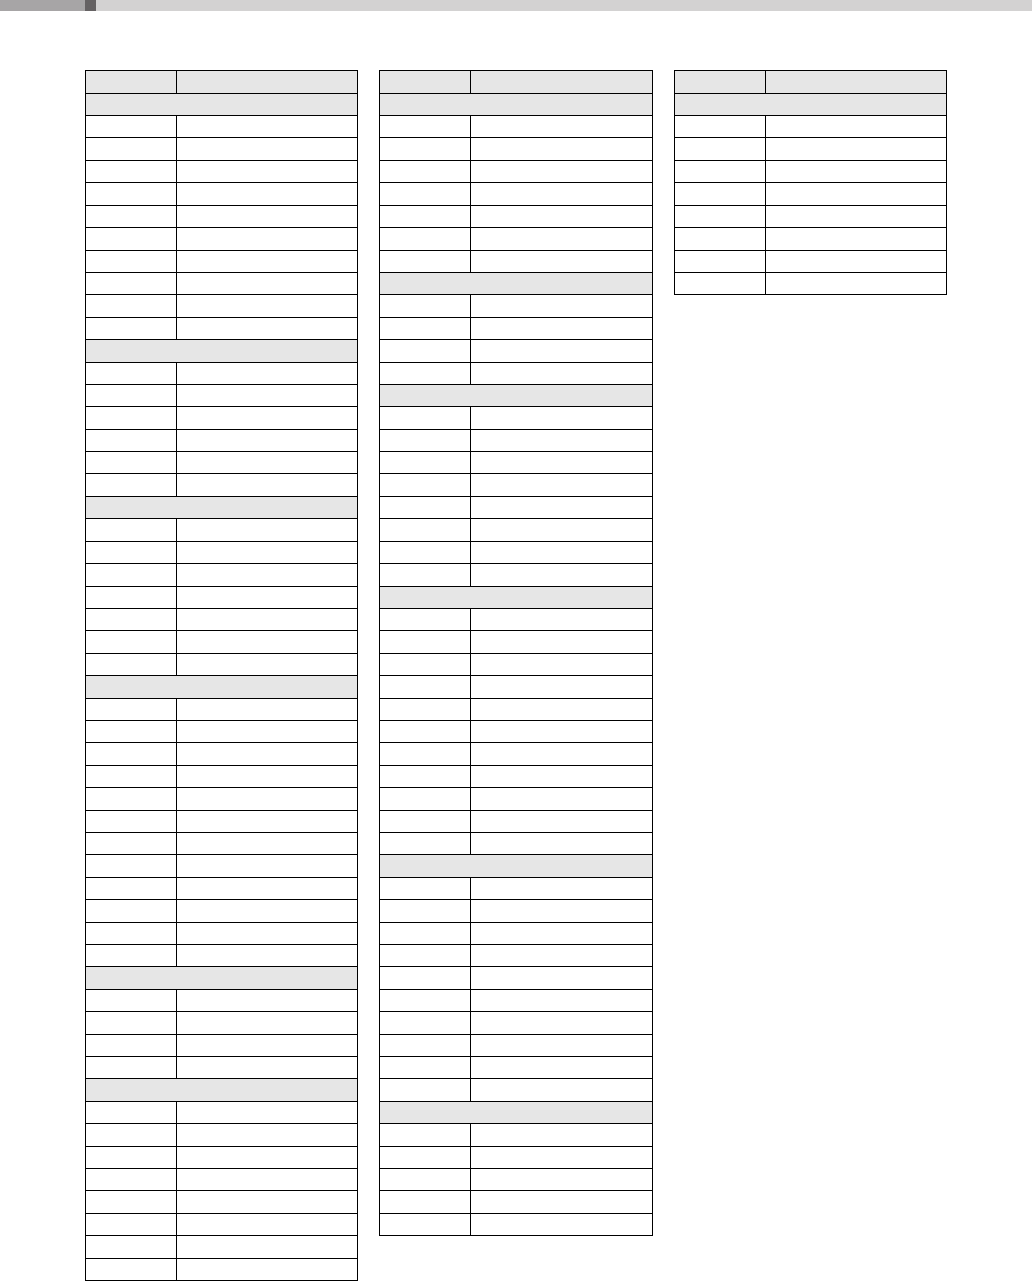
Effect Type List
Reverb Types
Chorus Types
No.Reverb TypeDescription
01–03Hall 1–3Concert hall reverb.
04–05Room 1–2Small room reverb.
06–07Stage 1–2Reverb for solo instruments.
08–09Plate 1–2Simulated steel plate reverb.
10OffNo effect.
No.Chorus TypeDescription
01–02Chorus 1–2Conventional chorus program with rich, warm chorusing.
03–04Flanger 1–2This produces a rich, animated wavering effect in the sound.
05OffNo effect.
PSR-E233/YPT-230 Owner’s Manual
42
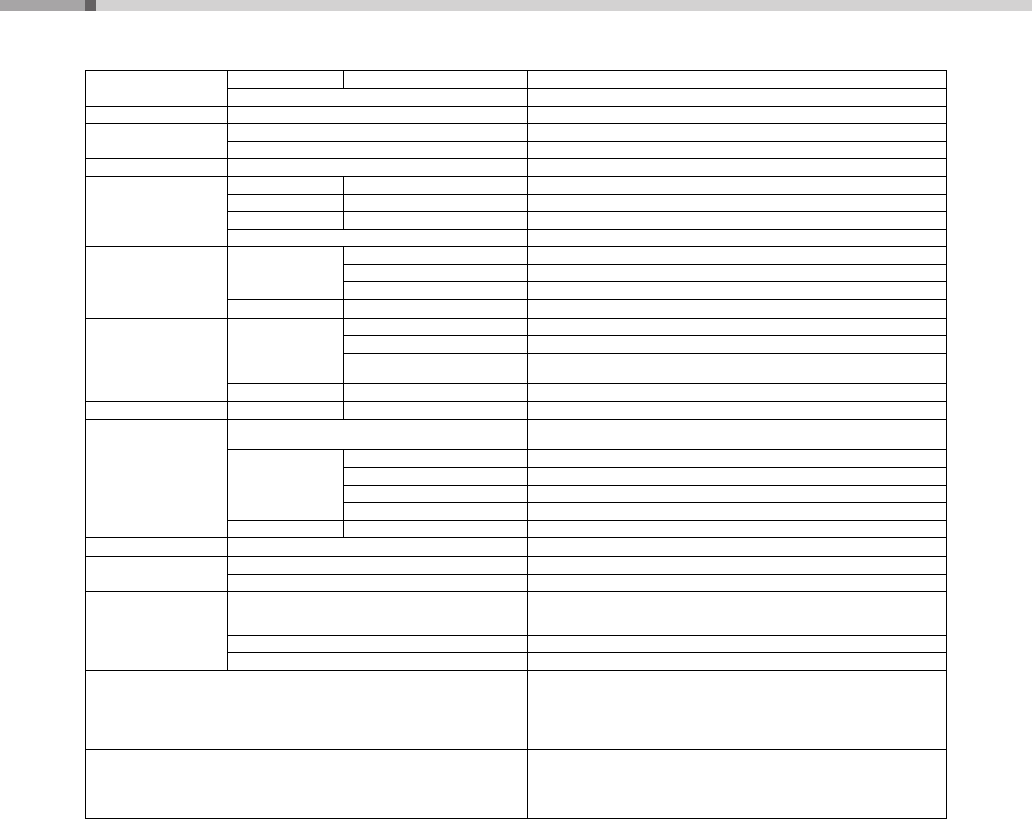
Specifications
*Specifications and descriptions in this owner’s manual are for information purposes only. Yamaha Corp. reserves the right to change or modify
products or specifications at any time without prior notice. Since specifications, equipment or options may not be the same in every locale, please
check with your Yamaha dealer.
Size/Weight
DimensionsW x D x H945 x 348 x 118 mm (37-3/16" x 13-11/16" x 4-5/8")
Weight4.5 kg (9 lbs. 15 oz.) (not including batteries)
KeyboardNumber of Keys61
Display
TypeLCD display
LanguageEnglish
PanelLanguageEnglish
Voices
Tone GenerationTone Generating TechnologyAWM Stereo Sampling
Information for Users on Collection and Disposal of Old Equipment and used Batteries
These symbols on the products, packaging, and/or accompanying documents mean that used electrical and electronic products and batteries should
not be mixed with general household waste.
For proper treatment, recovery and recycling of old products and used batteries, please take them to applicable collection points, in accordance with
your national legislation and the Directives 2002/96/EC and 2006/66/EC.
By disposing of these products and batteries correctly, you will help to save valuable resources and prevent any potential negative effects on human
health and the environment which could otherwise arise from inappropriate waste handling.
For more information about collection and recycling of old products and batteries, please contact your local municipality, your waste disposal service or
the point of sale where you purchased the items.
[For business users in the European Union]
If you wish to discard electrical and electronic equipment, please contact your dealer or supplier for further information.
[Information on Disposal in other Countries outside the European Union]
These symbols are only valid in the European Union. If you wish to discard these items, please contact your local authorities or dealer and ask for the
correct method of disposal.
Note for the battery symbol (bottom two symbol examples):
This symbol might be used in combination with a chemical symbol. In this case it complies with the requirement set by the Directive for the chemical
involved.
(weee_battery_eu_en)
OBSERVERA!
Apparaten kopplas inte ur växelströmskällan (nätet) så länge
som den ar ansluten till vägguttaget, även om själva apparaten
har stängts av.
ADVARSEL: Netspændingen til dette apparat er IKKE
afbrudt, sålænge netledningen sidder i en stikkontakt, som er
tændt — også selvom der er slukket på apparatets afbryder.
VAROITUS:Laitteen toisiopiiriin kytketty käyttökytkin ei irroita
koko laitetta verkosta.
(standby)
The serial number of this product may be found on the bottom
of the unit. You should note this serial number in the space
provided below and retain this manual as a permanent record
of your purchase to aid identification in the event of theft.
Model No.
Serial No.
(bottom)
Entsorgung leerer Batterien (nur innerhalb
Deutschlands)
Leisten Sie einen Beitrag zum Umweltschutz. Verbrauchte Bat-
terien oder Akkumulatoren dürfen nicht in den Hausmüll. Sie
können bei einer Sammelstelle für Altbatterien bzw. Sondermüll
abgegeben werden. Informieren Sie sich bei Ihrer Kommune.
(battery)
PSR-E233/YPT-230 Owner’s Manual
45
PSR-E233/YPT-230 Owner’s Manual
46
For details of products, please contact your nearest Yamaha
representative or the authorized distributor listed below.
Pour plus de détails sur les produits, veuillez-vous adresser à Yamaha
ou au distributeur le plus proche de vous figurant dans la liste suivante.
Para obter detalhes de produtos, entre em contato com o
representante mais próximo da Yamaha ou com o distribuidor
autorizado relacionado a seguir.
Para detalles sobre productos, contacte su tienda Yamaha más
cercana o el distribuidor autorizado que se lista debajo.
Die Einzelheiten zu Produkten sind bei Ihrer unten aufgeführten
Niederlassung und bei Yamaha Vertragshändlern in den jeweiligen
Bestimmungsländern erhältlich.
Подробные сведения об инструменте можно получить у местного
представителя корпорации Yamaha или уполномоченного
дистрибьютора, указанного в следующем списке.
HEAD OFFICEYamaha Corporation, Digital Musical Instruments Division
Nakazawa-cho 10-1, Naka-ku, Hamamatsu, Japan 430-8650
Tel: +81-53-460-3273
CANADA
Yamaha Canada Music Ltd.
135 Milner Avenue, Scarborough, Ontario,
M1S 3R1, Canada
Tel: 416-298-1311
U.S.A.
Yamaha Corporation of America
6600 Orangethorpe Ave., Buena Park, Calif. 90620,
U.S.A.
Tel: 714-522-9011
MEXICO
Yamaha de México S.A. de C.V.
Calz. Javier Rojo Gómez #1149,
Col. Guadalupe del Moral
C.P. 09300, México, D.F., México
Tel: 55-5804-0600
BRAZIL
Yamaha Musical do Brasil Ltda.
Rua Joaquim Floriano, 913 - 4' andar, Itaim Bibi,
CEP 04534-013 Sao Paulo, SP. BRAZIL
Tel: 011-3704-1377
ARGENTINA
Yamaha Music Latin America, S.A.
Sucursal de Argentina
Olga Cossettini 1553, Piso 4 Norte
Madero Este-C1107CEK
Buenos Aires, Argentina
Tel: 011-4119-7000
PANAMA AND OTHER LATIN
AMERICAN COUNTRIES/
CARIBBEAN COUNTRIES
Yamaha Music Latin America, S.A.
Torre Banco General, Piso 7, Urbanización Marbella,
Gebruikershandleiding.com neemt misbruik van zijn services uitermate serieus. U kunt hieronder aangeven waarom deze vraag ongepast is. Wij controleren de vraag en zonodig wordt deze verwijderd.
Product:
Spelregels forum
Om tot zinvolle vragen te komen hanteren wij de volgende spelregels:
lees eerst de handleiding door;
controleer of uw vraag al eerder door iemand anders is gesteld;
probeer uw vraag zo duidelijk mogelijk te stellen;
heeft u een probleem en al geprobeerd om dit op te lossen, vermeld dit erbij aub;
heeft u een oplossing gekregen van een bezoeker dan horen wij dat graag in dit forum;
wilt u een reactie geven op een vraag of antwoord, gebruik dan niet dit formulier maar klik op de knop 'reageer op deze vraag';
uw vraag wordt direct op de website gezet; vermijd daarom persoonlijke gegevens in te vullen;
Belangrijk! Als er een antwoord wordt gegeven op uw vraag, dan is het voor de gever van het antwoord nuttig om te weten als u er wel (of niet) mee geholpen bent! Wij vragen u dus ook te reageren op een antwoord.
Belangrijk! Antwoorden worden ook per e-mail naar abonnees gestuurd. Laat uw emailadres achter op deze site, zodat u op de hoogte blijft. U krijgt dan ook andere vragen en antwoorden te zien.
Abonneren
Abonneer u voor het ontvangen van emails voor uw Yamaha PSR-E233 - YPT-230 bij:
nieuwe vragen en antwoorden
nieuwe handleidingen
U ontvangt een email met instructies om u voor één of beide opties in te schrijven.
Ontvang uw handleiding per email
Vul uw emailadres in en ontvang de handleiding van Yamaha PSR-E233 - YPT-230 in de taal/talen: Engels als bijlage per email.
De handleiding is 4,24 mb groot.
U ontvangt de handleiding per email binnen enkele minuten. Als u geen email heeft ontvangen, dan heeft u waarschijnlijk een verkeerd emailadres ingevuld of is uw mailbox te vol. Daarnaast kan het zijn dat uw internetprovider een maximum heeft aan de grootte per email. Omdat hier een handleiding wordt meegestuurd, kan het voorkomen dat de email groter is dan toegestaan bij uw provider.
Stel vragen via chat aan uw handleiding
Stel uw vraag over deze PDF
Andere handleiding(en) van Yamaha PSR-E233 - YPT-230
Uw handleiding is per email verstuurd. Controleer uw email
Als u niet binnen een kwartier uw email met handleiding ontvangen heeft, kan het zijn dat u een verkeerd emailadres heeft ingevuld of dat uw emailprovider een maximum grootte per email heeft ingesteld die kleiner is dan de grootte van de handleiding.
Er is een email naar u verstuurd om uw inschrijving definitief te maken.
Controleer uw email en volg de aanwijzingen op om uw inschrijving definitief te maken
U heeft geen emailadres opgegeven
Als u de handleiding per email wilt ontvangen, vul dan een geldig emailadres in.
Uw vraag is op deze pagina toegevoegd
Wilt u een email ontvangen bij een antwoord en/of nieuwe vragen? Vul dan hier uw emailadres in.