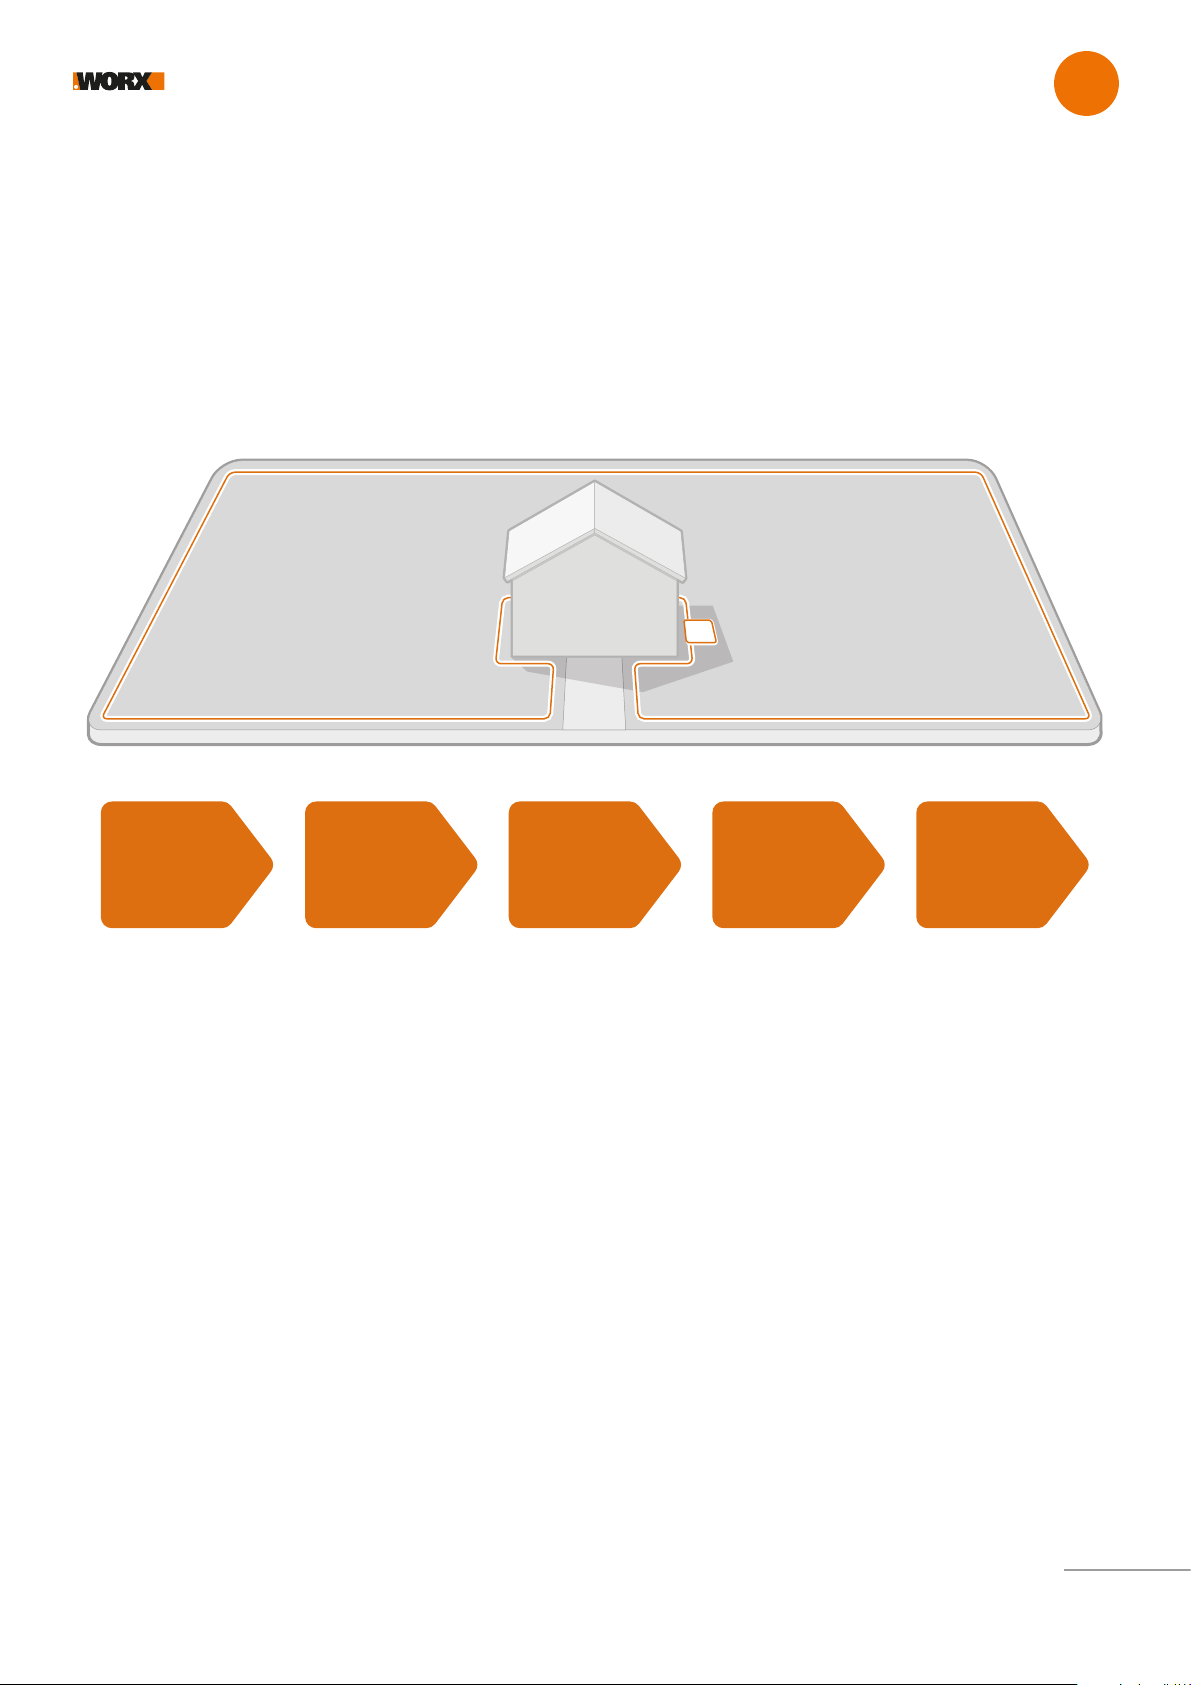
Installing your Worx Landroid is easier if you carefully follow these instructions. In the end, it is a matter of installing the charging station
and laying the boundary wire all around your lawn. In addition to this manual, you can use the Get Started guide that’s inside the box and
watch the comprehensive video tutorials on our YouTube channel*.
* This information is provided for your convenience but does not replace the instruction manual and the safety instructions that needs to be read and understood.
EVERY MINUTE SPENT IN PLANNING SAVES YOU 10 MINUTES IN EXECUTION
Installing Landroid is even easier if you have made a clear idea of what you need to do. A proper planning will also help you avoid
mistakes or having to rework the installation once it’s done.
On the surface or buried?
Landroid’s boundary wire is designed to stay on the surface of your lawn. Nearly invisible from the first day, it will be engulfed in the soil
in a few weeks. If you will want to bury the wire, it is recommended to first peg it down and test the installation is successful by running
Landroid over the perimeter. This allows you to easily check everything and, if necessary, change the layout before burying the wire. Bury
the wire no more than a few centimetres below ground level, so that the wire ensures good signal.
Plan for the charging station
The charging station is where your Landroid goes to have its battery recharged. It’s also the parking lot where it rests in between one
mowing session and the next.
Locate a proper position for it, bearing in mind:
• It needs to be powered, so it should be no more than 10m away from an AC mains outlet
• If possible, choose a shaded position as batteries and chargers don’t like over-heating
• The base needs to sit on flat land to ensure effective docking
Gebruikershandleiding.com neemt misbruik van zijn services uitermate serieus. U kunt hieronder aangeven waarom deze vraag ongepast is. Wij controleren de vraag en zonodig wordt deze verwijderd.
Product:
Spelregels forum
Om tot zinvolle vragen te komen hanteren wij de volgende spelregels:
lees eerst de handleiding door;
controleer of uw vraag al eerder door iemand anders is gesteld;
probeer uw vraag zo duidelijk mogelijk te stellen;
heeft u een probleem en al geprobeerd om dit op te lossen, vermeld dit erbij aub;
heeft u een oplossing gekregen van een bezoeker dan horen wij dat graag in dit forum;
wilt u een reactie geven op een vraag of antwoord, gebruik dan niet dit formulier maar klik op de knop 'reageer op deze vraag';
uw vraag wordt direct op de website gezet; vermijd daarom persoonlijke gegevens in te vullen;
Belangrijk! Als er een antwoord wordt gegeven op uw vraag, dan is het voor de gever van het antwoord nuttig om te weten als u er wel (of niet) mee geholpen bent! Wij vragen u dus ook te reageren op een antwoord.
Belangrijk! Antwoorden worden ook per e-mail naar abonnees gestuurd. Laat uw emailadres achter op deze site, zodat u op de hoogte blijft. U krijgt dan ook andere vragen en antwoorden te zien.
Abonneren
Abonneer u voor het ontvangen van emails voor uw Worx WR143E bij:
nieuwe vragen en antwoorden
nieuwe handleidingen
U ontvangt een email met instructies om u voor één of beide opties in te schrijven.
Ontvang uw handleiding per email
Vul uw emailadres in en ontvang de handleiding van Worx WR143E in de taal/talen: Engels als bijlage per email.
De handleiding is 9,51 mb groot.
U ontvangt de handleiding per email binnen enkele minuten. Als u geen email heeft ontvangen, dan heeft u waarschijnlijk een verkeerd emailadres ingevuld of is uw mailbox te vol. Daarnaast kan het zijn dat uw internetprovider een maximum heeft aan de grootte per email. Omdat hier een handleiding wordt meegestuurd, kan het voorkomen dat de email groter is dan toegestaan bij uw provider.
Uw handleiding is per email verstuurd. Controleer uw email
Als u niet binnen een kwartier uw email met handleiding ontvangen heeft, kan het zijn dat u een verkeerd emailadres heeft ingevuld of dat uw emailprovider een maximum grootte per email heeft ingesteld die kleiner is dan de grootte van de handleiding.
Er is een email naar u verstuurd om uw inschrijving definitief te maken.
Controleer uw email en volg de aanwijzingen op om uw inschrijving definitief te maken
U heeft geen emailadres opgegeven
Als u de handleiding per email wilt ontvangen, vul dan een geldig emailadres in.
Uw vraag is op deze pagina toegevoegd
Wilt u een email ontvangen bij een antwoord en/of nieuwe vragen? Vul dan hier uw emailadres in.