In order to receive a more complete assistance, please
register your appliance on:
www.whirlpool.eu/register
You can download the Safety Instructions and the Use
and Care Guide, by visiting our website
http://docs.whirlpool.eu and following the Instructions
on the back of this booklet.
Before using the appliance carefully read Health and Safety guide.
PRODUCT DESCRIPTION
APPLIANCE
1.Upper rack
2. Foldable flaps
3.Upper rack height adjuster
4.Upper spray arm
5.Lower rack
6.Cutlery basket
7.Lower spray arm
8.Filter Assembly
9.Salt reservoir
10.Detergent and Rinse Aid dispensers
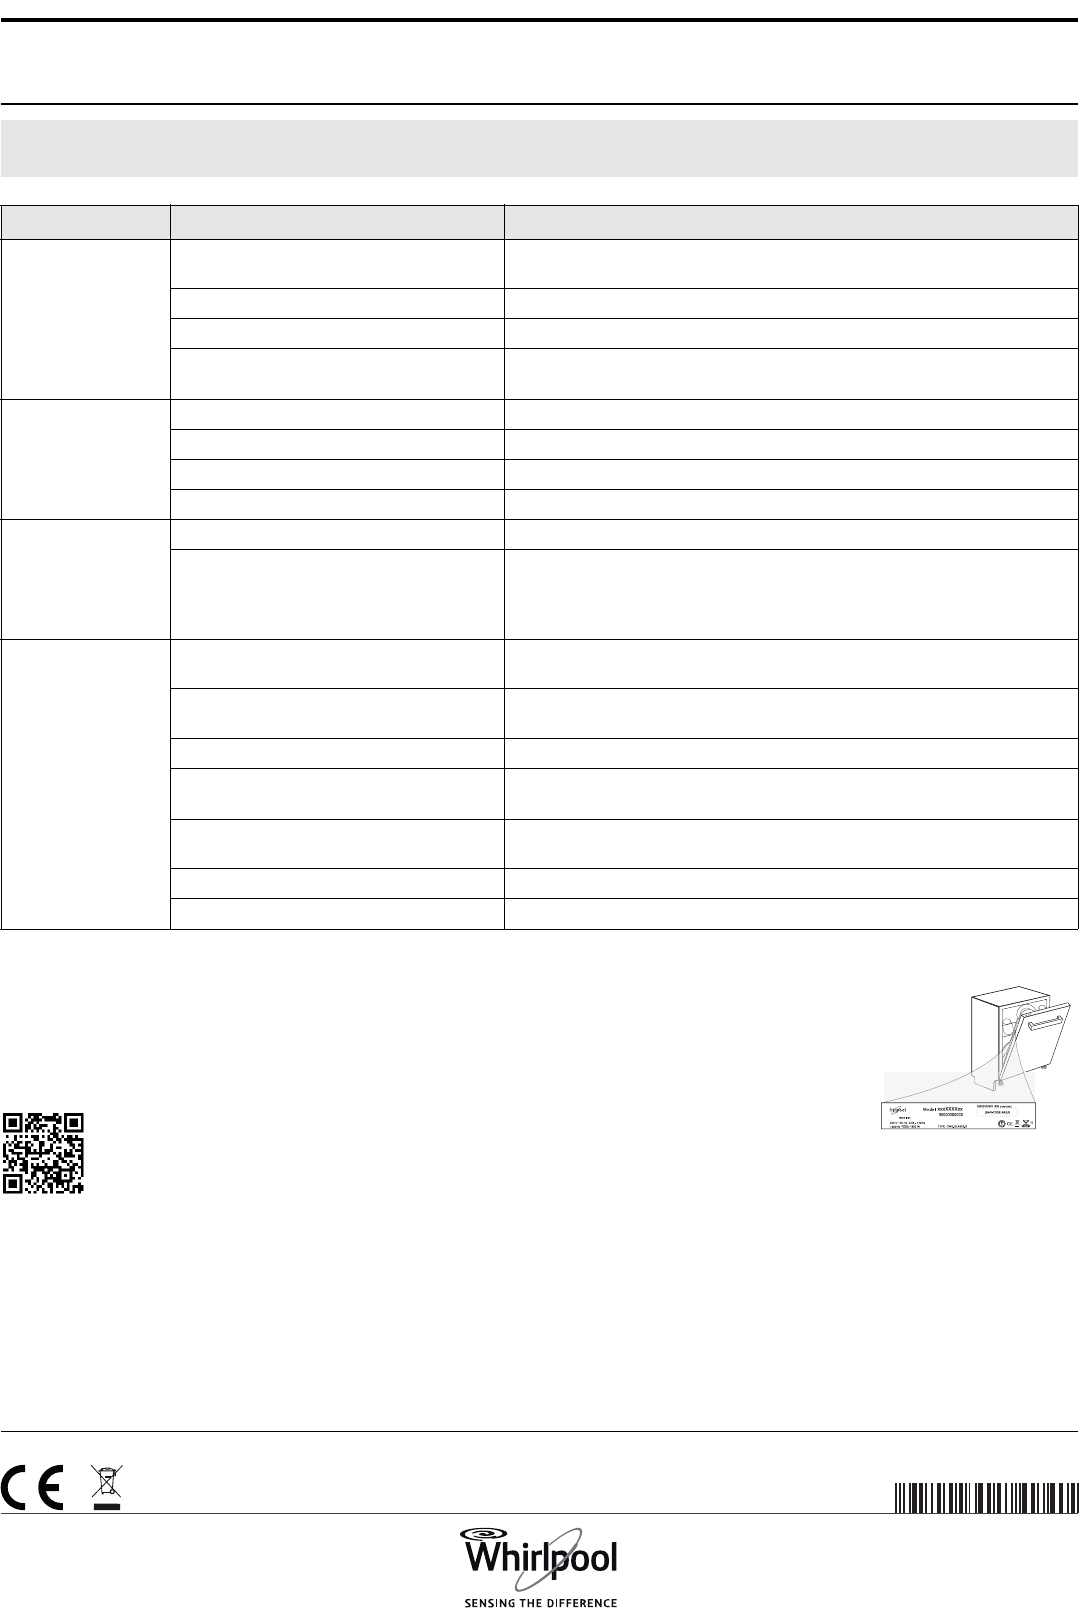
11.Rating plate
12.Control panel
0000 000 00000
Service:
1
2
3
4
5
6
11
13
7
12
10
8
9
CONTROL PANEL
1.On-Off/Reset button with indicator light
2.Program selection button
3.Salt refill indicator light
4.Rinse Aid refill indicator light
5.Program number and remaining time indicator
6.Delay indicator light
7.Display
8.Multizone indicator light
9.Delay button
10.Multizone button
11.Turbo button with indicator light
12.Extra Dry button with indicator light
13.Tablet (Tab) button with indicator light
12345678910111213
2
FIRST TIME USE
SALT, RINSE AID AND DETERGENT
ADVICE REGARDING THE FIRST TIME USE
After installation, remove the stoppers from the racks and the retaining
elastic elements from the upper rack.
FILLING THE SALT RESERVOIR
The use of salt prevents the formation of LIMESCALE on the dishes and
on the machine’s functional components.
•It is important that the salt reservoir be never empty.
•t is important to set the water hardness.
The salt reservoir is located in the lower part of the dishwasher and
should be filled when the SALT REFILL indicator light
in the
control panel is lit.
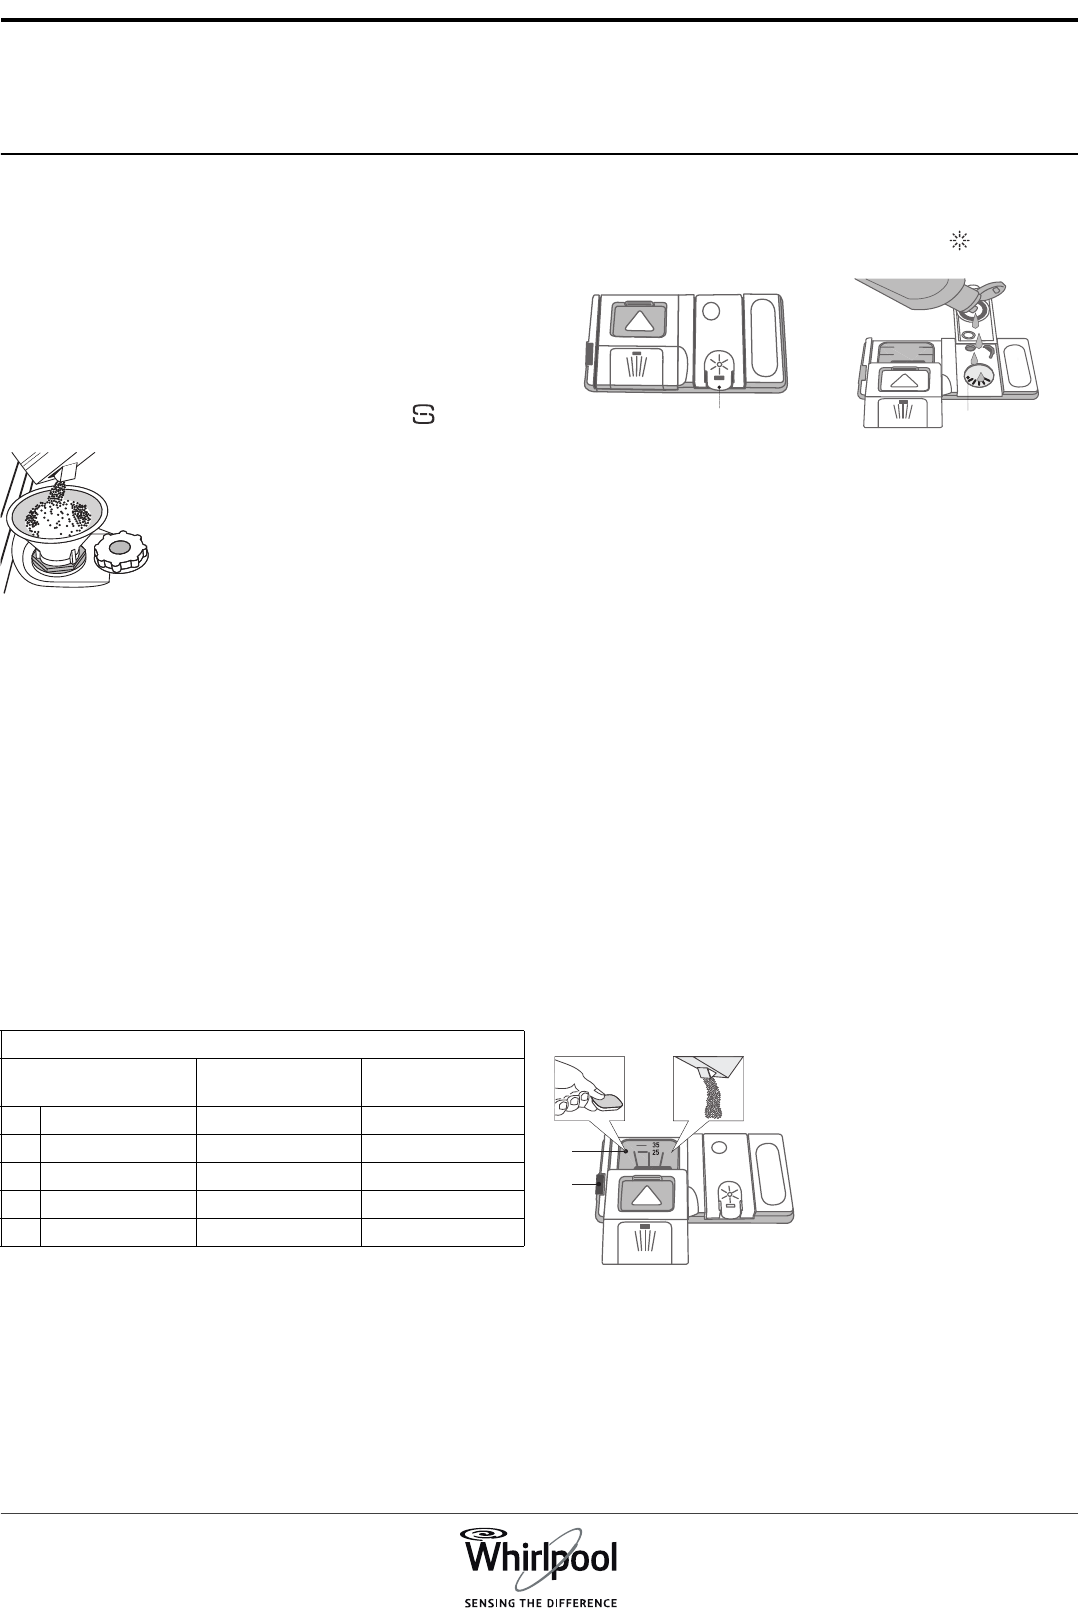
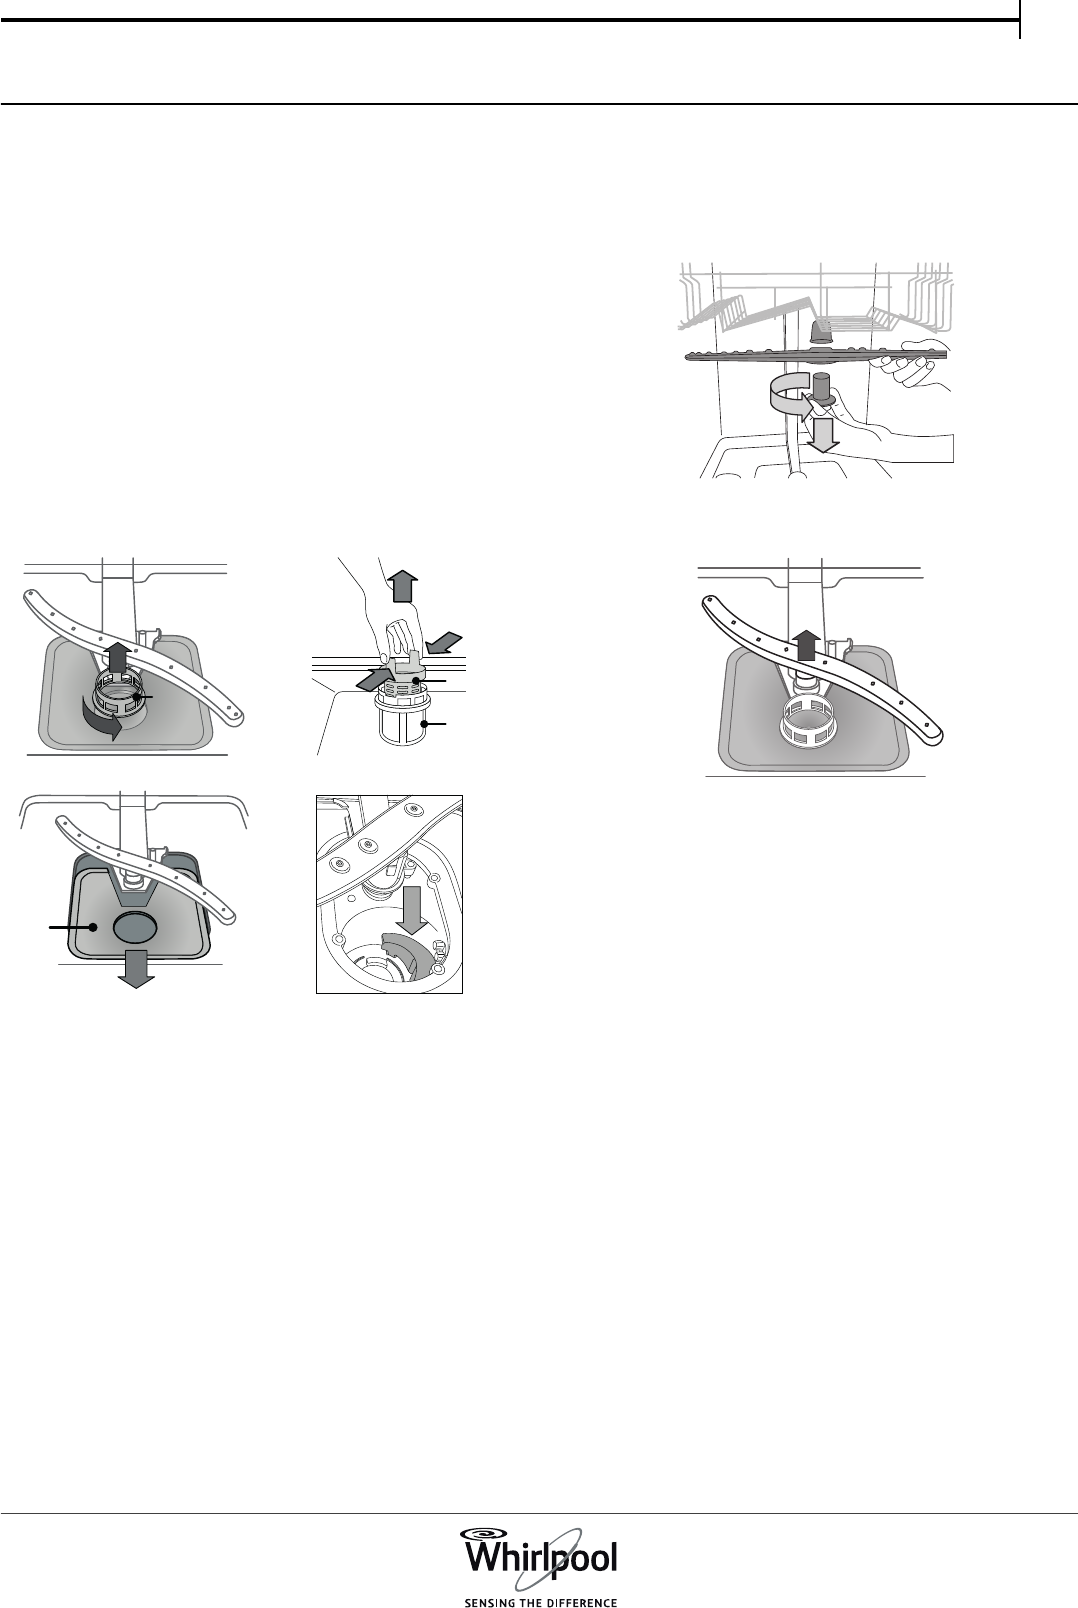
1.Remove the lower rack and unscrew the
reservoir cap (anticlockwise).
2.Position the funnel
(see figure)
and fill the salt
reservoir right up to its edge (approximately 1 kg);
it is not unusual for a little water to leak out.
3.Remove the funnel and wipe any salt residue
away from the opening.
Make sure the cap is screwed on tightly, so that no detergent can get
into the container during the wash program (this could damage the
water softener beyond repair).
Whenever you need to add salt, we recommend carrying out the
procedure before the washing cycle is started.
SETTING THE WATER HARDNESS
To allow the water softener to work in a perfect way, it is essential that
the water hardness setting is based on the actual water hardness in
your house. This information can be obtained from your local water
supplier.
The factory setting is for average (3) water hardness.
1.Switch on the appliance by pressing the
ON/OFF
button.
2.Switch off the appliance by pressing the
ON/OFF
button.
3.Hold down button
P
for 5 seconds, until you hear a beep.
4.Switch on the appliance by pressing the
ON/OFF
button.
5.The current selection level number and the salt indicator light both flash.
6.Press button
P
to select the desired hardness level (
see WATER
HARDNESS TABLE).
7.Switch off the appliance by pressing the
ON/OFF
button.
Setting is complete!
As soon as this procedure is complete, run a program without loading.
Only use salt that has been specifically designed for dishwashers.
After the salt has been poured into the machine, the SALT REFILL
indicator light switches off.
If the salt container is not filled, the water softener and the heating
element may be damaged as a result.
FILLING THE RINSE AID DISPENSER
Rinse aid makes dish DRYING easier. The rinse aid dispenser A should
be filled when the RINSE AID REFILL indicator light
in the control
panel is lit.
1.Open the dispenser
B
by pressing and pulling up the tab on the lid.
2.Carefully introduce the rinse aid as far as the maximum (110 ml)
reference notch of the filling space - avoid spilling it. If this happens,
clean the spill immediately with a dry cloth.
3.Press the lid down until you hear a click to close it.
NEVER pour the rinse aid directly into the tub.
ADJUSTING THE DOSAGE OF RINSE AID
If you are not completely satisfied with the drying results, you can ad-
just the quantity of rinse aid used.
•Switch the dishwasher on using the ON/OFF button.
•Switch it off using the ON/OFF button.
•Press button P three times - a beep will be heard.
•Switch it on using the ON/OFF button.
•The current selection level number and rinse aid indicator light flash.
•Press button P to select the level of rinse aid quantity to be
supplied.
•Switch it off using the ON/OFF button
Setting is complete!
If the rinse aid level is set to ZERO (ECO), no rinse aid will be supplied. The
LOW RINSE AID indicator light will not be lit if you run out of rinse aid.
A maximum of 4 levels can be set according to the dishwasher model.
The factory setting is for a medium level.
•If you see bluish streaks on the dishes, set a low number (1-2).
•If there are drops of water or limescale marks on the dishes, set a
high number (3-4).
FILLING THE DETERGENT DISPENSER
To open the detergent dispenser
use the opening device A. Introduce
the detergent into the dry dispenser
B only. Place the amount of
detergent for pre-washing directly
inside the tub.
1.When measuring out the detergent
refer to the to add the proper
quantity. Compartment
B
comprises a
level showing the maximum quantity
of liquid or powder detergent that can be added to each cycle.
2.Remove detergent residues from the edges of the dispenser and
close the cover until it clicks.
3.Close the lid of the detergent dispenser by pulling it up until the
closing device is secured in place.
The detergent dispenser automatically opens up at the right time
according to the program. If all-in-one detergents are used, we
recommend using the
TABLE T
button, because it adjusts the program so
that the best washing and drying results are always achieved.
Water Hardness Table
Level
°dH
German degrees
°fH
French degrees
1Soft0 - 60 - 10
2Medium7 - 1111 - 20
3Average12 - 1721 - 30
4Hard17 - 3431 - 60
5Very hard35 - 5061 - 90
M
A
X
A
B
35
25
A
B
3
EN
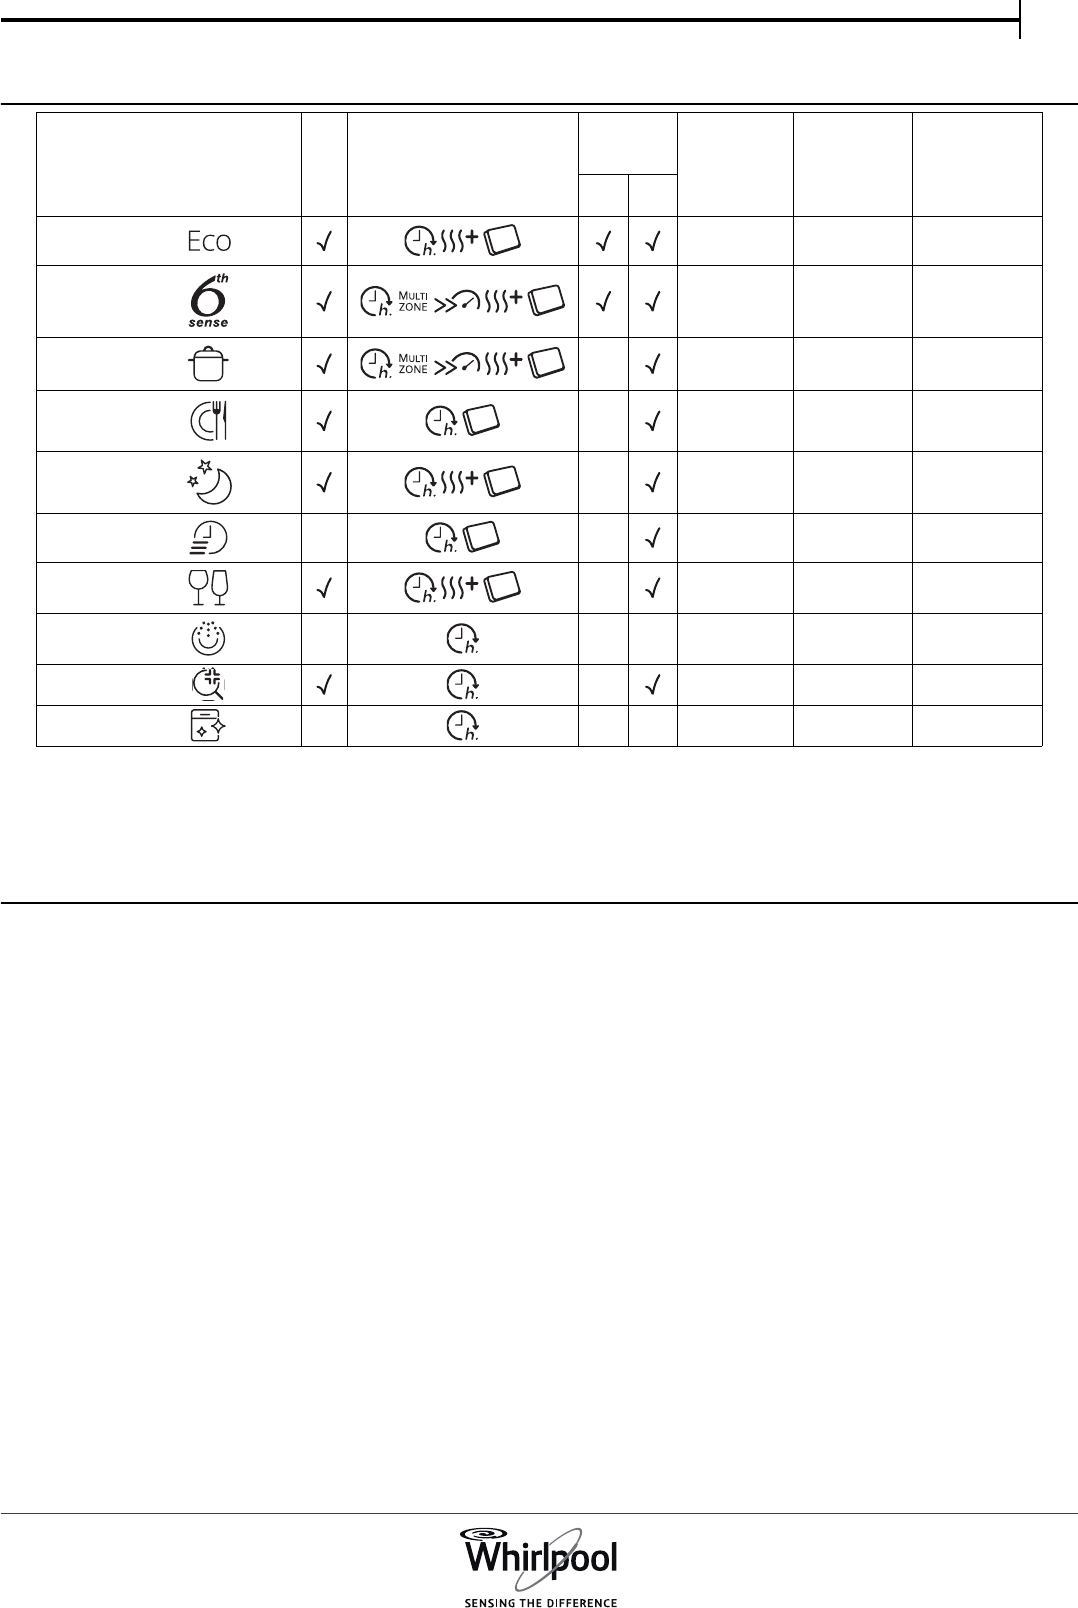
PROGRAMS TABLE
ECO program data is measured under laboratory conditions according to European Standard EN 50242.
*) Not all options can be used simultaneously.
**) The duration of the program shown on the display or in the booklet is an estimate calculated on standard conditions. The actual time may vary depending on many
factors such as temperature and pressure of the incoming water, room temperature, amount of detergent, quantity and type of load, load balancing, additional selected
options and sensor calibration. The sensor calibration can increase program duration up to 20 min.
Standby consumption: Left-on mode consumption: 5 W - Off mode consumption: 0.5 W
PROGRAMS DESCRIPTION
Instructions on wash cycle selection.
ECO
Normally soiled crockery. Standard program, the most efficient in terms
of its combined energy and water consumption.
6
th
SENSE ®
For normally soiled dishes with dried food residues. Senses the level of
soiling on the dishes and adjusts the program accordingly. When the
sensor is detecting the soil level an animation appears in the display
and the cycle duration is updated.
INTENSIVE
Program recommended for heavily soiled crockery, especially suitable
for pans and saucepans (not to be used for delicate items).
DAILY
Normally soiled crockery. Everyday cycle, that ensures optimal cleaning
performance in shorter time.
SILENT
Suitable for night-time operation of the appliance. Optimum
performance ensured.
RAPID 30’
Program to be used for lightly-soiled dishes with no dried food
residues. (Ideal for 2 place settings).
CRISTAL
Cycle for delicate items, which are more sensitive to high temperatures,
for example glasses and cups.
PRE-WASH
Crockery to be washed later. No detergent to be used with this
program.
SANITIZING 65°
Normally or heavily soiled crockery, with additional antibacterial wash.
SELF-CLEAN
Cycle to be used to perform maintenance of the dishwasher. It cleans
the interior of the appliance using hot water.
Notes:
Optimum performance levels when using the “1 Hour” and “Rapid”
programs can be achieved by observing the maximum amounts of
specified place settings.
To reduce consumption even further, only run the dishwasher
when it is full.
Program
Drying
phase
Available options
*)
Detergent
container
Duration of
wash pro-
gram
(h:min)
**)
Water
consumption
(litres/cycle)
Energy
consumption
(kWh/cycle)
Tub B
1.Eco50°
4:006.00.93
2.
6
th
Sense
50-60°
1:25 - 3:007.0 - 14.00.9 - 1.40
3.Intensive65°
-2:5014.01.50
4.Daily50°
-1:3012.01.15
5.Silent50°
-3:3015.01.15
6.Rapid 30’50°-
-0:309.00.50
7.Cristal45°
-1:4011.01.10
8.Pre-Wash----0:124.50.01
9.Sanitizing65°-1:4010.01.30
10.Self- Clean65°-1:3514.01.15
4
OPTIONS AND FUNCTIONS
OPTIONS can be selected directly by pressing the corresponding
button .
DELAY
The start time of the program may be delayed for a period
of time between 1 and 12 hours.
1.Press the DELAY button: the corresponding symbol
appears on the display; each time you press the button,
the time (1h, 2h, etc. up to max. 12h) from the start of
the selected wash cycle will be increased.
2.Select the wash program and close the door: the timer
will begin counting down;
3.Once this time has elapsed, the indicator light switches
off and the wash cycle begins.
To adjust the delay time and select a shorter period of
time, press the DELAY button. To cancel it, press the
button repeatedly until the selected delayed start
indicator light switches off.
The wash program will start automatically as soon as the
door is shut.
The Delay function cannot be set once a wash cycle
has been started.
MULTIZONE
If there are not many dishes to be washed, a half loading
may be used in order to save water, electricity and
detergent.
Select the program and then press the MULTIZONE
button: the indicator over the button lights up and the
symbol of the chosen rack will appear on the display. By
default the appliance washes dishes in all racks.
To wash only the specific rack, press this button
repeatedly:
shown on the display (only lower rack)
shown on the display (only upper rack)
shown on the display (option is OFF and the appliance
will wash dishes in all racks).
Remember to load the upper or lower rack only, and
to reduce the amount of detergent accordingly.
EXTRA DRY
To improve the drying of the dishes, after selecting the
program, press the EXTRA DRY button and the indicator
light comes on.
A higher temperature during the final rinse and an
extended drying phase allow for improving drying. To
deselect the option, press the same button again. The EXTRA DRY
option results in the lengthening of the wash cycle.
TURBO
This option can be used to reduce the duration of the
main programs while maintaining the same washing and
drying performance levels.
After selecting the program, press the TURBO button and
the indicator light will switch on. To deselect the option,
press the same button again.
TABLET (Tab)
This setting allows you to optimize the performance of
the program according to the type of detergent used.
Press the TABLET button (the indicator light will light up)
if you use combined detergents in tablet form (rinse aid,
salt and detergent in 1 dose).
If you use powder or liquid detergent, this option
should be off.
WATER RECYCLING SYSTEM
This dishwasher allows you to save up to 3 litres of water using the Eco
program.
Saved water is filtered and stored in a dedicated tank and will be reused
for subsequent Eco program.
For hygienic reasons, if the Eco cycle is not used for three or more days
it is strongly recommended to perform cleaning cycle of the
dishwasher. It can be done using Self-Clean cycle (see program table).
If an option is not compatible with the selected program , the
corresponding LED flashes rapidly 3 times and beeps will
sound. The option will not be enabled.
5
EN
DAILY USE
1.CHECK WATER CONNECTION
Check that the dishwasher is connected to the water supply and
that the top is open.
2.SWITCH ON THE DISHWASHER
Open the door and press the ON/OFF button.
3.LOAD THE RACKS
(see LOADING THE RACKS)
4.FILLING THE DETERGENT DISPENSER
(see PROGRAMS TABLE).
5.CHOOSE THE PROGRAM AND CUSTOMISE THE CYCLE
Select the most appropriate program in accordance with the type
of crockery and its soiling level (see PROGRAMS DESCRIPTION) by
pressing the P button.
Select the desired options (see OPTIONS AND FUNCTIONS).
6.START
Start the wash cycle by closing the door. When the program starts
you hear a beep.
7.END OF WASH CYCLE
The end of the wash cycle is indicated by beeps and by the flashing
of the wash cycle number on the display. Open the door and switch
off the appliance by pressing the ON/OFF button.
Wait for a few minutes before removing the crockery - to avoid
burns.
Unload the racks, beginning with the lower one.
After the program completion the additional drying phase can be
occurs for further 30 min. You can unload the dishwasher in any time
after the program is completed. To ensure better drying effect we
recommend to let it run for 30 min.
The machine will switch off automatically during certain extended
periods of inactivity, in order to minimise electricity consumption.
If the crockery is only lightly soiled or if it has been rinsed with
water before being placed in the dishwasher, reduce the amount
of detergent used accordingly.
MODIFYING A RUNNING PROGRAM
If a wrong program was selected, it is possible to change it, provided
that it has only just begun: open the door (be ware of HOT steam!),
press and hold the ON/OFF button, the machine will switch off.
Switch the machine back on using the ON/OFF button and select the
new wash cycle and any desired options; start the cycle by closing the
door.
ADDING EXTRA CROCKERY
Without switching off the machine, open the door (be ware of HOT
steam!) and place the crockery inside the dishwasher. Close the door
and the cycle will begin from the point at which it was interrupted.
ACCIDENTAL INTERRUPTIONS
If the door is opened during the wash cycle, or if there is a power cut,
the cycle stops. It starts again from the point at which it was
interrupted once the door has been closed or the electricity supply is
restored.
For more information about the functions, you can request or download
from the WEB a Use & Care Guide by following the instructions on the last
page.
ADVICE AND TIPS
TIPS
Before loading the baskets, remove all food residues from the crockery
and empty the glasses. You do not need to rinse beforehand under
running water.
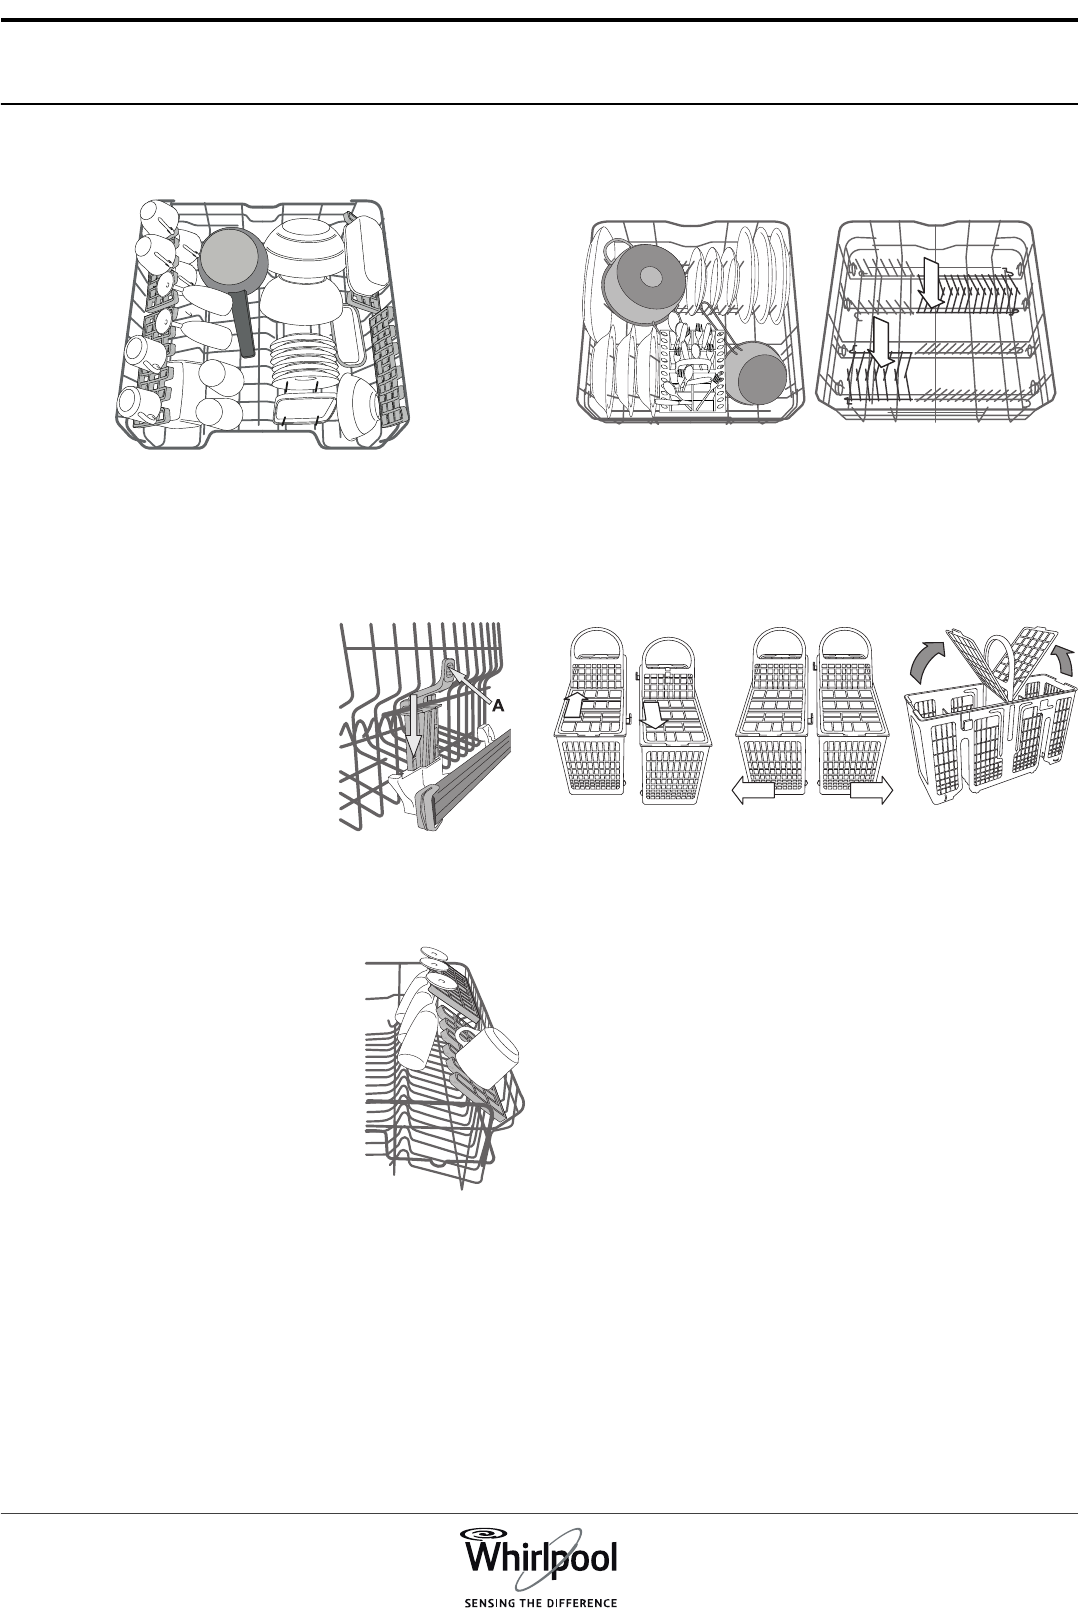
Arrange the crockery so that it is held in place firmly and does not tip
over; and arrange the containers with the openings facing downwards
and the concave/convex parts placed obliquely, thus allowing the
water to reach every surface and flow freely.
Warning: lids, handles, trays and frying pans do not prevent the
sprayer arms from rotating.
Place any small items in the cutlery basket.
Very soiled dishes and pans should be placed in the lower basket
because in this sector the water sprays are stronger and allow a higher
washing performance.
After loading the appliance, make sure that the sprayer arms can rotate
freely.
HYGIENE
To avoid odour and sediment which can be accumulated in the
dishwasher please run a high temperature program at least one a
month. Use a tea spoon of detergent and run it without the loading to
clean your appliance.
UNSUITABLE CROCKERY
•Wooden crockery and cutlery.
•Delicate decorated glasses, artistic handicraft and antique
crockery. Their decorations are not resistant.
•Parts in synthetic material which do not withstand high
temperatures.
•Copper and tin crockery.
•Crockery soiled with ash, wax, lubricating grease or ink.
The colours of glass decorations and aluminium/silver pieces can
change and fade during the washing process. Some types of glass (e.g.
crystal objects) can become opaque after a number of wash cycles too.
DAMAGE TO GLASS AND CROCKERY
•Only use glasses and porcelain guaranteed by the manufacturer as
dishwasher safe.
•Use a delicate detergent suitable for crockery
•Collect glasses and cutlery from the dishwasher as soon as the
Gebruikershandleiding.com neemt misbruik van zijn services uitermate serieus. U kunt hieronder aangeven waarom deze vraag ongepast is. Wij controleren de vraag en zonodig wordt deze verwijderd.
Product:
Spelregels forum
Om tot zinvolle vragen te komen hanteren wij de volgende spelregels:
lees eerst de handleiding door;
controleer of uw vraag al eerder door iemand anders is gesteld;
probeer uw vraag zo duidelijk mogelijk te stellen;
heeft u een probleem en al geprobeerd om dit op te lossen, vermeld dit erbij aub;
heeft u een oplossing gekregen van een bezoeker dan horen wij dat graag in dit forum;
wilt u een reactie geven op een vraag of antwoord, gebruik dan niet dit formulier maar klik op de knop 'reageer op deze vraag';
uw vraag wordt direct op de website gezet; vermijd daarom persoonlijke gegevens in te vullen;
Belangrijk! Als er een antwoord wordt gegeven op uw vraag, dan is het voor de gever van het antwoord nuttig om te weten als u er wel (of niet) mee geholpen bent! Wij vragen u dus ook te reageren op een antwoord.
Belangrijk! Antwoorden worden ook per e-mail naar abonnees gestuurd. Laat uw emailadres achter op deze site, zodat u op de hoogte blijft. U krijgt dan ook andere vragen en antwoorden te zien.
Abonneren
Abonneer u voor het ontvangen van emails voor uw Whirlpool WIO 3T323 6 bij:
nieuwe vragen en antwoorden
nieuwe handleidingen
U ontvangt een email met instructies om u voor één of beide opties in te schrijven.
Ontvang uw handleiding per email
Vul uw emailadres in en ontvang de handleiding van Whirlpool WIO 3T323 6 in de taal/talen: Engels als bijlage per email.
De handleiding is 6,15 mb groot.
U ontvangt de handleiding per email binnen enkele minuten. Als u geen email heeft ontvangen, dan heeft u waarschijnlijk een verkeerd emailadres ingevuld of is uw mailbox te vol. Daarnaast kan het zijn dat uw internetprovider een maximum heeft aan de grootte per email. Omdat hier een handleiding wordt meegestuurd, kan het voorkomen dat de email groter is dan toegestaan bij uw provider.
Uw handleiding is per email verstuurd. Controleer uw email
Als u niet binnen een kwartier uw email met handleiding ontvangen heeft, kan het zijn dat u een verkeerd emailadres heeft ingevuld of dat uw emailprovider een maximum grootte per email heeft ingesteld die kleiner is dan de grootte van de handleiding.
Er is een email naar u verstuurd om uw inschrijving definitief te maken.
Controleer uw email en volg de aanwijzingen op om uw inschrijving definitief te maken
U heeft geen emailadres opgegeven
Als u de handleiding per email wilt ontvangen, vul dan een geldig emailadres in.
Uw vraag is op deze pagina toegevoegd
Wilt u een email ontvangen bij een antwoord en/of nieuwe vragen? Vul dan hier uw emailadres in.