4Press and to select “Set Language”, “Set Temperature Unit”,
“Hour Format” or “Set Contrast".
5Press OK.
6Press or to select the desired language, temperature unit, hour format
or display contrast.
7Press OK.
8Press BACK to return to main menu,
or continue with another setting as described from step4 to 7.
4.5Programming timer
This allows you to operate the system using a 24 hour 7 day programmable timer.
Within this there are 2 programs you can set for each day, hour by hour, whether the
interior has to be heated or not (off, lower temperature, higher temperature) and if hot
water (70°C) has to be available or not.
4.5.1Program setting
Temperature setting
Make sure the device is switched on.
1Press MENU.
2Press and to select “Programming Timer”.
3Press OK.
4Press and to select “Timer Program 1” or “Timer Program 2”
(values T1 and T2 depend on program settings).
5Press OK.
6Press and to select “Set Cabin Temperatures”.
7Press OK.
8Press or to set desired T1 (low interior temperature).
9Press OK.
10Press or to set desired T2 (high interior temperature).
Note: T2 has to be higher than T1.
11Press OK.
12Press BACK to return to main menu or continue with Day setting, step6.
NOTE
Temperatures T1 and T2 may be programmed to different values in Timer Program 1
and Timer Program 2.
Dual Top Evo 7 / 8Operating Instructions
19
Day setting
In case you want to set the days after setting temperatures T1 and T2, continue with
step6.
Make sure the device is switched on.
1Press MENU.
2Press and to select “Programming Timer”.
3Press OK.
4Press and to select “Timer Program 1” or “Timer Program 2”
(values T1 and T2 depend on program settings).
5Press OK.
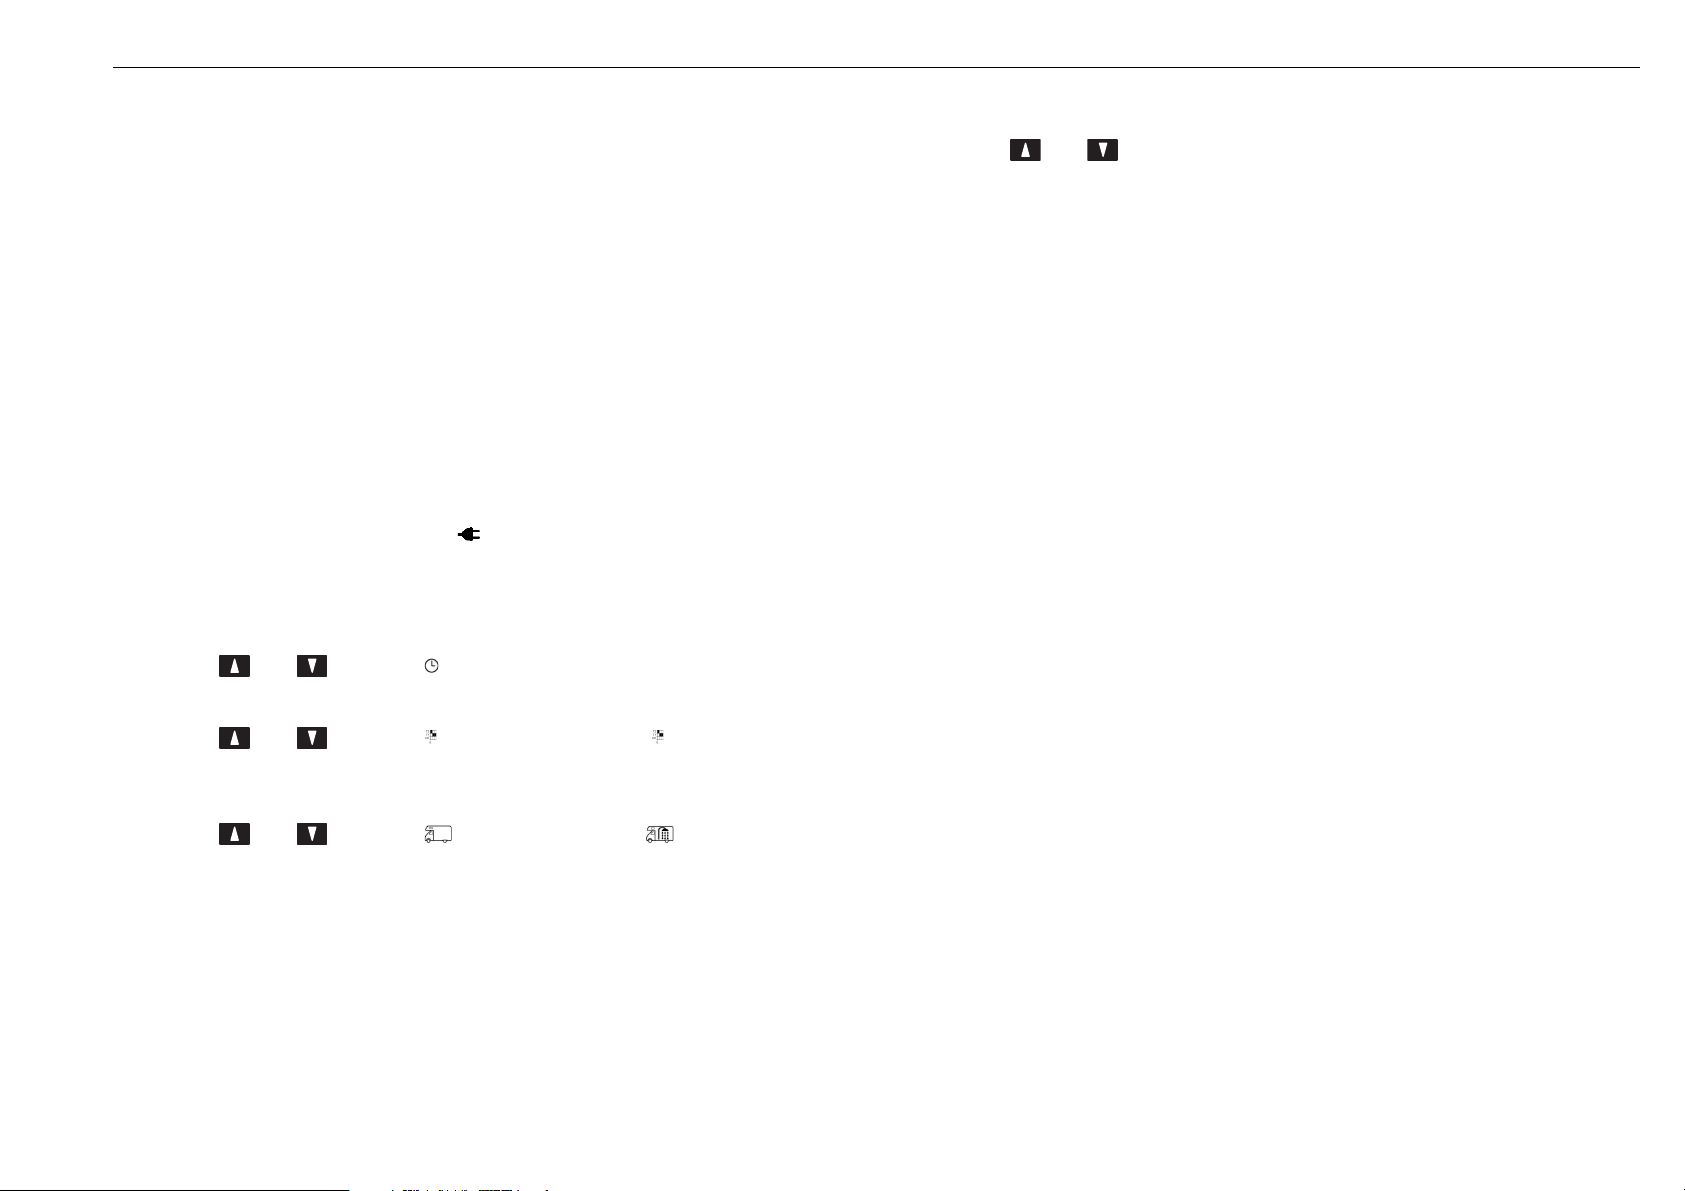
6Press and to select “Set Monday”, “Set Tuesday“, “Set
Wednesday“ etc..
7Press OK.
Operating InstructionsDual Top Evo 7 / 8
20
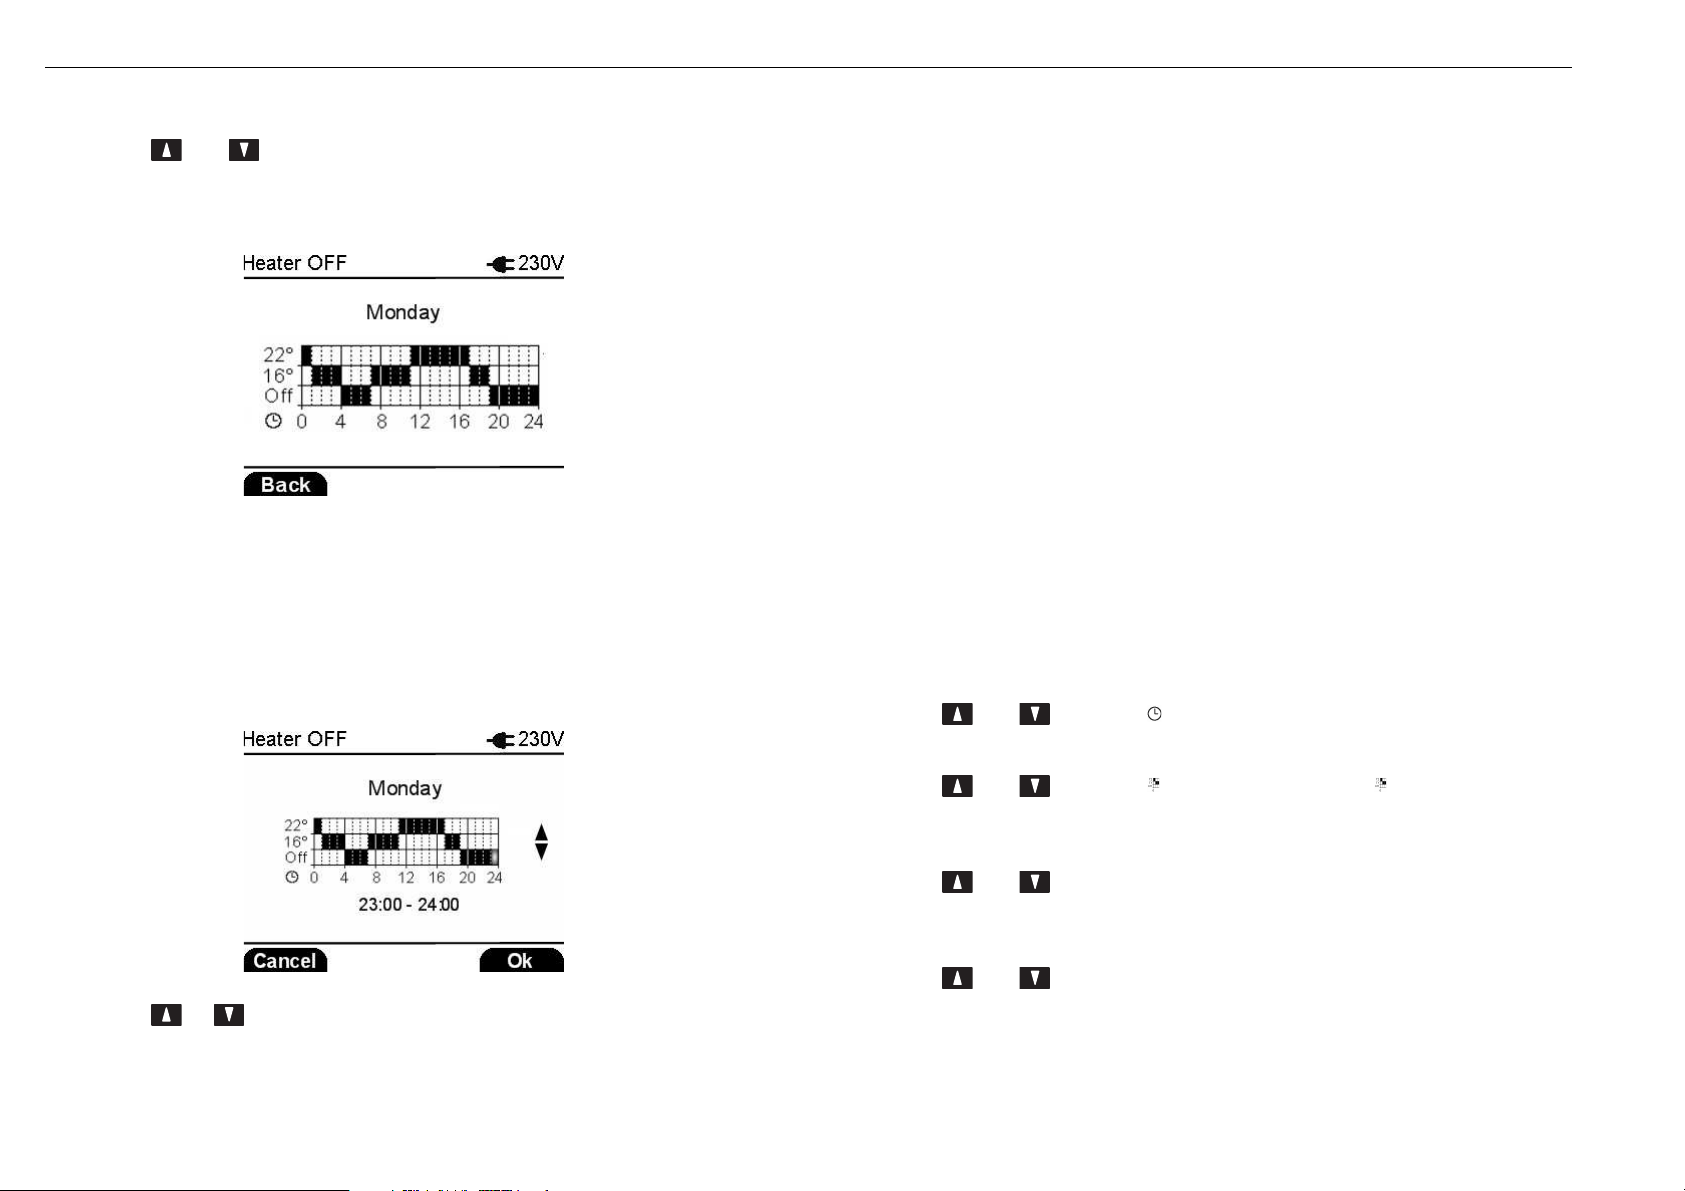
8Press and to:
–select “Show 24 h Program“.
Matrix with day, programmed hours and interior temperatures T1 and T2 ap-
pears.
Press BACK to return to main menu.
–or select “Modify 24 h Program“.
9Press OK.
10Selected day and hour appear on display.
Matrix with programmable hours and interior temperatures T1 and T2 appears.
Field of actual time and temperature blinks.
11Press or to adjust desired temperature for selected day and hour: OFF,
T1 or T2.
12Press OK.
13Repeat step 11 and 12 until all 24 hours are programmed.
(You will see the hour period displayed at the bottom of the screen.)
14“Programming 24 h successful” on display.
After 3 seconds, select another day as described in step6 and continue to
program remaining days.
It’s also possible to copy programmed values from one day to another. See Day
copying, step6.
When all days have been programmed, press BACK to return to main menu.
Day copying
Instead of programming each day individually, it’s also possible to copy programmed
values from one day to another.
After copying you can leave the values identical, but it’s also possible to make
adjustments (see Day setting, step6).
In case you copy days after setting temperatures T1 and T2 or programming and setting
a day, continue with step 6.
Make sure the device is switched on.
1Press MENU.
2Press and to select “Programming Timer”.
3Press OK.
4Press and to select “Timer Program 1” or “Timer Program 2”
(values T1 and T2 depend on program settings).
5Press OK.
6Press and to select “Set Monday”, “Set Tuesday“, “Set
Wednesday“ etc..
7Press OK.
8Press and to select “Copy Tuesday“, “Copy Wednesday“ etc.
9Press OK.
Dual Top Evo 7 / 8Operating Instructions
21
10“Copy of 24 h program successful” on display.
After 3 seconds, select another day as described in step6 and continue to
program remaining days.
When all days have been programmed, press BACK to return to main menu.
4.5.2Heating by timer
This paragraph describes how to select a program to heat the interior and to provide
hot water.
You can choose from 2 programs that define 7 days, 24 hours interior and water
heating.
To change the programs see paragraph 4.5.1: "Program setting".
If you want the electric heater to provide hot air or hot water, make sure you connect
the external power supply (230 V AC): “230 V” (10) on display.
Make sure the device is switched on.
1Press MENU.
2Press and to select “Heating by Timer”.
3Press OK.
4Press and to select “Timer Program 1” or “Timer Program 2”
(values T1 and T2 depend on program settings).
5Press OK.
6Press and to select “Heating Cabin” or “Heating Cabin+
Hot Water”.
7Press OK.
8Press and to select the desired heat source:
* Options “...W ~ 230 V” shown only when external 230V power supply is
connected.
9Press OK.
10“Selection completed” on display.
NOTE
When heater is already “ON”, text “Selection completed, press OK to change
operation mode” appears.
Press OK.
Dual Top Evo 7:
“Diesel powered”
“600 W ~ 230 V“ *
“1,200 W ~ 230 V“ *
Dual Top Evo 8:
“Diesel powered”
“1,000 W ~ 230 V“ *
“2,000 W ~ 230 V“ *
Operating InstructionsDual Top Evo 7 / 8
22
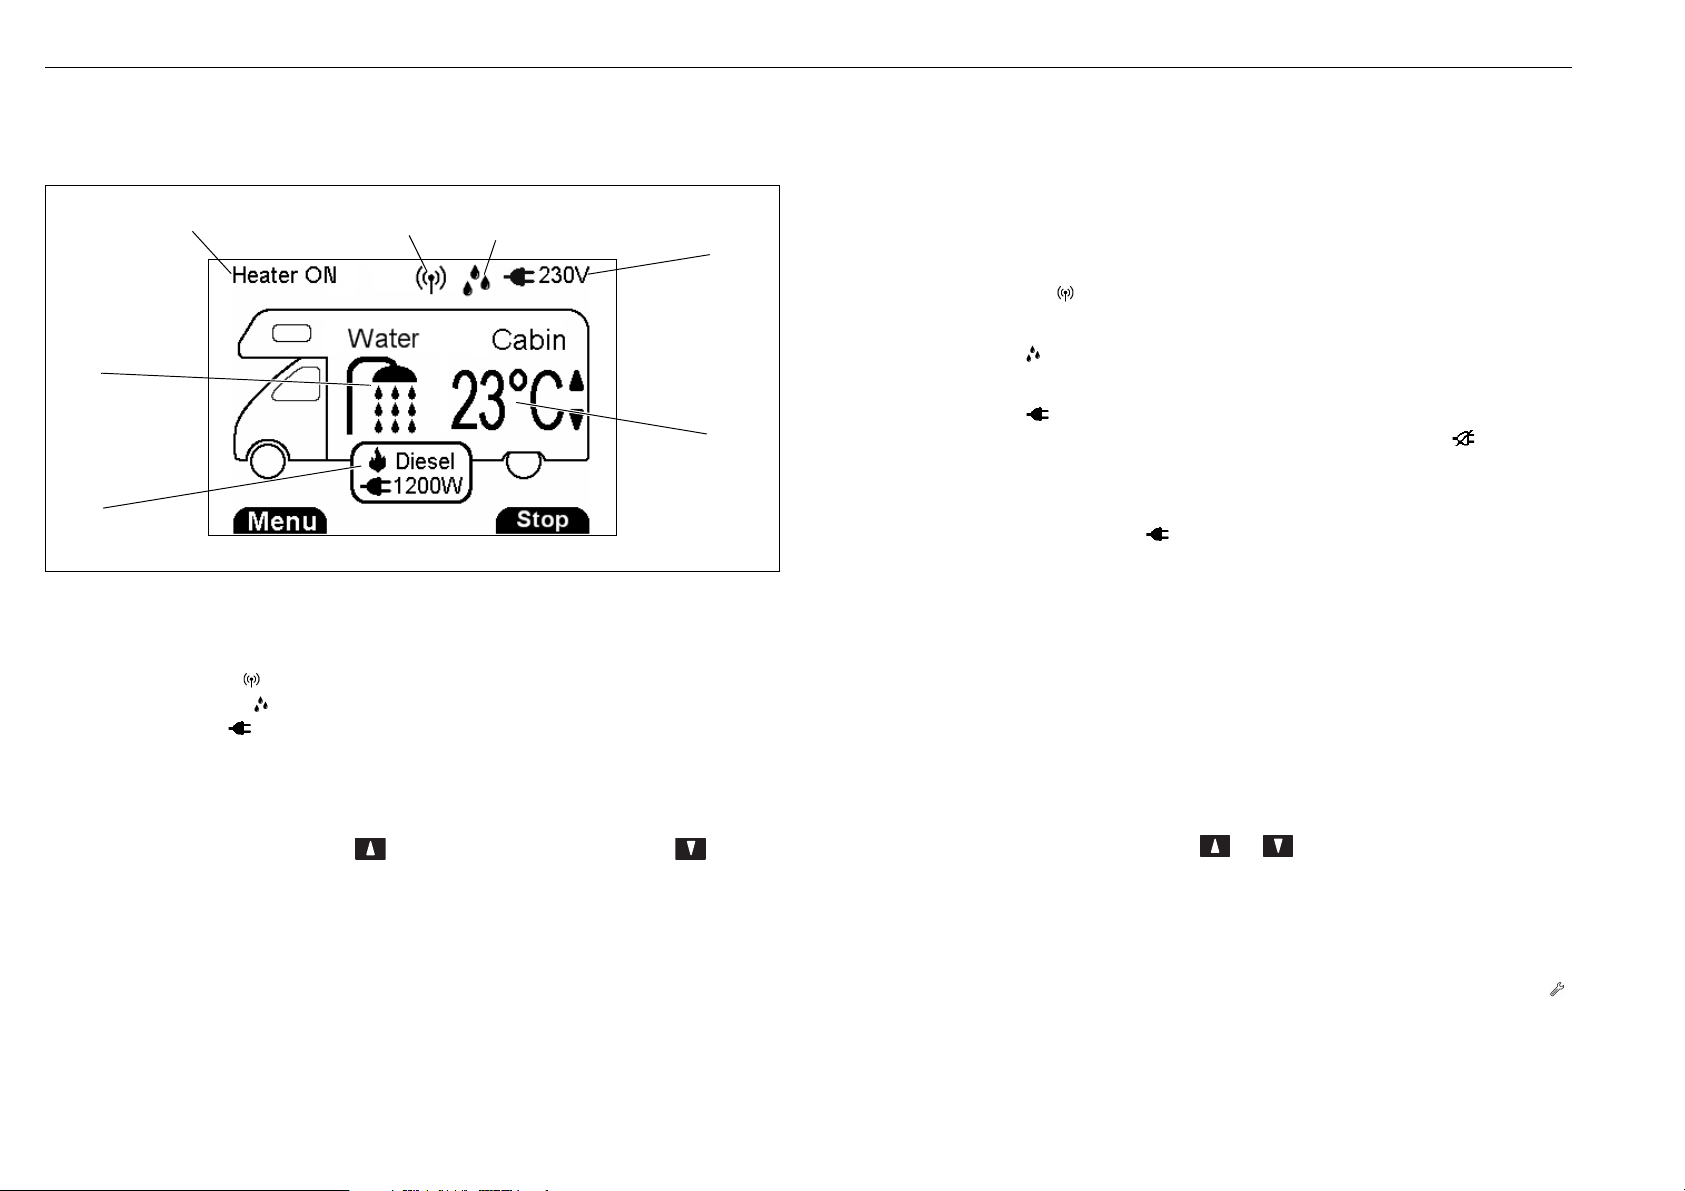
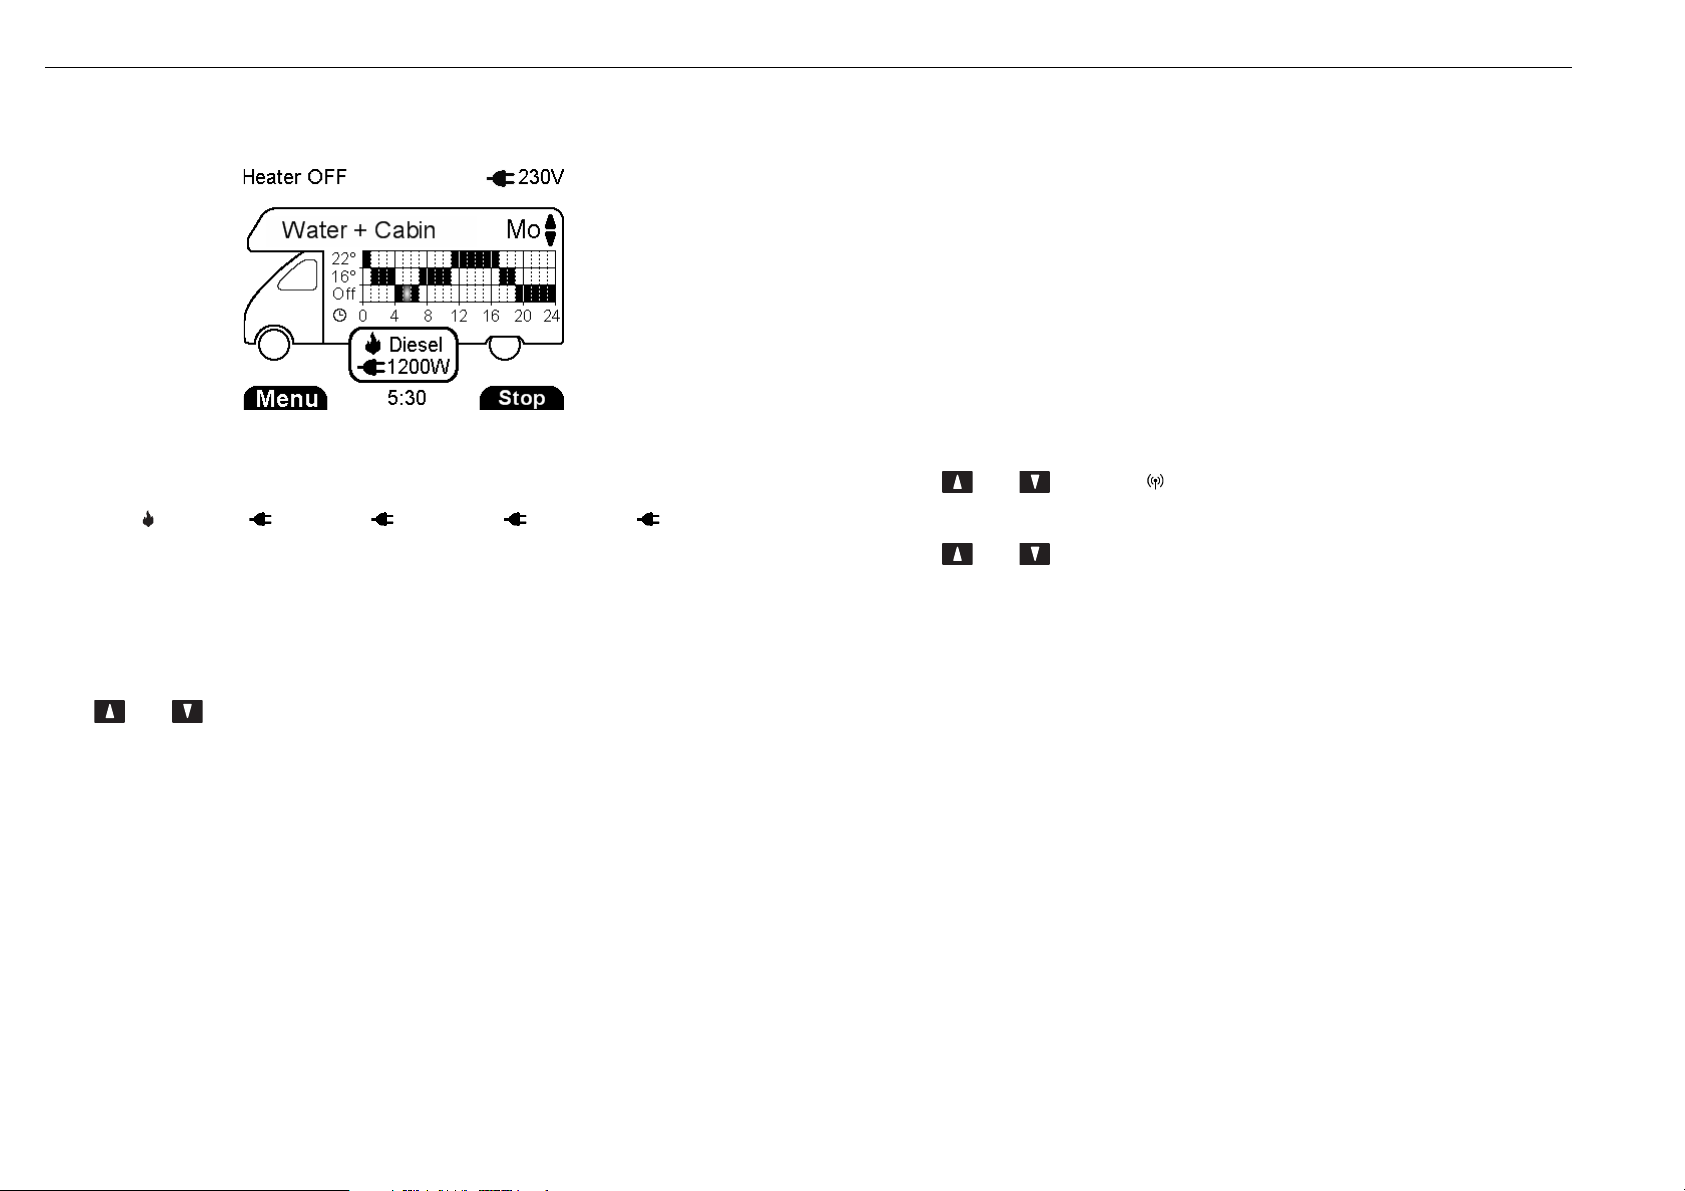
11After 3 seconds power indicator (6) lights green and display changes to:
–“Heater ON” or “Heater OFF”
–“Water” (if "Hot Water" selected)
–“Cabin”
–“diesel“, “600 W“, “1000 W“, “1200 W“, “2000 W“
(depending on programmed heat source).
–Day
–Time
–Matrix with programmed hours and interior temperatures.
Field of actual time and temperature blinks.
NOTE
Press and to view program settings of another day.
4.6Remote control
Heater can be operated by remote control devices: Webasto Telestart and Thermo Call.
These controls are optional.
Signal of remote control over-rules commands of control panel, as long as remote
control is enabled.
4.6.1Show actual mode
Make sure the device is switched on.
1Press MENU.
2Press and to select “ Setting ThermoCall/Telestart”.
3Press OK.
4Press and to select “Show actual Mode”.
5Press OK.
6On display appears following message, depending on disabled or enabled
remote control function:
–Disabled:“ThermoCall/Telestart disabled”
–Enabled:“ThermoCall/Telestart enabled Receiving a signal from
ThermoCall/Telestart system heats up cabin to ... °C and
provides hot water”.
NOTE
... °C or ... °F: value and unit depend on setting and set interior temperature.
NOTE
“and provides hot water” only appears when function “Heating Cabin + Hot Water” is
selected.
7Press BACK to return to main menu.
Dual Top Evo 7 / 8Operating Instructions
23
4.6.2Enabling and setting Telestart and Thermo Call
If you want the electric heater to provide hot air or hot water, make sure you connect
the external power supply (230 V AC): “230 V” (10) on display.
Make sure the device is switched on.
1Press MENU.
2Press and to select “Setting ThermoCall/Telestart”.
3Press OK.
4Press and to select “ThermoCall/Telestart enabling and setting”.
NOTE
If text “ThermoCall/Telestart not connected Visit www.webasto-dualtop.com”
appears, remote control device is not connected.
Press BACK to return to main menu.
5Press OK.
6Press and to select “Heating Cabin” or “Heating Cabin+ Hot
Water”.
7Press OK.
8Press and to select the desired heat source:
* Options “...W ~ 230 V” shown only when external 230V power supply is
connected.
9Press OK.
10Press and to set the desired interior temperature.
11Press OK.
12“Enabling ThermoCall/Telestart successful” on display.
After 3 seconds display changes to status of appliance at actual time.
““ (8) on display.
4.6.3Disabling Telestart and Thermo Call
Make sure the device is switched on.
1Press MENU.
2Press and to select “ Setting ThermoCall/Telestart”.
3Press OK.
4Press and to select “ThermoCall/Telestart disabling”.
5Press OK.
6“Disabling ThermoCall/Telestart” on display.
After 3 seconds display changes to status of appliance at actual time.
““ (8) disappears from display.
Dual Top Evo 7:
“Diesel powered”
“600 W ~ 230 V“ *
“1,200 W ~ 230 V“ *
Dual Top Evo 8:
“Diesel powered”
“1,000 W ~ 230 V“ *
“2,000 W ~ 230 V“ *
Operating InstructionsDual Top Evo 7 / 8
24
4.6.4Start and stop heater operation using Telestart
To do this, Telestart must be available and activated. This can be recognised from an
indicated symbol ““ (8).
Starting heater operation:
1Press ON button of Telestart.
LED of Telestart lights green, showing that signal was transferred successfully.
2The heater starts running in the (in paragraph 4.6.2: "Enabling and setting
Telestart and Thermo Call") selected mode, independent from the actual heater
status (heater off, heater on, drainage, ...).
Stopping heating operation:
1Press OFF button of Telestart.
LED of Telestart lights red, showing that signal was transferred successfully.
2The heater stops any heating operation and switches off, independent from the
actual heater status.
Exception: running drainage will be continued.
NOTE
If LED of Telestart blinks red after pressing ON or OFF button of Telestart, the signal was
not transferred successfully.
4.7Frost
There are several features that protect the water supply system against frost.
•Drain water contents manually when there is risk of frost and when storing the
vehicle for a longer period.
See paragraph4.7.1: "Draining the boiler manually".
•The boiler is drained automatically in case you forgot to drain manually.
See paragraph4.7.3: "Draining the boiler automatically".
•In case you don’t want to drain the water supply system and you don’t heat the
interior of the vehicle, you can select the frost protection mode.
See paragraph4.7.4: "Frost protection mode".
4.7.1Draining the boiler manually
Drain water contents manually when there is risk of frost and when storing the vehicle
for a longer period.
1Interrupt power for vehicle system water pump (main switch or pump switch,
depending on instructions of the vehicle manufacturer).
2Open hot water taps in kitchen, bathroom, shower, etc. (set pre-selecting mixing
taps or single-lever valves to "hot").
3Make sure the device is switched on.
4Press MENU.
5Press and to select “ Draining Boiler”.
6Press OK.
7“Press OK to confirm boiler drainage” on display.
8Press OK.
9“Draining... Press MENU to select heating operation”and“Press STOP
to abort drainage” on display.
“” (9) on display.
Dual Top Evo 7 / 8Operating Instructions
25
NOTE
Any kind of heater operation will be stopped when manually starting boiler
drainage.
NOTE
To stop drainage see paragraph 4.7.2: "How to stop draining the boiler".
The boiler content is now discharged to the outside through the electrical safety/
drainage valve.
Place a container beneath the outlet to check whether the water in the boiler has
completely drained away (approx. 10 litres!).
After approx. 90 min, text “Drainage completed” appears.
10Press OK to end manual drainage.
NOTE
Any kind of water from the vehicle has to be discharged at a proper disposal facility.
NOTE
Be aware of drainage behaviour when starting a heating operation (by menu guidance)
without aborting or completing drainage procedure:
a)Drainage aborted when one of the following modes is selected:
- Summer mode (hot water only)
- Winter mode (heating with hot water production)
- Frost protection mode;
b)Drainage continued in case of
- Winter mode (heating without hot water production).
NOTE
Avoid the formation of micro-organisms in the lines and in the boiler during storage and
make sure that the water supply system is completely drained. To do this, open all water
valves, connect an air pressure of approx.2bar to the hot water line and leave it
connected until the residual water is completely drained off.
4.7.2How to stop draining the boiler
Boiler drainage can be stopped, if circumstances require this.
Make sure the device is switched on.
1Press MENU.
2Press and to select “ Draining Boiler”.
3Press OK.
4“Press OK to confirm boiler drainage” on display.
5Press OK.
6“Drainage... Press MENU to select heating operation”and“Press STOP
to abort drainage” appears on the display.
“” (9) on display.
7Press STOP.
“Drainage aborted” on display.
8Press OK.
Operating InstructionsDual Top Evo 7 / 8
26
4.7.3Draining the boiler automatically
The electrical safety/drainage valve is opened electrically.
If the water temperature at the electrical safety/drainage valve is less than 6°C, the
boiler water contents may discharge automatically.
This function is active when:
•the appliance is switched "OFF";
•in winter mode (heating without hot water production) during a period when there
is no heating action in the heater (e.g.: selected interior temperature is reached, low
outside temperature);
•if battery power is too low;
•there is a failure!
NOTE
Note that it only works when a 12 V power supply is available!
During drainage, “” (9) appears on display.
After approx. 90min, the electrical safety/drainage valve will be closed again.
The drainage outlet of the electrical safety/drainage valve must always be kept clear
(free from dirt, ice, leaves etc.)!
To avoid water loss and to protect the heater and boiler against frost, select the frost
protection mode (see paragraph4.7.4: "Frost protection mode").
NOTE
Automatic drainage can not be stopped.
However, when you switch mode to manual drainage, it can be aborted.
(See paragraph4.7.2: "How to stop draining the boiler").
NOTE
Draining the boiler as well as the frost protection mode protect the heater and boiler
against frost. Not all water lines in the vehicle can be protected against freezing due to
installation variations.
When storing the vehicle, either choose a place that is well protected against low
temperatures or drain the whole water system, including all lines and tubes (e.g. with
air pressure, see note in paragraph 4.7.1: "Draining the boiler manually").
There shall be no warranty claims for damage caused by frost!
4.7.4Frost protection mode
This mode is a safety feature for the heater only. It does not prevent the water circuits
inside and outside the vehicle from freezing.
Store the vehicle at a place that is well protected against frost or drain water contents
if there is a risk of frost!
Make sure the device is switched on.
1Press MENU.
2Press and to select “Frost Protection”.
3Press OK.
4Press and to select the desired heat source:
* Options “...W ~ 230 V” shown only when external 230V power supply is
connected.
5Press OK.
6“Selection completed” on display.
Dual Top Evo 7:
“Diesel powered”
“600 W ~ 230 V“ *
“1,200 W ~ 230 V“ *
Dual Top Evo 8:
“Diesel powered”
“1,000 W ~ 230 V“ *
“2,000 W ~ 230 V“ *
Dual Top Evo 7 / 8Operating Instructions
27
NOTE
When heater is already “ON”, text “Selection completed, press OK to
change operation mode” appears.
Press OK.
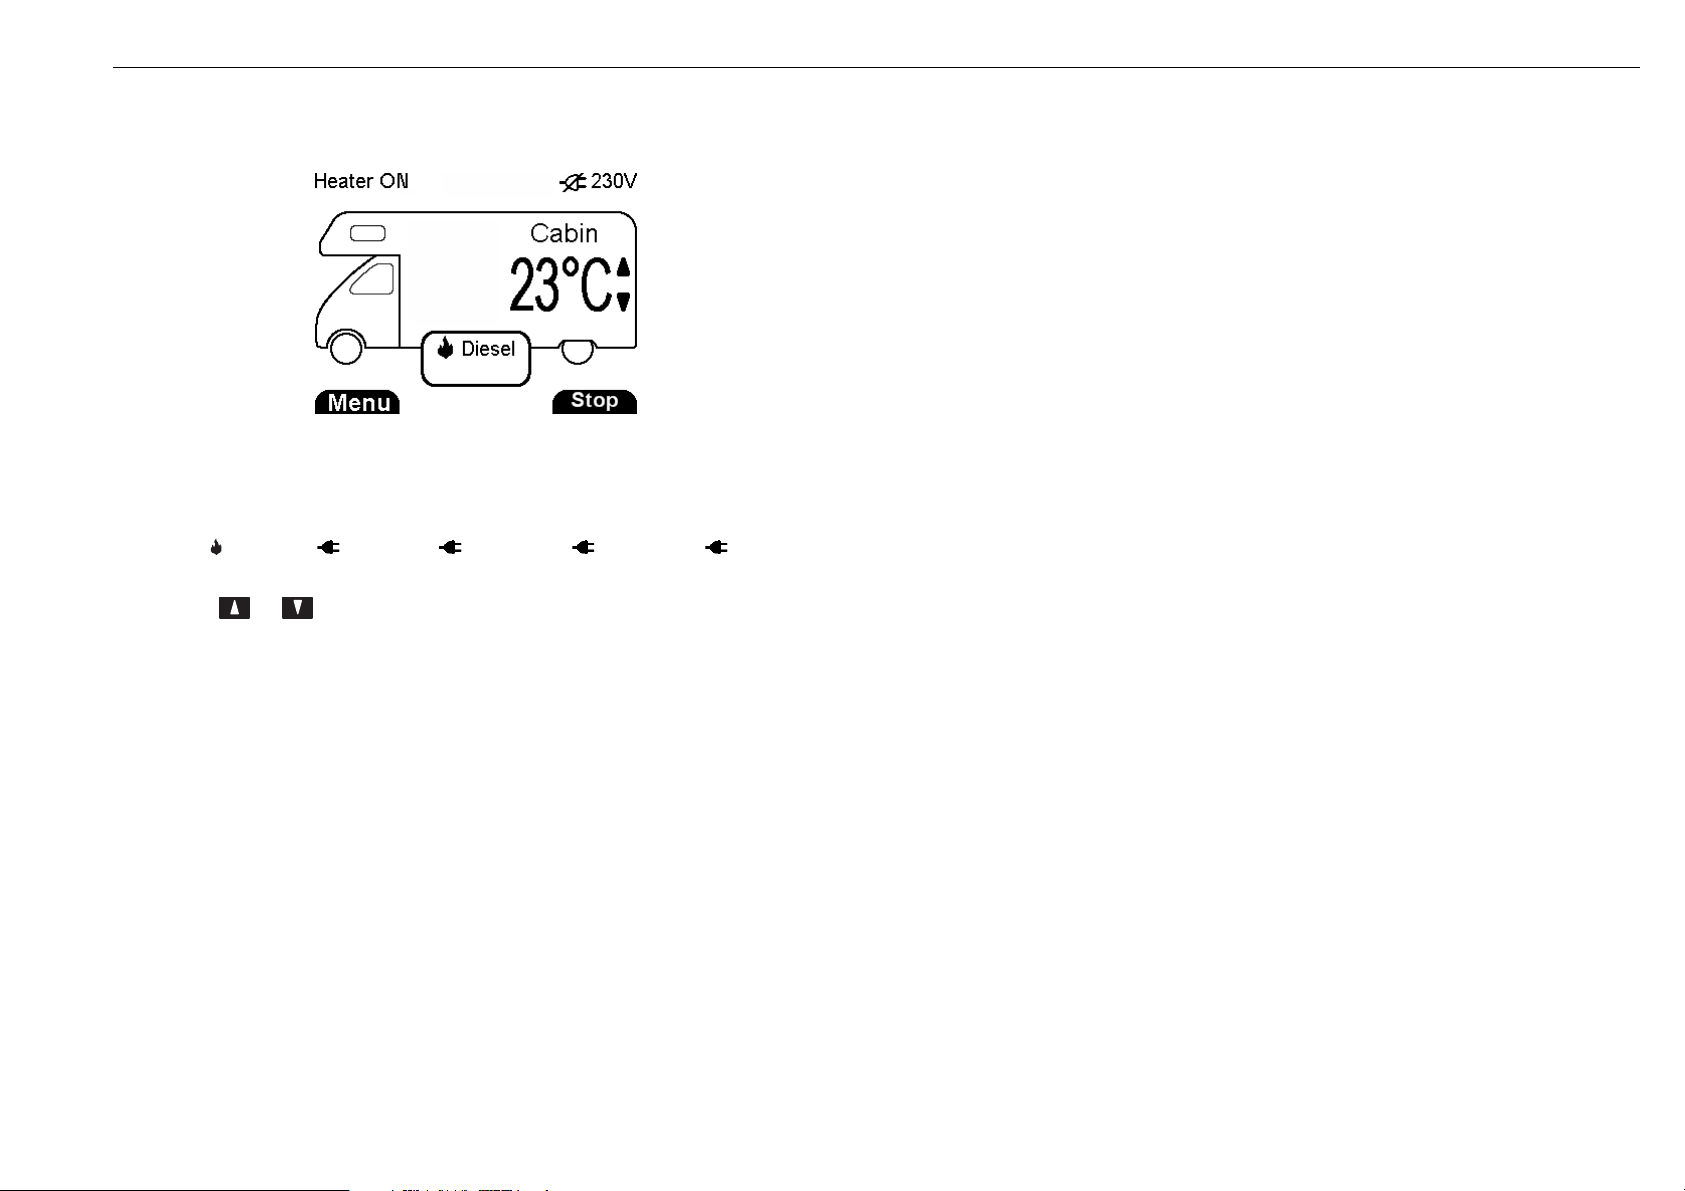
7After 3 seconds power indicator (6) lights green and display changes to:
–“Heater ON”
–“Frost Protection Boiler”
–“diesel“, “600 W“, “1000 W“, “1200 W“, “2000 W“
(depending on selected heat source).
The heater functions as in the winter mode, heating with hot water production, but
with lower values for air and water temperatures.
NOTE
When the frost protection mode is selected in dependence on the selected heat source,
diesel and electrical power are used. Therefore, it should be ensured that the battery is
charged and there is enough diesel in the tank when "Diesel mode" is selected. Check
this frequently.
Note:
When ambient temperatures below -20°C are expected, select heat source “Diesel
powered” for 100% frost protection of the system.
NOTE
Make sure that the boiler is filled with water when choosing frost protection mode.
NOTE
The frost protection mode enables the user to park the vehicle for a short time without
being observed and without having to worry about frost and frost damage.
During winter storage or when parking the unused vehicle for a longer time, the entire
water system should be drained and the heater disconnected from the battery to avoid
unnecessary battery discharging or possible frost damage.
Filling the boilerDual Top Evo 7 / 8
28
5Filling the boiler
Fill the vehicle fresh water tank with your own hose, which is kept and stored clean.
Before filling the tank rinse the hose thoroughly (approx. 30 seconds).
WARNING
Always fill the tank with drinking water only and prevent dirt from getting into the
entire water supply system.
1Fill the boiler with water at an ambient temperature of at least 6°C, or select
–summer mode 40°C or 70°C,
see paragraph4.3.5: "Summer mode (hot water only)", or
–winter mode (heating with hot water production),
see paragraph4.3.7: "Winter mode (heating with hot water production)",
to make sure the electrical safety/drainage valve does not open!
2Make sure that the boiler is filled with water.
3Open hot water taps in kitchen, bathroom, shower, etc. (set pre-selecting mixing
taps or single-lever valves to "hot"). Leave water taps open until water flows out
of taps. The air is pressed out of the boiler in the process and it fills with water.
If just the cold water supply system is being operated, without using the boiler, the latter
also fills up with water. In order to avoid damage by frost, the water contents must be
drained by operating the electrical safety/drainage valve (see paragraph4.7.1:
"Draining the boiler manually"), also when the boiler has not been used.
As an alternative, two shut-off valves, resistant to hot water, can be fitted in front of
the cold and hot water connection.
When connecting to a central water supply (rural or city mains) or if using a more
powerful water pump, a pressure reduction valve must always be installed to prevent a
pressure above 2.5 bar developing in the boiler.
NOTE
Due to pressure differences in the system which result during filling or operation, small
water quantities (approximately 30ml/24 h) can be drained out of the boiler, however
there is no need to be concerned about complete draining.
6Fault Message Output
When a fault occurs, power indicator/fault indicator (6) blinks RED.
Next to that, a fault message is shown on the display of the control panel.
The meaning of the messages is shown in the table in chapter8: "Troubleshooting".
Depending on the type of fault, you may need to visit a Webasto Service Centre.
Dual Top Evo 7 / 8Maintenance
29
7Maintenance
Correct maintenance of a Webasto Dual Top Evo 7 / 8 integrated heater is important to
ensure years of trouble free safe use and enjoyment.
We recommend taking the vehicle to your authorised Webasto dealer for periodic
service and
inspection.
It is very important that your dealer carries out any repair or maintenance, which is not
described in this manual. Consult your dealer for help in determining your maintenance
needs.
How much of your vehicle's service and maintenance you can do depends on your skill
and experience, and whether you have the special tools required. If you want to learn
how to work on your heater ask your dealer for advice.
WARNING
Many heater service and repair tasks require special knowledge and tools.
Improper adjustment or service may result in damage to the heater or in an
accident, which can cause serious injury.
•For best performance, your authorised Webasto dealer must inspect and service your
heating system at least every 2 years, independent of the usage.
•DO NOT use high-pressure washer or compressed air to clean the heater. This can
force dirt into areas that may cause damage.
•The heater must be switched "OFF" before cleaning.
•Always disconnect 230V power supply before any cleaning, maintenance or repair.
•Drain the water system when there is risk of frost or when the vehicle is stored for a
longer period.
•Use wine vinegar for descaling the boiler, this being introduced into the appliance via
the water supply.
See paragraph7.2: "Descaling".
•Regularly check all components of the water supply system.
7.1Disinfection
•In case no water has been taken from the water supply system for a period of a week
or more, drain the whole water system and rinse it thoroughly before refilling it.
•To avoid micro-organisms, water should not stay longer than a fortnight in the boiler.
Disinfect the water supply system if water was more than a fortnight in the boiler.
•To prevent any harm, operate the heater full power every four weeks (diesel powered
operation, not the electric heater):
–for at least 20minutes continuously, winter mode, heating cabin without
hot water production.
This prevents mechanical parts from seizing.
–followed by operation for at least 30minutes continuously, “Summer mode
70°C”, hot water production only.
Water supply systems below 60°C may breed micro-organisms.
•Clean and disinfect the water supply system immediately before rental or lending of
the vehicle.
•Clean and disinfect the water supply system at least one time per year.
NOTE
Before winter storage, it is advisable to completely drain the water supply system with
compressed air of2bar. To do this, open all taps, connect the compressed air to the hot
water line and wait until the water has completely drained off.
•With suspicion on contamination with pathogens the water supply system has to be
disinfected.
•Clean and disinfect the water supply system according to all local regulations (e.g.
DVGWW 291).
MaintenanceDual Top Evo 7 / 8
30
For disinfection use a solution of Sodium Hypochlorite (NaOCl), dilution5 %,
30to40ºC (e.g. Certisil
®
, Puriclean).
Other products can harm your health and/or the Dual Top Evo.
Carefully follow all instructions of the NaOCl supplier.
Carefully follow all instructions of the vehicle manufacturer.
1Drain all water contents. See paragraph4.7.1: "Draining the boiler manually".
2Close all water taps.
3Fill entire water supply system with NaOCl.
4Select “Summer mode 40°C” to make sure the electrical safety/drainage valve
does not open.
5Make sure that the boiler is filled with NaOCl.
6Open water taps in kitchen, bathroom, shower, etc. (set pre-selecting mixing taps
or single-lever valves to "hot").
Leave the taps open until the air has been completely forced out of the Dual Top
Evo, it is filled with NaOCl and NaOCl flows out of the taps. Then close the taps.
Open the taps one by one, not all at the same time.
7Leave it on for 1 to 2 hours.
8Drain all NaOCl contents.
9Repeat the described procedure (step 1 to 8) with drinking water 1 or 2 times.
No need to leave it on for 1 to 2 hours.
10Drain all water contents.
11Fill entire water supply system with drinking water. See chapter5: "Filling the
boiler".
7.2Descaling
Depending on the hardness of the water, used for heating in the Dual Top Evo, scaling
and lime deposits can form in the coolant hoses and the boiler. In order not to restrict
the water quality and the heater efficiency, it is advisable to conduct descaling regularly
depending on the water quality.
Use common household products, such as "Kettle Klear" or a wine vinegar-water
mixture with a ratio of 1:2 for descaling.
Other products can harm your health and/or the Dual Top Evo.
1Drain all water contents. See paragraph4.7.1: "Draining the boiler manually".
2Close all water taps.
3Fill the entire water supply system with wine vinegar-water mixture.
4Select “Summer mode 40°C” to make sure the electrical safety/drainage valve
does not open.
5Make sure that the boiler contains the mixture.
6Open water taps in kitchen, bathroom, shower, etc. (set pre-selecting mixing taps
or single-lever valves to "hot"). Leave the water taps open until the entire air has
been pressed out of the Dual Top Evo, they are filled with the wine vinegar-water
mixture and it flows out of the water taps. Then close the taps.
Open the taps one by one, not all at the same time.
7Leave it on for 1 to 2 hours and wait for reaction phase.
8Check whether the scale deposits have completely dissolved in the vinegar water.
If not, allow the heater to run for another 30minutes and then completely drain
off the wine vinegar-water mixture.
9Flush the water supply system with drinking water until it no longer smells like
vinegar.
10Then fill the boiler with fresh drinking water again. See chapter5: "Filling the
boiler".
Dual Top Evo 7 / 8Troubleshooting
31
8Troubleshooting
If a fault occurs, first check the fuses and plug connections to ensure that they are in
perfect condition and connected correctly.
If the action described below does not rectify the fault, have the heater checked by
Webasto-trained personnel.
To reset the fault, confirm message by pressing OK (if provided) or switch off the Dual
Top Evo for at least 5 seconds.
If serious malfunctions such as overheating or failure to start reoccur, the heater is
locked and can be put back into service by deleting the failures.
Do this by disconnecting the power supply:
1Switch off the Dual Top Evo by pressing the On/Off button .
2Ensure that the heater/fan is not running (to be established by the sound of the
heater operating).
If necessary wait until fans stop running.
3Remove the 15A fuse (red cable) for at least 5seconds and then install it again.
Now the heater is reset.
WARNING
In case you are a person not trained by Webasto for Dual Top Evo 7 / 8, all repair tasks
are done at your own risk. To avoid injuries and damage, the device must be switched
off, the 230V power supply interrupted and the battery disconnected before working
on the Dual Top Evo 7 / 8.
WARNING
Within the EU, maintenance work on electrical systems with a voltage of 230V may
only be carried out by appropriately qualified experts. Failure to observe these
regulations can result in serious injuries.
Residual-current device
In the event of continued ‘tripping’ of the 230V RCD (Residual Current Device) when
using one of the 230V modes, please contact an authorised Webasto Service Centre.
WARNING
If black smoke is being emitted from the heater exhaust, the combustion air system and/
or the exhaust system may be blocked. Check combustion air and exhaust system for
blockages.
A blocked exhaust system or combustion air system can cause unsafe status of the
heater!
TroubleshootingDual Top Evo 7 / 8
32
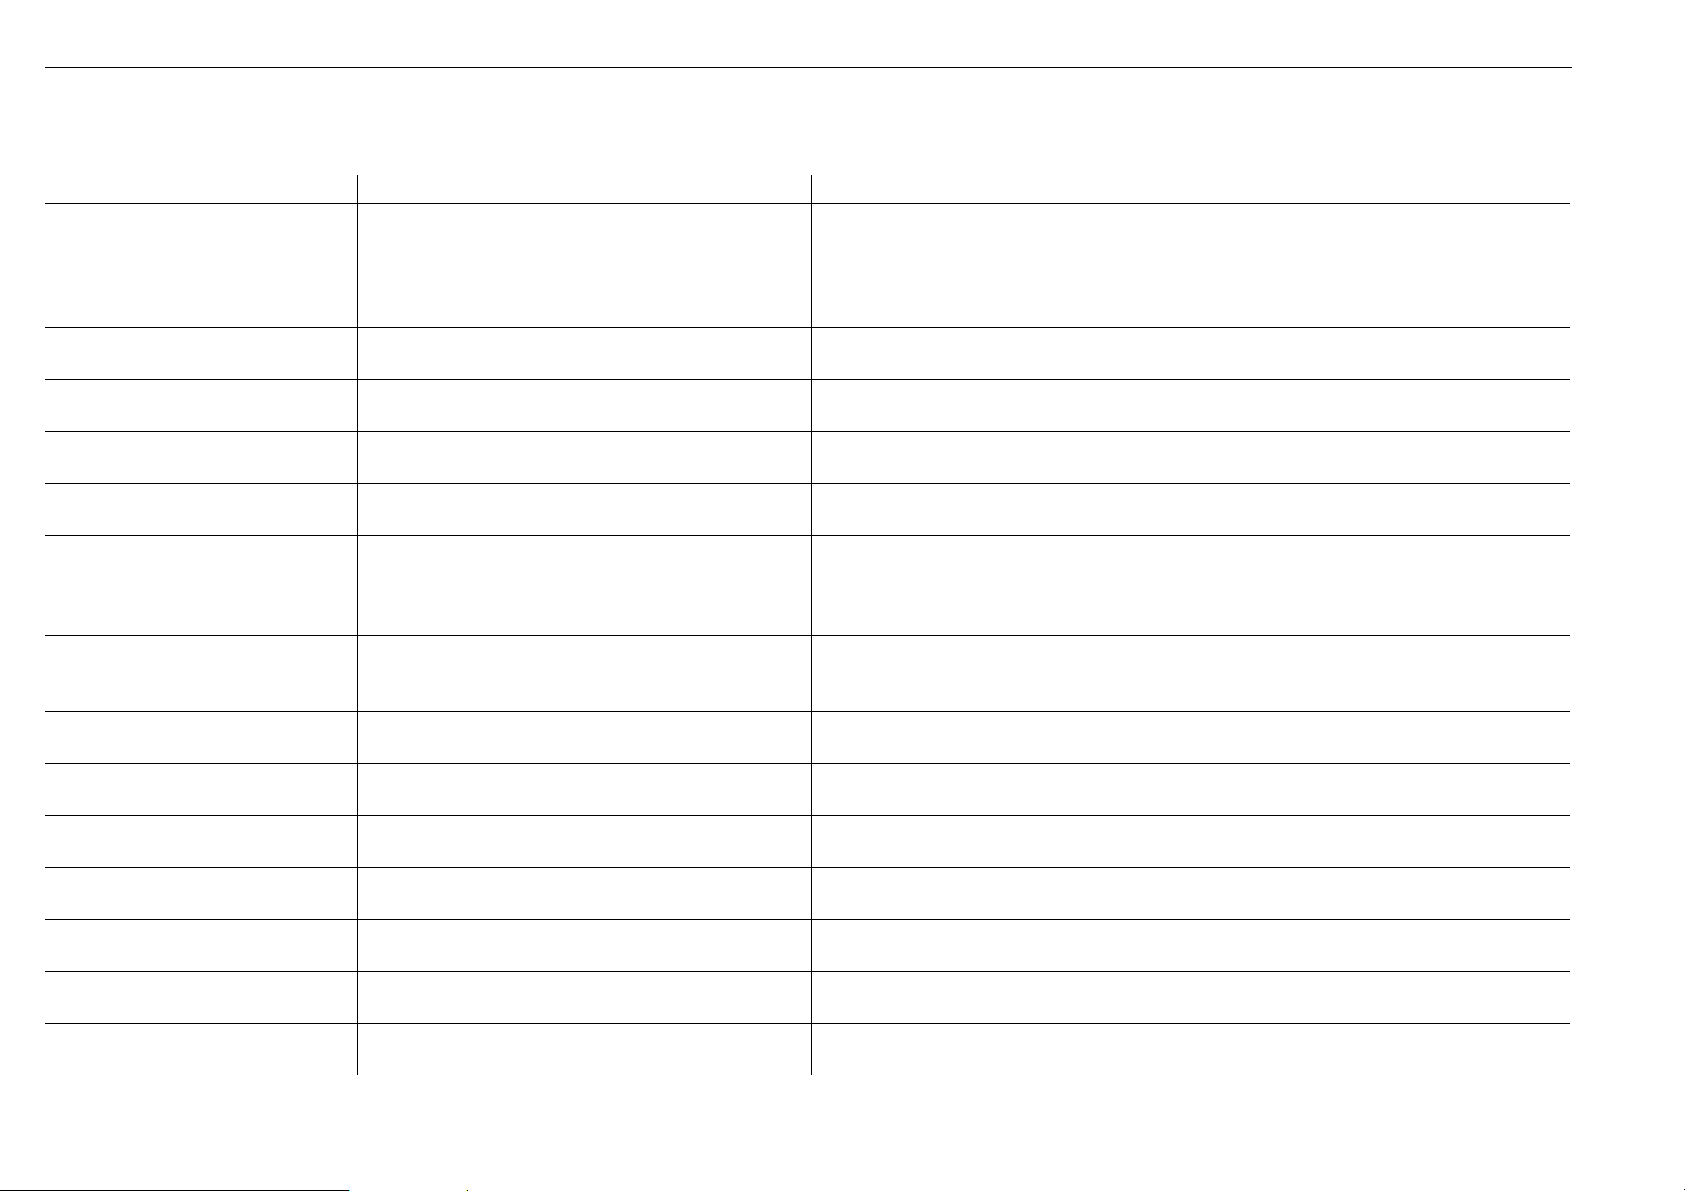
Fault message output on control panel
Message Meaning Remedy
Message 01
No data connection
No communication between control panel and
heater, or control panel error
First, remove fuses 15 A (red cable) and 5 A. Then put in fuse 15A (red cable), followed
by fuse 5 A.
Check connections of control panel.
Check fuse 15 A (red cable).
Contact a Webasto Service Centre.
Message 02
No start of combustion
No start (after 2 attempts to start) Check fuel supply (enough fuel, at least 8 ltr.), reset heater (by pressing OK or switching
off for at least 30 sec.)
Message 03
Combustion interrupted
Flame failure
Restart not successful
See message 02.
Message 04
High battery voltage
Operation voltage is above permitted value Reset heater (by pressing OK or switching off for at least 5 sec.)
Message 05
Low battery voltage
Operation voltage is below permitted value Charge battery or connect to main power supply (230V), reset heater (by pressing OK or
switching off for at least 5 sec.)
Message 06
Fuel pump disconnected or system
overheated
Fuel pump disconnection/one of the three
overheating switches detects too high temperature
OR relay box, cable or connection relay box is
defective
Check fuel pump cable and connectors, check for overheating (see messages 10, 11, 12,
13 and 14), reset heater (by pressing OK or switching off for at least 5 sec.)
Message 07
Fuel pump short circuit
Fuel pump short circuit to ground
OR relay box, cable or connection relay box is
defective
Check fuel pump cable and connectors.
Message 08
Failure hot air fan
Hot air motor fault: disconnection/short circuit/fan
speed out of range/fan blocked
Ensure that hot air fan can rotate freely, remove possible blocking objects, reset heater (by
pressing OK or switching off for at least 5 sec.)
Message 09
Failure fan amplifier
No communication between amplifier of hot air fan
and heater control unit
Contact a Webasto Service Centre.
Message 10
High temperature sanitary water
Overheating water temperature sensor Check water level, reset heater (by pressing OK or switching off for at least 5 sec.) or select
winter mode, heating without hot water production
Message 11
High temperature sanitary water
Exceeding gradient water temperature sensor Check water level, reset heater (by pressing OK or switching off for at least 5 sec.) or select
winter mode, heating without hot water production
Message 12
High temperature heating air
Overheating hot air temperature sensor Ensure that hot air can flow freely, air intake and outlets are not blocked. Reset heater (by
pressing OK or switching off for at least 5 sec.)
Message 13
High temperature heating air
Exceeding gradient hot air temperature sensor Ensure that hot air can flow freely, air intake and outlets are not blocked. Reset heater (by
pressing OK or switching off for at least 5 sec.)
Message 14
Failure cooling air ventilation
Overheating of heaters' control unit Ensure that cooling air can flow freely,
reset heater (by pressing OK or switching off for at least 5 sec.)
Dual Top Evo 7 / 8Troubleshooting
33
Message 15
Failure combustion air motor
Combustion air motor interrupted Ensure that cooling fan can freely rotate, remove possible blocking objects.
Check fuse 15 A (red cable).
Message 16
Failure combustion air motor
Combustion air motor fault:
disconnection/short circuit/overload/blocked
See message 15.
Message 17
Failure control unit
Control unit (heater) fault/heater locked Put heater back into service (see above this table) and restart heater.
Contact a Webasto Service Centre.
Message 18
Failure cabin temperature sensor
Interior temperature sensor
disconnection/short circuit
Check routing of cable, avoid that it is pinched or crushed, check the connector behind
the control panel.
Reset heater (by pressing OK or switching off for at least 5 sec.)
Message 19 n/a n/a
Message 20
Failure heating air temperature
sensor
Hot air temperature sensor disconnection Reset heater (by pressing OK or switching off for at least 5 sec.)
Contact a Webasto Service Centre.
Message 21
Failure heating air temperature
sensor
Hot air temperature sensor short circuit See message 20.
Message 22
Failure sanitary water temperature
sensor
Water temperature sensor disconnection See message 20.
Message 23
Failure sanitary water temperature
sensor
Water temperature sensor short circuit See message 20.
Message 24
Failure glow plug
Glow plug/Flame monitor disconnection See message 20.
Message 25
Failure glow plug
Glow plug/Flame monitor short circuit See message 20.
Message 26
Failure flame detection
Premature flame detection See message 20.
Message 27
Failure relay box
Short circuit of 230 V indication signal from relay box
to heater
Contact a Webasto Service Centre.
Message 28
Failure drain valve
Electrical safety/drainage valve disconnection See message 20.
Message 29
Failure drain valve
Electrical safety/drainage valve short circuit See message 20.
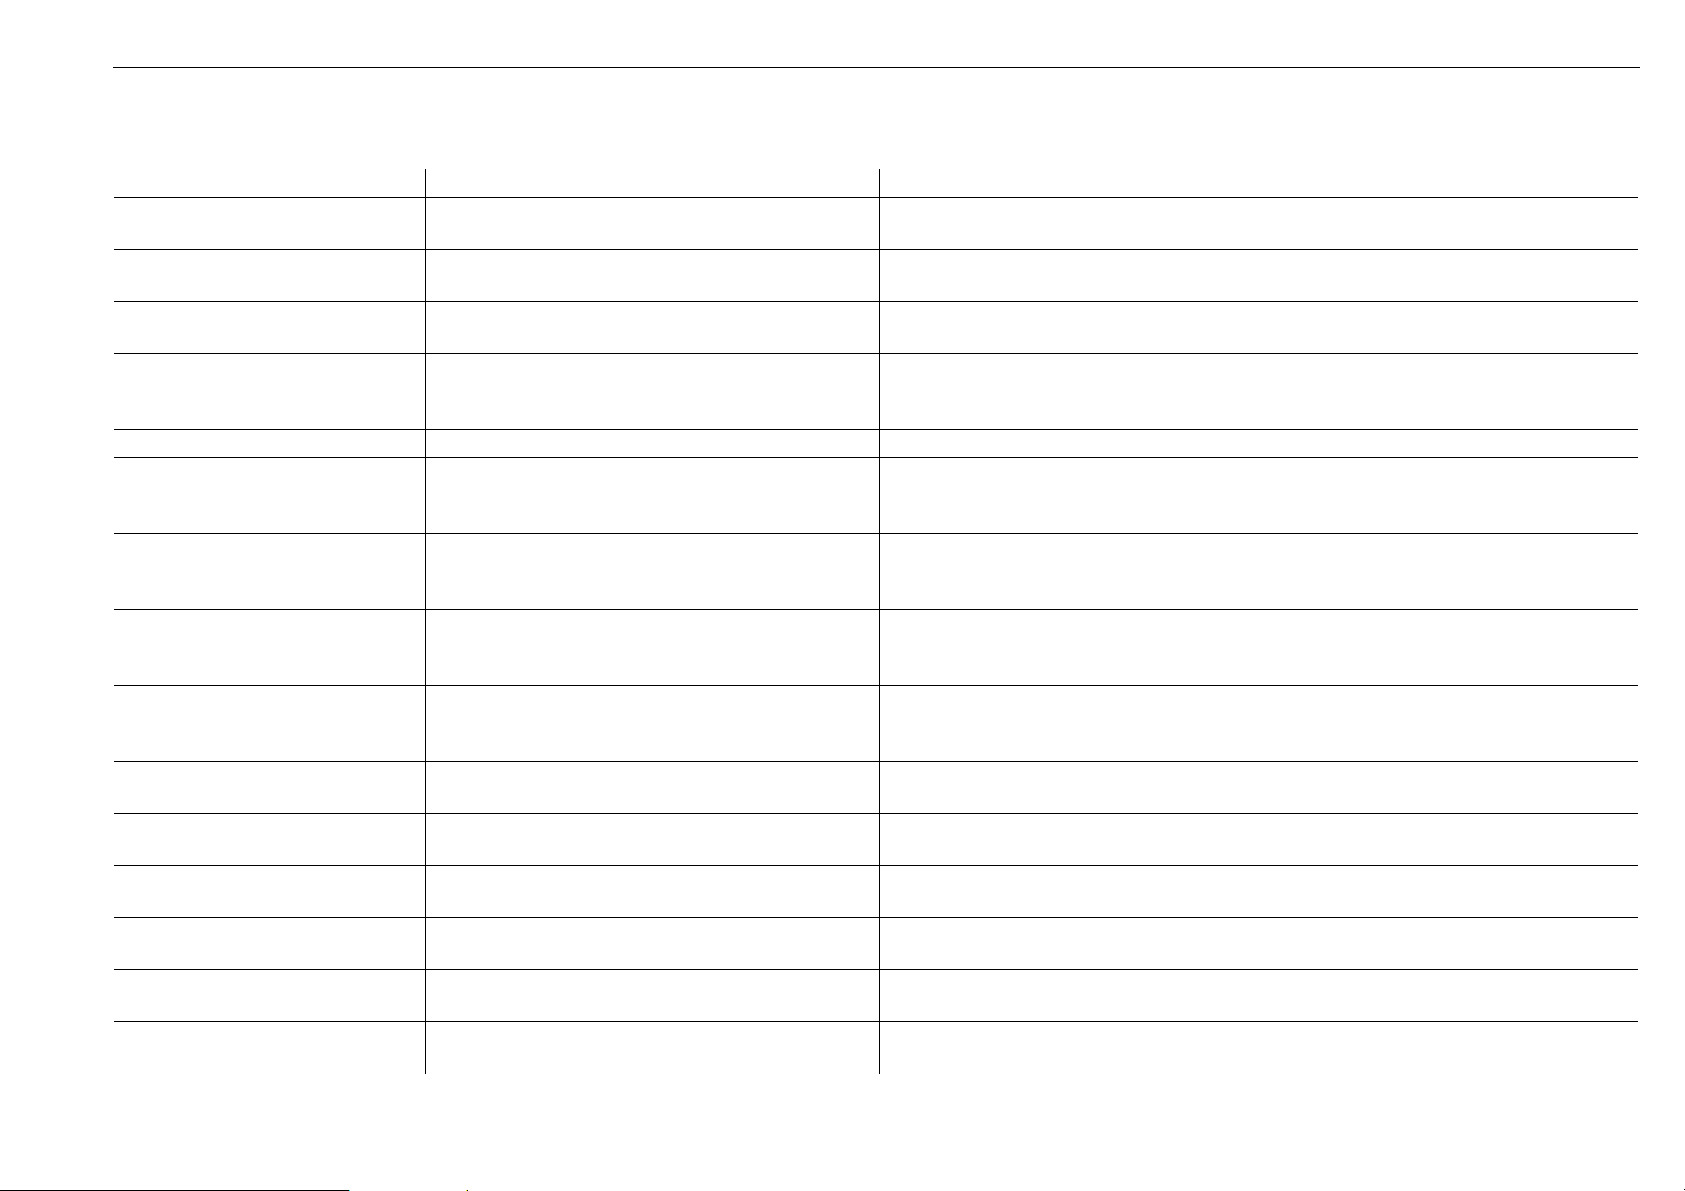
Fault message output on control panel
Message Meaning Remedy
TroubleshootingDual Top Evo 7 / 8
34
NOTE
n/a = not available
NOTE
All messages except message 28 and 29: heater shuts off automatically.
Failure of electrical safety/drainage valve (message 28 and 29) will not abort heater
operation and will not be shown during heater operation.
Message 30
Failure relay
230 V high or low power relay circuit interrupted/
short circuit
Contact a Webasto Service Centre.
Message 31, 32, 33 n/a n/a
Message 34
System overheated or relay circuit
disconnected
One of the three overheating switches detects too
high temperatures/overheating relay circuit
interrupted
Check for overheating (see messages 10, 11, 12, 13 and 14).
Reset heater (by pressing OK or switching off for at least 5 sec.)
Contact a Webasto Service Centre.
Message 35
Failure relay box
230 V overheating relay short circuit Contact a Webasto Service Centre.
Message
36, 37, 38, 39, 40, 41
n/a n/a
Message 42
Failure 230 V heating element
Electric heater (230 V) defect
No relevant temperature increase detected.
Check water supply system related for a permanent open hot water tap OR heavy
leakages.
Contact a Webasto Service Centre.
Fault message output on control panel
Message Meaning Remedy
Dual Top Evo 7 / 8Troubleshooting
35
8.1Fuses
The Dual Top Evo is equipped with 3 fuses: 5 A, 15 A and 15 A.
Each fuse must be connected to the corresponding cable (observe colour).
5A:red-and-blue cable
15A:red-and-black cable
15A: red cable
When you replace a fuse, make sure that the Dual Top Evo is switched off.
WARNING
In case of electrical deviations a fuse other than specified may cause fire.
Worldwide warrantyDual Top Evo 7 / 8
36
9Worldwide warranty
The following worldwide warranty is extended to cover the integrated Dual Top Evoair
and water heater, manufactured or supplied by Webasto and is subject to qualifications
indicated. Webasto warrants for the period set forth below that products be free from
defects in workmanship and material, provided such products are installed, operated,
and maintained in accordance with Webasto Dual Top Evowritten instructions. The
warranty is for the end-customer whereby it is administered and processed inside the
Webasto network of authorized dealers.
Terms and conditions
1Please note that the Dual Top Evo is only specified for applications in motor
homes or similar vehicles.
2The quality and good operation of Webasto Dual Top Evoproducts are
guaranteed by Webasto for a period of two (2) years, starting from the date of
installation. OE installed equipment warranties begin with the purchase of the
(recreational) vehicle, not from the date of installation.
In order to extend the parts warranty period to three (3) years, please contact
your Webasto Service Centre.
3Webasto will compensate the costs for the replacement/repair of the defective
part or component at the smallest sub-assembly level by using only but genuine
components. In the case of labour, installation or other allowances, where
accepted these cannot exceed the standard repair times. Any excess of such
allowances for example due to poor accessibility or equipment will not be
compensated.
4This warranty is limited to repair & replacement only. It does not cover:
•Damage resulting from defects in the Webasto Dual Top Evo equipment
•failure of the Dual Top Evoequipment due to frost, normal wear, accident,
misuse, abuse, negligence or improper installation, lack of reasonable and
necessary maintenance, unauthorized installation or repair, alterations, civil
disturbance or act of God.
5All Dual Top Evoproducts have to be installed by authorized installers or this
installation has to be reviewed and approved by an authorized installer.
6The Dual Top Evo should be demonstrated to the Webasto Service Centre for
repair/warranty claims. Travelling/transport costs shall be borne by the owner.
7Proof of original purchase with date of installation is required to receive warranty
service. Worldwide warranty can only be supported if purchase and installation
is centrally registered in the Webasto Warranty System.
Installed in vehicle type
Max. permissable weight
Date of InstallationDate of initial registration of
vehicle
Self-adhesive label
Stamp of installing workshop
Validation & Commissioning
Approved
Report available
Type:
Date:
By (name):
Warranty Certificate
Installed in vehicle type
Max. permissable weight
Date of InstallationDate of initial registration of
vehicle
Self-adhesive label
Stamp of installing workshop
Validation & Commissioning
Approved
Report available
Type:
Date:
By (name):
Control Card
In multilingual versions the German language is binding.
The telephone number of each country can be found in the Webasto service center leaflet or the website of the respective Webasto representative of your country.
Gebruikershandleiding.com neemt misbruik van zijn services uitermate serieus. U kunt hieronder aangeven waarom deze vraag ongepast is. Wij controleren de vraag en zonodig wordt deze verwijderd.
Product:
Spelregels forum
Om tot zinvolle vragen te komen hanteren wij de volgende spelregels:
lees eerst de handleiding door;
controleer of uw vraag al eerder door iemand anders is gesteld;
probeer uw vraag zo duidelijk mogelijk te stellen;
heeft u een probleem en al geprobeerd om dit op te lossen, vermeld dit erbij aub;
heeft u een oplossing gekregen van een bezoeker dan horen wij dat graag in dit forum;
wilt u een reactie geven op een vraag of antwoord, gebruik dan niet dit formulier maar klik op de knop 'reageer op deze vraag';
uw vraag wordt direct op de website gezet; vermijd daarom persoonlijke gegevens in te vullen;
Belangrijk! Als er een antwoord wordt gegeven op uw vraag, dan is het voor de gever van het antwoord nuttig om te weten als u er wel (of niet) mee geholpen bent! Wij vragen u dus ook te reageren op een antwoord.
Belangrijk! Antwoorden worden ook per e-mail naar abonnees gestuurd. Laat uw emailadres achter op deze site, zodat u op de hoogte blijft. U krijgt dan ook andere vragen en antwoorden te zien.
Abonneren
Abonneer u voor het ontvangen van emails voor uw Webasto Dual Top Evo 8 bij:
nieuwe vragen en antwoorden
nieuwe handleidingen
U ontvangt een email met instructies om u voor één of beide opties in te schrijven.
Ontvang uw handleiding per email
Vul uw emailadres in en ontvang de handleiding van Webasto Dual Top Evo 8 in de taal/talen: Engels als bijlage per email.
De handleiding is 0.44 mb groot.
U ontvangt de handleiding per email binnen enkele minuten. Als u geen email heeft ontvangen, dan heeft u waarschijnlijk een verkeerd emailadres ingevuld of is uw mailbox te vol. Daarnaast kan het zijn dat uw internetprovider een maximum heeft aan de grootte per email. Omdat hier een handleiding wordt meegestuurd, kan het voorkomen dat de email groter is dan toegestaan bij uw provider.
Uw handleiding is per email verstuurd. Controleer uw email
Als u niet binnen een kwartier uw email met handleiding ontvangen heeft, kan het zijn dat u een verkeerd emailadres heeft ingevuld of dat uw emailprovider een maximum grootte per email heeft ingesteld die kleiner is dan de grootte van de handleiding.
Er is een email naar u verstuurd om uw inschrijving definitief te maken.
Controleer uw email en volg de aanwijzingen op om uw inschrijving definitief te maken
U heeft geen emailadres opgegeven
Als u de handleiding per email wilt ontvangen, vul dan een geldig emailadres in.
Uw vraag is op deze pagina toegevoegd
Wilt u een email ontvangen bij een antwoord en/of nieuwe vragen? Vul dan hier uw emailadres in.