Kabels löst selbst bei richtigerAbsicherung(10 Amp.)
nicht immer die Sicherung aus. Bitte deshalb
vorsichtshalber an- oder durchgeschnittenes Kabel
niemals berühren, ehe der Stecker aus der Steckdose
gezogen ist. Es ist verboten, das Kabel mit Isolierband
zu flicken.
-
-
-
X
X
-
-
-
Schlechte Lüfterleistung:
Federn verschlissen
Gras zu nass
Nicht angepasste Arbeitstiefe
Arbeitswalze stark verschmutzt
-
-
-
-
-
-
-
-
-
-
-
-
X
X
X
X
I
m
Z
w
e
i
f
e
l
s
f
a
l
l
i
m
m
e
r
e
i
n
e
W
O
L
F
S
e
r
v
i
c
e
-
W
e
r
k
s
t
a
t
t
a
u
f
s
u
c
h
e
n
.
A
c
h
t
u
n
g
,
G
e
r
ä
t
v
o
r
j
e
d
e
r
P
r
ü
f
u
n
g
,
R
e
i
n
i
g
u
n
g
o
d
e
r
A
r
b
e
i
t
e
n
a
n
d
e
r
L
ü
f
t
e
r
w
a
l
z
e
a
b
s
t
e
l
l
e
n
,
u
n
d
N
e
t
z
s
t
e
c
k
e
r
z
i
e
h
e
n
.
B
e
i
R
ü
c
k
f
r
a
g
e
n
:
W
O
L
F
-
G
a
r
t
e
n
G
m
b
H
&
C
o
K
G
,
K
u
n
d
e
n
s
e
r
v
i
c
e
,
I
n
d
u
s
t
r
i
e
s
t
r
.
8
3
-
8
5
,
D
-
5
7
5
1
8
B
e
t
z
d
o
r
f
,
T
e
l
.
0
2
7
4
1
/
2
8
1
5
0
0
,
F
a
x
:
0
2
7
4
1
/
2
8
1
2
9
9
.
Garantiebedingungen
Die vom Verkäufer ausgefüllte Garantiekarte bzw. den Kaufbeleg bitte sorgfältig aufbewahren.
Für die Dauer von 24 Monaten vom Kaufdatum an leistet die Firma WOLF-Garten eine dem jeweiligen Stand der Technik und dem Verwendungszweck/Anwen-
dungsgebiet entsprechende Garantie.
Die gesetzlichen Rechte des Endverbrauchers werden durch die nachstehenden Garantierichtlinien nicht beeinträchtigt.
Voraussetzungen für den 24monatigen Garantieanspruch:
- Einsatz des Gerätes für den ausschließlichen privaten Gebrauch.
Im gewerblichen Bereich oder Verleihgeschäft reduziert sich die Garantie auf 12 Monate.
- Sachgemäße Behandlung und Beachtung aller Hinweise in der Gebrauchsanweisung, die Bestandteil unserer Garantiebedingungen ist.
- Beachtung der vorgeschriebenen Wartungsintervalle.
- Keine eigenmächtige Änderung der Konstruktion.
- Einbau von Original WOLF Ersatzteilen/Zubehör.
- Vorlage der ausgefüllten Garantiekarte und/oder des Kaufnachweises.
Die Garantie erstreckt sich nicht auf den normalen Verschleiß von Messern, Messerbefestigungsteilen wie Reibscheiben, Keil-/Zahnriemen, Laufräder/Reifen, Luftfilter,
Zündkerzen und Zündkerzenstecker.
Bei eigenmächtiger Reparatur erlischt automatisch sofort jeglicher Garantieanspruch.
Auftretende Fehler und Mängel, deren Ursachen auf Material- oder Fertigungsfehler zurückzuführen sind, werden ausschließlich durch unsere Vertragswerkstätten (der
Verkäufer hat das Recht zur Nachbesserung) in Ihrer Nähe oder, falls er näher liegt, durch den Hersteller beseitigt. Über die Garantieleistung hinausgehende Ansprüche
sind ausgeschlossen. Ein Anspruch auf Ersatzlieferung besteht nicht. Etwaige Transportschäden sind nicht uns, sondern dem zuständigen Transportträger zu melden,
da sonst die Ersatzansprüche an diese Unternehmen verloren gehen.
7
Read the entire operating instructions before putting the machine into operation for the first time. The WOLF UL 33 E is an electric lawn aerator.
The aerator cylinder works like a rake. In the middle and lowest position the lawn is freed from moss and weeds. The uppermost position is
intended for any remaining grass. This ensures that the grass grows quickly and provides for a thick, healthy lawn.
We recommend the catch bag TK 33 (35 l capacity) as a useful accessory.
Preface
Safety Instructions
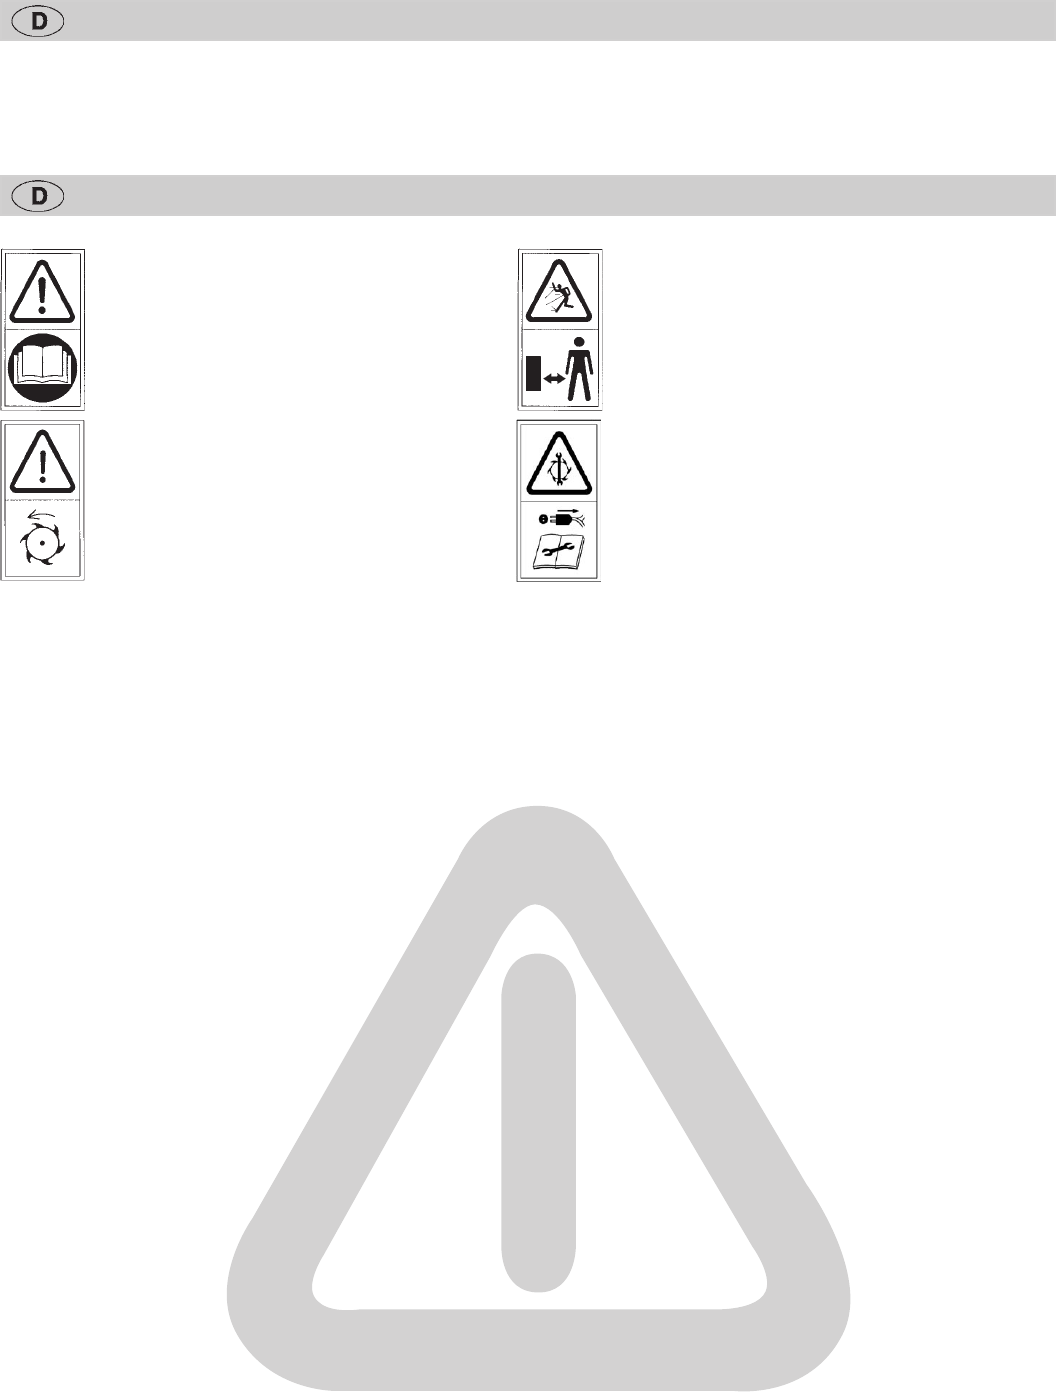
Attention!
Read Instruction manual
before use!
Keep bystanders away!
Warning!
Rotation blades!
Please read the user instructions very carefully and make sure that you know where all the operating elements are located and
what they do. The user is responsible for personal injuries or injuries caused by your equipment to third persons. Please consider
notes, explanations and conditions. The adherence to the user instructions is a precondition for the proper use of the tool.
1. General Advice
• Young people under 16 years or persons who are unfamiliar with the operating instructions must not use this machine.
• Never use the machine while persons, especially children or animals, are in the operating area.
2. Preparation for use
• Always wear sturdy footwear and long trousers when using the machine. Never operate the machine when you are barefoot or wearing
open sandals.
• First inspect the lawn thoroughly and remove all foreign bodies that may be thrown out of the machine.
• Check that the machine and its aerator roller are in good condition.
3. Cable
• Please work with safety cables from WOLF. For the connection only lines which are not lighter than rubber hose lines H0 7 RN-F to DIN/VDE
0282 with a minimum diameter of 3 x 1,5 mm2 must be used.
• The attachments of the connection cables must be rubber or covered with rubber and comply with Standard DIN/VDE 0620.
• Attachments must be splashproof (applicable in Austria only).
• Use a leakage-protective system (RCD) with a leakage current of no more than 30 mA.
• Attach connection cable to traction relief. Make sure that in does not rub against edges, pointed or sharp objects. Do not squeeze cable
through door or window gaps.
• Switching devices must not be removed or bridged (e. g. tying of switching lever to guide spar).
4. Use/operation
• Only use the machine in daylight or under good artificial lighting.
• The machine must not be used when it is raining. If possible, avoid using the machine in wet grass. The machine must not be washed or
rinsed with water.
• Make sure that you have a firm and solid foothold on slopes. Always work across the slope, never up and down the slope, and never work
on very steep inclines.
• Take special care when changing direction or when pulling the machine towards you.
• Switch off the motor if the machine is to be transported over surfaces other than grass.
• Never operate the machine with a defective guard or with missing safety devices.
• Switch off the motor, wait for the aerator roller to come to a halt, and pull the plug out of the mains socket before leaving the machine
unattended, or inspecting, cleaning or performing other operations on the machine (e. g. setting the working height).
• Keep your hands and feet away from the rotating aerator roller.
• Switch off the motor and pull out the plug from the mains socket if the aerator roller becomes blocked.
• Remove any obstructions, and check for damage to the machine. Any damage must be repaired before
• the machine is taken back into service.
• Inspect the extension lead for damage and ageing before use. Replace the lead if necessary. Do not use the machine if the lead is
damaged.
• The extension lead must lie free. Position the extension lead so that the machine cannot run over it. The extension lead must not come close
to the aerator roller.
Remove spark plug cap before
touching blades!
8
Please check noise abatement regulations prevailing in your Country.
Operating Times
Assembly
Assembling bottom handle part (fig. M1)
Insert securing screw (A) from inside through the left side element, so that both projections catch in the recesses (1). Position insulation
element (B) from outside; the two nubs must catch in the holes of the side element (2). Position handle element (M) in the insulating element
(B). Place insulating element (C) so that the large opening points to the outside. Then press washer (D) into the opening of the insulating
element (C) and tighten wing nut (G).
Assemble the right handle element in the same order.
Assembling top of handle (fig. M2)
Attach upper handle element (N) on the lower handle elements (M), making sure that the holes (1) match. Then insert the connecting screws
from outside, put on the washers (F) and tighten the wing nuts (G).
Attaching switch, strain relief and clips (fig. M3)
Fold up switch bracket (1) and position switch (H) on the upper handle element so that the two nubs catch in the holes (2). Close switch
bracket (1) and insert cable strain relief (I). Then fasten switch (H) and cable strain relief (I) with the two screws (K). Fasten switch cable (3)
with the clips (L) on the handle rod.
Attaching protective flap (fig. M4)
Place protective flap (O) on the cover (1). Then press retainer slots (2) into the fastening flaps (3) on the cover (1).
Operation
General
Before using the machine, the lawn must be mowed to a height of about 2.5-3.5 cm. Remove the cut grass from the lawn. The lawn should be
aerated several times each year. The loosened material can be removed with a rake or catch bag*. Afterwards, the lawn should be fertilized.
* Accessories at additional cost.
Insert connection cable in the strain relief (fig. B2)
Insert coupling of connection cable (3) in the socket of the switch (H). Then guide the cable (4) from outside in a slight loop over the peg (5)
of the strain relief assembly (I).
Connection to the power outlet
(230 Volt AC, 50 Hz). The machine can be connected to any power outlet that is protected by a 10 amp fuse (or line protecting switch type K
- formerly H).
Note:
Use a residual current protection device with a residual current of no more than 30 mA.
Motor on (fig. B2)
Press button (1) and hold.
Lift lever (2) and release button (1).
Motor off (fig. B2)
Release lever (2).
Attaching catch bag* (fig. B3)
Lift protective flap (O). Hang catch bag (1) with the hooks on both bolts** of the side elements.
(* TK 33, accessory at additional cost, ** bolts included with catch bag)
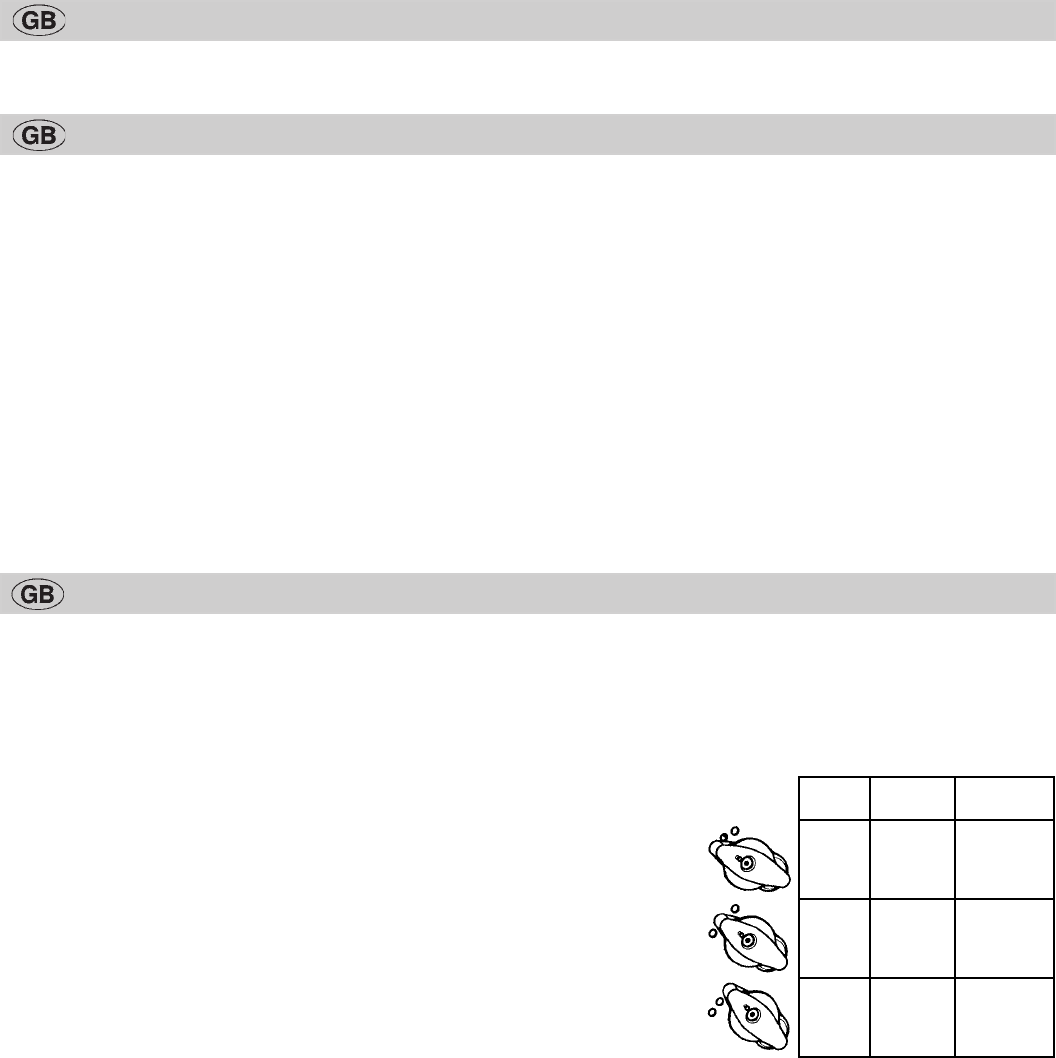
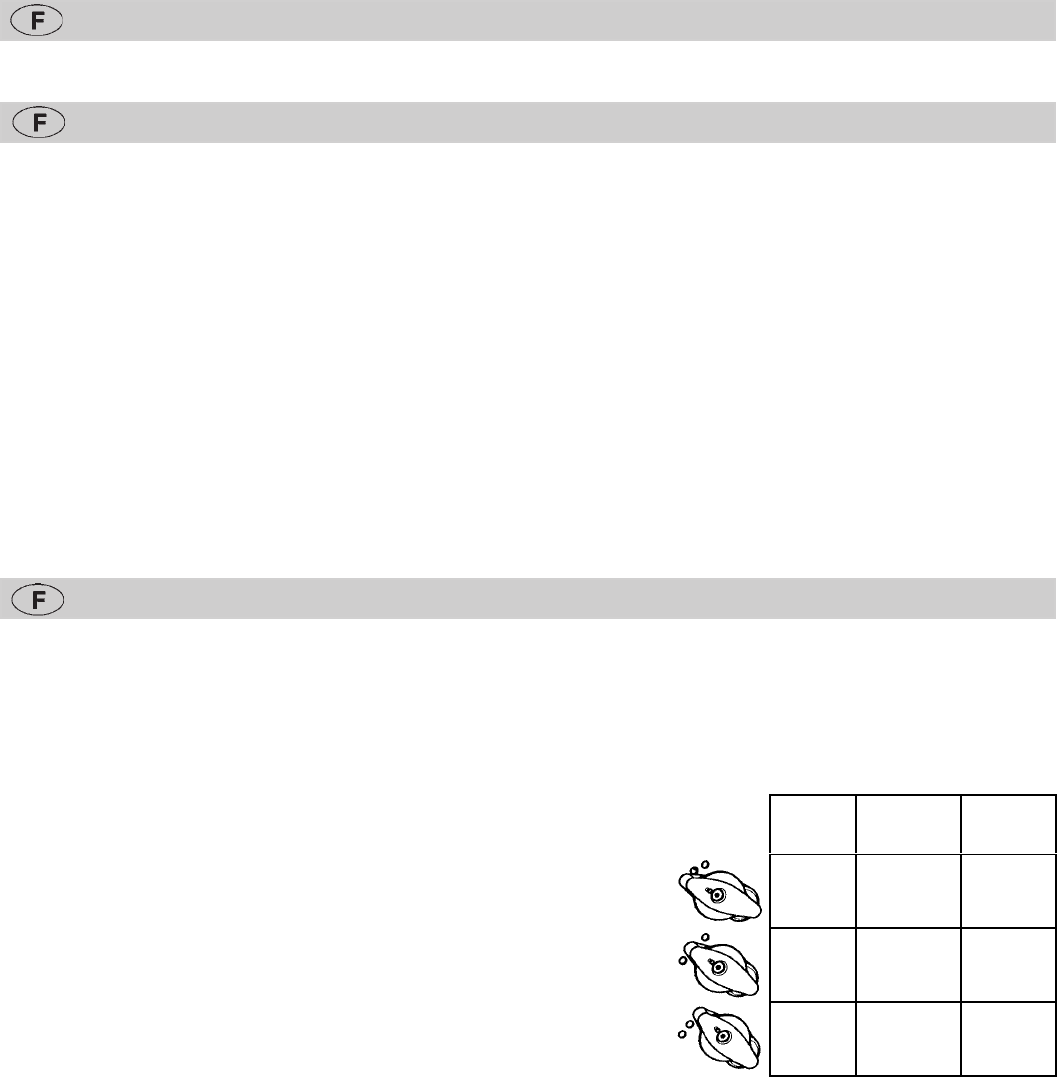
height
(mm)
Moss
Weeds
Grass-
remnants
-3X---
4X---
8---X
Recommended working depths
Setting the working depth (Fig. B1)
The working depth is adjustable to 3 heights. Pull adjustment arm (1) away from side
cover and allow to catch in desired position (2). Adjust the height alternately left and right
by only 1 position. The adjustment arms must always be in the same height position.
Lower and middle position of aerator cylinder:
Removes moss and weeds from the lawn.
Top position of aerator cylinder:
Removes grass remnants from the lawn.
9
Maintenance
Important! Disconnect from power supply before performing maintenance and cleaning.
Clean the machine without water after each use. Please note: the air intake slots of the electric motor must be freed from grass and moss
accumulations! Do not spray machine with water.
Store machine in a dry room.
Replacing the springs (fig. W1W2)
Important! Disconnect from power supply before performing maintenance and cleaning.
The aerator UL 33 E is equipped with 21 double springs, which can be easily replaced.
Removal
Unhook spring coils (1) using universal pliers and raise them until they are above the holding peg (2). Unhook opposing spring coils and
remove complete spring.
Replacement
Place spring into the recess (3) with the shackle facing down. Press first the left and then the right spring coils (4 and 5) inward and push them
above the holding peg (6).
Note
Insert the springs in such a way that the angular shackles point to the back (toward the operator) W2.
Replacement springs: Order no. 3620 095 (UV-EFF, Quantity: 21)
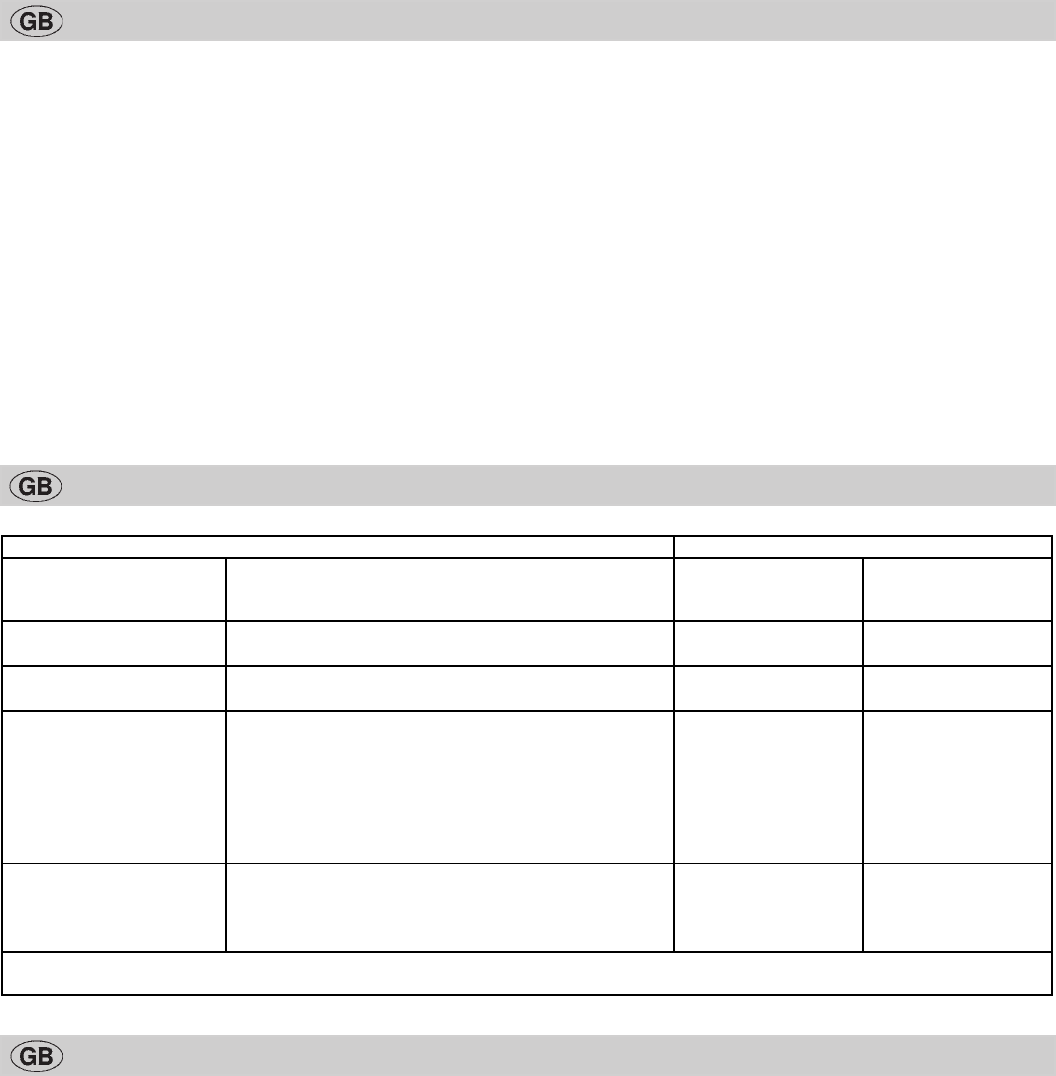
Faults and how to remedy
Guarantee terms
Please carefully retain the guarantee card completed by the seller, or the proof of purchase.
The company WOLF-Garten provides a guarantee for 24 months from the date of purchase. This guarantee is in accordance with the relevant state of technology and
the utilisation purpose / area of application. The consumer‘s statutory rights are not affected by the following guarantee guidelines.
Pre-conditions for the 24-month guarantee entitlement:
- Deployment of the device solely for private use.
The guarantee is reduced to 12 months in the commercial sector or leasing business.
- Proper handling and observance of all information given in the operating manual, which forms part of our guarantee terms.
- Observance of the prescribed maintenance intervals.
- No unauthorised alteration of the design.
- Installation of original WOLF replacement parts / accessories.
- Presentation of the completed guarantee card and/or proof of purchase.
This guarantee does not extend to normal wear-and-tear on blades, blade mounting components or friction disks, V-belts/toothed belts, running wheels/tyres, air filters,
spark plugs and spark plug connectors. Any guarantee claim shall be immediately void in the event of unauthorised repairs.
Faults and defects which can be traced to material or manufacturing faults will be rectified exclusively by our contracted workshops (the seller has the right to remedy
a defect) in your vicinity, or by the manufacturer if the latter is closer. Any claims going beyond the provision of a guarantee are ruled out. There is no entitlement to a
replacement. Any transport damage should be reported not to us but to the shipper in question since, otherwise, any compensation claims vis-à-vis the shipper would
be voided.
Remedy (X) by:
ProblemPossible cause
WOLF
service
workshop
Yourself
Machine runs unevenly or
vibrates heavily:
Springs are damaged
---
X
Uneven running, heavy
vibrations in the mower:
Blades damaged
Blades loose in the fastening parts
X
---
---
X
Motor will not run:
Fuse blown
Cable damaged
Important: If you inadvertently cut through the cable, the
fuse (10Amp) will not alwaysblow.Intheinterestof
safety, never touch damaged or severed cables before
disconnecting the mains plug. Repairing the cable with
insulating tape is prohibited.
---
X
X
---
Poor aerating:
Springs are worn
Grass is too wet
Working depth is incorrect
Cylinder is extremely dirty
---
---
---
---
X
X
X
X
When in doubt, always consult a WOLF service workshop.
Important: switch off the mower and disconnect the mains plug before inspecting, cleaning or working on the blades.
10
Préface
Veuillez lire attentivement le mode d‘emploi entier avant la première mise en service de l‘appareil. Le WOLF UL 33 E est un scarificateur
électrique permettant d‘aérer la pelouse. Le rotor fonctionne comme un rateau. La position moyenne ou inférieure permet d‘extirper de
la pelouse les mauvaises herbes et la mousse. La position supérieure est prévue pour le chaume. Cela assure une croissance rapide de
la pelouse et permet d‘obtenir un gazon dense et régulier. Nous recommandons d‘utiliser le sac de ramassage TK 33 (35 l de volume)
disponible en accessoire.
Consignes de sécurité
Attention!
Avant utilisation lire la
notice d‘emploi!
Tenir les tiers à l‘ecart de la
zone dangereuse!
Attention danger!
Elément de coupe
rotatif!
Lire attentivement la notice d‘utilisation et se familiariser avec les différentes pièces de commande de l‘appareil ainsi qu‘avec leurs fonctions.
L‘utilisateur est responsable des accidents survenus à des tiers ou à leurs biens. Respecter toute consigne, explication et autre réglementation. Le
respect des consignes indiquées dans la notice d‘utilisation est la condition préalable à une utilisation en bonne et due forme de l‘appareil.
1. Remarques générales
• Il est interdit aux jeunes de moins de 16 ans et aux personnes ignorant le mode d’emploi d’utiliser l’appareil.
• Il est interdit d’utiliser l’appareil si des personnes, en particulier des enfants, et des animaux, se trouvent dans la zone de travail.
2. Préparation
• Pour utiliser l’appareil, toujours porter des chaussures solides et des pantalons longs. Ne jamais utiliser l’appareil avec les pieds nus ou
avec des sandales.
• Contrôler le terrain et retirer tout objet susceptible d’être projeté par l’appareil.
• S’assurer que l’appareil et le rouleau aérateur ne sont pas endommagés.
3. Câbles électriques
• Utiliser les câbles de sécurité WOLF. N‘utiliser que des câbles électriques plus lourds que des câbles en caoutchouc HO 7 RN-F à la norme
DIN/VDE 0282 et de diamètre 3 x 1,5 mm2 minimum.
• Les raccords des câbles électriques doivent être en caoutchouc ou recouverts de caoutchouc et respecter la norme DIN/DVE 0620.
• Les connexions doivent être protégées contre les jets d‘eau (valable pour l‘Autriche).
• Utiliser un disjoncteur (RCD) dont le courant de défaut ne dépasse pas les 30 mA.
• Attacher les câbles électriques du détendeur. Éviter les frottements avec des arêtes, des corps pointus ou aiguisés. Ne pas écraser les
câbles à des encoignures de portes ou de fenêtres.
• Il est interdit de supprimer ou de ponter les interrupteurs (par ex. en attachant le levier de commande au guidon).
4. Utilisation
• Utiliser l’appareil à la lumière du jour ou lorsque l’éclairage est suffisant.
• L’appareil ne doit pas être utilisé par temps pluvieux. Si possible, éviter d’utiliser l’appareil lorsque l’herbe est mouillée. L’appareil ne doit
pas être nettoyé ou rincé à l’eau.
• Veiller à ce que la stabilité soit suffisante sur les pentes. Passer en biais sur les pentes; ne jamais monter ou descendre perpendiculairement
à la pente. Ne pas passer sur les pentes particulièrement abruptes.
• Se montrer particulièrement vigilant en cas de changement de direction ou en tirant l’appareil vers soi.
• Eteindre le moteur pour traverser des surfaces non recouvertes d’herbes.
• Ne jamais utiliser l’appareil si le chassis ou l’équipement de protection sont endommagés.
• Éteindre le moteur, attendre l’arrêt complet du rouleau aérateur et débrancher l’appareil, avant de quitter, de contrôler, de nettoyer l’appareil,
ou avant díeffectuer toute autre opération (par ex.: réglage de la hauteur de travail).
• Ne jamais approcher les mains ou les pieds du rouleau aérateur en rotation.
• En cas de blocage du rouleau aérateur, éteindre le moteur et débrancher l’appareil. Retirer les objets éventuels et contrôler si l’appareil est
endommagé. Des dommages éventuels doivent Ítre réparés avant toute nouvelle utilisation de l’appareil.
• Avant chaque utilisation, s’assurer que le câble de rallonge n’est ni endommagé ni usé. Si nécessaire, remplacer le câble. Ne pas utiliser
l’appareil avec un câble endommagé.
• Rien ne doit gêner l’utilisation du câble de rallonge. Poser le câble de sorte que l’appareil ne puisse pas passer dessus. Le câble ne doit
pas se trouver à proximité du rouleau aérateur.
Avant de travailler sur le système de coupe,
retirer la prise de courant!
11
Observez les dispositions spécifiques de la lloi nationale.
Tranches horaires
Montage
Montage des parties inférieures du guidon (fig. M1)
Insérer la vis d‘arrêt (A) depuis l‘intérieur dans la partie latérale gauche de façon à enclencher les deux ergots dans les encoches (1). Mettre
en place l‘élément isolant (B) de l‘extérieur, les deux ergots doivent s‘enclencher dans les alésages de la partie latérale (2). Mettre en place
la partie du guidon (M) dans l‘élément isolant (B). Monter l‘élément isolant de façon à ce que la grande ouverture soit dirigée vers l‘extérieur.
Ensuite presser la rondelle (D) dans l‘ouverture de l‘élément isolant (C) et serrer l‘écrou papillon (G). Le montage de la partie droite du guidon
s‘effectue de la même manière.
Montage de la partie supérieure du guidon (fig. M2)
Fixer la partie supérieure (N) sur les parties inférieures du guidon et veiller à ce que les alésages (1) respectifs correspondent. Ensuite insérer
les vis depuis l‘extérieur, poser les rondelles (F) et serrer les papillons (G).
Montage de l‘interrupteur, du détendeur et des attaches (fig. M3)
Déplier la patte de l‘interrupteur (1) et positionner l‘interrupteur (H) sur la partie supérieure du guidon de façon à enclencher les deux ergots
dans les alésages (2). Replier la patte de l‘interrupteur (1) et insérer le détendeur (l). Ensuite, fixer l‘interrupteur (H) et le détendeur de câble
(l) à l‘aide des deux vis (K). Fixer le câble de l‘interrupteur (3) au guidon au moyen d‘attaches (L).
Fixation de la trappe de protection (fig. M4)
Poser la trappe de protection (O) contre le capot (1). Ensuite presser les fentes de logement (2) dans les pattes de fixation (3) disposées
sur le capot (1) .
Utilisation
Généralités
Avant d‘utiliser l‘appareil, tondre la pelouse afin d‘obtenir une hauteur de coupe d‘environ 2,5 à 3,5 cm. Nettoyer la pelouse de l‘herbe coupée.
Travailler les surfaces couvertes de pelouse plusieurs fois par an. Eliminer proprement les débris à l‘aide d‘un rateau ou en utilisant le sac de
ramassage* . * Ensuite, répandre de l‘engrais sur la pelouse.
Passer le cordon dans le détendeur (fig. B2)
Insérer la prise femelle du cordon (3) dans la prise mâle de l‘interrupteur (H). Ensuite passer le cordon (4) depuis l‘extérieur par dessus l‘axe
(5) du détendeur (I) en une légère boucle .
Branchement sur secteur
(Courant alternatif 230 Volt, 50 Hz). L‘appareil peut être branché sur toute prise protégée par un fusible 10 ampère à action retardée (ou par
un disjoncteur divisionnaire de type K , ancien type H).
Conseil:
Utiliser un disjoncteur différentiel (DDR) offrant une protection différentielle de 30 mA au maximum.
Moteur marche (fig. B2)
Appuyer sur le bouton (1) et le maintenir enfoncé.
Actionner le levier (2), relâcher le bouton (1).
Moteur arrêt (fig. B2)
Relâcher le levier (2).
Monter le sac de ramassage* (fig. B3)
Soulever la trappe de protection (O). Accrocher le sac de ramassage (1) par les crochets aux deux axes** des parties latérales.
(* TK 33, accessoire non compris dans le prix, ** axes fournis avec le sac de ramassage)
Hauteur
(mm)
Mousse
Mauvaises
herbes
Chaume
-3X---
4X---
8---X
Recommandation de la
profondeur de scarification
Réglage de la profondeur de scarification (fig. B1)
La profondeur de scarification se règle en trois différentes positions. Ressortir les bras de
réglage (1) de la tôle latérale du carter et les réenclencher à la hauteur souhaitée (2). Lors
du réglage, ne changer que de respectivement une position alternativement à gauche et à
droite. Les bras de réglage doivent toujours se trouver à la même hauteur.
Position inférieure et moyenne du rotor :
pour extirper de la pelouse la mousse et les mauvaises herbes.
Et le chaume.
Position supérieure du rotor : pour nettoyer la pelouse de chaume.
Gebruikershandleiding.com neemt misbruik van zijn services uitermate serieus. U kunt hieronder aangeven waarom deze vraag ongepast is. Wij controleren de vraag en zonodig wordt deze verwijderd.
Product:
Spelregels forum
Om tot zinvolle vragen te komen hanteren wij de volgende spelregels:
lees eerst de handleiding door;
controleer of uw vraag al eerder door iemand anders is gesteld;
probeer uw vraag zo duidelijk mogelijk te stellen;
heeft u een probleem en al geprobeerd om dit op te lossen, vermeld dit erbij aub;
heeft u een oplossing gekregen van een bezoeker dan horen wij dat graag in dit forum;
wilt u een reactie geven op een vraag of antwoord, gebruik dan niet dit formulier maar klik op de knop 'reageer op deze vraag';
uw vraag wordt direct op de website gezet; vermijd daarom persoonlijke gegevens in te vullen;
Belangrijk! Als er een antwoord wordt gegeven op uw vraag, dan is het voor de gever van het antwoord nuttig om te weten als u er wel (of niet) mee geholpen bent! Wij vragen u dus ook te reageren op een antwoord.
Belangrijk! Antwoorden worden ook per e-mail naar abonnees gestuurd. Laat uw emailadres achter op deze site, zodat u op de hoogte blijft. U krijgt dan ook andere vragen en antwoorden te zien.
Abonneren
Abonneer u voor het ontvangen van emails voor uw WOLF-Garten UL 33 E bij:
nieuwe vragen en antwoorden
nieuwe handleidingen
U ontvangt een email met instructies om u voor één of beide opties in te schrijven.
Ontvang uw handleiding per email
Vul uw emailadres in en ontvang de handleiding van WOLF-Garten UL 33 E in de taal/talen: Nederlands, Duits, Engels, Frans, Italiaans als bijlage per email.
De handleiding is 0,75 mb groot.
U ontvangt de handleiding per email binnen enkele minuten. Als u geen email heeft ontvangen, dan heeft u waarschijnlijk een verkeerd emailadres ingevuld of is uw mailbox te vol. Daarnaast kan het zijn dat uw internetprovider een maximum heeft aan de grootte per email. Omdat hier een handleiding wordt meegestuurd, kan het voorkomen dat de email groter is dan toegestaan bij uw provider.
Uw handleiding is per email verstuurd. Controleer uw email
Als u niet binnen een kwartier uw email met handleiding ontvangen heeft, kan het zijn dat u een verkeerd emailadres heeft ingevuld of dat uw emailprovider een maximum grootte per email heeft ingesteld die kleiner is dan de grootte van de handleiding.
Er is een email naar u verstuurd om uw inschrijving definitief te maken.
Controleer uw email en volg de aanwijzingen op om uw inschrijving definitief te maken
U heeft geen emailadres opgegeven
Als u de handleiding per email wilt ontvangen, vul dan een geldig emailadres in.
Uw vraag is op deze pagina toegevoegd
Wilt u een email ontvangen bij een antwoord en/of nieuwe vragen? Vul dan hier uw emailadres in.