- Keep the batteries out of reach of children
- Non-rechargeable batteries should not be recharged
- Unequally charged batteries or different battery types should
not be used together
- Use recommended batteries or similar
- After using the copter, remove the batteries if you will not use
it again for a long period of time
- The terminals must not be short-circuited
- This model is equipped with a rechargeable Li-po Battery. Li-
po batteries require special attention, follow the manual
- The batteries must be charged with the charger supplied by
WLtoys
- When charging the battery, always ensure that you do so on a
non-combustible surface
- Do not leave charging without supervision
- Always charge the battery to 100%
- Ensure that the battery wires are not in contact to avoid a
short-circuit
- The ignition wires of the battery must not be modified or
damaged
- Never damage the battery mechanically (this could cause an
explosion)
- The battery should not be placed near children (unless you
have an adult supervision)
- The technical design of the battery must not be changed
- Touching of damaged batteries can cause injury. If there is
contact with skin or eyes, seek medical attention immediately!
- Do not charge directly after the flight or when the battery is
warm
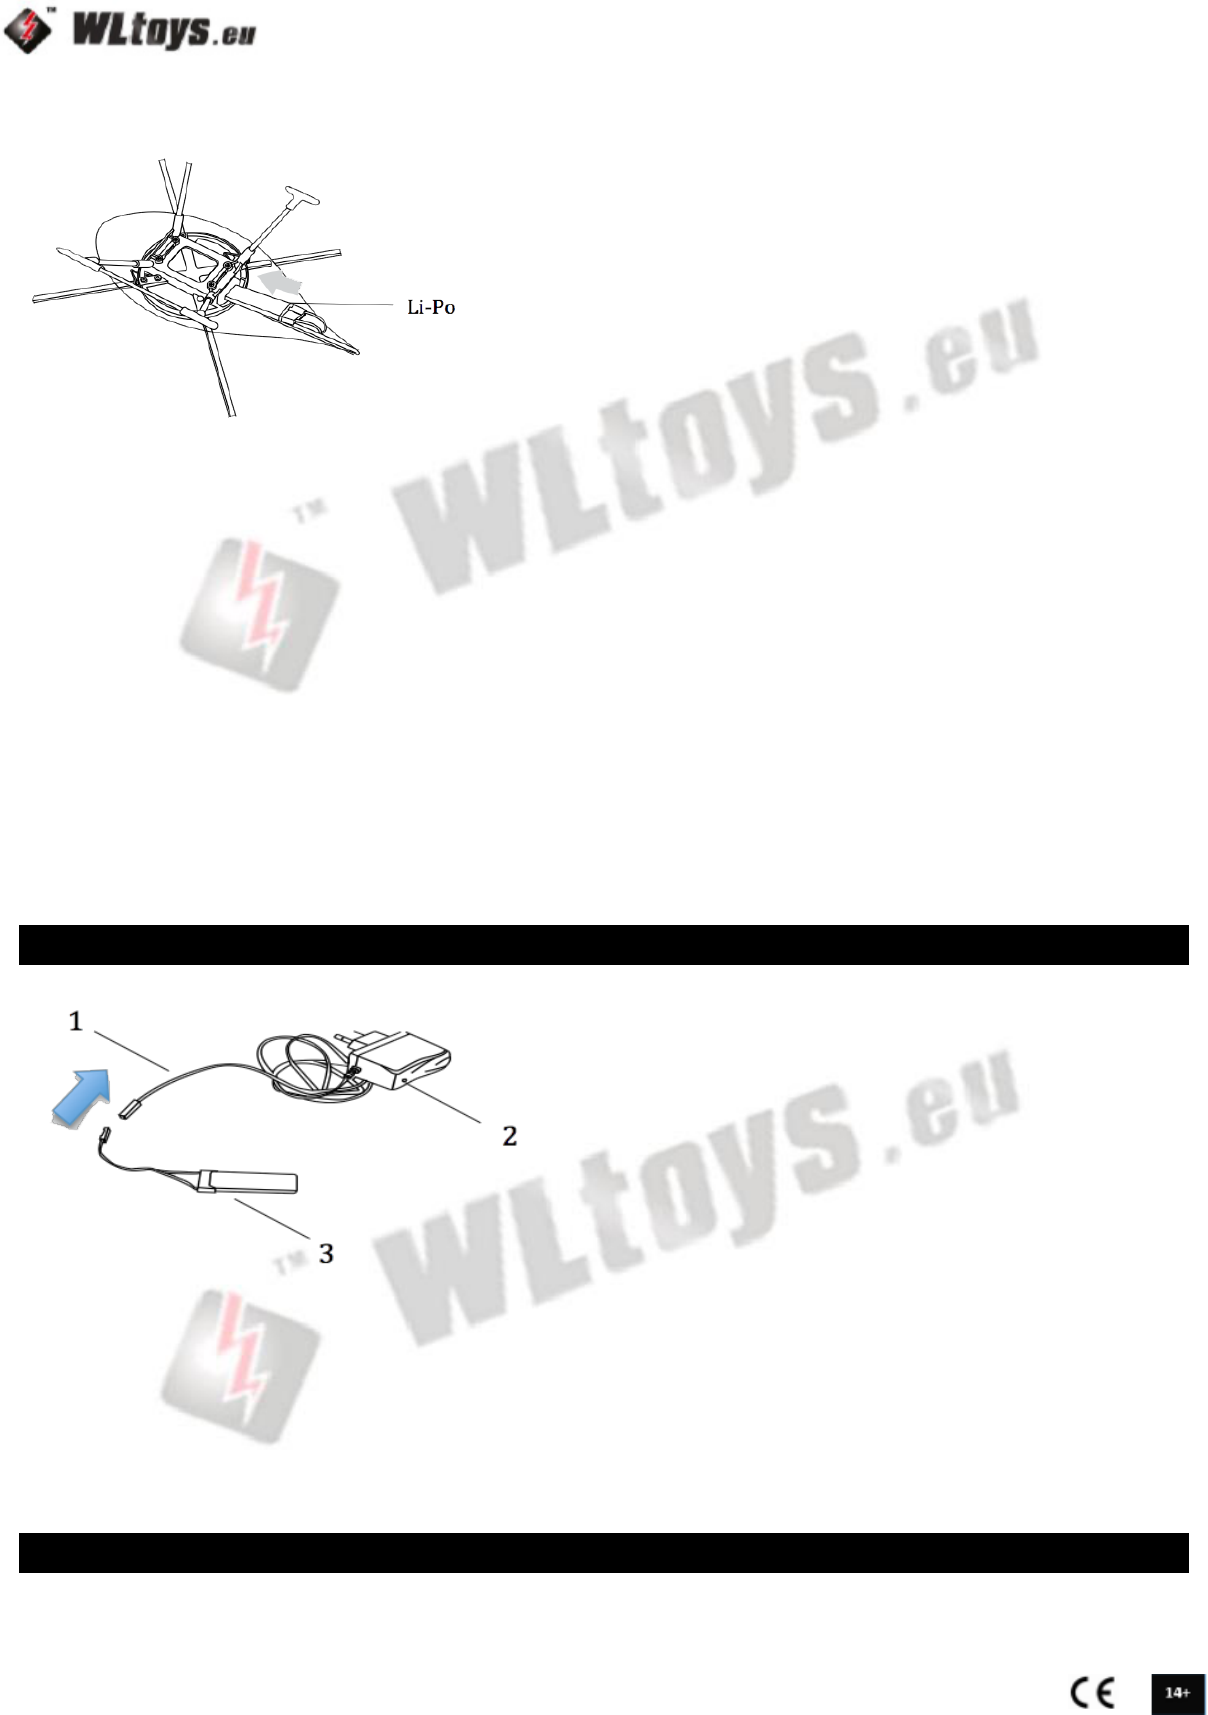
1. Charging wire
2. LED
3. Li-po Battery
Plug the charger into a wall socket and connect the battery to
the charger. This can only be done in one way: by firmly
connecting the charging cable. If the green light is on, the
battery is fully charged and can be disconnected. Then do not
forget to unplug the charger from the wall socket.
Green LED = Charged battery
Orange LED = Charging battery
Red LED = Battery is empty / Charging battery
Input : 220V
Charging Current : 500mA
Full Voltage: 4.2 +/- 0.03V