||
10 Maintenance and service
10
338
NOTE
Outside lighting such as headlamps, fog
lamps and rear lamps may temporarily
have condensation on the inside of the
lens. This is normal, all exterior lighting is
designed to withstand this. Condensation
is normally vented out of the lamp housing
when the lamp has been switched on for a
time.
Related information
•
Lamp replacement - headlamps (p. 338)
•
Lamp replacement - location of rear
lamps (p. 342)
•
Lamp replacement - vanity mirror lighting
(p. 343)
•
Lamp replacement - lighting in cargo area
(p. 342)
•
Lamp replacement - number plate lighting
(p. 342)
Lamp replacement - headlamps
All of the headlamp bulbs are replaced via the
engine compartment. First loosen and remove
the whole headlamp.
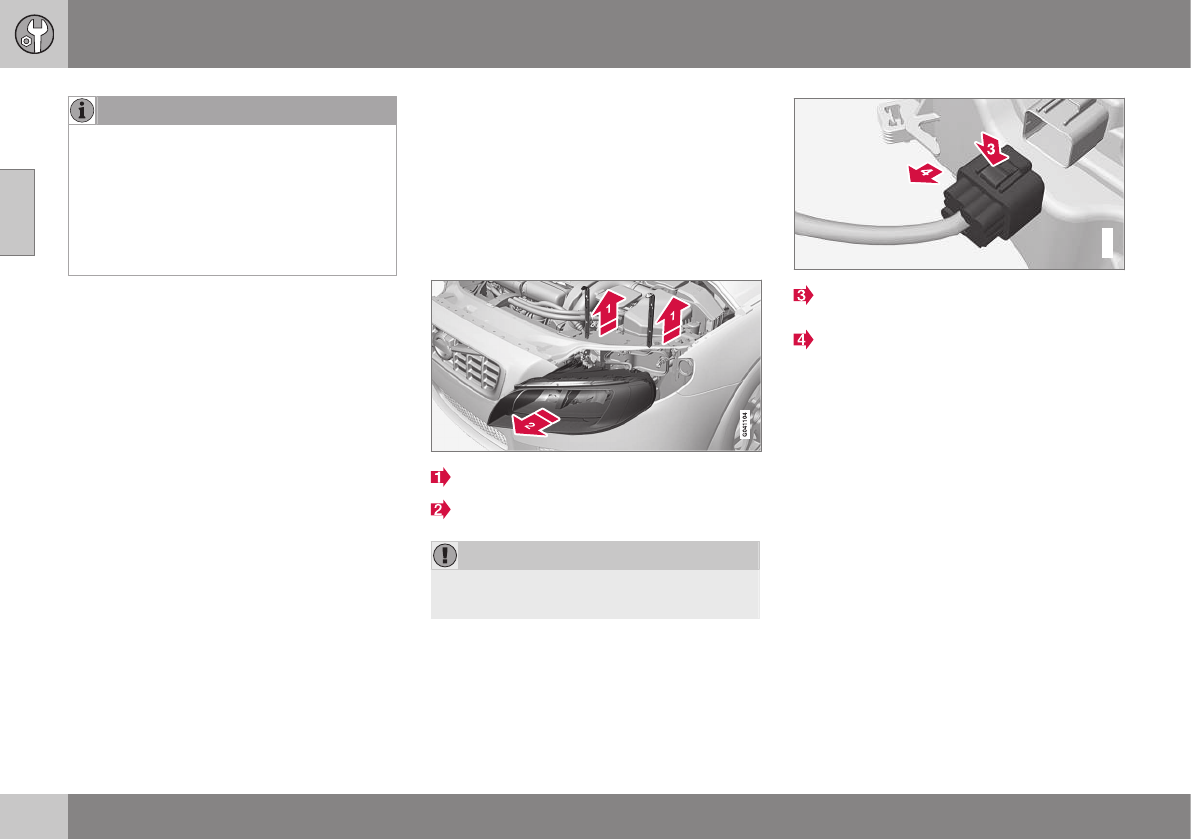
Removing the headlamp
Set the car's electrical system in key position
0, see Key positions - functions at different
levels (p. 69).
Pull out the headlamp's locking pins.
Pull the headlamp straight forward.
IMPORTANT
Do not pull the electrical cable, only the
connector.
Detach the headlamp connector by
pressing down the clip with your thumb.
At the same time, guide out the connec-
tor with your other hand.
5. Lift out the headlamp and place it on a
soft surface to avoid scratching the lens.
6. Replace the bulb in question.
Securing the headlamp
1. Plug in the connector, a clicking sound
should be heard.
2. Reinstall the headlamp and locking pins.
Check that they are correctly inserted.
3. Check the lighting.
The headlamp must be mounted and the con-
nector correctly installed before the lighting is
switched on or the remote control key is
inserted into the ignition switch.

