||
10 Maintenance and service
10
354
1. Plug in the connector, a clicking sound
should be heard.
2. Reinstall the headlamp and locking pins.
The short pin is fitted closest to the grille.
Check that they are correctly inserted.
3. Check the lighting.
The headlamp must be mounted and the con-
nector correctly installed before the lighting is
switched on or the remote control key is
inserted into the ignition switch.
Related information
•
Lamp replacement (p. 352)
•
Lamp replacement - cover for main/
dipped beam bulbs (p. 354)
•
Lamps - specifications (p. 358)
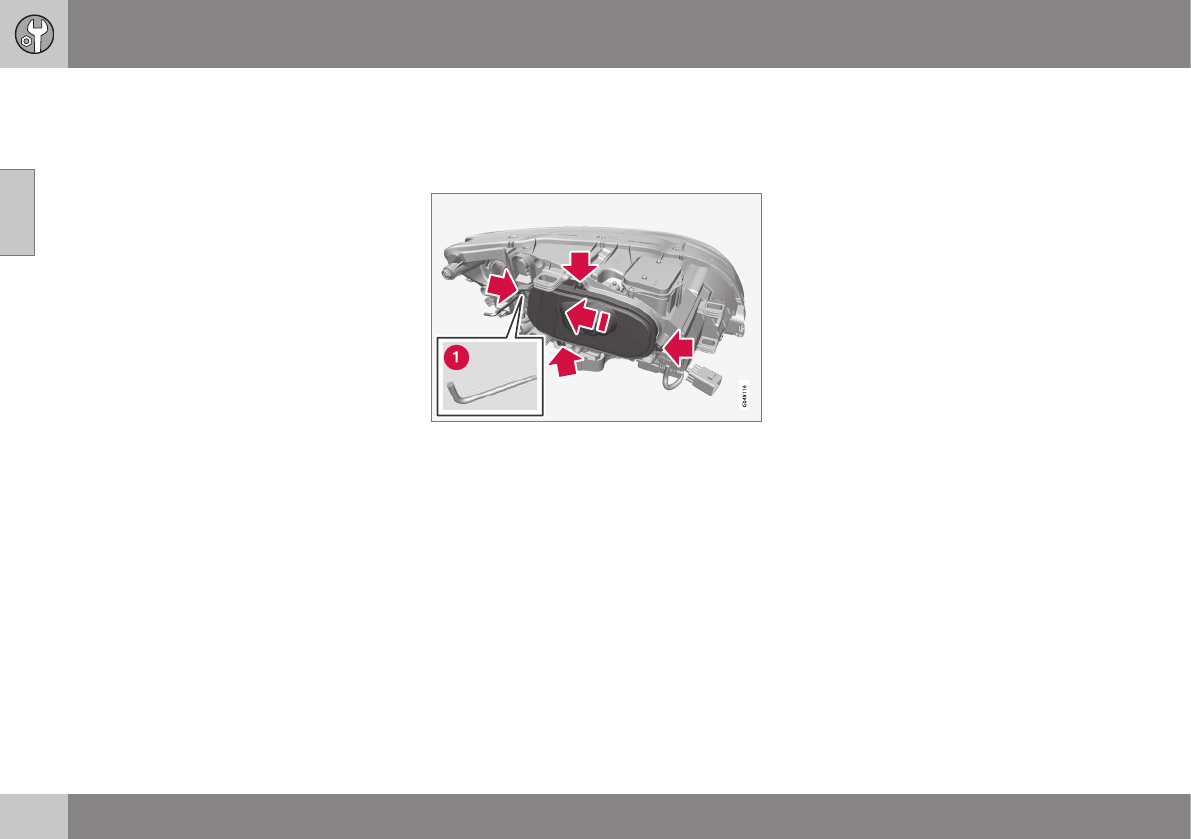
Lamp replacement - cover for main/
dipped beam bulbs
Main/dipped beam bulbs are accessed by
releasing the headlamp's larger cover.
Before starting to replace a bulb, see Lamp
replacement - headlamps (p. 353).
1. Unscrew the cover's four screws using a
Torx tool, size T20 (1). They should not be
loosened completely. (3 - 4 turns are suf-
ficient.)
2. Slide the cover to one side.
3. Remove the cover.
Reinstall the cover in reverse order.
Related information
•
Lamp replacement - headlamps (p. 353)
•
Lamp replacement - dipped beam (p.
355)
•
Lamp replacement - main beam (p. 355)
•
Lamp replacement - extra main beam (p.
355)

