Please drain all water completely.
Please check the O-ring, O-ring groove, and O-ring surface and remove any
dust, sand or debris. Check for any scratches or damage to the O-rings and
confirm an appropriate amount of silicon has been applied.
Installation of propeller Assy is the inverse order to "Remove the propeller Assy".
Please note that the propeller shaft needs to be seated correctly before
pushing the propeller assembly down and relocking the clamp ring into position.
You can find the right position by pushing down gently on the propeller Assy while slowly spinning the propeller
manually.
Please confirm the clamp ring is seated down correctly and that the O-ring is not protruding.
Maintenance after use.
Please wash with tap water after use. Make sure to flush sand and other debris from around the propeller, switch,
throttle unit, and locking buckles.
STEP1 Avoid salt build-up - desalt afte use.
Stand the SAV-7 upright, and flush with tap water from your hose all salt, sand
and debris. Take special care to efficiently wash the switch part of the throttle unit,
as this is a critical moving part during operation.
With the SAV-7 laid horizontally slowly rotate the propeller manually and wash using
a hose all the joints and seam in and around this area.
If possible, you can "desalt" the SAV-7 in a large water tank if the
diving store has this facility.
CAUTION
Please do not activate the SAV-7 until confirming that the surrounding area is safe and that no other equipment
is in the tank as the propeller generates turbulence. Please never put your hand near or in the
rotating propeller.
A water tank that has not been refreshed may itself have excess salt and in this case will not
provide a sufficient rinse.
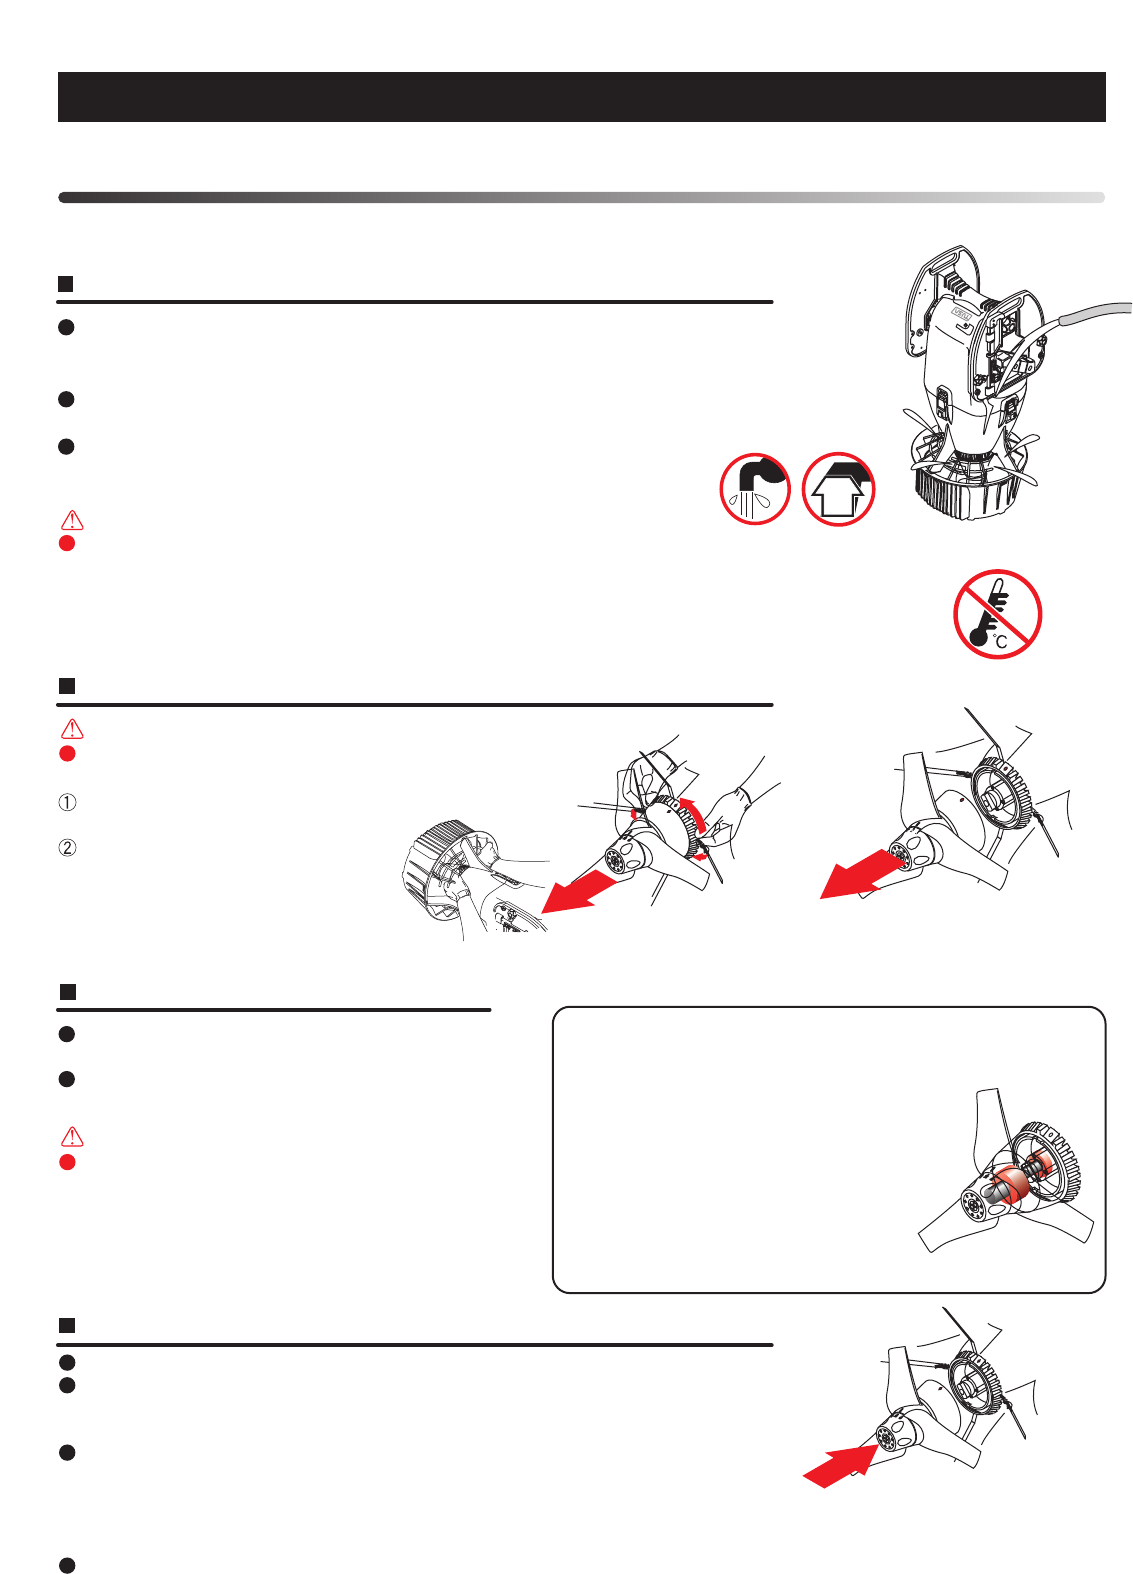
STEP2 Disassembling the propeller Assy.
CAUTION
Please remove the battery from the SAV-7 before working
on the propeller area.
Pull up the two clamp lock levers in order to unlock the
clamp ring.
Next, the clamp ring can be
unlocked by rotating counter
clockwise and matching the oval
mark on the clutch/propeller housing.
Then pull out the propeller housing.
STEP4 Set the propeller Assy.
Remove propeller Assy.
Pull clamp lock lever toward self
And turn clamp ring.
14
In general many scooters have leakage weakness around the
sealing area on the propeller shaft. If a seal becomes worn
water can infiltrate the motor compartment and cause major
damage. SAV-7 have greatly
improved this area of weakness in comparison
to other scooters. We specially designed a
double sealing system for the propeller shaft by
building a small watertight compartment
between the first seal and the second seal.
Even if water leaks into this area through
the first seal into this compartment further
leakage into the motor compartment is prevented.(PATENTED)
STEP3 Check and cleaning of propeller Assy.
Check to see if any water leakage has occurred
inside the propeller Assy.
If a little water is present please flush it away with
fresh tap water.
WARNING
A small amount of water leakage (a teaspoon or
so) is not abnormal and will not harm the operation
of the SAV-7. However, if the propeller Assy is full of
water then discontinue using the SAV-7 as the
propeller Assy area and rear seals of the SAV-7
need to be overhauled before any further use.
Propeller Assy
60
Maintenance