- 2 -
The illustrations of the machine used in this document may be different from what you actually see
on your machine.
Table of contents
1 Troubleshooting............................. 4
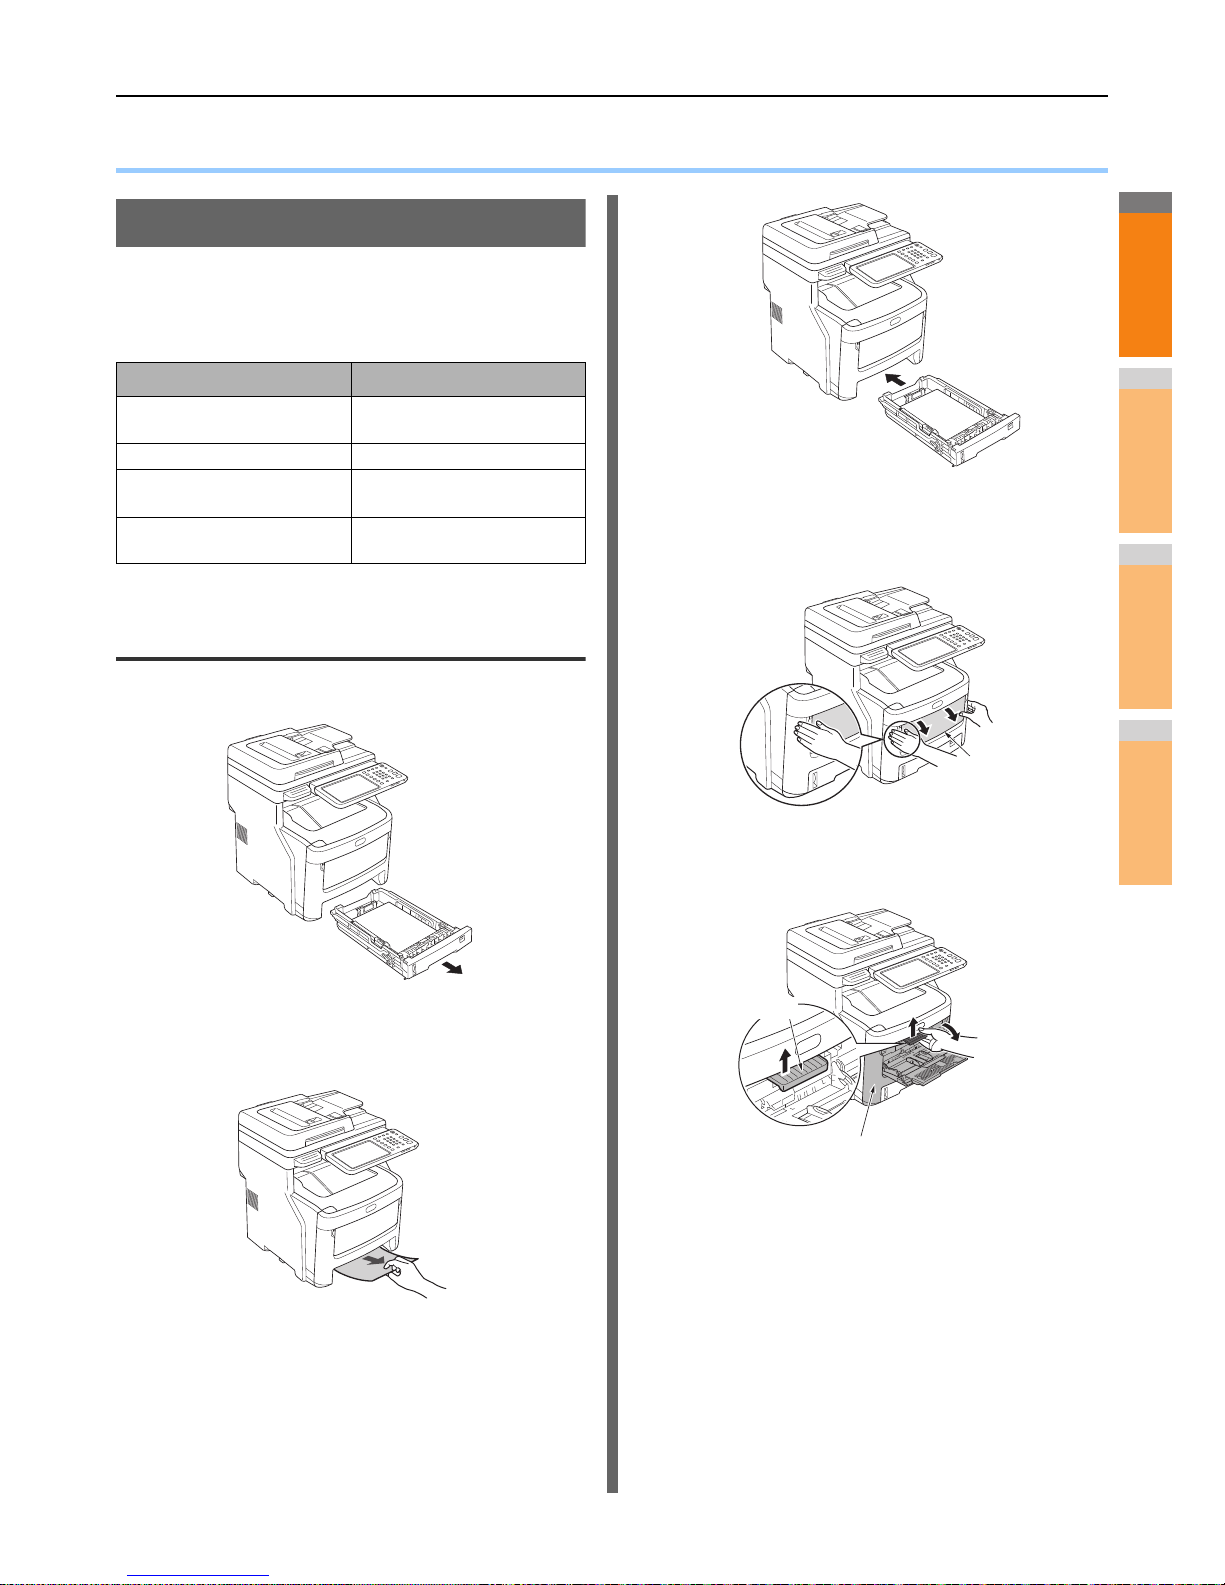
When a Paper Jam Occurs.......................5
During Paper Jams ..............................................5
When a paper jam occurs in Drawer 1, Bypass tray
...............................................................................5
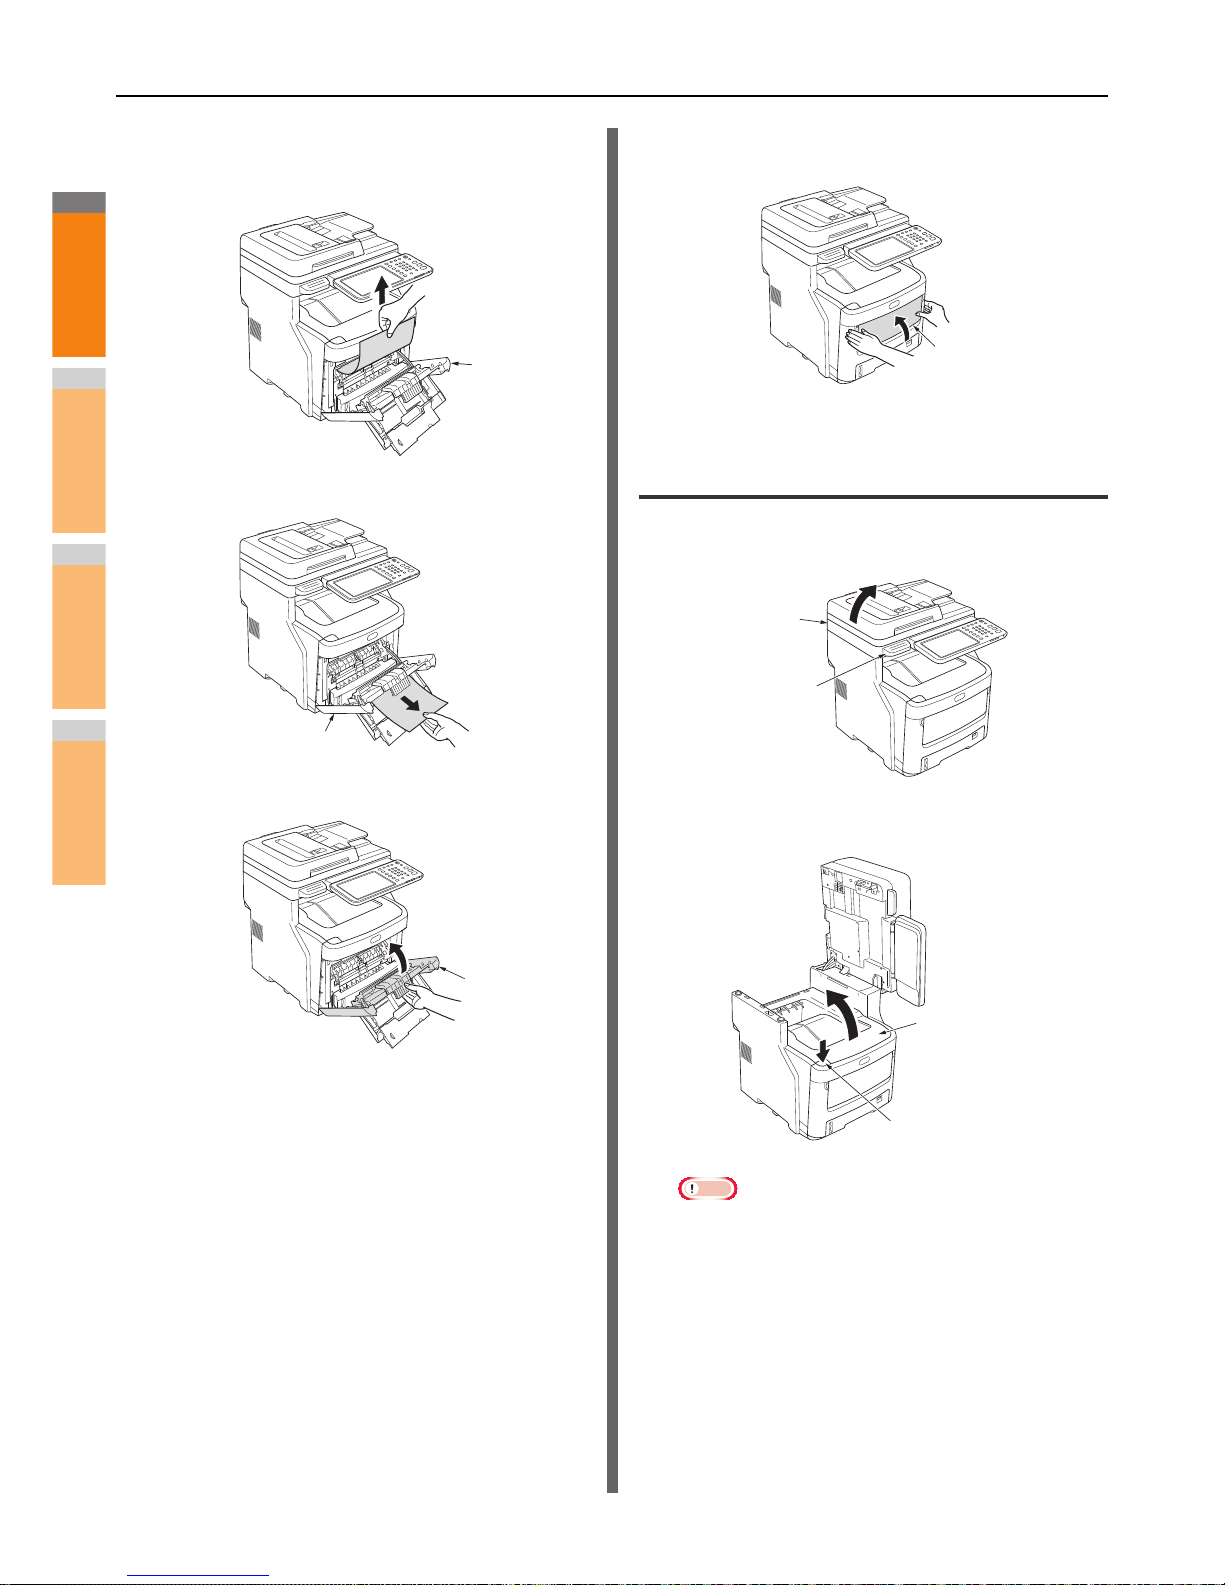
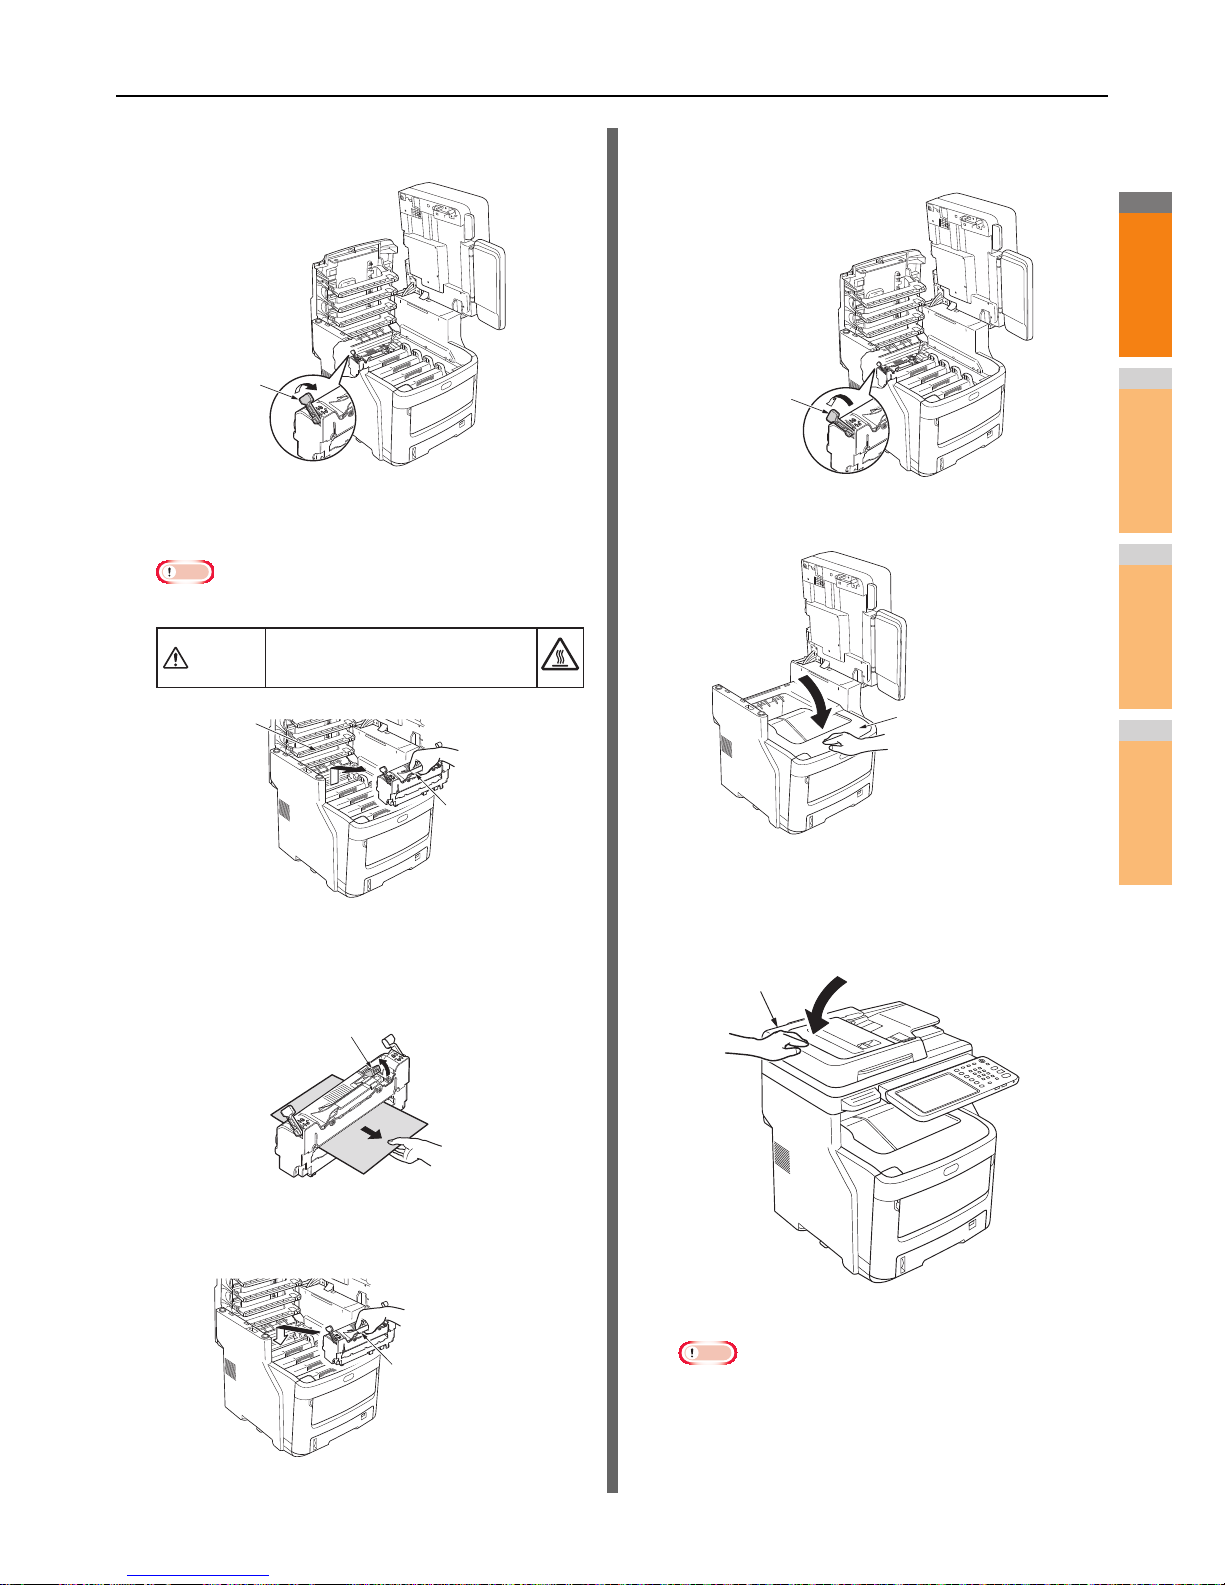
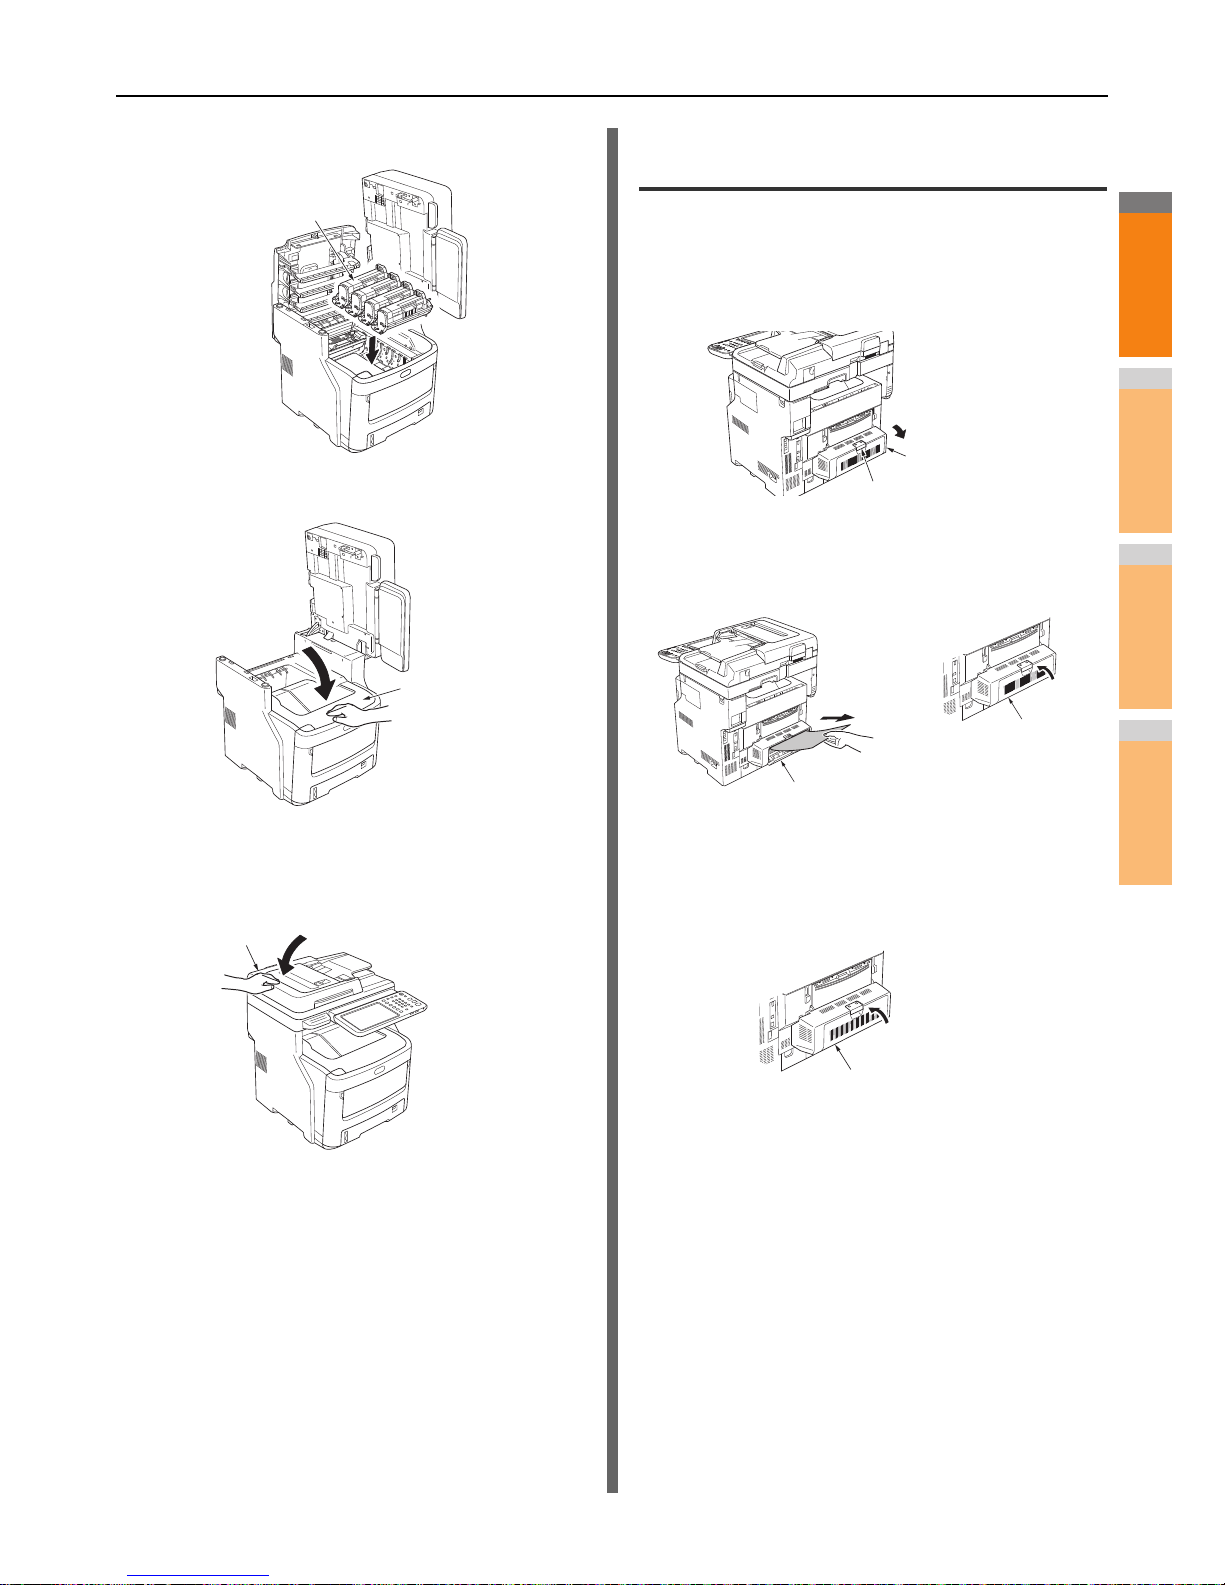
When Paper Jam Occurs Inside the Machine..........6
When an Error Remains After Removing Jammed
Paper ..................................................................... 8
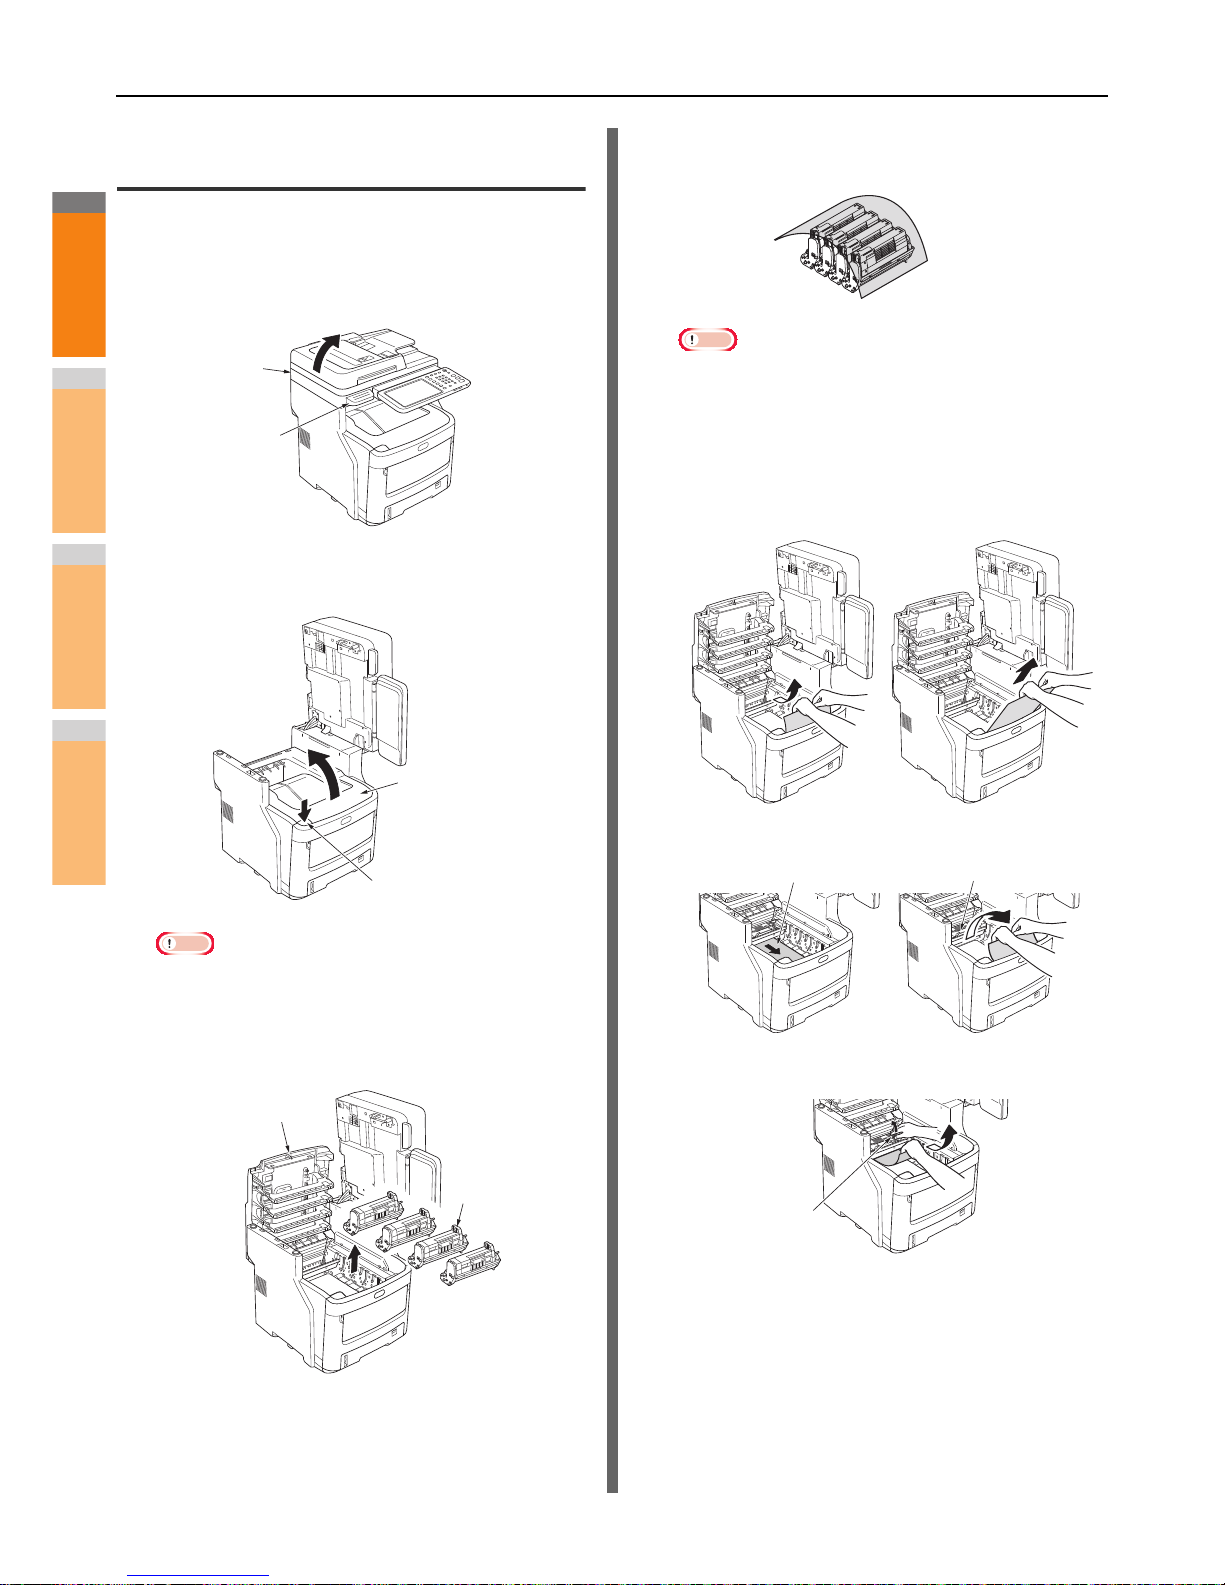
Paper Jam on Both Sides of the Printer Unit ...........9
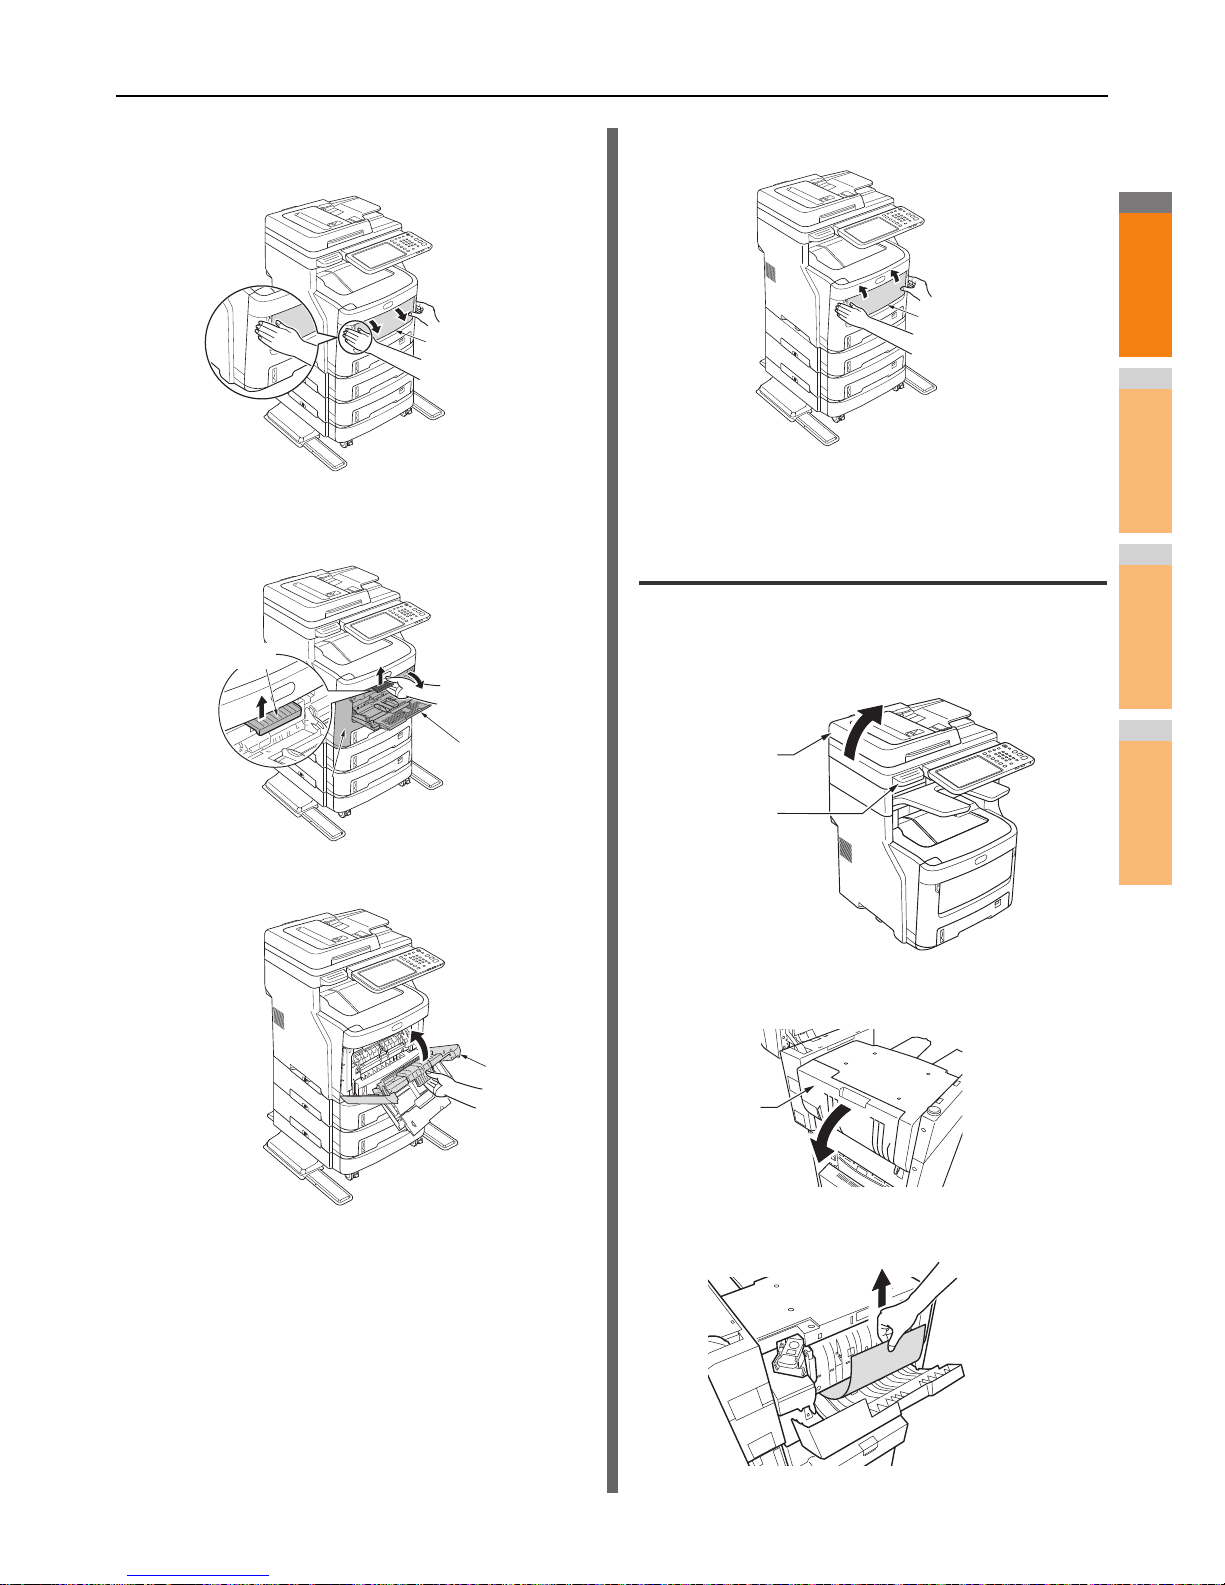
When Paper Jam Occurs in Drawer 2/3/4 (Option) ...
............................................................................. 10
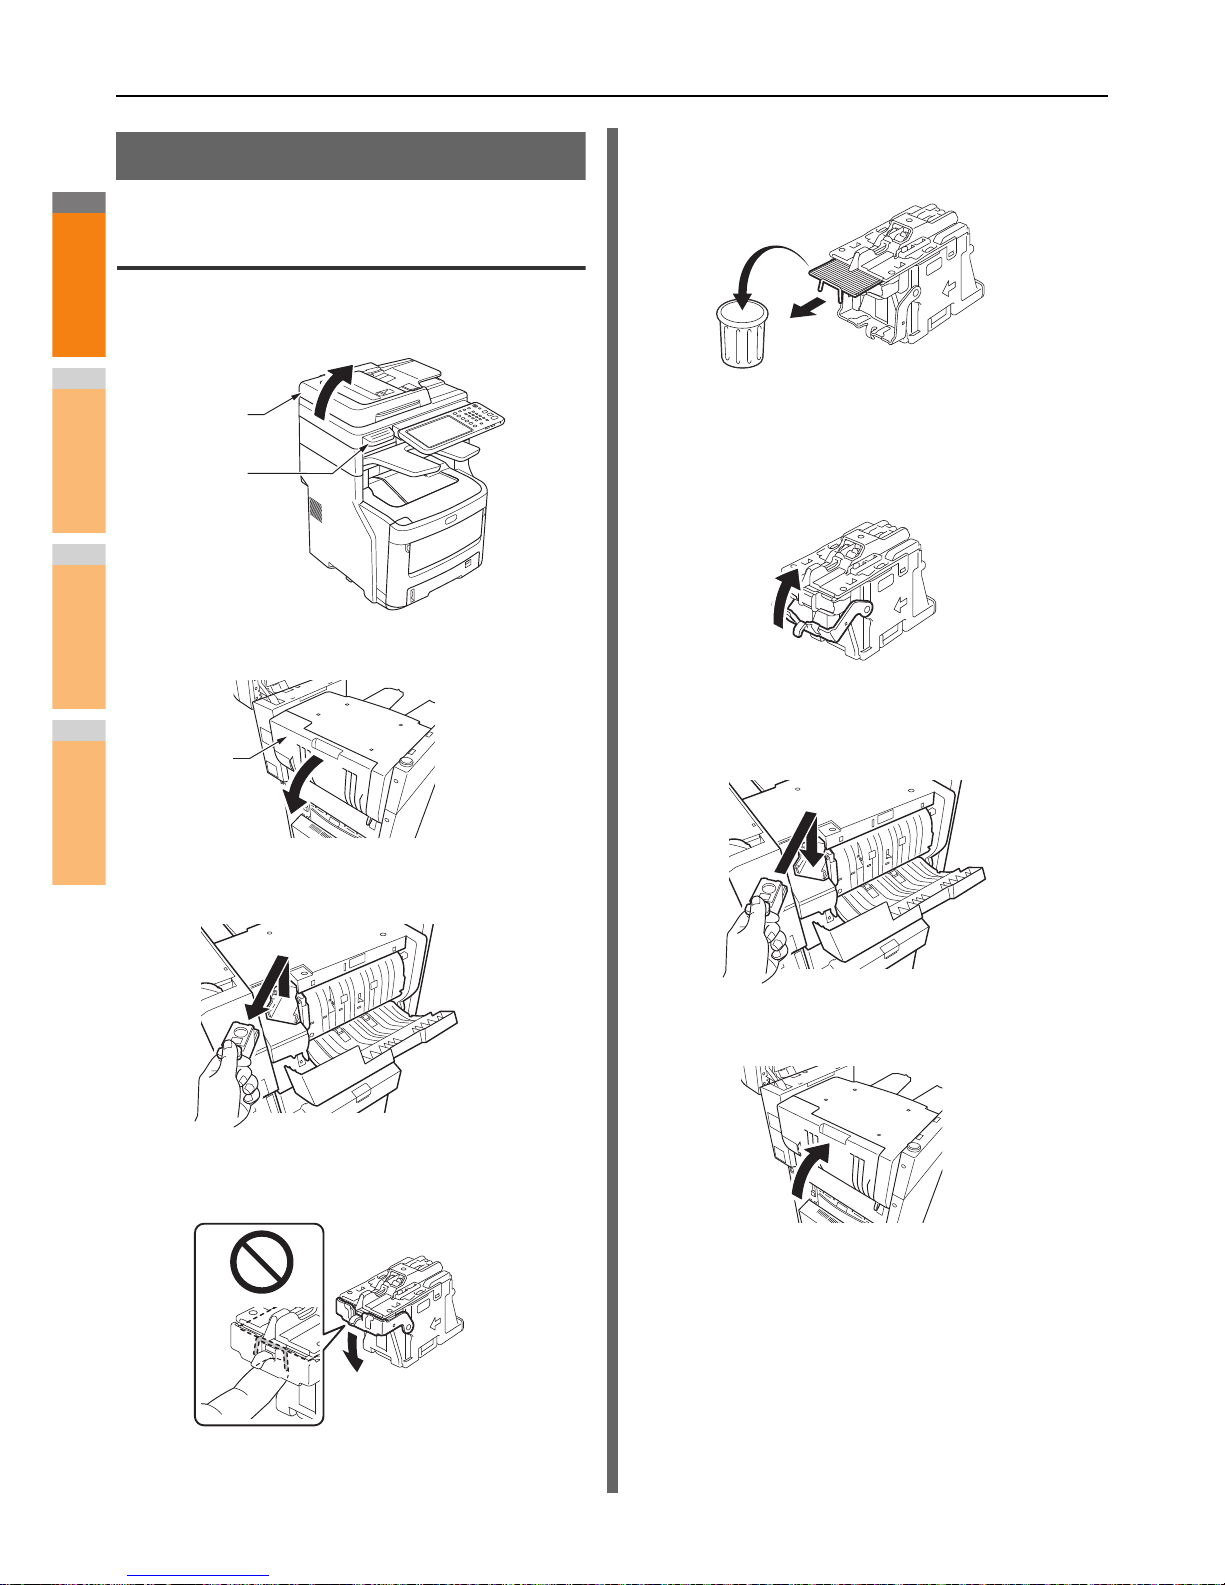
When Paper Jam Occurs in Inner Finisher (Option)
............................................................................. 11
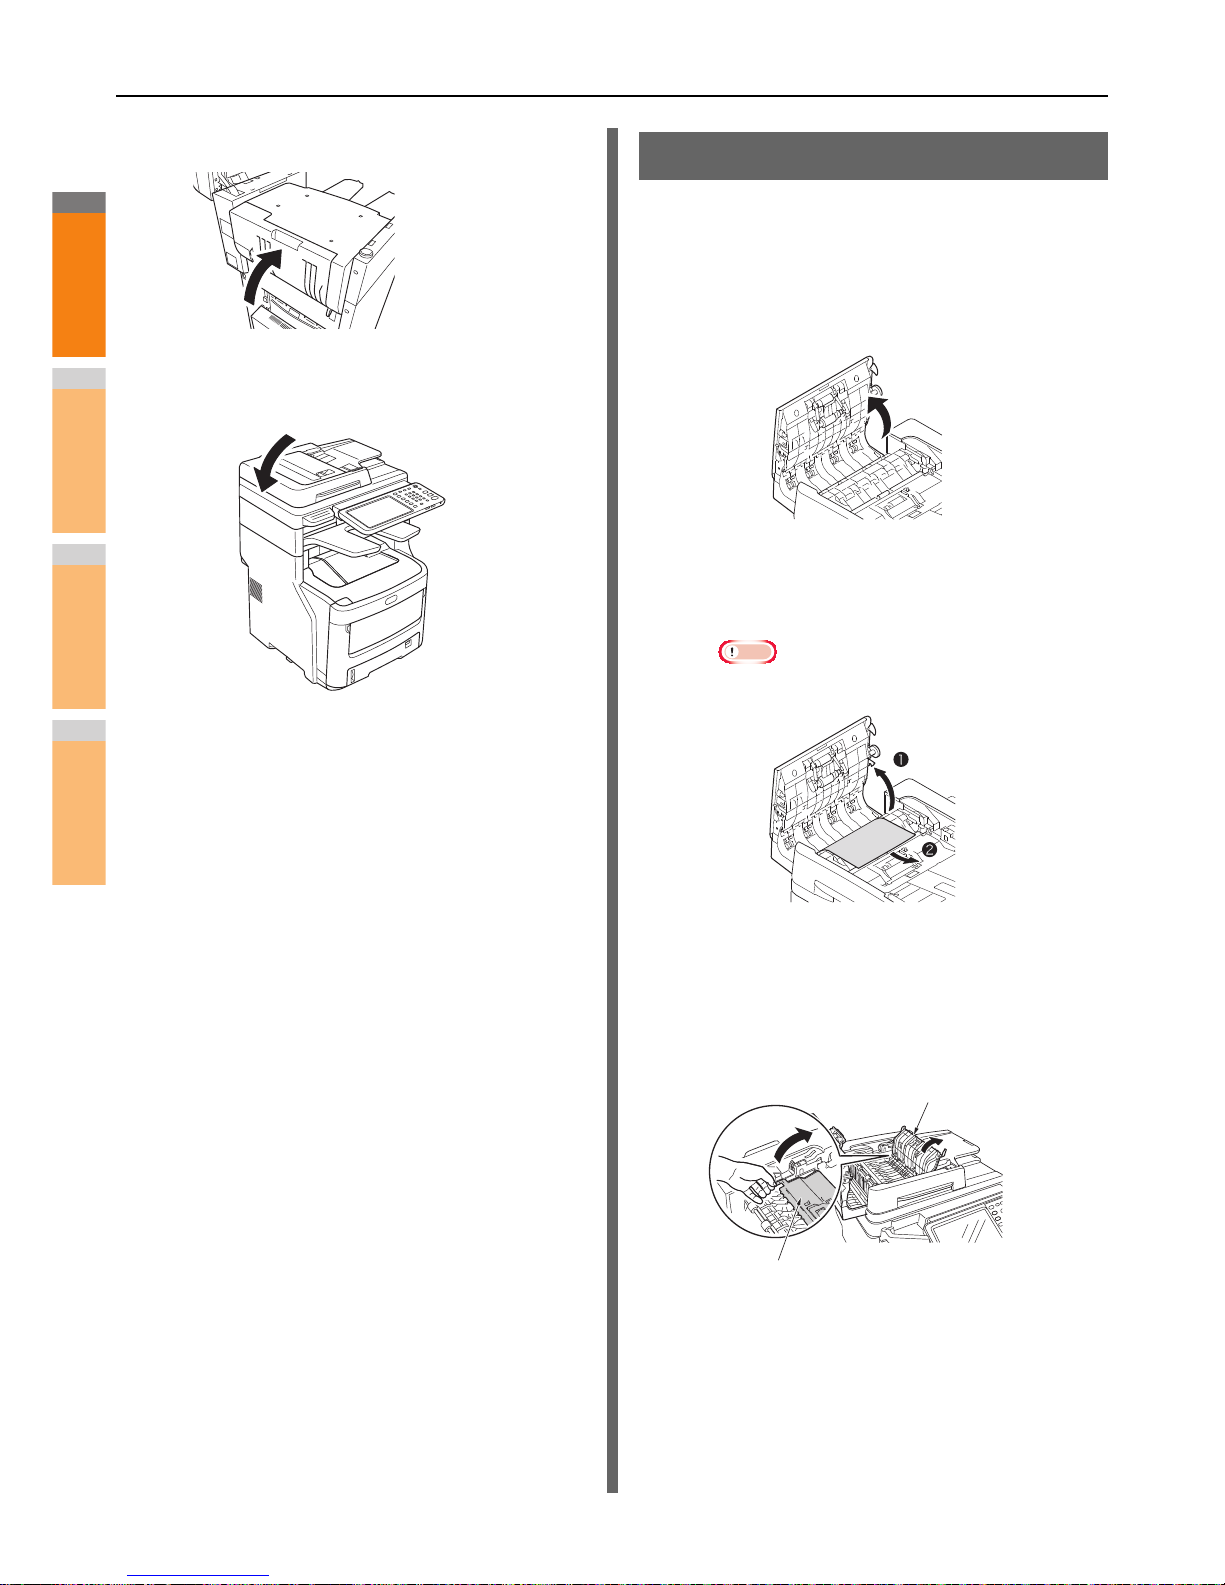
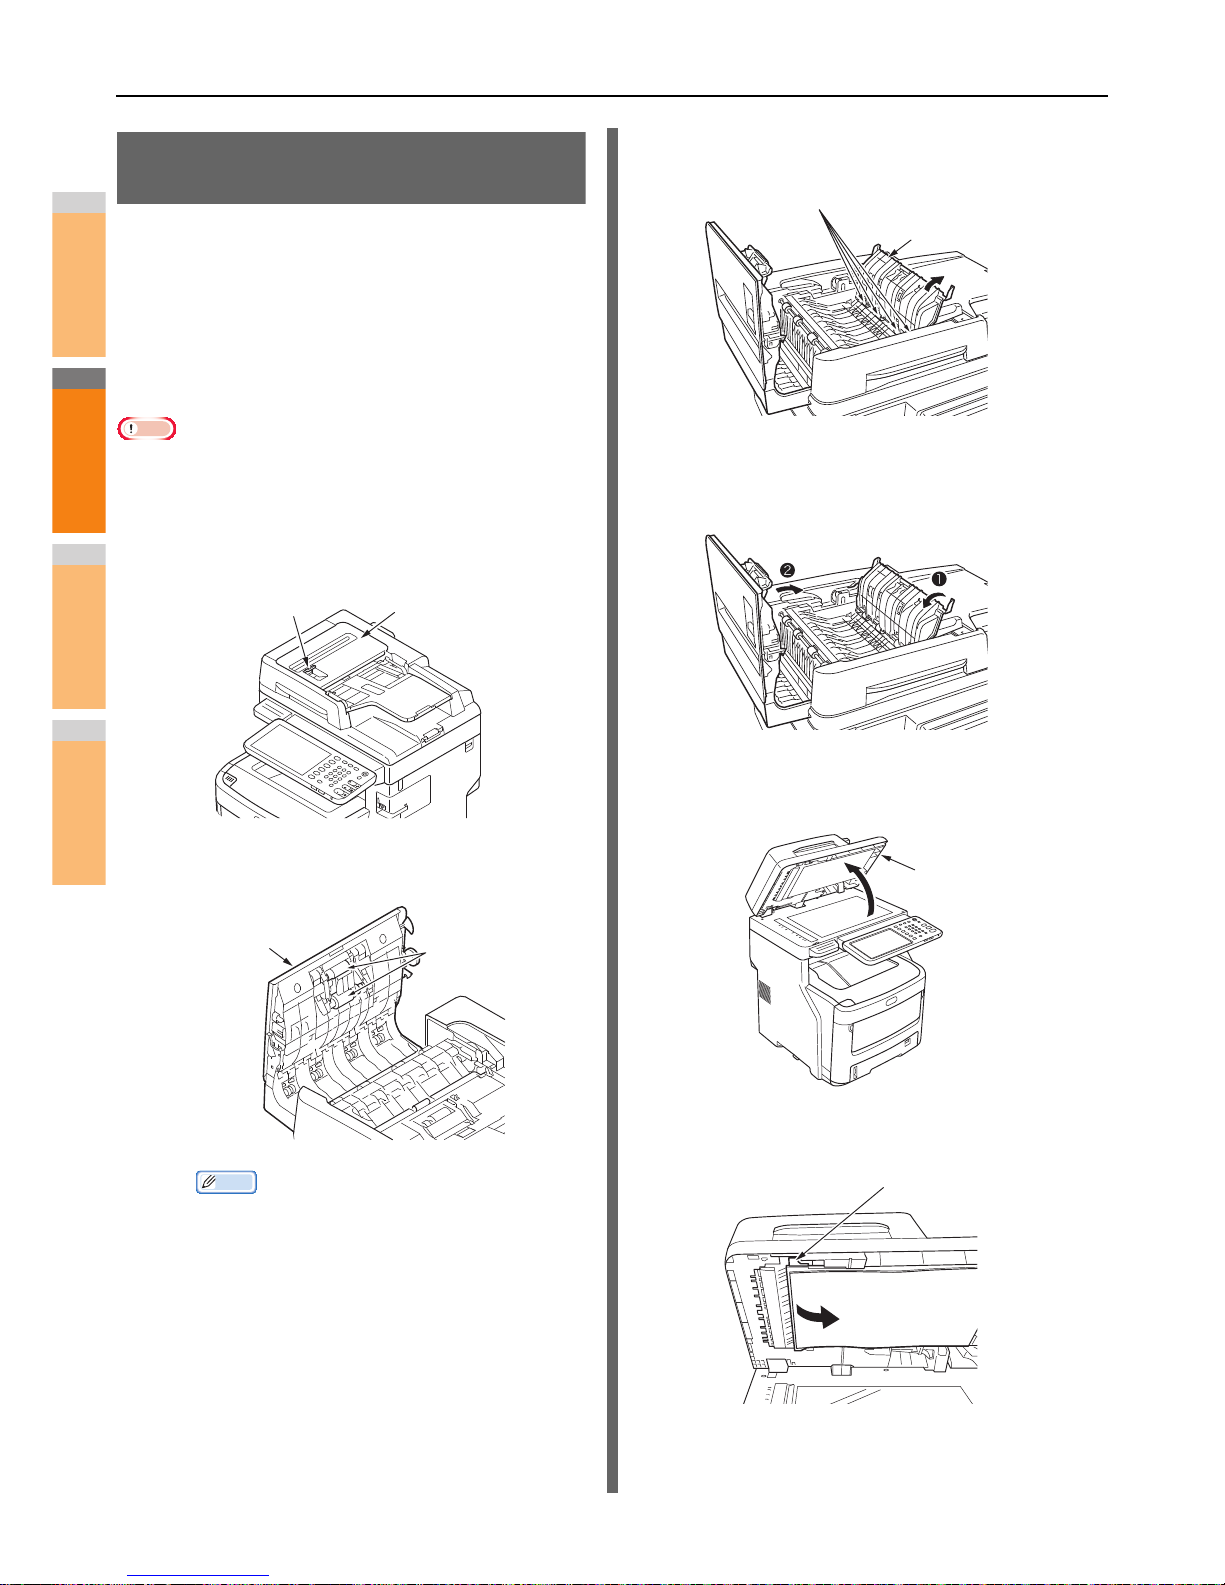
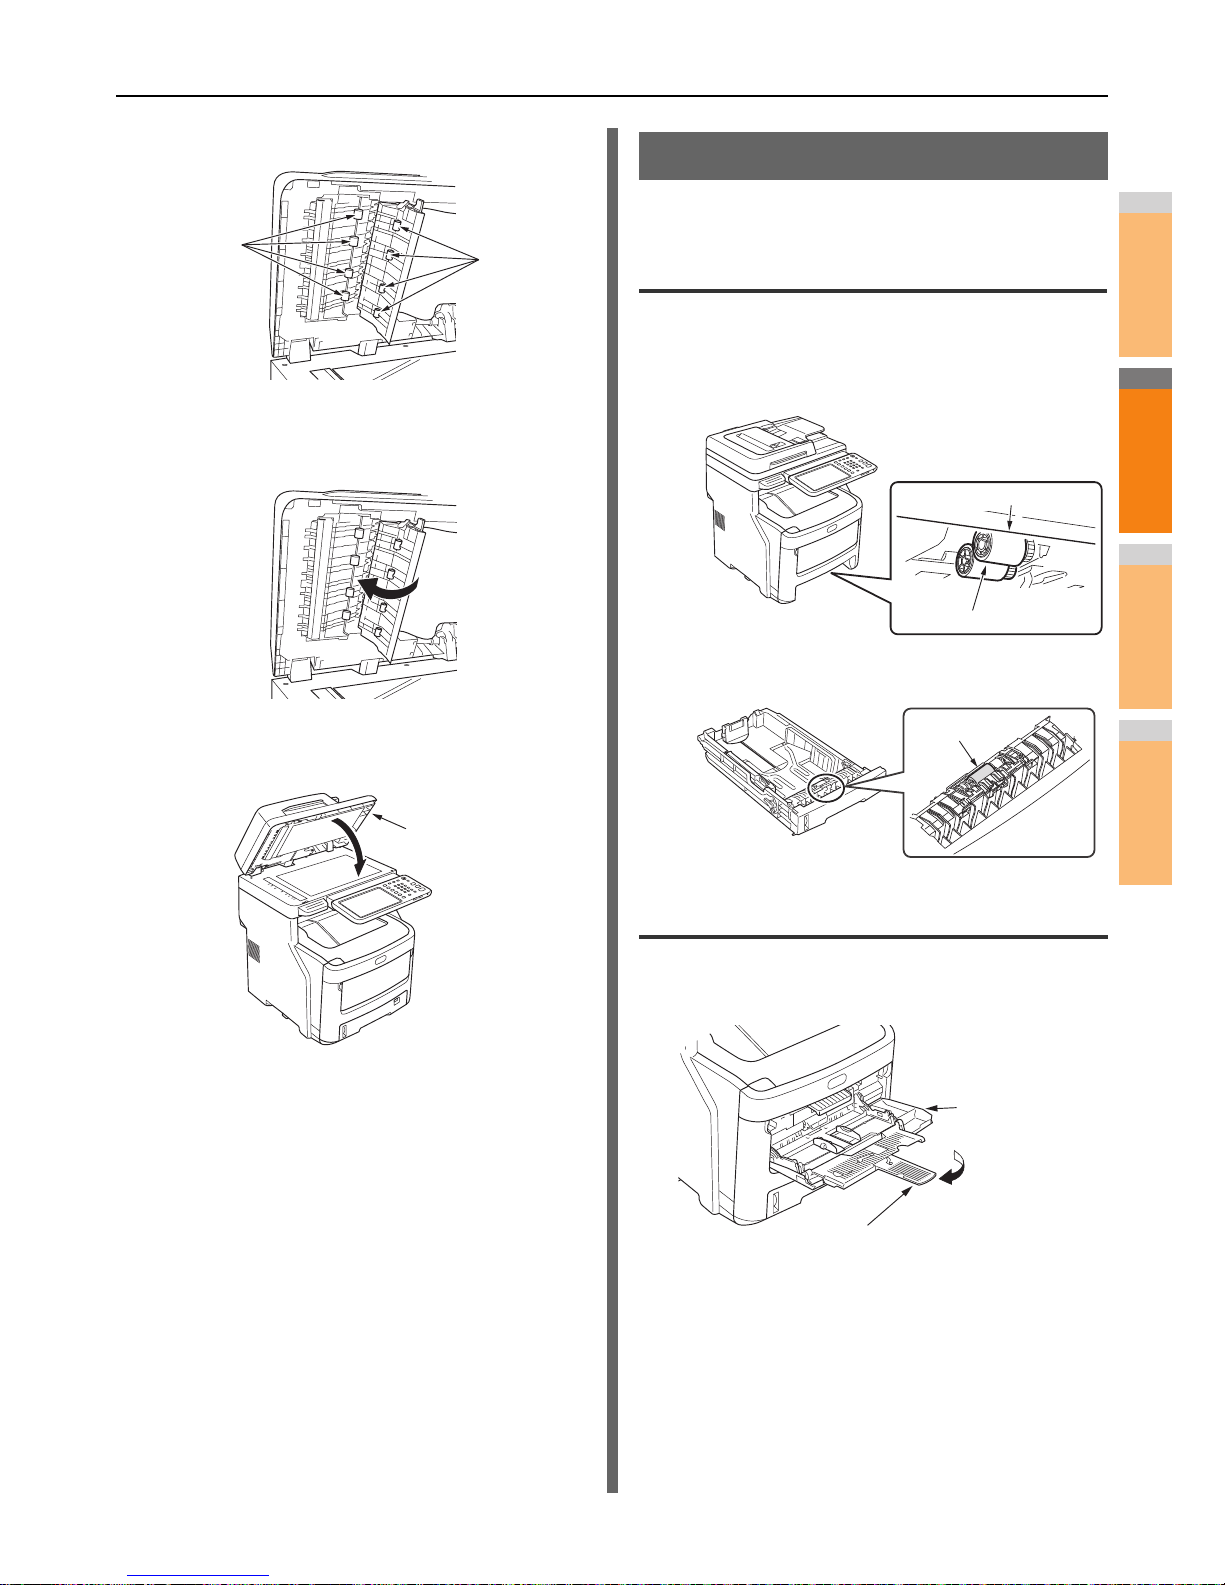
When a Document is Jammed...........................12
When a Staple Jammed.....................................14
When Staple Jam Occurs in Inner Finisher (Option)
............................................................................. 14
When Staple Jam Occurs in Offline Stapler (Option)
............................................................................. 15
TROUBLESHOOTING FOR THE
HARDWARE ...........................................16
When This Screen Is Displayed.........................16
Messages Displayed on the Touch Panel..........17
TROUBLESHOOTING FOR PRINTING...20
Print Job Problems.............................................20
Clearing print job errors ......................................... 20
Cannot remember the document password for a
Private Print job ................................................... 21
Printing a document including many graphics takes
time ...................................................................... 21
Printer Driver Problems......................................21
Cannot print (port setting problems) ...................... 21
Cannot print (SNMP Community Name problems)
............................................................................. 21
Command line options not processed.................... 22
Retrieval of printer configuration failed ..................22
Cannot change settings on the [Device Settings] tab
............................................................................. 22
Network Connection Problems ..........................22
Cannot print with the equipment (network connection
problems)............................................................. 22
Cannot print with SMB print ................................... 23
Client Problems..................................................23
Checking the client status...................................... 23
Hardware Problems ...........................................24
Print jobs not output............................................... 24
Envelope creased .................................................. 24
TROUBLESHOOTING FOR COPYING ...25
Copying Problems..............................................25
TROUBLESHOOTING for FAX ...............27
Troubleshooting .................................................27
Error codes ............................................................ 27
Error messages ..................................................... 27
Transmission/reception trouble.............................. 28
FAX Unit Specifications .....................................29
TROUBLESHOOTING FOR SCANNING
................................................................30
Scanning Problems............................................30
Cannot E-mail my scans........................................ 30
Cannot find the data saved in the shared folder .... 30
Cannot perform scanning from a PC with Office 2013
............................................................................. 30
TROUBLESHOOTING FOR e-Filing.......31
e-Filing Web Utility Problems .............................31
e-Filing Web Utility terminates the session............ 31
Numerous sub windows repeatedly appear........... 31
Displaying the items in the Contents Frame takes a
long time .............................................................. 31
Error messages ..................................................... 31
TROUBLESHOOTING FOR NETWORK
CONNECTIONS .....................................33
Locating the Equipment in the Network .............33
Cannot locate the equipment in the network ......... 33
Cannot locate the equipment with Local Discovery
............................................................................. 34
Equipment does not respond to ping command .... 35
LDAP Search and Authentication Problems ......35
Network shutdown occurs or touch panel disabled
after LDAP search ............................................... 35
LDAP authentication takes a long time.................. 35
Printing Problems (Network Related).................36
SMB print in a Windows operating system
environment......................................................... 36