In addion to cooling, the air condioner has two other funcons, i.e. air circulaon and dehumidicaon.
The air condioner can be operated via the control panel on the appliance and with the provided remote control.
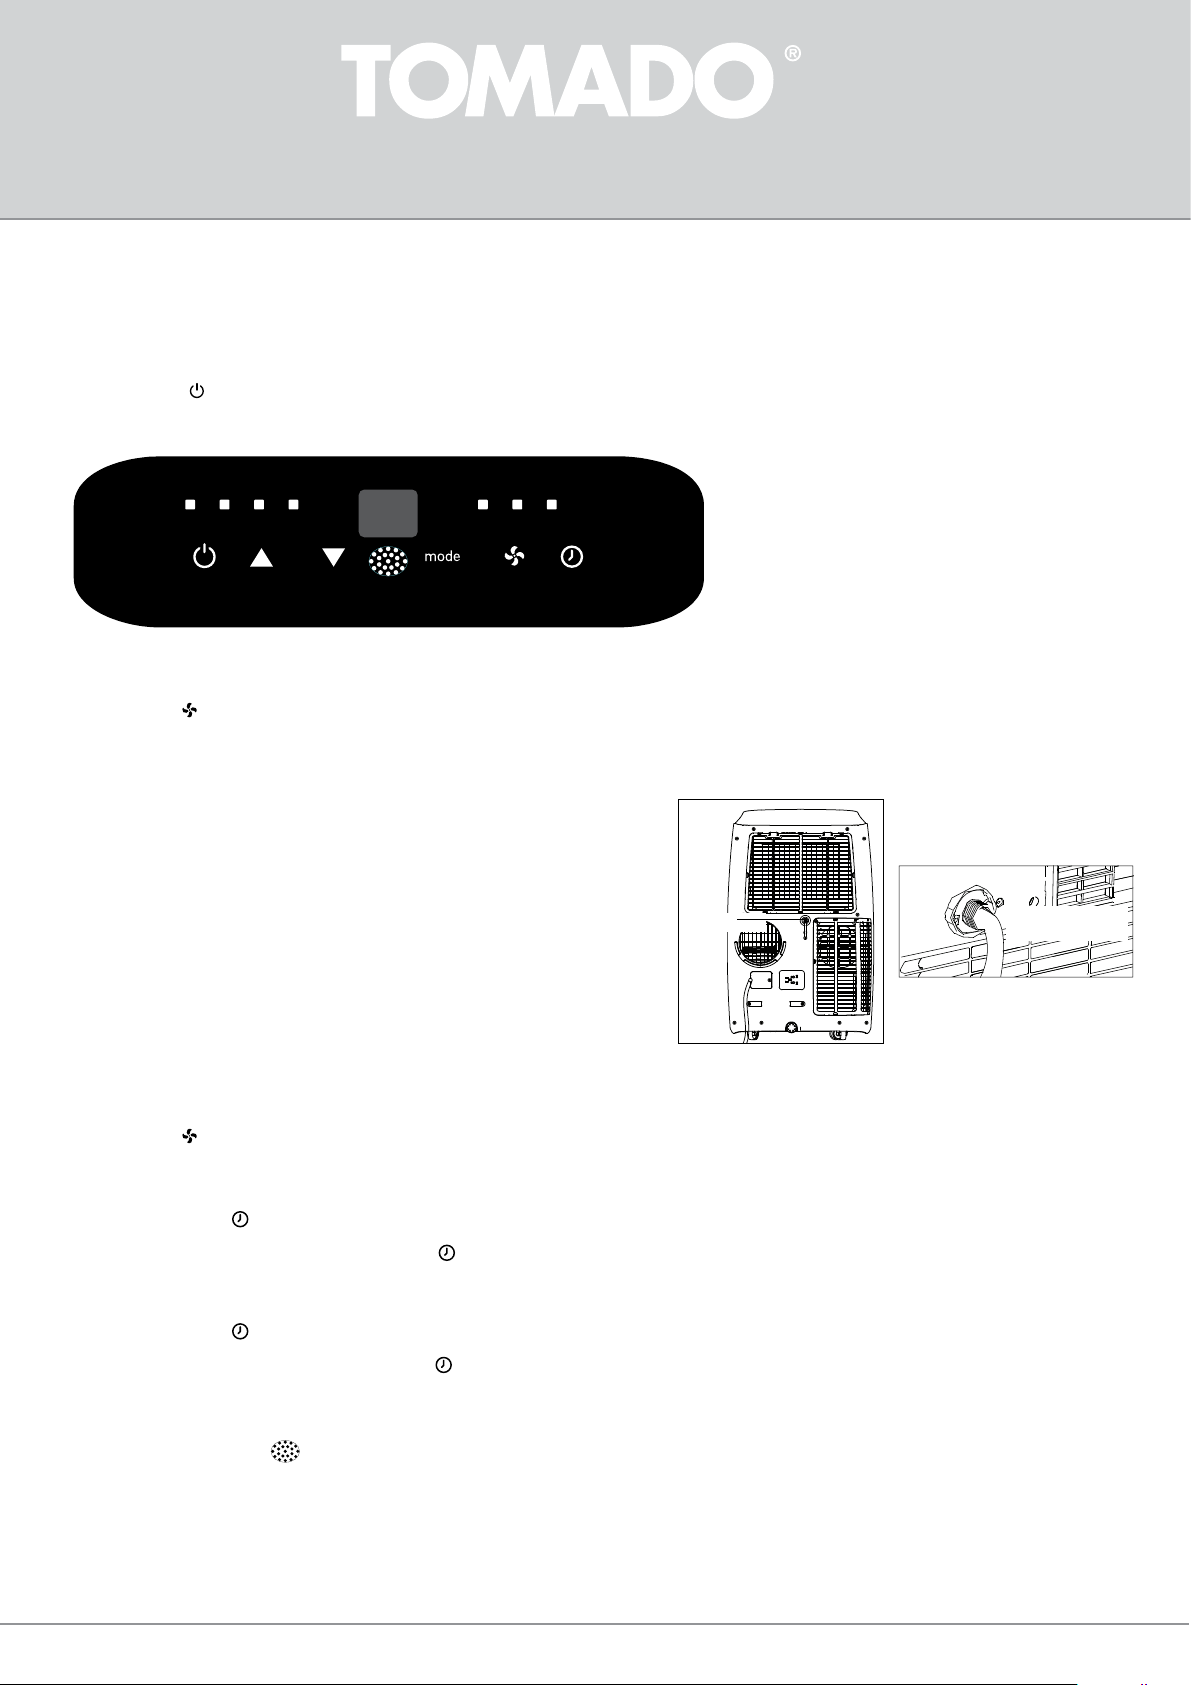
• Choose a locaon near a socket.
• Install the discharge hose in accordance with the gures and make sure the window is closed as much as possible.
• Insert the plug in an earthed socket.
• Press the on/o key to switch on the air condioner.
• The temperature range of the air condioner is: 16 to 31°C.
• Check that the discharge hose is mounted correctly.
• Do not share the socket with any other appliances.
COOLING
• Press the mode key [mode] unl the indicator light for cooling [ cool ] lights up on the display.
• Press the [ temp + / and temp - / ] keys to set the required room temperature (between 16°C and 31°C).
• Press the [ speed / ] key to set the wind speed.
DEHUMIDIFICATION
• Press the mode key [mode] unl the indicator light for dehumidicaon [ dry ] lights up on the display.
• The air condioner automacally adjusts the temperature to the current room temperature minus 2°C.
• The wind speed is at low speed automacally [ low ]. This cannot be changed.
When using this posion, a garden hose (not included in the delivery) or something similar must be
connected to discharge condensaon water.
• Unscrew the screw cap on the back of the appliance.
• Mount the end of a garden hose or a similar discharge hose to the drain and place the other end in
a receptacle, such as a bucket, situated lower than the drain of the appliance, so that the condensate
water can be discharged properly.
Cauon:
• Condensaon water may run out of the drain when the screw cap is removed and the appliance has been
used in cooling mode. Keep a drip tray at hand when removing the screw cap, in order to collect the
condensaon water.
• Make sure the discharge hose for the condensaon water properly descends and is not higher than the
drain of the appliance.
• When using this posion, the air discharge hose does not have to be connected.
• When using the cooling posion, it is recommended to not discharge the condensaon water
connuously, but to close the screw cap again. In this way the appliance is able to provide its best
performance.
AIR CIRCULATION
When using this posion, the air discharge hose does not have to be connected.
• Press the mode key [mode] unl the indicator light for air circulaon [ fan ] lights up on the display.
• Press the [ speed / ] key to adjust the wind speed - [low] or [high].
ADJUSTING THE TIMER
The mer funcon can be used to allow the air condioner to switch on automacally (delayed start) or switch o automacally at a set me (automac deacvaon).
Delayedstart
• Press the mer key [ mer/ ] when the air condioner is o and select the required me at which you want the air condioner to switch on
by means of the [ temp + / en temp - / ] keys. The delayed start can be set between 0 and 24 hours.
• Conrm the number of hours by pressing the mer key [ mer/ ] once more.
• The set number of hours is shown in the display.
• When the set number of hours have passed, the air condioner switches on automacally.
Automacdeacvaon
• Press the mer key [ mer/ ] when the air condioner is on and select the required me at which you want the air condioner to switch o using the
temperature and me [ temp + / and temp - / ] keys. Automac deacvaon can be set between 0 and 24 hours.
• Conrm the number of hours by pressing the mer key [ mer/ ] once more.
• The set number of hours is shown in the display.
• When the set number of hours have passed, the air condioner switches o automacally.
THE REMOTE CONTROL
Aim the remote control to the sensor of the appliance. The range of the remote control is approx. 8 metres (without obstacles between the appliance and the remote control).
Insert the two supplied AAA 1.5 Volt baeries in the remote control. Do take the plus and minus symbols on the inside of the remote control into account.
Note:
• If the remote control is replaced or is no longer used, remove the baeries and dispose them in accordance with applicable legislaon, as they are harmful to the environment.
• Do not mix old and new baeries. Do not use a mix of alkaline, standard (carbon-zinc) or chargeable (nickel-cadmium) baeries.
• Baeries could explode or leak when exposed to open re. Hand in baeries at a waste collecon facility or recognised waste collecon point.
• Remove the baeries from the remote control when the appliance is not being used for a longer period of me (winter storage) and keep them on a cool, dry place.
Gebruikershandleiding.com neemt misbruik van zijn services uitermate serieus. U kunt hieronder aangeven waarom deze vraag ongepast is. Wij controleren de vraag en zonodig wordt deze verwijderd.
Product:
Spelregels forum
Om tot zinvolle vragen te komen hanteren wij de volgende spelregels:
lees eerst de handleiding door;
controleer of uw vraag al eerder door iemand anders is gesteld;
probeer uw vraag zo duidelijk mogelijk te stellen;
heeft u een probleem en al geprobeerd om dit op te lossen, vermeld dit erbij aub;
heeft u een oplossing gekregen van een bezoeker dan horen wij dat graag in dit forum;
wilt u een reactie geven op een vraag of antwoord, gebruik dan niet dit formulier maar klik op de knop 'reageer op deze vraag';
uw vraag wordt direct op de website gezet; vermijd daarom persoonlijke gegevens in te vullen;
Belangrijk! Als er een antwoord wordt gegeven op uw vraag, dan is het voor de gever van het antwoord nuttig om te weten als u er wel (of niet) mee geholpen bent! Wij vragen u dus ook te reageren op een antwoord.
Belangrijk! Antwoorden worden ook per e-mail naar abonnees gestuurd. Laat uw emailadres achter op deze site, zodat u op de hoogte blijft. U krijgt dan ook andere vragen en antwoorden te zien.
Abonneren
Abonneer u voor het ontvangen van emails voor uw Tomado TMA1201W bij:
nieuwe vragen en antwoorden
nieuwe handleidingen
U ontvangt een email met instructies om u voor één of beide opties in te schrijven.
Ontvang uw handleiding per email
Vul uw emailadres in en ontvang de handleiding van Tomado TMA1201W in de taal/talen: Nederlands, Duits, Engels, Frans, Italiaans, Spaans, Pools, Deens als bijlage per email.
De handleiding is 19,04 mb groot.
U ontvangt de handleiding per email binnen enkele minuten. Als u geen email heeft ontvangen, dan heeft u waarschijnlijk een verkeerd emailadres ingevuld of is uw mailbox te vol. Daarnaast kan het zijn dat uw internetprovider een maximum heeft aan de grootte per email. Omdat hier een handleiding wordt meegestuurd, kan het voorkomen dat de email groter is dan toegestaan bij uw provider.
Stel vragen via chat aan uw handleiding
Stel uw vraag over deze PDF
Uw handleiding is per email verstuurd. Controleer uw email
Als u niet binnen een kwartier uw email met handleiding ontvangen heeft, kan het zijn dat u een verkeerd emailadres heeft ingevuld of dat uw emailprovider een maximum grootte per email heeft ingesteld die kleiner is dan de grootte van de handleiding.
Er is een email naar u verstuurd om uw inschrijving definitief te maken.
Controleer uw email en volg de aanwijzingen op om uw inschrijving definitief te maken
U heeft geen emailadres opgegeven
Als u de handleiding per email wilt ontvangen, vul dan een geldig emailadres in.
Uw vraag is op deze pagina toegevoegd
Wilt u een email ontvangen bij een antwoord en/of nieuwe vragen? Vul dan hier uw emailadres in.