CLEANING
• All removable parts (A, B, C, D, G, L, M and N) may be cleaned in the
dishwasher, except for the juice collector (E). The juice collector (E) must be
cleaned straight after use in soapy water.
• This appliance is easier to clean immediately after use.
• Do not use scouring pads, acetone, alcohol (white spirit), etc. to clean the
appliance.
• The sieve must be handled with care. Avoid any mishandling that may affect
the performance of the appliance. The sieve can be cleaned with the brush
(O). Change your sieve at the first sign of wear or damage.
• Clean the motor unit with a damp cloth. Dry carefully.
• Never immerse the motor unit under running water.
WHAT TO DO IF YOUR APPLIANCE DOES NOT WORK?
ENVIRONMENT PROTECTION FIRST!
Your appliance contains valuable materials which can be
recovered or recycled.
Leave it at a local civic waste collection point or at an
approved service centre.
5
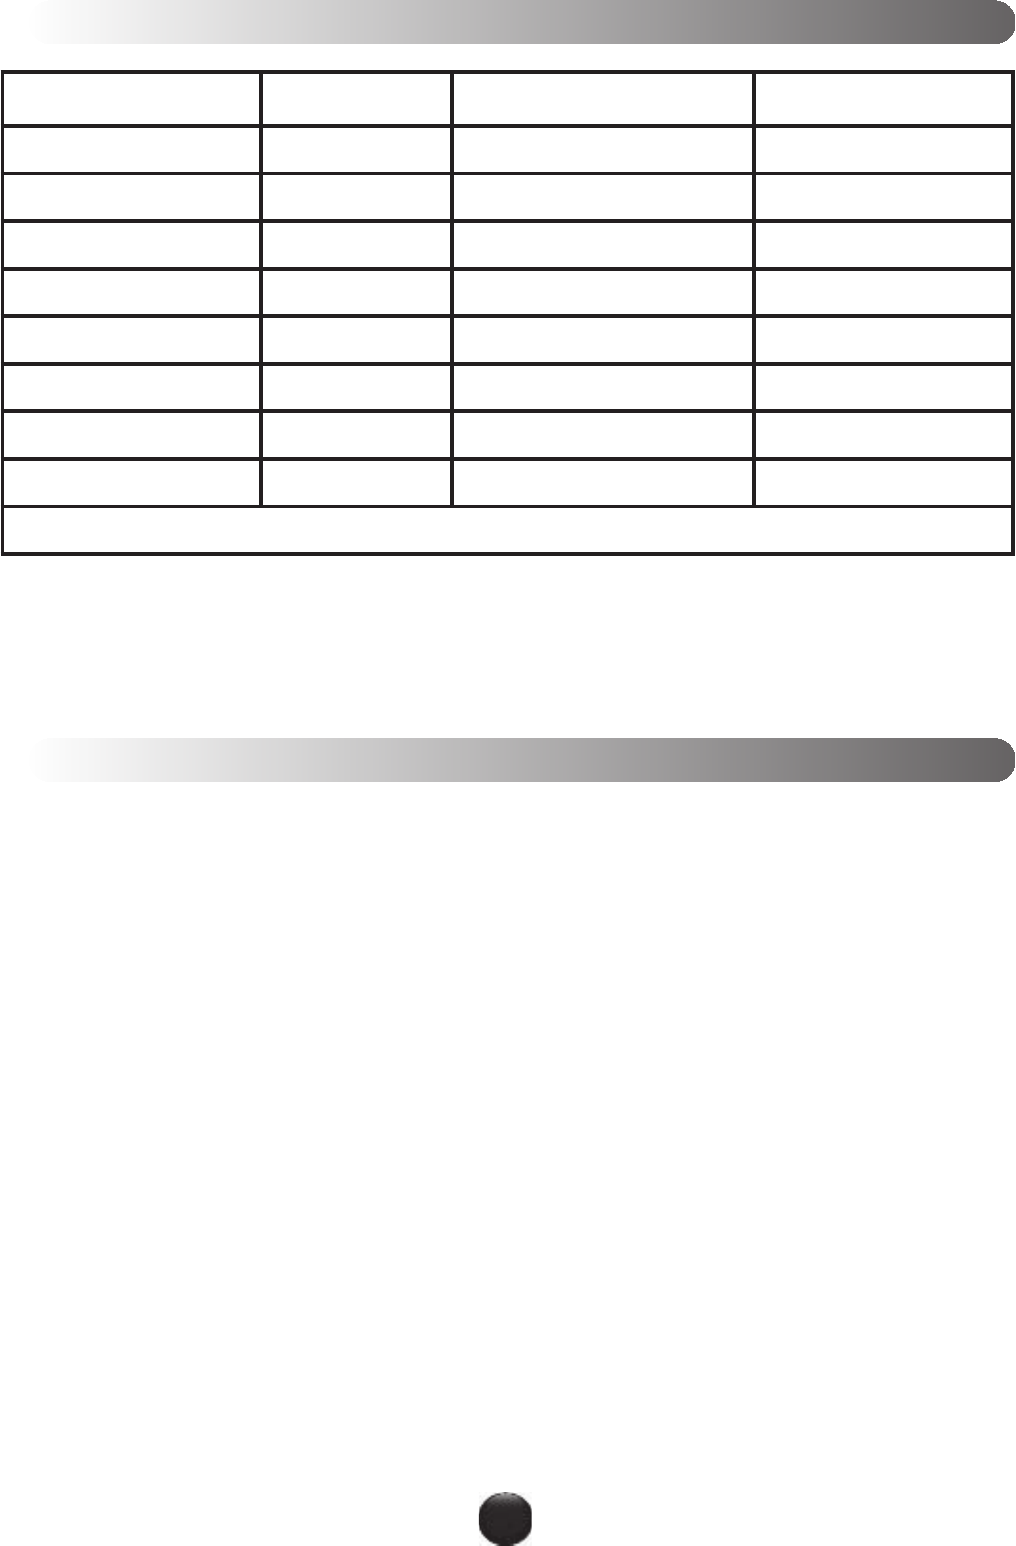
PROBLEMS
CAUSES
SOLUTIONS
The appliance does not work.
The plug is not inserted correctly;
the control switch (I) is neither on
“1” nor on “2”.
Plug the appliance into a socket with the
correct voltage. Turn the control switch
to speed “1” or “2”.
The cover (C) is not properly
secured.
Check that the cover (C) is properly
fitted and secured by the safety
clamp (H).
The appliance is giving off a smell
or is very hot to touch, is making
an abnormal noise or smoking.
The sieve (D) is not properly fitted.
Check that the sieve (D) is fitted
properly onto the drive shaft (J).
The quantity of fruit or vegetables
being processed is too great.
Leave the appliance to cool and
reduce the quantity of fruit or
vegetables being processed.
The flow of juice decreases.
The sieve (D) is blocked.
Switch off the appliance, clean the
feed tube (B) and the sieve (D).
For any other problem or fault, please contact your approved Service centre.