424665
28
Verklein
Vergroot
Pagina terug
1/44
Pagina verder
for the reception of
DVB-TTV and radio channels
Operating Manual
Digit MF4-T
1 Contents
1 Contents . . . . . . . . . . . . . . . . . . . . . . . . . . . . . . . . . . . . . . . . . . . . . . .2
2 Illustrations . . . . . . . . . . . . . . . . . . . . . . . . . . . . . . . . . . . . . . . . . . . .5
3 Important notes on operation . . . . . . . . . . . . . . . . . . . . . . . . . . . . . .8
Note on disposal . . . . . . . . . . . . . . . . . . . . . . . . . . . . . . . . . . . . . . . . . . . . . . . . . . . .8
Safety notes . . . . . . . . . . . . . . . . . . . . . . . . . . . . . . . . . . . . . . . . . . . . . . . . . . . . . . .8
When not in use . . . . . . . . . . . . . . . . . . . . . . . . . . . . . . . . . . . . . . . . . . . . . . . . . . . .9
4 Connections . . . . . . . . . . . . . . . . . . . . . . . . . . . . . . . . . . . . . . . . . . .11
4.1 Antenna . . . . . . . . . . . . . . . . . . . . . . . . . . . . . . . . . . . . . . . . . . . . . . . . . . . . . . . . . .11
4.2 Connection to a television set . . . . . . . . . . . . . . . . . . . . . . . . . . . . . . . . . . . . . . . . .11
4.2.1 Using a SCART cable . . . . . . . . . . . . . . . . . . . . . . . . . . . . . . . . . . . . . . . . . . . . . . .11
4.2.2 Using HF cable* . . . . . . . . . . . . . . . . . . . . . . . . . . . . . . . . . . . . . . . . . . . . . . . . . . . .11
4.3 Video cassette recorder (VCR)* . . . . . . . . . . . . . . . . . . . . . . . . . . . . . . . . . . . . . . .11
4.4 Hi-fi amplifier* . . . . . . . . . . . . . . . . . . . . . . . . . . . . . . . . . . . . . . . . . . . . . . . . . . . . .11
4.4.1 Analogue* . . . . . . . . . . . . . . . . . . . . . . . . . . . . . . . . . . . . . . . . . . . . . . . . . . . . . . . .11
4.4.2 Digital* . . . . . . . . . . . . . . . . . . . . . . . . . . . . . . . . . . . . . . . . . . . . . . . . . . . . . . . . . . .11
4.5 Mains power connection . . . . . . . . . . . . . . . . . . . . . . . . . . . . . . . . . . . . . . . . . . . . .12
4.6 Serial interface (RS 232)* . . . . . . . . . . . . . . . . . . . . . . . . . . . . . . . . . . . . . . . . . . . .12
5 Getting started: initial installation . . . . . . . . . . . . . . . . . . . . . . . . .12
6 Settings . . . . . . . . . . . . . . . . . . . . . . . . . . . . . . . . . . . . . . . . . . . . . . .13
6.1 Menu language . . . . . . . . . . . . . . . . . . . . . . . . . . . . . . . . . . . . . . . . . . . . . . . . . . . .13
6.2 Basic settings . . . . . . . . . . . . . . . . . . . . . . . . . . . . . . . . . . . . . . . . . . . . . . . . . . . . .13
6.2.1 Time difference to GMT (hours) . . . . . . . . . . . . . . . . . . . . . . . . . . . . . . . . . . . . . . .14
6.2.2 Country . . . . . . . . . . . . . . . . . . . . . . . . . . . . . . . . . . . . . . . . . . . . . . . . . . . . . . . . . .14
6.2.3 Remote control code . . . . . . . . . . . . . . . . . . . . . . . . . . . . . . . . . . . . . . . . . . . . . . . .14
6.2.4 Antenna feed 5V . . . . . . . . . . . . . . . . . . . . . . . . . . . . . . . . . . . . . . . . . . . . . . . . . . .14
6.2.5 Stand-by clock* . . . . . . . . . . . . . . . . . . . . . . . . . . . . . . . . . . . . . . . . . . . . . . . . . . . .14
6.3 Audio/Video settings . . . . . . . . . . . . . . . . . . . . . . . . . . . . . . . . . . . . . . . . . . . . . . . .14
6.3.1 Picture format TV set . . . . . . . . . . . . . . . . . . . . . . . . . . . . . . . . . . . . . . . . . . . . . . .15
6.3.2 Language (Audio signal) . . . . . . . . . . . . . . . . . . . . . . . . . . . . . . . . . . . . . . . . . . . . .15
6.3.3 Language (Sub-titles) . . . . . . . . . . . . . . . . . . . . . . . . . . . . . . . . . . . . . . . . . . . . . . .15
6.3.4 TV SCARTmode* . . . . . . . . . . . . . . . . . . . . . . . . . . . . . . . . . . . . . . . . . . . . . . . . . .15
6.3.5 VCR SCARTmode* . . . . . . . . . . . . . . . . . . . . . . . . . . . . . . . . . . . . . . . . . . . . . . . .15
6.3.6 Dolby Digital (AC3)* . . . . . . . . . . . . . . . . . . . . . . . . . . . . . . . . . . . . . . . . . . . . . . . .15
6.4 Antenna adjustment . . . . . . . . . . . . . . . . . . . . . . . . . . . . . . . . . . . . . . . . . . . . . . . .16
7 Operation . . . . . . . . . . . . . . . . . . . . . . . . . . . . . . . . . . . . . . . . . . . . .16
7.1 Switching on and off . . . . . . . . . . . . . . . . . . . . . . . . . . . . . . . . . . . . . . . . . . . . . . . .16
7.2 Programme selection . . . . . . . . . . . . . . . . . . . . . . . . . . . . . . . . . . . . . . . . . . . . . . .16
7.2.1 Using the Programme up/down keys . . . . . . . . . . . . . . . . . . . . . . . . . . . . . . . . . . .16
7.2.2 Using the numeric keys . . . . . . . . . . . . . . . . . . . . . . . . . . . . . . . . . . . . . . . . . . . . . .16
7.2.3 Using the programme list (Navigator) . . . . . . . . . . . . . . . . . . . . . . . . . . . . . . . . . . .17
7.2.3.1 Selecting a list . . . . . . . . . . . . . . . . . . . . . . . . . . . . . . . . . . . . . . . . . . . . . . . . . . . . .17
7.2.4 Calling up blocked programmes . . . . . . . . . . . . . . . . . . . . . . . . . . . . . . . . . . . . . . .17
7.2.5 Information box . . . . . . . . . . . . . . . . . . . . . . . . . . . . . . . . . . . . . . . . . . . . . . . . . . . .17
7.3 Volume control . . . . . . . . . . . . . . . . . . . . . . . . . . . . . . . . . . . . . . . . . . . . . . . . . . . . .18
7.4 Selecting a different language . . . . . . . . . . . . . . . . . . . . . . . . . . . . . . . . . . . . . . . . .18
2
7.4.1 Dolby Digital (AC3 mode)* . . . . . . . . . . . . . . . . . . . . . . . . . . . . . . . . . . . . . . . . . . .18
7.5 TV/Radio switching . . . . . . . . . . . . . . . . . . . . . . . . . . . . . . . . . . . . . . . . . . . . . . . . .18
7.6 Return to last programme selected . . . . . . . . . . . . . . . . . . . . . . . . . . . . . . . . . . . . .19
7.7 Display time and programme information . . . . . . . . . . . . . . . . . . . . . . . . . . . . . . . .19
7.8 Additional Programme information . . . . . . . . . . . . . . . . . . . . . . . . . . . . . . . . . . . . .19
7.9 Channel information . . . . . . . . . . . . . . . . . . . . . . . . . . . . . . . . . . . . . . . . . . . . . . . .19
7.10 Freeze frame . . . . . . . . . . . . . . . . . . . . . . . . . . . . . . . . . . . . . . . . . . . . . . . . . . . . . .19
7.11 Sleep timer . . . . . . . . . . . . . . . . . . . . . . . . . . . . . . . . . . . . . . . . . . . . . . . . . . . . . . .19
7.12 Video text . . . . . . . . . . . . . . . . . . . . . . . . . . . . . . . . . . . . . . . . . . . . . . . . . . . . . . . .20
7.12.1 Using the video text decoder of your TV . . . . . . . . . . . . . . . . . . . . . . . . . . . . . . . . .20
7.12.2 Using the internal video text decoder . . . . . . . . . . . . . . . . . . . . . . . . . . . . . . . . . . .20
7.13 Sub-titles . . . . . . . . . . . . . . . . . . . . . . . . . . . . . . . . . . . . . . . . . . . . . . . . . . . . . . . .20
7.14 Electronic Programme Guide SFI . . . . . . . . . . . . . . . . . . . . . . . . . . . . . . . . . . . . . .21
7.14.1 Downloading SFI data . . . . . . . . . . . . . . . . . . . . . . . . . . . . . . . . . . . . . . . . . . . . . . .21
7.14.2 Interrupting the download . . . . . . . . . . . . . . . . . . . . . . . . . . . . . . . . . . . . . . . . . . . .21
7.14.3 Viewing the Electronic Programme Guide . . . . . . . . . . . . . . . . . . . . . . . . . . . . . . .21
7.14.4 Now (Table of current programme contents) . . . . . . . . . . . . . . . . . . . . . . . . . . . . . .21
7.14.5 Next . . . . . . . . . . . . . . . . . . . . . . . . . . . . . . . . . . . . . . . . . . . . . . . . . . . . . . . . . . . .22
7.14.6 More . . . . . . . . . . . . . . . . . . . . . . . . . . . . . . . . . . . . . . . . . . . . . . . . . . . . . . . . . . . .22
7.14.7 SFI Functions . . . . . . . . . . . . . . . . . . . . . . . . . . . . . . . . . . . . . . . . . . . . . . . . . . . . .22
7.14.7.1SFI Information . . . . . . . . . . . . . . . . . . . . . . . . . . . . . . . . . . . . . . . . . . . . . . . . . . . .22
7.14.7.2Marking a programme . . . . . . . . . . . . . . . . . . . . . . . . . . . . . . . . . . . . . . . . . . . . . . .23
7.14.7.3SFI Timer programming . . . . . . . . . . . . . . . . . . . . . . . . . . . . . . . . . . . . . . . . . . . . .23
7.14.7.4SFI Programme overview . . . . . . . . . . . . . . . . . . . . . . . . . . . . . . . . . . . . . . . . . . . .23
7.14.7.5SFI overview by programme type (category) . . . . . . . . . . . . . . . . . . . . . . . . . . . . .24
7.14.8 Exiting SFI . . . . . . . . . . . . . . . . . . . . . . . . . . . . . . . . . . . . . . . . . . . . . . . . . . . . . . .24
7.15 Timer recording . . . . . . . . . . . . . . . . . . . . . . . . . . . . . . . . . . . . . . . . . . . . . . . . . . . .24
7.2 Receiving encrypted programmes . . . . . . . . . . . . . . . . . . . . . . . . . . . . . . . . . . . . .27
8 Changing the basic programming . . . . . . . . . . . . . . . . . . . . . . . . . .27
8.1 Configuring the Favourites list . . . . . . . . . . . . . . . . . . . . . . . . . . . . . . . . . . . . . . . . .27
8.1.1 Calling up the Navigator . . . . . . . . . . . . . . . . . . . . . . . . . . . . . . . . . . . . . . . . . . . . .27
8.1.2 Adding programmes to the Favourites list . . . . . . . . . . . . . . . . . . . . . . . . . . . . . . .28
8.1.3 Deleting programmes . . . . . . . . . . . . . . . . . . . . . . . . . . . . . . . . . . . . . . . . . . . . . . .28
8.1.3.1 Removing (deleting) from the Favourites list . . . . . . . . . . . . . . . . . . . . . . . . . . . . .28
8.1.3.2 Deleting from the Total list . . . . . . . . . . . . . . . . . . . . . . . . . . . . . . . . . . . . . . . . . . . .29
8.1.4 Sorting programmes . . . . . . . . . . . . . . . . . . . . . . . . . . . . . . . . . . . . . . . . . . . . . . . .29
8.2 Programming the electr. programme guide . . . . . . . . . . . . . . . . . . . . . . . . . . . . . . .30
8.2.1 Selecting a channel . . . . . . . . . . . . . . . . . . . . . . . . . . . . . . . . . . . . . . . . . . . . . . . . .30
8.2.2 Start category . . . . . . . . . . . . . . . . . . . . . . . . . . . . . . . . . . . . . . . . . . . . . . . . . . . . .31
8.2.3 SFI Channel . . . . . . . . . . . . . . . . . . . . . . . . . . . . . . . . . . . . . . . . . . . . . . . . . . . . . .31
8.3 Parental control(blocking programmes) . . . . . . . . . . . . . . . . . . . . . . . . . . . . . . . . .32
8.3.1 Changing the receiver PIN code . . . . . . . . . . . . . . . . . . . . . . . . . . . . . . . . . . . . . .32
8.3.2 Mode . . . . . . . . . . . . . . . . . . . . . . . . . . . . . . . . . . . . . . . . . . . . . . . . . . . . . . . . . . . .32
8.3.3 Selecting a programme . . . . . . . . . . . . . . . . . . . . . . . . . . . . . . . . . . . . . . . . . . . . . .32
8.4 Programme search (scan) . . . . . . . . . . . . . . . . . . . . . . . . . . . . . . . . . . . . . . . . . . . .33
8.4.1 Automatic Scan . . . . . . . . . . . . . . . . . . . . . . . . . . . . . . . . . . . . . . . . . . . . . . . . . . . .33
8.4.2 Expanded Scan . . . . . . . . . . . . . . . . . . . . . . . . . . . . . . . . . . . . . . . . . . . . . . . . . . . .33
3
8.4.3 Manual Scan . . . . . . . . . . . . . . . . . . . . . . . . . . . . . . . . . . . . . . . . . . . . . . . . . . . . . .34
8.4.4 After the scan . . . . . . . . . . . . . . . . . . . . . . . . . . . . . . . . . . . . . . . . . . . . . . . . . . . . .34
8.5 Service settings . . . . . . . . . . . . . . . . . . . . . . . . . . . . . . . . . . . . . . . . . . . . . . . . . . . .35
8.5.1 Activating default (factory) setting . . . . . . . . . . . . . . . . . . . . . . . . . . . . . . . . . . . . . .35
8.5.2 Delete all programmes . . . . . . . . . . . . . . . . . . . . . . . . . . . . . . . . . . . . . . . . . . . . . .35
8.5.3 Updating Software . . . . . . . . . . . . . . . . . . . . . . . . . . . . . . . . . . . . . . . . . . . . . . . . . .36
8.5.4 Copying settings . . . . . . . . . . . . . . . . . . . . . . . . . . . . . . . . . . . . . . . . . . . . . . . . . . .36
8.6 System configuration . . . . . . . . . . . . . . . . . . . . . . . . . . . . . . . . . . . . . . . . . . . . . . . .36
8.7 Encryption/decoding system . . . . . . . . . . . . . . . . . . . . . . . . . . . . . . . . . . . . . . . . . .36
9 Technical terms . . . . . . . . . . . . . . . . . . . . . . . . . . . . . . . . . . . . . . . .37
10 Technical data . . . . . . . . . . . . . . . . . . . . . . . . . . . . . . . . . . . . . . . . .38
11 Trouble-shooting guide . . . . . . . . . . . . . . . . . . . . . . . . . . . . . . . . . .41
Notes . . . . . . . . . . . . . . . . . . . . . . . . . . . . . . . . . . . . . . . . . . . . . . . . .42
Index . . . . . . . . . . . . . . . . . . . . . . . . . . . . . . . . . . . . . . . . . . . . . . . . .43
For daily use . . . . . . . . . . . . . . . . . . . . . . . . . . . . . . . . . . . . . . . . . . .44
4
Your unit carries the CE logo, and complies with all relevant EU standards.
Not responsible for printing errors, subject to change without notice.
Correct as at 06/05
TechniSat, DigiPal 2 and DigitMod T1 are registered trade-marks of
TechniSat Digital GmbH
P.O. Box 560
D- 54541 Daun Germany
www.technisat.com
Reproduction and copying only with the permission of the publisher
5
2 Illustrations
On/Stand-by
Programme list on/off
Back
Language select
Info
Stop
Menu on/off
Sound on/off-mute
EXTERNAL
Multi-function keys
TV/Radio mode
Volume +
SFI/EPG
Programme -
Volume -
Programme +
Video text
OK
Arrow key right
Arrow key left
Arrow key up
Arrow key down
Remote Control
Sleep-Timer
Help
Option
Numeric keys
6
SCART socket
TV
SCART socket
VCR
Mains power socket
Antenna
output
Input terrestrial antenna
(antenna feed +5V/30mA/
switchable via OSD)
RS 232
interface
Audio outputs
analogue
Audio output
digital (electric)
Digit MF4-T
Programme
selection up/down
On/Standby
LED display
7
Dear customer,
congratulations on your decision to buy this digital receiver.
This operating manual is designed to assist you in using the comprehensive functions of
your new digital receiver to the optimum.
We have tried to keep the instructions as brief as possible, while making them as compre-
hensive, and comprehensible, as necessary.
The range of features of your unit is constantly being expanded in the form of software
updates. This may lead to additional operating steps becoming necessary which are not yet
described in this manual, or the operation of existing functions may be altered. For this rea-
son, you should occasionally visit the TechniSat homepage in the Internet, to download the
most up-to-date operating manual.
We wish you many years of enjoyable entertainment with your digital receiver!
Your
TechniSat Team
3 Please read this first
> Before you set up your unit for operation, please first check that the package contains
all the components that should be there. The following are supplied as standard:
1 digital receiver, 1 mains power cable, 1 remote control unit, 1 operating manual, 1
guarantee card, 2 batteries (1,5VAAAsize).
> Insert the batteries provided in the battery compartment of the remote control unit.
Note the correct polarity when inserting the batteries.
> Before connecting the digital receiver, please first read the safety notes in Chapter 3.
> Chapters 4, 5 and 6 describe connection of the receiver, and adjusting it to the
external installation (dish antenna, LNC, etc.), to the television set, VCR, etc. These
settings need only be made once during initial installation, and need only be adjusted
or changed when there are any changes in your equipment, i.e. if a different external
unit is connected, or additional appliances are connected.
> Chapter 7describes all the functions necessary for day-to-day operation, such as
programme selection or volume adjustment.
> Chapter 8contains information on how to add new programmes, and how to chan-
ge the programme order.
> Technical terms used in the operating manual are explained in Chapter 9.
> Technical data may be found in Chapter 10.
> Assistance in finding and eliminating problems can be found in the trouble-shooting
guide in Chapter 11.
Important notes on operation
The use of a so-called "On Screen Display" simplifies the operation of the digital receiver,
and reduces the number of keys required on the remote control unit. All functions are
displayed on the screen, and can be controlled by a few keystrokes. Related functions are
grouped together in a "MENU". The selected function is highlighted in a different colour. The
lower line of the display shows coloured bars representing the red, green, yellow and blue
function keys. These coloured bars represent different functions in the various menues,
which can be executed by pressing the appropriate colour-coded key (“multi-function key”)
on the remote control unit. The function keys are only active when a brief description is
displayed in the appropriate field.
The descriptions of keys and terms that appear in the OSDmenu are printed in bold type in
this operating manual.
Help function:
Where available in the menu, pressing the blue function key will cause a help text to be
displayed, pressing again will return to normal operation.
Note on disposal
The packaging of your unit consists entirely of recyclable material. Please sort the compo-
nents apprpriately, and dispose of them via the “Dual System”, or your equivalent recycling
system. Please note that spent batteries from the remote control unit, as well as electronic
components in general, shouls not be disposed of in your domestic refuse. For appropriate
disposal, consult your specialist retailer, or consult your local authority).
Safety notes
For your own protection you should read the notes on safety precautions carefully before
commencing operation of your new unit.
8
The manufacturer bears no responsibility for damage caused by non-observance of the safe-
ty precautions, or by inappropriate handling.
> To ensure adequate circulation of air, place the unit on a smooth horizontal surface
and do not place any objects on top of the unit. The top cover contains air slits which
permit heat to escape from the interior of the unit.
> Do not place any burning items, such as burning candles, on top of the unit.
> Do not place any containers filled with liquid, such as vases, on top of the unit, and
ensure the unit remains dry, i.e. it must not be subjected to water spray or droplets.
> The unit may only be operated in a temperate climate.
> Do not open the cover of your unit! You are in danger of receiving an electric shock. If
it becomes necessary to open the unit, this should only be done by trained personnel.
In the following cases you should disconnect the unit from the mains power and con-
sult a specialist repair service:
> the mains cable or the mains plug are damaged
> the unit has been exposed to humidity, or liquid has entered the casing
> in case of severe malfunction
> in case of significant external damage
When not in use
The unit should be disconnected from the mains power supply if it will not be operated for an
extended period (e.g. when you are away on holiday), or during an electric storm.
9
10
Connecting the DVB-T receiver
a. Connect the antenna with the terrestrial antenna input of the DVB-T receiver.
b. Scart connection between the DVB receiver and the television set.
c. Connection between the antenna output of the DVB-T receiver and the antenna input
of the television set.
d. Scart connection of a video recorder with the VCR Scart socketof the DVB receiver.
e. Connection between the audio outputs and a Hi-Fi installation.
f. Mains power connection
VCR
a
c
f
d
e
b
4 Connections
The references below to items a b c etc. refer to the illustration on page 10.
4.1 Antenna
a The cable coming from the terrestrial antenna (roof-mounted or room antenna) should
be connected with the terrestrial antenna input of the receiver.
Wherever possible please use a roof-mounted antenna. An internal room antenna may
be sufficient under very favourable reception conditions. If an active antenna is being
used, ensure that the antenna feed is switched on (Point 6.2.4).
4.2 Connection to a television set
4.2.1 Using a SCART cable
b Connect your receiver (SCART socket TV) and the television set (SCARTsocket)
by means of a SCARTcable. If your television set is appropriately equipped, this will
switch automatically to AV mode when the digital receiver is switched on, and will thus
switch to DVB-T operation.
4.2.2 Using HF cable
If you wish to continue receiving any analogue programmes that may be available, the digital
receiver must be connected to the antenna input of the television set.
c Connect the receiver (antenna output) with the antenna input socket of the televi-
sion set, using a suitable cable connection.
4.3 Video cassette recorder (VCR)*
d Connect the video recorder to the SCARTsocket VCR. In playback mode, the video
recorder will supply a switching signal to the digital receiver. The video recorder signal
will be supplied automatically to the televison set.
If your video recorder does not supply a switching signal, use the O/AV key to switch
your digital receiver to the external input AV. Press this key again to revert to normal
operation.
4.4 Hi-fi amplifier*
4.4.1 Analogue*
e To enjoy the best possible sound quality, you can connect the digital receiver to a hi-
fi amplifier. Use a suitable cable to connect the cinch sockets Audio R and Audio
L of the digital receiver to an input of the hi-fi amplifier (e.g. CD or AUX; please note
that the Phono input is not suitable!).
4.4.2 Digital*
e If your amplifier is equipped with an appropriate electrical or optical input socket,
connect the socket AUDIO OUT DIGITAL electrical with the electrical input of
your amplifier.
Sampling rates of 32, 44.1 and 48 KHz are provided, depending on the broadcasting station.
In addition, this connection will reproduce the Dolby Digital signal (AC3), where available.
11
4.5 Mains power connection
The digital receiver should only be connected to the mains power supply after it has been
completely connected with all other components in the system. This serves to avoid the digi-
tal receiver or other components being damaged or destroyed.
f When you have completed making all the connections, use the mains cable (DigiPal
2) or power adapter (DigitMod T1) supplied to connect the receiver to a mains power
outlet 230 V/50-60 Hz.
4.6 Serial interface (RS 232)*
The RS 232 interface is used to update the operating system, and to facilitate pre-program-
ming by means of a personal computer.
5 Getting started: initial installation
When you have read the safety notes, and have connected the unit as described in Chapter 4,
you can proceed to switch on the receiver as described in Chapter 7. When switching on the
unit for the first time, the Start window with the AutoInstall installation assistantwill be
displayed. The installation assistant will guide you through the most important settings of the
digital receiver quickly and in an easy-to-follow manner.
The keys on the remote control required to make the appropriate step in the installation are
marked.You can break off the initial installation procedure at any time by pressing the redfunc-
tion key.
Pressing the green function key takes you back to the previous step of the installation pro-
cedure. This allows you to correct any entries made in error.
If the initial installation is not carried out at all, or is interrupted, your unit will start operation
with its standard pre-programmed settings.
The initial installation procedure described her serves only as an example. The exact initial
installation procedure will depend on the settings you wish to make.
Please follow closely any instructions that appear on the screen.
Menu/OSD language:
> Press OK to display the selection window for the Menu/OSD language.
> Use the arrow keys up/down to select the preferred OSD language.
> Confirm by pressing OK.
Audio language
> Use the arrow keys up/down to select the preferred audio channel language.
When the installation assistant has been completed, your language selection here will
be used to sort the programmes in your Favourites list.
> Confirm by pressing OK.
Country/Time Zone
> Use the arrow keys up/down to select the time zone of the country in which you
are located.
(Fig. 5-4)
The time on the receiver clock will be set automatically based on your selection.
> Press OK to confirm your selection, and continue with antenna configuration.
12
Searching/scanning for channels/stations
When the software version has been checked, and updated if necessary, you can proceed to
the programme search.
> Use the arrow keys up/down to mark the field All Programmes, if you want to
search for both freely available and enrcypted programmes, or All unencrypted
Programmes, if you want to search only for free-to-air programmes.
> Press the OK key now to confirm, and an automatic programme scan will be carried
out. The entire reception range of the receiver will be scanned for digital programmes
This procedure may take several minutes. Please note any messages displayed on
the screen.
Updating the software
When the programme scan has been completed, the digital receiver will check whether a
new version of the software is available for your unit. If a new version is available, you can
perform an automatic software update.
> Use the arrow keys left/right to select the field Update, and confirm by pressing
OK. The new software for the receiver will now be downloaded. This procedure may
take several minutes.
Exiting from the installation assistant
> Read the message displayed and confirm by pressing OK, to return to normal opera-
tion.
6 Settings
Now that you have completed connecting your new digital receiver, and have commenced
operation, you can, if you wish, further optimize the settings of the digital receiver for your
personal preferences.
6.1 Menu language
Under this menu item you have the option of setting the menu language according to your
personal preference.
To alter the OSD language proceed as follows:
> Press the Menukey to call up the Main Menu.
> Now use the arrow keys up/down to select the menu item OSD/Menu language.
> Confirm by pressing OK.
The sub-menu OSD language will be displayed.
> Use the arrow keys up/down to select the desired language.
> Confirm by pressing OK, this will store the selection in memory.
> Press Backto return to the Main Menu.
6.2 Basic settings
To optimize the performance of your DVB receiver, you must still set this to your personal
preferences.
> Press the Menu key to call up the Main Menu.
> Use the arrow keys up/down to mark the item Settings.
> Confirm by pressing OK. The sub-menu Settings will be displayed.
> Now use the arrow keys up/down to mark the item Basic Settings.
> Confirm by pressing OK. The menu Basic Settings will be displayed.
13
> Use the arrow keys up/down to move the marker within the menu, and to change
the individual positions as indicated. When selecting a menu item, please also note
any messages displayed on the screen.
The following settings may be made:
6.2.1 Time difference to GMT (hours)
Your receiver is equipped with a clock. This is synchronised to Greenwich Mean Time via
satellite signals. If you have selected the option None under the heading Country(Point
6.2.3), you will simply need to correct the time to correspond to your local time by using the
arrow keys right/left.
6.2.2 Country
This function provides for automatic adjustment for summer and winter time. Using the
arrow keys right/left, enter your home country in the line Country.
> Press the Back key to return to the menu Settings, or press the Menukey to
return to normal operation. The settings are automatically stored in memory.
6.2.3 Remote control code
Your digital receiver can be operated wither with the remote control unit supplied (remote
control code Sat2), or with an optional remote control unit utilising remote control code Sat1.
This option allows you, for instance, to operate two similar sets in the same room, with each
being controlled independently, and without interference of the other. To do this, unit 1 is
controlled by remote control code Sat1, and unit 2 by remote control code Sat2.
In this line, decide whether your receiver should be allocated the remote control code SAT1
or SAT2.
> In this line, operate any key of the appropriate remote control unit (Sat1 or Sat2) to
select the remote control code.
> Press Backto return to the menu Settings, or press Menu to return to normal
operation. The settings will be stored automatically.
6.2.4 Antenna feed 5V
If you are using an active antenna, you will have to switch on the antenna power feed
(5V/30mA). The antenna will be fed via the terrestrial antenna input.
> In this line, use the arrow keys left/rightto switch the antenna feed on or off.
In case of an overload or short circuit of the antenna feed, this will be switched off automati-
cally. If this occurs, rectify the problem/cause, then switch the antenna feed on again.
6.2.5 Stand-by clock*
To reduce the power consumption of your unit in -standby mode, you have the option of swit-
ching the clock time display on or off.
> In this line, use the arrow keys left/rightto set the standby clock mode to on or
off.
> Press Backto return to the menu Settings, or press Menu to return to normal
operation. The settings will be stored automatically.
6.3 Audio/Video settings
In order to optimize the performance of your digital receiver in conjunction with your televi-
sion set, you may wish to make further settings in the menu Audio /Video Settings.
14
> Press the Menu key to call up the Main Menu.
> Use the arrow keys up/down to select the line Settings.
> Confirm by pressing OK. The sub-menu Settings will be displayed.
> Now use the arrow keys up/down to select the line Audio/Video Settings.
> Confirm by pressing OK. The menu Audio/Video Settings will be displayed.
> You can use the arrow keys up/downto move the marker around within the
menu, and change the individual settings as indicated. When selecting a menu item
please also note any messages displayed on screen.
The following settings can be adjusted:
6.3.1 Picture format TV set
Use the arrow keys left/right to select the appropriate picture format for your TV set, 4:3
or 16:9. This function provides for automatic adjustment of the picture format broadcast to
your television set.
6.3.2 Language (Audio signal)
Use the arrow keys right/left to select your preferred language. If the language is availa-
ble from the provider, this language will be automatically selected.
6.3.3 Language (Sub-titles)
Sub-titles can be displayed on your screen using this DVB receiver. If the function Sub-titles
is switched on, and the language selected is being broadcast, these will be automatically
displayed.
If the function is not switched on, sub-titles can also be displayed manually. Sub-titles are
indicated by the osd insertion Sub-title choosingshown in the information box. Please
also note Point 7.13 of this operating manual.
6.3.4 TV SCART mode*
Use the arrow keys right/left to select the appropriate setting for your TV set,FBAS, S-
Video or RGB. The standard setting is FBAS.
6.3.5 VCR SCART mode
Use the arrow keys left/right to select the appropriate setting for your video recorder, eit-
her FBAS or S-Video.
6.3.6 Dolby Digital (AC3)*
Anumber of movies are transmitted in the Dolby Digital format. This is indicated after a pro-
gramme has been selected by the Dolby logo in the information window. If you have
connected a Dolby Digital 5.1 channel amplifier to the system, you can enjoy movies in 5.1
channel Dolby Digital sound where available.
To enjoy this feature, you must simply connect the Audio Out Digital output (see Point 4.5.2)
of your DVB receivers with the digital input of your Dolby Digital 5.1 channel amplifier.
Where a programme is broadcast in Dolby Digital sound, this will be indicated by the Dolby
logo being displayed in the information window when the programme is selected. If the func-
tion Dolby Digital (AC3) is switched on, these programmes will automatically be reproduced
in Dolby Digital format.
If the function is not enabled (off) , Dolby Digital sound can also be switched on manually.
Please refer to Point 7.4.1 of this operating manual.
15
6.4 Antenna adjustment
To position the antenna in the optimum direction, the receiver is equipped with a signal
strength indicator.
> Press the Menu key to display the Main Menu.
> Now use the arrow keys up/down to select the entry Settings.
> Confirm by pressing OK.
The sub-menu Settings will be displayed.
> Now use the arrow keys up/down to mark the menu line Antenna adjust-
ment.
> Confirm by pressing OK. The menu Antenna adjustment will be displayed.
> Now use the arrow keys left/rightto enter the channel with the weakest recep-
tion signal.
> Now position the antenna in such a way that both bars show a maximum position.
red bar poor reception
yellow bar good reception
green bar excellent reception
7 Operation
7.1 Switching on and off
> You can switch on the digital receiver by pressing the On/Standby key either on the
receiver front panel, or on the remote control.
> Press the same key again, either on the receiver front panel or on the remote control,
to switch the receiver off again.
> The receiver is now in standby mode,and the display on the receiver will show the
time.
If the current time is not shown, this must still be downloaded to the unit. To do this,
switch the receiver on, and set it to a major channel that broadcasts a time signal, for
about 30 seconds to download the time automatically.
7.2 Programme selection
7.2.1 Using the Programme up/down keys
> You can move through the list one slot at a time, up or down, by using the
Programme keys up/down either on the receiver or on the remote control.
7.2.2 Using the numeric keys
> Use the numeric keys to enter the programme number you wish to view.
For example:
1 for programme slot 1
1, then 4 for programme slot 14
2, then 3, then 4 for programme slot 234
When entering multi-digit programme numbers you have approx. 3 seconds after pressing
the key to complete your entry.
If you wish to enter a number consisting of only one or two digits, you can speed up the
selection process by holding down the key of the last digit a little longer.
16
7.2.3 Using the programme list (Navigator)
> Press OK.
The programme list will now be displayed. In TV mode only the TV programmes will
be displayed, and in radio mode only the radio programmes will be displayed. The
programme currently selected is marked/highlighted.
> Use the arrow keys up/down to mark the desired programme.
> Press the yellow function key Preview to view a preview of the programme highligh-
ted.
> Press OK to view the highlighted programme.
> Use the arrow keys up/down to move the marker around the list one line at a
time.
> Use the arrow keys right/leftto move the marker around the list, backward or
forward, one page at a time.
7.2.3.1 Selecting a list
To facilitate finding programmes your receiver is equipped with several programme lists. You
may select your Favourites list (see Point 8.1), or display the alphabetically sorted Total
list or sort the list by Providers.
> Press OK to display the active programme list.
> Now use the red function key to open a window showing the types of programme list
available (Favourites List, Providers and Total list). The active programme
list type will be highlighted.
> Use the arrow keys up/down to select, e.g. the programme list type Total list.
> Confirm by pressing OK.
The alphabetically sorted Total list, which includes all programmes, will be display-
ed.
> Use the arrow keys up/down to mark the programme you wish to view.
> Confirm by pressing OK.
7.2.4 Calling up blocked programmes
If you select a programme that is blocked by the parental control function, the message
Receiver PIN will be displayed on screen.
> Use the numeric keysto enter your PIN code. You can now view the programme
selected.
or
> Switch to a programme that is not blocked.
If you have selected the option Always under Point 6.2.1, the message requiring entry of
the code will appear each time you switch to a blocked programme. However, to make your
life a little easier, the PIN code only needs to be entered once in each operational cycle.
If you have selected the option Auto, only the programme currently running will be unbloc-
ked. The parental control will be active again for the next programme broadcast, and the PIN
code will also have to be entered again.
7.2.5 Information box
Each time the programme is changed, an information box will be displayed briefly showing
the programme slot and programme name. In addition, symbols will indicateother programme
characteristics, such as for video text, for a 16/9 format programme, for various
audio channels (e.g. movie with soundtrack in various languages, or various radio program-
17
mes) and for encrypted programmes. Where available from the provider, the recommen-
ded age restriction as well as the programme genre will also be indicated.
7.3 Volume control
You have the facility to adjust the volume of your digital receiver. This makes operating the
receiver even more convenient, since you can access all important functions from a single
remote control, and will rarely have to use the remote control of your television set. When
the digital receiver is switched on it will reproduce sound at the volume level last set.
> Adjust the volume of your digital receiver using the Volume + key to increase volu-
me, and the Volume - key to make it softer.
> Press the Sound on/off key to switch the sound off (mute), press the same key
again to switch the sound back on.
7.4 Selecting a different language
If a programme is broadcast in several languages, or with various soundtracks, proceed as
follows to select a different language or sound channel:
> Press the Language Select key. Alist of languages currently broadcast will be
displayed on screen.
> Use the arrow keys up/down to select the desired language.
> Confirm by pressing OK.
You can now listen to the programme in the desired language. Your digital receiver can also
receive mono broadcasts.
> Use the arrow keys right/leftto choose between Mono Channel 1 ( ), Mono
Channel 2 ( ) and Stereo ( ).
7.4.1 Dolby Digital (AC3 mode)*
If a programme is broadcast in Dolby Digital sound, this will be indicated by the Dolby logo in
the information window when you switch to the programme. If the Dolby Digital (AC3) func-
tion has been enabled as per Point 6.3.6, this programme will automatically be reproduced in
this format.
If you have not switched on the function Dolby Digital (AC3), switch your receiver to AC-
3 mode manually as follows:
> Press the Language Select key. If available, a list of the languages currently
being broadcast as well as Dolby Digital (AC 3)will be displayed on screen.
> Use the arrow keys up/down to mark the line Dolby Digital.
> Confirm by pressing OK.
You can now enjoy the programme in full 5.1 channel Dolby Digital sound. If you would like
your receiver to recognise and reproduce Dolby Digital broadcasts automatically, you should
set your receiver to automatic AC3 reproduction as described in Point 6.3.6.
7.5 TV/Radio switching
The pre-programming setup contains not only television programmes, but radio programmes as well.
> Press the TV/Radio key to switch the digital receiver to radio mode.
The receiver will now play the radio programme last selected.
> Press the TV/Radio key again to return to the television programme last viewed.
18
7.6 Return to last programme selected
> Press Backon the remote control to return to the last programme viewed previously.
> Press the key again to return to the programme viewed previously.
7.7 Display time and programme information
This function allows you to view programme information related to the current programme.
> Press the Info key to display the information related to the current programme (Fig.
7-8).
In the bottom half of the screen you will now see displayed the current time, the name of the
current channel and programme, including the starting and ending time, where these data
are broadcast by the provider.
> Where available, press the Info key again to display information on the next pro-
gramme.
7.8 Additional Programme information
Where available, the function Programme Information can be used to obtain additional pro-
gramme information on the programme currently selected.
> Press 2 x the Info key to open an additional information window (Fig. 7-9).
More detailed information on the current programme will be displayed.
> Lengthy text passages can be scrolled one line at a time using the arrow keys
right/left.
> Press the Info function key again to display information on the next programme.
> Press the Info key once more to exit the information window.
7.9 Channel information
> Press the OK key
> Use the arrow keys up/down to mark the programme you wish to view informa-
tions.
> Press Option key to display the data of the channel currently selected.
> You may use the other coloured function keys to display Audio/Video information,
Programme information and, where available, information on the Encryption
system (CA) used.
> Press Menu to return to normal operating mode.
7.10 Freeze frame
> Press the Stop key to freeze the current television image as a still image.
> Press the same key again to return to normal operation.
7.11 Sleep timer
> Press the key Sleep timer several times to select the desired switch-off time of the
receiver, from 15 minutes to 2 hours. At the end of the selected time, the receiver will
switch off automatically, and go to stand-by mode.
19
7.12 Video text
7.12.1 Using the video text decoder of your television set
Where broadcast by the provider, video text will be transferred to your television set. To ope-
rate the video text function, use the remote control of your television set. Should you expe-
rience problems with your television set, such as an overlap of video text and picture con-
tent, you should set your digital receiver to FBAS mode(Point 6.3.4).*
7.12.2 Using the internal video text decoder
As an alternative, you can utilize the integrated TOP video text decoder to display informa-
tion. The TOP video text system groups togetherall text pages in groups and blocks accor-
ding to subjec matter, which makes the system more manageable.
> Select the programme on which you wish to view video text information.
> Press the Video text key to switch on the video text .
> Use the numeric keysto enter the video text page you wish to view. Your entry will
be displayerd in the upper left corner of the screen. When you have entered the des-
ired video text page, your receiver will search for this page.
Since not all video text pages can be transmitted simultaneously, it may take a few
seconds for your unit to find the page and display it on your television screen.
All video text providers utilize page 100 for their index.
> Use the red resp. green keys to move forward or back one page at a time.
> Press the yellowfunction key to call up the video text group indicated in the yellow
field.
> Press the blue function key to call up the video text block indicated in the blue field.
Mixed mode
> Pressing the key Video text again will switch the screen display to mixed mode
(simultaneous display of the video text information as well as of the TV picture). Press
this key again to exit from mixed mode.
Stop mode
> Press the Stop key; the message Stop will be displayed in the top left corner of the
video text window. This will prevent the automatic continuous paging of the video text
sub-pages. Press the Stop key again to exit the Stop mode.
> Press Backto return to normal operation.
7.13 Sub-titles
Where sub-titles are available, this will be indicated by the osd insertion Sub-title choo-
sing in the information window. If you have enabled the function Sub-titles (in accordance
with Point 6.3), these will automatically be displayed, provided they are available in the lang-
uage selected.
If the sub-titles are only available in other languages, or are broadcast via video text, you
can enable these manually as follows.
> Press the Option key (you may have to press it several times) until the heading
Sub-titles display a table listing the sub-title languages being broadcast, and/or the
video text pages on which the sub-titles are being broadcast.
> Use the arrow keys up/down to mark the desired language or video text page.
> Confirm by pressing OK. The sub-titles will now be displayed.
Please note that these functions are only available when sub-titles are actually being
broadcast, and the settings are not stored in memory if you switch to another channel.
20
7.14 Electronic Programme Guide SFI
Your digital receiver provides an electronic programme guide. This allows you to view the
programme information relating to one or more programmes on your screen.
You can very quickly obtain an overview of programmes currently being broadcast, or you
can view all the programmes being broadcast today, or on the following days.
The SFI functions allow you to:
- display information relating to programme contents on your screen
- mark programmes you wish to view, which will be automatically selected when the
programme begins
- programme time events
- search for and set programmes according to the programme type or category.
7.14.1 Downloading SFI data
The programme information is updated by your receiver at the times set in accordance with
Point 8.2.3 (SFI Channel). The only proviso is that the receiver must be in standby mode.
The download procedure is indicated by the message SFld in the display. If your receiver is
switched on at this time, the function will not be carried out.
You can also initiate a manual download procedure immediately after switching the reciver
off (while the display shows “oooo”) by pressing the SFI key. During the download procedure
the message SFld will appear briefly in the display, followed by an indication of the percen-
tage of SFI data already transferred, e.g.038P for 38%).
The duration of the download procedure will depend on the number of programmes that
need to be updated. The maximum period in advance for which data is available is seven
days. Based on the limit on total data that can be stored, this time-frame will be reduced the
more programmes are listed in the electronic programme guide.
You can decide for yourself, which programme should be listed in the electronic programme
guide. These can be added to the list as described in Point 8.2.1.
7.14.2 Interrupting the download
The download procedure can be interrupted by switching on the digital
receiver(On/Standby key). The SFI data obtained during the previous update remains avai-
lable.
7.14.3 Viewing the Electronic Programme Guide
> Switch on both the digital receiver and your television set.
> Press the SFI key on the remote control of your digital receiver.
The electronic programme guide will now be displayed on screen. The programmes
you have selected, or which were listed as part of the default setting, are shown here
with their current programmes being broadcast.You can now use the SFI function to
obtain information on the contents of various programmes. You can also use the SFI
functions to select a particular programme, to pre-select it for later viewing, or to add
it to the timer programming.
7.14.4 Now (Table of current programme contents)
The SFI table “Now” listing current programmes will be displayed first. The yellow bar to the
right of the programme name indicates the time elapsed of the current programme. The pro-
gramme currently being viewed is highlighted.
> Use the arrow keys up/down to move the marker one line at a time. Use the
arrow keys right/left to move the marker one page at a time.
21
> The SFI functions (Point 7.14.7) are now available.
> Press the yellowfunction key to move to the SFI table “Next” (See Point 7.14.5)
or
> Press the TV/Radio key to return to normal operation.
7.14.5 Next
> Use the yellowfunction key to display the table "Next" (following programmes).
The SFI functions (Point 7.14.3) are available.
> Press the yellowfunction key to move to the SFI table “More” (Point 7.14.6)
or
> Press greenfunction key or Backkey to return to the previous SFI table “Now
or
> Press the TV/Radio key to return to normal operation.
7.14.6 More
> While the SFI table “Next” is displayed, press the yellow function key to display the
SFI table “More”.
An additional time window will be displayed in the title line of this table. This window
will show the time of the SFI table displaed.
> Press the yellowfunction key to page onward by the time indicated in the yellow
bar.
> Keep the yellowfunction key depressed to continue paging on. Aclock will be
shown to give you a better overview.
> Press the green function key to page backward
The individual days of the week are displayed along the lower border of your screen.
If information is available for the following days, the corresponding fields will be high-
lighted.
> To obtain a preview for a specific day, press the appropriate number corresponding to
the day of the week on the numeric keys
or
> Press Backto return to the table “Next”.
7.14.7 SFI Functions
To perform the following SFI functions, call up the SFI as described in Point 7.14.3.
7.14.7.1 SFI Information
Use the SFI Information to obtain brief information on the programme or channel selec-
ted. Where SFI information is available, this will be indicated by next to the corresponding
programme.
> Use the arrow keysresp. the function keys to highlight the desired programme.
> Press the SFI key to display the information.
Lengthy text passages can be scrolled one line at a time by using the arrow keys
or use the green or red function keys to move backward or forward one page at a
time.
> Press Backto return to the previous table.
22
7.14.7.2 Marking a programme
> Use the arrow keysor the function keys to mark/pre-select the desired .
> Confirm by pressing OK. The programme will be automatically marked, and will be
selected when the broadcast begins.
> Press Backto return to the previous table.
7.14.7.3 SFI Timer programming
Use the electronic programme guide SFI to simplify the programming of timer events.
Marking a programme
> Use the arrow keysor function keys to mark the appropriate programme
> Press OK to automatically mark the programme, the receiver will switch to this chan-
nel when the programme begins.
or
Recording a programme (timer operation)
> Use the arrow keysto mark the desired programme.
> Press the OK key twice to highlight the line in red and to accept the data for this pro-
gramme directly into the timer memory.
or
> Press the red function key (Timer/VCR) to open a selection window.
> Use the arrow keys up/down to mark your desired type of timer.
> Confirm by pressing OK.
The timer menushowing the data of the selected programme will be displayed for
monitoring purposes. If necessary, you can make alterations or corrections at this
stage (see 7.15).
> Press Back to return to the previous table.
The appropriate line will be highlighted. Your receiver will be switched on at the star-
ting time of the programme selected.Most of the functions of the remote control are
disabled at this stage to avoid any accidental interruption of the recording.
In standby mode the active timer will be indicated by the blinking of the colon in the
time display.
Delete timer operation
If you wish to delete a timer event programmed by means of the SFI, proceed as described
in Point 7.15. To abort an active timer, switch the digital receiver off by pressing the
On/Standby key.
Then press this key again to switch the receiver on, and proceed to operate it normally.
7.14.7.4 SFI Programme overview
The SFI programme overview function allows you to display the full daily programme of an
individual channel. Proceed as follows:
> Press the key SFI.
The SFI table “Now” will be displayed.
> Press the blue function key SFI Menu to open a selection window.
> Use the arrow keys up/down to mark the line Programmes.
> Confirm by pressing OK. The overview for today of the programme selected will be
displayed.
> Use the arrow keysto move the marker to the appropriate programme or starting time.
The individual days of the week are displayed along the lower border of your screen.
If information is available for the following days, the appropriate fields will be highlighted.
23
> To display the programme contents for a specific day, press the numeric keycorre-
sponding to the desired day of the week.
Displaying SFI overview for other programmes
> Press the green function key Programmes.
Alist of SFI programmes will be displayed.
> Now use the arrow keysto mark the desired programme.
> Press the OK key to display the SFI overview of the marked programme.
7.14.7.5 SFI overview by programme type (category)
If you are particularly interested in certain types of programme, you can have the programme
information displayed according to certain categories such as movies, news, etc.
> Press the SFI key. The SFI table “Now” will be displayed.
> Press the blue function key SFI Menu to open a selection window.
> Use the arrow keys up/down to mark the line Categories.
> Confirm by pressing OK.
> Use the green function key Categories to open a window showing the programme
categories available.
> Use the arrow keysto select the desired programme category, and confirm by
pressing OK.
An overview of the day’s programmes conforming to this category will be displayed. >
Use the arrow keys up/down to move the marker to any specific programme.
> Use the arrow keys right/leftto move the marker to programmes with a later
starting time.
The individual days of the week are shown along the lower border of the screen. If
information is available for any of the following days, the corresponding fields will be
highlighted.
> To display the programme contents of a specific day, press the appropriate numeric
key corresponding to the day of the week.
7.14.8 Exiting SFI
> Press the Menu or TV/Radio key to return to normal operation.
7.15 Timer recording
Your receiver is equipped with both a video recorder timer and a programme switching timer.
In terms of their programming, these two timer types differ only with regard to the respective
categories..
You can programme your timer manually as described in this chapter, or by means of the SFI
function, as described in Point 7.14.7.
1. Video recorder timer
Use a video recorder timer to switch your digital receiver on and off in your absence, in order
to record a programme by means of an external recording unit, e.g. a video recorder. Please
note that you must also programme your video recorder in order to record the programme.
If the unit was switched on by means of the video recorder timer, this will be indicated by
“rec” in the display. Most of the remote control functions will be disabled, to avoid an acci-
dental interruption of the recording. In stand-by mode, the active timer will be indicated by
the colon in the LED resp. time display blinking.
24
2. Programme change timer
If your unit is in norm,al operating mode, it will switch to the pre-selected programme slot at
the selected time. Unlike the video recorder timer mode, all the functions of the unit remain
operational, and the unit will not be switched off at the end of the programme.
Manual timer programming
> Press the Menu key to display the Main Menu.
> Use the arrow keys up/down to mark the line Timer organizing.
> Confirm by pressing OK.
The sub-menu Timer organizing will be displayed.
> Use the arrow keys up/down to select the type of timer you wish to programme.
> Press OK to go to the entry window used to programme a new timer event.
To programme a timer event, proceed as follows:
Source
> Use the arrow keysto mark the column Source.
> Press OK to enter the desired source (TV or Radio).
> Use the arrow keys up/down to mark the desired source (TV or Radio).
> Press OK.
> Use the arrow keysto mark the column Channel.
> Press OK.
Depending on the previous setting, either the TV or the radio programme list will now
be displayed.
> Use the arrow keysto mark the desired programme.
> Use the arrow keys up/down to move the marker around the list one line at a
time.
> Use the arrow keys right/leftto move the marker backward or forward in the list
one page at a time.
> Press OK to accept this into the timer programming.
Date
> Use the arrow keysto mark the column Date.
> Use the numeric keysto enter the date on which you wish to record a programme.
Start
> Use the arrow key rightto mark the column Start.
> In this line, use the numeric keys to enter the starting time for the timer.
Stop
> Repeat the steps as described under “Start” to enter the stopping time.
Repeat
> Use the arrow keys to mark the column Rep.
> Press OK.
Aselection window will be displayed, offering various suggested repeating intervals.
1x Timer used once only
T Daily repeat
1 W Repeat once weekly
1-5 Repeat only on weekdays
6-7 Repeat only on weekends
> Use the arrow keys up/down to select the desired function.
> Press OK
to accept the setting into memory.
25
Transferring data into memory
> When you have completed the programming, press the yellow function key Accept
to transfer the data into memory.
If under Programme you have selected a programme that is blocked as per Point
8.3, you must first enter the PIN code before the data will be accepted into memory.
> Press the TV/Radio key to return to normal operation.
Timer overview
The timer overview function will display a list of all timer events already programmed.
> To display the menu Timer overview, call up the menu Timer organizing as
described above.
> Use the arrow keys up/down to mark the line Timer overview.
> Confirm by pressing OK.
If there is an overlap of timer events, these overlaps will be marked in red.
Changing timer programming
> To change an existing timer setting, use the arrow keys up/downto mark the
timer event you wish to change.
Press the yellow function key Change to move to the settings of the marked timer.
You can now effect the changes as described in Point 7.15.1.2.
> When you have completed the programming, press the yellow function key Accept
to transfer the data into memory.
Deleting timer programming
> To delete an existing timer setting, use the arrow keys up/down to mark the setting.
> Press the green function key Delete.
The message will be displayed:“Do you really want to delete this timer?”
> Use the arrow keys right/leftto mark Yes.
> To delete the timer entry, confirm by pressing OK.
> Press the TV/Radio key to return to normal operation.
Programming a new timer event
> To programme a new timer event, use the arrow keys up/downto mark a free
line in the menu Timer overview.
> Press the yellowfunction key New to go to the entry window used to programme
the new timer event. Work through this as described above.
> Use the arrow keys up/down to mark the additional field Type.
> Confirm by pressing OK. Awindow will be displayed, showing the various available
types of timer.
> Use the arrow keys up/down to select the desired timer type.
> To accept the timer type, confirm by pressing OK.
> When you have completed the programming, press the yellow function key Accept
to transfer the data into the timer memory.
Note!!!
Please check that the unit has acquired the clock time. If activated as described in Point
6.2.5, this will be shown on the display in stand-by mode. If this is not the case, leave your
unit switched to a major channel for approx. 30 seconds, so that the current time can be
downloaded.
26
The time should now be displayed in stand-by mode, if it has been activated as per Point
6.2.5.
7.2 Receiving encrypted programmes
Your receiver is equipped with an integrated CONAX decoding system as well as with a
Common Interface. This allows you to receive encrypted programmes. To do this, you must
first insert either a CONAX Smartcard into the integrated card reader, or insert a CI module
including a valid Smartcard in the slot provided:
> Insert the CONAX Smartcard in the card slot of the integrated card reader.
or
> Insert a CI module into the slot.
> Insert the Smartcard in the card slot of the CI module. Ensure that the gold-coloured
chip of the Smartcard is located uppermost on the card in the direction of insertion.
> If an encrypted programme is now selected, your digital receiver will automatically
check the card reader as well as the interface, and will display the programme in
unencrypted form provided the appropriate valid Smartcard or an appropriate CI
module containing a valid Smartcard for this programme has been inserted.
8 Changing the basic programming
8.1 Configuring the Favourites list
This chapter describes how you can change the pre-programming of your digital receiver as
well as the Favourites programme list according to your preferences. This function is also
required to sort newly found programmes into the list after a search has been carried out.
In this regard you should know the following: your receiver is equipped with two programme
lists, the Favourites list and the Total list. The Favourites programme list includes all
the programmes you have placed there, using the procedure as described below. The Total
list contains all programmes.
This chapter also describes how you can delete programmes, or restrict access to program-
mes by means of the parental control feature. When calling up a programme list by pressing
OK the Favourites programme list will be displayed.
8.1.1 Calling up the Navigator (Programme List Manager)
To manage the Favourites list, proceed as follows:
> Press the Menu key to call up the Main Menu.
> Use the arrow keys up/down to mark the line Manage TV lists, to work on the
TV list, or Manage Radio list, to work on the radio list.
> Confirm by pressing OK.
The appropriate Navigator will be displayed, allowing you to work on the Favourites
list (TV or radio list).
The Favourites list will be displayed on the right half of the screen. This is currently
active, as the programme currently selected is highlighted in blue. The alphabetically
sorted Total list will be displayed on the left half of the screen.
This Total list includes all available programmes.
27
> Press the red function key to move the marker to the Total list. This is now active.
> Press the red function key again to open a selection window. You are given the
option of sorting the Total list according to various selection criteria (e.g. all program-
mes, all free-to-air, all newly found, all English-language programmes, etc.) or sorted
by Providers.
> Use the arrow keys up/down to select the preferred programme listing (e.g. Total
list).
> Confirm by pressing OK.
An additional selection window will be displayed.
> Now use the arrow keys up/down to mark the selection criterion according to
which the Total list is to be sorted. Select e.g. All Programmes, to indicate all avai-
lable programmes in the Total list or All new, to indicate only the newly found pro-
grammes of the last programme search or All English, to indicate only English-
language programmes.
> Confirm by pressing OK.
Depending on your selection, a programme list will now be displayed showing, e.g., all, all
new or all English-language programmes. Programmes already included in the Favorites list
are indicated by a check-mark.
> Press the red function key Programmes resp. the green function key TV List
can switch between the Favourites list and the Total list. The currently active list is
indicated by a blue marker.
8.1.2 Adding programmes to the Favourites list
To accept programmes from the Total list into the Favourites list, call up the Navigator as
described in Point 8.1.1, and switch to the Total list.
> Press the blue function key Functions.
Aselection window will be displayed, indicating the available Navigator functions.
> Use the arrow keys up/down to mark the line Add.
> Confirm by pressing OK.
> Use the arrow keys up/down to mark a programme that you wish to include in
the list.
> Press the yellowfunction key Add to add the marked programme to the Favourites
list.
Marking blocks of programmes
To mark several programmes simultaneously proceed as follows:
> Press
OOKK
to access the Selection mode.
The marked programme will be indicated by a cross at the left side of the entry.
> Use the arrow keys up/down to mark the following and/or previous programmes
as well.
> When you have marked all the programmes you wish to select, press the yellow
function key Add, to include the marked programmes in the Favourites list.
8.1.3 Deleting programmes
8.1.3.1 Removing (deleting) from the Favourites list
To remove programmes from the Favourites list, call up the Navigator as described in Point
8.1.1. You will move to the Favourites list.
> Press the blue function key Functions.
Aselection window indicating the Navigator functions will be displayed.
28
> Use the arrow keys up/down to mark the line Remove.
> Confirm by pressing
OOKK
.
> Use the arrow keys up/down to mark a programme that you wish to remove from
the list.
> Press the yellowfunction key Remove.
The following message will be displayed: “Remove programme(s) from the list?”.
> Use the arrow keys right/leftto mark Yes or No.
> Confirm your entry by pressing OK.
> To remove several programmes simultaneously, mark these as described in 8.1.2
(Marking blocks of programmes).
> When you have completed marking the programmes you wish to remove in this man-
ner, press the yellow function key Remove.
The message will be displayed “Do you really want to delete the programme(s)?”.
> Use the arrow keys right/leftto mark Yes or No.
> Confirm your entry by pressing OK.
The programmes deleted in this manner remain in the Total list, and can be added to the
Favourites list again at any time.
8.1.3.2 Deleting from the Total list
To remove programmes from the Total list, proceed as described in Point 8.1.3.1. However,
after calling up the Navigator, press the redfunction key Programmes, and move to the
Total list first before selecting the function Delete.
8.1.4 Sorting programmes
Call up the Navigator as described in Point 8.1.1 to sort the programme order of the
Favourites list according to your personal preference. The Favourites list will be active.
> Press the blue function key Functions. Awindow will be opened, indicating the
Navigator functions available.
> Use the arrow keys up/down to mark the line Sort.
> Confirm by pressing OK.
> Use the arrow keys up/down to mark the programme you wish to move to anot-
her place in the list.
> Now press the yellowfunction key Sort. Adouble arrow will be displayed next to
the programme selected.
> You can now use either the arrow keys up/downor the numeric keys to move
the marked programme to the desired position in the list.
> Press the yellowfunction key Sort to save the programme at the new position.
> To sort several programmes simultaneously, mark these as described in 8.1.2
(Marking blocks of programmes).
> Now press the yellowfunction key Sort. Adouble arrow will be displayed next to
the block of programmes selected.
> You can now use either the arrow keys up/downor the numeric keys to move
the block of programmes to the desired list position.
> Press the yellowfunction key Sort to save the block of programmes at the new
position.
> When you have completed configuring the programme list according to your preferen-
ce in this manner, press the Menu key to return to normal operation.
29
8.2 Programming the electronic programme guide
To improve the readability, you can also configure the electronic programme guide SFI to
conform to your favourite programmes. To add programmes to the electronic programme
guide, or to delete them from the guide, call up the Navigator as described in Point 8.1.1.
You are now in the Favourites list.
Please note:
The more programmes are added to the electronic programme guide, the longer it will take
to update the SFI data!
Also, the more programmes are added, the less likely it is that the full preview period of
seven days for the electronic programme guide can be accommodated in the limited memory
space available.
> Press the Menu key to display the Main Menu.
> Use the arrow keys up/down to mark the line Settings.
> Confirm by pressing OK.
The sub-menu Settings will be displayed.
> Use the arrow keys up/down to mark the line Programme Guide.
> Confirm by pressing OK.
The menu Programme Guide will be displayed.
> Use the arrow keys up/down to move the marker around within the menu, and to
change the various positions. When selecting a menu item, please also note any
messages displayed on the screen.
8.2.1 Selecting a channel
> Press the OK key.. The Favourites list of the mode selected (Radio or TV) will be
displayed. The programme currently selected will be highlighted.
> Press the green function key to switch between radio and TV lists.
> Press the red function key to display a selection window. Here you can select the
desired type of programme list.
> Use the arrow keys up/down to select the desired type of programme list, e.g.
Favourites list.
> Confirm by pressing OK. The programme list seledcted will be displayed.
> Use the arrow keysto mark a programme you wish to include in the electronic pro-
gramme guide.
> Press the yellowfunction key SFI to accept the marked programme into the electro-
nic programme guide.
> To add several programmes to the electronic programme guide simultaneously, pro-
ceed as described in Point 8.1.2 (Marking blocks).
> When you have completed marking the desired programmes in this way, press the
yellow function key SFI, to accept the marked programmes into the electronic pro-
gramme guide.
> Press the Menu key to return to normal operation.
You can now initiate the updating procedure manually:
> Use the On/Standby key to switch off the receiver (Standby).
> Now, while the display shows “oooo”, press the key SFI.
The receiver will now perform an update. This will be indicated by the message SFld
30
appearing briefly in the display, followed by a progressive indication of the percentage
of SFI data already downloaded.
> The updating procedure may be interrupted by switching on the digital receiver (Key
On/ Standby).
8.2.2 Start category
The electronic programme guide is equipped with various display/presentation modes (categories).
Overview
This display mode gives you a quick overview of all programmes included in the electronic
programme guide.
Programmes
This display mode shows the programmes for the current day for one specific channel.
Genres
If you are interested in particular types of programmes, you can display the programme infor-
mation sorted according to specific genres, such as movies, news, etc..
Last used
When this setting is selected, the unit will always show the last type of display used when the
SFI is called up.
> In this line, use the arrow keys left/rightto select the display mode you wish to
utilise when the electronic programme guide is called up.
> If you select Genres, you can use the arrow keys to further select the preferred
category, e.g. movies, news, shows, etc..
8.2.3 SFI Channel
Your receiver is equipped to receive a data channel carrying additional SFI (EPG) data. This
allows you to see programme previews covering as much as a whole week.
> Press OK, to display the sub-menu SFI Channel .
Source
> Use the arrow keysto mark the field Source, and confirm by pressing OK.
> Use the arrow keys up/down to select the channel from which the SFI data is to
be downloaded, and confirm by pressing OK.
Your receiver will now check whether SFI data is being received on the channel selec-
ted. This infromation will be displayed along the bottom of the window.
Update time
> In the line Update time use the numeric keys to set the time at which you wish
the automatic download of SFI data to be performed.
Updating
> To download the data of the data channel, mark the line SFI Updating.
> Switch the function on by pressing OK .
If you do not wish to receive the additional data, or if you are unable to receive the data
because of your location, the data reception function can also be switched off:
> Set the SFI Updating function to off, to switch off the data reception. Only the pro-
gramme information provided by programme providers will then by available.
Starting download procedure manually
> To start the updating of SFI data manually, press the redfunction key Start now.
31
8.3 Parental control (blocking programmes)
Your unit is equipped with a parental control function. This means that important functions
(e.g. calling up the main menu) can be protected from unauthorised manipulation. In addi-
tion, programmes and recordings that you have specifically blocked can only be accessed
after entering a four-digit PIN code (unit PIN).
To work with the Parental Control menu proceed as follows:
> Press the Menu key to display the Main Menu.
> Use the arrow keys up/down to mark the line Settings.
> Confirm by pressing OK.
The sub-menu Settings will be displayed.
> Use the arrow keys up/down to mark the line Parental Control.
> Confirm by pressing OK.
The menu Parental Control will be displayed.
> Use the arrow keys up/down to move the marker withing the menu, and to chan-
ge the individual positions as indicated. When selecting a menu item, please also
note any messages displayed on the screen.
8.3.1 Changing the receiver PIN code
The receiver PIN code is set at the factory to 0000.
To change the receiver PIN code proceed as follows:
> Use the Menu key to call up the Main Menu.
> Use the arrow keys up/down to mark the line Settings.
> Confirm by pressing OK.
The sub-menu Settings will be displayed.
> Use the arrow keys up/down to mark the line Change Receiver PIN.
> Confirm by pressing OK.
> Now use the numeric keysto enter the current receiver PIN code (Default set-
ting 0000).
> Use the numeric keysto enter the desired new receiver PIN code.
> Repeat the entry of the code.
> When you have changed the receiver PIN code as described here, press the Menu
key to return to normal operation.
Note!
Ensure that you do not forget the receiver PIN code. If you do forget it, please consult your
specialist retailer!
8.3.2 Mode
> In this line, use the arrow keys left/rightto switch the parental control on or off.
8.3.3 Selecting a programme
> Press OK. The Favourites list of the selected range (TV or Radio) will be displayed.
The programme currently selected will be highlighted.
> Press the green function key to switch back and forth between radio and TV lists.
> Press the red function key to display a selection window. Here you have the option
of selecting the desired type of programme list.
> Use the arrow keys up/down to select the desired type of programme list, e.g.
Favourites list.
32
> Confirm by pressing OK. The programme list selected will be displayed.
> Now use the arrow keysto mark the programme which you wish to block.
> Block access to the programme by pressing the yellow function key. The parental
control symbol will be displayed next to the programme selected.
> To block access to a number of programmes simultaneously, proceed as described in
8.1.2 (Marking Blocks) and block the whole group by pressing the yellow func-
tion key.
> When you have completed configuring the programme list according to your preferen-
ce, press Menu to return to normal operation.
> To lift the blocking of individual programmes, proceed as described above. Mark the
specific programme, and press the yellow function key to remove the Parental
Control symbol.
8.4 Programme search (scan)
To receive new programmes, several options exist to carry out a programme search.
1. Automatic search
Select this type of search to scan the entire reception frequency band of the receiver for pro-
grammes.
2. Expanded search
Select this type of search to scan a specific frequency or channel range for programmes.
3. Manual search
Select this type of scan to scan a particular channel or frequency for programmes. Use this
type of scan to look for a specific programme by means of programme-specific PID numbers.
After the scan has been completed, a message will be displayed on screen indicating how
many programmes your digital receiver has found, how many of these are new, and how
many are broadcast in encrypted form. New programmes will be stored in the Total list,
and can then be transferred to the Favourites list as described in Point 8.1.
> To perform a programme search, first call up the Main Menu.
> Use the arrow keys up/down to mark the entry Programme Search.
> Confirm by pressing OK.
The sub-menu Programme Search will be displayed
> Now use the arrow keys up/down to select the type of scan you wish to perform.
Confirm by pressing OK.
8.4.1 Automatic Scan
If this type of scan is selected, the entire reception frequency range of the receiver will be
scanned for programmes.
The scanning procedure may take more than 15 minutes. Please also note any messages
displayed on the screen.
> You can terminate the scan by pressing the redfunction key.
8.4.2 Expanded Scan
When using the expanded scan function you have two options for performing a programme scan.
1. Frequency scan
When using the frequency scan mode, a specific frequency range selected by the user will
be scanned for programmes.
33
2. Channel scan
When using the channel scan mode, a specific range of channels selected by the user will
be scanned for programmes. The channel scan mode is faster than the frequency scan
mode.
> Press OK to display a selection window showing the available scan mode options.
> Use the arrow keys up/down to mark the scanning mode you wish to perform.
> Confirm by pressing OK.
> Use the arrow keys up/down to mark either the field Start Channel or Start
Frequency.
> Use the arrow keys left/rightto enter the start channel, or use the numeric
keys to enter the start frequency.
> Use the arrow keys up/down to mark the field Stop Channel resp. Stop
Frequency, and proceed as described above to enter the stop channel or the stop
frequency.
In the line Scan Mode you can decide whether you wish to search only for free-to-
air programmes, or whether you wish to include encrypted programmes as well.
> Use the arrow keys up/down to select the desired Scan Mode.
> Press OK, to decide whether you wish to scan only for free-to-air programmes (Only
free) or whether you wish to include encrypted programmes (All Programmes).
> Press the red function key Start Scan to initiate the programme scan.
The scan will commence. Please note any messages displayed on the screen.
> You can terminate the scan by pressing the redfunction key Abort.
The scanning procedure may take more than 15 minutes. Please note any messages
displayed on the screen.
8.4.3 Manual Scan
Should a programme not be found by either the automatic scan or the expanded scan, you
can scan a specific channel for available programmes, or you may use PID data to search
for a specific programme.These numbers may have to be found in the Internet, or obtained
from the relevant programme provider.
> To scan a particular channel, use the arrow keys left/right to enter the desired
channel.
> Press the red function key Start Scan to initiate the scan.
PID scan
> Enter the channel on which the desired programme is broadcast as described above.
> Use the green function key PID scan to enter the PCR, Audio and Video PID.
> Now use the arrow keys up/down to mark the lines PCR PID, Audio PID and
Video PID and use the numeric keys to enter the appropriate values.
8.4.4 After the scan
You can follow the progress of the programme scan on screen while it is still in progress.
When the scan is completed, the total number of programmes found as well as the number
of new programmes found will be indicated. In addition, a prompt will be displayed, asking
you whether you wish to save the programmes found automatically in the TV or Radio list. If
you wish to accept the programme list automatically, you can then decide whether the pro-
grammes should be added to the Favourites list in sorted or unsorted form.
34
Sorted
The programmes found will be sorted into the Favourites list in accordance with a pre-pro-
grammed list. The order in which programmes are listed will depend on the audio language
selected in Point 6.3.2 resp. the country selected in Point 6.2.2.
Unsorted
The newly found programmes will be added to the end of the Favourites list in unsorted form.
No
The newly found programmes will not be added to the Favourites list, and will only be added
to the Total list.
> Use the arrow keys left/rightto indicate whether you wish to accept the pro-
grammes in sorted or unsorted form.
> Confirm by pressing OK.
Please note any other messages displayed on screen.
> Press the Menu key to return to normal operation.
> Independently of whether you have added the found programmes automatically to the
Favourites list, you can still add these to the Favourites manually at any time, as des-
cribed in Point 8.1.
8.5 Service settings
You can revert to the factory-installed default settings at any time. Also, if the programme list
has become outdated by virtue of changes effected by the programme providers, you can
delete this completely and perform a new programme search/scan. Please note that, if you
have used the delete function, you must then initiate a scan, and copy the programmes
found from the Total list to the Favourites list.
> Press the Menu key to display the Main Menu.
> Now use the arrow keys up/down to select the menu item Settings.
> Confirm by pressing OK.
The sub-menu Settings will be displayed.
> Now use the arrow keys up/down to mark the menu line Service Settings.
> Confirm by pressing OK.
The sub-menu Service Settings will be displayed.
8.5.1 Activating default (factory) setting
When this function is called up, the original default programming will be restored, as set at
the factory, any personal settings will be deleted, and the AutoInstall installation assi-
stant will be started.
> Use the arrow keys up/down to mark the line Activate default setting.
> Confirm by pressing OK.
The message will be displayed: “Do you really wish to activate the default setting?”.
> Use the arrow keys left/rightto select either Yes or Abort.
> Confirm your entry by pressing OK.
8.5.2 Delete all programmes
This function will delete all programme memory banks.
> Use the arrow keys up/down to mark the line Delete All Programmes.
> Confirm by pressing OK.
The following message will be displayed; “Do you really wish to delete all programmes?”.
> Use the arrow keys left/rightto select Yes or Abort.
> Confirm your selection by pressing OK.
35
8.5.3 Updating Software
You also have the facility of updating the operating software of your digital receiver.
> Press OK to display the sub-menu Software update.
To perform a software update, mark the line Software update.
> Set the software update function to on by pressing OK.
> In the line Update time, use the numeric keys to set the time when the software
update is to be carried out.
> To initiate the update for the operating software manually, press the redfunction key
Test.
> Press the Menu key to return to normal operation.
Should the parameters of the data used to download the soft ware update have changed,
you can correct these via the menu. Current transmission data can be obtained via your
retailer. Under normal cicumstances, there should be no need for you to make any changes
in this menu.
Note:
For the new software version to be downloaded automatically, the digital
receiver must be in standby mode. The downloading procedure is indica-
ted by “TErL”, followed by “TEr0” to “TEr9” in the display. Ensure that this
procedure is not interrupted by switching the receiver on or off while the
download is in progress.
Independent of whether you have switched the automatic software update function on or off,
the receiver will check automatically each time it is switched on whether a new version of the
operating software for your digital receiver is available. If a new version of the operating soft-
ware is available, this will be indicated by a message displayed on screen.
To start the software update, follow the instructions displayed on your screen.
8.5.4 Copying settings
You have the facility to copy all the settings of the programme list, antenna settings, etc. of
your digital receiver from your receiver to another digital receiver of the same type, and using
the same operating software version.
> Use a null modem cable to connect the two receivers.
> Switch on the receiver to which the settings are to be transferred.
> To copy the settings, press one of the keys on the panel of the source receiver.
The settings of this source receiver will now be transferred to the other, receiving,
receiver. Please note any messages displayed on screen.
8.6 System configuration
Use this menu item to view the specific data relating to your receiver.
> Use the arrow keys up/down to mark this line in the sub-menu Settings.
> Confirm by pressing OK.
> Press the Menu key to return to normal operation.
8.7 Encryption/decoding system
This menu point takes you to the sub-menues for the CONAX Smartcard used, and for the
CI module. You can view information related to the Smartcard or the CI module used by
36
selecting the Smartcard or the CI interface, by pressing the arrow keys, then confirm by
pressing OK.
Manual Initialisation of the CI module
> You can initialise the CI module manually by pressing the redfunction key CI
Reset.
9 Technical terms
Antenna cable:
Cable used to connect the modulator of the satellite receiver to the antenna input socket of
the television set. Used as an alternative where no SCARTsocket is available
AV: see SCART
Channel:
Part of a frequency band, divided and allocated by an agreed system. ATV channel consists
of two frequencies, one for the audio and one for the visual content. Each channel is descri-
bed in terms of a numeric description (with the exception of European television channels
broadcast in the frequency band 40-230 MHz, these are denoted by letters).
Data compression/MPEG1/MPEG2:
The transmission of the current television standard (625 lines, and a picture frequency of 50
Hz) results in a digital data volume of 216 MBit/s.
This would require enormous bandwidths which are simply not available, whether via satellite
of via terrestrial reception. Therefore the data is compressed in order to achieve a reduction
in the data volume. For Europe,MPEG-2 has been laid down as the world-wide standard for
data compression. MPEG2 is an expanded version of MPEG1
Coaxial cable:
Cable used to connect the LNC to the satellite receiver, used to transmit the signal received
as well as to provide power to the LNC.
DVB:
Digital Video Broadcasting: Adigital universal broadcast technology used to transmit pictures,
graphics, sound and text, i.e. data in any form imaginable form, in appropriate quality.
Frequency:
Aphysical term, indicates the number of vibrations per second, expressed in terms of the unit
Hertz (Hz)
DVB-T receiver:
The signals received by the antenna cannot be processed by the television set. The DVB-T
receiver processes them in such a way that audio and video signals (AV) are available at its
outputs, which can then be passed on to the television set.
OSD:
On Screen Display - data shown on screen
PID:
Packet Identifier, Packet-ID
Receiver:
The signals received from the antenna cannot be processed by the television set. The sig-
nals are processed by the receiver so that audio and video (AV) signals are generated at its
outputs that can be handled by the television set.
SCART:
Type of connector used on television sets, video recorders, satellite receivers and other
home electronics components to transmit audio and video signals (AV).
37
Software Update:
Digital television is a new medium that provides improved sound and picture quality as well
as the facility to provide interactive services. These new services are constantly being deve-
loped and improved by the providers. To utilize the services, it may occasionally be necessa-
ry to update the software of the digital receiver.
Signal:
General description for data, for information, sound or pictures, the content of which is
modulated electrically to broadcast the data over a distance, or to connect various suitable
reception and viewing units with each other.
10 Technical data
DVB-T Tuner:
Input frequency range 174.... 230 MHz /
470 .... 860 MHz
Tuner input IEC socket
Input/output impedance 75 Ohms
Tuner output IEC jack
Bandwidth 7/8 MHz (switchable)
S/N ratio <8dB
Demodulation COFDM 2k/8K
No. of carriers 1705/6817
Guard Interval 1/4, 1/8, 1/16, 1/32
Constellation QPSK, 16-QAM, 64-QAM
antenna feed 5V/0,03A
(double insulated, switchable)
Demultiplexing: in accordance with ISO 13818-1
Video decoding:
Video compression MPEG-2 and MPEG-1 compatible
Up to MP@ML(main profile @ main level)
Video standard PAL/ 25 Hz
Active screen area 720 pixels x 576 lines
Picture format 4 : 3 / 16 : 9
Picture material 16:9 Automatic adaptation for 16:9 TV sets (via SCART)
Letterbox filtering for 4:3 TV sets
Audio decoding:
Audio compression MPEG-1 & MPEG-2 Layer I and II
Audio Mode Dual (main/sub), Stereo
Sampling frequencies 32 kHz, 44.1 kHz, 48 kHz
Audio parameters:
Output analogue:
Output level L/R 0,5 V r.m.s. (nominal)
Output impedance 600 Ohms
THD > 60 dB ( 1 kHz )
S/N > 60 dB
Cross-talk < - 65 dB
Input analogue:
Input level l/r 0,5 V r.m.s. (nominal)
Input impedance > 40 kOhm
Volume at switch-on Automatic output of volume level previously selected
Dolby Digital AC3
38
Video parameters:
Output:
Output level FBAS 1 Vs-s +/- 0.3 dB into 75 Ohms
Output level RED 0,7 Vs-s +/- 0.1Vp-p into 75 Ohms
Output level GREEN 0,7 Vs-s +/- 0.1Vp-p into 75 Ohms
Output level BLUE 0,7 Vs-s +/- 0.1Vp-p into 75 Ohms
S/N rated > 60 dB
Connections:
TV SCART:
Output: FBAS or RGB or S-Video
VCR SCART:
Output: FBAS or S-Video
Input: FBAS or RGB or S-Video
Audio output digital:
S/PDIF output electrical, cinch socket (yellow)
Audio output analogue:
Audio channel left/right cinch sockets (white, red)
Video text:
Teletext filtering in accordance with ETS 300 472 Standard
Scanning teletext data (FBAS) corresponding to ITU-R BT.653-2 lines: 6-22 and 320-335
Soft video text 800 pages memory
(DigiPal 2)
1000 pages memory
(DigitMod T1)
Display:
LED display 4-digit (7 segment)
(DigiPal 2)
LED green and red (DigitMod T1)
Serial interface RS 232:
Type RS 232, bidirectional
Bit rate 115,2 kBit/s max.
Connection D-SUB socket, 9-pin
Function Update for operating system software, pre-programming
Programme memory:
Number of programmes, Favourites list TV:
999 TV programmes
Number of programmes, Favourites list:
999 RADIO programmes
Number of programmes:
Total list TV/Radio: 4000 programme possible in Total list
SFI data:
SFI preview: maximum 7 days in advance
Timer:
Events: maximum 124 (DigiPal 2)
30 (DigitMod T1) events,
one year in advance
Remote control system: RC-5
Sub-system address 10 (SAT2)
Modulation frequency 36 kHz
Infra-red wavelength 950 nm
Optional remote control:
Sub-system address 8 (SAT1)
Power supply:
39
Mains adapter:
Power consumption (DigiPal 2):
3,4 VA Stand-by mode (standby clock on)
3,0 VA Stand-by mode (standby clock off)
7 VA in operation
Nominal power supply (DigiPal 2):
230 V / 50 Hz alternating current
Input power supply (DigiPal 2):
180 V.... 250 V / 47 ... 63 Hz alternating current
Input power supply (DigitMod T1):
12 V / 0,5 A
Power consumption (DigitMod T1):
3,5 W Stand-by mode
7,5 W in operation
General:
DigiPal 2:
Dimensions (WxDxH): 205 mm x 130 mm x 35 ... 38 mm
Weight: approx. 370 g
DigitMod T1:
Dimensions (WxDxH): 155 mm x 105 mm x 30 ... 35 mm
Weight: approx. 230 g
40
41
11 Trouble-shooting guide
Problem Possible cause Solution
Various programmes not shown in
the programme list
Wrong programme list selected Select another programme list (see
Point 7.2.3.1)
Sound OK, no TV picture Radio mode selected Switch to TV mode
Clock time not shown in stand-by
mode*
Clock time not downloaded
Stand-by clock switched off
Go to a major channel for 30 secs.
Switch on stand-by clock (Point
6.2.5)
Unit cannot be operated Defective data stream-->unit block-
ed
Pull mains plug for approx. 5 secs.,
then switch unit on again
Press stand- by key on unit for
approx. 5 seconds
Remote control not working Batteries spent Insert new batteries
Picture temporarily shows blocks.
Unit switches temporarily to freez
frame, no sound. Screen temporarily
black with message “No signal”.
Antenna incorrectly positioned Adjust antenna position
No picture, no sound, display on Defective or no cable connection Check all cable connections
Antenna incorrectly positioned Adjust antenna position
No reception when using an active
antenna
Antenna power feed (5V) not swit-
ched on
Switch on antenna power feed
(Point 6.2.4)
No picture, no sound, display off No mains power Check mains cable and plug
No reception of programmes previo-
usly received
Antenna defective, or incorrectly
positioned
Check antenna
Programme now broadcast on
another channel
Perform scan (see Point 8.4)
Programme no longer being broad-
cast
None
Unit cannot be switched on, or can-
not be operated
Unit blocked Perform flash-reset: Note! All perso-
nal settings will be lost.
> Disconnect mains plug.
> Simultaneously press
Programme up and
Programme down keys on the
unit and hold down.
> While Programme up and
down keys are pressed, re-
connect mains power plug.
> Keep keys pressed for approx.
5 secs. until message *
“FLAS” is displayed.
Notes
42
Index
AC3 . . . . . . . . . . . . . . . . . . . . . . . . . . . . . . . . . . . . . . . . . . . . . . . . . . . . . . . . . . .18, 21
Antenna adjustment . . . . . . . . . . . . . . . . . . . . . . . . . . . . . . . . . . . . . . . . . . . . . . . . . . . . . . .18
Antenna feed . . . . . . . . . . . . . . . . . . . . . . . . . . . . . . . . . . . . . . . . . . . . . . . . . . . . . . . . . . . .16
Automatic search . . . . . . . . . . . . . . . . . . . . . . . . . . . . . . . . . . . . . . . . . . . . . . . . . . . . . . . . .41
Channel information . . . . . . . . . . . . . . . . . . . . . . . . . . . . . . . . . . . . . . . . . . . . . . . . . . . . . . .23
Clock . . . . . . . . . . . . . . . . . . . . . . . . . . . . . . . . . . . . . . . . . . . . . . . . . . . . . . . . . . . . . . .22
Country . . . . . . . . . . . . . . . . . . . . . . . . . . . . . . . . . . . . . . . . . . . . . . . . . . . . . . . . . . . . . . .16
Deleting programmes . . . . . . . . . . . . . . . . . . . . . . . . . . . . . . . . . . . . . . . . . . . . . . . . . . . . . .36
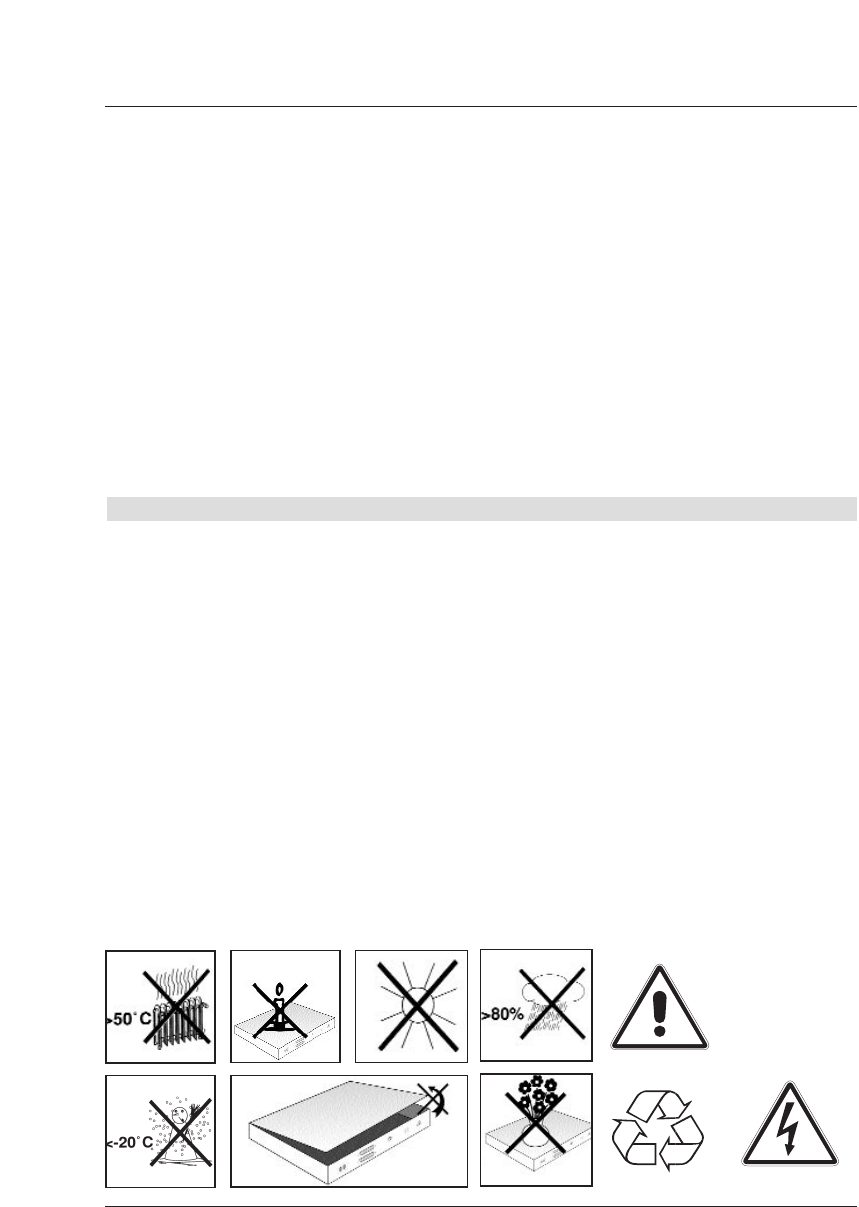
Disposal advice . . . . . . . . . . . . . . . . . . . . . . . . . . . . . . . . . . . . . . . . . . . . . . . . . . . . . . . . . . .9
Dolby Digital . . . . . . . . . . . . . . . . . . . . . . . . . . . . . . . . . . . . . . . . . . . . . . . . . . . . . . . . . .18, 21
Electronic Programme Guide . . . . . . . . . . . . . . . . . . . . . . . . . . . . . . . . . . . . . . . . . . . . . . . .25
Expanded search mode . . . . . . . . . . . . . . . . . . . . . . . . . . . . . . . . . . . . . . . . . . . . . . . . . . . .42
Freeze frame . . . . . . . . . . . . . . . . . . . . . . . . . . . . . . . . . . . . . . . . . . . . . . . . . . . . . . . . . . . . .23
Frequency . . . . . . . . . . . . . . . . . . . . . . . . . . . . . . . . . . . . . . . . . . . . . . . . . . . . . . . . . . . . . . .46
Genre . . . . . . . . . . . . . . . . . . . . . . . . . . . . . . . . . . . . . . . . . . . . . . . . . . . . . . . . . . . . . . .29
Infobox . . . . . . . . . . . . . . . . . . . . . . . . . . . . . . . . . . . . . . . . . . . . . . . . . . . . . . . . . . . . . . .20
Initial installation . . . . . . . . . . . . . . . . . . . . . . . . . . . . . . . . . . . . . . . . . . . . . . . . . . . . . . . . . .12
Language . . . . . . . . . . . . . . . . . . . . . . . . . . . . . . . . . . . . . . . . . . . . . . . . . . . . . . . . . . . . . . .21
Manual search mode . . . . . . . . . . . . . . . . . . . . . . . . . . . . . . . . . . . . . . . . . . . . . . . . . . . . . .43
MPEG1 . . . . . . . . . . . . . . . . . . . . . . . . . . . . . . . . . . . . . . . . . . . . . . . . . . . . . . . . . . . . . . .46
MPEG2 . . . . . . . . . . . . . . . . . . . . . . . . . . . . . . . . . . . . . . . . . . . . . . . . . . . . . . . . . . . . . . .46
Navigator . . . . . . . . . . . . . . . . . . . . . . . . . . . . . . . . . . . . . . . . . . . . . . . . . . . . . . . . . . . . . . .19
Operating language . . . . . . . . . . . . . . . . . . . . . . . . . . . . . . . . . . . . . . . . . . . . . . . . . . . . . . .15
Operation . . . . . . . . . . . . . . . . . . . . . . . . . . . . . . . . . . . . . . . . . . . . . . . . . . . . . . . . . . . . . . .18
Parental control . . . . . . . . . . . . . . . . . . . . . . . . . . . . . . . . . . . . . . . . . . . . . . . . . . . . . . . . . .39
Picture format . . . . . . . . . . . . . . . . . . . . . . . . . . . . . . . . . . . . . . . . . . . . . . . . . . . . . . . . . . . .17
Programme information . . . . . . . . . . . . . . . . . . . . . . . . . . . . . . . . . . . . . . . . . . . . . . . . . . . .23
Programme list management . . . . . . . . . . . . . . . . . . . . . . . . . . . . . . . . . . . . . . . . . . . . . . . .33
Programme search mode . . . . . . . . . . . . . . . . . . . . . . . . . . . . . . . . . . . . . . . . . . . . . . . . . . .41
Remote control code . . . . . . . . . . . . . . . . . . . . . . . . . . . . . . . . . . . . . . . . . . . . . . . . . . . . . .16
RS 232 . . . . . . . . . . . . . . . . . . . . . . . . . . . . . . . . . . . . . . . . . . . . . . . . . . . . . . . . . . . . . . .12
Safety advice . . . . . . . . . . . . . . . . . . . . . . . . . . . . . . . . . . . . . . . . . . . . . . . . . . . . . . . . . . . . .9
SCART . . . . . . . . . . . . . . . . . . . . . . . . . . . . . . . . . . . . . . . . . . . . . . . . . . . . . . . . . . . . . . .47
Serial interface . . . . . . . . . . . . . . . . . . . . . . . . . . . . . . . . . . . . . . . . . . . . . . . . . . . . . . . . . . .12
SFI channel . . . . . . . . . . . . . . . . . . . . . . . . . . . . . . . . . . . . . . . . . . . . . . . . . . . . . . . . . . . . . .38
SFI (Electronic Programme Guide) . . . . . . . . . . . . . . . . . . . . . . . . . . . . . . . . . . . . . . . . . . . .25
Software updates . . . . . . . . . . . . . . . . . . . . . . . . . . . . . . . . . . . . . . . . . . . . . . . . . . . . . . . . .45
Sorting programmes . . . . . . . . . . . . . . . . . . . . . . . . . . . . . . . . . . . . . . . . . . . . . . . . . . . . . . .36
Sub-titles . . . . . . . . . . . . . . . . . . . . . . . . . . . . . . . . . . . . . . . . . . . . . . . . . . . . . . . . . . . . . . .24
System configuration . . . . . . . . . . . . . . . . . . . . . . . . . . . . . . . . . . . . . . . . . . . . . . . . . . . . . .46
Timer recordings . . . . . . . . . . . . . . . . . . . . . . . . . . . . . . . . . . . . . . . . . . . . . . . . . . . . . . . . .30
TV/Radio switching . . . . . . . . . . . . . . . . . . . . . . . . . . . . . . . . . . . . . . . . . . . . . . . . . . . . . . . .22
Unit PIN . . . . . . . . . . . . . . . . . . . . . . . . . . . . . . . . . . . . . . . . . . . . . . . . . . . . . . . . . . . . . .39
Video text . . . . . . . . . . . . . . . . . . . . . . . . . . . . . . . . . . . . . . . . . . . . . . . . . . . . . . . . . . . . . . .23
Volume control . . . . . . . . . . . . . . . . . . . . . . . . . . . . . . . . . . . . . . . . . . . . . . . . . . . . . . . . . . .21
When not in use . . . . . . . . . . . . . . . . . . . . . . . . . . . . . . . . . . . . . . . . . . . . . . . . . . . . . . . . . . .9
43
For daily use
Switching on and off
> Switch on the digital receiver bypressing the On/Standby key, either on the receiver
or on the remote control.
> Press this key again to switch the receiver off.
> The receiver is now in standby mode, the display on the receiver shows the time.
Programme selection
Using the programme up/down keys
> Use the programme keys up/down either on the remote control or on the recei-
ver to move up or down one programme slot at a time.
Using the numeric keys
> Use the numeric keys to enter the desired programme number.
For example
1 for programme slot 1
1, then 4 for programme slot 14
2, then 3, then 4 for programme slot 234
When entering programme numbers consisting of several digits, you have approximately 3
seconds after pressing a key to complete the entry.
If you wish to enter a number consisting of only one or two digits, you can speed up the swit-
ching procedure by keeping the key depressed a little longer on the last digit.
Using the programme list:
> Press OK.
> You can now use the arrow keys up/downto mark the desired programme.
> Press OK to switch to the marked programme.
> Use the arrow keys up/down to move the marker by one line at a time within the
list.
> Use the arrow keys right/leftto move the
marker around the list one page at a time.
Volume control
> You can regulate the volume of your digital receiver: press the key Volume + to
increase the volume, and Volume - to decrease it.
> Press the key Sound on/off to switch the sound on or off (mute).
44
28

Hulp nodig? Stel uw vraag in het forum

Spelregels

Misbruik melden

Gebruikershandleiding.com neemt misbruik van zijn services uitermate serieus. U kunt hieronder aangeven waarom deze vraag ongepast is. Wij controleren de vraag en zonodig wordt deze verwijderd.

Product:

Bijvoorbeeld antisemitische inhoud, racistische inhoud, of materiaal dat gewelddadige fysieke handelingen tot gevolg kan hebben.

Bijvoorbeeld een creditcardnummer, een persoonlijk identificatienummer, of een geheim adres. E-mailadressen en volledige namen worden niet als privégegevens beschouwd.

Spelregels forum

Om tot zinvolle vragen te komen hanteren wij de volgende spelregels:

Belangrijk! Als er een antwoord wordt gegeven op uw vraag, dan is het voor de gever van het antwoord nuttig om te weten als u er wel (of niet) mee geholpen bent! Wij vragen u dus ook te reageren op een antwoord.

Belangrijk! Antwoorden worden ook per e-mail naar abonnees gestuurd. Laat uw emailadres achter op deze site, zodat u op de hoogte blijft. U krijgt dan ook andere vragen en antwoorden te zien.

Abonneren

Abonneer u voor het ontvangen van emails voor uw Technisat digit mf4 t bij:


U ontvangt een email met instructies om u voor één of beide opties in te schrijven.


Ontvang uw handleiding per email

Vul uw emailadres in en ontvang de handleiding van Technisat digit mf4 t in de taal/talen: Engels als bijlage per email.

De handleiding is 1,4 mb groot.


U ontvangt de handleiding per email binnen enkele minuten. Als u geen email heeft ontvangen, dan heeft u waarschijnlijk een verkeerd emailadres ingevuld of is uw mailbox te vol. Daarnaast kan het zijn dat uw internetprovider een maximum heeft aan de grootte per email. Omdat hier een handleiding wordt meegestuurd, kan het voorkomen dat de email groter is dan toegestaan bij uw provider.

Stel vragen via chat aan uw handleiding

Stel uw vraag over deze PDF

Andere handleiding(en) van Technisat digit mf4 t

Technisat digit mf4 t Gebruiksaanwijzing - Deutsch - 62 pagina's


Uw handleiding is per email verstuurd. Controleer uw email

Als u niet binnen een kwartier uw email met handleiding ontvangen heeft, kan het zijn dat u een verkeerd emailadres heeft ingevuld of dat uw emailprovider een maximum grootte per email heeft ingesteld die kleiner is dan de grootte van de handleiding.

Er is een email naar u verstuurd om uw inschrijving definitief te maken.

Controleer uw email en volg de aanwijzingen op om uw inschrijving definitief te maken

U heeft geen emailadres opgegeven

Als u de handleiding per email wilt ontvangen, vul dan een geldig emailadres in.

Uw vraag is op deze pagina toegevoegd

Wilt u een email ontvangen bij een antwoord en/of nieuwe vragen? Vul dan hier uw emailadres in.


Info