656212
6
Verklein
Vergroot
Pagina terug
1/19
Pagina verder
11
Prior to Use
10
Prior to Use
Before You Start
Charging the Battery (main unit)
Caution
Always use the dedicated AC adapter and AC cord.
Use of other adapters may result in damage or fire.
Warning
Inserting batteries incorrectly may result in overheating of the impedance meter. Do not use the
impedance meter when it has overheated.
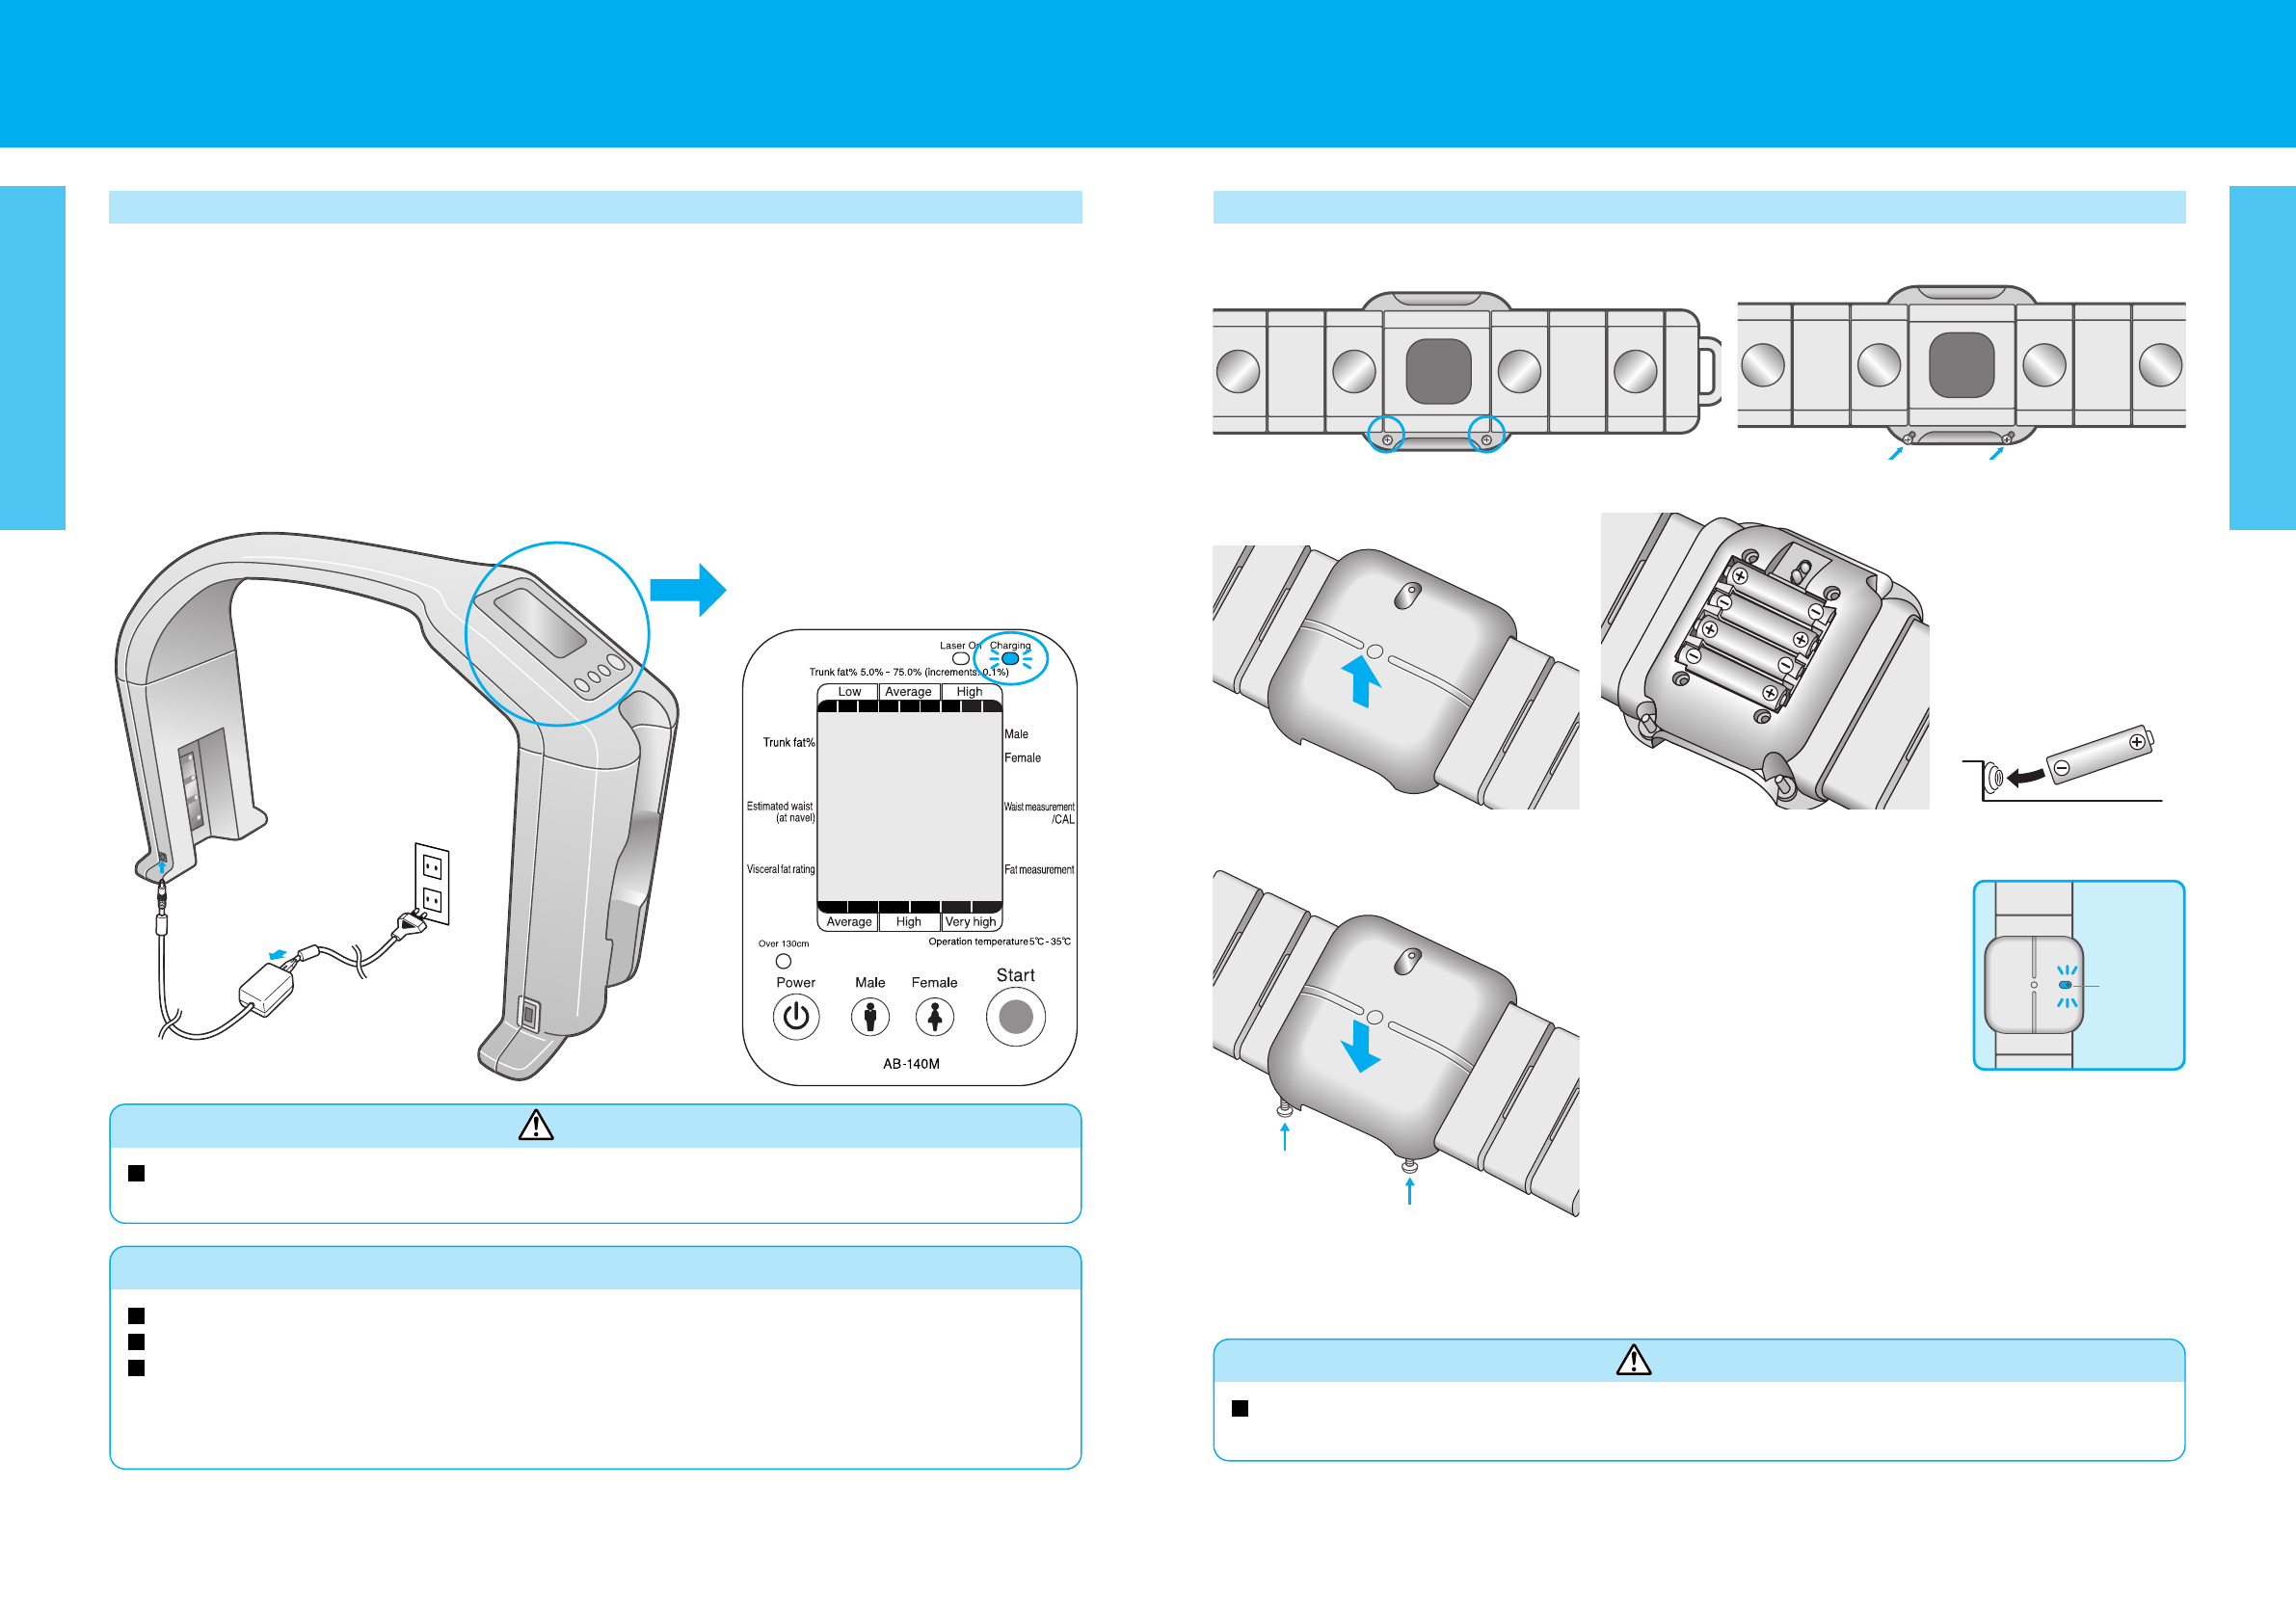
Inserting Batteries (Impedance Meter)
Replacing Batteries
Please replace all four batteries should
the green ‘Power’ LED not come on
when the impedance meter is removed
from the main unit.
Note: Do not use rechargeable
batteries.
Note: Never use a combination of
alkaline and manganese batteries.
Note: The batteries that come with the unit were inserted at the
time of leaving the manufacturing plant. As such, they may have
a limited life.
The life of the batteries is approximately two years (using the
unit five times/day).
Note: This may differ according to measuring methods used.
Disposing of used batteries.
Please dispose of used batteries in accordance with the
regulations of your local governing body.
2. Loosen screws
3. Turn over to front side
and remove the cover
1. Turn over
Image only
Please…
Charge the battery immediately after purchase.
The main unit cannot measure during charging.
Remove the AC adapter from the main unit when:
taking measurements
•moving the main unit
charging is complete
4. Insert batteries
1. Insert the AC adapter jack into the AC adapter connection on the main
unit.
2. Plug the AC adapter into the power point.
The battery will fully charge in approximately 2 hours.
•A fully charged battery will last for approximately 1000 measurements (although this may differ
according to how measurements are conducted.
The remaining battery level is displayed in ‘Battery Level’ when the unit is turned on (see page 9).
Recharge when the battery level gets low.
3. Remove the AC adapter from the main unit when charging is complete.
Green light flashes on and off during battery
charging, and will be on when charging is
complete.
*Please use LR03 alkaline
batteries
*Insert batteries so that the flat
surface of the minus pole
touches the tip of the spring.
5. Close cover
Tighten screws
Power LED
6

Hulp nodig? Stel uw vraag in het forum

Spelregels

Misbruik melden

Gebruikershandleiding.com neemt misbruik van zijn services uitermate serieus. U kunt hieronder aangeven waarom deze vraag ongepast is. Wij controleren de vraag en zonodig wordt deze verwijderd.

Product:

Bijvoorbeeld antisemitische inhoud, racistische inhoud, of materiaal dat gewelddadige fysieke handelingen tot gevolg kan hebben.

Bijvoorbeeld een creditcardnummer, een persoonlijk identificatienummer, of een geheim adres. E-mailadressen en volledige namen worden niet als privégegevens beschouwd.

Spelregels forum

Om tot zinvolle vragen te komen hanteren wij de volgende spelregels:

Belangrijk! Als er een antwoord wordt gegeven op uw vraag, dan is het voor de gever van het antwoord nuttig om te weten als u er wel (of niet) mee geholpen bent! Wij vragen u dus ook te reageren op een antwoord.

Belangrijk! Antwoorden worden ook per e-mail naar abonnees gestuurd. Laat uw emailadres achter op deze site, zodat u op de hoogte blijft. U krijgt dan ook andere vragen en antwoorden te zien.

Abonneren

Abonneer u voor het ontvangen van emails voor uw Tanita AB-140M - Abdominal Fat Analyser bij:


U ontvangt een email met instructies om u voor één of beide opties in te schrijven.


Ontvang uw handleiding per email

Vul uw emailadres in en ontvang de handleiding van Tanita AB-140M - Abdominal Fat Analyser in de taal/talen: Engels als bijlage per email.

De handleiding is 2,62 mb groot.


U ontvangt de handleiding per email binnen enkele minuten. Als u geen email heeft ontvangen, dan heeft u waarschijnlijk een verkeerd emailadres ingevuld of is uw mailbox te vol. Daarnaast kan het zijn dat uw internetprovider een maximum heeft aan de grootte per email. Omdat hier een handleiding wordt meegestuurd, kan het voorkomen dat de email groter is dan toegestaan bij uw provider.

Uw handleiding is per email verstuurd. Controleer uw email

Als u niet binnen een kwartier uw email met handleiding ontvangen heeft, kan het zijn dat u een verkeerd emailadres heeft ingevuld of dat uw emailprovider een maximum grootte per email heeft ingesteld die kleiner is dan de grootte van de handleiding.

Er is een email naar u verstuurd om uw inschrijving definitief te maken.

Controleer uw email en volg de aanwijzingen op om uw inschrijving definitief te maken

U heeft geen emailadres opgegeven

Als u de handleiding per email wilt ontvangen, vul dan een geldig emailadres in.

Uw vraag is op deze pagina toegevoegd

Wilt u een email ontvangen bij een antwoord en/of nieuwe vragen? Vul dan hier uw emailadres in.


Info