3534
CHARGE-IT WIRELESS – Sveglia digitale con stazione di ricarica a induzione
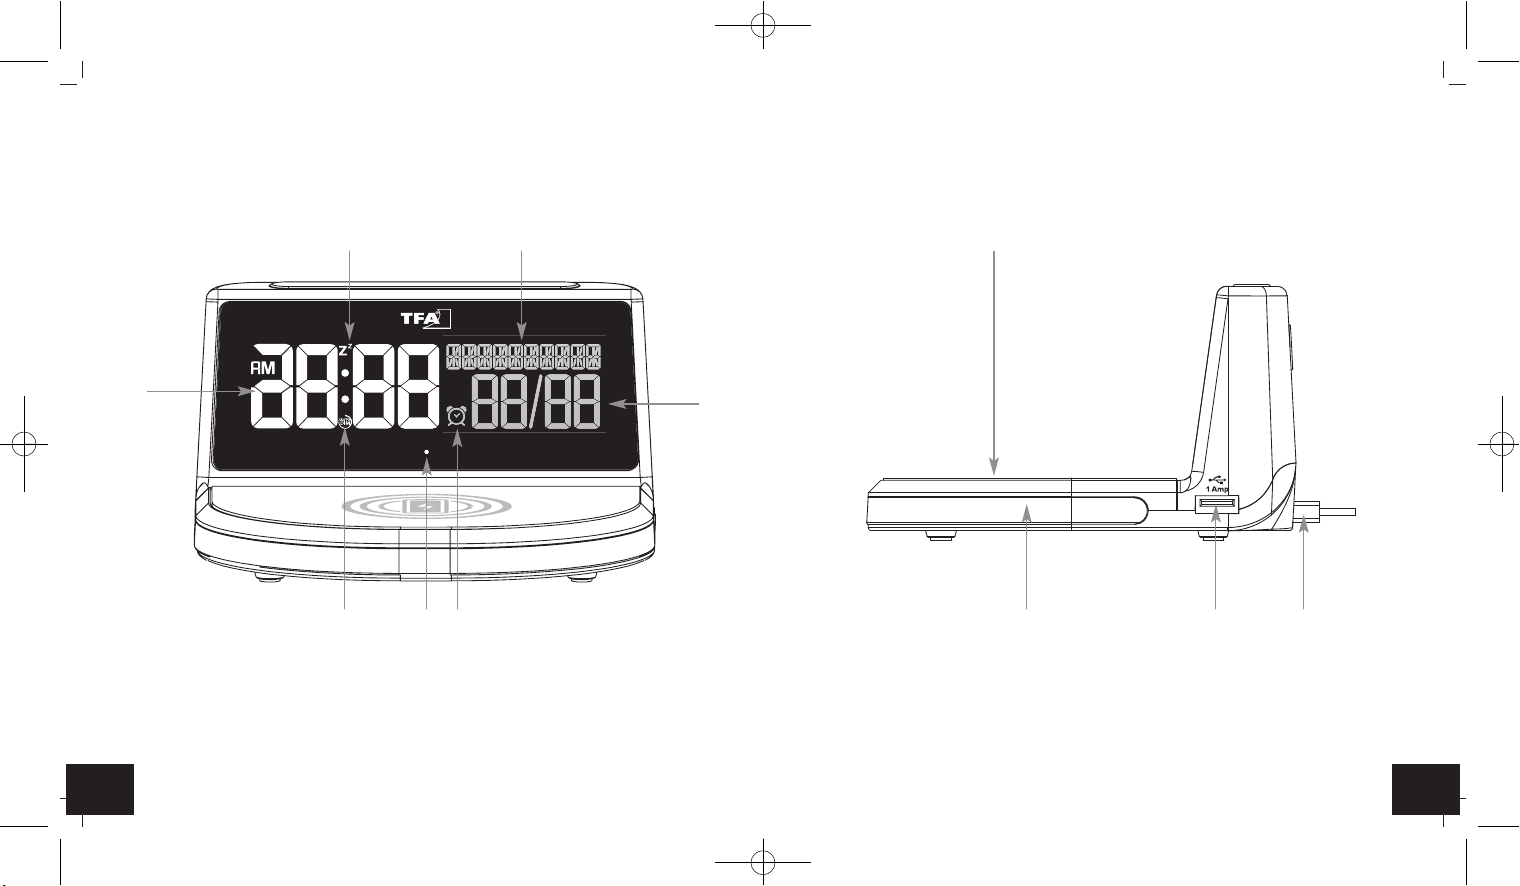
7. Uso
• Tenere premuto il tasto +o –in modalità impostazione per procedere velocemente.
• Premere il tasto SNOOZE/LIGHT nella modalità impostazione per tornare in modalità normale.
• L'apparecchio esce automaticamente dalla modalità impostazione se non si preme alcun tasto
per più di 10 secondi.
7.1 Impostazioni
• Dopo la messa in funzione oppure tenendo premuto il tasto SET nella modalità normale per tre
secondi, si entra nella modalità di impostazione.
• Sul display lampeggia DEUTSCH (predefinita).
• Impostare con il tasto +o –la lingua tedesca – DEUTSCH, inglese – ENGLISH, spagnola –
ESPANOL e francese – FRANCAIS.
• Se avete selezionato l'inglese, il display verrà visualizzato in inglese.
• Premendo nuovamente il tasto SET è possibile modificare una dopo l'altra le impostazioni per il
sistema orario a 12 ore o a 24 ore (FORMAT 24 Hr - predefinita), ore, minuti, anno, mese, giorno,
formato data giorno/mese o mese/giorno (DATE/MONTH - impostazione predefinita) e la visualiz-
zazione della temperatura in °C o °F (TEMP °C - predefinita). Impostare con il tasto +o –.
• Confermare con il tasto SET.
7.1.1 Impostazione del sistema orario a 12 ore o a 24 ore
• Impostare il sistema orario di 12 - o 24-ore con il tasto +o –nella modalità impostazione.
• Nel formato 12 ore compare AM (prima di mezzogiorno) e PM (dopo mezzogiorno) sul display.
7.2 Funzione sveglia
• Premere il tasto
SVEGLIA
nella modalità normale.
• ALARM e 6:30 (predefinita) o l'ultima ora della sveglia impostata vengono visualizzati sul display.
• Tenere premuto per tre secondi il tasto
SVEGLIA
.
• Il simbolo della sveglia appare e l’indicazione dell’ora lampeggia.
• È possibile impostare l'ora con il tasto
+o –
.
• Premere nuovamente il tasto
SVEGLIA
ed impostare i minuti con il tasto
+o –
.
• Premere nuovamente il tasto
SVEGLIA
.
CHARGE-IT WIRELESS – Sveglia digitale con stazione di ricarica a induzione
• SNOOZE, il simbolo snooze e 10 minuti (predefinita) o l'ultimo intervallo della funzione snooze
impostato vengono visualizzato sul display.
• Impostare la durata desiderata per mezzo del tasto
+o –
ad incrementi di 5 (da 5 a 120 minuti).
• Confermare con il tasto
SVEGLIA
per ritornare alla modalità normale.
• La funzione sveglia è attivata e sul display appare il simbolo della sveglia.
• Quando l'ora della sveglia inserito viene raggiunto, la sveglia comincia a suonare.
• Se non viene interrotto, il suono crescente della sveglia si disattiva automaticamente dopo due
minuti e si riattiva nuovamente alla stessa ora di sveglia. Il simbolo della sveglia resta fisso sul
display.
• Premere un tasto qualunque per arrestare l'allarme o premere il tasto
SNOOZE/LIGHT
per attivare
la funzione snooze.
• Il suono della sveglia verrà interrotto per l’intervallo programmato.
• L'indicatore del tempo indicherà il conto alla rovescia.
• Premere un tasto qualunque per spegnere la funzione snooze.
7.2.1 Attivare e disattivare la funzione sveglia
• Premere il tasto SVEGLIA in modalità normale per attivare o disattivare la funzione della sveglia.
Sul display appare o scompare il simbolo della sveglia.
• Per confermare la selezione, aspettate un momento, fino a che l’indicazione torna in modalità
normale.
7.3 Modalità display
• Premere il tasto SET in modalità normale, fino alla selezione tra i seguenti:
• Giorno della settimana scritto per esteso e data
• Giorno della settimana scritto per esteso e temperatura interna
• Giorno della settimana con data e temperatura interna
8. Illuminazione del display
8.1 Luminosità
• È possibile impostare la luminosità con 4 livelli con il tasto sensore SNOOZE/LIGHT (BACKLIGHT
1-4) o disattivarla (OFF).
• Per confermare la selezione, aspettate un momento, fino a che l’indicazione torna in modalità
normale.
TFA_No. 60.2028_Anleitung_06_20 05.06.2020 11:13 Uhr Seite 18