577031
24
Verklein
Vergroot
Pagina terug
1/43
Pagina verder
48
WIRELESS 433 MHz TEMPERATURE STATION
Instruction Manual
Cat. No. 30.3015
Thank you for choosing this wireless temperature station from TFA.
BEFORE YOU USE IT
Please be sure to read the instruction manual carefully.
This information will help you to familiarise yourself with your new device, learn all of its functions and
parts, find out important details about its first use and how to operate it, and get advice in the event of
faults.
Following the instruction manual for use will prevent damage to the device and loss of your statutory rights
arising from defects due to incorrect use.
We shall not be liable for any damage occurring as a result of not following these instructions.
Likewise, we take no responsibility for any incorrect readings and for any consequences which
may result from them.
Please take particular note of the safety advice!
Please look after this manual for future reference.
SCOPE OF SUPPLY:
Temperature station (basic unit)
Instruction manual
FIELD OF OPERATION AND ALL OF THE BENEFITS OF YOUR NEW TEMPERATURE
STATION AT A GLANCE
DCF radio controlled time with manual setting option
49
Time zone option ±12 hours
Indoor and outdoor temperature display with MIN/MAX records and time of reception
Indoor and outdoor humidity display as RH% with MIN/MAX records
Data logging function – with adjustable recording intervals, can store up to 3000 sets of
Temperature/Humidity data
Connectable to PC (Com port) – data can be transferred to PC with the software (in CD ROM)
provided
Can receive up to 5 outdoor transmitters
Time reception ON/OFF selectable
Dew point temperature displayed
Temperature & humidity High/Low alarm function
12/24 hour time display
Year/ Month/ Day calendar display
Temperature display in ºC/ ºF
LCD contrast selectable
Temperature and humidity calibration function
Low battery indicator
Table standing or wall mounting
FOR YOUR SAFETY:
The product is exclusively intended for the field of application described above. The product should
only be used as described within these instructions.
Unauthorised repairs, modifications or changes to the product are prohibited.
The product is not to be used for medical purpose or for public information, but is intended solely for
home use.
50
Caution!
Risk of injury:
Keep this instrument and the batteries out of reach of children.
Batteries must not be thrown into the fire, short-circuited, taken apart or recharged. Risk of
explosion!
Batteries contain harmful acids. Low batteries should be changed as soon as possible to prevent
damage caused by a leaking battery. Never use a combination of old and new batteries together or
batteries of different types. Wear chemical-resistant protective gloves and glasses when handling
leaked batteries.
! Important information on product safety!
Do not expose the instrument to extreme temperatures, vibration or shock.
Protect from moisture.
51
ELEMENTS:
The temperature station
The outdoor transmitter (purchased separately)
Remote transmission of outdoor temperature and humidity to
temperature station by 433 MHz
Shower proof casing
Wall mounting case
Mounting at a sheltered place. Avoid direct rain and sunshine
Function keys
LCD screen
Battery
Compartment
Foldout stand
Hanging Hole
Cable socket (to PC)
Stand
52
Battery compartment
HOW TO INSTALL AND REPLACE BATTERIES IN THE TEMPERATURE STATION
The temperature station uses 3 x AA, IEC LR6, 1.5V batteries. To
install and replace the batteries, please follow the steps below:
1. Insert finger or other solid object in the space at the bottom
center of the battery compartment and lift up to remove the
cover.
2. Insert batteries observing the correct polarity (see marking).
3. Replace compartment cover.
HOW TO INSTALL AND REPLACE BATTERIES IN THE OUTDOOR TRANSMITTER
The outdoor transmitter uses 2 x AA. IEC LR6, 1.5V batteries. To install
and replace the batteries, please follow the steps below:
1. Remove the battery cover at the front side with an appropriate
screwdriver.
2. Insert the batteries, observing the correct polarity (see battery
compartment marking).
3. Replace the battery cover on the unit
SIZE AA LR6
SIZE AA LR6
SIZE AA LR6
53
BATTERY CHANGE:
User shall replace batteries of the temperature station when the battery low indicator is displayed at the
LCD. If user does not replace batteries, working error may be resulted.
Note:
After changing batteries in temperature station, there is no need for user to reset the temperature
station. In fact, the temperature station can remember all transmitter information and sequence as
per the pervious set-up. However, user may require to reset the desired LCD contrast, Alarm On/Off
condition, Calibration value and the Clock (by re-entering the date and time manually or simply wait
for the DCF time signal).
The “Average” value display for particular channel will only be calculated from the data after battery
change.
It is recommended to replace the batteries in all units on an annual basis to ensure optimum
accuracy of these units.
SETTING UP
1. Insert batteries into the temperature station (see “How to install and replace batteries in the
temperature station above). Once the batteries are in place, all segments of the LCD will light up
briefly. Then the indoor temperature and humidity will be displayed. The time will be shown 0:00 and
the date as 1.1.04.
Note:
If the indoor temperature and humidity are not displayed after 15 seconds, remove the batteries and wait
for at least 2 minutes before reinserting them. Also check if the battery has been used up. User is
recommended to use new alkaline batteries to the units.
There is a four-minute time for user to set up all transmitters one by one, after inserting batteries to the
temperature station. The below steps 2 to 4 shall be completed within this 4-minute time.
54
2. Insert batteries to the first transmitter. The temperature station will start learning the transmitter. The
outdoor Channel 1 (out 1) temperature and humidity readings will then be displayed. User may
observe the outdoor channel icon appear. (If this does not happen after 3 minutes, the batteries will
need to be removed from both units and reset from step 1.)
3. After the readings from the first transmitter (Channel 1) are successfully shown by the temperature
station, insert batteries to the second transmitter. The outdoor “Channel 2” temperature and
humidity readings will then be displayed. User may observe the outdoor channel icon appear.
4. Set up the third, fourth, and fifth transmitter (if applicable) one by one as described in the above
steps.
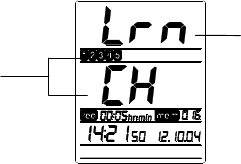
5. Please note that the unit’s built-in memory stores not only saved readings but also any integrated
transmitters on their respective channels. If after you start to use the unit not all transmitters are
being received, you can manually incorporate these one by one as described at
LEARNING/REMOVING A TRANSMITTER.
To free up a used channel for a new transmitter please proceed as described at point 4.
You can also do this for all channels at the same time by returning to the factory settings as
described at CLEARING ALL DATA AND SETTINGS OF THE TEMPERATURE STATION FROM
THE PERMANENT MEMORY.
Please note that this will delete all stored data.
6. The temperature station will also try to receive the DCF time signal (radio controlled) after the
transmitter signal reception.
7. If after 10 minutes, the DCF time has not been received, press and hold the OK () key for 3
seconds to enter the Set up mode for manual time setting. The clock of the temperature station will
automatically attempt to receive the DCF time at midnight. When this is successful, the received
time will override the manually set time. The date is also updated with the received time. (Please
refer also to notes on “Radio controlled Time Reception” and “Manual Setting”).
55
DCF-77 RADIO CONTROLLED TIME
The time base for the radio controlled time is a Cesium Atomic Clock operated by the Physikalisch
Technische Bundesanstalt Braunschweig which has a time deviation of less than one second in one million
years. The time is coded and transmitted from Mainflingen near Frankfurt via frequency signal DCF-77
(77.5 kHz) and has a transmitting range of approximately 1,500 km. Your radio-controlled temperature
station receives this signal and converts it to show the precise time in summer or wintertime.
The quality of the reception depends greatly on the geographic location. In normal cases, there should be
no reception problems within a 1500km radius of Frankfurt.
Once the outdoor reception test period is completed, the DCF tower icon in the clock display will start
flashing in the upper center. This indicates that the clock has detected that there is a radio signal present
and is trying to receive it. When the time code is received, the DCF tower becomes permanently lit and the
time will be displayed.
If the tower icon flashes, but does not set the time or the DCF tower does not appear at all, then please
take note of the following:
Recommended distance to any interfering sources like computer monitors or TV sets is a minimum
of 1.5 - 2 meters.
Within ferro-concrete rooms (basements, superstructures), the received signal is naturally
weakened. In extreme cases, please place the unit close to a window and/ or point its front or back
towards the Frankfurt transmitter.
During nighttime, the atmospheric disturbances are usually less severe and reception is possible in
most cases. A single daily reception is adequate to keep the accuracy deviation below 1 second.
56
FUNCTION KEYS:
Temperature Station:
There are 5 function keys in the Temperature Station:
OK key (
)
In normal display mode, press and hold for 3 seconds to enter the manual setting mode for the
following:
a. LCD contrast level
b. Time zone
c. Daylight saving time (On/ Off)
d. Radio-controlled time reception (On/ Off)
e. 12/ 24 hour Display
f. Time setting (Hour and Minute)
g. Calendar setting (Year, Month and Day)
h. Temperature unit (°C/ °F) setting
Mode
key
Alarm
key
Plus key
Minus key
57
i. Recording intervals to memory (hr:min)
j. Re-learning/ Removing channels
k. Number of channels to be saved to memory
In view mode or alarm mode, press to go back to normal display mode
Plus (+) and Minus (–) key
In normal display mode, press to select a channel (the indoor sensor or one of the outdoor
transmitters)
Press to make adjustment (increase or decrease) in different manual settings and alarm setting
Mode key (mode)
In normal display mode, press to toggle between the following view mode:
a. Maximum record of a selected channel (the indoor sensor or one of the outdoor
transmitters, depending on the user’s selection)
b. Minimum record of a selected channel
c. Average humidity and temperature readings of a selected channel (over the last 100
values stored in memory)
d. The dew point temperature of a selected channel
e. History readings in the memory of a selected channel
f. Calibration mode of humidity and temperature of a selected channel
In alarm setting mode, press to activate/ deactivate the temperature and humidity alarm.
In manual setting mode, press to go back to normal display mode
Press and hold for 3 seconds to reset Min/ Max record of a particular channel
Press and hold for 5 seconds to reset Min/ Max record of all channels
Alarm key (al)
Press and hold for 3 seconds to enter the alarm setting mode.
58
In alarm setting mode, press to toggle between the following settings:
1. high humidity alarm
2. low humidity alarm
3. high temperature alarm
4. low temperature alarm
In manual setting mode, press to go back to normal display mode
LCD Screen:
The LCD screen is split into 4 sections displaying the relatively humidity, temperature, EPROM status and
Time/ Date.
Time reception icon
(for DCF time)
Outdoor data signal
reception indicator
Outdoor transmitter
identification number
Data recording interval
Low battery indicator
Time
Calendar display
Relative humidity
reading in RH%
Temperature
reading in ºC/
ºF
Buzzer-on icon
Memory data display
(showing no. of sets of unread
data stored in memory)
59
MANUAL SETTINGS:
In normal display mode, press and hold the OK key for 3 seconds to enter the manual setting mode for the
following:
a. LCD contrast setting
b. Time zone setting
c. Daylight saving time On/ Off setting
d. Radio-controlled time reception On/ Off setting
e. 12/ 24 hour format setting
f. Time setting (Hour and Minute)
g. Calendar setting (Year, Month and Day)
h. Temperature unit (°C/ °F) setting
i. Recording intervals to memory (hr:min)
j. Relearning or removing a transmitter
k. Number of sets of outdoor channel to be saved to memory of temperature station
LCD CONTRAST SETTING:
Digits flashing
60
The LCD contrast can be set within 8 levels, from LCD 0 to LCD7 (Default setting is “LCD 5”):
1. In normal display, press and hold the OK () key until the digits “Lcd” starts flashing.
2. Use the Plus (+) and Minus (–) key to view all levels of contrast.
3. Select the desired LCD contrast. Confirm with the mode or Alarm (al) key to go back to the normal
display mode.
TIME ZONE SETTING:
The time zone default of the temperature station is “0”. To set a different time zone:
1. Press and hold the OK key until the digits “Lcd” starts flashing.
2. Press shortly the OK key one more time to enter the time zone setting. The digits “Zo” will be
flashing.
3. Use the Plus and Minus key to set the time zone (-12 to 12 hr).
4. Press the Mode or Alarm key to confirm and go back to the normal display mode.
Digits flashing
61
DAYLIGHT SAVING TIME SETTING
1. Press and hold the OK key until the digits “Lcd” starts flashing.
2. Press shortly the OK key two times to enter the daylight saving time setting. The digit “dS” will be
flashing.
3. Use the Plus and Minus key to set the daylight saving time function to “On” or “Off” mode.
4. Press the Mode or Alarm key to confirm and go back to the normal display mode.
Note:
The function of day night time saving is only applicable to WWVB time reception within the areas
in the United States.
“dS off” means that the feature is off and the WWVB will not change times automatically. “dS On”
indicates that the feature is on and the WWVB will change times automatically.
Digits flashing
62
TIME RECEPTION ON/OFF SETTING:
In area where reception of the DCF time is not possible, the DCF time reception function can be turned
OFF. The clock will then work as a normal Quartz clock. (Default setting is ON).
1. Press and hold the OK key until the digits “Lcd” starts flashing.
2. Press and release the OK key three times to enter the time reception time setting. The digit “rEc”
will be flashing.
3. Use the Plus and Minus key to set the time reception function to on or off mode.
4. Press the Mode or Alarm key to confirm and go back to the normal display mode.
Note:
If the Time Reception function is turn OFF manually, the clock will not attempt any reception of the DCF
time as long as the Time Reception OFF function is activated. The time reception icon and the “DCF” icon
will not be displayed on the LCD
Digits flashing
63
12/24-HOUR FORMAT SETTING:
The time display can be selected to show hours in 12-hour or 24-hour settings. (Default 24-Hour)
1. Press and hold the OK key until the digits “Lcd” starts flashing.
2. Press and release the OK key four times to enter the time format setting. The digit “24h” will be
flashing.
3. Use the Plus and Minus key to set the time shown in 12-hour or 24-hour format.
4. Press the Mode or Alarm key to confirm and go back to the normal display mode.
MANUAL TIME SETTING:
In case the temperature station cannot detect the DCF-signal (for example due to disturbances,
transmitting distance, etc.), the time can be manually set. The clock will then work as a normal Quartz
clock.
Digits flashing
64
Hour flashing
Minutes flashing
1. Press and hold the OK key until the digits “Lcd” starts flashing.
2. Press and release the OK key five times to enter the hour setting. The hour digit in the time LCD
will be flashing.
3. Use the Plus and Minus key to set the hour.
4. Press the OK key one more time to confirm the hour and advance to the minute setting. The
minute digit will be flashing.
5. Use the Plus and Minus key to set the minute
6. Press the Mode or Alarm key to confirm and go back to the normal display mode.
Note: The unit will still try and receive the signal every day despite it being manually set. When it does
receive the signal, it will change the manually set time into the received time. During reception attempts the
DCF tower icon will flash. If reception has been unsuccessful, then the DCF tower icon will not appear but
reception will still be attempted the following hour.
65
CALENDAR SETTING:
The date default of the temperature station is 1. 1. in the year 2004. Once the radio-controlled time signals
are received, the date is automatically updated. However, if the signals are not received, the date can also
be set manually.
1. Press and hold the OK key until the digits “Lcd” starts flashing.
2. Press and release the OK key seven times to enter the year setting. The year digit in the date LCD
will be flashing.
3. Use the Plus and Minus key to set the year.
4. Press the OK key one more time to confirm the year and advance to the month setting. The month
digit will be flashing.
5. Use the Plus and Minus key to set the month.
6. Press the OK key one more time to confirm the month and advance to the day setting. The day digit
will be lashing.
Year
Month
Date
66
7. Use the Plus and Minus key to set the day.
8. Press the Mode or Alarm key to confirm and go back to the normal display mode.
TEMPERATURE UNIT SETTING (°C/ °F):
The temperature display can be selected to show temperature data in °C or °F (Default °C).
1. Press and hold the OK key until the digits “Lcd” starts flashing.
2. Press and release the OK key ten times to enter the temperature unit setting. The “°C” digit will be
flashing.
3. Use the Plus and Minus key to set the unit of temperature in °C or °F.
4. Press the Mode or Alarm key to confirm and go back to the normal display mode.
Digit flashing
67
RECORDING INTERVAL (hr:min) SETTING
The time intervals at which the temperature and humidity data saved to memory can be set to one of the
following:
1-minute; 5-minute; 10-minute; 15-minute; 20-minute; 30-minute; 1-hour; 2-hour; 4-hour; 6-hour; 8-hour;
12-hour or 24-hour.
Your appliance has been developed and produced to the very latest technical standards. Unfortunately,
however, an error occurred in programming the time intervals.
The following intervals are out of line, as follows:
3-hour interval Records every 4 hours
4-hour interval Records every 6 hours
6-hour interval Records every 8 hours
8-hour interval Records every 12 hours
12-hour interval Records every 24 hours
Digits flashing
68
1. Press and hold the OK key until the digits “Lcd” starts flashing.
2. Press and release the OK key eleven times to enter minute setting of the recoding interval. The min
in the record LCD will be flashing.
3. Use the Plus and Minus key to set the desired recording interval.
4. Press the Mode or Alarm key to confirm and go back to the normal display mode.
LEARNING/ REMOVING A TRANSMITTER (CHANNEL)
After replacement of batteries of a particular transmitter, it is necessary to learn the transmitter again in the
learning mode. On the other hand, when user wants to decrease the number of transmitters to be applied,
he may remove the transmitter so that the data from this channel will not be displayed in the temperature
station. The below procedures describe how to “re-learn” or “remove” a channel:
1. Press and hold the OK key until the digits “Lcd” starts flashing.
2. Press shortly the OK key twelve times to enter Learn/ Remove setting of channels. The digits “Lrn”,
“CH” and the channel icons will be flashing.
Digit flashing
Flashing
69
3. Press Plus to get in Learn/ Remove setting of channels. The channel icon “1” will be flashing.
4. Press OK key () to select another channel, if necessary (1-5).
5. Press Plus to set the selected channel to “Re-learn” state (The channel icon will flash in two places
on the display), or press Minus to remove the channel (The channel icon will disappear).
6. As soon as the in two places flashing channel number disappears, the reception icon will be flashing
in the top left corner. Insert the batteries in the respective transmitter.
After a short time (1 minute at the maximum) the transmitter should be linked.
7. Repeat the above steps for further channels, if necessary.
Note: Once a channel is removed, the temperature station will be “disconnected” form the channel and
the data transmitted by this channel cannot be viewed at the temperature station.
THE NUMBER OF OUTDOOR TRANSMITTERS TO BE SAVED INTO THE SYSTEM
MEMORY
Digits flashing
70
Up to 5 outdoor transmitters can be received by the temperature station. User may decide the number of
transmitter data to be save to the permanent memory of the temperature station. For instant, user may
apply 5 transmitters but set to save the data only from particular 3 transmitters. To set the number of
transmitters whose data are to be saved in the system memory:
1. Press and hold the OK key until the digits “Lcd” starts flashing.
2. Press and release the OK key thirteen times to enter transmitter number setting. The digit “Enr” will
be flashing.
3. Use the Plus and Minus key to select the number of transmitter to be used with the temperature
station (up to 5 transmitters)
4. Press the OK key one more time to confirm and go back to the normal display mode.
Note:
If user has set “Enr = 2” and five transmitters are on, the data only from channel No. 1 and 2 will be
saved in the system memory. Similarly, if user set “Enr = 4”, data from channels No. 1 to 4 will be
saved.
On the other hand, if user has initially applied 5 transmitters but then remove the Channel 3, the
temperature station will thereafter display “--.-“ for Channel 3. And if the user has chosen “Enr = 3,
then data from Channel 1 to 3 will be stored in the memory, instead of Channel 1, 2 and 4. The data
stored in the memory for channel 3 will be “--.-“.
After the “Enr” number has been changed, the history data will be cleared and “mem” will be rest to
“000”.
TO EXIT THE MANUAL SETTING MODE
Press the Mode key or Alarm key to exit the manual setting mode anytime during the manual setting. The
mode will return to the normal time display.
71
TOGGLING BETWEEN DIFFERENT CHANNELS (INDOOR AND OUTDOOR
CHANNELS):
1. Press the Plus or Minus key to toggle between the Temperature and humidity readings of the indoor
channel and the outdoor transmitter channel(s). The channel identification icon (“in”, “out 1”, “out 2”,
“out 3” … ) will be displayed at the upper right screen indicating that the particular channel is now
being selected.
VIEWING VARIOUS TYPE OF TEMP/HUMDITY READINGS OF A SELECTED
CHANNEL:
After a particular channel (the indoor sensor or one of the outdoor transmitters) has been selected by
pressing the Plus or Minus key, the following modes of data may be viewed by user:
The temperature and humidity
readings of Outdoor
transmitter No. 2 is now
shown
24

Hulp nodig? Stel uw vraag in het forum

Spelregels

Misbruik melden

Gebruikershandleiding.com neemt misbruik van zijn services uitermate serieus. U kunt hieronder aangeven waarom deze vraag ongepast is. Wij controleren de vraag en zonodig wordt deze verwijderd.

Product:

Bijvoorbeeld antisemitische inhoud, racistische inhoud, of materiaal dat gewelddadige fysieke handelingen tot gevolg kan hebben.

Bijvoorbeeld een creditcardnummer, een persoonlijk identificatienummer, of een geheim adres. E-mailadressen en volledige namen worden niet als privégegevens beschouwd.

Spelregels forum

Om tot zinvolle vragen te komen hanteren wij de volgende spelregels:

Belangrijk! Als er een antwoord wordt gegeven op uw vraag, dan is het voor de gever van het antwoord nuttig om te weten als u er wel (of niet) mee geholpen bent! Wij vragen u dus ook te reageren op een antwoord.

Belangrijk! Antwoorden worden ook per e-mail naar abonnees gestuurd. Laat uw emailadres achter op deze site, zodat u op de hoogte blijft. U krijgt dan ook andere vragen en antwoorden te zien.

Abonneren

Abonneer u voor het ontvangen van emails voor uw TFA 30.3015 Klima Logger bij:


U ontvangt een email met instructies om u voor één of beide opties in te schrijven.


Ontvang uw handleiding per email

Vul uw emailadres in en ontvang de handleiding van TFA 30.3015 Klima Logger in de taal/talen: Engels als bijlage per email.

De handleiding is 0,55 mb groot.


U ontvangt de handleiding per email binnen enkele minuten. Als u geen email heeft ontvangen, dan heeft u waarschijnlijk een verkeerd emailadres ingevuld of is uw mailbox te vol. Daarnaast kan het zijn dat uw internetprovider een maximum heeft aan de grootte per email. Omdat hier een handleiding wordt meegestuurd, kan het voorkomen dat de email groter is dan toegestaan bij uw provider.

Stel vragen via chat aan uw handleiding

Stel uw vraag over deze PDF

Andere handleiding(en) van TFA 30.3015 Klima Logger

TFA 30.3015 Klima Logger Gebruiksaanwijzing - Nederlands - 45 pagina's

TFA 30.3015 Klima Logger Gebruiksaanwijzing - Deutsch - 47 pagina's


Uw handleiding is per email verstuurd. Controleer uw email

Als u niet binnen een kwartier uw email met handleiding ontvangen heeft, kan het zijn dat u een verkeerd emailadres heeft ingevuld of dat uw emailprovider een maximum grootte per email heeft ingesteld die kleiner is dan de grootte van de handleiding.

Er is een email naar u verstuurd om uw inschrijving definitief te maken.

Controleer uw email en volg de aanwijzingen op om uw inschrijving definitief te maken

U heeft geen emailadres opgegeven

Als u de handleiding per email wilt ontvangen, vul dan een geldig emailadres in.

Uw vraag is op deze pagina toegevoegd

Wilt u een email ontvangen bij een antwoord en/of nieuwe vragen? Vul dan hier uw emailadres in.


Info