Power and Plug ......................................................................................................................................................
Power Cord and Signal Cable ...............................................................................................................................
Use Environment ....................................................................................................................................................
Hanging the TV Set on the Wall .............................................................................................................................
.............................................................................................................................................Important Information
4
4
6
7
7
7
Buttons on the TV .......................................................................................................................................................
Remote Control Functions ..........................................................................................................................................
Switching on ...............................................................................................................................................................
Switching off ...............................................................................................................................................................
Using Menu System ..................................................................................................................................................
PAP Function........ .....................................................................................................................................................
Timer Menu ......... .......................................................................................................................................................
Option Menu .......... ...................................................................................................................................................
Menu display .............................................................................................................................................................
Chapter 3: Menu Operation
12
12
12
Customising the input settings ..................................................................................................................................
Diagnostics on digital TV channels ............................................................................................................................
Time shift ................ ...................................................................................................................................................
10
Lock Menu ...... ...........................................................................................................................................................
Using electronic programme guide .............................................................................................................................
Energy saving.............................................................................................................................................................
V...............................................................................................................................iewing TV using the 3D fucntion
Smart TV ...................................................................................................................................................................
Schedule list .................................... .........................................................................................................................
Setting up your favourite channels ...... ............. ......................................................................................................
MHEG function ................ ..........................................................................................................................................
Viewing photos, playing music and watching videos from a USB storage device ....................................
Introduction
3
Chapter 1
Precautions
Product
Read all of the instructions before operating the set.
Keep these instructions well for future use.
Do not block or cover the ventilation openings on the
back cover.
Cleaning
Dust the set by wiping the screen and the cabinet with
a soft, clean cloth or some special liquid cleaner.
Unplug the set under the following conditions:
Power and Plug
Do not allow anything to rest on or roll over the power
cord and the signal cable.
Power Cord and Signal Cable
Hanging the TV Set on the Wall
Warning: This operation requires two persons.
Do not push objects of any kind into this unit through
the cabinet slots as they could touch current carrying
parts or short-circuit parts, resulting in fire, electric
shock, or damage to the unit.
Do not attempt to open the cabinet
. There are no parts inside you can service by
yourself. Refer all servicing to qualified personnel.
as this may cause
damage
Do not touch the screen surface with fingers as this
may scratch or mark the TV screen.
Do not impact the TV screen with hard pressure as
this may damage the TV screen severely.
The appliance is not intended for use by young children
or infirm persons without supervision. Young children
should be supervised to ensure that they do not play
with the appliance.
- If the set will not be used for a long period of time.
- If the power cord or the power outlet/plug is damaged.
- Follow the instructions to install and adjust the
product. Adjust those controls that are covered in these
operating instructions as improper adjustment of other
controls may result in damage. If this happens, unplug
the set and refer to the service personnel.
- If the set has been subjected to impact or dropped
and the cabinet is damaged.
Where the mains plug or an appliance coupler is
used as disconnect device, the disconnect device
shall remain readily operable.
Protect the power cord and the signal cable from being
trampled.
Do not overload the power cord or the power outlet.
Do not expose the power cord and the signal cable to
moisture.
Do not place the set on an unstable cart, stand, or table.
Use Environment
Place the set in an area that allows good ventilation.
Do not use the set near damp, and cold areas. Protect
the set from overheating.
Keep the set away from direct sunlight.
The set shall not be exposed to drips or splashes
and no objects filled with liquids, such as vases, shall be
placed on the set.
Do not use the set in dusty environments.
Do not apply excessive force to the screen when
cleaning.
Do not use water or other chemical cleaners to clean the
screen as this may damage the surface of the TV
screen.
Check that the wall can support the weight of the TV
set and wall mount assembly.
All other safety instructions about our TV sets are also
applicable here. Wall Mount Bracket not included.
Follow the mounting instructions provided with the wall
mount.
The TV set must be installed on a vertical wall.
Make sure to use only screws suitable for the material
of the wall.
Make sure that the TV set cables are placed so that
there is no danger of tripping over them.
To ensure a safe installation, observe the following safety
notes:
Important Information
Using cabinets or stands recommended by the
manufacturer of the television.
If a television is not positioned in a sufficiently stable
location, it can be potentially hazardous due to falling.
Many injuries, particularly to children, can be avoided by
taking simple precautions such as:
Note: Graphics contained within this publication
are presentation only.
Only using furniture that can safely support the television.
Ensuring the television is not overhanging the edge of
the supporting furniture.
Not placing the television on tall furniture (for example,
cupboards or bookcases) without anchoring both the
furniture and the television to a suitable support.
Not standing the televisions on cloth or other materials
placed between the television and supporting furniture.
Educating children about the dangers of climbing on
furniture to reach the television or its controls.
Operating Temperature: 5 to 35(41F to 95F)
Operating Humidity: 20% to 80%, non-condensing
Storage Temperature: -15 to 45(5F to 113F)
Storage Humidity: 10% to 90%, non-condensing
Buttons on the TV
1. PR-/+ (PROGRAMDOWN/UP) button
Scans down/up through the channel list. In the menu system, PROGRAM DOWN acts like the down direction
button on the remote and adjusts menu; PROGRAM UP acts like the up direction buttons on the remote and
adjusts menu controls.
2
MENU ( )button
Bringsupthemenusystem
5. POWER ( )button
Turns the TV on or to standby. (Note: for some models, the POWER button turns the TV on or off.)
. VOL-/+ (VOLUME DOWN/UP) button
Decreases/increases the volume. In the menu system, they act like the left/right direction buttons on the remote
and adjusts menucontrols
3
OK/SOURCE ( ) button
4
Note:
The location and names of the function buttons and power button on the TV may vary according to TV model.
4
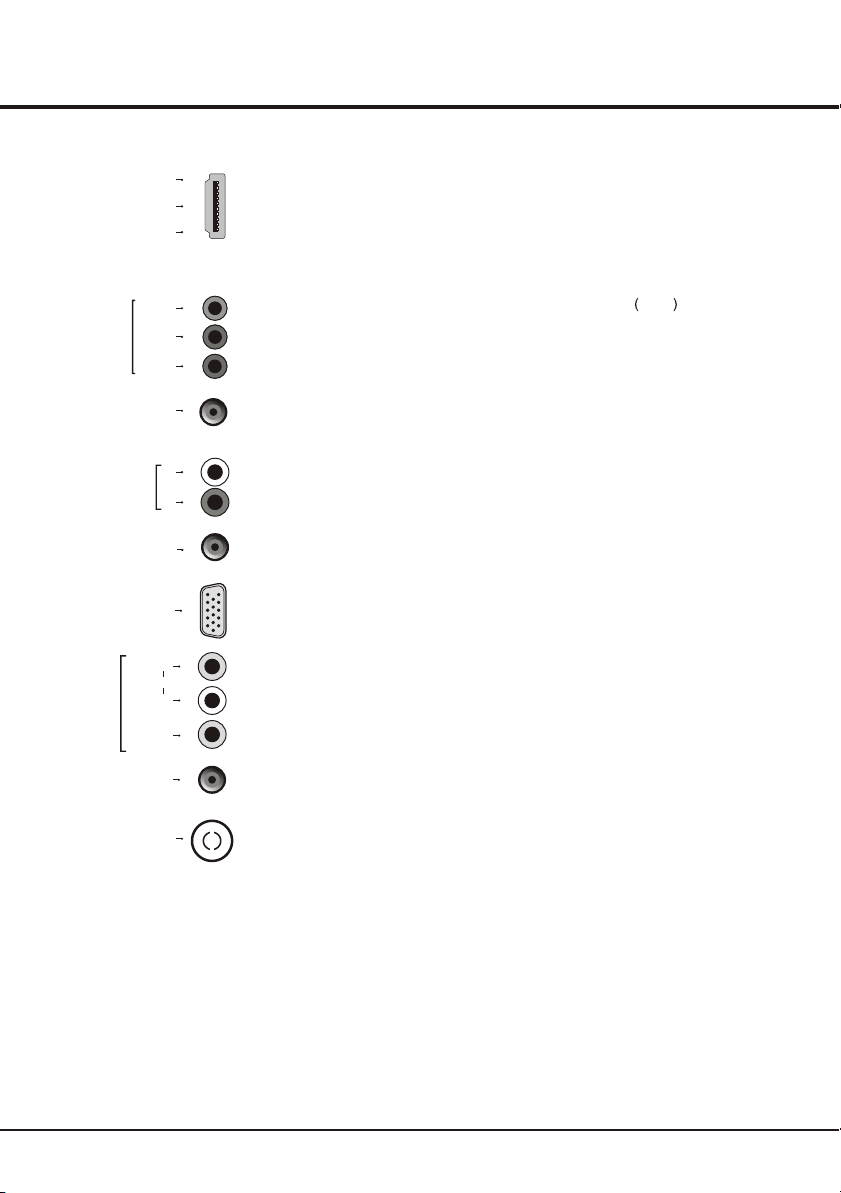
SPDIF
SPDIF socket (output)
The SPDIF socket can be used to connect a compatible digital audio receiver.
or
Sockets
Note: the location and names of the sockets on the TV may vary according to
TV model, and not all sockets available on all models.
Headphone socket (output)
This socket can be used to connect headphones or stereo earphones.
Warning: excessive sound pressure from earphones and headphones can
cause hearing loss.
HEADPHONE
or
USB socket (input)
These socketscan be used to connect a USB device.
Note:the number of USB sockets on the TV may vary according to TV model.
USB
LAN
Chapter 2Connections and Setup
3D
This socket can be used to connect the local area network.
Note: For some TV models, the socket is called Service instead, and has no function.
LAN
AV RCA audio + video sockets (input) or AV IN adapter socket
Note: AV IN adapter
The AV IN sockets can be used to connect a range of equipment, including video
recorders, camcorders, decoders, satellite receivers, DVD players, or games
consoles. The VIDEO IN socket provides
the socket can be used to connect the attached AV adapter
cable with VIDEO and AUDIO L & R IN sockets.
composite video connection.
L
AUDIO
VIDEO
AV IN
R
AV IN adapter
5
VGA socket (input)
This socket can be used to connect a computer.
VGA
ANTENNA INANTENNA IN socket (input)
This socketcan be used to connect the outside aerial or cable network.
YPbPr component sockets (input) or CMP adapter
CMP adapter
socketinput
Note: The socket can be used to connect the attached CMP adapter
cable with YPbPr component sockets
Y
Pb/Cb
Pr/Cr
COMPONENT
IN
These YPbPr sockets can be used to connect a device that has component video
sockets, such as a DVD player. The component sockets can recognize if the device
you're connecting to is Y Pb Pr compatible or Y Cb Cr compatible. The component
sockets provide excellent picture quality because the video is separated into three
separate parts.
CMP IN
adapter
or
R
L
AUDIO IN
AUDIO IN or AUDIO IN adapter sockets (input)
Note: TAUDIO in adapter
and
hesocket can be used to connect the attached AUDIO
in adapter cable with audio L & R sockets,be used to obtain sound.
AUDIO IN
adapter
or
These AUDIO IN L & R sockets can be used to connect a range of equipment,
including video recorders, camcorders, satellite receivers, DVD players, or games
consoles. AUDIO IN sockets (or AUDIO in adapter) are shared by VGA and YPbPr
(or CMP adapter) sockets.
HDMI1 or HDMI2 or HDMI3 socket (input)
The HDMI can be used to connect a
blu ray, PC with a compatible video card installed, certain DVD players or a
high-definition compatible digital satellite decoder. This socket p
(High-Definition Multimedia Interface) socket
rovides an
uncompressed digital connection that carries both video and audio data by way of
an integrated mini-plug cable.
HDMI 1
HDMI 2
or
HDMI 3
or
Connections and Setup
or
6
Connections and Setup
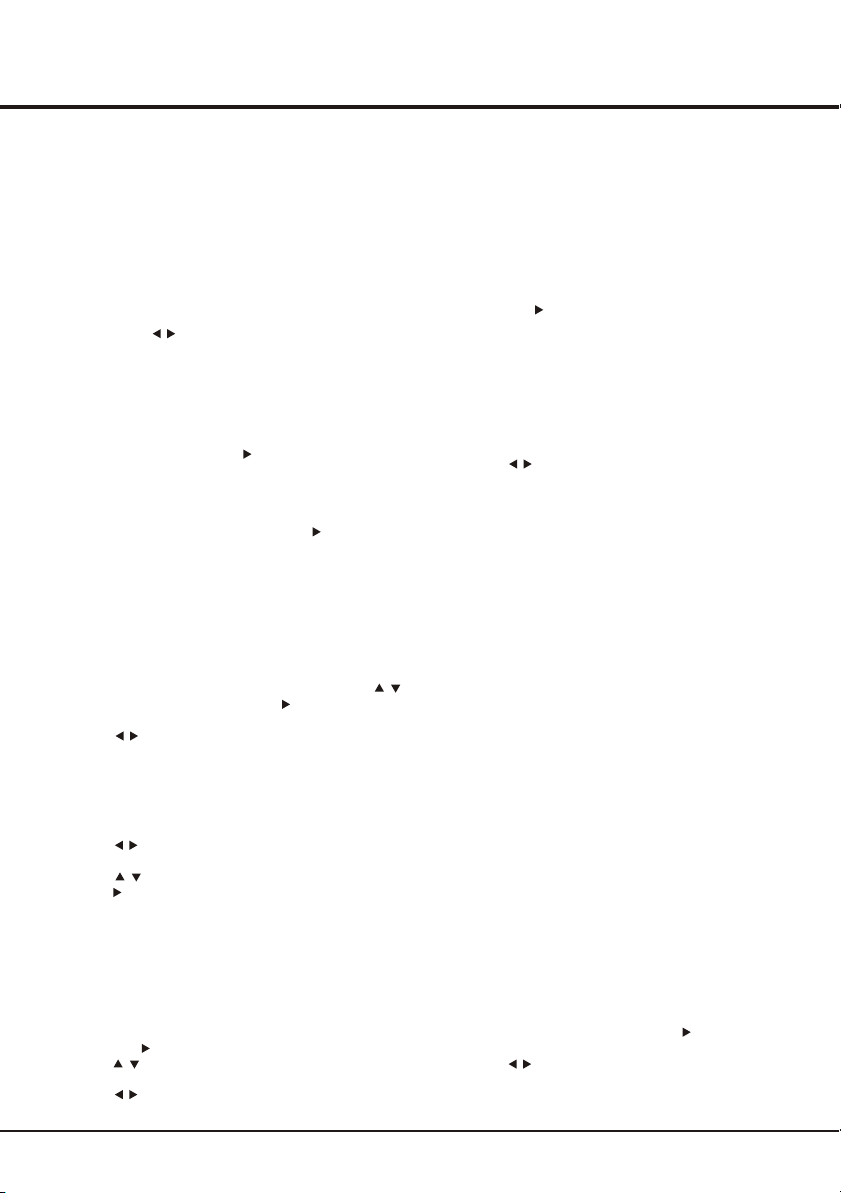
Remote control functions
Most of your television's functions are available via the menus that appear on the screen. The remote control supplied
Note: You are recommended to use the full screen mode. Do not use the display mode with black bars on both sides of the picture (such
as 4:3) for a long time; otherwise the TV screen may be damaged permanently.
ECO
To select desired power saving mode.
V+/-
To control the volume.
INFO
To display programme information, if
available.
SMART TV
To display the Smart TV homepage.
YouTube
To display YouTube homepage.
MENU
To access the main menu; to return to
the previous menu;
To return to the previous menu
EXIT
To exit the menu structure or Teletext.
ZOOM-/ZOOM+
To select the picture format.
PRE-CH
To return to the previous channel.
LANG
To select a sound type available for
selected analogue TV programme; to
select an audio language available for
selected digital TV programme.
SLEEP
To toggle among the sleep timer
options.
Colour buttons
To select tasks or Teletext pages. The
red button can also be used for MHEG
and HbbTV function.
Standby / quit standby.
To select the previous photo, music
or video.
To start or pause playback.
To stop playback.
To select the next photo, music or video.
To start fast forward.
Recording button.
To start fast reverse.
TEXT
To toggle Teletext on or off.
TV
To access TV mode.
GUIDE
To toggle the Electronic Programme
Guide on or off (only available for digital
channels).
To navigate through the menus; to set
functions and change values.
To navigate through the menus; to select
menu options; to switch to the previous or
next photo, song or video in USB function.
SUBTITLE
To select a subtitle language available for
selected digital TV programme.
P+/-
To change channels.
To switch the sound off and back on.
SOURCE
To select connected devices.
OK
LIST
To display the channel list.
FAV
To bring up the Channel list selection
menu.
3D
To toggle among the 3D input format
options.
Alphanumeric buttons
To enter channel numbers; to enter
a letter, a digit or a symbol in some
functions.
◄/►
▲/▼
OPTION
To display the function menu to
perform certain operations; to display
the Teletext page in different modes.
7
Switching on
Follow the instructions on this page on how to switch on your TV set and the remote control before going on to following
pages describing how to use the channel set-up procedure.
1. Insert two AAA batteries in the remote control.
Precautions on using batteries:
- Only use the battery types specified.
- Make sure you use the correct polarity.
- Do not mix new and used batteries.
- Do not use rechargeable batteries.
-
- Remove the batteries from the remote control if you are not using it for a long period of time.
Do not expose batteries to excessive heat such as sunshine, fire or the like, throw them in a fire, recharge them or
try to open them, as this could cause them to leak or explode.
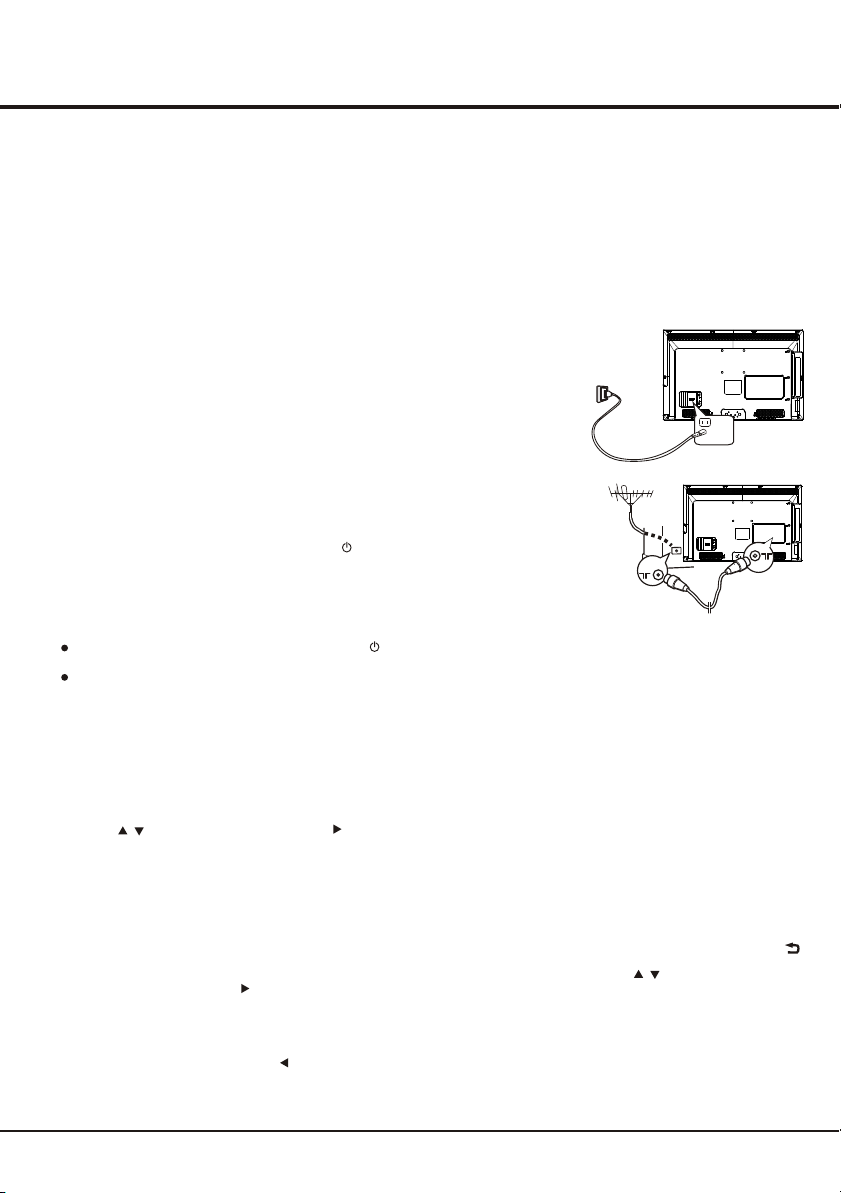
3. Connect an outside aerial to the ANTENNA IN socket at the back of the TV set.
The aerial socket (75 OHM - VHF / UHF / cable) can be used for connecting
an external aerial or other equipment fitted.
4. When powered on, the TV will be turned on directly or be in standby mode.
If the TV set is in standby mode, press the button on the remote control or
on the TV set to turn on the TV.
Note: the location and name of the power button on the TV may vary according
to TV models.
2. Connect the power cable FIRST to the television, THEN to a mains socket.
Your TV set should only be connected to an AC supply. It must not be connected
to a DC supply. If the plug is detached from the cable, do not, under any
circumstances, connect it to a mains socket, as there is a risk of electric shock.
Note: the figures are for representation only. The location of the power socket at
the back of the television might differ depending on the model.
Switching off
To put the TV set into standby mode, press the button on the remote control
or on the TV, the TV set remains powered up, but with low energy consumption.
To switch off the TV set, unplug the mains socket from the mains outlet.
InitialSet-up
Initial set-up involves selecting all the settings required to be able to search for and store all the channels you can
receive. Make sure that the television is switched on and follow all the steps in turn specified hereafter.
The first time you switch the set on, the Initial setup wizard opens, which guides you through the initial setup
process. Press OK to start your initial setup.(See figure 1)
In this step, you can also select Skip Scan to skip the channel search progress. But when you turn the TV on next time,
the prompt on the screen will remind you to do the channel scan first.
2. During the setup, you can follow the hints available at the bottom of the screen to return to the last step by pressing .
4. - In this step, you can press OK to exit the initial setup. The channels are arranged in a preset order. If you wish to skip
channels, modify the preset order or rename channels, select Setup > Organiser for these operations.
- In this step, you can also press to return to the previous step.
1. Press to select Scan and press OK/ to start the search automatically. All available TV programmes are stored.
This operation takes a few minutes. The display shows the progress of the search and the number of programs found.
Note: to prevent the channel setup process from being interrupted, wait for the message indicating that the setup is
complete.
/
3. Once the automatic search ends, the set enters the next step automatically. You can press to select your location
Shop or Home. Press OK/ to confirm your selection and enter the next step.
Note: the Shop mode does not meet the MEPS requirements, we would like to suggest selecting Home.
/
Connections and Setup
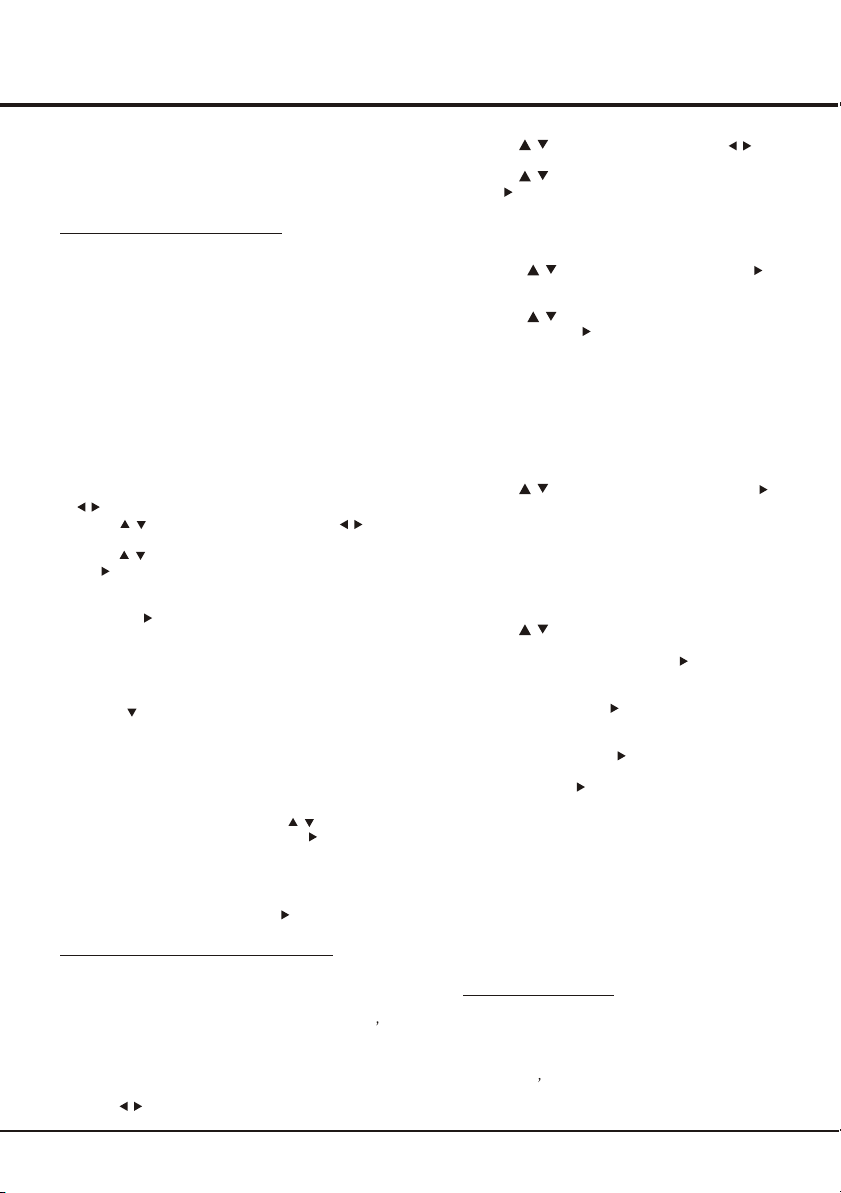
Chapter 3Menu Operation
Menu Display
Initial setup
Welcome to use the Wizard for Initial Setup !!
Please press [OK] to start the wizard.
Welcome
PictureSoundPAPOptions
Setup
LockInstallationTimer
Picture
Picture presetStandard
Brightness
Contrast
Saturation
Sharpness
Screen mode
Auto format
Advanced settings
60
50
50
8
16:9 format
On
Color Temperature
Normal
Back
Exit
Select
Menu
Exit
......
CEC
Version Info
Sound
Sound preset
Balance
Audio delay
0
Auto volume control
Sound type
Off
Stereo
......
Back
Exit
Select
Enter
Menu
Exit
OK
500
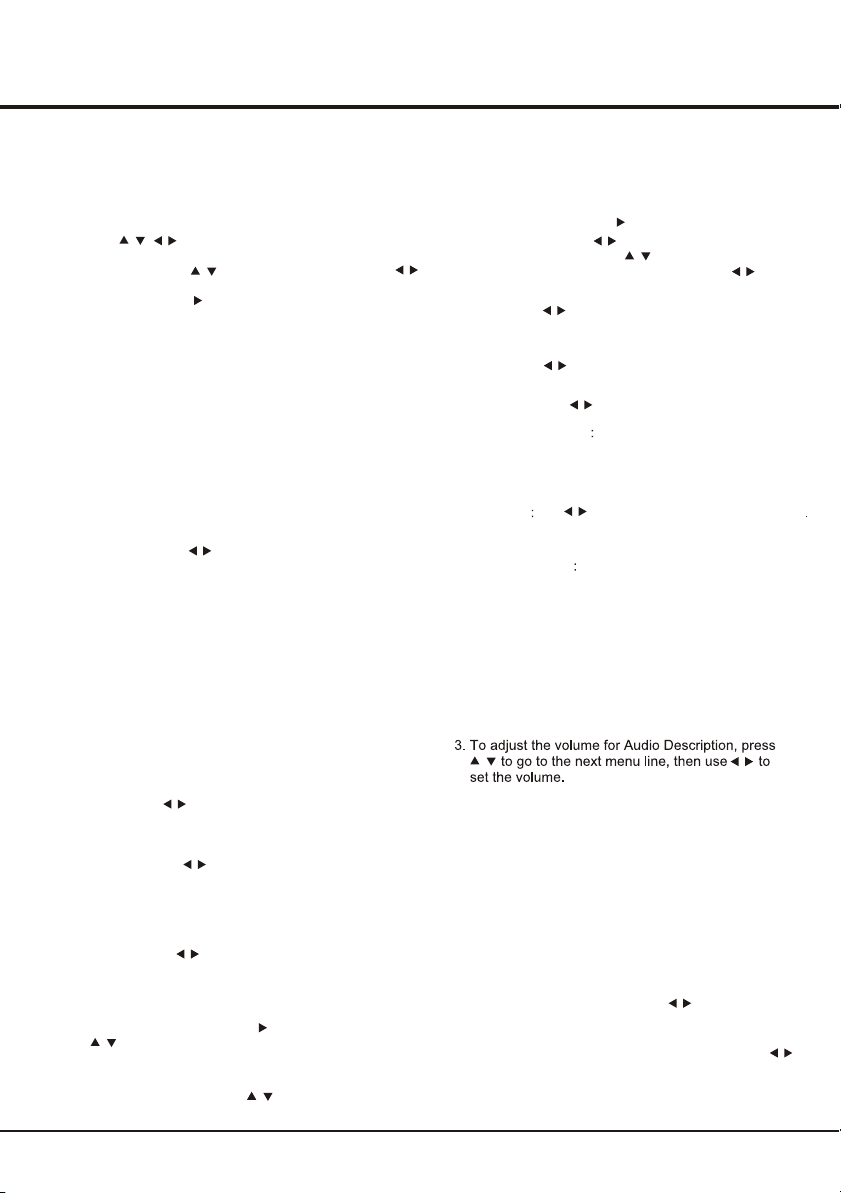
Audio Description
......
PAP
PAP
Off
Back
Exit
Select
Menu
Exit
Options
Teletext
SPDIF typePCM
SPDIF delay
T-LinkOff
LocationHome
140
Subtitle
Back
Exit
Select
Enter
Menu
Exit
OK
Network updateOn
Software update
Timer
Time zone
Clock
Sleep timer
As per broadcaster
Off
......
Back
Exit
Select
Menu
Exit
NSW/ACT
Country region
Channel install
Automatic update
Analogue manual scan
Antenna manual installation
Clean channel list
Automatic search
Back
Exit
Select
Enter
Menu
Exit
OK
Setup
Organiser
Input settings
Diagnostics
Time shiftOn
Reset shop
ECO settings
Back
Exit
Select
Enter
Menu
Exit
OK
Network
Figure 1Figure 2
Figure 3Figure 4
Figure 5Figure 6
Figure 7Figure 8
Figure 9Figure 10
8
Off
Wide Stereo
Menu Operation
UsingMenuSystem
9
a setting. Use OK/ to open the corresponding submenu.
1. Press Menu to display the main menu.
2. Press to select the desired item, then press
OK button to open the corresponding submenu.
3. In submenus, use to select menu options, use
to set functions or change values. Press OK to activate
4. Press Menu to return to the previous menu or press
Exit to close the menu.
Picture Menu
The menus for adjusting the picture are used to obtain
the best picture settings according to your preference,
the type of program you are watching and the ambient
lighting. (see figure 3.)
Display the main menu by pressing Menu and select
Picture, then press OK to confirm. The Picture options
are as below:
Note: some options may not be available for certain
Gebruikershandleiding.com neemt misbruik van zijn services uitermate serieus. U kunt hieronder aangeven waarom deze vraag ongepast is. Wij controleren de vraag en zonodig wordt deze verwijderd.
Product:
Spelregels forum
Om tot zinvolle vragen te komen hanteren wij de volgende spelregels:
lees eerst de handleiding door;
controleer of uw vraag al eerder door iemand anders is gesteld;
probeer uw vraag zo duidelijk mogelijk te stellen;
heeft u een probleem en al geprobeerd om dit op te lossen, vermeld dit erbij aub;
heeft u een oplossing gekregen van een bezoeker dan horen wij dat graag in dit forum;
wilt u een reactie geven op een vraag of antwoord, gebruik dan niet dit formulier maar klik op de knop 'reageer op deze vraag';
uw vraag wordt direct op de website gezet; vermijd daarom persoonlijke gegevens in te vullen;
Belangrijk! Als er een antwoord wordt gegeven op uw vraag, dan is het voor de gever van het antwoord nuttig om te weten als u er wel (of niet) mee geholpen bent! Wij vragen u dus ook te reageren op een antwoord.
Belangrijk! Antwoorden worden ook per e-mail naar abonnees gestuurd. Laat uw emailadres achter op deze site, zodat u op de hoogte blijft. U krijgt dan ook andere vragen en antwoorden te zien.
Abonneren
Abonneer u voor het ontvangen van emails voor uw TCL U40E5800FS bij:
nieuwe vragen en antwoorden
nieuwe handleidingen
U ontvangt een email met instructies om u voor één of beide opties in te schrijven.
Ontvang uw handleiding per email
Vul uw emailadres in en ontvang de handleiding van TCL U40E5800FS in de taal/talen: Engels als bijlage per email.
De handleiding is 2.85 mb groot.
U ontvangt de handleiding per email binnen enkele minuten. Als u geen email heeft ontvangen, dan heeft u waarschijnlijk een verkeerd emailadres ingevuld of is uw mailbox te vol. Daarnaast kan het zijn dat uw internetprovider een maximum heeft aan de grootte per email. Omdat hier een handleiding wordt meegestuurd, kan het voorkomen dat de email groter is dan toegestaan bij uw provider.
Stel vragen via chat aan uw handleiding
Stel uw vraag over deze PDF
Uw handleiding is per email verstuurd. Controleer uw email
Als u niet binnen een kwartier uw email met handleiding ontvangen heeft, kan het zijn dat u een verkeerd emailadres heeft ingevuld of dat uw emailprovider een maximum grootte per email heeft ingesteld die kleiner is dan de grootte van de handleiding.
Er is een email naar u verstuurd om uw inschrijving definitief te maken.
Controleer uw email en volg de aanwijzingen op om uw inschrijving definitief te maken
U heeft geen emailadres opgegeven
Als u de handleiding per email wilt ontvangen, vul dan een geldig emailadres in.
Uw vraag is op deze pagina toegevoegd
Wilt u een email ontvangen bij een antwoord en/of nieuwe vragen? Vul dan hier uw emailadres in.