462921
16
Verklein
Vergroot
Pagina terug
1/60
Pagina verder
WL-358/359/363/367
Wireless ADSL2+ router
Annex-A (WL-358,WL-359,WL-363) & Annex-B (WL-367)
User Manual
Version: 1.0
T
ABLE OF
C
ONTENTS
1
KEY FEATURES .................................................................................................................... 4
2
PACKAGE CONTENTS ....................................................................................................... 5
3
PRODUCT LAYOUT............................................................................................................. 6
4
SYSTEM REQUIREMENTS............................................................................................... 8
5
MODEM/ROUTERPLACEMENT ..................................................................................... 9
6
SETUP LAN, WAN ............................................................................................................... 9
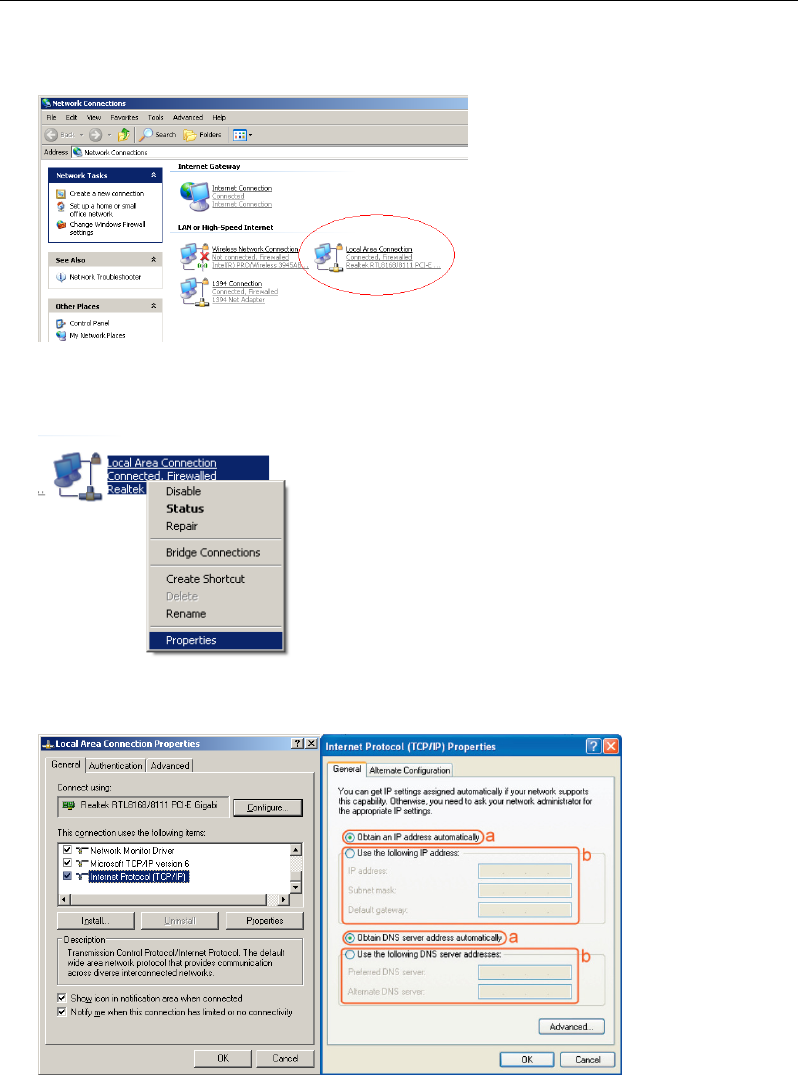
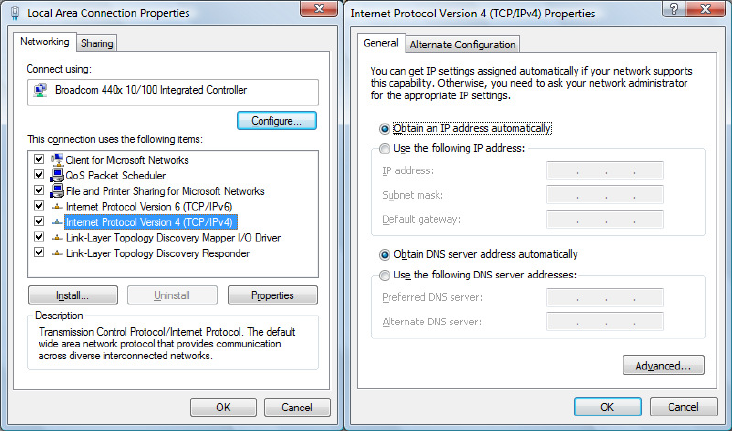
7
PC NETWORK ADAPTER SETUP................................................................................ 10
8
BRINGING UP THE WL-358/359/363/367 ...................................................... 13
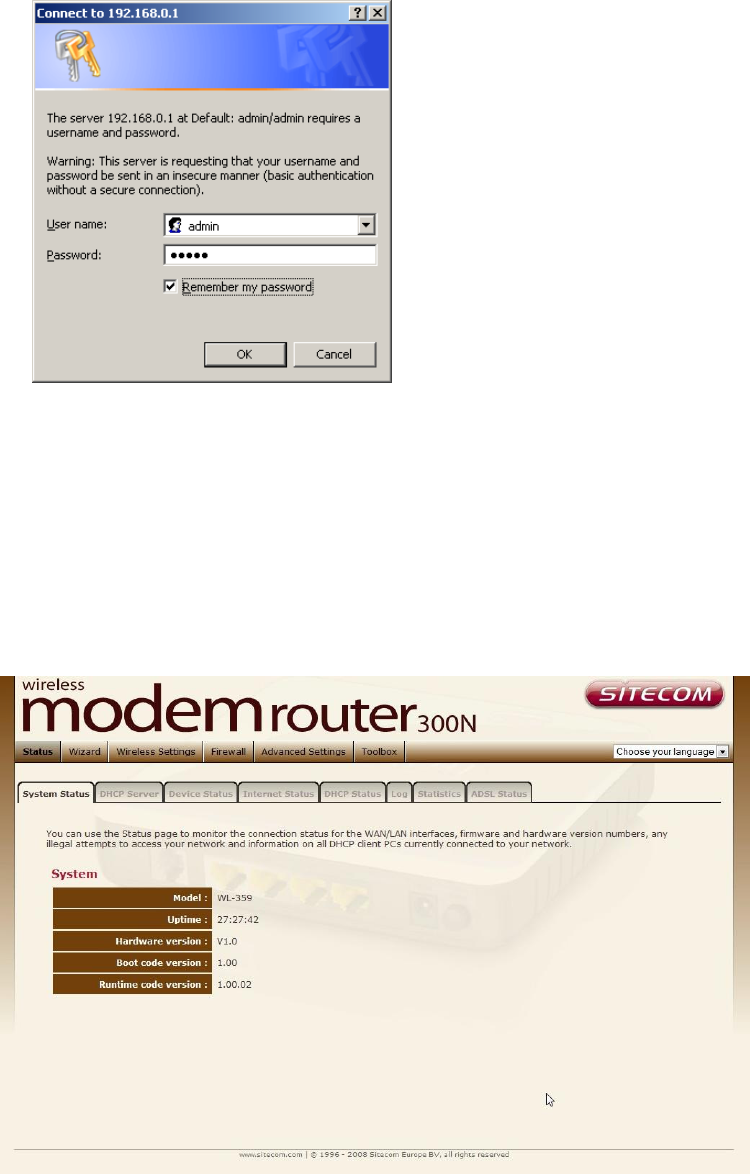
9
INITIAL SETUP WL-358/359/363/367 ............................................................. 13
10
CONFIGURATION WIZARD......................................................................................... 23
11
WIRELESS SETTINGS .................................................................................................... 25
12
FIREWALL SETTINGS .................................................................................................... 35
13
ADVANCED SETTINGS................................................................................................... 42
14
TOOLBOX SETTINGS ...................................................................................................... 54
Introduction
Congratulations on your purchase of the WL-358,359,363 or 367 Wireless
ADSL2+ Modem. The Modem is fully compliant with 802.11n. This modem is
also fully compliant with 802.11g & 802.11b. This modem provide the best
performance when used in combination with 802.11n client adapters.
The WL-358,359,363 or 367 is not only a Modem or Wireless Access Point,
but can also be used to connect wired-Ethernet devices.
For data protection and privacy, the modem can encode all wireless
transmissions with WEP, WPA, and WPA2 encryption. By default, the modem
is secured with a WPA2(AES) encryption key. (The WPA2-key is printed on the
label underneath the modem.)
With a built-in DHCP Server & powerful SPI firewall the modem protects your
computers against intruders and known Internet attacks, and also provides
safe VPN pass-through.
1 Key Features
Features Advantages
IEEE 802.11b/g/n compliant Fully Interoperable with IEEE
802.11b / IEEE802.11g /802.11n
compliant devices
Four 10/100 Mbps Fast Ethernet
Port (Auto-Crossover)
To connect four wired PC's as well.
Firewall supports Virtual Server
Mapping, DMZ, IP Filter, ICMP
Blocking, SPI
Avoids the attacks of Hackers or
Viruses from Internet
Support 802.1x authenticator,
802.11i (WPA/WPA2, AES), VPN
pass-through
Provide mutual authentication
(Client and dynamic encryption keys
to enhance security
Integrated modem (Annex B) Fully compatible with the fastest
ADSL2+ connections up-to-date.
2 Package Contents
Open the package carefully, and make sure that none of the items listed
below are missing. Do not discard the packing materials, in case of return;
the unit must be shipped back in its original package.
1. WL-358,359,363 or 367 modem/router
2. 220V ~ 240V Power Adapter
3. Quick Install Guide
4. CD (Users Manual)
5. Warranty card
6. UTP cable
3 Product Layout
Port Description
ADSL Connect your telephone/ADSL cable this port
LAN
Connect the cable from your PC or network device
to this ports.
Power
connector
Connect your power adapter to this port.
Power button Turn the modem On or Off.
Power connector
LAN / computer connections
Modem connection
WPS/Reset butto
n
Back label
The back label describes the corresponding LED indications and port functionality.
LED Description
Power Lights up when powered ON. Blinks on
TEST/RESET
ADSL Lights up when an ADSL cable is
connected.
Internet Lights up when internet connection is UP.
WLAN Lights up in Blue when WLAN is enabled.
Blinks on traffic
OPS Blinks when OPS mode is on
LAN1~4 When a LAN cable is connected the
corresponding light lights up.
4 System Requirements
To begin using the WL-358/359/363/367, make sure you meet the
following as minimum requirements:
PC/Notebook.
1 Free Ethernet port.
Wi-Fi card/USB dongle (802.11 b/g/n) – optional.
Annex B, ADSL internet connection.
PC with a Web-Browser (Internet Explorer, Safari, Firefox,
Opera)
Ethernet compatible CAT5 cables.
5 MODEM/ROUTER Placement
You can place the modem on a desk or other flat surface, or you can
mount it on a wall. For optimal performance, place your Wireless
Broadband Modem/Router in the center of your office (or your home)
in a location that is away from any potential source of interference,
such as a metal wall or microwave oven. This location must be close to
a power connection and the ADSL/phone line should not be over 2
meters long.
6 Setup LAN, WAN
Modem connection
LAN / computer connections
7 PC Network Adapter setup
Windows XP
Go to [Start Menu], [Control panel], [Network Connections].
Right-mouse-click on the [Local Area Connection]) icon, and select
[properties]
Select [Internet Protocol (TCP/IP)] =>Click [Properties].
Select the [General] tab.
The Modem/Router supports DHCP. Please select both [Obtain an IP
address automatically] and [Obtain DNS server address automatically].
Windows Vista/Windows 7
Go to [Start Menu], [Control panel], [View network status and
tasks], -> [Manage network connections].
Right-mouse-click on the [Local Area Connection]) icon, and select
[properties]
Select [Internet Protocol Version 4 (TCP/IPv4)], and Click [Properties].
Open the [General] tab.
The Modem/Router supports DHCP. Please select both [Obtain an IP
address automatically] and [Obtain DNS server address automatically].
8 Bringing up the Modem/Router
Connect the supplied power-adapter to the power inlet port and connect it to
a wall outlet. Press the Power-Button to turn the modem on.
The WL-358/359/363 automatically enters the self-test phase. During self-test
phase, the Power LED will blink briefly, and then will be lit continuously to
indicate that this product is in normal operation.
9 Initial Setup Modem/Router
LOGIN procedure
1. OPEN your browser (e.g. Internet Explorer).
2. Type http://192.168.0.1 in address bar and press [Enter]
4. Type user name and password (default is admin/admin).
3. Click OK.
4. You will see the home page of the WL-358/359/363/367.
The System status section allows you to monitor the current status of your
router: the UP time, hardware information, serial number as well as firmware
version information is displayed here.
LAN settings
The LAN tab gives you the opportunity to change the IP settings of the WL-
358/359/363/367.
Click <Apply> at the bottom of this screen to save any changes.
IP address 192.168.0.1. It is the router’s LAN IP address (Your LAN clients
default gateway IP address).
IP Subnet Mask 255.255.255.0 Specify a Subnet Mask for your LAN
segment.
DHCP Server Enabled by default. You can enable or disable the DHCP server.
When DHCP is disabled no ip-addresses are assigned to clients and you have
to use static ip-addresses. When DHCP server is enabled your computers will
be assigned an ip-address automatically until the lease time expires.
Lease Time Forever. In the Lease Time setting you can specify the time
period that the DHCP lends an IP address to your LAN clients. The DHCP will
change your LAN clients IP address when this time threshold period is
reached.
IP Address Pool You can select a particular IP address range for your DHCP
server to issue IP addresses to your LAN Clients.
Note: default IP range 192.168.0.100



192.168.0.199. If you want
your PC(s) to have a static/fixed IP address, then you’ll have to
choose an IP address outside this IP address Pool
Domain Name You can specify a Domain Name for your LAN. Or just keep
the default (SitecomWLxxx).
16

Hulp nodig? Stel uw vraag in het forum

Spelregels

Misbruik melden

Gebruikershandleiding.com neemt misbruik van zijn services uitermate serieus. U kunt hieronder aangeven waarom deze vraag ongepast is. Wij controleren de vraag en zonodig wordt deze verwijderd.

Product:

Bijvoorbeeld antisemitische inhoud, racistische inhoud, of materiaal dat gewelddadige fysieke handelingen tot gevolg kan hebben.

Bijvoorbeeld een creditcardnummer, een persoonlijk identificatienummer, of een geheim adres. E-mailadressen en volledige namen worden niet als privégegevens beschouwd.

Spelregels forum

Om tot zinvolle vragen te komen hanteren wij de volgende spelregels:

Belangrijk! Als er een antwoord wordt gegeven op uw vraag, dan is het voor de gever van het antwoord nuttig om te weten als u er wel (of niet) mee geholpen bent! Wij vragen u dus ook te reageren op een antwoord.

Belangrijk! Antwoorden worden ook per e-mail naar abonnees gestuurd. Laat uw emailadres achter op deze site, zodat u op de hoogte blijft. U krijgt dan ook andere vragen en antwoorden te zien.

Abonneren

Abonneer u voor het ontvangen van emails voor uw Sitecom WL-363 bij:


U ontvangt een email met instructies om u voor één of beide opties in te schrijven.


Ontvang uw handleiding per email

Vul uw emailadres in en ontvang de handleiding van Sitecom WL-363 in de taal/talen: Engels als bijlage per email.

De handleiding is 5,59 mb groot.


U ontvangt de handleiding per email binnen enkele minuten. Als u geen email heeft ontvangen, dan heeft u waarschijnlijk een verkeerd emailadres ingevuld of is uw mailbox te vol. Daarnaast kan het zijn dat uw internetprovider een maximum heeft aan de grootte per email. Omdat hier een handleiding wordt meegestuurd, kan het voorkomen dat de email groter is dan toegestaan bij uw provider.

Stel vragen via chat aan uw handleiding

Stel uw vraag over deze PDF

Uw handleiding is per email verstuurd. Controleer uw email

Als u niet binnen een kwartier uw email met handleiding ontvangen heeft, kan het zijn dat u een verkeerd emailadres heeft ingevuld of dat uw emailprovider een maximum grootte per email heeft ingesteld die kleiner is dan de grootte van de handleiding.

Er is een email naar u verstuurd om uw inschrijving definitief te maken.

Controleer uw email en volg de aanwijzingen op om uw inschrijving definitief te maken

U heeft geen emailadres opgegeven

Als u de handleiding per email wilt ontvangen, vul dan een geldig emailadres in.

Uw vraag is op deze pagina toegevoegd

Wilt u een email ontvangen bij een antwoord en/of nieuwe vragen? Vul dan hier uw emailadres in.


Info