


-
Hoi wie kan mij helpen ik heb mijn route gereset en nu gaat het niet eens meer aan Gesteld op 11-7-2016 om 13:39
Reageer op deze vraag Misbruik melden-
zit de voedingskabel goed in het stopkontakt? Geantwoord op 11-7-2016 om 13:42
Waardeer dit antwoord Misbruik melden
-
-
Hoe stel ik de sitecom wl 323 terug naar de fabrieksinstellingen? Gesteld op 2-10-2015 om 12:56
Reageer op deze vraag Misbruik melden-
De OPS knop minimaal 15 sec. ingedrukt houden. Geantwoord op 2-10-2015 om 13:17
Waardeer dit antwoord Misbruik melden
-
-
gebruiksaanwijzing is niet in het nederlands vanwl 342 Gesteld op 4-4-2015 om 13:25
Reageer op deze vraag Misbruik melden-
Handleiding (in Nederlands) zit bij aanschaf in de doos. Neem anders contact op met de klantenservice van Sitecom. Geantwoord op 7-4-2015 om 15:46
Waardeer dit antwoord (4) Misbruik melden
-
-
Is oke ik was de doos kwijt maar intussen gevonden
Waardeer dit antwoord (2) Misbruik melden
Geantwoord op 7-4-2015 om 19:11 -
Ik heb een nieuwe computer gekocht en wil die nu aansluiten op mijn draadloos netwerk. Ik heb een router sitecom WL- 342 v2 002
Reageer op deze vraag Misbruik melden
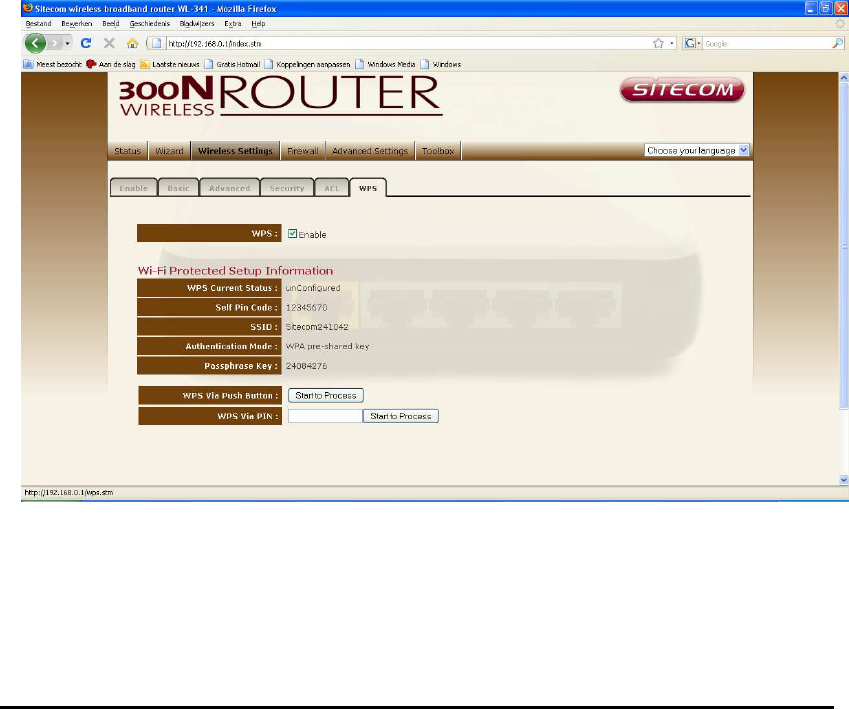
Mijn computer geeft aan dat de code van 4 of 8 cijfers op het apparaat moet steen, maar ik kan deze niet vinden. De nummers die er wel staan, daar reageert hij niet op.
Het serienummer is:095220999 Gesteld op 6-2-2013 om 15:09-
moet niet het Serial No in voeren maar de
Waardeer dit antwoord (7) Misbruik melden
WPA2 code welke onder het Serial No: staat in het witte balkje. Geantwoord op 19-4-2013 om 21:55
-
-
wat is de pincode van WL-342 v2 OO2 Gesteld op 7-7-2012 om 07:36
Reageer op deze vraag Misbruik melden-
wat is de pincode van WL-342 v2 002 Geantwoord op 10-9-2012 om 12:12
Waardeer dit antwoord (30) Misbruik melden
-
