en Detergent
22
Tip: If the utensils are only lightly
soiled, slightly less than the indicated
amount of detergent is usually
adequate.
Suitable detergents and care products
can be purchased online via our
website or via customer service (see
back page).
Combination detergent
Apart from conventional detergents
(Solo), a number of products are offered
with additional functions. These
products contain not only the detergent
but also rinse-aid and salt replacement
substances (3in1) and, depending on
the combination (4in1, 5in1, ...),
additional components such as glass
protection or stainless steel cleaner.
Combination detergents function only
up to a specific degree of hardness
(usually 21°dH). Over this limit salt and
rinse-aid must be added.
As soon as combined detergents are
used, the rinse programme is adjusted
automatically to ensure the best
possible rinsing and drying result.
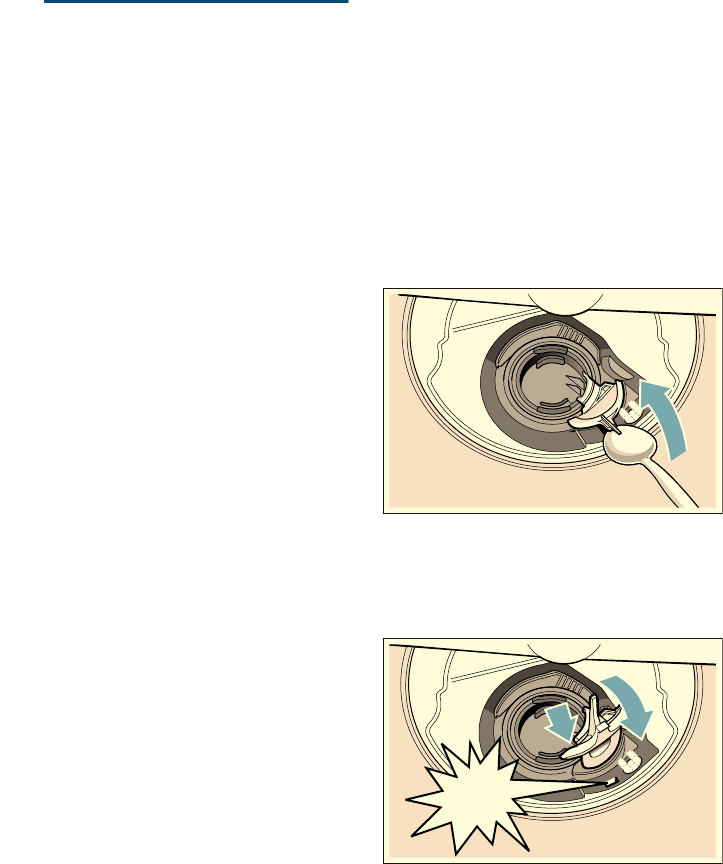
Notes
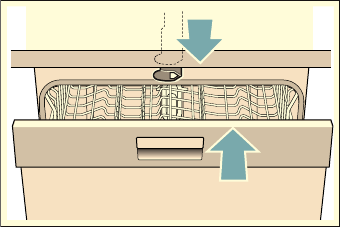
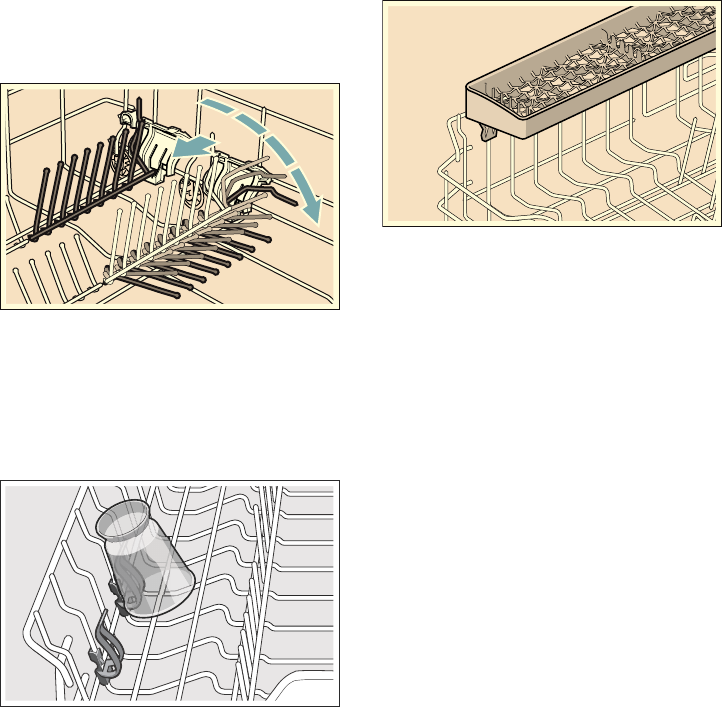
■ If you want to add more utensils after
the programme has started, do not
use the tablet collecting tray 1B as
a handle for the upper basket. The
tablet could already be there and
you will touch the partially dissolved
tablet.
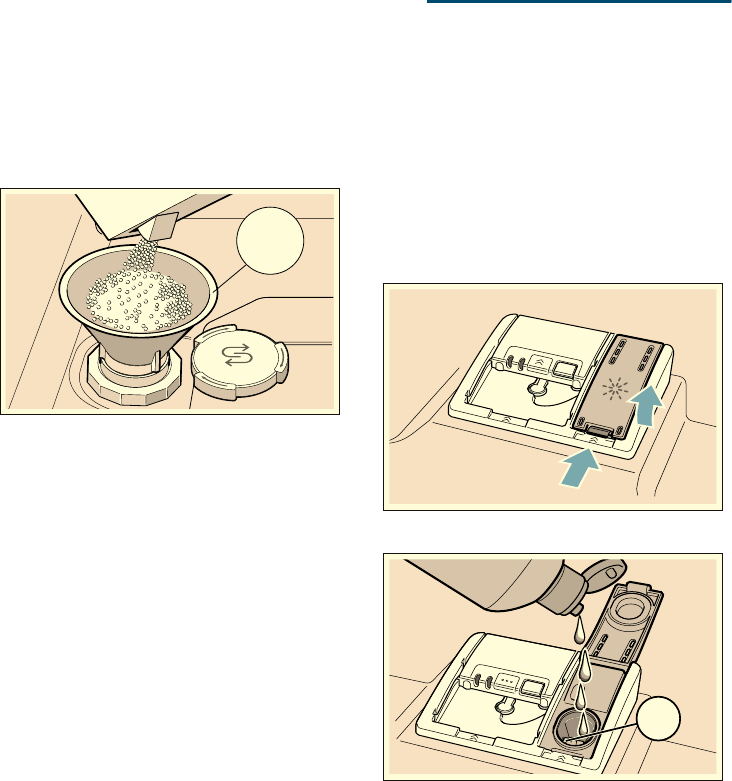
■ Do not place small parts for washing
in the tablet collecting tray 1B; this
prevents the tablet from dissolving
evenly.
■ You will obtain optimum rinsing and
drying results by using solo
detergents and applying salt
and rinse aid separately.
■ If programmes are short, tablets may
not have full cleaning effect due to
different dissolving properties and
there may even be undissolved
detergent residue. It is
recommended to use washing
powder for these programmes.
■ The dosing of a tablet is adequate
for the “Intensive” programme (for
some models). When using washing
powder, you can apply some of this
cleaning agent to the inside of the
appliance’s door.
■ Even if the rinse-aid and/or salt refill
indicator is lit, the rinse programme
will run correctly with combined
detergents.
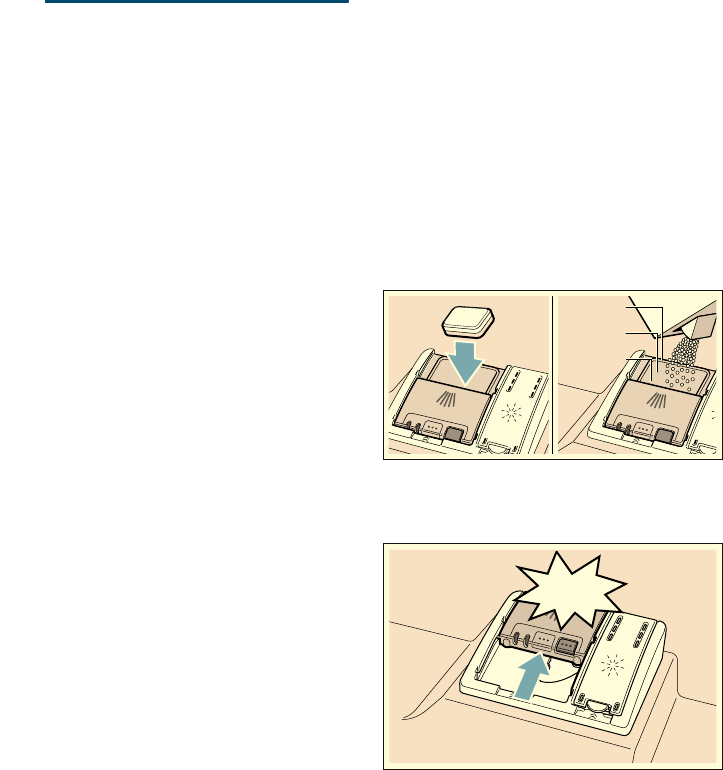
■ If using detergents in a water-soluble
protective cover: Take hold of the
cover with dry hands only and put
the detergent into an absolutely dry
detergent dispenser only, otherwise
the detergent may stick.
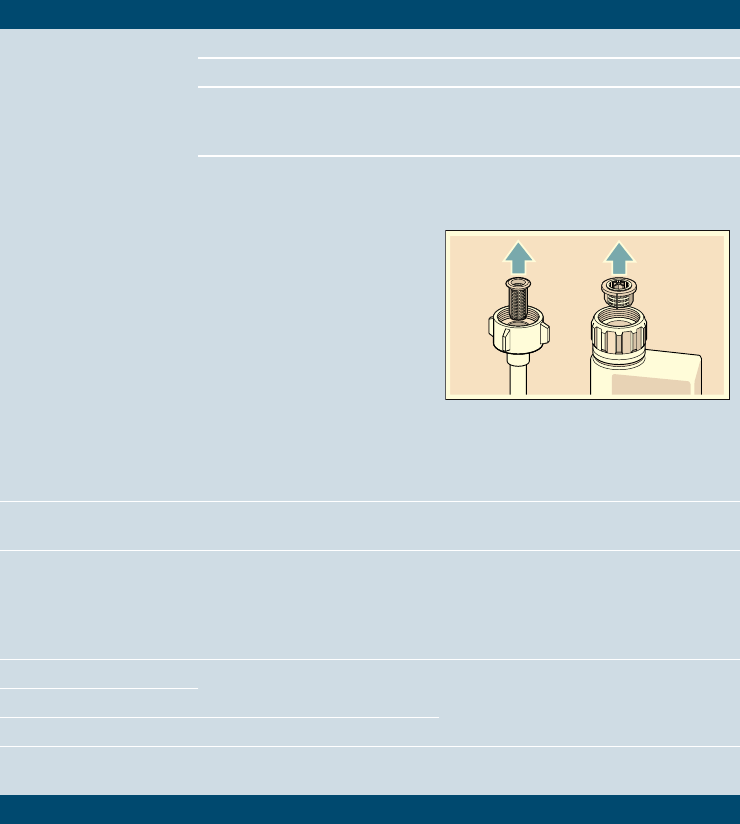
■ If you switch from combined
detergents to solo detergents,
ensure that the water softening
system and amount of rinse aid have
been set to the correct value.
■ Biological/eco detergents: Detergent
products identified as “Bio” or “Eco”
(to protect the environment) usually
use lower quantities of active agents
or completely dispense with certain
substances. The cleaning effect of
such products may occasionally be
restricted.