Product images are for illustration purposes only. Actual product may vary. | Das Bild auf der Verpackung kann vom Inhalt abweichend sein. | Las imágenes del
producto son para fi nes ilustrativos solamente. | Le immagini dei prodotti sono solo ai fi ni illustrativi. | Les images du produit sont présentées à titre d’illustration
uniquement. | Zdjęcie produktu jest tylko w celach ilustracyjnych. Produkt może się różnić.
ENESDEITFRPL
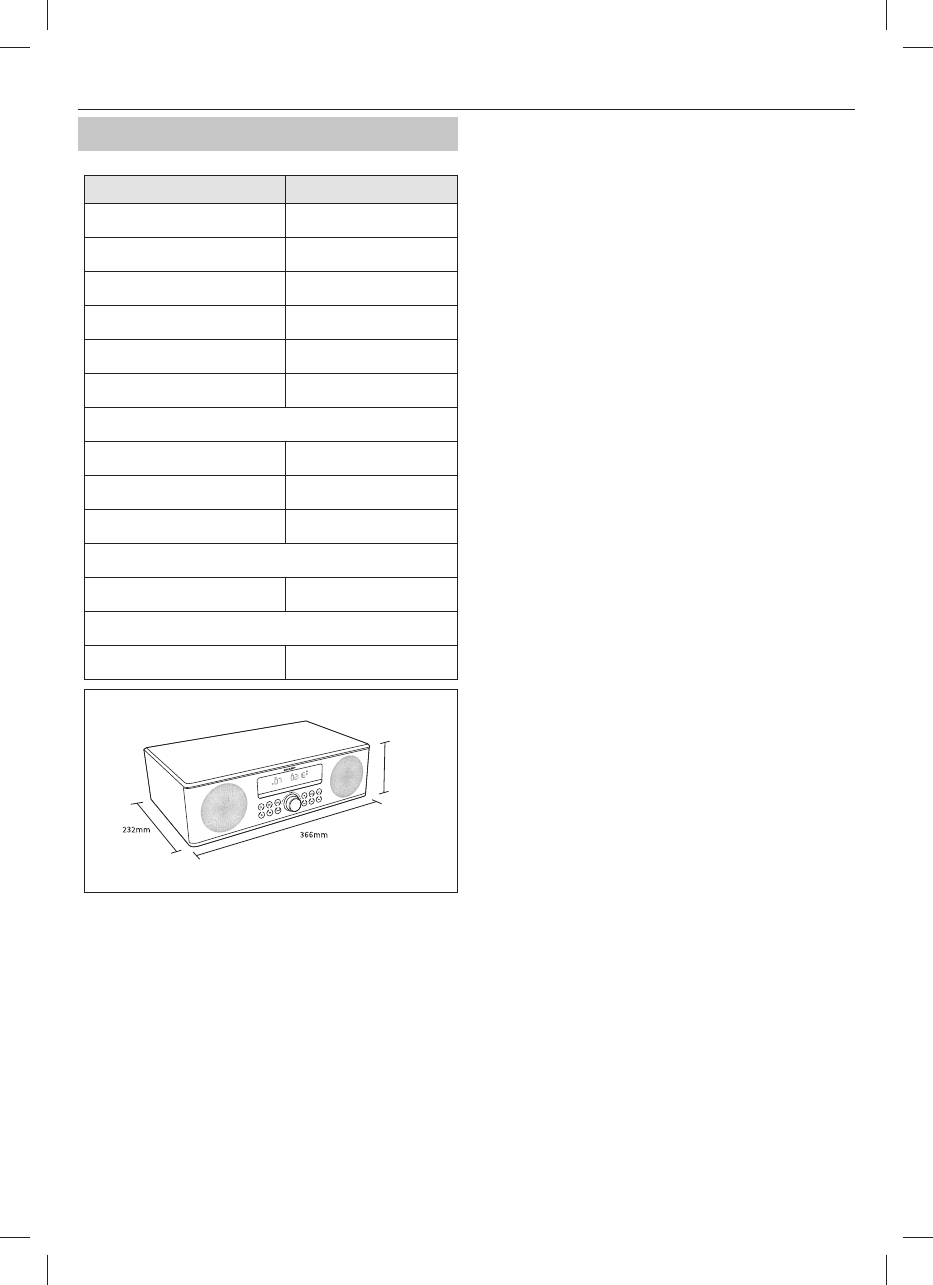
90 W
Total max power output
EN
Important safety instructions
CAUTION
RISK OF ELECTRIC SHOCK
DO NOT OPEN
Please, read these safety instructions and respect
the following warnings before the appliance is
operated:
The lightning ash with arrowhead symbol, within an
equilateral triangle, is intended to alert the user to the
presence of uninsulated “dangerous voltage” within the
product’s enclosure that may be of su cient magnitude as to
constitute a risk of electric shock to persons.
The exclamation point within an equilateral triangle is
intended to alert the user to the presence of important
operating and maintenance (servicing) instructions in the
literature accompanying the appliance.
In order to prevent re always
keep candles and other open
ames away from this product.
Warning:
• Always follow basic safety precautions when using this applience, espe-
cially when children are present.
• Children should be supervised to ensure that they do not play with the
appliance.
• Do not damage the power cord, neither do not place any heavy objects
on it, do not strech it or bend it. Also do not attach extension cables.
Damage to the power cord may occur re or electric shock.
• If the supply cord is damaged, it must be replaced by the manufacturer,
a service agent or similarly qualied persons in order to avoid a hazard.
• Ensure that the unit is plugged into an AC 220-240V 50Hz power outlet.
Using higher voltage may cause the unit to malfunction or catch re.
• If the power plug does not t into your outlet, do not force the plug into
an electrical socket if it does not t.
• If the power plug does not t into your socket, do not force it.
• Do not disconnect or connect the power cord with wet hands. It may
cause an electric shock.
• Disconnect the power cord if it is not used for a long time.
• Ensure that the mains plug is always easily accessible.
• This product does not contain any parts that are serviceable by the
user. In case of a fault, contact the manufacturer or authorised service
department. Exposing the internal parts inside the device may endanger
your life. The manufacturers guarantee does not extend to faults caused
by repairs carried out by unauthorised third parties.
• Do not use this product immediately after unpacking. Wait until it warms
up to room temperature before using it.
• Ensure this product is used in moderate climates only (not in tropical/
subtropical climates).
• Place product on a at, stable surface that is not subject to vibrations.
• Ensure the product and its parts is not overhanging the edge of the
supporting furniture.
• To reduce the risk of fire, electric shock or damage to this product, do
not expose it to direct sunlight, dust, rain and moisture. Never expose it
to dripping or splashing and do not place objects filled with liquids on
or near the product.
• Do not place objects lled with liquids, such as vases, on the apparatus.
• Do not install near any heat sources such as radiators, heat registers,
stoves, or other apparatus (including ampli ers) that produce heat.
• Do not place the product where the humidity is high and ventilation is
poor.
• Ensure a minimum distance of 5 cm around the apparatus for su cient
ventilation. Do not block any ventilation openings of this product.
Always ensure that the ventilation openings are not covered with items
such as newspapers, table-cloths, curtains, etc.
• NEVER let anyone, especially children, push anything into holes, slots
or any other openings in the unit’s casing as this could result in a fatal
electric shock.
• Storms are dangerous for all electric appliances. If the mains or aerial
wiring is struck by lightning, the appliance might get damaged, even if it
is turned o . You should disconnect all the cables and connectors of the
appliance before a storm.
• Excessive sound pressure from earphones and headphones can cause
hearing loss.
• Do not move the unit during disc playback. During playback, the disc
rotates at high speed. Do not lift or move the unit during playback, as
doing so may damage the disc or the unit.
• Do not turn up the volume while listening to a section with very low
level inputs or no audio signals. lf you do, the speaker maybe damaged
when a peak level section is suddenly played.
Maintenance
• Unplug the power cable from the power source before cleaning the
appliance.
• Use a soft and clean cloth to clean the outside of the unit. Never clean it
with chemicals or detergent.
Batteries
• Observe the correct polarity when inserting the
batteries.
• Do not expose batteries to high temperatures and
do not place them in locations where the tempera-
ture might increase quickly, e.g. near open res or in
direct sunshine.
• Do not expose batteries to excessive radiant heat,
do not throw them into the re, do not disassemble
them and do not try to recharge un-rechargeable
batteries. They could leak or explode.
• Never use di erent batteries together or mix new and old ones.
• When the Remote Control is not to be used for a long time (more than a
month), remove the battery from the Remote Control to prevent it from
leaking.
• If the batteries leak, wipe away the leakage inside the battery compart-
ment and replace the batteries with new ones.
• Do not use any batteries other than those specied.
Do not ingest battery, chemical burn hazard
• If the battery is swallowed, it can cause severe internal burns in just
2 hours and lead to death. Keep new and used batteries away from
children. If the battery compartment does not close securely, stop
using the product and keep it away from children. If you think batteries
might have been swallowed or placed inside any part of the body, seek
immediate medical attention.
Cd
2
Disposal of this equipment and Batteries
• Do not dispose of this product or its batteries as unsorted
municipal waste. Return it to a designated collection point
for the recycling of WEEE in accordance with local law. By
doing so, you will help to conserve resources and protect
the environment.
• Most EU countries and the UK regulate the disposal of
batteries by law. Contact your retailer or local authorities
for more information.
• The shown above appears on electrical and electronivcal
equipment and batteries (or the packaging) to remind
users of this. If "Hg" or 'Pb' appears below the symbol,
this mean that the battery cantains traces of mercury (Hg) or lead (Pb),
respectively.
• Users are requested to use existing return facilities for used equipment
and batteries.
CAUTION:
• Appliances with built in CD player are marked with this caution label
• THIS UNIT IS A CLASS 1 LASER
PRODUCT. THIS UNIT USES A VISIBLE
LASER BEAM WHICH COULD CAUSE
HAZARDOUS RADIATION EXPOSURE IF
DIRECTED. BE SURE TO OPERATE THE
PLAYER CORRECTLY AS INSTRUCTED.WHEN THIS UNIT IS PLUGGED INTO
THE WALL OUTLET, DO NOT PLACE YOUR EYES CLOSE TO THE OPENINGS
TO LOOK INTO THE INSIDE OF THIS UNIT.
• USE OF CONTROLS OR ADJUSTMENTS OR PERFORMANCE OF PROCEDU-
RES OTHER THAN THOSE SPECIFIED HEREIN MAY RESULT IN HAZARDOUS
RADIATION EXPOSURE.
• DO NOT OPEN COVERS AND DO NOT REPAIR YOURSELF. REFER SERVI-
CING TO QUALIFIED PERSONNEL.
CE Statement:
• Here by, Universal Media Corporation Poland Sp. z o.o. declares that this
audio device is in compliance with the essential requirements and other
relevant provisions of RED Directive 2014/53/EU. The full text of the EU
declaration of conformity is available by following the link http://www.
sharp.eu/av/documents-of-con rmity
Trademarks:
The Bluetooth word mark and logos are registered trademarks owned by
Bluetooth SIG,. Inc.
CLASS 1
LASER PRODUCT
EN
What is included in the box
1x Main unit
1x Remote control
1x User guide
1x Quick start guide
1x EU power cord
1x FM Aerial
Panels & Controls
Front panel
n
it
1. Remote Control Sensor
Receives the infra-red signal from the remote control.
2. Display
3.
button
Switches the unit between the ON and standby modes.
4.
button
Select the source.
5. MODE button
Select repeat/shu e play mode.
6.
button
Open and close the disc compartment.
7. EQ button
Select the preset equaliser.
8. PROG button
Program the soundtracks. Presets radio stations.
9. VOLUME+/- dial
Increase/decrease the volume level.
10.
(preset -) button
Select a previous preset station.
Skip to the previous album.
11. CLOCK
In standby mode, press and hold to activate the clock setup.
Display the current clock time
12.
(preset+) button
Select a next preset station.
Skip to the next album.
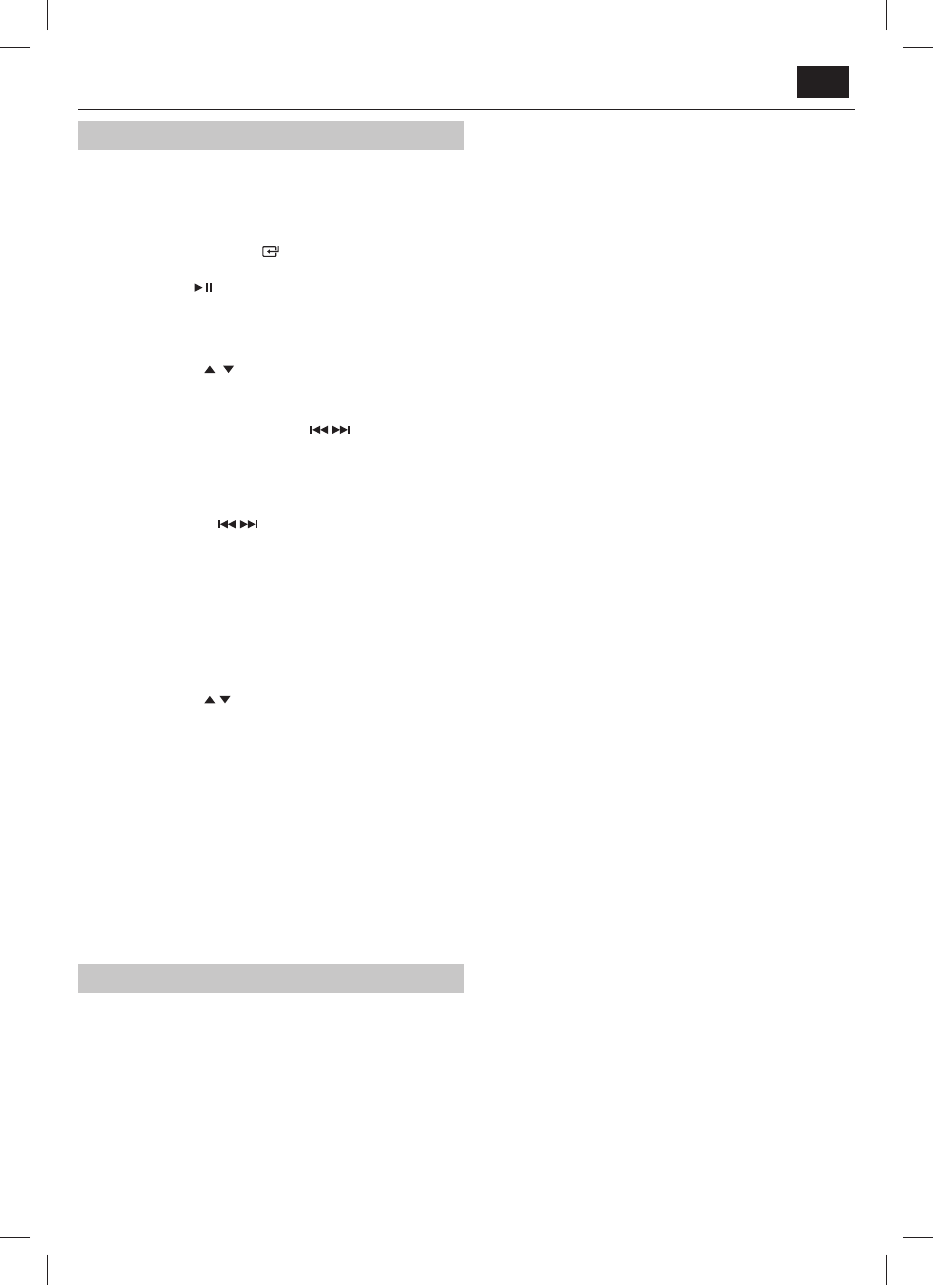
13.
button
In CD/USB/Bluetooth mode, skip to previous audio track.
In CD/USB mode, press and hold the button to rewind a track/disc.
In FM mode, search radio stations manually, press and hold the button
to search automatically.
14.
button
Play/pause/resume playback.
Press and hold to activate the pairing function in Bluetooth mode and
disconnect the existing paired Bluetooth device.
Press to perform auto scan for radio stations in FM mode.
15.
button
In CD/USB/Bluetooth mode, skip to next audio track.
In CD/USB mode, press and hold the button to fast forward a track/
disc.
In FM mode, search radio stations manually, press and hold the button
to search automatically.
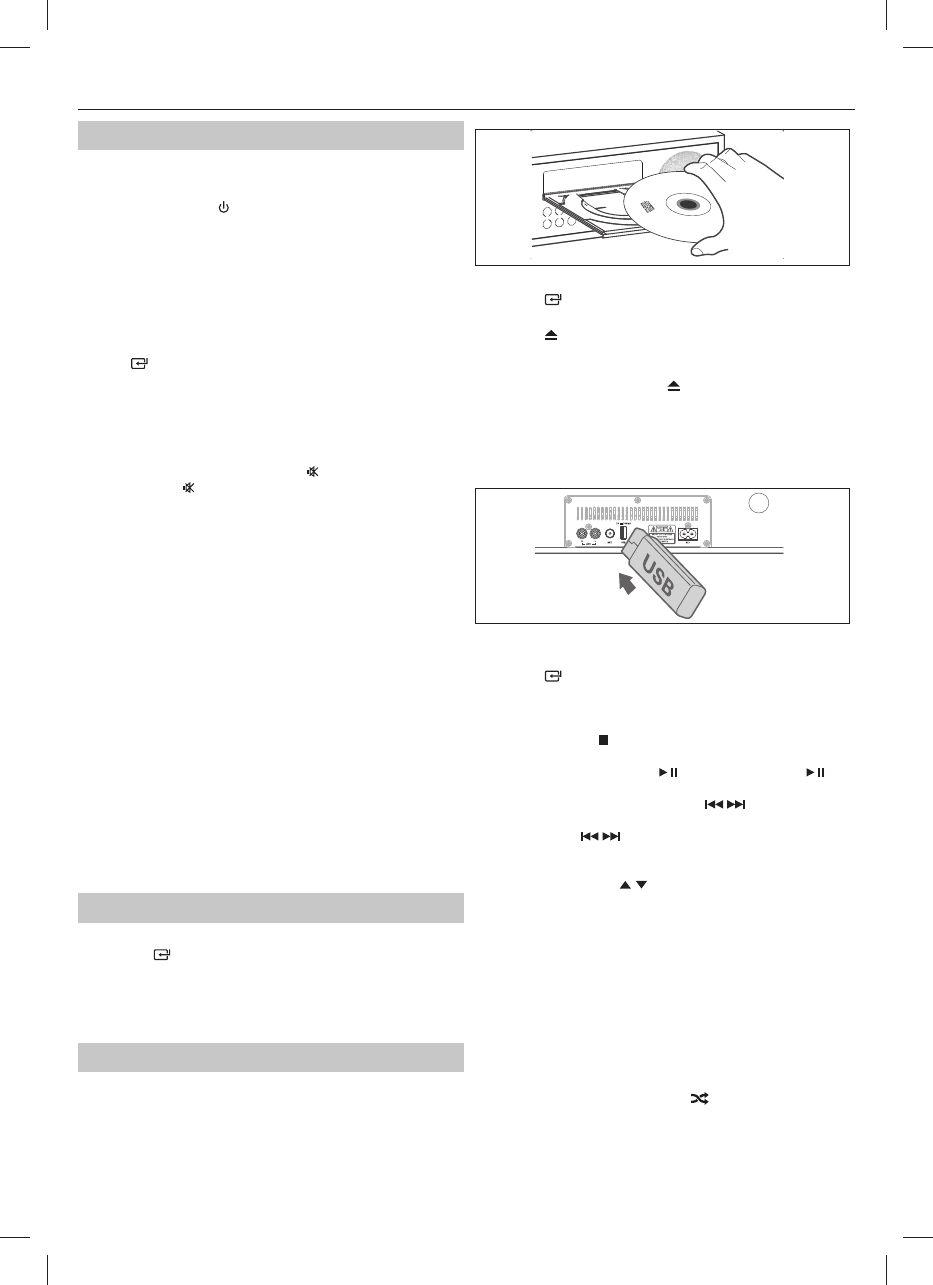
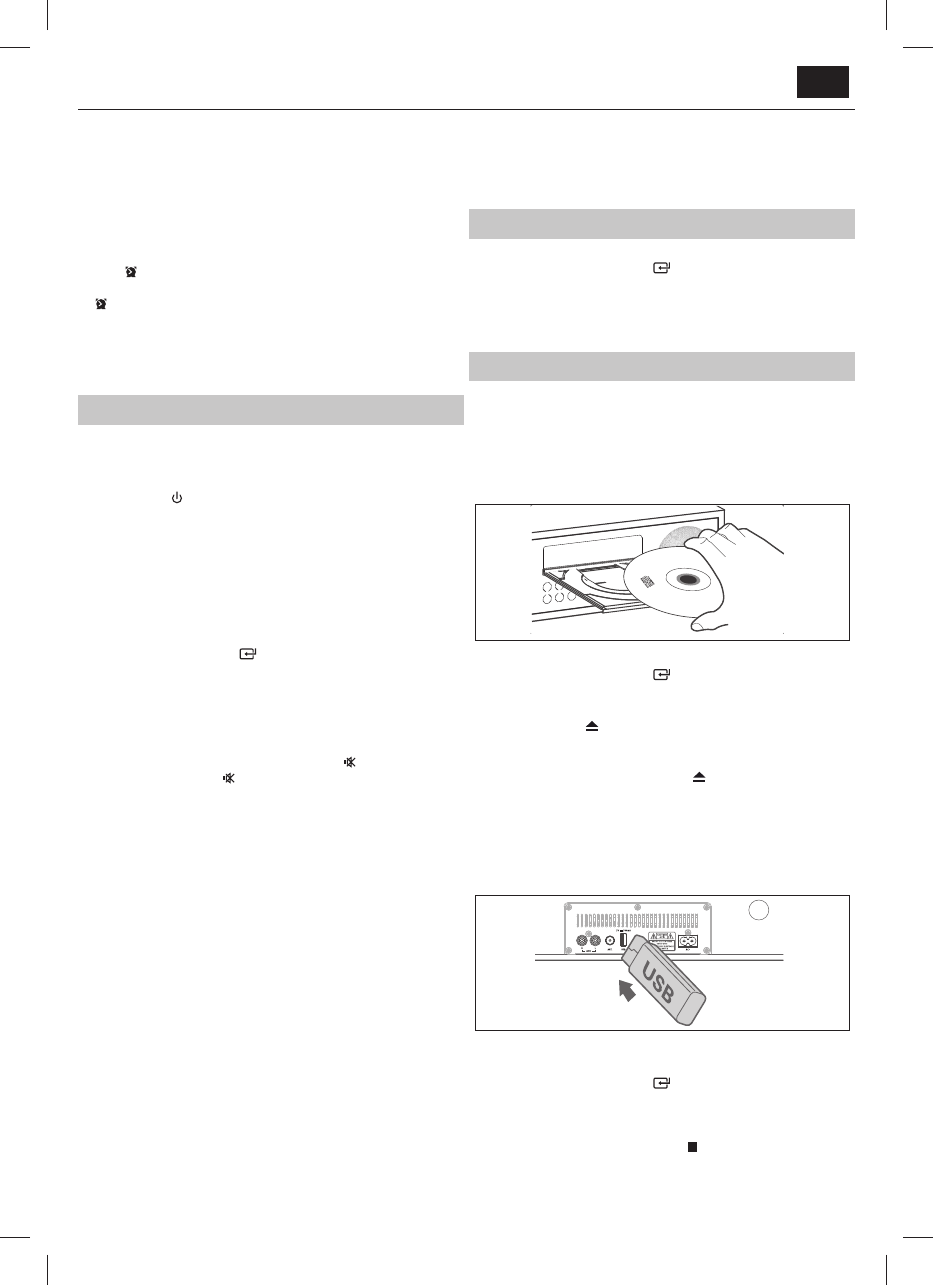
16. Disc Compartment
Rear panel
1. AUX (R L) Sockets
2. Antenna Socket
Connect to a FM Antenna.
3. USB Socket
4. AC~ Socket
Connect to power cord.
Remote control
1.
Switch the unit between ON and Standby mode.
2. SOURCE buttons
Select the source.
4
3. INFO
Displays playback information.
4. INTRO
In CD/USB mode, every soundtrack will be played for 10 Sec.
5.
(MONO/STEREO)
Stop play.
In standby mode, press and hold to switch to the
CLOCK SYNC mode.
In FM mode, switch between stereo or mono sound.
6. VOL+/VOL-
Increase/decrease the volume level.
7. Numeric keypad (0~9)
In CD/USB mode, select a track number for playback.
In FM mode, choose the preset radio station.
8. DIMMER
Adjust display brightness.
9.
Mute or resume the sound.
10. SHUFFLE
Select shu e play mode.
11. REPEAT
Select repeat play modes.
12.
Open or close disc compartment.
13.
/SCAN
Play/pause/resume playback.
Press to con rm a selection.
Press to perform auto scan for radio stations in FM mode.
14.
/
In CD/USB/BT mode, skip to previous/next track.
In CD/USB mode, press and hold to rewind / fast forward a track/disc.
In FM mode, search radio stations manually, press and hold the button
to search automatically.
15.
, (ALBUM/PRESET)
Navigate up/down through.
Select a previous/next preset station.
Skip to the previous/next album.
16. EQ
Select the preset equaliser.
17. BASS
Turn ON/OFF the bass enhancement.
18. SLEEP/TIMER
Set the sleep timer. In standby mode, press and hold to set the alarm
timer.
19. CLOCK
In standby mode, press and hold to activate clock setup. Display
current clock.
20. PROG
Program soundtracks.
Presets radio stations.
Remote Control
Max. 6 m
30
。
30
。
Control allows the unit to be operated from a distance.
Even if the Remote Control is operated within the e ective range of 6m,
remote control operation may be impossible if there are any obstacles
between the unit and the remote control.
If the Remote Control is operated near other products which generate
infrared rays, or if other remote control devices using infra-red rays are
used near the unit, it may operate incorrectly. Conversely, the other
products may operate incorrectly.
First-time use:
The unit has a pre-installed lithium CR2025 battery. Remove the protective
tab to activate the remote control battery.
Remote control battery replacement
The remote control requires a CR2025, 3V Lithium battery.
1. Remove the screw from the underside of the remote control.
2. Push the tab on the side of the battery tray towards the tray.
3. Now slide the battery tray out of the remote control.
4. Remove the old battery. Place a new CR2025 battery into the battery
tray with the correct polarity (+/-) as indicated.
5. Slide the battery tray back into the slot in the remote control.
6. Secure the tray in place using the screw.
EN
Connections
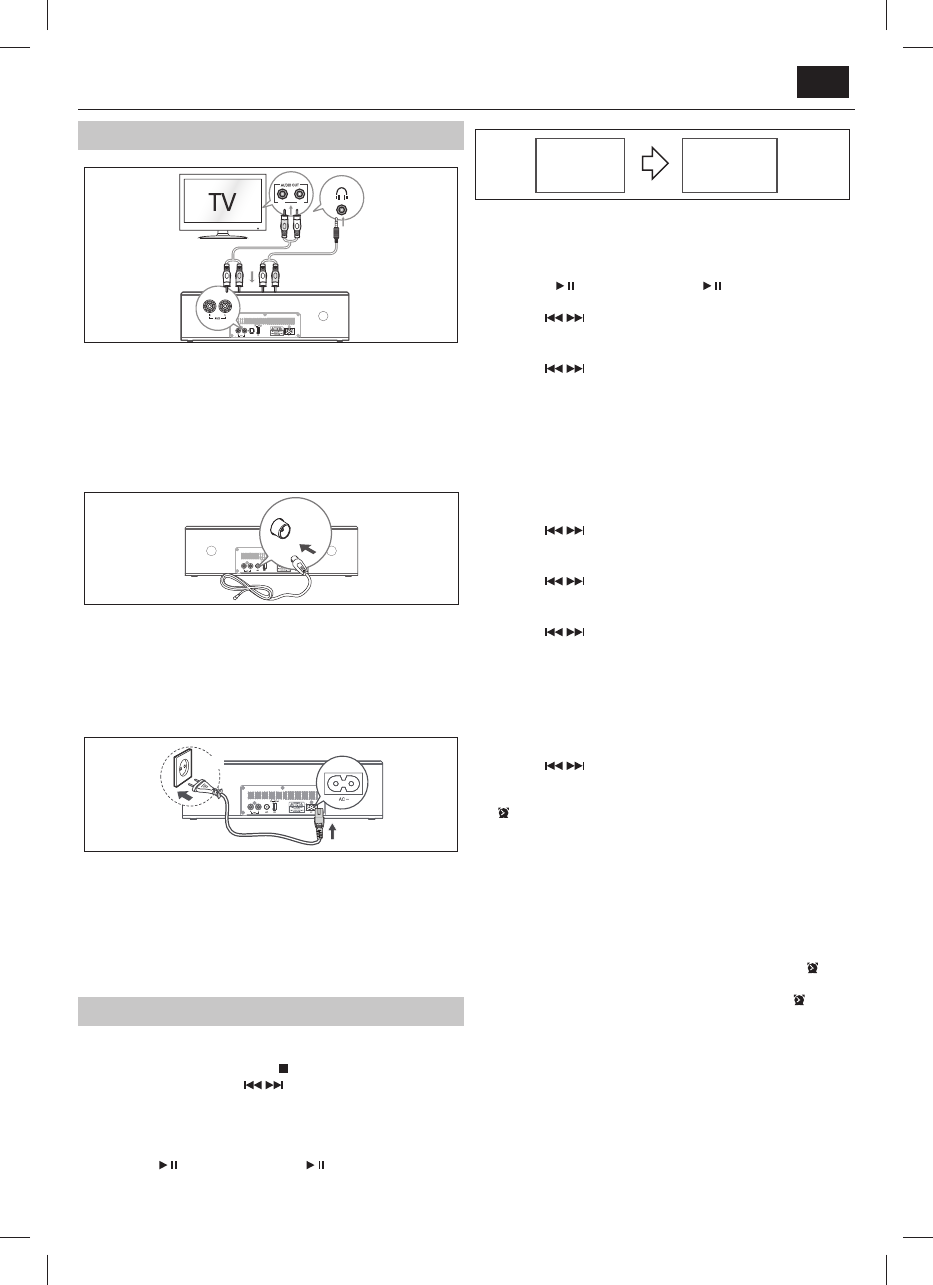
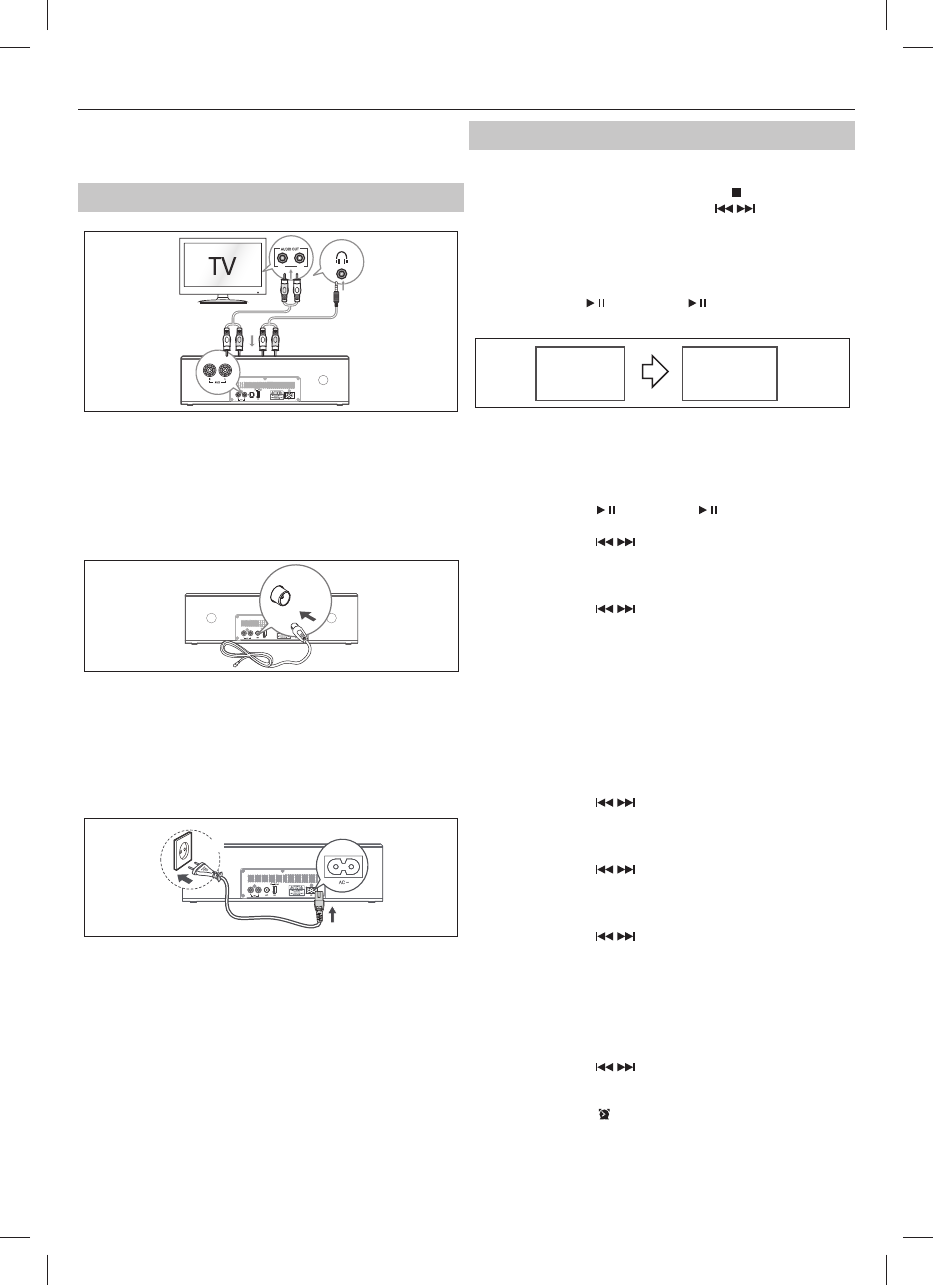
AUX socket
L
R
AB
a, Use a RCA to RCA audio cable (not included) to connect the TV’s audio
output sockets to the AUX (R L) sockets on the unit.
b, Use a RCA to 3.5mm audio cable (not included) to connect the audio
player’s headphone socket to the AUX (R L) sockets on the unit.
TIP:
• When you use the headphone output on the TV set, you will be able to
adjust the volume level directly using the TV remote control.
Connect the FM Aerial
ANT.
Connect one end of the aerial (included) to the ANT. socket at the rear of
the unit. Then position the aerial to obtain optimum reception.
IMPORTANT:
• You may need to adjust the position of the aerial when tuning the radio
to receive the strongest signal.
• Never leave the aerial where it can be pulled by children.
Connect to Power
EU
• Before connecting the AC power cord, ensure you have completed all
other connections.
• Risk of product damage! Ensure that the power supply voltage corres-
ponds to the voltage printed on the back or the underside of the unit.
Connect the mains cable to the AC~ Socket of the unit and then into a
mains socket.
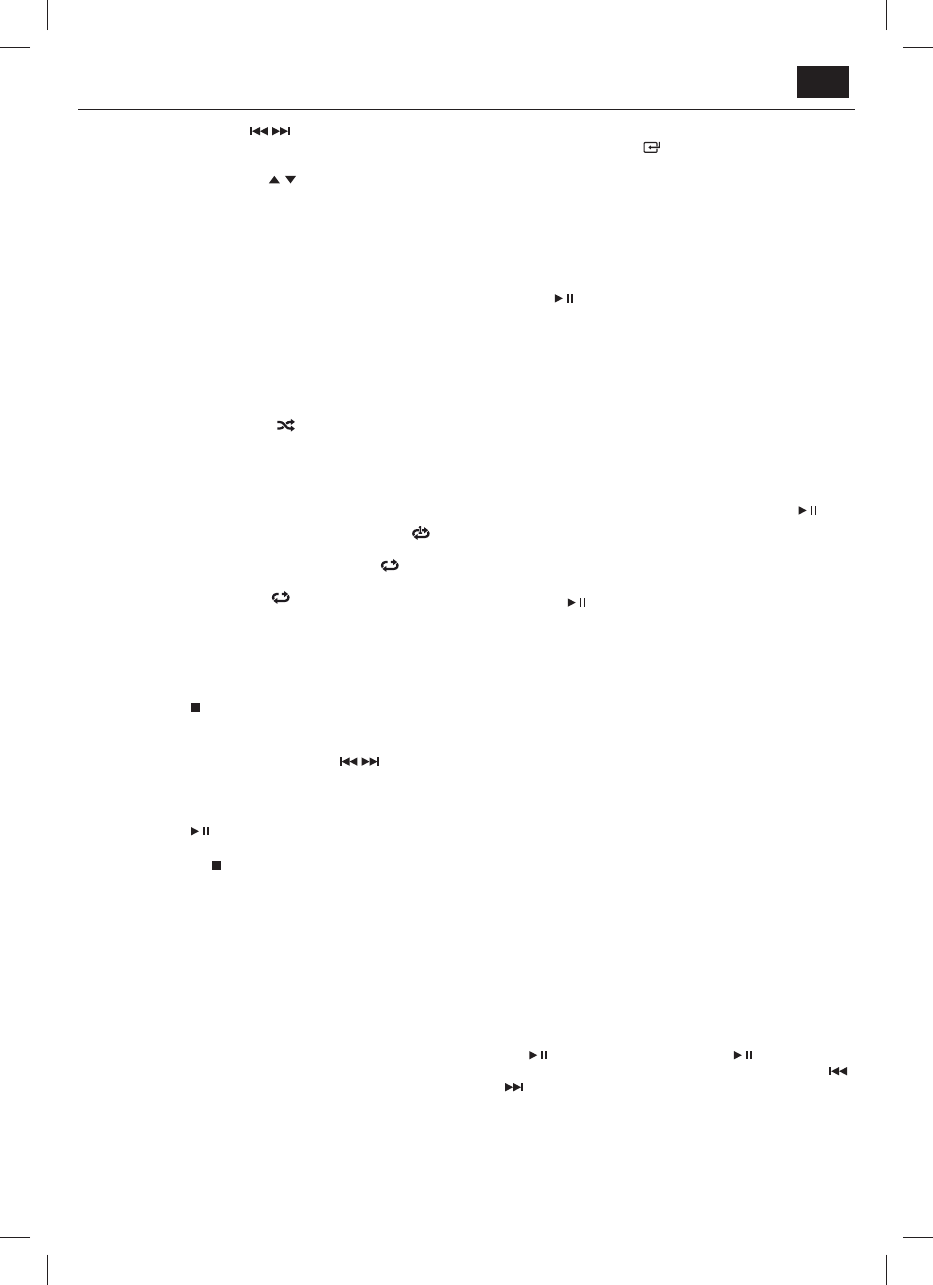
Set the Clock
Clock synchronization
In STANDBY mode, press and hold the button on the remote control to
synchronize the clock. Press the
/ buttons on the remote control or
on the unit to switch the clock synchronization modes:
• RDSOnly synchronize with the RDS radio station.
• OFF Turn o the clock synchronization function, clock needs to be
adjusted manually.
Then press the
button on the unit or the /SCAN on the remote
control to con rm.
Manual Setting the clock
--:--
00:00
1
1
1
1
Manual Setting the clock can only be done in STANDBY mode.
1. In STANDBY mode, press and hold the CLOCK button on the remote
control or on the unit until the hour digits are ashing.
Press the
button on the unit or the /SCAN button
on the remote control to select 12/24 hour format.
2. Press the
/ buttons on the remote control or on the unit to
adjust the hour digits while ashing, then press CLOCK button on the
remote control to con rm, then the minute digits will ash.
3. Press the
/ buttons on the remote control or on the unit to
adjust the minute digits while ashing, then press the CLOCK button
on the remote control to con rm. Each activated state will be cleared
if any buttons are not pressed within 15 seconds.
Set the Alarm Clock Timer
The clock time must be set to the current time and for the timer to operate
correctly
1. In STANDBY mode, press and hold the TIMER/SLEEP button on the
remote control until the hour digits ash on the display.
2. Press the
/ buttons on the remote control or on the unit to
adjust the hour digits, and then press the TIMER/SLEEP button on the
remote control to con rm, the minute digits will ash on the display.
3. Press the
/ buttons on the remote control or on the unit to
adjust the minute digits, and then press the TIMER/SLEEP button on
the remote control to con rm, the mode will ash on the display.
4. Press the
/ buttons on the remote control or on the unit to
select:
FM (to wake to your selected FM Radio Station)
BUZZER (to wake to a buzzer sound)
DISC (to wake to your DISC music)
USB (to wake to your USB music)
5. Press the TIMER/SLEEP button on the remote control to con rm, the
display will show the volume level.
6. Press the
/ buttons on the remote control or on the unit to
adjust the volume, and then press the TIMER/SLEEP button on the
remote control to con rm, the display will show the current time and “
” will appear from the display.
Tips:
• Each set state will be cleared if any button is not pressed within 15
seconds.
• The FM tuner timer will show the last tuned station.
Activate and Deactivate the Alarm Timer
• Press the TIMER/SLEEP button on the remote control to view the alarm
settings or activate the alarm.
• To deactivate the alarm, press the TIMER/SLEEP two times. The “
” will
disappear from the display on the front of the unit.
• To activate the alarm, press the TIMER/SLEEP two times. The “
” will
show from the display on the front of the unit.
Stop Alarm Ring
• When the alarm rings, press the power button on the remote control or
on the unit. The alarm stops but the alarm settings remain.
6
General Operation
Standby/ON
When you rst connect the unit to the mains socket, the unit will be in
STANDBY mode. Press the
button on the remote control to switch the
main unit ON or OFF.
• When turning the system on, the system will start in the same mode as
during switch o .
• Disconnect the mains plug from the mains socket if you want to switch
the unit o completely.
• If there is no signal under the CD, USB, BT (Bluetooth) or AUX mode,
the unit will automatically switch o within 15 minutes.
Select Modes
Press the button repeatedly on the unit or press the CD/AUX, FM, USB
or BT PAIR buttons on the remote control to select the desired mode. The
selected mode will show on the display.
Adjust the Volume
• Press the VOL +/– buttons on the remote control or turn the VOLUME
+/- dial on the unit to adjust the volume.
• If you wish to turn the sound o , press the
button on the remote
control. Press the
button again or press VOL+/- button on the remote
control or turn the VOLUME +/- dial on the unit to resume normal
volume.
Select the Equaliser
Press the EQ button on the remote control or on the unit repeatedly to
Gebruikershandleiding.com neemt misbruik van zijn services uitermate serieus. U kunt hieronder aangeven waarom deze vraag ongepast is. Wij controleren de vraag en zonodig wordt deze verwijderd.
Product:
Spelregels forum
Om tot zinvolle vragen te komen hanteren wij de volgende spelregels:
lees eerst de handleiding door;
controleer of uw vraag al eerder door iemand anders is gesteld;
probeer uw vraag zo duidelijk mogelijk te stellen;
heeft u een probleem en al geprobeerd om dit op te lossen, vermeld dit erbij aub;
heeft u een oplossing gekregen van een bezoeker dan horen wij dat graag in dit forum;
wilt u een reactie geven op een vraag of antwoord, gebruik dan niet dit formulier maar klik op de knop 'reageer op deze vraag';
uw vraag wordt direct op de website gezet; vermijd daarom persoonlijke gegevens in te vullen;
Belangrijk! Als er een antwoord wordt gegeven op uw vraag, dan is het voor de gever van het antwoord nuttig om te weten als u er wel (of niet) mee geholpen bent! Wij vragen u dus ook te reageren op een antwoord.
Belangrijk! Antwoorden worden ook per e-mail naar abonnees gestuurd. Laat uw emailadres achter op deze site, zodat u op de hoogte blijft. U krijgt dan ook andere vragen en antwoorden te zien.
Abonneren
Abonneer u voor het ontvangen van emails voor uw Sharp XL-B710 bij:
nieuwe vragen en antwoorden
nieuwe handleidingen
U ontvangt een email met instructies om u voor één of beide opties in te schrijven.
Ontvang uw handleiding per email
Vul uw emailadres in en ontvang de handleiding van Sharp XL-B710 in de taal/talen: Duits, Engels, Frans, Italiaans, Spaans, Pools als bijlage per email.
De handleiding is 7,8 mb groot.
U ontvangt de handleiding per email binnen enkele minuten. Als u geen email heeft ontvangen, dan heeft u waarschijnlijk een verkeerd emailadres ingevuld of is uw mailbox te vol. Daarnaast kan het zijn dat uw internetprovider een maximum heeft aan de grootte per email. Omdat hier een handleiding wordt meegestuurd, kan het voorkomen dat de email groter is dan toegestaan bij uw provider.
Uw handleiding is per email verstuurd. Controleer uw email
Als u niet binnen een kwartier uw email met handleiding ontvangen heeft, kan het zijn dat u een verkeerd emailadres heeft ingevuld of dat uw emailprovider een maximum grootte per email heeft ingesteld die kleiner is dan de grootte van de handleiding.
Er is een email naar u verstuurd om uw inschrijving definitief te maken.
Controleer uw email en volg de aanwijzingen op om uw inschrijving definitief te maken
U heeft geen emailadres opgegeven
Als u de handleiding per email wilt ontvangen, vul dan een geldig emailadres in.
Uw vraag is op deze pagina toegevoegd
Wilt u een email ontvangen bij een antwoord en/of nieuwe vragen? Vul dan hier uw emailadres in.