Este equipamento obedece às exigências das directivas 89/336/CEE e 73/23/CEE, na sua versão corrigida pela directiva 93/68/CEE.
Este aparato satisface las exigencias de las Directivas 89/336/CEE y 73/23/CEE, modifi cadas por medio de la 93/68/CEE.
Denna utrustning uppfyller kraven enligt riktlinjerna 89/336/EEC och 73/23/EEC så som kompletteras av 93/68/EEC.
Dette produktet oppfyller betingelsene i direktivene 89/336/EEC og 73/23/EEC i endringen 93/68/EEC.
Tämä laite täyttää direktiivien 89/336/EEC ja 73/23/EEC vaatimukset, joita on muutettu direktiivillä 93/68/EEC.
Bu cihaz Konsey Direktifi 93/68/EEC tarafi ndan düzeltilen 89/336/EEC ve 73/23/EEC Konsey Direktifl erinin gerekliliklerine uygundur.
Tento přístroj je v souladu s požadavky směrnic rady 89/336/EEC a 73/23/EEC, tak jak byly upraveny směrnicí rady 93/68/EEC.
See seade on vastavuses Nõukogu Direktiivis nr 89/336/EEC ja 73/23/EEC esitatud nõuetega, vastavalt Nõukogu Direktiivis nr 93/68/EEC esitatud
parandustele.
Ez a készülék megfelel a Tanács által kiadott, 89/336/EGK és 73/23/EGK Irányelveknek és az utóbbit módosító 93/68/EGK Irányelvnek.
Ši ierice atbilst tehniskam prasibam pec 89/336/EEC un 73/23/EEC direktivam papildinats ar direktivu 93/68/EEC.
Šis prietaisas atitinka ES Tarybos direktyvu 89/336/EEC ir 73/23/EEC paktikslintos direktyvos 93/68/EEC reikalavimus.
To urządzenie spelnia wymagania dyrektyw 89/336/EEC i 73/23/EEC wraz z poprawkami dyrektywy 93/68/EEC.
Tento prístroj je v súlade s požiadavkami smerníc rady 89/336/EEC a 73/23/EEC tak ako boli upravené smernicou rady 93/68/EEC.
Ta aparat je v skladu z zahtevami Direktiv Sveta 89/336/EEC in 73/23/EEC kot je navedeno v dopolnilu k Direktivi Sveta 93/68/EEC.
SPECIAL NOTE FOR USERS IN THE U.K.
The mains lead of this product is fi tted with a non-rewireable (moulded) plug incorporating a 13A fuse. Should the fuse need to be replaced, a BSI or
ASTA approved BS 1362 fuse marked
or
ASA
and of the same rating as above, which is also indicated on the pin face of the plug, must be used.
Always refi t the fuse cover after replacing the fuse. Never use the plug without the fuse cover fi tted. In the unlikely event of the socket outlet in your
home not being compatible with the plug supplied, cut off the mains plug and fi t an appropriate type.
DANGER:
The fuse from the cut-off plug should be removed and the cut-off plug destroyed immediately and disposed of in a safe manner. Under no circum-
stances should the cut-off plug be inserted elsewhere into a 13A socket outlet, as a serious electric shock may occur. To fi t an appropriate plug to the
mains lead, follow the instructions below:
IMPORTANT:
The wires in the mains lead are coloured in accordance with the following code:
Blue: Neutral
Brown: Live
As the colours of the wires in the mains lead of this product may not correspond with the coloured markings identifying the terminals in your plug,
proceed as follows:
The wire which is coloured blue must be connected to the plug terminal which is marked N or coloured black.
The wire which is coloured brown must be connected to the plug terminal which is marked L or coloured red.
Ensure that neither the brown nor the blue wire is connected to the earth terminal in your three-pin plug.
Before replacing the plug cover make sure that:
If the new fi tted plug contains a fuse, its value is the same as that removed from the cut-off plug.
The cord grip is clamped over the sheath of the mains lead, and not simply over the lead wires.
IF YOU HAVE ANY DOUBT, CONSULT A QUALIFIED ELECTRICIAN.
•
•
•
•
1
Adjusting the sound 16
Setting the picture 17
Operation on the TV set 17
Modes of operation 18
TV mode 18
Picture in picture (PIP) 21
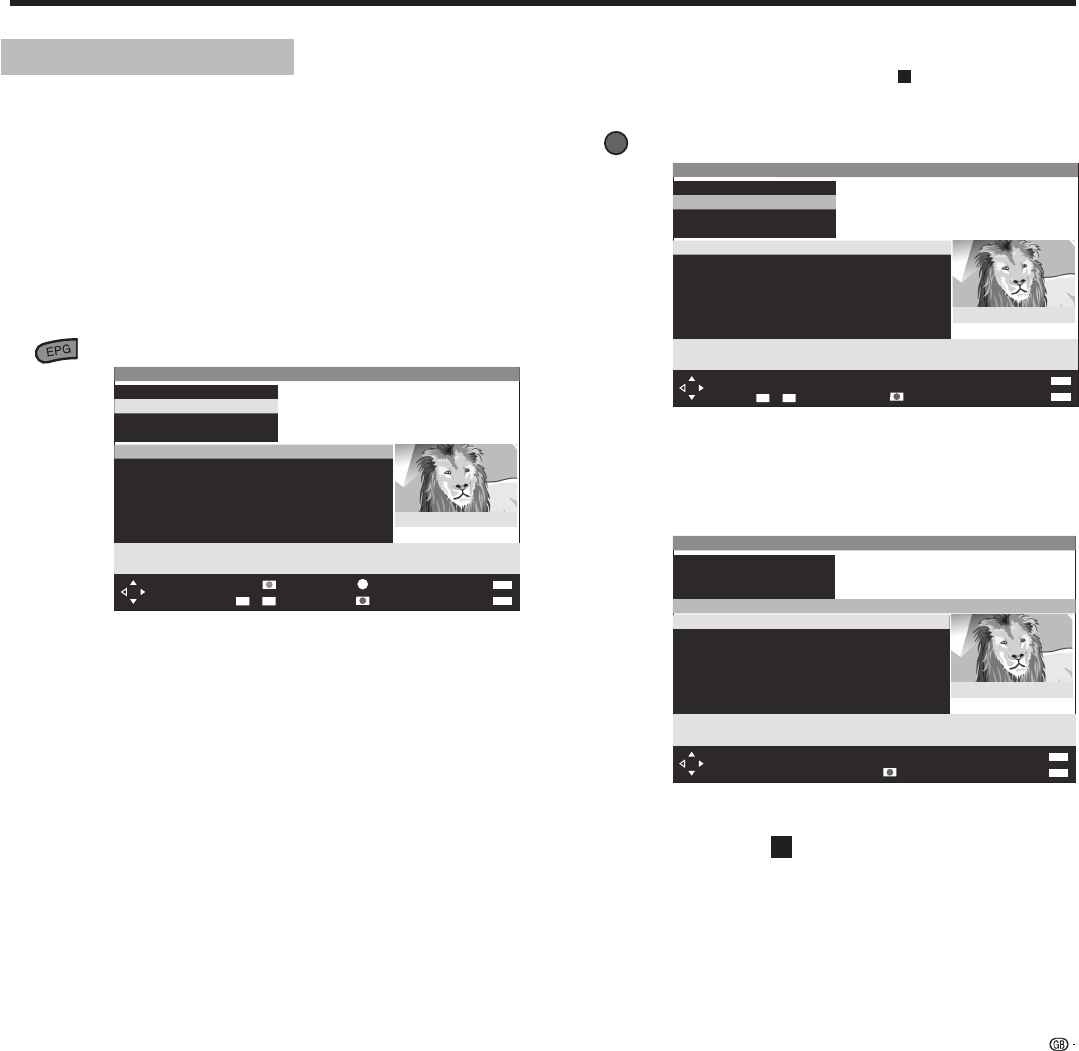
EPG – Programme guide 23
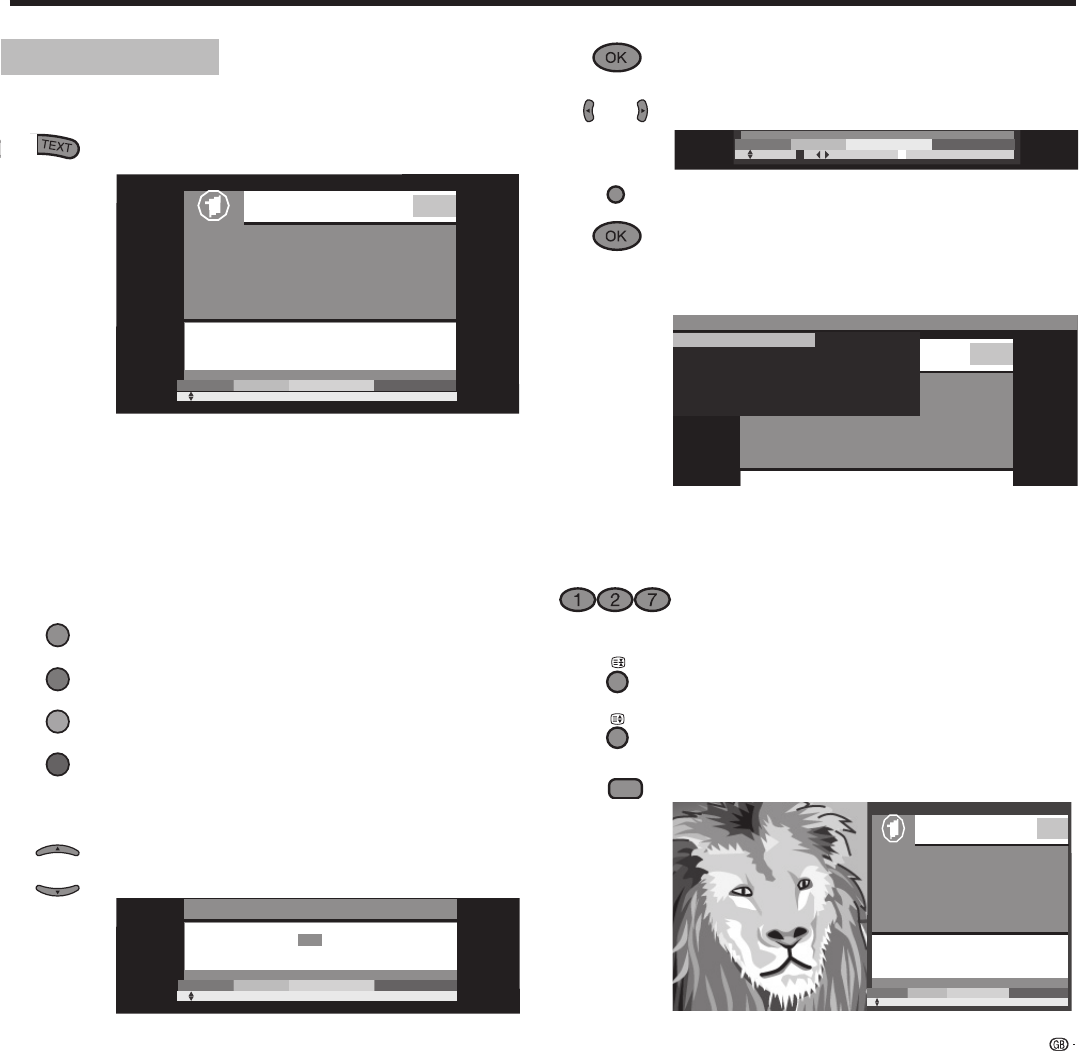
Analogue Teletext 25
Digital Teletext (UK only) 26
Radio mode 27
DVB subtitles 28
CI module 28
Installing new software 29
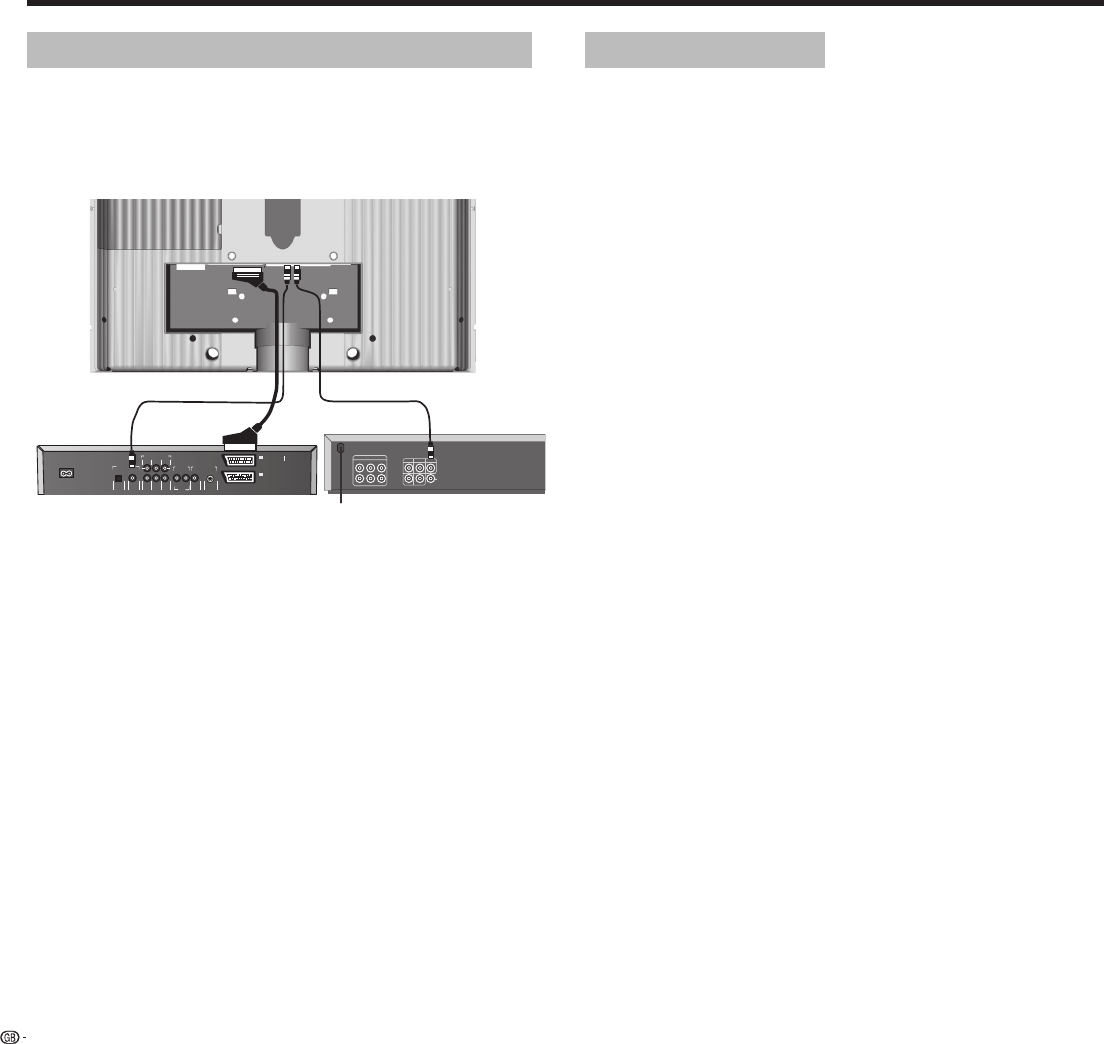
Operating additional equipment 30
Login and connect equipment 30
Video playback 31
Timer recording with video or DVD recorder 31
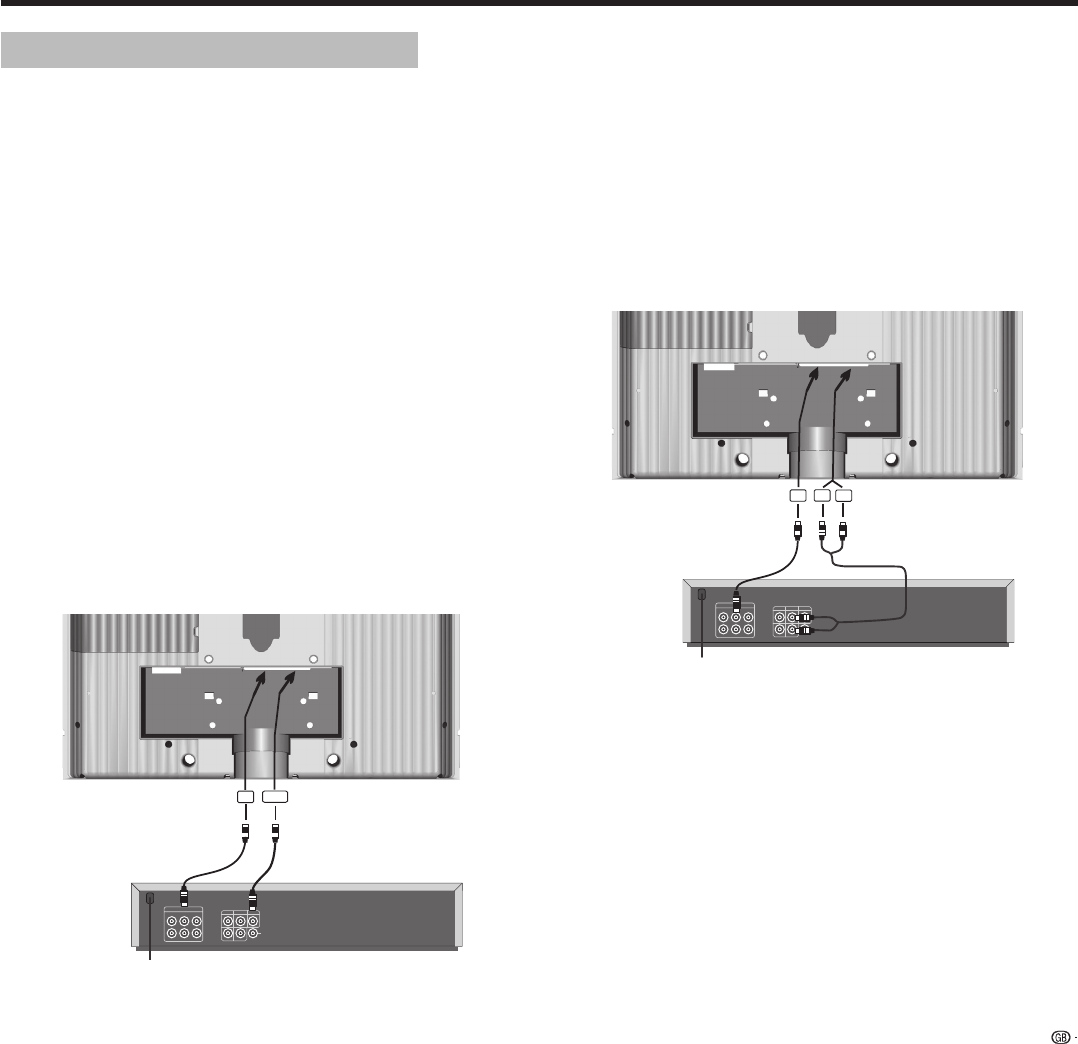
Assignment of digital audio in- and outputs 32
Digital audio output 32
Audio amplifi ers or active speakers 33
HDMI connection 34
PC connection 34
Component Video connection 35
Specifi cations 36
Troubleshooting 37
Contents
Important Safety Precautions 2
Supplied accessories 3
Remote control functions 4
Control unit 5
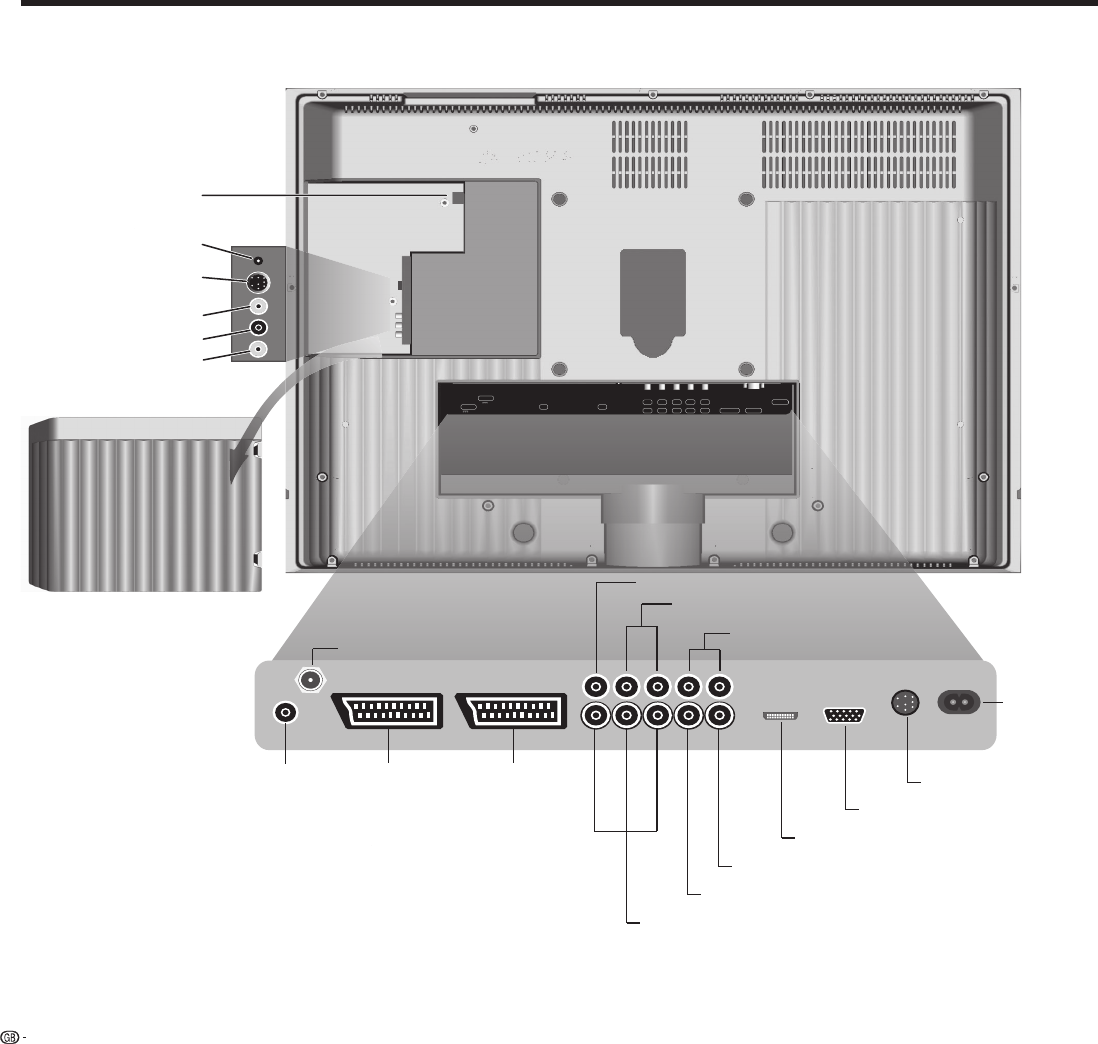
Connections to rear panel 6
Welcome 7
TV equipment 7
Installation possibilities 7
Information on Disposal for Users (private households) 8
Information on Disposal for Business Users 8
First installation 9
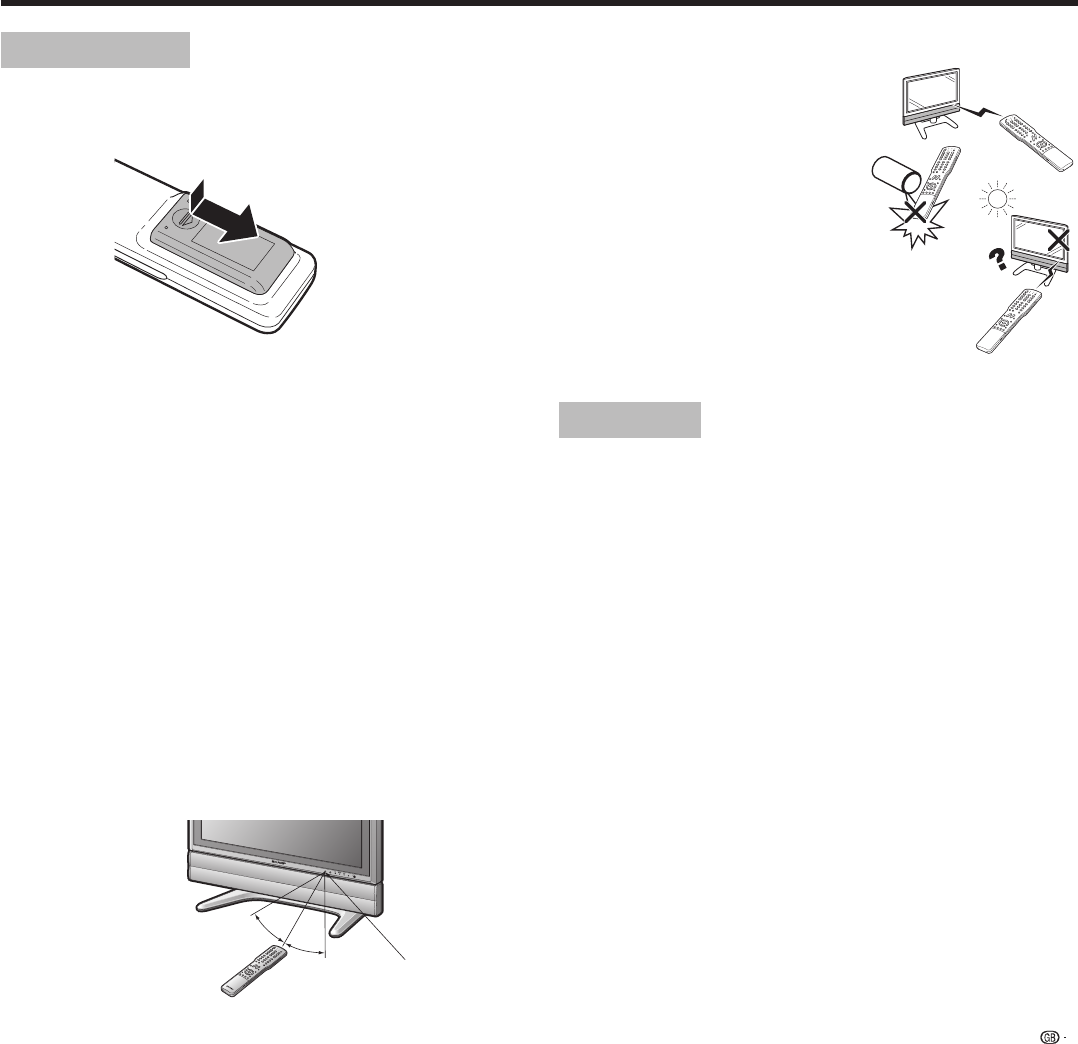
Remote control 9
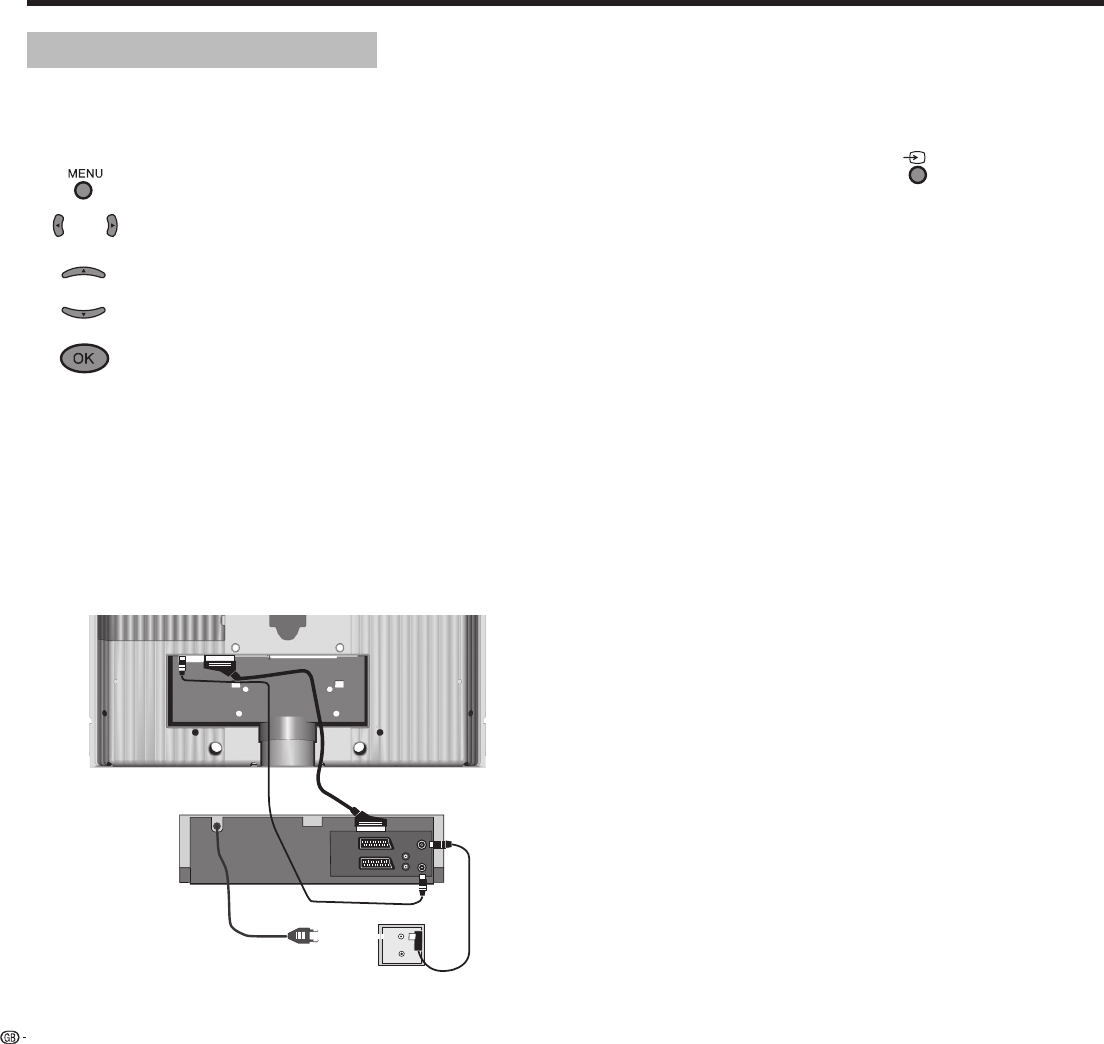
Connection 9
Switching on 10
Basics about the menu operation 10
Automatic station programming 11
Station sorting 12
DVB-T antenna position 12
New station search 13
Manual station setting 14
Digital radio stations search 14
Daily operation 15
Switch on/off 15
Changing stations 15
ENGLISH
OPERATION MANUAL
The illustrations and on-screen displays in this operation manual are for explanation purpose and may vary slightly from the actual operations.
The examples used throughout this manual are based on the LC-32GD7E model.
•
•
Manufactured under license from Dolby Laboratories. “Dolby”, “Pro Logic” and the double-D symbol are trademarks of Dolby Laboratories.
“HDMI, the HDMI logo and High-Defi nitions Multimedia Interface are trademarks or registered trademarks of HDMI Licensing LLC.”
WARNING:
This is a Class A product. In a domestic environment this product may cause radio interference in which case the user may be required to take ad-
equate measures.
2
Dear SHARP customer
Thank you for your purchase of the SHARP LCD colour TV product. To ensure safety and many years of troublefree operation of your product, please
read the Important Safety Precautions carefully before using this product.
Important Safety Precautions
Cleaning—Unplug the AC cord from the AC outlet before cleaning
the product. Use a damp cloth to clean the product. Do not use liquid
cleaners or aerosol cleaners.
Water and moisture—Do not use the product near water, such as
bathtub, washbasin, kitchen sink, laundry tub,
swimming pool and in a wet basement.
Do not place vases or any other water-fi lled con-
tainers on this product. The water may spill onto
the product causing fi re or electric shock.
Stand—Do not place the product on an unstable
cart, stand, tripod or table. Doing so can cause the
product to fall, resulting in serious personal injuries
as well as damage to the product. Use only a cart, stand, tripod,
bracket or table recommended by the manufacturer or sold with the
product. When mounting the product on a wall, be sure to follow the
manufacturer’s instructions. Use only the mounting hardware recom-
mended by the manufacturer.
When relocating the product placed on a cart, it
must be moved with utmost care. Sudden stops,
excessive force and uneven fl oor surface can cause
the product to fall from the cart.
Ventilation—The vents and other openings in the
cabinet are designed for ventilation. Do not cover or block these vents
and openings since insuffi cient ventilation can cause overheating
and/or shorten the life of the product. Do not place the product on a
bed, sofa, rug or other similar surface, since they can block ventilation
openings. This product is not designed for built-in installation; do not
place the product in an enclosed place such as a bookcase or rack, un-
less proper ventilation is provided or the manufacturer’s instructions
are followed.
The LCD panel used in this product is made of glass. Therefore, it can
break when the product is dropped or impact applied. If the LCD panel
is broken, be careful not to be injured by broken glass.
•
•
•
•
•
•
•
Heat sources—Keep the product away from heat sources such as
radiators, heaters, stoves and other heat-generat-
ing products (including amplifi ers).
To prevent fi re, never place any type of candle or
naked fl ames on the top or near the TV set.
To prevent fi re or shock hazard, do not place the
AC power cord under the TV set or other heavy
items.
Do not display a still picture for a long time, as this could cause an
afterimage to remain.
There is power consumtion always if main plug is connected.
The LCD panel is a very high technology product with 3,147,264 thin
fi lm transistors, giving you fi ne picture details. Due to the very large
number of pixels, occasionally a few non-active pixels may appear on
the screen as a fi xed point of blue, green or red. This is within product
specifi cations and does not constitute a fault.
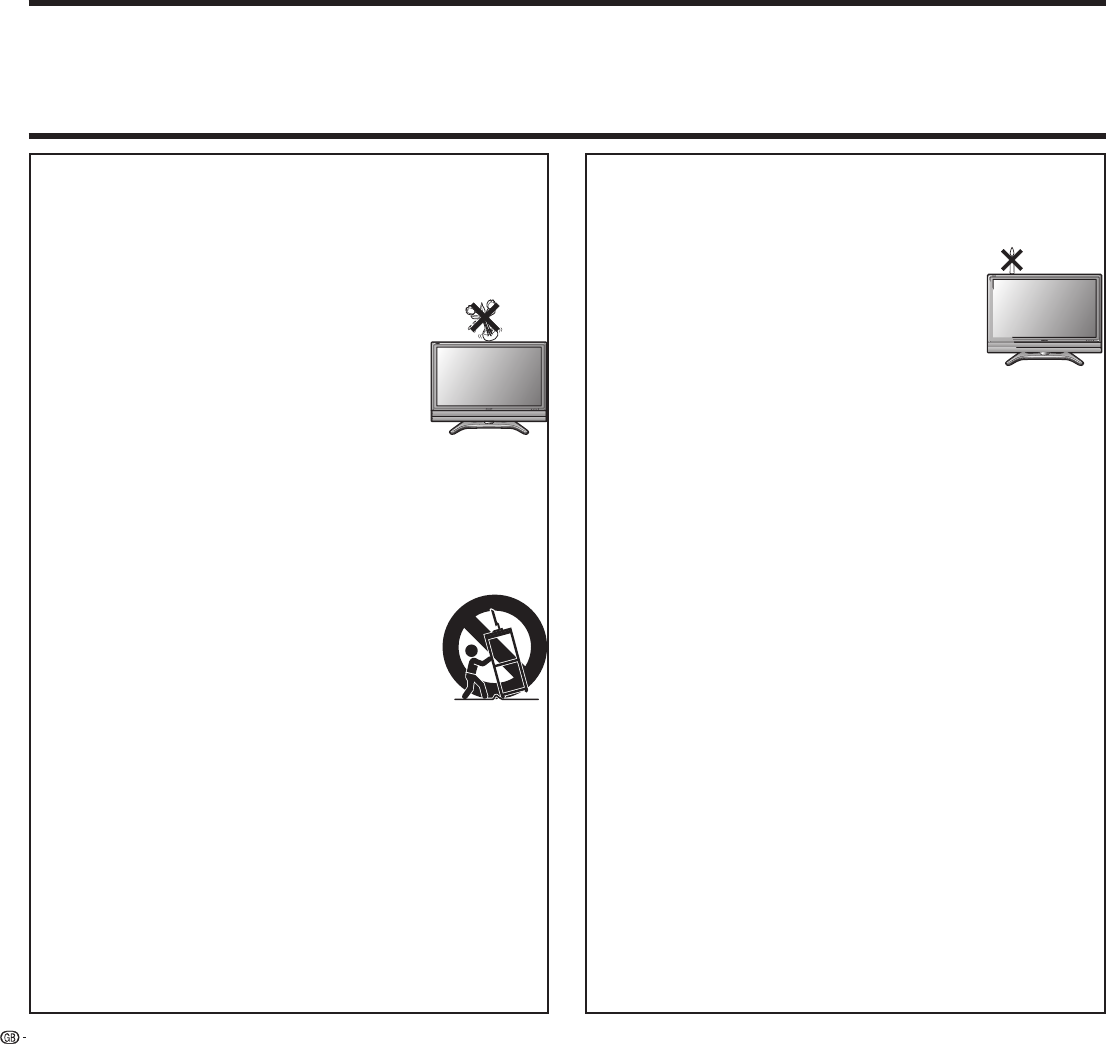
Precautions when transporting the TV
When transporting the TV, never carry it by holding onto the speaker. Be
sure to always carry the TV by two people holding it with two hands—
one hand on each side of the display.
•
•
•
•
•
3
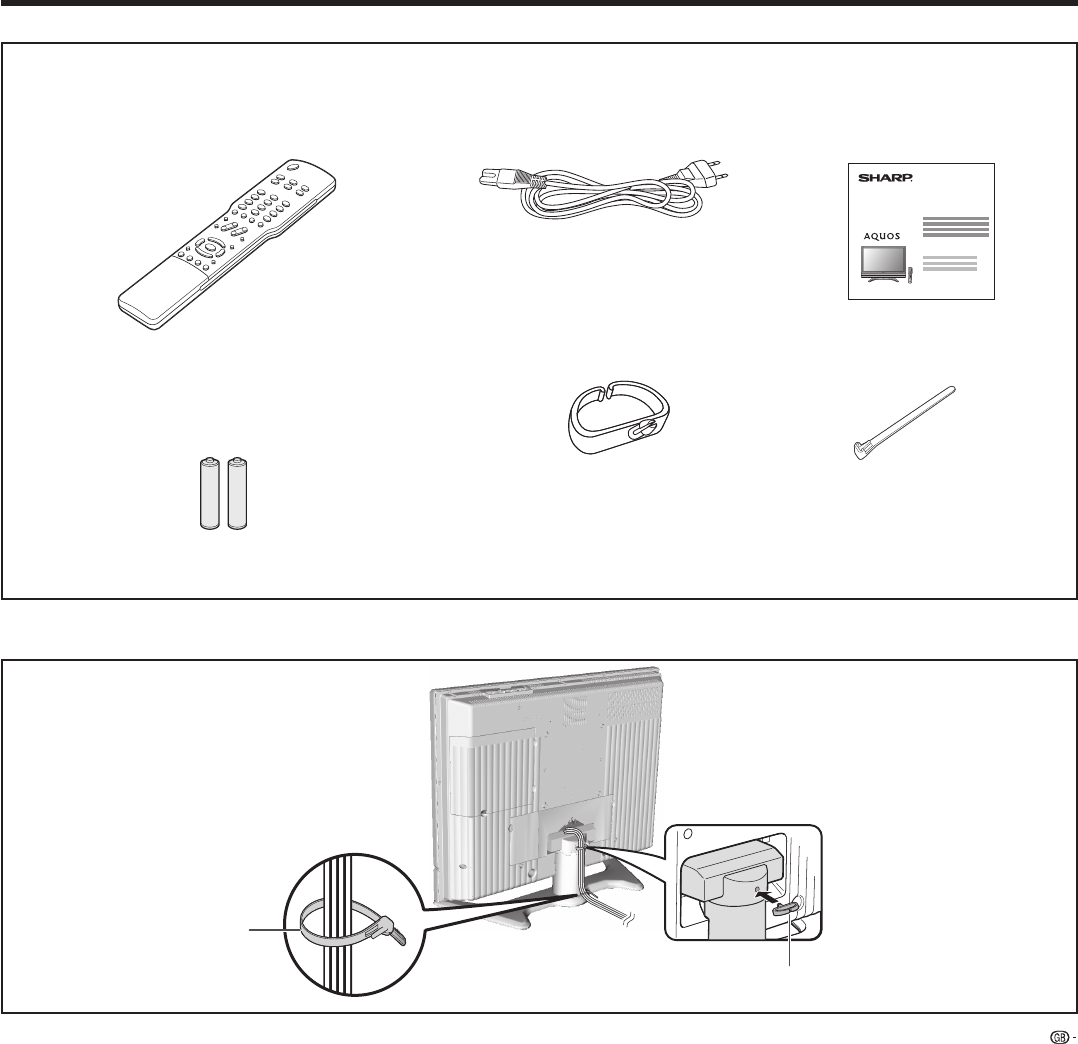
Supplied accessories
PIP
PC
ABCDEF
JKLGHIMNO
TUVPQRSWXYZ
INFO
END
BACK
TIMER
RADIO
LC-26GD7E
LC-32GD7E
LC-37GD7E
Remote control unit (x 1)
Page 4
Bundling the cables
AC cord (x 1)Operation manual (x 1)
Product shape varies in some
countries
Page 9
Page 3
Page 9
“AAA” size battery (x 2)
Cable clamp (x 1)
Cable clamp
Cable tie (x 1)
Page 3
Cable tie
4
1Switch on/off – to standby
2 Picture menu on/off
3Personal/factory values for picture and sound
/ menu “Additional functions”
(1
4AVL Timer list
5 PIP (picture in picture) on/off / in the wizard: back
6Select station directly / menu: enter numbers or letters
7 Radio on/off (back to TV mode)
8 Teletext: Subtitles on/off
(1
9 Analogue Teletext: Reveal text
10 Sound menu on/off
11 Volume: + louder /- quieter
12 Sound off/on
13 EPG on/off / Programme info
(1
14 Index on/off / menu: Info texts on/off
15 Station list on / menu: confi rm/call
16 Status display on/off / menu: hide menu
17 Red button: freeze frame on/off / digital teletext
(1
18 Green button: menu “Additional functions” / digital teletext
Gebruikershandleiding.com neemt misbruik van zijn services uitermate serieus. U kunt hieronder aangeven waarom deze vraag ongepast is. Wij controleren de vraag en zonodig wordt deze verwijderd.
Product:
Spelregels forum
Om tot zinvolle vragen te komen hanteren wij de volgende spelregels:
lees eerst de handleiding door;
controleer of uw vraag al eerder door iemand anders is gesteld;
probeer uw vraag zo duidelijk mogelijk te stellen;
heeft u een probleem en al geprobeerd om dit op te lossen, vermeld dit erbij aub;
heeft u een oplossing gekregen van een bezoeker dan horen wij dat graag in dit forum;
wilt u een reactie geven op een vraag of antwoord, gebruik dan niet dit formulier maar klik op de knop 'reageer op deze vraag';
uw vraag wordt direct op de website gezet; vermijd daarom persoonlijke gegevens in te vullen;
Belangrijk! Als er een antwoord wordt gegeven op uw vraag, dan is het voor de gever van het antwoord nuttig om te weten als u er wel (of niet) mee geholpen bent! Wij vragen u dus ook te reageren op een antwoord.
Belangrijk! Antwoorden worden ook per e-mail naar abonnees gestuurd. Laat uw emailadres achter op deze site, zodat u op de hoogte blijft. U krijgt dan ook andere vragen en antwoorden te zien.
Abonneren
Abonneer u voor het ontvangen van emails voor uw Sharp LC-37GD7 bij:
nieuwe vragen en antwoorden
nieuwe handleidingen
U ontvangt een email met instructies om u voor één of beide opties in te schrijven.
Ontvang uw handleiding per email
Vul uw emailadres in en ontvang de handleiding van Sharp LC-37GD7 in de taal/talen: Engels als bijlage per email.
De handleiding is 6,4 mb groot.
U ontvangt de handleiding per email binnen enkele minuten. Als u geen email heeft ontvangen, dan heeft u waarschijnlijk een verkeerd emailadres ingevuld of is uw mailbox te vol. Daarnaast kan het zijn dat uw internetprovider een maximum heeft aan de grootte per email. Omdat hier een handleiding wordt meegestuurd, kan het voorkomen dat de email groter is dan toegestaan bij uw provider.
Stel vragen via chat aan uw handleiding
Stel uw vraag over deze PDF
Uw handleiding is per email verstuurd. Controleer uw email
Als u niet binnen een kwartier uw email met handleiding ontvangen heeft, kan het zijn dat u een verkeerd emailadres heeft ingevuld of dat uw emailprovider een maximum grootte per email heeft ingesteld die kleiner is dan de grootte van de handleiding.
Er is een email naar u verstuurd om uw inschrijving definitief te maken.
Controleer uw email en volg de aanwijzingen op om uw inschrijving definitief te maken
U heeft geen emailadres opgegeven
Als u de handleiding per email wilt ontvangen, vul dan een geldig emailadres in.
Uw vraag is op deze pagina toegevoegd
Wilt u een email ontvangen bij een antwoord en/of nieuwe vragen? Vul dan hier uw emailadres in.