GB
14
the housing provided on top of the hood.
Replace the grease filter/s (and where foreseen the
grease collecting panels) and check that the hood is
operating correctly.
For Models HL 998 and HLS 998: carry out “Manual
calibration of the sensors” and “Selection of the type of
cooking top”.
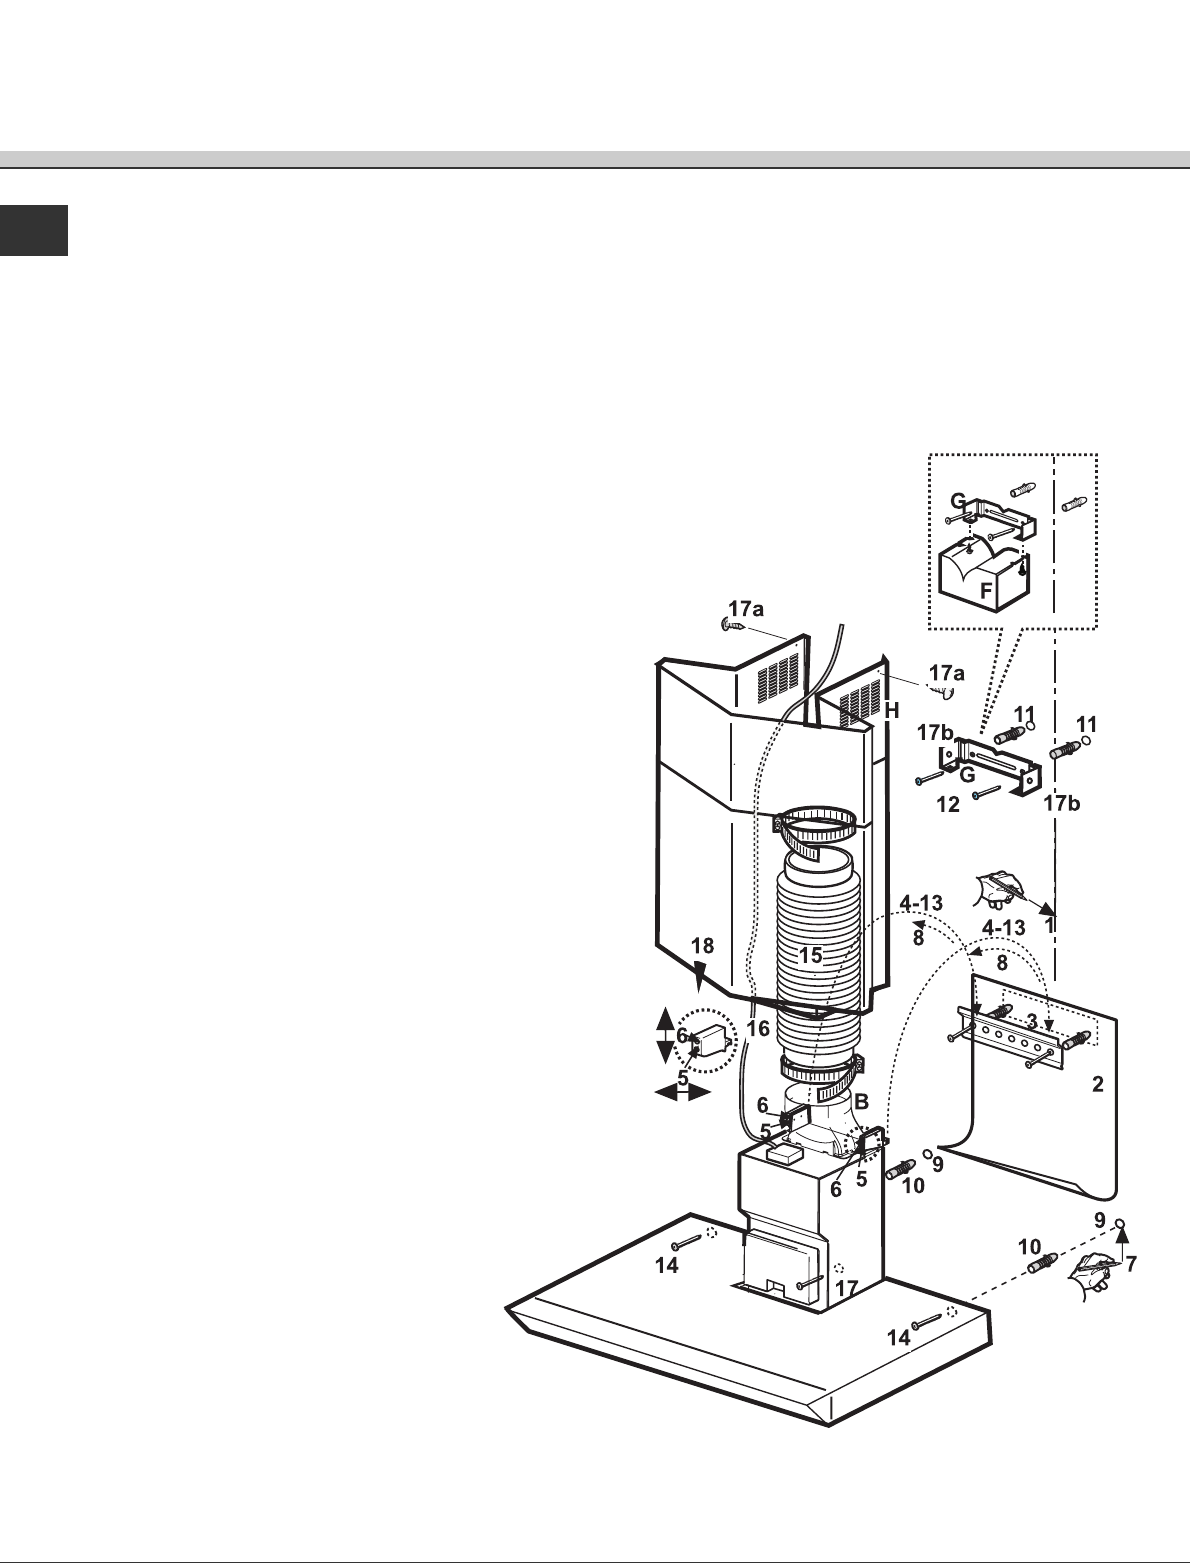
Mounting the hood
1. Using a pencil, draw a line on the wall, extending
up to the ceiling, to mark the centre. This will
facilitate installation.
2. Rest the drilling template against the wall: the
vertical centre line printed on the drilling template
must correspond to the centre line drawn on the
wall, and the bottom edge of the drilling template
must correspond to the bottom edge of the hood.
3. Rest the support bracket on the drilling template
so that it coincides with the dotted rectangle, mark
the two outer holes and drill them, remove the
drilling template, insert 2 wall plugs and fix the
hood support bracket into place using two
5x45mm screws.
4. Hang the hood on the bracket.
5. Adjust the distance of the hood from the wall.
6. Adjust the horizontal position of the hood.
7. Using a pencil mark the cooker hood permanent
drill hole inside the suction group (two drill holes
are necessary for fastening).
8. Remove the hood from the bracket.
9. Drill at the point marked (Ø8mm - see operation 7).
10. Insert 2 wall plugs.
11. Rest the chimney support bracket G against the
wall, touching the ceiling. Use the support bracket
as a drilling template (the small slot formed on the
support must coincide with the line drawn on the
wall as above – operation 1) and mark 2 holes with
a pencil, drill the holes (Ø8mm), insert 2 wall
plugs.
12. Fix the chimney support bracket to the wall using
two 5x45mm screws.
13. Hook the hood onto the bottom bracket.
14. Fix the hood into its final position on the wall. This
is absolutely necessary.
15. Connect a pipe (pipe and pipe clamps not
provided, to be purchased separately) for
discharge of fumes to the connection ring located
over the suction motor unit. If the hood is to be
used in ducting version, the other end of the pipe
must be connected to a device expelling the
fumes to the outside. If the hood is to be used in
filter version, then fix the deflector F to the
chimney support bracket G and
connect the other extremity of the pipe
to the connection ring placed on the
deflector F.
16. Make the electrical connections.
17. Apply the chimney stacks and fasten them at the
top to the chimney support G (17b) using 2 screws
(17a).
18. Slide the bottom section of the chimney down until
it completely covers the suction unit and slots into