Drehzahl Schleifscheibe min. (1/min) ....................................................................................................................................................................1500
Länge Absaugschlauch (mm) ................................................................................................................................................................................1500
Gewicht kg .................................................................................................................................................................................................................3,4
Antrieb
Motor V/Hz .........................................................................................................................................................................................................230/50
Weight kg ...................................................................................................................................................................................................................3,4
Power unit
Motor V/Hz .........................................................................................................................................................................................................230/50
Rated power P1 (W) ...............................................................................................................................................................................................1200
Subject to technical modications!
Noise characteristics
Sound power level LWA dB(A)97,6
Sound pressure level LpA dB(A)86,6
Uncertainty in measurement K dB(A)3
Vibrationm/s²2,356
Uncertainty in measurement Km/s²1,5
Note:
The measured noise levels are determined according to EN 60745.
Use hearing protection!
The measured total vibration values (triax vector sum) are determined
according to Standard EN 60745.
The vibration level specied in this data sheet has been measured
according to the standard test stated in Standard EN 60745, and it is
used to compare the different devices.
The level can be used for an initial exposure assessment. The specied
vibration level applies to the most important applications of the
device. However, if the device is used for other applications with other
accessories or if it is used in a badly maintained condition, the vibration
level can deviate from the specications. This means that the exposure
level may increase signicantly during the course of the operational
hours.
An estimation of the vibration exposure also needs to include the times
during which the device is switched off or it is switched on but not in
use. This means that the exposure level may decrease signicantly
during the course of the operational hours.
Additional safety measures must be taken to protect the operator from
the impact of the vibrations. This includes: Maintaining the device and
accessories; keeping hands warm; organising work patterns.
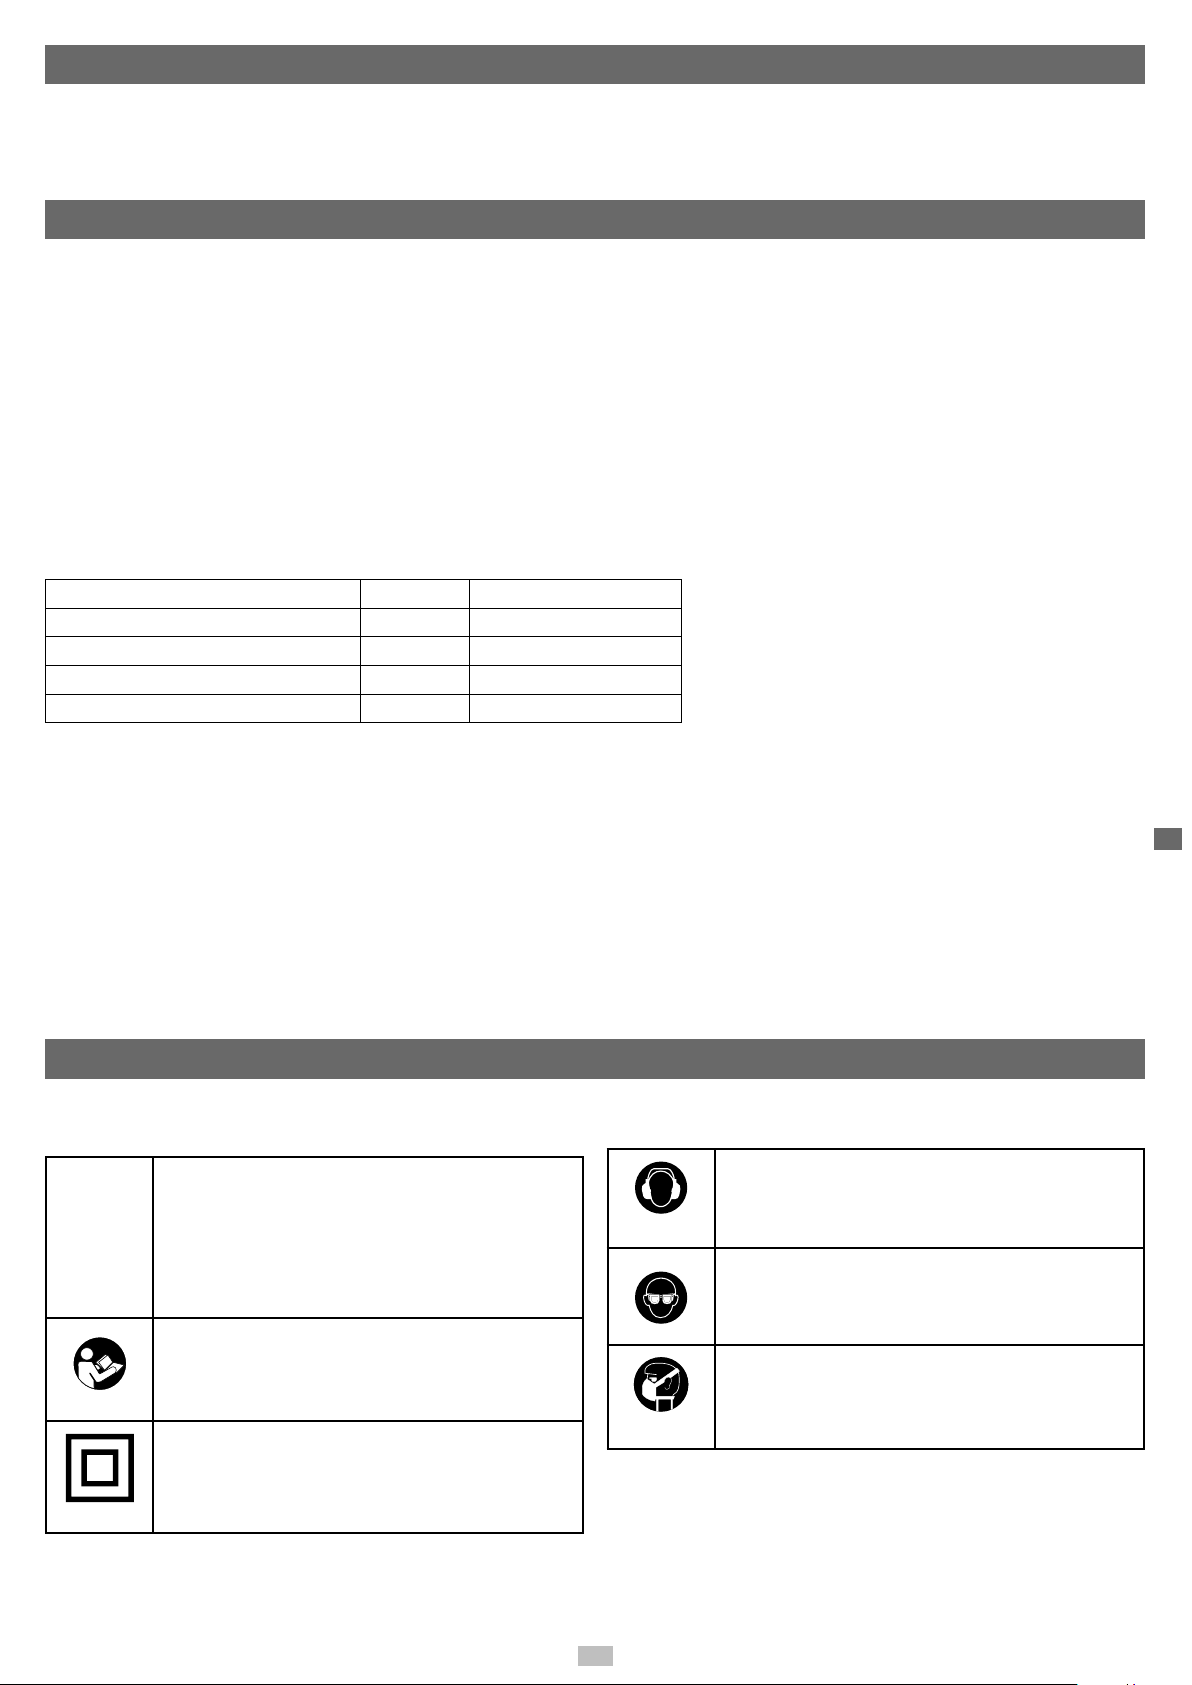
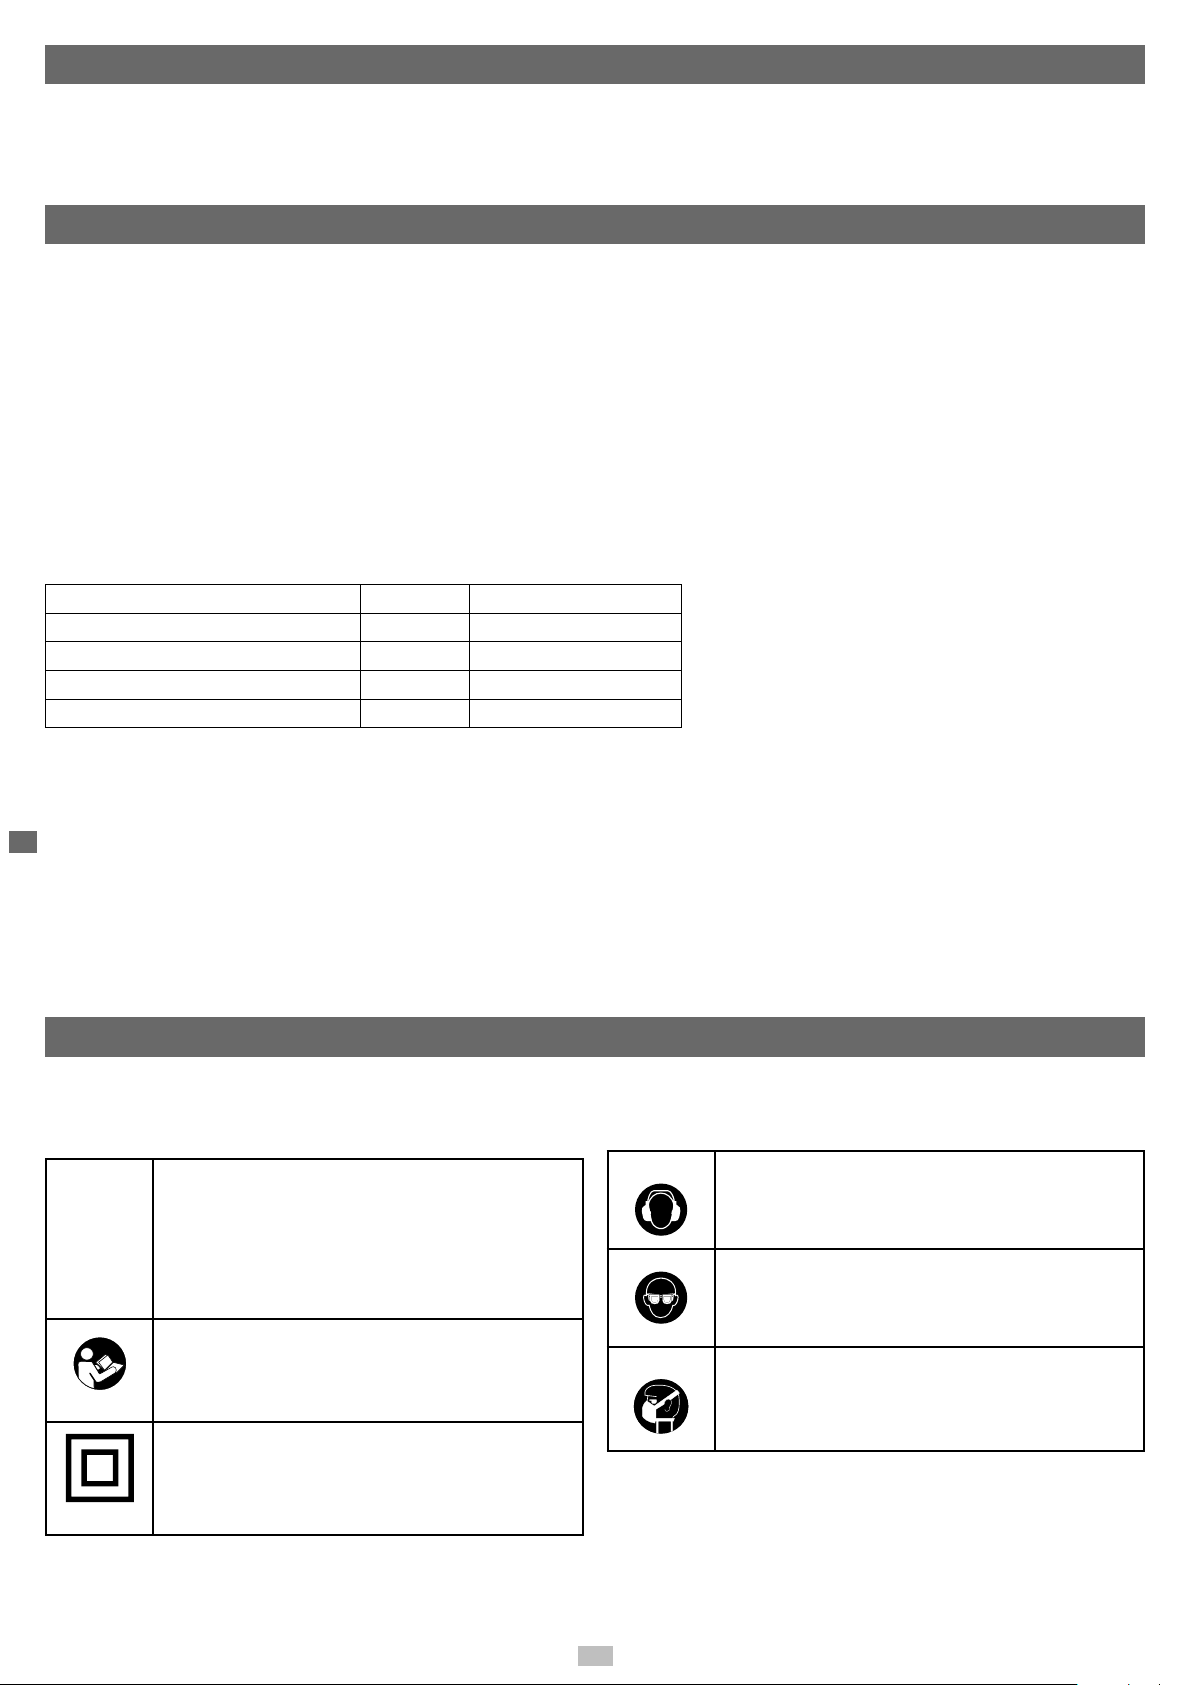
Explanation of symbols
The symbols used in this operating manual should direct your attention to potential risks. Please ensure that you fully understand the related safety
symbols and explanations. The warnings relating to these symbols can neither prevent risk nor substitute correct actions to prevent accidents.
m
This symbol points out safety risks and shows
a warning or danger. Non-compliance with this
warning may lead to your own accidents or to those
of others. To minimise risks based on injury, re or
electric shock, you must always follow the stipulated
recommendations.
Read the relevant chapters in this operating manual
carefully before use.
Symbol Category II: This device is equipped with dual
insulation and does not need to be connected to an
earthed power socket.
Use hearing protection
Wear goggles
Use breathing equipment
GB
13
General information
• After unpacking, check all parts for possible transportation dama-
ges. In the event of complaints, inform the supplier immediately. Any
complaints made after this time will not be accepted.
• The shipment is to be checked for completeness upon receipt.
• Read through the manual carefully in order to make yourself familiar
in dealing with the device before using it for the rst time.
• Only use original equipment regarding accessories, as well as
consumable items and spare parts. Spare parts can be obtained
from your specialized dealer. When ordering, please specify our part
numbers, as well as type and construction year of the device.
NOTE:
According to the applicable product liability laws, the manufacturer of the
device does not assume liability for damages to the product or damages
caused by the product that occurs due to:
• Improper handling,
• Non-compliance of the operating instructions,
• Repairs by third parties, not by authorized service technicians,
• Installation and replacement of non-original spare parts,
• Application other than specied,
• A breakdown of the electrical system that occurs due to the non-
compliance of the electric regulations and VDE regulations 0100, DIN
57113 / VDE0113.
We recommend:
Read through the complete text in the operating instructions before
installing and commissioning the device. The operating instructions are
intended to help the user to become familiar with the machine and take
advantage of its application possibilities in accordance with the recom-
mendations. The operating instructions contain important information
on how to operate the machine safely, professionally and economically,
how to avoid danger, costly repairs, reduce downtimes and how to incre-
ase reliability and service life of the machine.
In addition to the safety regulations in the operating instructions, you
have to meet the applicable regulations that apply for the operation of
the machine in your country. Keep the operating instructions package
with the machine at all times and store it in a plastic cover to protect it
from dirt and moisture. Read the instruction manual each time before
operating the machine and carefully follow its information. The machine
can only be operated by persons who were instructed concerning the
operation of the machine and who are informed about the associated
dangers. The minimum age requirement must be complied with.
We have marked the points in this manual that concern your safe-
ty with this sign: m
Safety notices m
WARNING: When using electric tools basic safety precautions should
always be followed to reduce the risk of re, electric shock and perso-
nal injury.
WARNING: Read all safety warnings and instructions. Failure to follow
the warnings and instructions may result in electric shock, re and/ or
serious injury.
Save all warnings and instructions for future reference.
The term “power tool” in the warnings refers to your mains-operated
(corded) power tool
or battery-operated (cordless) power tool.
Work area safety
• Keep work area clean and well lit. Cluttered or dark areas invite
accidents.
• Do not operate power tools in explosive atmospheres, such as in the
presence of ammable liquids, gasses or dust. Power tools create
sparks which may ignite the dust or fumes.
• Keep children and bystanders away while operating power tool.
Distractions can cause you to lose control.
Electrical Safety
• Power tool plugs must match the outlet. Never modify the plug in any
way Do not use any adapter plugs with earthed (grounded) power
tools. Unmodied plugs and matching outlets will reduce the risk of
electric shock.
• Avoid body contact with earthed or grounded surfaces, such as
pipes, radiators, ranges and refrigerators. There is an increased risk
of electric shock if your body is earthed or grounded.
• Do not expose power tools to rain or wet conditions. Water entering a
power tool will increase the risk of electric shock.
• Do not abuse the cord. Never use the cord for carrying, pulling or un-
plugging the power tool.Keep cord away from heat, oil, sharp edges
or moving parts. Damaged or entangled cords increase the risk of
electric shock.
• When operating a power tool outdoors, use an extension cord suitab-
le for outdoor use. Use of a cord suitable for outdoor use reduces the
risk of electric shock.
• If operating a power tool in a damp location is unavoidable, use a
residual current device (RCD) protected supply. Use of an RCD redu-
ces the risk of electric shock.
Personal Safety
• Stay alert, watch what you are doing and use common sense when
operating a power tool. Do not use a power tool while you are tired
or under the inuence of drugs, alcohol or medication. A moment of
inattention while operating power tools may result in serious personal
injury.
• Use personal protective equipment. Always wear eye protection. Pro-
tective equipment such as dust masks, non-skid safety shoes, hard
hat or hearing protection used for appropriate conditions will reduce
personal injuries.
• Prevent unintentional starting. Ensure the switch is in the off-position
before connecting to power source and or battery pack, picking up
or carrying the tool. Carrying power tools with your nger on the
switch or energising the power tools that have the switch on invites
accidents.
• Remove any adjusting key or wrench before turning the power tool
on. A wrench or key left attached to a rotating part of a power tool
may result in personal injury .
• Do not overreach. Keep proper footing and balance at all times. This
enables better control of the power tool in unexpected situations.
• Dress properly. Do not wear loose clothing or jewellery. Keep your
hair, clothing and gloves away from moving parts. Loose clothes,
jewellery or long hair can be caught in moving parts.
• If devices are provided for the connection of dust extraction and coll-
ection facilities, ensure that these are connected and properly used.
Use of dust collection can reduce dust-related hazards.
Power tool use and care
• Do not force the power tool. Use the correct power tool for your
application. The correct power tool will do the job better and safer at
a rate for which it was designed.
• Do not use the power tool if the switch does not turn it on or off. Any
power tool that cannot be controlled with the switch is dangerous and
must be repaired.
• Disconnect the power tool from the power source and/or battery pack
from the power tool before making any adjustments, changing ac-
cessories, or storing power tools. Such preventative safety measures
reduce the risk of starting the power tool accidentally.
• Store idle power tools out of the reach of children and do not allow
persons unfamiliar with the power tool or these Instructions to
operate the power tool. Power tools are dangerous in the hands of
untrained users.
• Maintain power tools. Check for misalignment or binding of moving
parts, breakage of moving parts and any other condition that may
affect the power tools operation. If damaged, have the power tool
GB
14
repaired before use. Many accidents are caused by poorly maintai-
with sharp cutting edges are less likely to bind and are easier to
control.
• Use the power tool, accessories and tool bits etc. in accordance with
these instructions, taking into account the working conditions and the
work to be performed. Use of the power tool for operations different
from those intended could result in a hazardous situation.
Service
Have your power tool serviced by a qualied repair person using only
identical replacement parts. This will ensure that the safety of the
power tool is maintained. If the power cable is damaged, it must be
replaced by the manufacturer, its service agent or a similarly qualied
person in order to avoid any danger.
Safety instructions for all operations
Safety warnings common for sanding operations:
• This power tool is intended to function as a sander. Read all safety
warnings, instructions, illustrations ans specications provided with
this power tool. Failure to follow all instructions listed below may
result in electric shock, re and/or injury.
• Operations such as grinding, polishing, wire brushing or cutting-off
are not recommended to be performed with this power tool. Opera-
tions for which the power tool was not designed may create a hazard
and cause personal injury.
• Do not use accessories which are not specically designed and
recommended by the tool manufacturer. Just because the accessory
can be attached to your power tool, it does not assure safe operation.
• The rated speed of the accessory must be at least equal to the ma-
ximum speed marked on the power tool. Accessories running faster
than their rated can break and y apart.
• The outside diameter and the thickness of your accessory must be
within the capacity rating of your power tool. Incorrectly sized acces-
sories cannot be adequately guarded or controlled.
• Threaded mounting of accessories must match grinder spindle th-
read. For accessories mounted by anges, the arbour hole of acces-
sory must t the locating diameter of the ange. Accessories that do
not match the mounting hardware of the power tool will not balance,
vibrate excessively and may cause loss of control.
• Do not use a damaged accessory. Before each use inspect the
accessory such as abrasive wheels for chips and cracks, backing
pad for cracks, tear or excess wear, wire brush for loose or cracked
wires. If power tool or accessory is dropped, inspect for damage or
install an undamaged accessory. After inspecting and installing an
accessory, position yourself and bystanders away from the plane of
the rotating accessory and run the power tool at maximum no - load
speed for one minute. Damaged accessories will normally break
apart during this test time.
• Wear personal protective equipment. Depending on application, use
face shield, safety goggles or safety glasses. As appropriate, wear
dust mask, hearing protectors, gloves and workshop apron capable
of stopping small abrasive or workpiece fragments. The eye protec-
tion must be capable of stopping ying debris generated by various
operations . The dust mask or respirator must be capable of ltrating
particles generated by your operation. Prolonged exposure to high
intensity noise may cause hearing loss.
• Keep bystanders a safe distance away from work area. Anyone
entering the work area must wear personal protective equipment.
Fragments of workpiece or of a broken accessory may y away and
cause injury beyond immediate area of operation.
• Hold the power tool by insulated gripping surfaces only, when perfor-
ming an operation where the cutting accessory may contact hidden
wiring or its own cord. Cutting accessory contacting a „live“ wire may
make exposed metal parts of the power tool „live“ and could give the
operator an electric shock .
• Position the cord clear of th e spinning accessory. If you lose control,
the cord may be cut or snagged and your hand or arm may be pulled
into the spinning accessory.
• Never lay the power tool down until the accessory has come to a
complete stop. The spinning accessory may grab the surface and
pull the power tool out of your control.
• Do not run the power tool while carrying it at your side. Accidental
contact with the spinning accessory could snag your clothing, pulling
the accessory into your body.
• Regularly clean the power tool’s air vents. The motor’s fan will draw
the dust inside the housing and excessive accumulation of powdered
metal may cause electrical hazards.
• Do not operate the power tool near ammable materials. Sparks
could ignite these materials.
• Do not use accessories that require liquid coolants. Using water or
other liquid coolants may result in electrocution or shock
Kickback and Related Warnings
Kickback is a sudden reaction to a pinched or snagged rotating wheel,
backing pad, brush or any other accessory. Pinching or snagging
causes rapid stalling of the rotating accessory which in turn causes
the uncontrolled power tool to be forced in the direction opposite of the
accessory’s rotation at the point of the binding.
For example, if an abrasive wheel is snagged or pinched by the workpi-
ece, the edge of the wheel that is entering into the pinch point can dig
into the surface of the material causing the wheel to climb out or kick
out. The wheel may either jump toward or away from the operator, de-
pending on direction of the wheel’s movement at the point of pinching.
Abrasive wheels may also break under these conditions. Kickback is
the result of power tool misuse and/or incorrect operating procedures
or conditions and can be avoided by taking proper precautions as given
below.
• Maintain a rm grip on the power tool and position your body and
arm to allow you to resist kickback forces. Always use auxiliary hand-
le, if provided, for maximum control over kickback or torque reaction
during start-up. The operator can control torque reactions or kickback
forces, if proper precautions are taken.
• Never place your hand near the rotating accessory. Accessory may
kickback over your hand.
• Do not position your body in the area where power tool will move if
kickback occurs. Kickback will propel the tool in direction opposite to
the wheel’s movement at the point of snagging.
• Use special care when working corners, sharp edges etc. Avoid
bouncing and snagging the accessory. Corners, sharp edges or
bouncing have a tendency to snag the rotating accessory and cause
loss of control or kickback.
• Do not attach a saw chain woodcarving blade or toothed saw blade.
Such blades create frequent kickback and loss of control.
Additional safety instructions for sanding operations
• Do not use excessively oversized sanding disc paper. Follow manu-
facturers recommendations, when selecting sanding paper. Larger
sanding paper extending beyond the sanding pad presents a lacera-
tion hazard and may cause snagging, tearing of the disc or kickback.
Intended use m
As one of our products, the device belongs to the hand-held electric
tools. The device mainly cares for lime surface, including the interior
wall, ceiling, exterior wall, corridor, etc. Remove the painting lime mud
from the wall, and make the surface even or smooth. It may promote the
wall polishing efciency and quality by workers.
With various conditions taken into consideration in the design, the
device may run at high or low speed. In addition, you may adjust the
connection structure at high and low locations respectively, in order to
optimize the sanding efciency and realize user-friendly and compact
design.
GB
15
Residual risks m
The machine has been built according to the latest technology
and recognised safety rules. However, there is still a chance of
residual risks whilst working.
• Endangering health through noise.
• Endangering health through electricity, when using improperly
connecting cables.
• Additionally, despite all the safety provisions, residual risks can
occur which are not obvious.
Residual risks can be minimised by complying with the “Safety
notices”, the “Intended use” as well as operating instructions
overall.
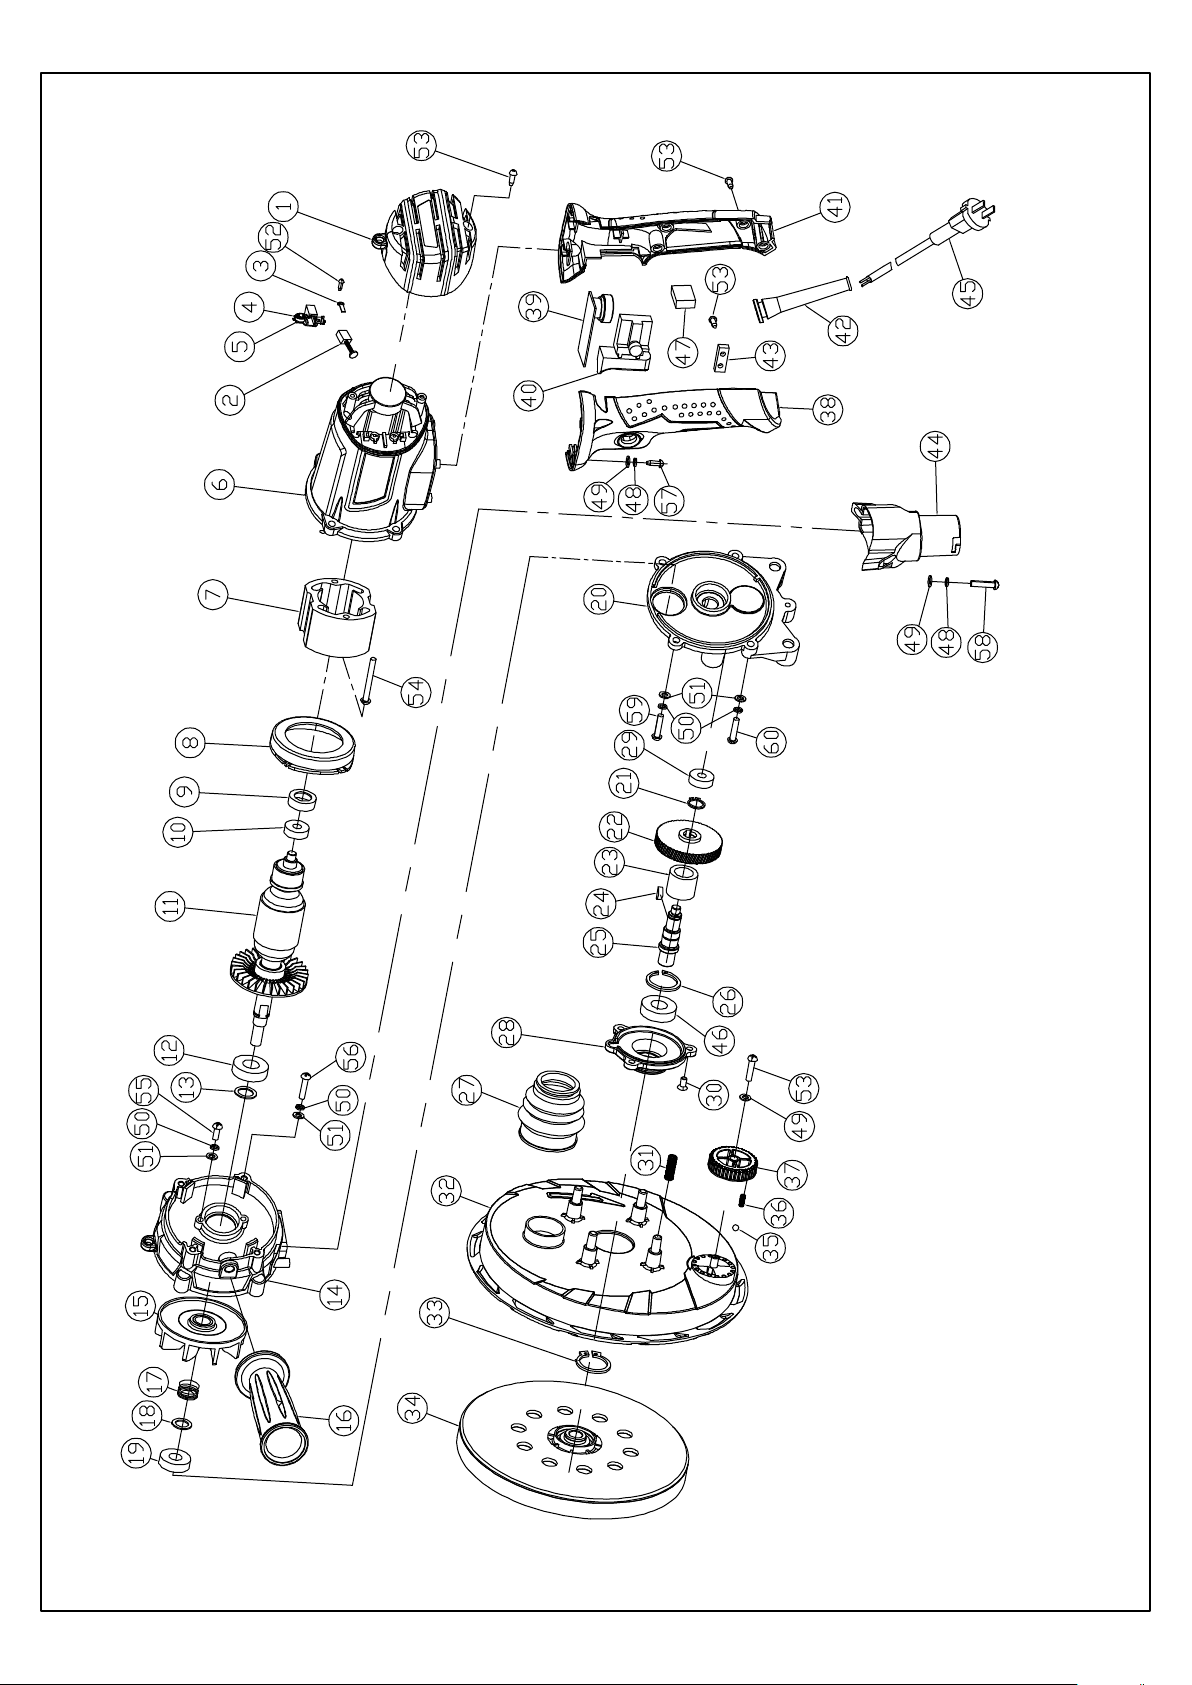
Equipment g. A
1. Speed adjustment
2. Locking mechanism for on switch
3. Handle
4. Additional handle
5. Suction adjustment
6. Main switch
7. Dust extractor
8. Grinding plate
9. Sand paper 6 units (grain: 80, 100, 120, 150, 180, 240)
10. Flexible suction hose
11. Dust bag
12. Carrying strap
13. Replacement carbon brushes, 2 brushes
14. Screwdriver
15. Allen key
16. Connection adapter
Commissioning
Main switch and speed adjustment (Fig. 1+2)
This device is equipped with a locking mechanism for the on switch so
that the device remains on after it has been switched on.
• Switching the device on using the „On“ button: Actuate the main
switch (1) to start the electric tool
• Leaving the device switched on using the „On“ button: For conti-
nuous operation, actuate the locking mechanism for the on switch (2)
so that device continues to operate.
• Switching the device off using the „Off“ button: To switch the
device off, only briey press the main switch (1) and release it imme-
diately.
• Adjusting the speed: You can control the speed of the grinding
plate by adjusting the speed control (3).
Inserting and changing the sand paper (Fig. 3+4)
Note: Before inserting or removing the sand paper, make sure to switch
off the device and disconnect it from the power supply.
• To replace the sand paper (1), place the device on the oor. Take
the sand paper (1) and secure it on the grinding plate (2). The sand
paper (1) automatically connects to the grinding plate (2). Make sure
that the holes of the grinding plate (2) align with the holes of the sand
paper (1).
Connection set for the dust extractor
The connection piece for the dust extractor is used to connect the
device with the fabric bag. This minimises the level of dust for the
operator.
Connect the device to the suction hose (Fig. 5.1, 5.2, 5.3)
• Plug the adapter connector (1) on the vacuum cleaner connection (2)
of the machine and turn it to lock it.
• Insert the dust hose (3) into the dust extractor (4).
Connect the dust bag to the suction hose (Fig. 6.1, 6.2, 6.3, 6.4)
• Installation instructions: Insert the hose (1) into the connection piece
of the dust bag (2). Make sure that the spigot locks into place in the
connection piece of the dust bag to securely connect the hose (1)
with the dust bag (2). (Fig. 6.1, 6.2)
• Removal: Press the locked connection piece of the hose (1) together
using a screwdriver and remove the hose (1). (Fig. 6.3, 6.4)
Adjusting the suction power (Fig.7)
• Turn the suction adjustment control until the desired suction power is
achieved.
Electrical connection m
The installed electronic motor is connected and operational. The con-
nection complies with relevant VDE and DIN stipulations.
The customer’s mains connection as well as extension leads used must
comply with these provisions.
Hazardous electronic connections
Insulation damage often occurs on electric connections.
Causes include:
• Pressure marks when connections are guided through windows and
doors
• Kinks due to inappropriate attachment or guidance of the connection
• Cuts when the connection is run over
• Insulation damage when being pulled out of the wall socket
• Tears from ageing insulation
Such hazardous electric connections must not be used and are dange-
rous to life due to the insulation damage.
Regularly check electric connections for damage. Make sure the
connection is not connected to the mains when checking. Electric
connections must comply with relevant VDE and DIN stipulations. Only
use connections marked H 07 RN. Printing the type designation on the
connection is the law.
AC motor
• The power voltage has to be 230 Volt – 50 Hz.
• Extension leads up to 25 m in length must have a cross section of
1.5 mm2, at more than 25 m length, it has to be at least 2.5 mm2.
• The mains connection is protected against short circuit with a 16A
slow fuse.
Connections and repairs to the electrical equipment may only be
carried out by a trained electrician.
If there are any questions, please provide the following data:
• Motor’s type of power
• Data from the machine’s type plate
When sending back the motor, always send the entire motor unit with
switch.
Follow the safety notices!
GB
16
Maintenance
Replacing the grinding disc (Fig. 8.1, 8.2)
• Remove the sand paper (1).
• Insert the Allen key (3) into the hexagonal hole in the centre of the
grinding disc (2) and turn it clockwise to remove the damaged grin-
ding disc (2).
• Insert the new grinding disc (2) and tighten it again.
Replacing the carbon brushes
The carbon brushes are wear parts that wear out during use. The car-
bon brushes should therefore be checked regularly. To prevent damage
to the circuit, the two carbon brushes must be replaced at the same
time.
ATTENTION!
The carbon brushes may only be replaced by authorised service perso-
nnel. The device must only be used with both brushes.
Cleaning
Clean the device after each grinding process
• Regularly cleaning the device can extend its service life and reduce
the amount of repair work required.
• We recommend cleaning the connection pieces and components of
the electrical motor without water.
• The parts should be cleaned immediately after use.
• Clean the parts with a hairbrush and a dry cloth.
Service
Only have your electrical device cleaned by qualied specialised perso-
nnel and only use spare parts with identical designs. This ensures the
technical safety during use.
Storage
The device, the operating manual as well as accessories, if applicable,
must be stored in the original packaging. In this way, you will always
have all information and parts at your disposal when required. Pack the
device carefully or use the original packaging in order to prevent dama-
ge during transport. Always store the device in a dry location.
GB
17
Fabricant
scheppach Fabrikation von Holzbearbeitungsmaschinen GmbH
Günzburger Straße 69
89335 Ichenhausen
Germany
Caractéristiques techniques
Dimensions L x l x H (mm) …………………………… ...............................................…………………………………………………………….380x260x260
Diamètre de la meule (mm) …………………………… ..............................................…………………………………………………………………………230
Vitesse de rotation de la meule min. (t/min) ..........................................................................................................................................................1500
Vitesse de rotation de la meule max. (t/min) .........................................................................................................................................................3200
Longueur du tuyau d’aspiration (mm) ....................................................................................................................................................................1500
Poids kg .....................................................................................................................................................................................................................3,4
Entraînement
Moteur V / Hz ...................................................................................................................................................................................................230/50
Průměr kotouče (mm)...............................................................................................................................................................................................230
Otáčky brusného kotouče min. (1/min) ..................................................................................................................................................................1500
Délka odsávací hadice (mm) ..................................................................................................................................................................................1500
Gewicht kg .................................................................................................................................................................................................................3,4
Hmotnost kg
Motor V/Hz .........................................................................................................................................................................................................230/50
Tento přístroj je vybaven aretací zapnutí, takže přístroj zůstane po
zapnutí zapnutý.
• Zapnutí přístroje tlačítkem „On“: Spusťte elektrický nástroj
stisknutím hlavního vypínače (1)
• Nechte přístroj zapnutý s tlačítkem „On“: Pro trvalý provoz
stiskněte aretaci zapnutí (2), aby přístroj zůstal i nadále v provozu.
• Vypnutí přístroje tlačítkem „Off“: K vypnutí přístroje pouze krátce
stiskněte hlavní vypínač (1) a ihned jej znovu uvolněte.
• Přestavení otáček: Přestavením regulátoru rychlosti (3) můžete
regulovat otáčky brusné desky.
Použití a výměna brusného papíru (obr. 3+4)
Upozornění: Ujistěte se, že jste před vkládáním nebo odstraňováním
brusného papíru přístroj nejen vypnuli, ale i odpojili od elektrického
napájení.
• Pro výměnu brusného papíru (1) položte přístroj na podlahu.
Vezměte brusný papír (1) a připevněte jej na brusnou desku (2).
Brusný papír (1) se samočinně spojí s brusnou deskou (2). Dbejte,
aby otvory brusné desky (2) lícovaly s otvory brusného papíru (1).
Připojovací sada pro odsávání prachu
Připojovací kus pro zařízení na odsávání prachu se používá ke spojení
přístroje s látkovým pytlem. Tím se zmenší zatížení prachem na straně
obsluhy.
Spojte přístroj s odsávací hadicí (obr. 5.1, 5.2, 5.3)
• Nasaďte připojovací adaptér (1) na přípojku odsávání prachu (2)
stroje a otočte jím pro zaaretování.
• Vsaďte prachovou hadici (3) do zařízení na odsávání prachu (4).
Spojte vak na zachytávání prachu s odsávací hadicí (obr. 6.1, 6.2,
6.3, 6.4)
• Montážní návod: Vsaďte hadici (1) do připojovacího kusu vaku na
zachytávání prachu (2). Dbejte, aby čep v připojovacím kusu vaku na
zachytávání prachu zaklapl kvůli vytvoření pevného spojení hadice
(1) s vakem na zachytávání prachu (2). (Obr. 6.1, 6.2)
• Demontáž: Stlačte zaaretovaný připojovací kus hadice (1) pomocí
šroubováku a vytáhněte hadici (1). (Obr. 6.3, 6.4)
Seřízení sacího výkonu (obr. 7)
• Otáčejte seřizováním sacího výkonu, dokud nebude dosaženo
požadovaného sacího výkonu.
Elektrické připojením
Instalovaný elektromotor je připojen v provozuschopném stavu.
Přípojka musí odpovídat příslušným předpisům VDE a DIN.
Těmto předpisům musí odpovídat síťová přípojka zákazníka i použité
prodlužovací kabely.
Vadné elektrické přívodní kabely
U elektrických přívodních kabelů často dochází k poškození izolace.
Příčiny jsou:
• Poškození tlakem, je-li přívodní kabel veden oknem nebo štěrbinou
ve dveřích.
• Místa zlomu kvůli nevhodnému upevnění nebo vedení přívodního
kabelu.
• Místa řezu následkem přejetí přívodního kabelu.
• Poškození izolace kvůli vytrhnutí z elektrické zásuvky ve stěně.
• Protržení v důsledku stárnutí izolace.
Tyto vadné elektrické přívodní kabely nesmějí být používány a kvůli
poškození izolace jsou životu nebezpečné.
Pravidelně kontrolujte, zda elektrické přívodní kabely nejsou
poškozeny. Dávejte pozor, aby nebyl přívodní kabel při kontrole
připojen do elektrické sítě. Elektrické přívodní kabely musejí odpovídat
příslušným předpisům VDE a DIN. Používejte pouze přívodní kabely s
označením H 07 RN. Uvedení typových označení na přívodním kabelu
je stanoveno předpisem.
Motor na střídavý proud
• Jmenovité napětí musí činit 230 V – 50 Hz.
• Prodlužovací vedení musí vykazovat do délky 25 m průřez 1,5 mm2,
nad 25 m délky nejméně 2,5 mm2.
• Síťová přípojka je jištěna 16 A setrvačně.
Připojení a opravy elektrického vybavení mohou provádět pouze
odborní elektrikáři.
Při zpětných dotazech uvádějte prosím tyto údaje.
• Typ proudu napájejícího motor
• Údaje z typového štítku stroje
V případě, že budete motor vracet, zasílejte vždy kompletní pohonnou
jednotku se spínačem.
Dodržujte bezpečnostní pokyny!
CZ
27
Údržba
Výměna brusného talíře (obr. 8.1, 8.2)
• Odstraňte brusný papír (1).
• Vsaďte klíč na vnitřní šestihran (3) do šestihranného otvoru ve středu
brusného talíře (2) a otáčejte jím ve směru pohybu hodinových
ručiček pro odstranění poškozeného brusného talíře (2).
• Vsaďte nový brusný talíř (2) a znovu jej připevněte.
Výměna uhlíkových kartáčů
Uhlíkové kartáče jsou opotřebitelné díly, které se v průběhu používání
opotřebují. Proto by se měly uhlíkové kartáče pravidelně kontrolovat.
Pro zabránění poškození obvodu se musí oba uhlíkové kartáče vyměnit
současně.
POZOR!
Výměnu uhlíkových kartáčů smějí provádět pouze autorizovaní servisní
pracovníci. Přístroj se smí používat pouze s oběma kartáči!
Čištění
Vyčistěte přístroj po každém broušení
• Pravidelné čištění přístrojů může prodloužit jejich životnost a snížit
počet oprav.
• Doporučuje se čistit připojovací kusy a komponenty elektromotoru
bez vody.
• Čištění by se mělo provádět bezprostředně po použití dílů.
• Čistěte díly vlasovým kartáčem a suchou tkaninou.
Servis
Nechte údržbu vašeho přístroje provádět pouze kvalikovaný odborný
personál a používejte pouze konstrukčně shodné náhradní díly. Tím
bude zaručena technická bezpečnost během používání.
Uložení
Přístroj, návod k obsluze a případné příslušenství se musí uchovávat
v originálním balení. Tak máte neustále všechny informace a díly v
případě potřeby po ruce. Zabalte
pečlivě přístroj nebo použijte originální balení kvůli zabránění poškození
při přepravě. Uchovávejte přístroj vždy na suchém místě.
CZ
28
Výrobca
scheppach Fabrikation von Holzbearbeitungsmaschinen GmbH
Günzburger Straße 69
89335 Ichenhausen
Germany
Technické údaje
Rozmery D x Š x V (mm) ..........................................................................................................................................................................380x260x260
Priemer kotúčov (mm) ..............................................................................................................................................................................................230
Otáčky kotúča min. (1/min) .....................................................................................................................................................................................1500
Dĺžka odsávacej hadice (mm) ................................................................................................................................................................................1500
Hmotnosť kg ..............................................................................................................................................................................................................3,4
Pohon
Motor V/Hz .........................................................................................................................................................................................................230/50
Omwentelingen van slijpschijf min. (1/min) ............................................................................................................................................................1500
Omwentelingen van slijpschijf max. (1/min) ...........................................................................................................................................................3200
Lengte van afzuigslang (mm) .................................................................................................................................................................................1500
Gewicht kg .................................................................................................................................................................................................................3,4
Voedingseenheid
Motor V/Hz .........................................................................................................................................................................................................230/50
Gebruikershandleiding.com neemt misbruik van zijn services uitermate serieus. U kunt hieronder aangeven waarom deze vraag ongepast is. Wij controleren de vraag en zonodig wordt deze verwijderd.
Product:
Spelregels forum
Om tot zinvolle vragen te komen hanteren wij de volgende spelregels:
lees eerst de handleiding door;
controleer of uw vraag al eerder door iemand anders is gesteld;
probeer uw vraag zo duidelijk mogelijk te stellen;
heeft u een probleem en al geprobeerd om dit op te lossen, vermeld dit erbij aub;
heeft u een oplossing gekregen van een bezoeker dan horen wij dat graag in dit forum;
wilt u een reactie geven op een vraag of antwoord, gebruik dan niet dit formulier maar klik op de knop 'reageer op deze vraag';
uw vraag wordt direct op de website gezet; vermijd daarom persoonlijke gegevens in te vullen;
Belangrijk! Als er een antwoord wordt gegeven op uw vraag, dan is het voor de gever van het antwoord nuttig om te weten als u er wel (of niet) mee geholpen bent! Wij vragen u dus ook te reageren op een antwoord.
Belangrijk! Antwoorden worden ook per e-mail naar abonnees gestuurd. Laat uw emailadres achter op deze site, zodat u op de hoogte blijft. U krijgt dan ook andere vragen en antwoorden te zien.
Abonneren
Abonneer u voor het ontvangen van emails voor uw Scheppach DS200 bij:
nieuwe vragen en antwoorden
nieuwe handleidingen
U ontvangt een email met instructies om u voor één of beide opties in te schrijven.
Ontvang uw handleiding per email
Vul uw emailadres in en ontvang de handleiding van Scheppach DS200 in de taal/talen: Nederlands, Duits, Engels, Frans als bijlage per email.
De handleiding is 3.36 mb groot.
U ontvangt de handleiding per email binnen enkele minuten. Als u geen email heeft ontvangen, dan heeft u waarschijnlijk een verkeerd emailadres ingevuld of is uw mailbox te vol. Daarnaast kan het zijn dat uw internetprovider een maximum heeft aan de grootte per email. Omdat hier een handleiding wordt meegestuurd, kan het voorkomen dat de email groter is dan toegestaan bij uw provider.
Stel vragen via chat aan uw handleiding
Stel uw vraag over deze PDF
Uw handleiding is per email verstuurd. Controleer uw email
Als u niet binnen een kwartier uw email met handleiding ontvangen heeft, kan het zijn dat u een verkeerd emailadres heeft ingevuld of dat uw emailprovider een maximum grootte per email heeft ingesteld die kleiner is dan de grootte van de handleiding.
Er is een email naar u verstuurd om uw inschrijving definitief te maken.
Controleer uw email en volg de aanwijzingen op om uw inschrijving definitief te maken
U heeft geen emailadres opgegeven
Als u de handleiding per email wilt ontvangen, vul dan een geldig emailadres in.
Uw vraag is op deze pagina toegevoegd
Wilt u een email ontvangen bij een antwoord en/of nieuwe vragen? Vul dan hier uw emailadres in.