42
Keystone
Press the MENU button to display the On-Screen Menu.
Press the Point
7 8 button to move the red frame pointer to
the Setting Menu icon.
1
2
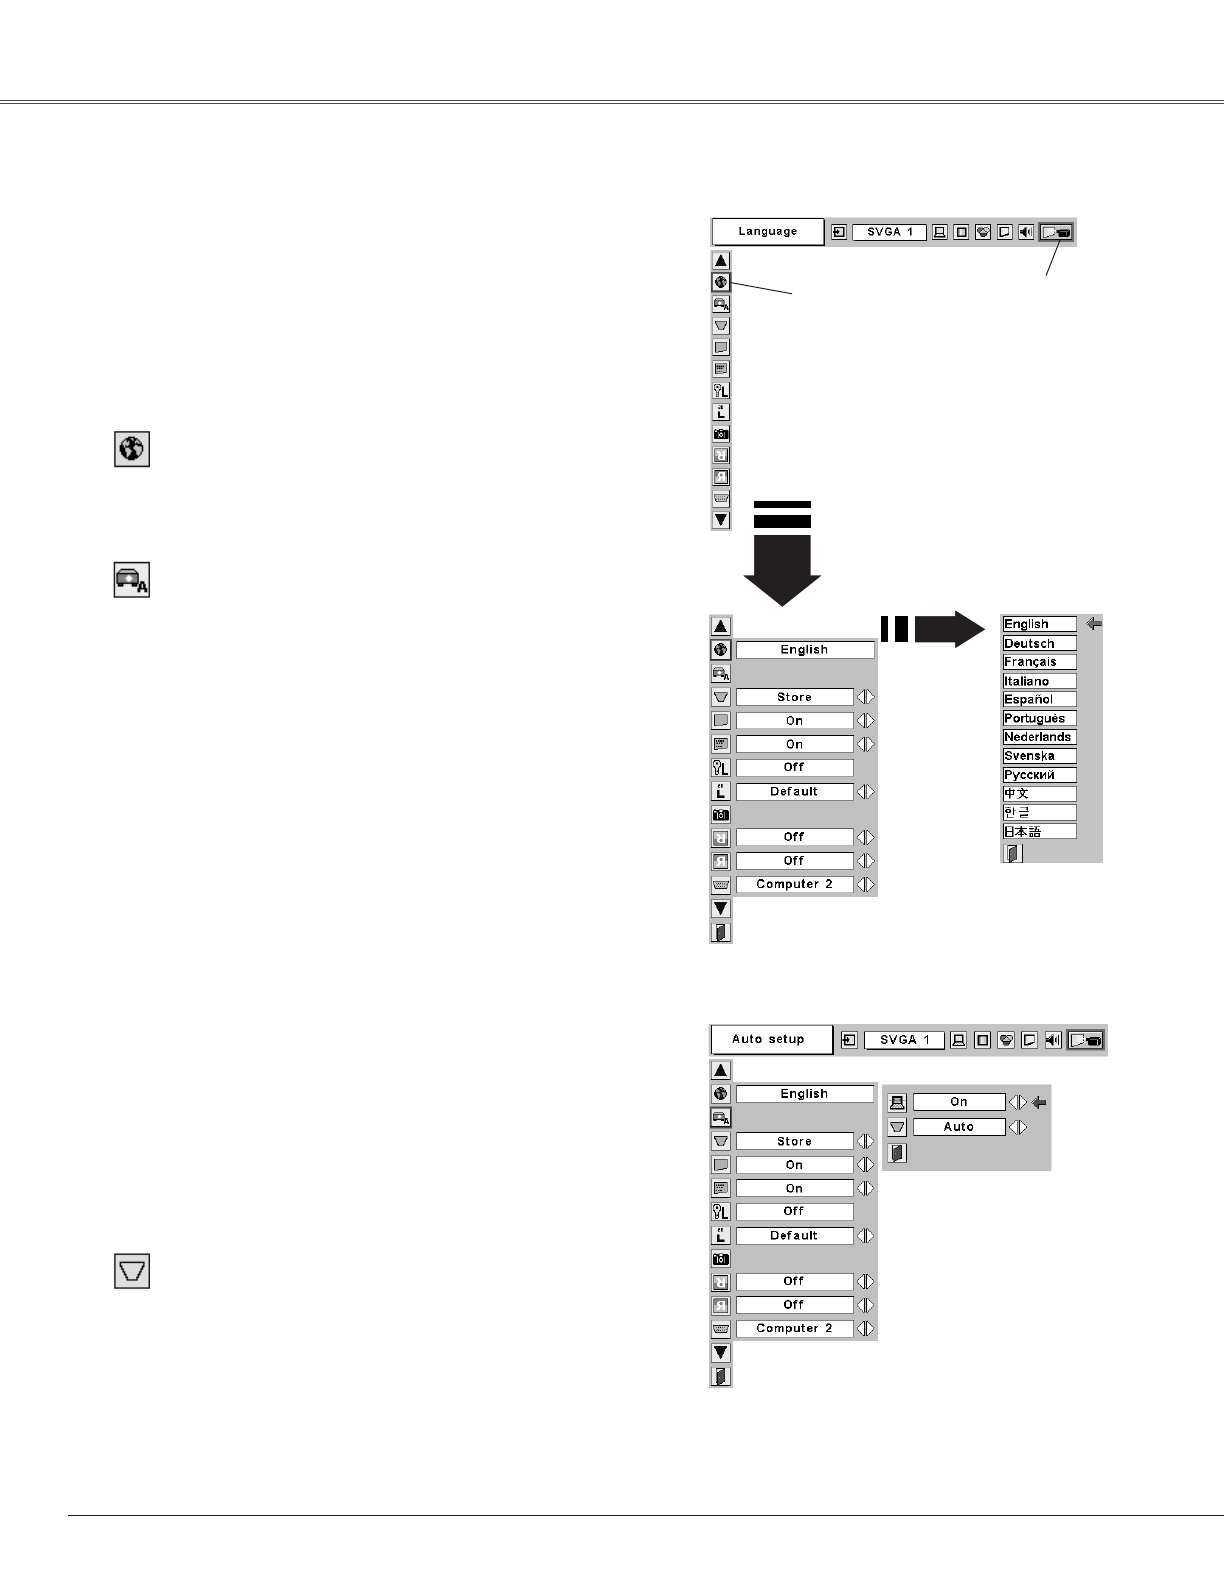
Language
The language used in the On-Screen Menu is available in English,
German, French, Italian, Spanish, Portuguese, Dutch, Swedish,
Russian, Chinese, Korean, or Japanese.
Set the red frame
pointer to the item
and press the
SELECT button.
Press the Point
dd
button to move the red frame pointer to
the item that you want to set and then press the
SELECT
button. The Setting dialog box appears.
When pressing the SELECT
button at Language, the
Language Menu appears.
Setting Menu (Language)
Setting Menu icon
This function corrects distortion of a projected image. Select
either Store or Reset with the Point
7 8 button, and then press
the Select button. The keystone dialog box appears. Adjust
keystone with the Point
eedd
7 8 button.
Store . . . . stores the keystone adjustment even if the AC
power cord is disconnected.
Reset . . . . .resets the keystone adjustment when the AC power
cord is disconnected.
Setting
Setting
This projector has Setting menu that allows you to set up the
other various functions described as follows;
Auto Setup
This function enables Auto Keystone correction and Auto PC
adjustment by pressing the AUTO SETUP button on the top
control or the AUTO SET button on the remote control. Settings
for those functions can be altered as follows:
Auto PC Adj.
On . . . . . . .enables Auto PC Adjustment when pressing the
AUTO SET button on the remote control or the
AUTO SETUP button on the top control.
Off . . . . . . .disables Auto PC Adjustment.
Auto Keystone
Auto . . . . . . always works and corrects keystone distortion
according to the projector's tilt.
Manual . . . .works only when pressing the AUTO SET button on
the remote control or the AUTO SETUP button on
the top control.
Off . . . . . . .disables Auto Keystone.
Auto Setup
✔Note:
• Auto PC Adj. and Auto Keystone cannot be set "Off" at the same time.
• Auto Keystone corrects vertical distortion only, not correct horizontal distortion.
• The Auto Keystone cannot work when Ceiling feature is On in the Setting menu.
(p44)
• Perfect correction of the image distortion cannot be ensured with the Auto Setup
function. If the distortion is not corrected properly by pressing the AUTO SETUP/
AUTO SET button, adjust manually by pressing the KEYSTONE button on the
remote control or selecting Keystone in the Setting menu. (See p25 or Keystone
feature below.)
Select Auto setup and this box
appears. Choose desired
setting for Auto keystone and
Auto PC adj. with the Point 7
8 button.