461665
58
Verklein
Vergroot
Pagina terug
1/66
Pagina verder
ENGLISH
Miscellaneous Information: Printing Photos
115115
ENGLISH
Miscellaneous Information: Connecting the CAM with other Devices
114114
After completing the data transfer, you must disconnect the cable in the following way.
1. Select the removable disk icon and click the right mouse button to select Safely Remove Hardware.
2. Select Stopand disconnect the USB cable when the pop-up screen disappears.
Disconnecting USB Connection
Notes
If you disconnect the USB cable from the PC or the CAM during the data transfer,
the data transfer will stop and the data may be damaged.
If you connect the USB cable to a PC using a USB HUB or with other device at the same time,
it might cause conflict and may not work properly. If this occurs, remove all other devices and try the connection again.
The CAM may operates abnormally in the recommended system environment depending on the assembling of PC.
For example, the video file is played abnormally.
Once you select the USB 2.0 MassStorage, USB 1.1 MassStorage, PC-Cam or PictBridge, you cannot select
the modes. Disconnect the USB cable or turn on the CAM again to select the modes.
If you disconnect the USB cable, the message Now refresh file listappears for 1 second.
All operation mentioned on the page 102 may not guaranteed in the system environment.
With the PictBridge Support, you can control the printer directly through
the CAM in order to print out stored pictures.
For direct printing of your stored pictures using the PictBridge function,
you must connect the CAM to a PictBridge printer using a USB cable.
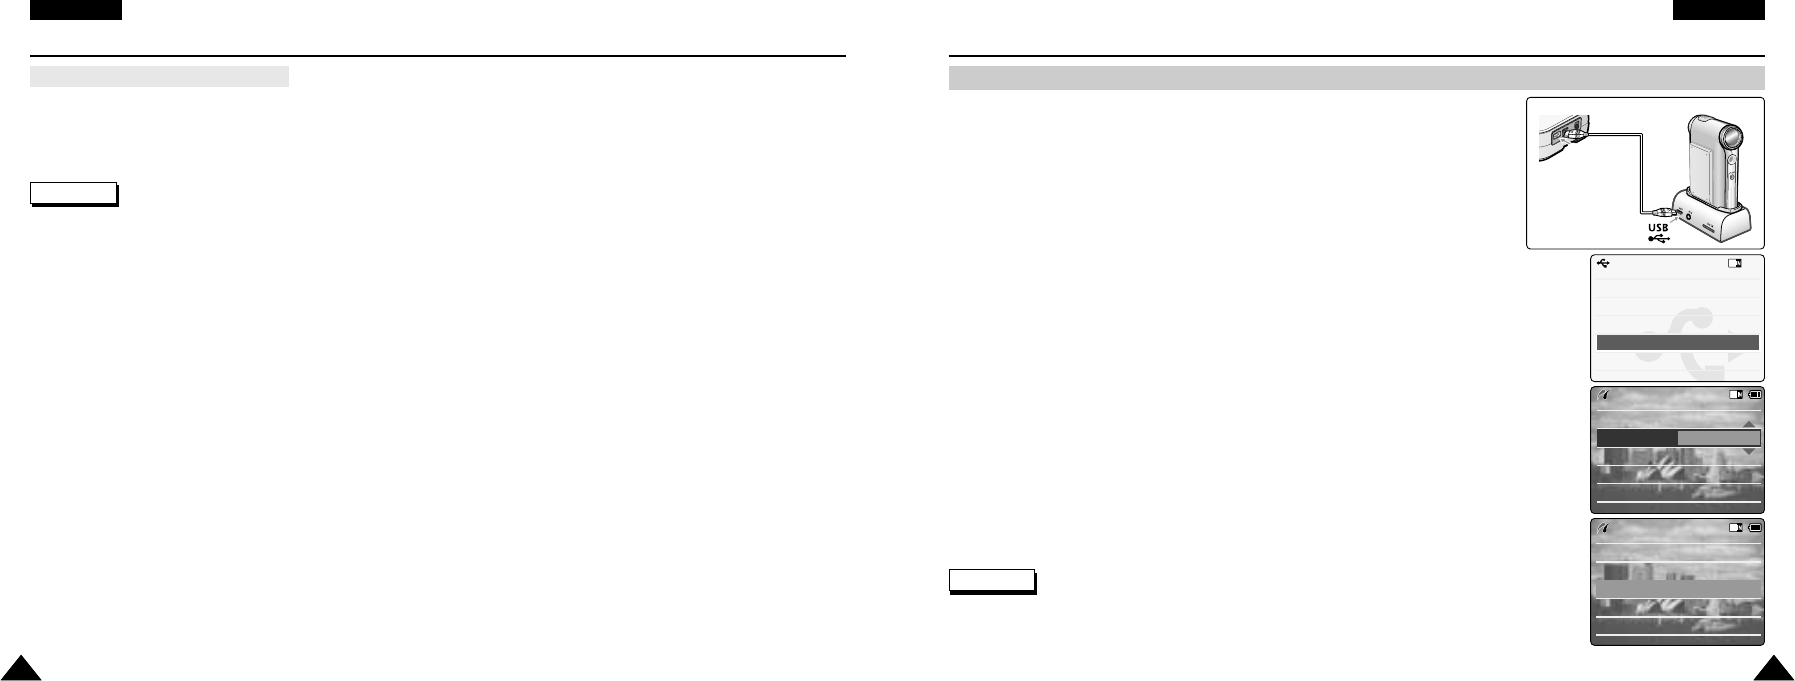
1. Connect the CAM to the PC with the USB cable.
2. Move [Mode Selector] down to turn on the CAM.
USB menu screen appears automatically.
3. Move the [ / ] switch to select <PictBridge> and press the [OK] button.
4. Move the [ / ] switch to select <Copies> and press the [OK] button.
5. Move the [ / ] switch to select desired number and press the [OK] button.
You can select the number of copy from 1 to 99.
6. Move the [ / ] switch to select <Print> and press the [OK] button.
Back
USB Mode
PC-Cam
PictBridge
USB 2.0 MassStorage
USB 1.1 MassStorage
Print
Next Photo
Previous Photo
Date Off
Copies
5
PictBridge 100-0056
Print
Next Photo
Previous Photo
Date Off
Copies
5
PictBridge 100-0056
Printing with PictBridge Function
Notes
If you select <Back> in the menu, the previous menu appears.
If you want to select the next or previous photo, select <Next> or <Previous> using [ / ] switch.
For further details about printing photos, refer to the User’s manual of the printer.
VP-M102 UK_5-Info 2004.12.20 11:39 AM Page 114
58

Hulp nodig? Stel uw vraag in het forum

Spelregels

Misbruik melden

Gebruikershandleiding.com neemt misbruik van zijn services uitermate serieus. U kunt hieronder aangeven waarom deze vraag ongepast is. Wij controleren de vraag en zonodig wordt deze verwijderd.

Product:

Bijvoorbeeld antisemitische inhoud, racistische inhoud, of materiaal dat gewelddadige fysieke handelingen tot gevolg kan hebben.

Bijvoorbeeld een creditcardnummer, een persoonlijk identificatienummer, of een geheim adres. E-mailadressen en volledige namen worden niet als privégegevens beschouwd.

Spelregels forum

Om tot zinvolle vragen te komen hanteren wij de volgende spelregels:

Belangrijk! Als er een antwoord wordt gegeven op uw vraag, dan is het voor de gever van het antwoord nuttig om te weten als u er wel (of niet) mee geholpen bent! Wij vragen u dus ook te reageren op een antwoord.

Belangrijk! Antwoorden worden ook per e-mail naar abonnees gestuurd. Laat uw emailadres achter op deze site, zodat u op de hoogte blijft. U krijgt dan ook andere vragen en antwoorden te zien.

Abonneren

Abonneer u voor het ontvangen van emails voor uw Samsung VP-M102 bij:


U ontvangt een email met instructies om u voor één of beide opties in te schrijven.


Ontvang uw handleiding per email

Vul uw emailadres in en ontvang de handleiding van Samsung VP-M102 in de taal/talen: Engels als bijlage per email.

De handleiding is 2,15 mb groot.


U ontvangt de handleiding per email binnen enkele minuten. Als u geen email heeft ontvangen, dan heeft u waarschijnlijk een verkeerd emailadres ingevuld of is uw mailbox te vol. Daarnaast kan het zijn dat uw internetprovider een maximum heeft aan de grootte per email. Omdat hier een handleiding wordt meegestuurd, kan het voorkomen dat de email groter is dan toegestaan bij uw provider.

Stel vragen via chat aan uw handleiding

Stel uw vraag over deze PDF

loading

Uw handleiding is per email verstuurd. Controleer uw email

Als u niet binnen een kwartier uw email met handleiding ontvangen heeft, kan het zijn dat u een verkeerd emailadres heeft ingevuld of dat uw emailprovider een maximum grootte per email heeft ingesteld die kleiner is dan de grootte van de handleiding.

Er is een email naar u verstuurd om uw inschrijving definitief te maken.

Controleer uw email en volg de aanwijzingen op om uw inschrijving definitief te maken

U heeft geen emailadres opgegeven

Als u de handleiding per email wilt ontvangen, vul dan een geldig emailadres in.

Uw vraag is op deze pagina toegevoegd

Wilt u een email ontvangen bij een antwoord en/of nieuwe vragen? Vul dan hier uw emailadres in.


Info