633535
15
Verklein
Vergroot
Pagina terug
1/117
Pagina verder
E-MANUAL
Thank you for purchasing this Samsung product.
To receive more complete service, please register your
product at
www.samsung.com/register
Model Serial No.
Contents
Quick Guides
Connecting to Samsung Smart Remote
Guide for Samsung Smart Remote Buttons
Using Smart Hub
2 Using Smart Hub
Using Voice Interaction
3 Setting up Voice Interaction
3 Running Voice Interaction
Connections
Connecting an Antenna (Aerial)
Connecting to the Internet
5 Connecting Internet network
Troubleshooting Internet Connectivity Issues
7 Troubleshooting wired Internet connectivity issues
8 Troubleshooting wireless Internet connectivity issues
Connecting Video Devices
9 Connecting with an HDMI cable
9 Connecting with a component cable (Only the models with
COMPONENT IN / AV IN)
10 Connecting with a composite cable (only the models with
COMPONENT IN / AV IN port)
Audio Input and Output Connections
10 Connecting with an HDMI (ARC) cable
11 Connecting with a digital audio (optical) cable
11 Connecting through wireless network
11 Connecting Bluetooth Devices
Connecting a Computer
12 Connecting through the HDMI port ― Screen sharing
12 Connecting through the Smart View app ― Content sharing
Connecting a Mobile Device
13 Using Smart View (Screen Mirroring) or contents sharing
13 Connecting mobile devices without a wireless router (Wi-Fi
Direct)
13 Connecting a mobile device via Smart View App
Switching between external devices connected to the TV
14 Changing the input signal
14 Editing external devices
15 Using additional functions
Connection Notes!
15 Connection notes for HDMI
16 Connection notes for audio devices
16 Connection notes for computers
16 Connection notes for mobile devices
Remote Control and Peripherals
About the Samsung Smart Remote (Voice Interaction version)
About the Samsung Smart Remote
Connecting to Samsung Smart Remote
Controlling External Devices with the Samsung Smart Remote
- Using the Universal Remote
Controlling the TV with a Keyboard or Gamepad
22 Connecting a USB keyboard
22 Connecting a Bluetooth keyboard and gamepad
22 Using the keyboard
Entering Text using the On-Screen QWERTY Keypad
23 Using additional functions
Smart Features
Smart Hub
25 Displaying Home Screen
26 Launching Smart Hub automatically
26 Launching the last used app automatically
26 Testing Smart Hub connections
26 Resetting Smart Hub
Using a Samsung account
27 Creating a Samsung account
27 Signing in to a Samsung account
28 Managing payment information saved on the TV
28 Deleting a Samsung account from the TV
Using the GAMES Service
29 Installing and running a game
29 Managing purchased or installed games
30 Rating games
Using the APPS Service
31 Installing and running an app
32 Managing purchased or installed apps
33 Using other app features and functions
Using the e-Manual
34 Launching the e-Manual
34 Using the buttons in the e-Manual
Using the Web Browser
Playing pictures/video/music
35 Playing media content
36 Functions on the media content list screen
Using Voice Interaction
37 Setting up Voice Interaction
37 Running Voice Interaction
TV Viewing
Viewing Digital Broadcast Information at a Glance
38 Using the guide
39 Changing the broadcast signal
39 Checking digital channel signal info and strength
Recording Programmes
39 Recording programmes
40 Managing the schedule recording list
40 Viewing recorded programmes
Setting Up a Schedule Viewing
41 Setting up a schedule viewing for a channel
Using Timeshift
Using the Channel List
Editing channels
43 Removing registered channels
44 Editing registered channels
Creating a Personal Favourites List
44 Registering channels as favourites
45 Viewing and selecting channels on favourites lists only
Editing a Favourites List
45 Removing channels from a favourites list
45 Rearranging a favourites list
45 Renaming a favourites list
Making Sports programmes More Realistic with Sports Mode
46 Extracting highlights automatically
47 Viewing a game recorded in sports mode
TV-Viewing Support Functions
47 Scanning for available channels
47 Configuring advanced broadcasting settings
47 Reading digital text
48 Selecting the broadcast audio language
48 Setting the country (area)
48 Tuning broadcast signals manually
49 Fine-tuning analog broadcasts
49 Transferring channel list
49 Deleting CAM operator profile
50 Setting satellite system
50 Changing teletext language
50 Showing common interface menu
Picture and Sound
Adjusting the Picture Quality
51 Choosing a picture mode
51 Configuring advanced picture settings
Picture Support Functions
53 Viewing a picture-in-picture (PIP)
54 Changing the picture size
Adjusting the Sound Quality
55 Choosing a sound mode
55 Configuring advanced sound settings
Using the Sound Support Functions
56 Selecting speakers
57 Listening to the TV with a Samsung audio device
57 Listening to the TV through Bluetooth devices
58 Listening to the TV through a Multiroom speaker
System and Support
Setting the Time and Using the Timer
59 Setting the current time
60 Using the timers
Using the Screen Burn Protection and Energy Saving Functions
61 Preventing screen burn
61 Reducing the energy consumption of the TV
Using Anynet+ (HDMI-CEC)
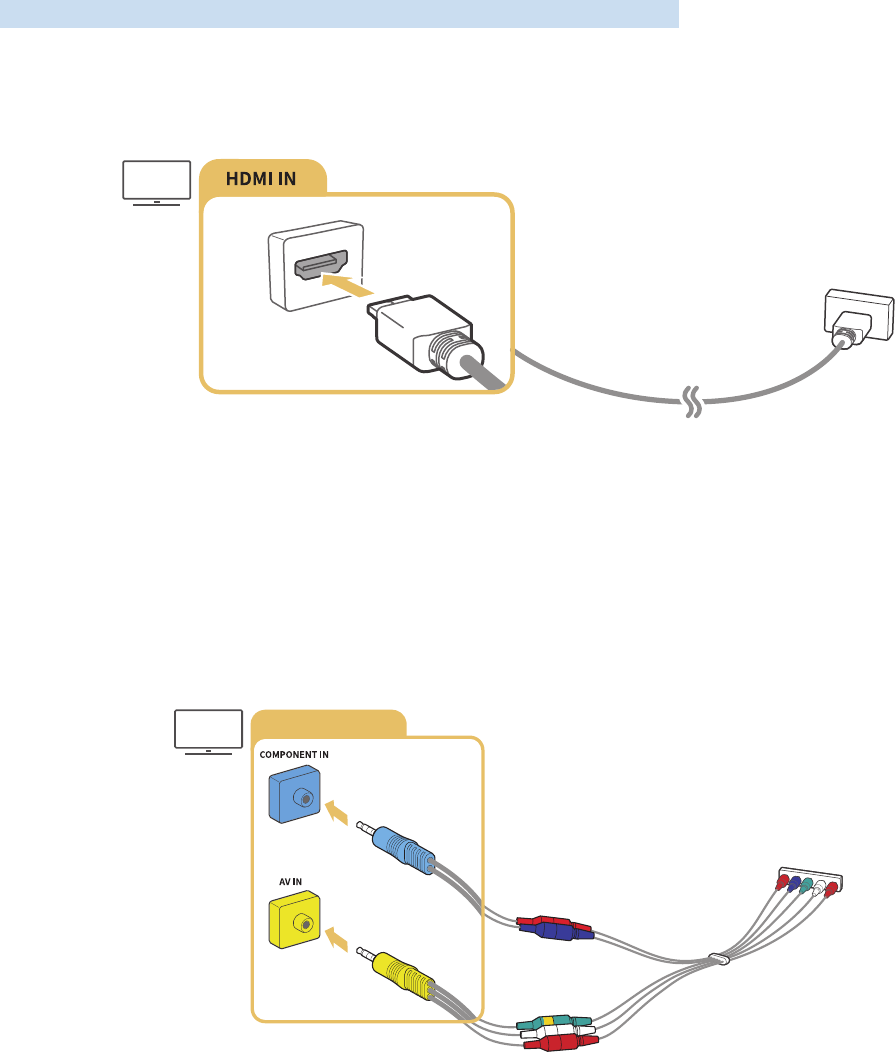
62 Connecting an external device through Anynet+ and using
their menus
Updating the TV’s Software
63 Updating the TV’s software to the latest version
64 Updating the TV automatically
Protecting the TV from Hacking and Malicious Code
64 Checking the TV and connected storage for malicious code
64 Scanning viruses in real time
64 Checking a scanned list
Using Other Functions
65 Running the accessibility functions
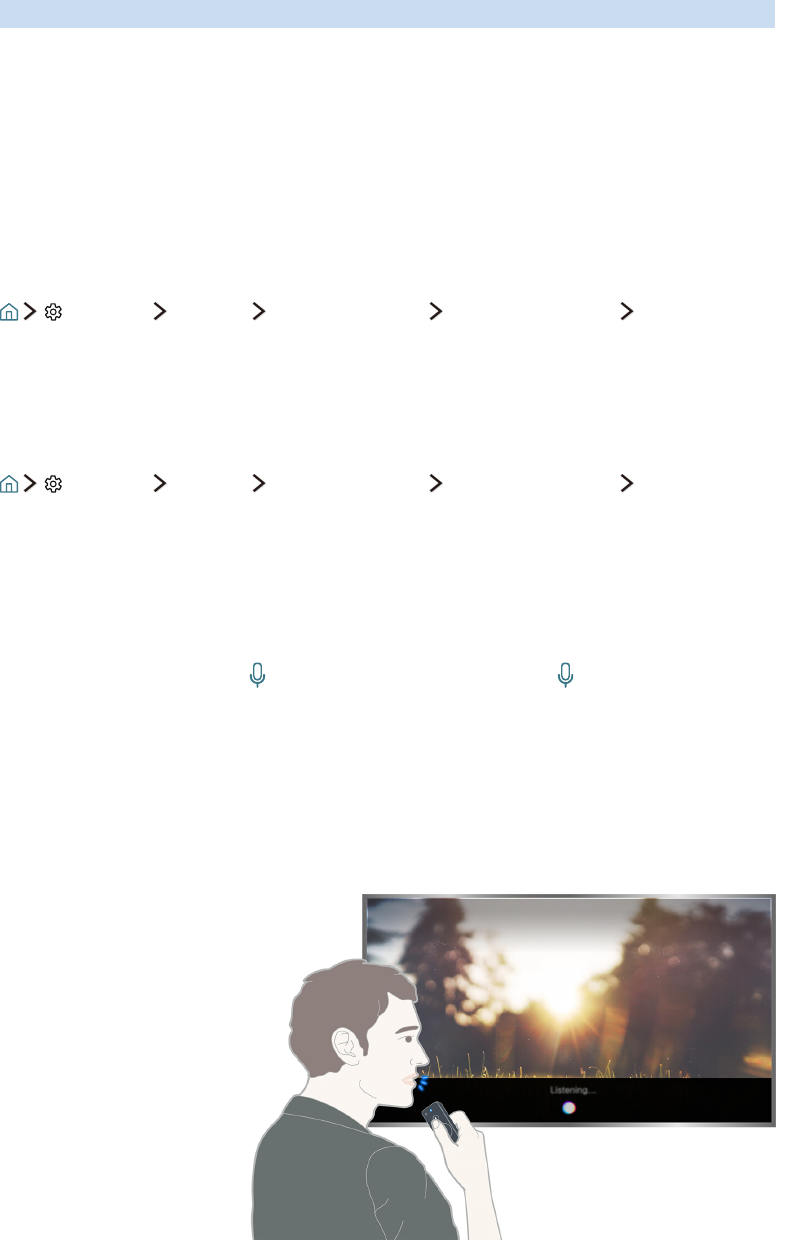
65 Enabling voice guides for the visually impaired
65 Watching TV broadcasts with subtitles
66 Audio Description
67 Adjusting the menu transparency
67 White text on black background (high contrast)
67 Enlarging font (for the visually impaired)
67 Learning about the remote control (for the visually impaired)
68 Listening to the TV through Bluetooth devices (for the hearing
impaired)
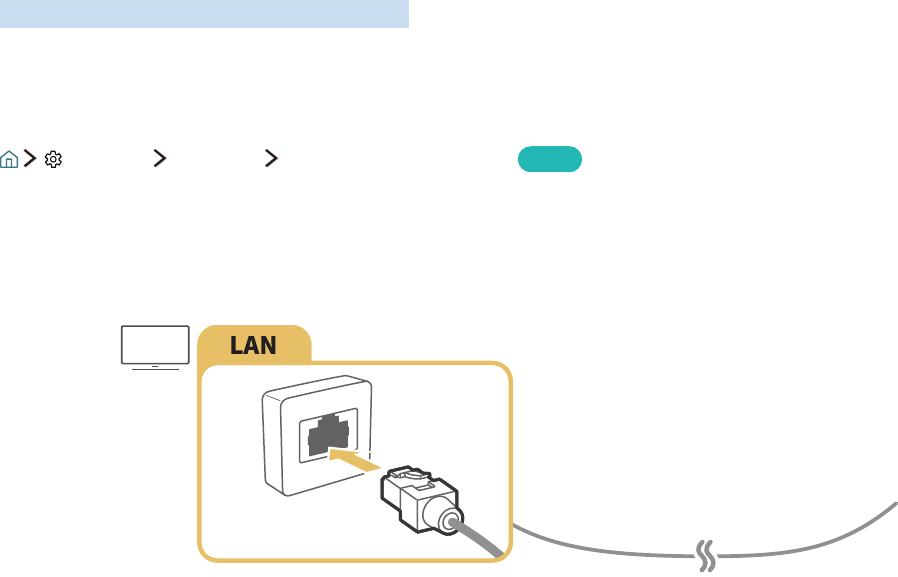
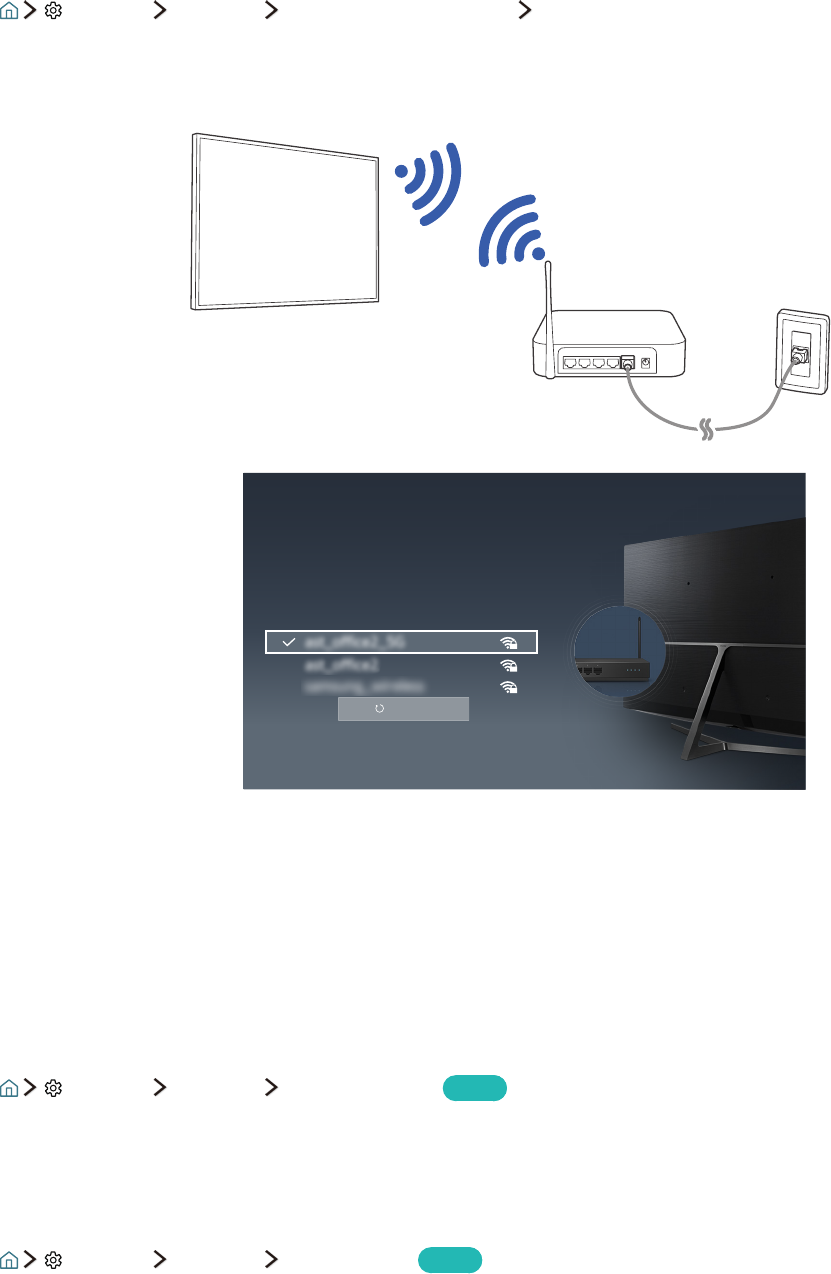
68 Configuring advanced system settings
70 Restoring the TV to the factory settings
70 Enabling game mode
Running Data Service Automatically
HbbTV
Using a TV Viewing Card (“CI or CI+ Card”)
72 Connecting the “CI or CI+ Card” via COMMON INTERFACE slot
73 Using the “CI or CI+ Card”
Teletext Feature
Troubleshooting
Getting Support
76 Getting support through Remote Management
77 Finding the contact information for service
77 Requesting service
Diagnosing the TV operation
There Is a Problem with the Picture
77 Testing the picture
I Can't Hear the Sound Clearly
80 Testing the sound
There Is a Problem with the Broadcast
My Computer Won't Connect
I Can't Connect to the Internet
Data Service
The Schedule Recording/Timeshift Function Isn't Working
Anynet+ (HDMI-CEC) Isn't Working
I Have Trouble Launching/Using Apps
My File Won't Play
I Want to Reset the TV
Other Issues
Precautions and Notes
Before Using the Recording and Timeshift Functions
89 Before using the recording and schedule recording functions
90 Before using the timeshift function
Supported Resolutions for each of UHD Input Signals
91 If HDMI UHD Color is set to Off
91 If HDMI UHD Color is set to On
Read Before Using Voice Interaction
92 Precautions for voice interaction
92 Requirements for using voice interaction
Read Before Using Apps
Read Before Using the Web Browser
Read Before Playing Photo, Video, or Music Files
95 Limitations on use of photo, video, and music files
96 Supported external subtitles
96 Supported internal subtitles
97 Supported image formats and resolutions
97 Supported music formats and codecs
98 Supported video codecs
Read After Installing the TV
101 Picture sizes and input signals
102 Installing an anti-theft lock
102 Read before setting up a wireless Internet connection
Read Before Connecting a Computer (Supported Resolutions)
103 IBM
103 MAC
104 VESA DMT
Supported Resolutions for Video Signals
105 CEA-861
Read Before Using Bluetooth Devices
106 Restrictions on using Bluetooth
Buttons and Functions
107 Buttons and functions available while playing multimedia
content
109 Buttons and functions available while using sports mode
110 Buttons and functions available while recording a programme
or Timeshift
Licence
1
Connecting to Samsung Smart Remote
Can connect Samsung Smart Remote to your TV for control.
When you turn on the TV for the first time, the Samsung Smart Remote pairs to the TV automatically. If
the Samsung Smart Remote does not pair to the TV automatically, point it at the remote control sensor of
the TV, then press the and buttons on the Samsung Smart Remote simultaneously for 3 seconds or
more.
"
This function may not be supported depending on the model or geographical region.
Guide for Samsung Smart Remote Buttons
You can see the basic usage of the buttons on Samsung Smart Remote.
Move it up or down to
adjust the volume.
Use to move to up/down/
left/right.
Press to mute the sound. Press to select an item.
Move it up or down to
change the channel.
Press to pop up the play
control screen.
Press to perform Guide.
Select the desired function
after pressing the
button.
"
This function may not be supported depending on the model or geographical region.
Quick Guides
You can learn quickly how to run and use the frequently used functions
2
Using Smart Hub
Connect to Smart Hub for apps, games, movies, and more.
Using Smart Hub
Enjoy the multiple functions provided by Smart Hub on a single screen.
Source
Source
When you press the button on the Samsung Smart Remote, you can use the following functions and
features.
Settings
When the focus is moved, a quick settings appears on the top of the menu. You can quickly set the
frequently used functions.
Source
You can select an external device connected to the TV.
"
For more information, refer to "Switching between external devices connected to the TV."
Search
You can search data for channels, programmes, movie titles, and apps from Smart Hub.
"
For more information, refer to "Smart Hub."
"
The image may differ by the specific model and area.
3
Using Voice Interaction
Say command into the microphone on Samsung Smart Remote for the desired operation.
"
This function may not be supported depending on the model or geographical region. This function is available
for the remote control with a microphone.
Setting up Voice Interaction
Turning the voice on/off
Settings System Expert Settings Voice Interaction Voice Feedback
You can determine whether or not to output response messages using voice against your voice commands.
Selecting the desired voice's gender
Settings System Expert Settings Voice Interaction Voice Gender
You can select the desired voice's gender for response voice messages.
Running Voice Interaction
Say a command while the button is pressed and release the button. The voice command is then
identified.
"
If the command is not identified, try again with correct pronunciation.
"
This function may not be supported depending on the model or geographical region. This function is available
for the remote control with a microphone.
4
Connecting an Antenna (Aerial)
Can connect the antenna cable to your TV.
"
An antenna connection is not necessary if you connect a cable box or satellite receiver.
It is best to connect the both connectors using a Multi-Switch or DiSEqC. Switch, etc and to set Aerial
Connection Type to Dual Oscillator.
"
A connection method may differ with the models.
"
DVB-T2 system may not be available in specific geographical areas.
Connections
You can watch live broadcasts by connecting the antenna cable to your TV and can get access to the Internet by using the LAN cable or wireless router. With various connectors, you
can also connect external devices.
5
Connecting to the Internet
Can get access to the Internet through your TV.
Connecting Internet network
Settings Network Open Network Settings
Try Now
Connect to an available network.
Establishing a wired Internet connection
"
Use Cat7 (*STP Type) cable for the connection.
* Shielded Twist Pair
"
The TV will not be able to connect to the Internet if the network speed is below 10Mbps.
"
If the LAN cable is connected, accessing the Internet is automatically enabled.
6
Establishing a wireless Internet connection
Settings Network Open Network Settings Wireless
Make sure that you have the wireless router's SSID (name) and password settings before attempting to
connect.
Network Settings
Wireless Connection
Select your wireless network.
Refresh
"
The image may differ by the specific model and area.
"
If the network you want doesn't appear in the list, select Add Network, and then enter the network's SSID
(name) manually.
"
Select WPS in the network setup screen and then press the WPS or PBC button on the wireless router. The TV is
automatically connected to the Internet.
Checking the internet connection status
Settings Network Network Status
Try Now
View the current network and Internet status.
Changing the name of the TV on a network
Settings Network Device Name
Try Now
You can change the name of the TV on the network. Select User Input at the bottom of the list and change
the name.
7
Troubleshooting Internet Connectivity Issues
If the Internet is not accessed, find solutions.
Troubleshooting wired Internet connectivity issues
Try Now
After referencing the following content, troubleshoot the wired Internet connection issue. If the problem
persists, contact your Internet Service Provider.
No network cable found
Make sure that the network cable is plugged in. If it is connected, make sure that the router is turned on. If
it is on, try turning it off and on again.
IP auto setting failed
1.
Do the following or configure the IP Settings manually.
2.
Make sure that the DHCP server is enabled on the router, and reset the router.
Unable to connect to the network
1.
Check all IP Settings.
2.
After checking the DHCP server status (must be active) on the router, remove the LAN cable and
connect it again.
Connected to a local network, but not to the Internet
1.
Make sure that the Internet LAN cable is connected to the router's external LAN port.
2.
Check the DNS values in IP Settings.
Network setup is complete, but unable to connect to the Internet
If the problem persists, contact your Internet Service Provider.
8
Troubleshooting wireless Internet connectivity issues
After referencing the following content, troubleshoot the wireless Internet connection issue. If the
problem persists, contact your Internet Service Provider.
Wireless network connection failed
If a selected wireless router is not found, go to Open Network Settings and select the correct router.
Unable to connect to a wireless router
1.
Check if the router is turned on. If it is, turn it off and on again.
2.
Enter the correct password if required.
IP auto setting failed
1.
Do the following or configure the IP Settings manually.
2.
Make sure that the DHCP server is enabled on the router. Then, unplug the router and plug it back in.
3.
Enter the correct password if required.
Unable to connect to the network
1.
Check all IP Settings.
2.
Enter the correct password if required.
Connected to a local network, but not to the Internet
1.
Make sure that the Internet LAN cable is connected to the router's external LAN port.
2.
Check the DNS values in IP Settings.
Network setup is complete, but unable to connect to the Internet
If the problem persists, contact your Internet Service Provider.
9
Connecting Video Devices
Make proper video connection between your TV and the other external device.
Connecting with an HDMI cable
Connecting with a component cable (Only the models with COMPONENT IN /
AV IN)
Connect the component cable to the component input connections of the TV and the component output
connectors of the device using component and AV adapters as shown in the image below. Make sure to
connect the same colour connectors together. (blue to blue, yellow to yellow)
"
To use component equipment, connect both a component cable(blue) and an AV cable (yellow).
10
Connecting with a composite cable (only the models with COMPONENT IN /
AV IN port)
Connect the video and audio cables to the provided adapters after referencing the following figure and
then connect the adapters between the COMPONENT/AV IN port on your TV and the OUT port on an
external device. When connecting the cables, be sure to match the colours between the cables and ports.
"
If you want to use AV (composite) equipment, remove the component adapter.
Audio Input and Output Connections
Make proper audio connection between your TV and an external device.
Connecting with an HDMI (ARC) cable
15

Hulp nodig? Stel uw vraag in het forum

Spelregels

Misbruik melden

Gebruikershandleiding.com neemt misbruik van zijn services uitermate serieus. U kunt hieronder aangeven waarom deze vraag ongepast is. Wij controleren de vraag en zonodig wordt deze verwijderd.

Product:

Bijvoorbeeld antisemitische inhoud, racistische inhoud, of materiaal dat gewelddadige fysieke handelingen tot gevolg kan hebben.

Bijvoorbeeld een creditcardnummer, een persoonlijk identificatienummer, of een geheim adres. E-mailadressen en volledige namen worden niet als privégegevens beschouwd.

Spelregels forum

Om tot zinvolle vragen te komen hanteren wij de volgende spelregels:

Belangrijk! Als er een antwoord wordt gegeven op uw vraag, dan is het voor de gever van het antwoord nuttig om te weten als u er wel (of niet) mee geholpen bent! Wij vragen u dus ook te reageren op een antwoord.

Belangrijk! Antwoorden worden ook per e-mail naar abonnees gestuurd. Laat uw emailadres achter op deze site, zodat u op de hoogte blijft. U krijgt dan ook andere vragen en antwoorden te zien.

Abonneren

Abonneer u voor het ontvangen van emails voor uw Samsung UE55KU6649 bij:


U ontvangt een email met instructies om u voor één of beide opties in te schrijven.


Ontvang uw handleiding per email

Vul uw emailadres in en ontvang de handleiding van Samsung UE55KU6649 in de taal/talen: Engels als bijlage per email.

De handleiding is 26,13 mb groot.


U ontvangt de handleiding per email binnen enkele minuten. Als u geen email heeft ontvangen, dan heeft u waarschijnlijk een verkeerd emailadres ingevuld of is uw mailbox te vol. Daarnaast kan het zijn dat uw internetprovider een maximum heeft aan de grootte per email. Omdat hier een handleiding wordt meegestuurd, kan het voorkomen dat de email groter is dan toegestaan bij uw provider.

Stel vragen via chat aan uw handleiding

Stel uw vraag over deze PDF

Andere handleiding(en) van Samsung UE55KU6649

Samsung UE55KU6649 Gebruiksaanwijzing - Nederlands - 117 pagina's

Samsung UE55KU6649 Gebruiksaanwijzing - Deutsch - 117 pagina's

Samsung UE55KU6649 Gebruiksaanwijzing - Français - 117 pagina's


Uw handleiding is per email verstuurd. Controleer uw email

Als u niet binnen een kwartier uw email met handleiding ontvangen heeft, kan het zijn dat u een verkeerd emailadres heeft ingevuld of dat uw emailprovider een maximum grootte per email heeft ingesteld die kleiner is dan de grootte van de handleiding.

Er is een email naar u verstuurd om uw inschrijving definitief te maken.

Controleer uw email en volg de aanwijzingen op om uw inschrijving definitief te maken

U heeft geen emailadres opgegeven

Als u de handleiding per email wilt ontvangen, vul dan een geldig emailadres in.

Uw vraag is op deze pagina toegevoegd

Wilt u een email ontvangen bij een antwoord en/of nieuwe vragen? Vul dan hier uw emailadres in.


Info