


-
Het losse toetsenbord werkt niet meer, ofschoon de toestellen zijn opgeladen. Gesteld op 28-2-2024 om 13:53
Reageer op deze vraag Misbruik melden -
Hoe gebruik ik op de juiste manier het afdrukken voor foto's op de camera Gesteld op 27-2-2023 om 14:53
Reageer op deze vraag Misbruik melden -
Mijn sm-t813 start niet door, komt in een loop. Batterij is vol. Lijkt wel of hij niet voldoende power heeft om door te starten.
Reageer op deze vraag Misbruik melden
Het begon met een enkele keer als de voeding onder de 60% kwam. Opladen en hij werkte weer. Gesteld op 17-9-2022 om 11:27 -
Tablet Samsung SM-T813 slaat na het opstarten steeds uit,heb zelfs de tijd niet om op het het scherm te werken. Gesteld op 29-8-2021 om 18:56
Reageer op deze vraag Misbruik melden-
Met mijn vorige tablet Samsung Galaxy Tab2 10.1 juist hetzelfde voorhad na 5jaar oud ! Was niets anders aan te doen dan een nieuwe aan te schaffen! Nu al 4 jaar mijn Samsung SM T813 ! Geantwoord op 30-8-2021 om 00:04
Waardeer dit antwoord (4) Misbruik melden
-
-
De startpagina van Google Chrome valt ver over hrt scherm heen (dus te breed). Hoe pas ik dit aan? Gesteld op 1-8-2021 om 15:02
Reageer op deze vraag Misbruik melden -
geluid niet te regelen, soms herstart daarna wel. regelmatig
Reageer op deze vraag Misbruik melden
Gesteld op 26-7-2021 om 14:53
-
Mijn Tab S2 9.7 wil niet meer opstarten alles geprobeerd maar niets helpt Gesteld op 22-6-2021 om 16:33
Reageer op deze vraag Misbruik melden -
Hoe kan ik de tablet in de fabrieksinstelling krijgen. Gesteld op 2-5-2021 om 13:24
Reageer op deze vraag Misbruik melden -
Ik heb de batterij vervangen en daarna reageert de startswitch minder goed en heb aan de smalle onderzijde een aantal felle kleurige lijnen op het scherm. Gesteld op 23-1-2021 om 09:29
Reageer op deze vraag Misbruik melden -
Mijn scherm staat altijd in 'landscape'. Hoe ddraai ik het naar 'portrai'?
Reageer op deze vraag Misbruik melden
Gesteld op 14-10-2020 om 11:49-
Zelfde vraag is gesteld en ook antwoord gegeven op 4-8-2018 Geantwoord op 1-8-2021 om 15:13
Waardeer dit antwoord (1) Misbruik melden
-
-
Onze tablet [Galaxy SM-T813 staat vast op een scherm; laad heel langzaam op.
Reageer op deze vraag Misbruik melden
op het blauwe scherm staat Factory Mode [High Speed]
System Status : official
Fap Lock: On
Warranty Void: 0x0
Downloading....
Do not turn off target Gesteld op 8-9-2020 om 14:08 -
mijn tablet s2 terugzetten naar fabrieksinstelling Gesteld op 19-6-2020 om 06:48
Reageer op deze vraag Misbruik melden
-
Heb een NFC-lezer nodig. Waar kan ik deze vinden op de Samsung Galaxy Tab S2 Gesteld op 18-3-2020 om 10:40
Reageer op deze vraag Misbruik melden -
Goedemorgen
Reageer op deze vraag Misbruik melden
Ik heb mijn toetsenblok veranderd hij is nu geel met bruine cijfers ik wil weer naar de standaard (wit)gaan. Waar moet ik het zoeken? bij voorbaat dank Gesteld op 18-7-2019 om 09:27-
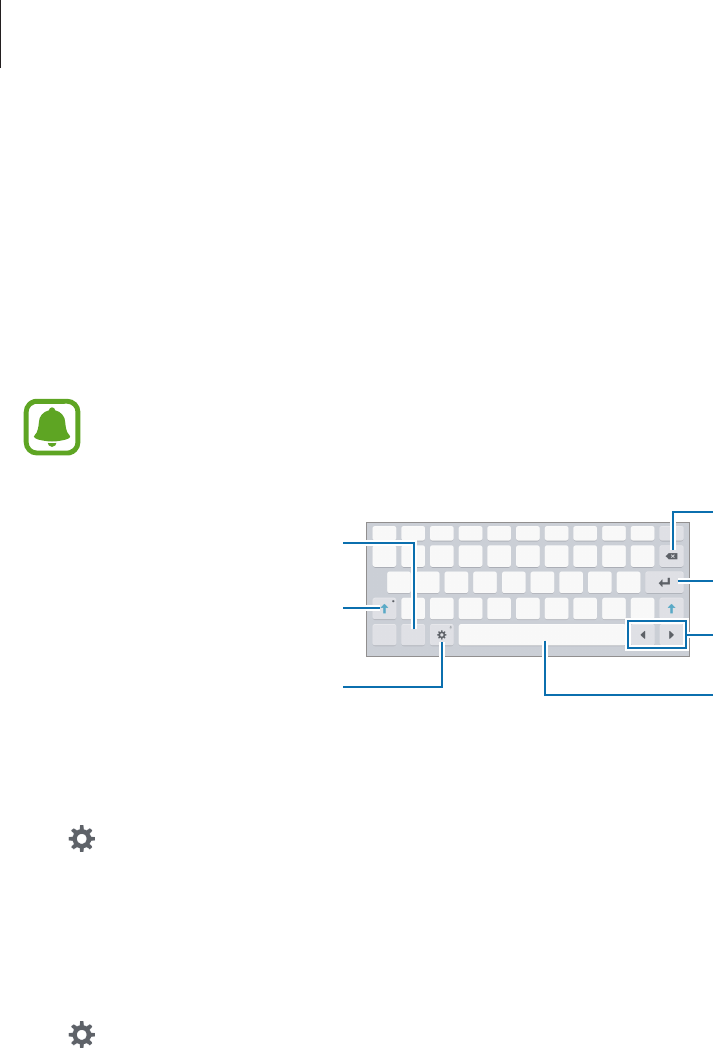
Als je gaat schrijven en je toetsenbord verschijnt zie je boven je bord instellingen (het rad) staan.
Waardeer dit antwoord (1) Misbruik melden
Hier kan je alles aanpassen. Geantwoord op 18-7-2019 om 11:04
-
-
dank U het is inmiddelsopgelost Geantwoord op 18-7-2019 om 11:25
Waardeer dit antwoord (2) Misbruik melden -
heb de tablet volledig opgeladen maar wil niet meer starten wat kan de oorzaak zijn is nog maar 1 jaar oud Gesteld op 28-6-2019 om 17:46
Reageer op deze vraag Misbruik melden-
Er kunnen verschillende redenen voor zijn.
Waardeer dit antwoord (3) Misbruik melden
Een belangrijke is dat het tablet wellicht een keer opgeschoond moeten worden, bv van cash enz.
Daarvoor je bv de gratis AVG cleaner downloaden uit de app store.
Om hem opnieuw geforceerd op te starten ... kijk even bij de antwoorden van dec. Daar staat het antwoord al gegeven.. succes ermee! Geantwoord op 28-6-2019 om 21:44
-
-
Lang op de aan-uitknop drukken, het apparaat schakeld terug in en geef je wachtwoord.
Waardeer dit antwoord Misbruik melden
Alles is dan terug OK, bij mij toch!!!
Geantwoord op 29-6-2019 om 19:29 -
Ik krijg steeds verificatie fout verkeerd wachtwoord op de tablet S2 terwijl de rest het wel doet en het wacht woord ook juist is Gesteld op 22-5-2019 om 14:25
Reageer op deze vraag Misbruik melden-
Antwoord is al gegeven op 2 sept 2018 Geantwoord op 22-5-2019 om 14:39
Waardeer dit antwoord (2) Misbruik melden
-
-
Ik hoef geen nieuw wachtwoord want op de pc en andere Samsung Galaxy tab en telefoon doet dit het wel Geantwoord op 22-5-2019 om 14:56
Waardeer dit antwoord (1) Misbruik melden -
Ja dat begreep ik al, maar hij pak Geantwoord op 22-5-2019 om 17:10
Waardeer dit antwoord Misbruik melden -
Sorry er ging iets verkeerd...
Waardeer dit antwoord (3) Misbruik melden
De foutmelding is hetzelfde ook al klopt je ww.
Soms helpt het om het toestel helemaal uit te zetten en opnieuw op te starten.
Of je zou expres een paar keer een verkeerd ww kunnen gebruiken waardoor hij wordt geblokkeerd. Dan opnieuw inloggen met je puk code (die bij je toestel geleverd is). Geantwoord op 22-5-2019 om 17:28 -
Mijn Samsung T813 Galaxy Tab S2 9.7 VE WiFi 3 is tijdens het gebruik plotseling uitgevallen en krijgt het nu ook niet meer opgestart. Graag advies om het weer goed te krijgen. Gesteld op 18-5-2019 om 16:31
Reageer op deze vraag Misbruik melden-
Kijk even naar de vraag en het antwoord van 27-12 2018 Geantwoord op 18-5-2019 om 16:50
Waardeer dit antwoord (3) Misbruik melden
-
-
ik krijg elke keer een verificatiefout, als ik wifi wil opstarten. Ik heb een reset gedaan naar fabrieksinstellingen, en sindsdien kan ik dus geen wifi ontvangen, krijg elke keer, wachtwoord onjuist Gesteld op 17-3-2019 om 11:12
Reageer op deze vraag Misbruik melden-
Kijk even naar het antwoord op de vraag van 2 sept 2018. Geantwoord op 17-3-2019 om 15:30
Waardeer dit antwoord (9) Misbruik melden
-
-
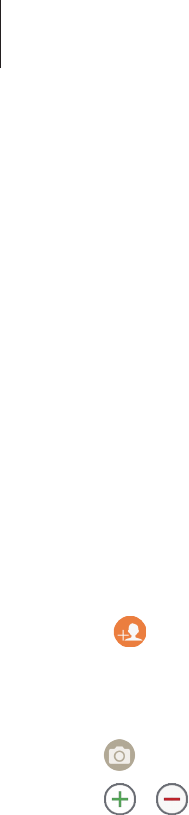
Ik wil een nieuw album maken in mijn galerie van een Samsung T813 S2 9.7 Gesteld op 15-3-2019 om 19:34
Reageer op deze vraag Misbruik melden-
Ga naar galerij en selecteer een foto, houd hem even ingedrukt zodat er een vinkje verschijnt.
Waardeer dit antwoord Misbruik melden
Ga dan rechts bovenin naar de puntjes en selecteer: kopieer of verplaats naar album.
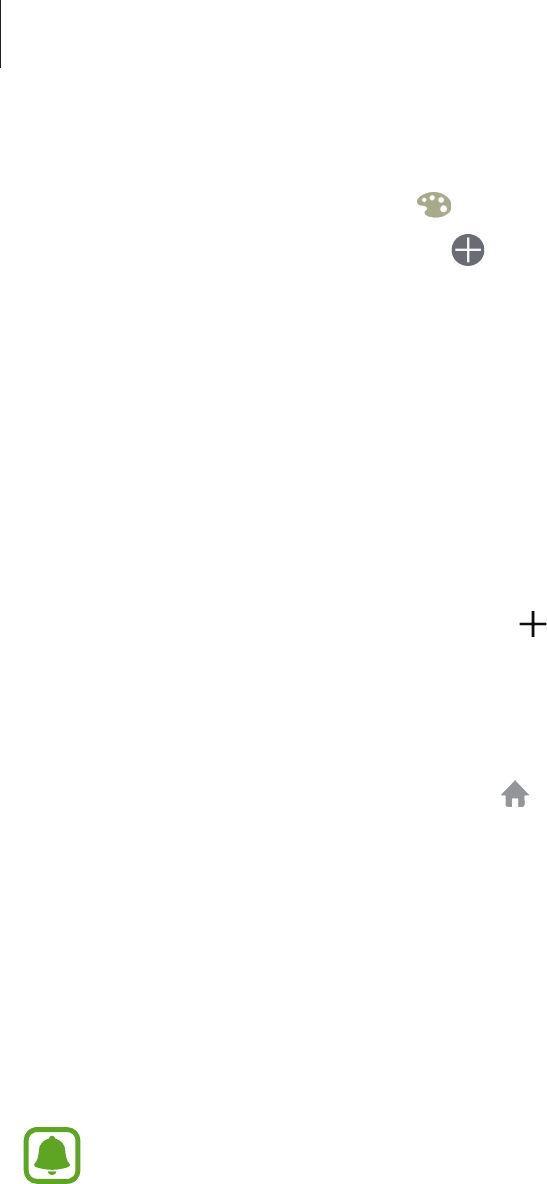
Dan krijg je je albums te zien of wanneer je die nog niet hebt kies dan het plusteken.
Geef je album een naam en kies foto's die je hierheen wilt verplaatsen. Geantwoord op 15-3-2019 om 20:17
-
-
Het is gelukt hartstikke bedankt
Waardeer dit antwoord (2) Misbruik melden
Anton Geantwoord op 16-3-2019 om 12:49 -
Hoe krijg ik mijn fb pagina weer normaal?
Reageer op deze vraag Misbruik melden
Het is nu vergroot over de hele tablet Gesteld op 6-3-2019 om 16:21-
Geen idee wat je bedoelt.. Het is de bedoeling lijkt me dat wat je ook opent je hele beeld gebruikt wordt.
Waardeer dit antwoord Misbruik melden
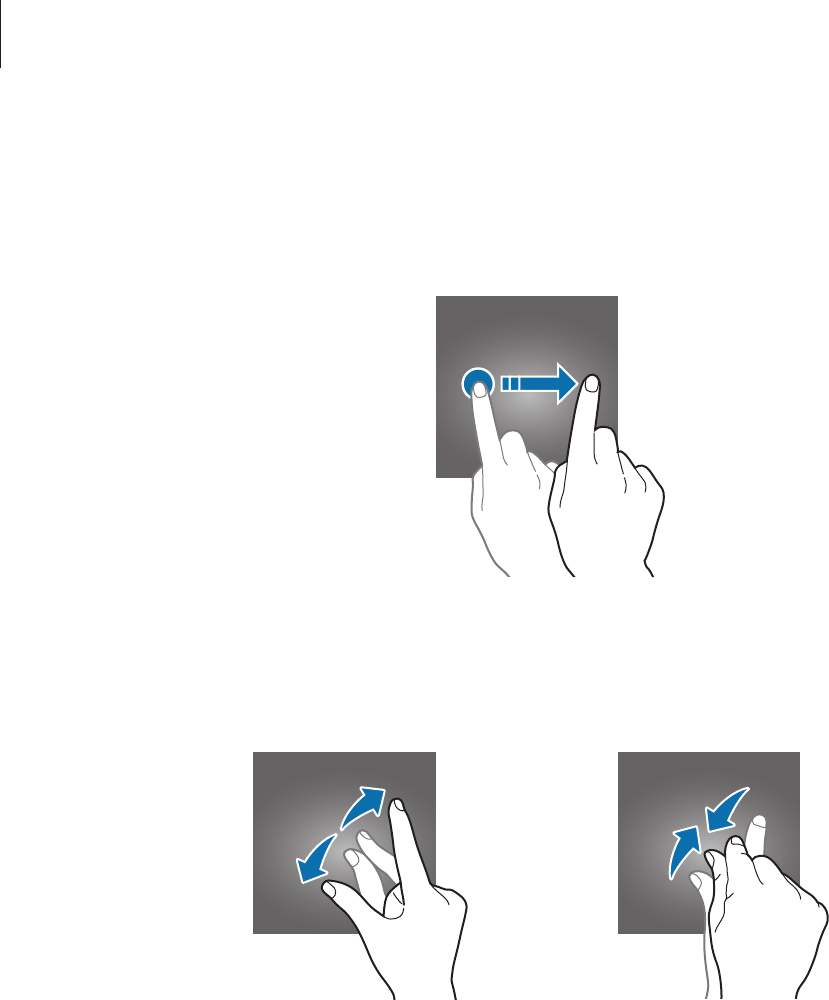
Probeer 2 gespreide vingers op het beeld naar elkaar toe te vegen, zo verkleind je pagina.
En kijk anders eens bij instellingen en dan onder display of je daat iets kan vinden wat je zoekt.
Geantwoord op 6-3-2019 om 20:51
-
-
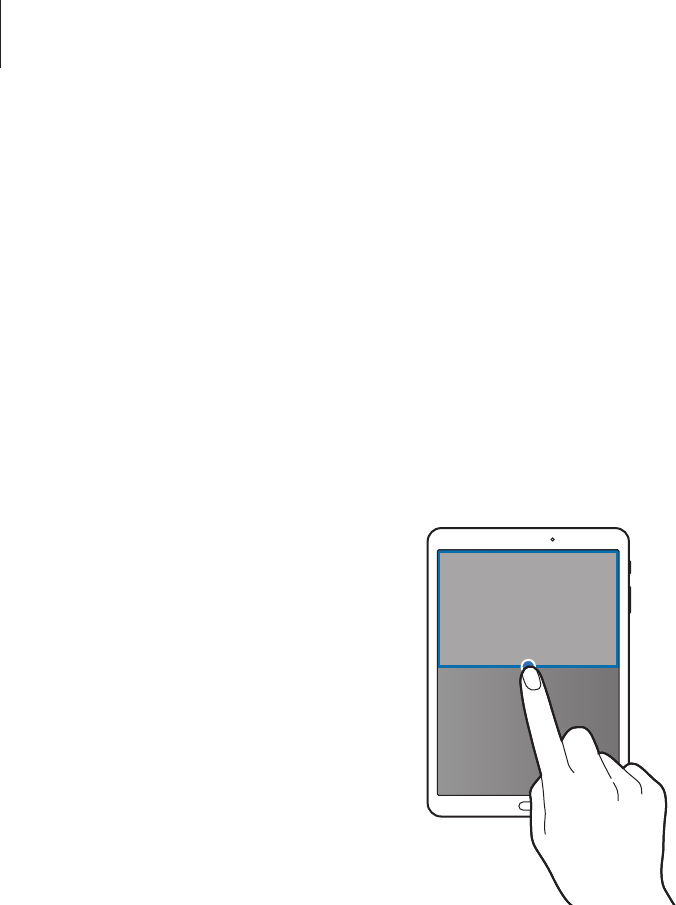
Mijn tablet was vastgelopen en ik heb hem uitgezet. Krijg hem nu niet meer aan de praat... Gesteld op 27-12-2018 om 13:21
Reageer op deze vraag Misbruik melden-
Sit zegt de handleiding..
Waardeer dit antwoord (4) Misbruik melden
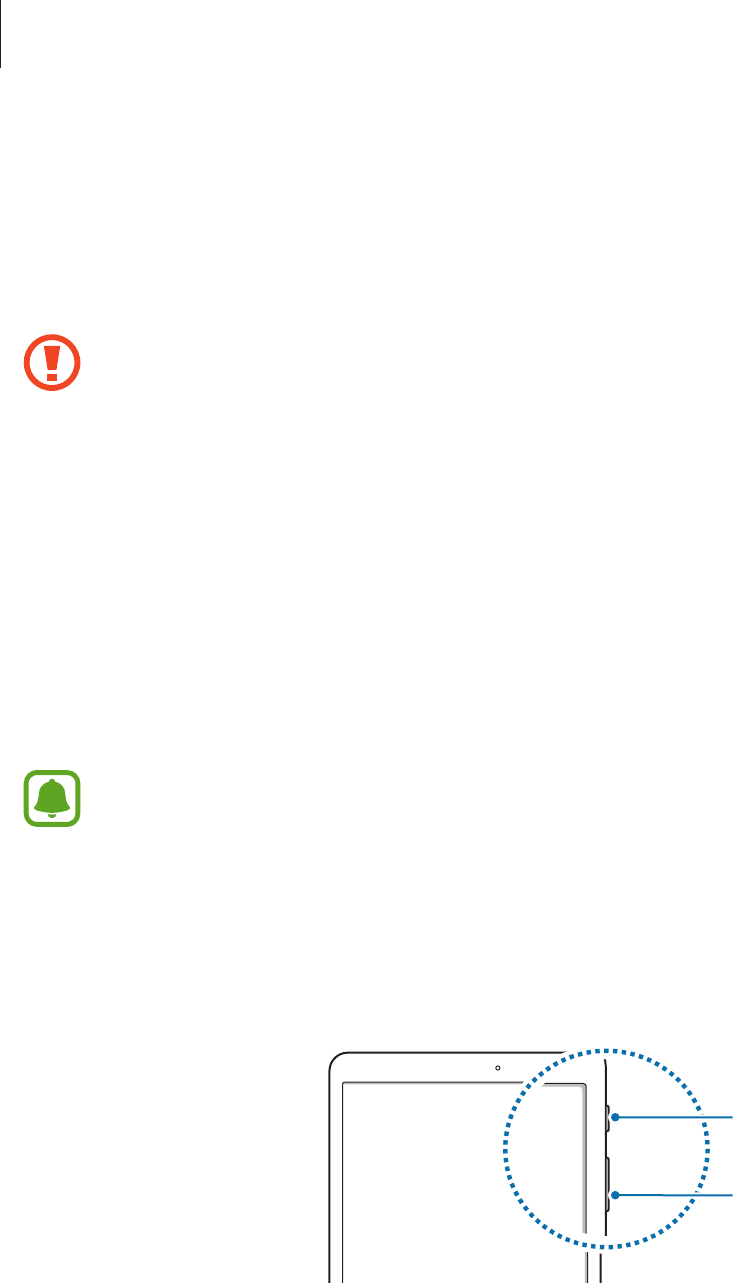
Geforceerd opnieuw opstarten
Als het apparaat is vastgelopen en niet reageert, houdt u de aan/uit-toets en de toets Volume omlaag minstens 7 seconden ingedrukt om het apparaat opnieuw op te starten.
Hoop dat het lukt!
Geantwoord op 27-12-2018 om 16:25
-
-
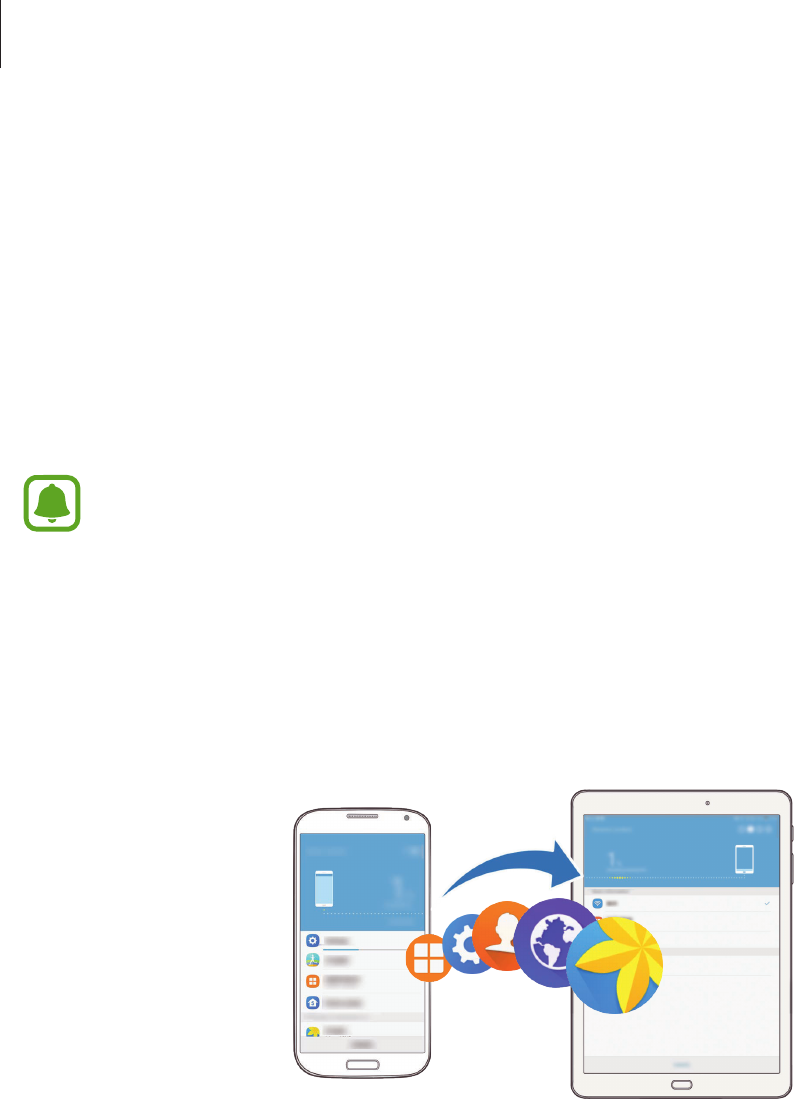
HOE ZET IK MIJN GEGEVENS VAN MIJN OUDE SAMSUNG TABLET OVER OP MIJN NIEUWE SAMSUNG GALAXY TAB S2? Gesteld op 25-11-2018 om 15:53
Reageer op deze vraag Misbruik melden-
Je kan dat via de app Smart Switch doen. Op YouTube tube kan je filmpjes bekijken hoe je dit makkelijk kan doen..
Waardeer dit antwoord (2) Misbruik melden
Ook als je tablet of telefoon vast loopt kan je dit eerst op bv je laptop of pc overdragen en daarna je vastgelopen apparaat resetten en vervolgens alles weer terug plaatsen. Let wel op dat alle apps 100% zijn overgebracht...dat staat er per app bij. Geantwoord op 25-11-2018 om 17:34
-
-
Hoe zet ik mijn tablet Samsung s2 terug naar fabrieksinstellingen? Gesteld op 9-9-2018 om 12:49
Reageer op deze vraag Misbruik melden-
Veeg het scherm van biven naar beneden en tik op het tandrad(instellingen) boven in.
Waardeer dit antwoord Misbruik melden
Ga naar Apparaat en gegevensbeheer.... selecteer deze en scroll naar beneden naar ....Fabrieksinstellingen herstellen.
Wil je niet je gegevens kwijtraken maak hier dan eerst een backup.
Hoe dat moet staat in de regel erboven onder...backup maken en gegevens herstellen. Geantwoord op 9-9-2018 om 13:13
-
-
Galaxy Tab s2
Reageer op deze vraag Misbruik melden
Wifi is in orde, melding 'Verificatiefout opgetreden'==> melding 'Onjuist wachtwoord'.
Waar kan ik het nieuwe wachtwoord invoeren? op tablet of elders anders? Gesteld op 2-9-2018 om 11:09-
In de gebruiksaanwijzing staat:
Waardeer dit antwoord (3) Misbruik melden
Als u uw ontgrendelingscode vergeet, moet u uw apparaat naar een Samsung-servicecenter brengen om het te laten resetten.
Geantwoord op 2-9-2018 om 16:56
-
-
Is het normaal dat volledig opladen 4 uur duurt?
Reageer op deze vraag Misbruik melden
Jolanda Gesteld op 15-8-2018 om 18:29-
4 uur lijkt me redelijk.
Waardeer dit antwoord (2) Misbruik melden
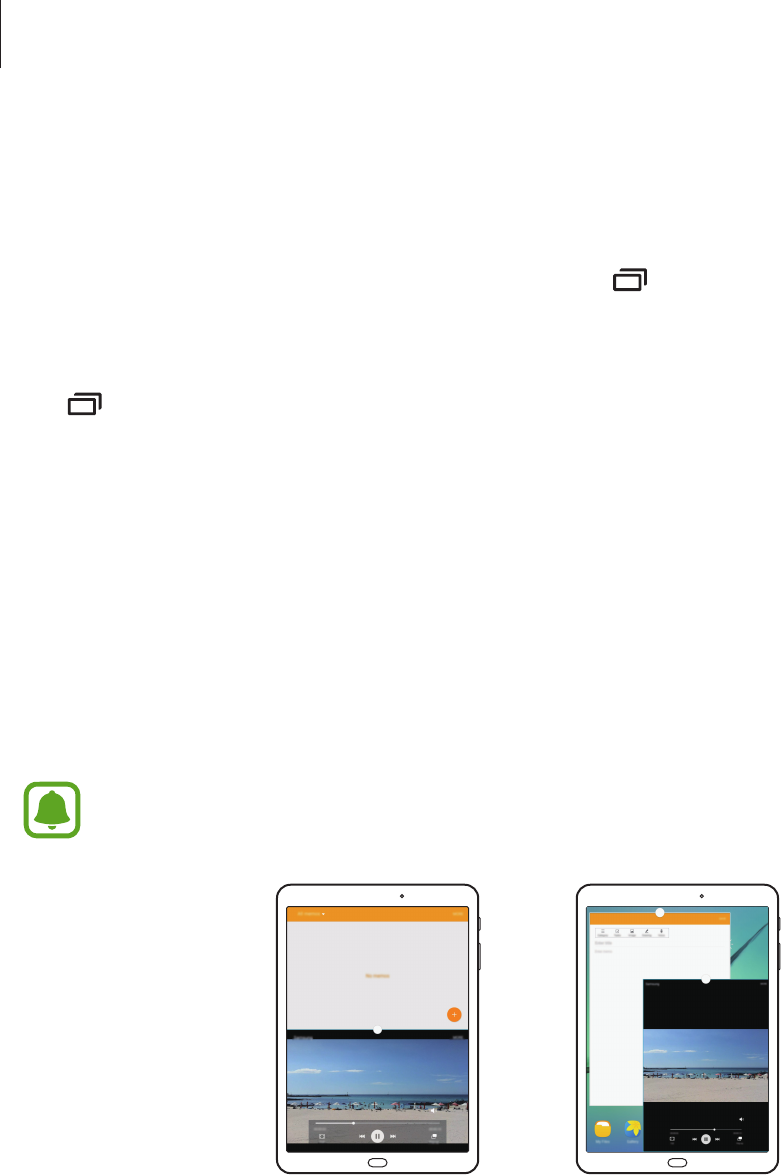
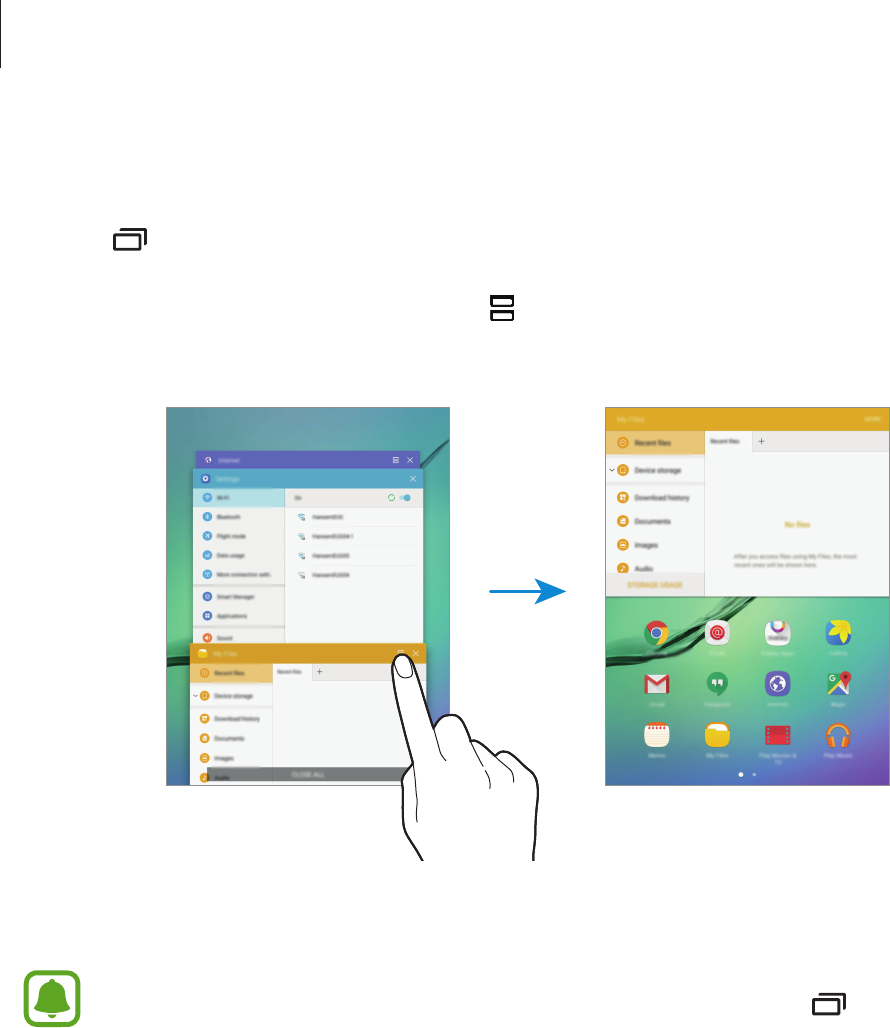
Maar voor hij aan de oplader gaat, alle afsluiten (beneden het dubbele blokje aantikken en vervolgens op alles afsluiten tikken) .
Het opladen gaat sneller als je hem op vliegtuigstand zet. Dan worden er geen gegevens opgehaald. Geantwoord op 2-9-2018 om 17:21
-
-
Waarom draait schermafbeelding van mijn samsung galacy s2 tablet (SM-T813) niet automatisch mee met het draaien van mijn tablet Gesteld op 4-8-2018 om 15:20
Reageer op deze vraag Misbruik melden-
Omdat je op instellingen het meedraaien dan hebt uitgezet.
Waardeer dit antwoord (1) Misbruik melden
Van boven naar beneden vegen en het blauwe kadertje met slotje aantikken. Geantwoord op 2-9-2018 om 17:01
-
-
Vraag over onderstreping in mail tekst: ineens is ontstaan de onderstreping van elke letter in een mail bericht, na aanraken spatiebalk verdwijnt deze onderstreping. Hoe verwijder ik de blijkbaar automatische onderstreping permanent? Gesteld op 13-3-2018 om 13:50
Reageer op deze vraag Misbruik melden-
Ik wist niet eens dat het kon, onderstrepen.
Waardeer dit antwoord (25) Misbruik melden
Maar ik ben er inmiddels achter dat je het inschakelt, als je de 1 ingedrukt houdt. (bij het lettertoetsenbord staat er naast de 1 een streepje) Hij wordt dan blauw.
Het heeft in ieder geval te maken met deze toets in combinatie met de hoofdletter toets.
Ik kreeg zelfs een rode streep eronder, maar vraag me niet hoe.....
Even uitproberen, je kan het in ieder geval zo weghalen. Geantwoord op 13-3-2018 om 14:44
-
-
Inderdaad. Elke letter die je typt wordt onderstreept en de onderstreping verdwijnt na gebruik van de spatiebalk. Maar ik wil graag af van die automatische onderstreping. Die was er ineens. Ik zal wel een of andere combinatietoets hebben ingedrukt, maar weet niet welke. Geantwoord op 13-3-2018 om 15:05
Waardeer dit antwoord (47) Misbruik melden -
Volgens mij is dat altijd zo geweest. Op mijn telefoon gaat het ook zo.
Waardeer dit antwoord (3) Misbruik melden
Maar misschien kan je bij het toetsenbord naar instellingen en dan bij overige instellingen: resetten.
Geantwoord op 13-3-2018 om 15:27 -
Wel aan gedacht, maar dan ben ik alles kwijt; moet dan eerst een back up maken. Geantwoord op 13-3-2018 om 15:46
Waardeer dit antwoord (3) Misbruik melden -
Ja dat is zo. Maar zoals gezegd...ik denk dat het altijd zo geweest is. Alleen als je voorspellende tekst uitzet krijg je geen streepjes. Geantwoord op 13-3-2018 om 18:25
Waardeer dit antwoord (5) Misbruik melden -
Het ei van Columbus! Voorspellende tekst uitgezet en weg is de onderstreping. Dank! Geantwoord op 13-3-2018 om 20:45
Waardeer dit antwoord (11) Misbruik melden -
Haha, dus toch niet ineens ontstaan ?? Geantwoord op 13-3-2018 om 22:28
Waardeer dit antwoord Misbruik melden -
Ik zal zeker iets gedaan hebbeb,maar wat ? Geen idee. De functie Voorspellende tekst was mij geheel onbekend; die heb ik dus niet rechtstreeks aan gezet. Geantwoord op 14-3-2018 om 09:02
Waardeer dit antwoord (8) Misbruik melden -
mijn tab heeft de laatse tijd problemen met wifi nu wou ik hem opnieuw opstarten maar nu doet hij niks meer
Reageer op deze vraag Misbruik melden
Gesteld op 8-3-2018 om 21:21-
Kijk eens naar de vorige vraag en antwoord. Geantwoord op 8-3-2018 om 23:00
Waardeer dit antwoord Misbruik melden
-
-
De aan/uit knop en de volumeknop gelijktijdig indrukken.
Waardeer dit antwoord (2) Misbruik melden
Bij mij ging hij weer aan. Geantwoord op 9-3-2018 om 08:45 -
bedankt voor je antwoord maar helaas werkt dat niet bij mij het lijkt wel of de accu ook dood is als hem aan de lader leg geeft hij niks aan Geantwoord op 9-3-2018 om 21:08
Waardeer dit antwoord Misbruik melden -
De gebruiksaanwijzing zegt het volgende:
Waardeer dit antwoord (1) Misbruik melden
Als het probleem hiermee niet wordt opgelost, moet u de fabrieksinstellingen herstellen.
Tik op het scherm Apps op Instellingen ? Back-up maken en terugzetten ? Fabrieksgegevens herstellen ? APPARAAT RESETTEN? ALLES VERWIJDEREN. Voordat u de fabrieksinstellingen van het apparaat herstelt, moet u een back-up van alle belangrijke gegevens op het apparaat maken.
Geantwoord op 9-3-2018 om 23:22 -
tablet (SM-T813) start niet meer na het starten/ installeren van update Gesteld op 2-3-2018 om 11:43
Reageer op deze vraag Misbruik melden-
Geforceerd opnieuw opstarten
Waardeer dit antwoord (12) Misbruik melden
Als het apparaat is vastgelopen en niet reageert, houdt u de aan/uit-toets en de toets Volume omlaag minstens 7 seconden ingedrukt om het apparaat opnieuw op te starten.
Geantwoord op 2-3-2018 om 15:47
-
-
Ik heb problemen met wifi van KPN. Het zou aan de updates van Samsung liggen. Mijn apparaat staat op automatisch wat betreft de updates. Wat kan ik nu nog doen? Gesteld op 8-2-2018 om 13:39
Reageer op deze vraag Misbruik melden-
Kijk eens op je tablet bij instellingen en scroll naar >gebruiksaanwijzing
Waardeer dit antwoord (1) Misbruik melden
Dan bijlage > problemen oplossen.
Wellicht kan je een back up maken van alles wat je wilt (aanvinken) en een herstel maken.
Geantwoord op 8-2-2018 om 17:40
-
-
waar moet ik de aansluiting zoeken voor mijntablet smt813 galaxys2v Gesteld op 29-1-2018 om 15:53
Reageer op deze vraag Misbruik melden-
De vraag is niet duidelijk....wat bedoelt u precies? Geantwoord op 29-1-2018 om 16:11
Waardeer dit antwoord Misbruik melden
-
-
Kan er in een SM-T813 ook een geheugenkaart geplaatst worden?en waar moet die dan komen en weet iemand waar dat kleine zilveren ding voor dient? Gesteld op 25-1-2018 om 12:12
Reageer op deze vraag Misbruik melden-
Ga naar de app (het tandrad) =instellingen .
Waardeer dit antwoord (7) Misbruik melden
Helemaal links beneden staat - gebruiksaanwijzing. Selecteer deze..
Vervolgens kies je --- basisfuncties....
Dan zie je hier links onder -- geheugenkaart (micro SD-kaart ).
Selecteer deze. Dan kies je - de geheugenkaart installeren...rechts verschijnt de uitleg..als je even doorscrolt staater een plaatje waar je precies ziet wat je moet doen met dat zilveren dingetje. Geantwoord op 25-1-2018 om 17:15
-
-
Wasr vind ik een flitser op de Samsung Galaxy tablet S2? Gesteld op 26-12-2017 om 22:49
Reageer op deze vraag Misbruik melden-
De flitser is niet te vinden. Wel het volgende:
Waardeer dit antwoord (4) Misbruik melden
Nacht: Maak foto’s zonder de flitser te gebruiken wanneer er weinig licht is. Tik op het voorbeeldscherm op STAND ? Nacht. Geantwoord op 26-12-2017 om 23:08
-
-
Vergeten:
Waardeer dit antwoord (6) Misbruik melden
Als je de app opent ze je beneden 3 puntjes.
Als je op de eerste tikt krijg je opties te zien die je kan downloaden (puntjes rechtsboven).
Als ik het goed begrijp, kan je de camera op auto instellen, hij kiest dan zelf de belichting. Geantwoord op 26-12-2017 om 23:15 -
Enorm bedankt want dan staat mijn tablet goed in gesteld. Geantwoord op 20-10-2018 om 23:44
Waardeer dit antwoord Misbruik melden -
Goedendag,
Reageer op deze vraag Misbruik melden
Hoe zet ik het geluid van de tablet zacht of hard?
Gesteld op 11-12-2017 om 15:41-
Ga naar het rad instellingen.
Waardeer dit antwoord (4) Misbruik melden
Onder : geluid, niet storen kan je alle geluiden instellen.
Bij volume hoe hard het moet. Geantwoord op 11-12-2017 om 15:59
-
-
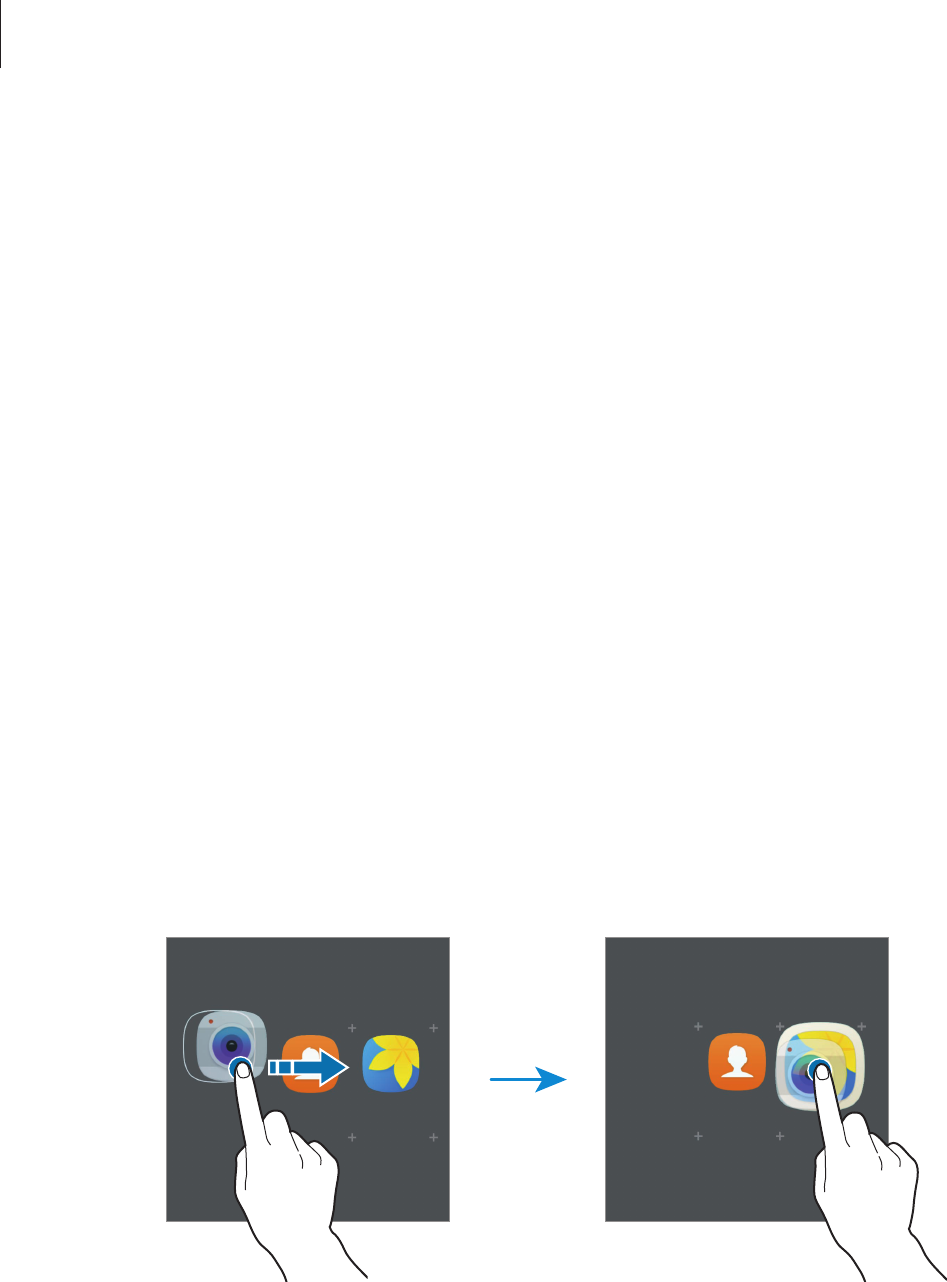
Kunnen er mappen worden gemaakt om apps onder te brengen? Gesteld op 10-12-2017 om 17:21
Reageer op deze vraag Misbruik melden-
Sleep de app boven op een andere app .
Waardeer dit antwoord (1) Misbruik melden
Ze worden dan geïsoleerd en samengebracht.
Er verschijnt een regel boven waar je de map een naam kunt geven.
Om een app eruit te halen; gewoon uit het kader slepen.
Om een toe te voegen: in het kader slepen. Geantwoord op 10-12-2017 om 17:40
-
-
handleiding om SM-T813 opstarten en klaarmaken voor gebruik Gesteld op 6-11-2017 om 10:53
Reageer op deze vraag Misbruik melden-
Scroll even naar boven, daar kan je de handleiding downloaden. Geantwoord op 6-11-2017 om 12:38
Waardeer dit antwoord (2) Misbruik melden
-
-
Hoe kan ik een hard reset doen, mijn pincode vind ik niet meer terug Gesteld op 28-9-2017 om 19:41
Reageer op deze vraag Misbruik melden-
Je kan je bijgeleverde puk code gebruiken om je tablet te ontgrendelen. Geantwoord op 28-9-2017 om 19:57
Waardeer dit antwoord (1) Misbruik melden
-
-
Ik heb fotos gemaakt, hoe komen die dan op mijn tablet terecht? Gesteld op 25-8-2017 om 16:37
Reageer op deze vraag Misbruik melden-
Door op alle apparaten bv dropbox of samsung cloud of one drive te installeren komt alles daar terecht en kan je het overal bekijken.
Waardeer dit antwoord (1) Misbruik melden
Als je met je tablet foto's maakt komt het ook vanzelf op galerij te staan. Geantwoord op 25-8-2017 om 17:22
-
-
Hoe kan bij het zenden van in een email metgelukwensen een bijlage toevoegen Gesteld op 15-8-2017 om 21:27
Reageer op deze vraag Misbruik melden-
Door bovenin op te paperclip te tikken kan je iets toevoegen. Geantwoord op 24-8-2017 om 21:44
Waardeer dit antwoord (1) Misbruik melden
-
-
Ik wil videos in mappen doen. Bv map familie, map vakantie enz. Hoe doe ik Dit? Gesteld op 24-7-2017 om 11:46
Reageer op deze vraag Misbruik melden-
Alles komt terecht op de app galerij.
Waardeer dit antwoord (1) Misbruik melden
Bij de minupuntjes kunnen je een nieuwe map aanmaken.
Blijf vervolgens drukken op de video/foto zodat er een vinkje komt.
Bovenin kies je dan bij de menupuntjes de optie -verplaatsen- selecteer dan de map waar je het wilt onderbrengen. Geantwoord op 24-8-2017 om 21:52
-
-
ik ontvang de melding: je apparaat is offline. hoe kan ik dit herstellen,door recetten lukt het niet.
Reageer op deze vraag Misbruik melden
hartelijk dank. Gesteld op 3-6-2017 om 07:51-
Als er een storing is op wat voor manier dan ook, zet het apparaat dan gewoon helemaal uit en start het opnieuw op.
Waardeer dit antwoord Misbruik melden
Vaak is hef probleem dan opgelost.
Bedenk wel dat je dan opnieuw moet inloggen... Geantwoord op 24-8-2017 om 22:00
-
-
Hoe kan 2e gebruiker inloggen met vingerafdrukken Gesteld op 9-5-2017 om 13:35
Reageer op deze vraag Misbruik melden-
Ga naar (tandrad) instellingen
Waardeer dit antwoord (1) Misbruik melden
Kies daar ...schermbeveiliging
Dan vingerafdrukken
Kies + ........en volg de richtlijnen
Geantwoord op 24-8-2017 om 21:56
-
-
Ik zou graag een handleiding downloaden. Hoe krijg ik dat voor elkaar Gesteld op 26-1-2017 om 20:32
Reageer op deze vraag Misbruik melden-
Er staat met grote letters in het oranje op deze site " Ga naar handleidingen"
Waardeer dit antwoord (1) Misbruik melden
Selecteer deze en vul de taal in.
En tik op downloaden.
Geantwoord op 25-1-2018 om 17:21
-
-
ik heb het apparaat verkeert in gestelt voor vinger herkenning. Gesteld op 13-10-2016 om 08:12
Reageer op deze vraag Misbruik melden-
Wie stelt die vraag..? We hebben geen behoefte aan vingerherkenning! KL&Henny Geantwoord op 17-10-2016 om 18:28
Waardeer dit antwoord Misbruik melden
-
