Conventions Used in This Manual.....................................................................................................................................12
Keyboards and Divisions.......................................................................................................................................................12
Names of Things and What They Do ..........................................................13
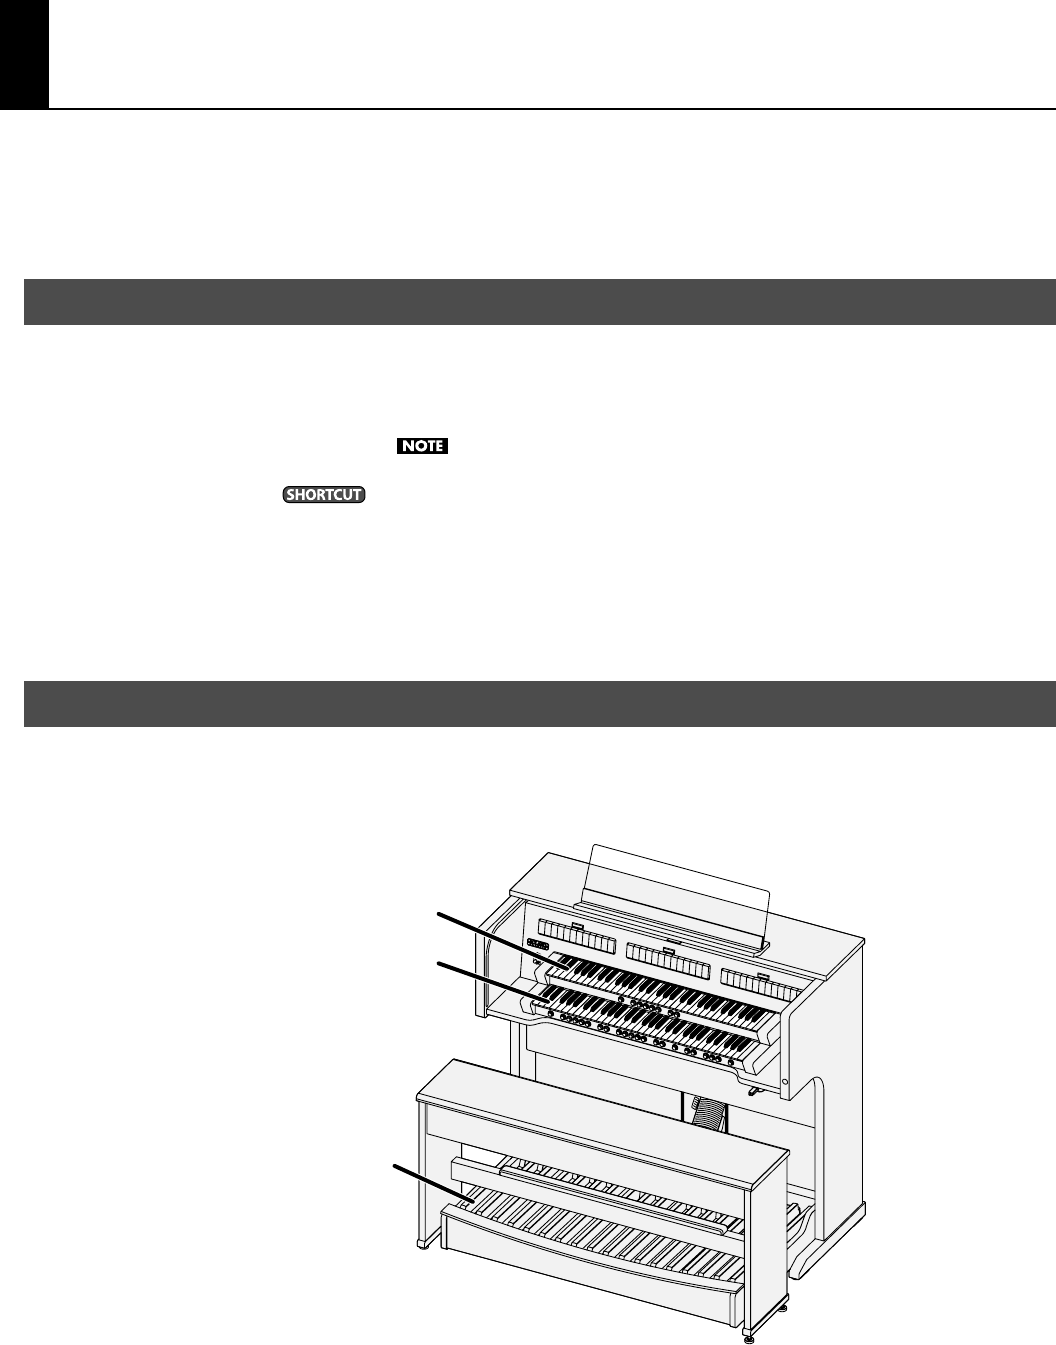
Names of Things on the C-380............................................................................................................................................13
Names of Things on the C-330............................................................................................................................................13
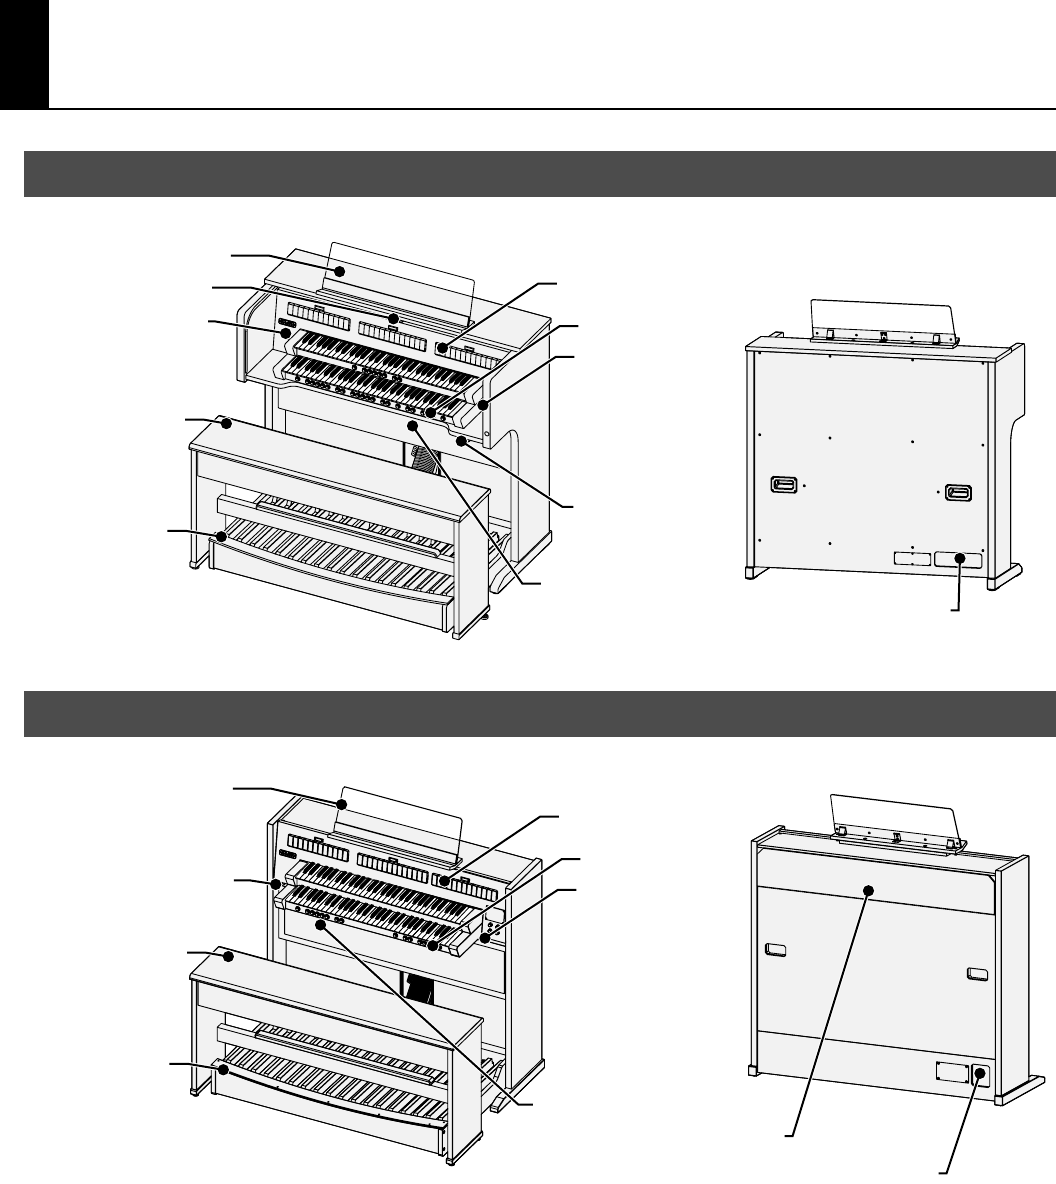
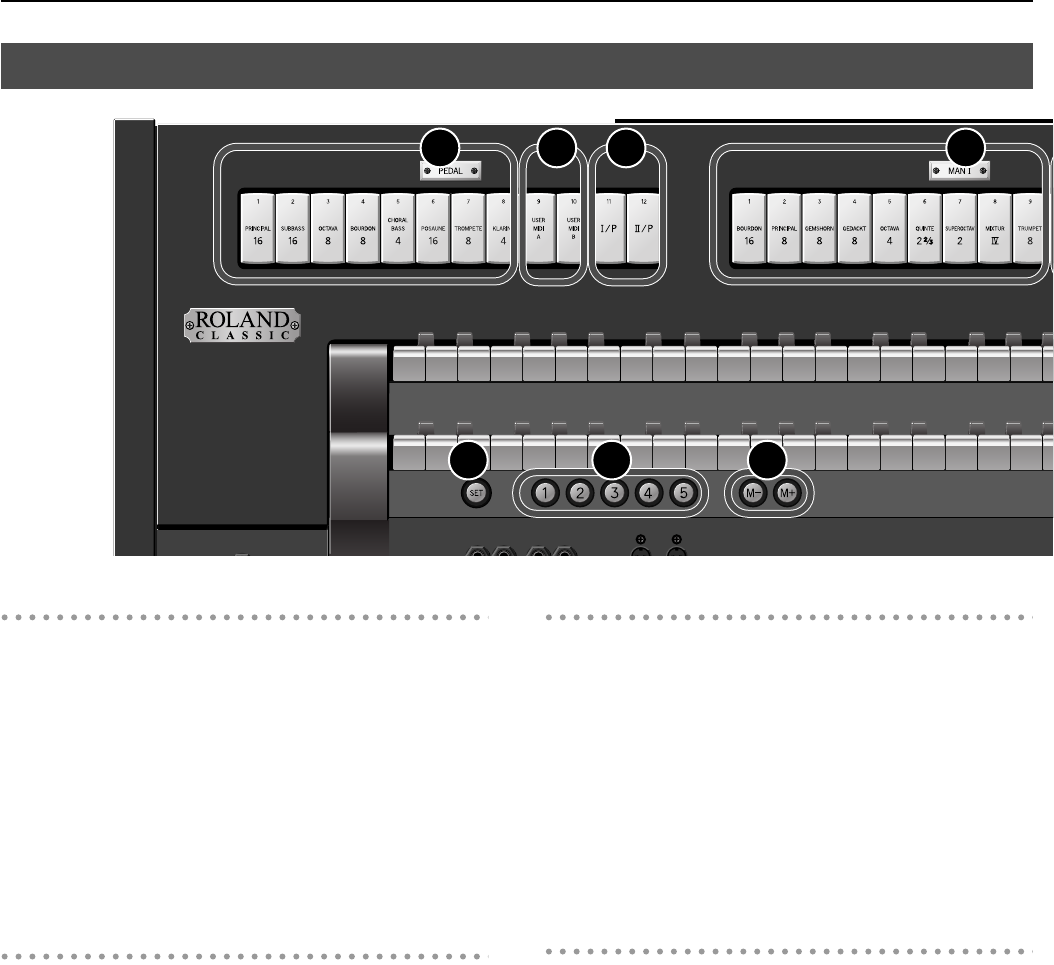
Tablets and Pistons (C-380)..................................................................................................................................................14
Tablets and Pistons (C-330)..................................................................................................................................................16
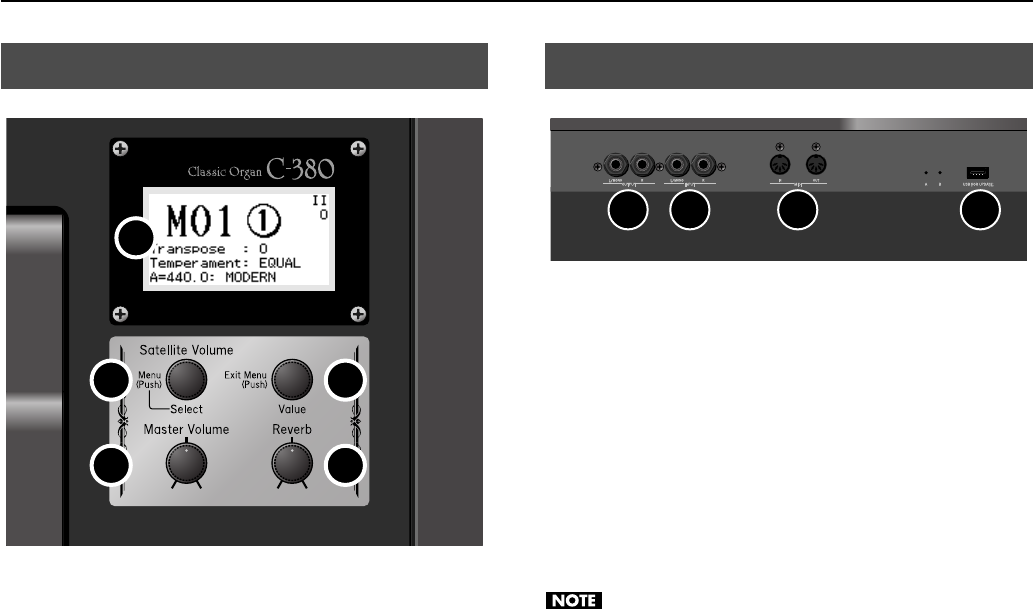
Display and Panel....................................................................................................................................................................18
Before You Start Playing.............................................................................19
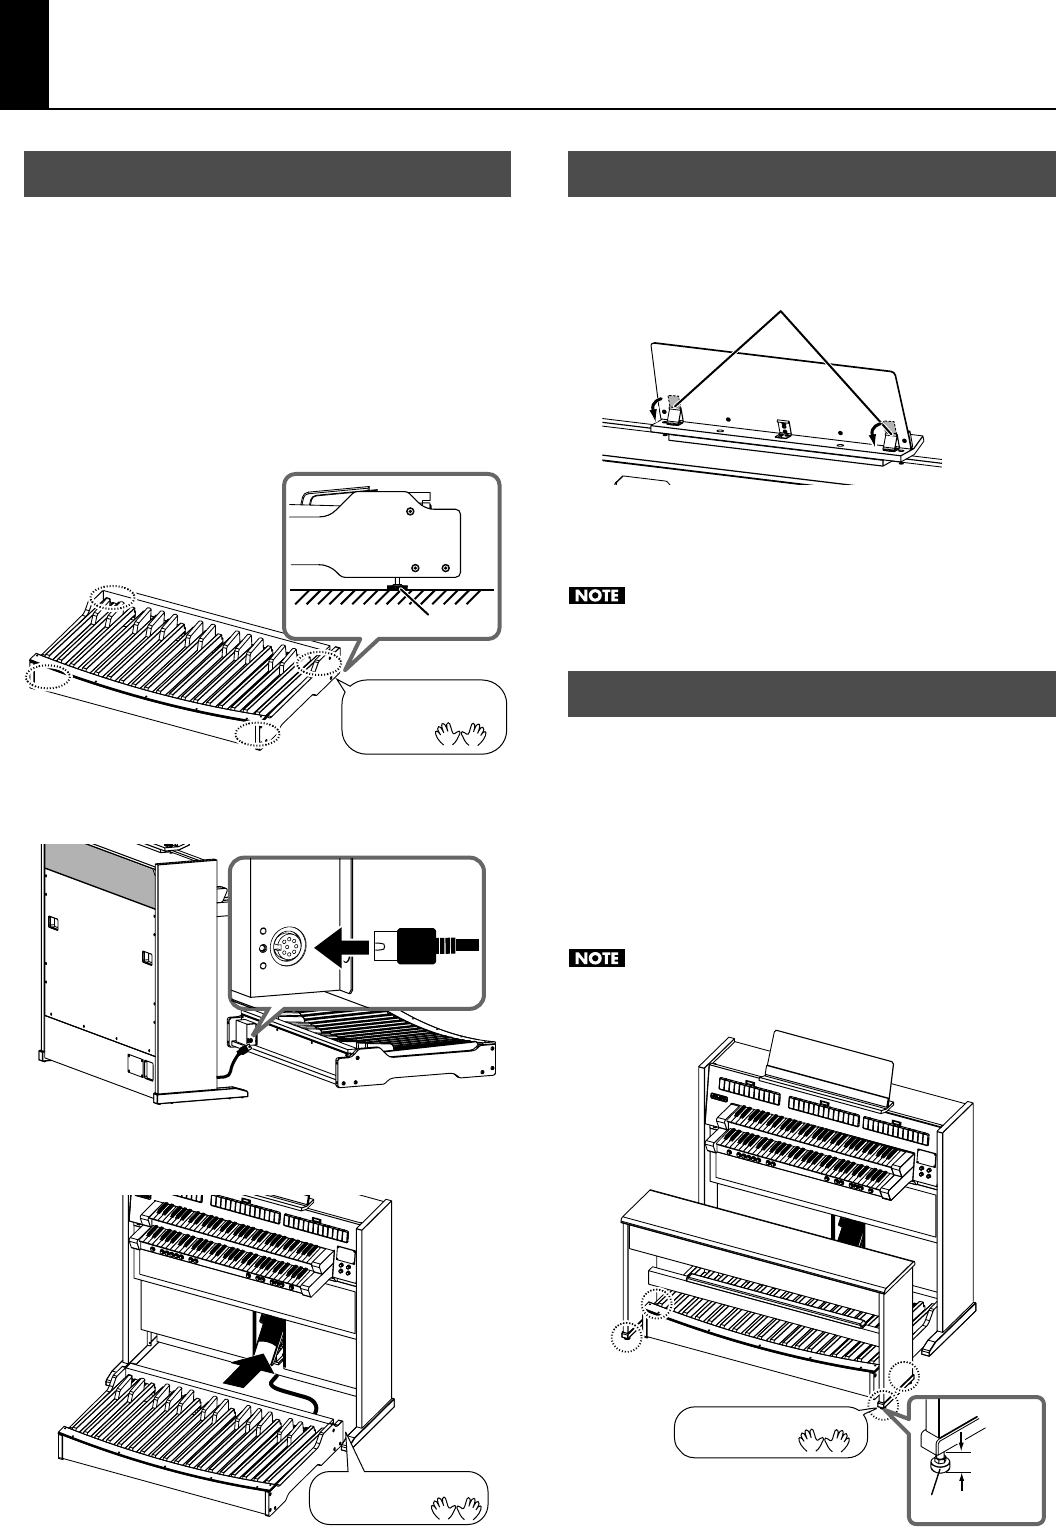
Connecting the Pedalboard................................................................................................................................................19
Using the Music rest...............................................................................................................................................................19
Placing the Bench....................................................................................................................................................................19
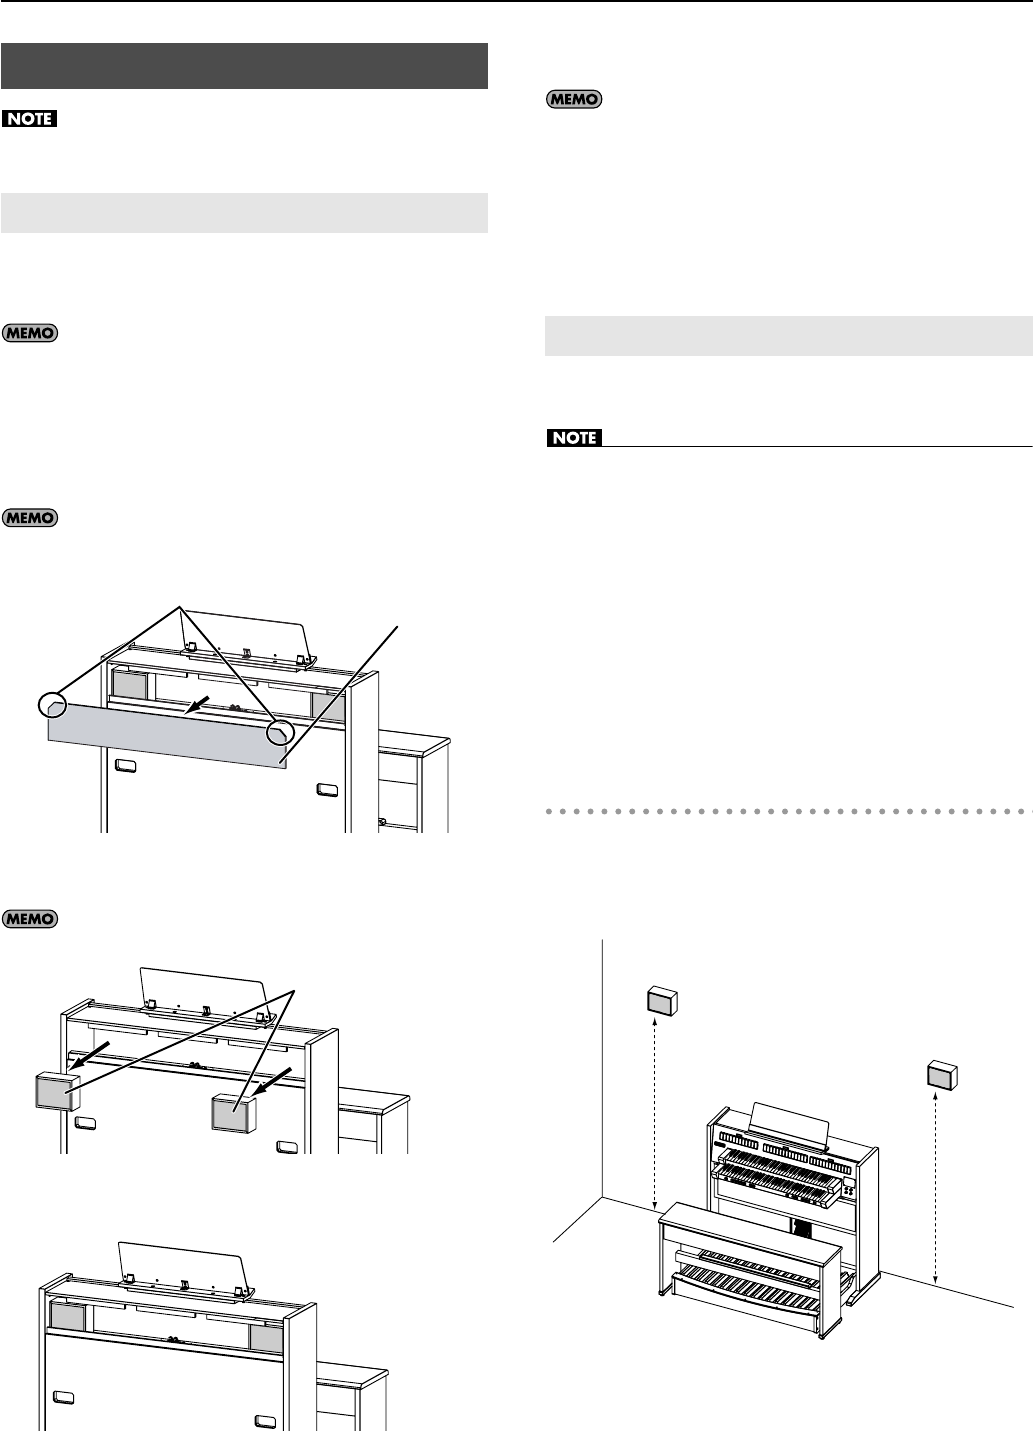
Installing the Satellite Speakers .........................................................................................................................................20
Attaching to the Main Unit (C-330 Only)...........................................................................................................20
Attaching to the Wall................................................................................................................................................20
Connecting the Satellite Speakers to the Organ............................................................................................21
Opening and Closing the Keyboard Cover (C-380 only)...........................................................................................22
Locking the Cover......................................................................................................................................................22
Connecting the Power Cord................................................................................................................................................22
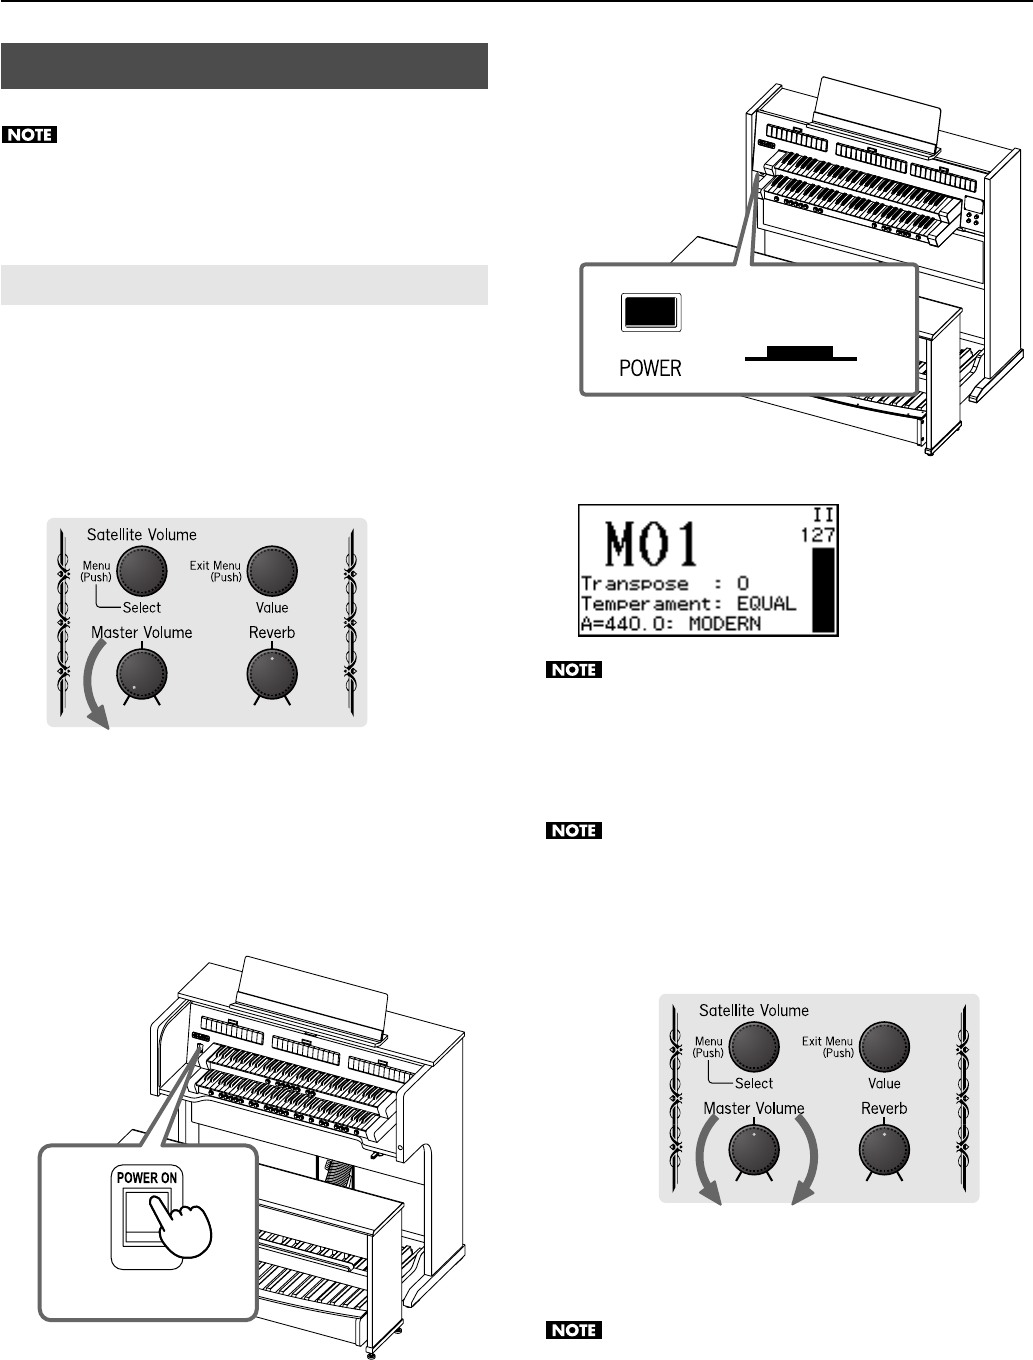
Turning the Power On and Off............................................................................................................................................24
Turning On the Power..............................................................................................................................................24
Turning Off the Power..............................................................................................................................................25
Connecting the USB memory .............................................................................................................................................26
About the Display....................................................................................................................................................................27
Contents of the Main Screen.................................................................................................................................27
Return to the Main Screen......................................................................................................................................27
Adjusting the Display Contrast.............................................................................................................................27
Listening to the Demo Songs..............................................................................................................................................28
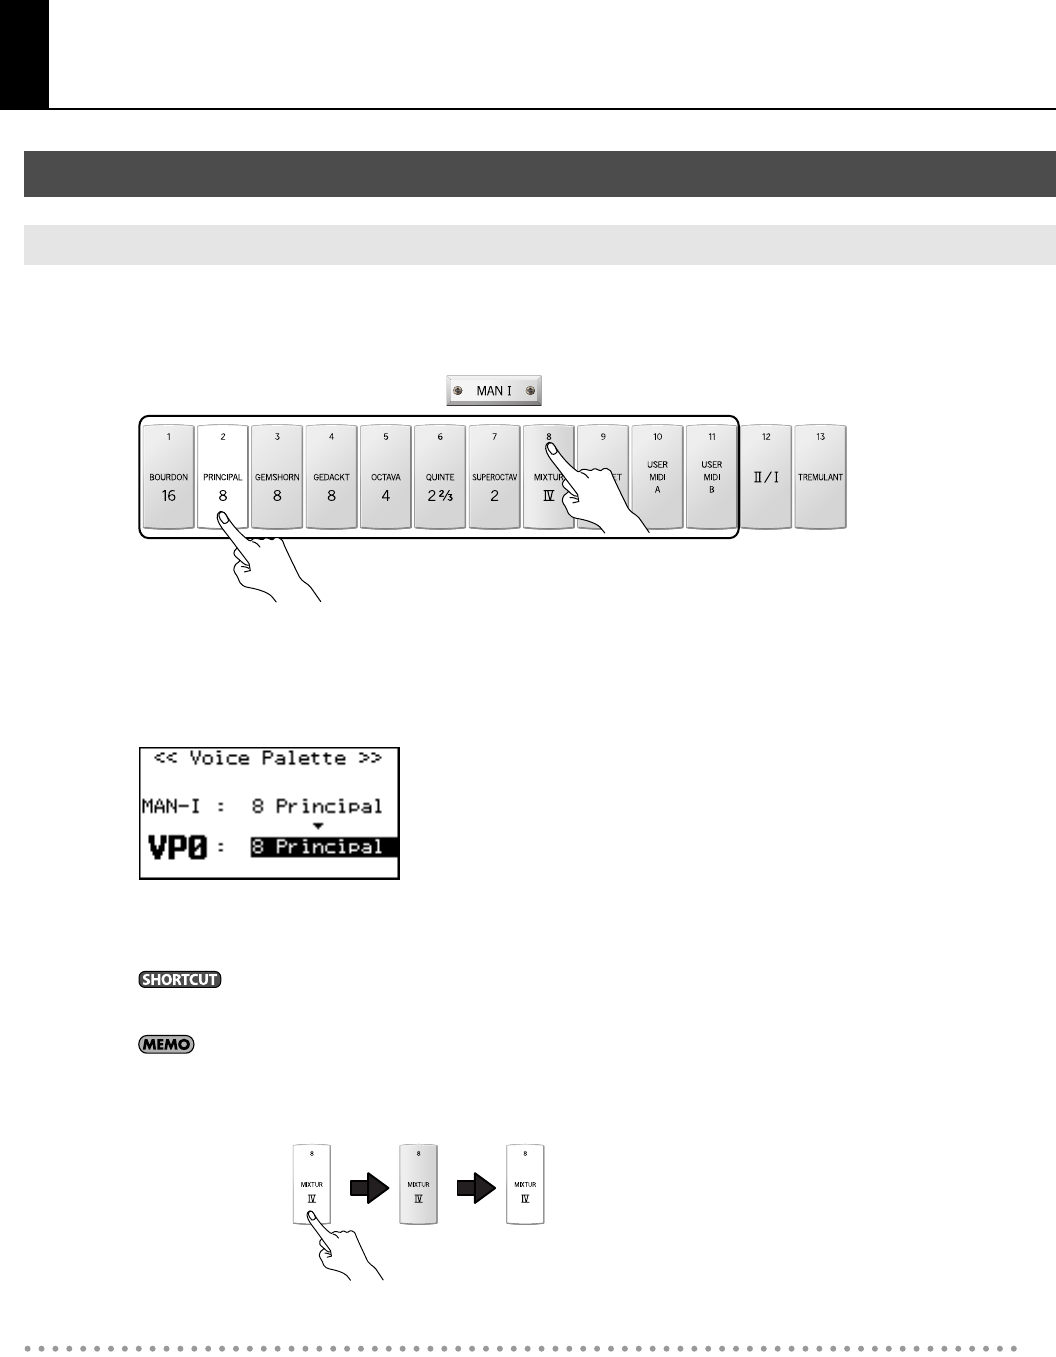
Playing Various Sounds.........................................................................................................................................................29
Selecting a Sound Variation (Voice Palette).....................................................................................................30
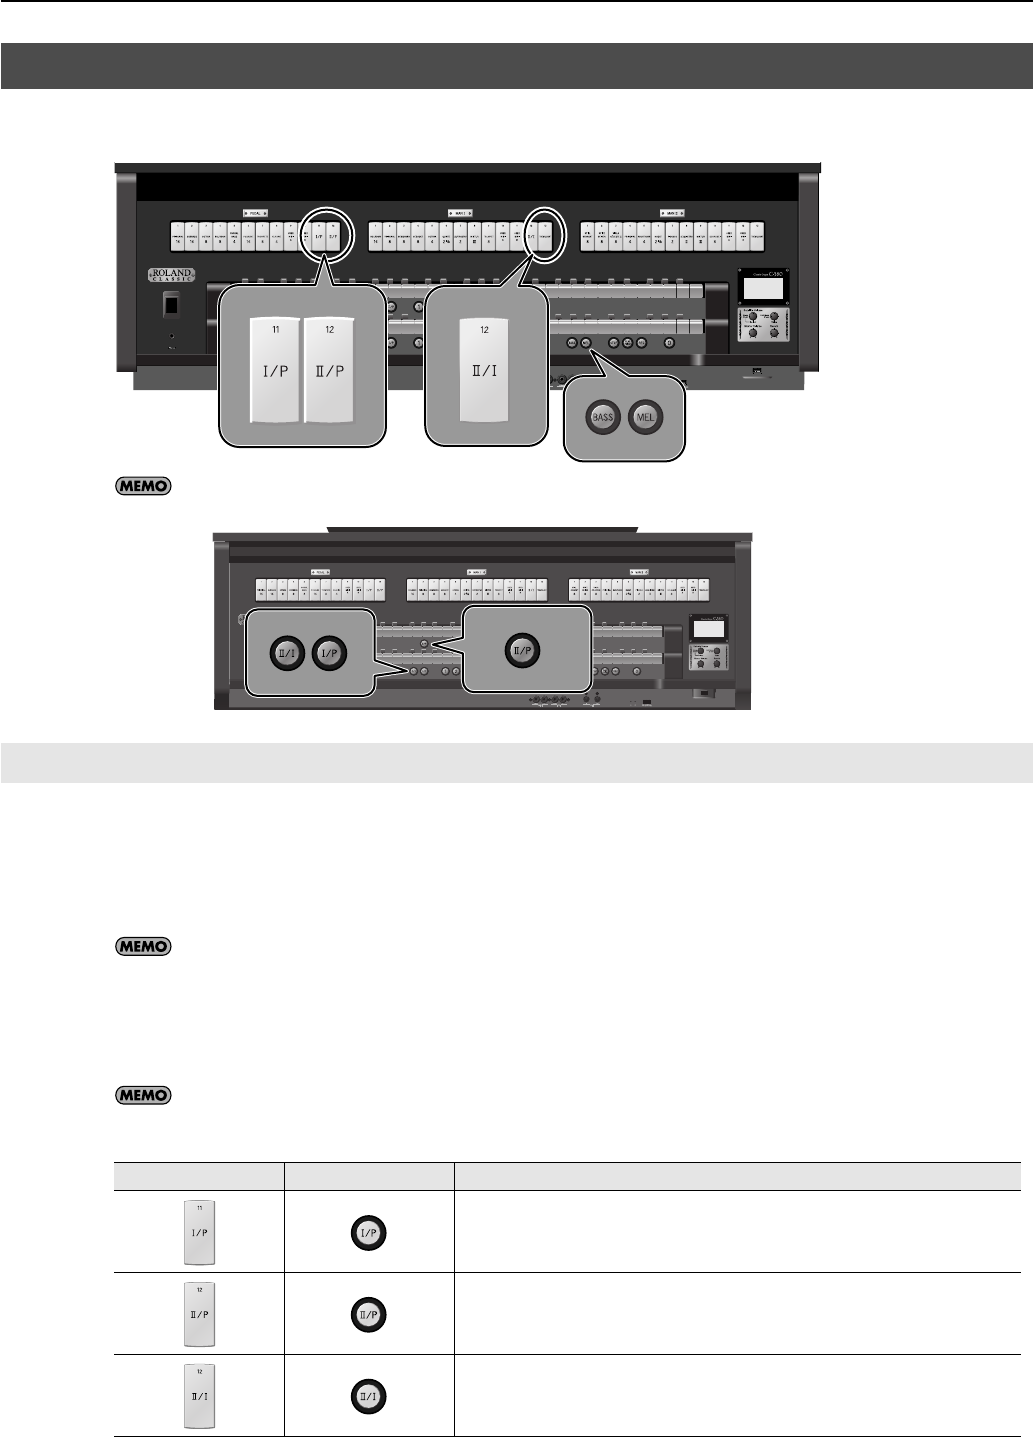
Playing the Sounds of Another Division (Couplers)....................................................................................................31
Using a Manual Coupler..........................................................................................................................................31
Using the Melody Coupler......................................................................................................................................32
Using the Bass Coupler............................................................................................................................................33
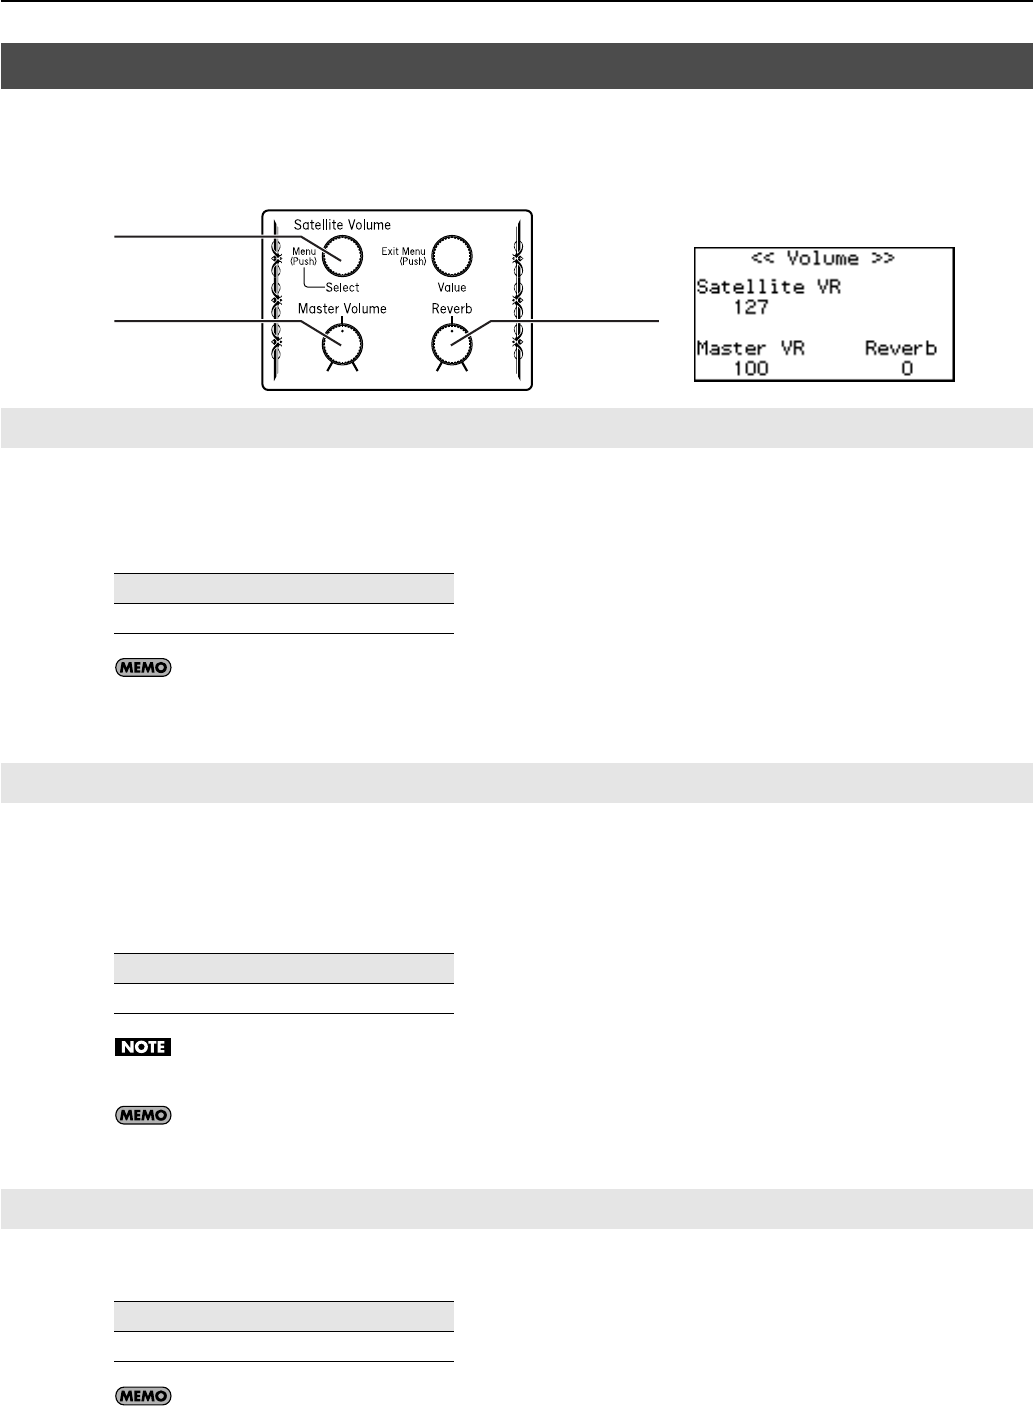
Adjusting the Volume and Reverberation......................................................................................................................34
Adjusting the Overall Volume...............................................................................................................................34
Adjusting the Volume of the Satellite Speakers.............................................................................................34
Adjusting the Reverberation.................................................................................................................................34
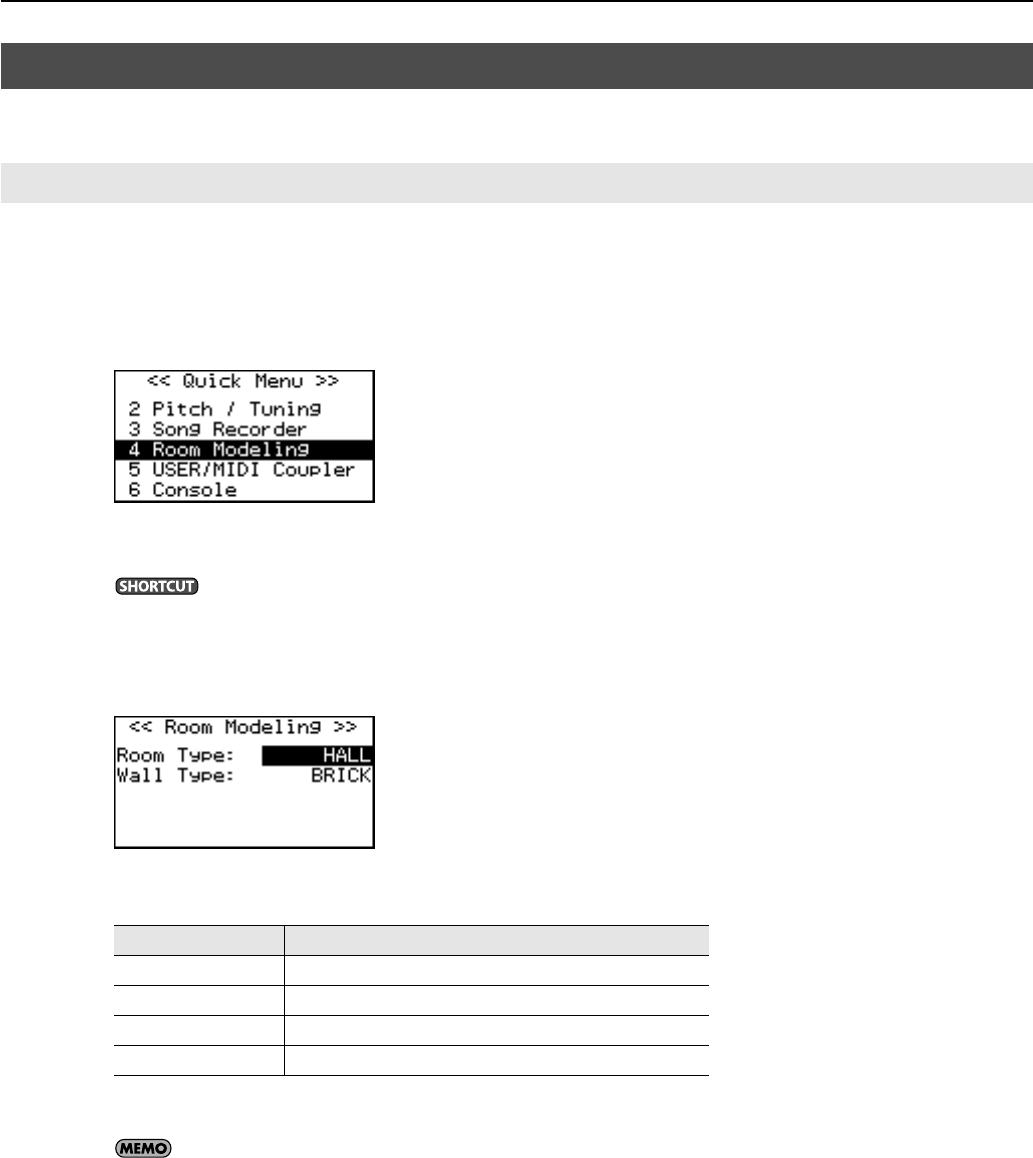
Changing the Type of Reverberation...............................................................................................................................35
Changing the Room Type.......................................................................................................................................35
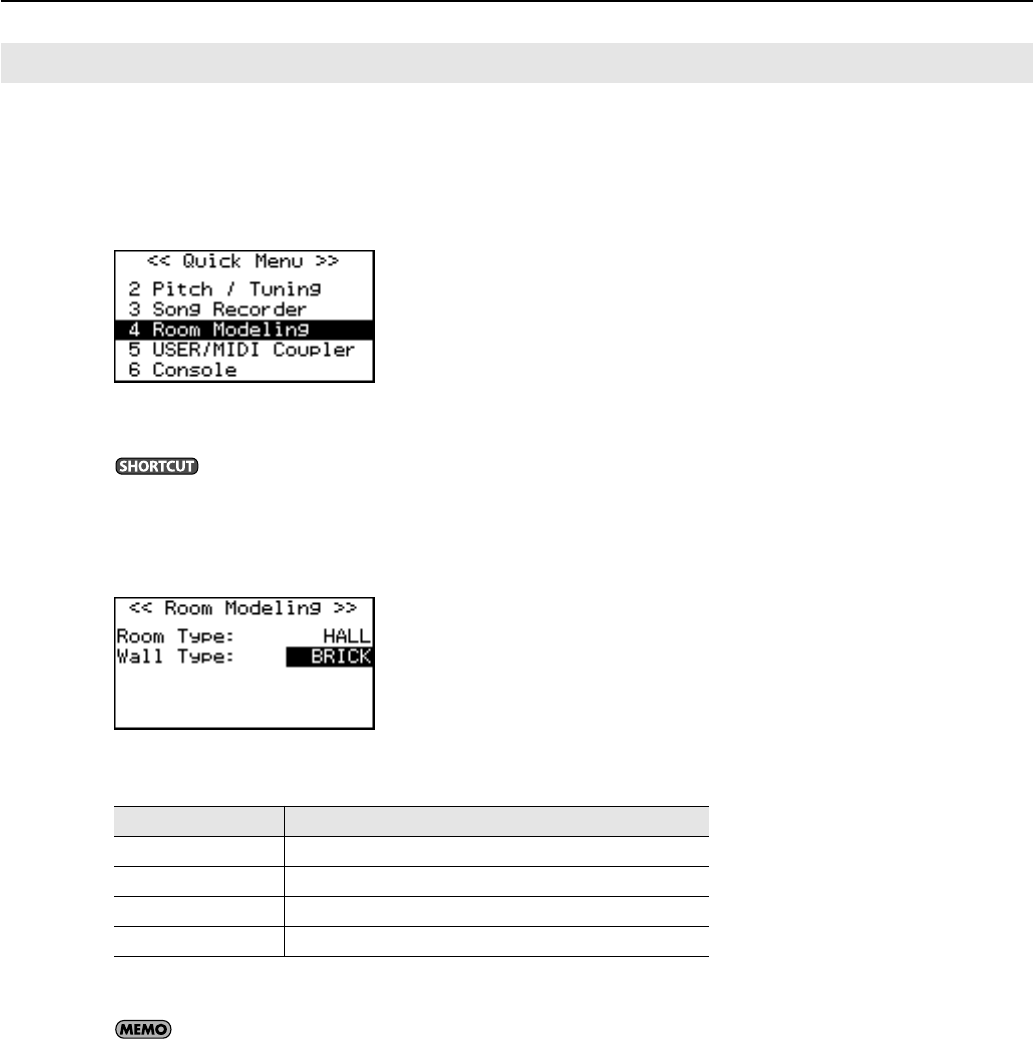
Changing the Wall Type..........................................................................................................................................36
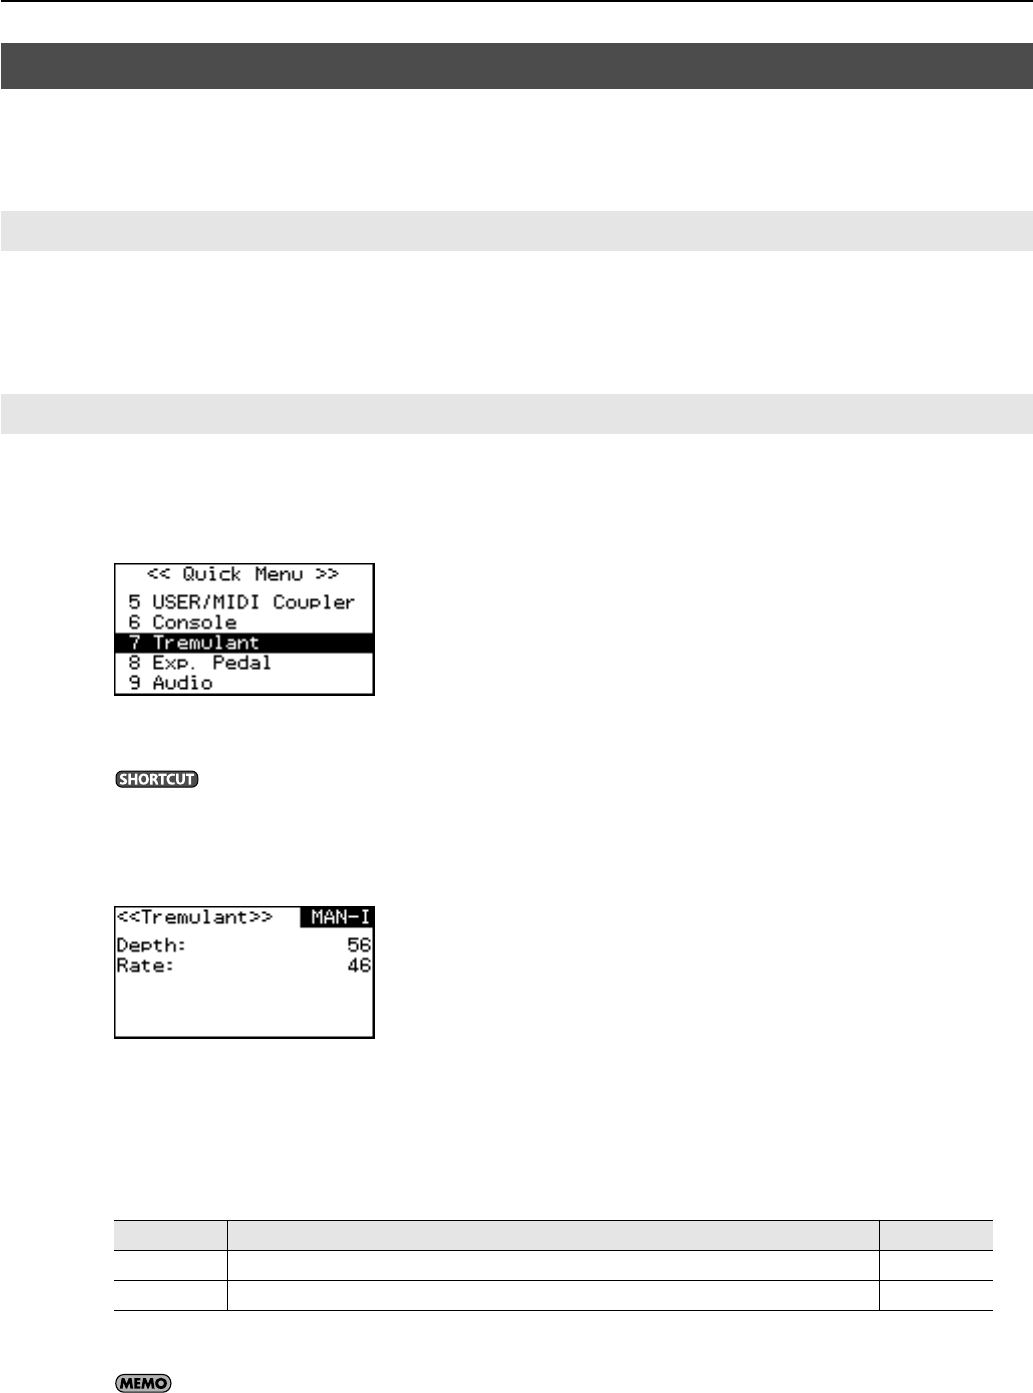
Adding Tremulant to Each Division....................................................................................................................37
Adjusting the Tremulant Effect.............................................................................................................................37
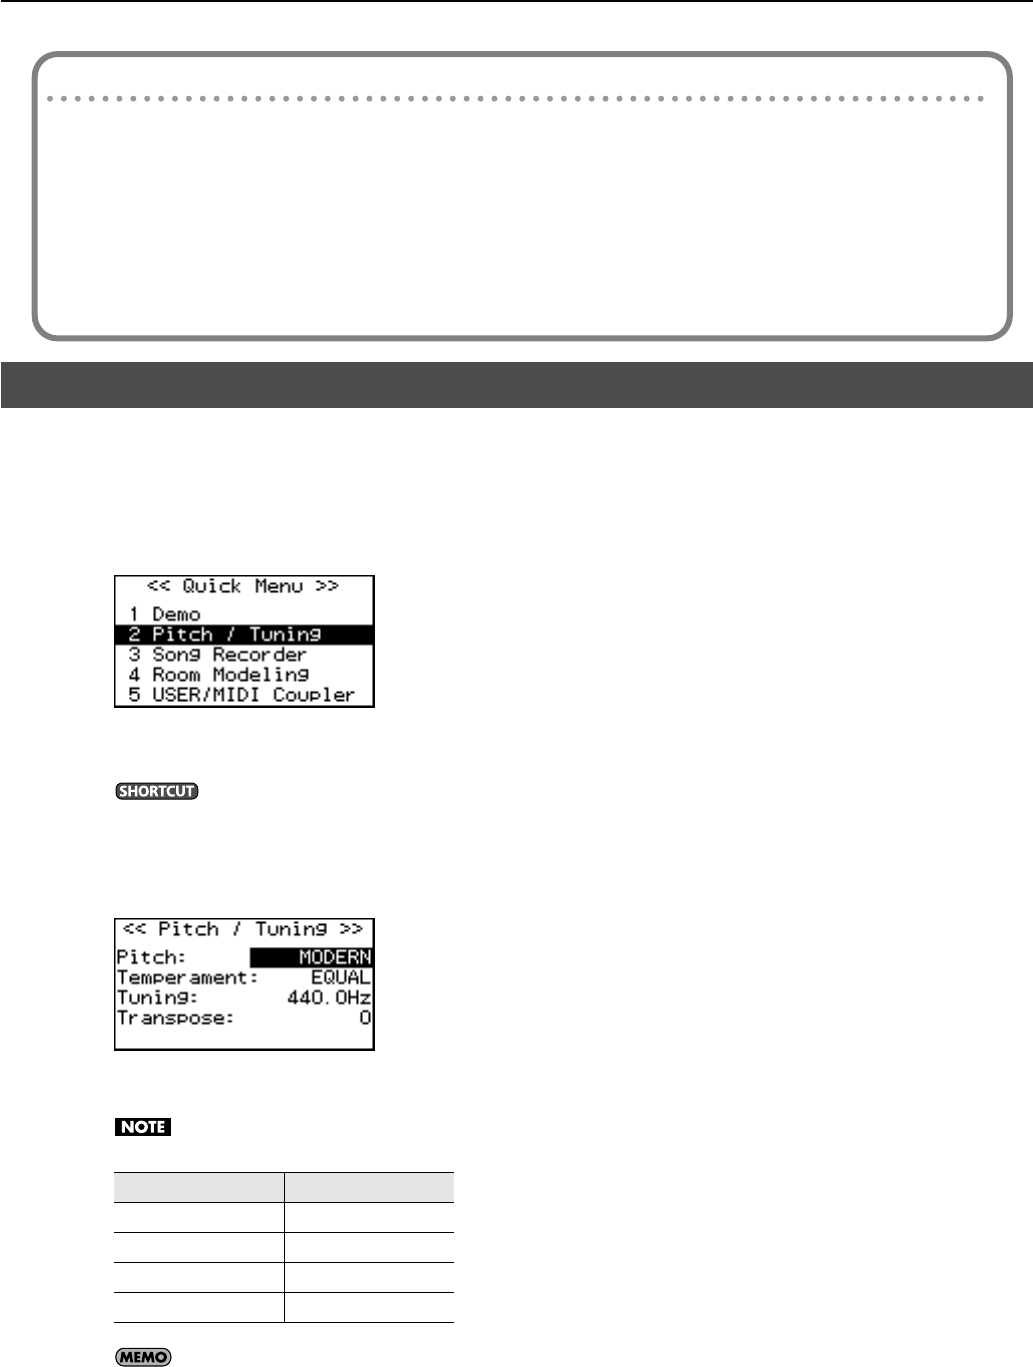
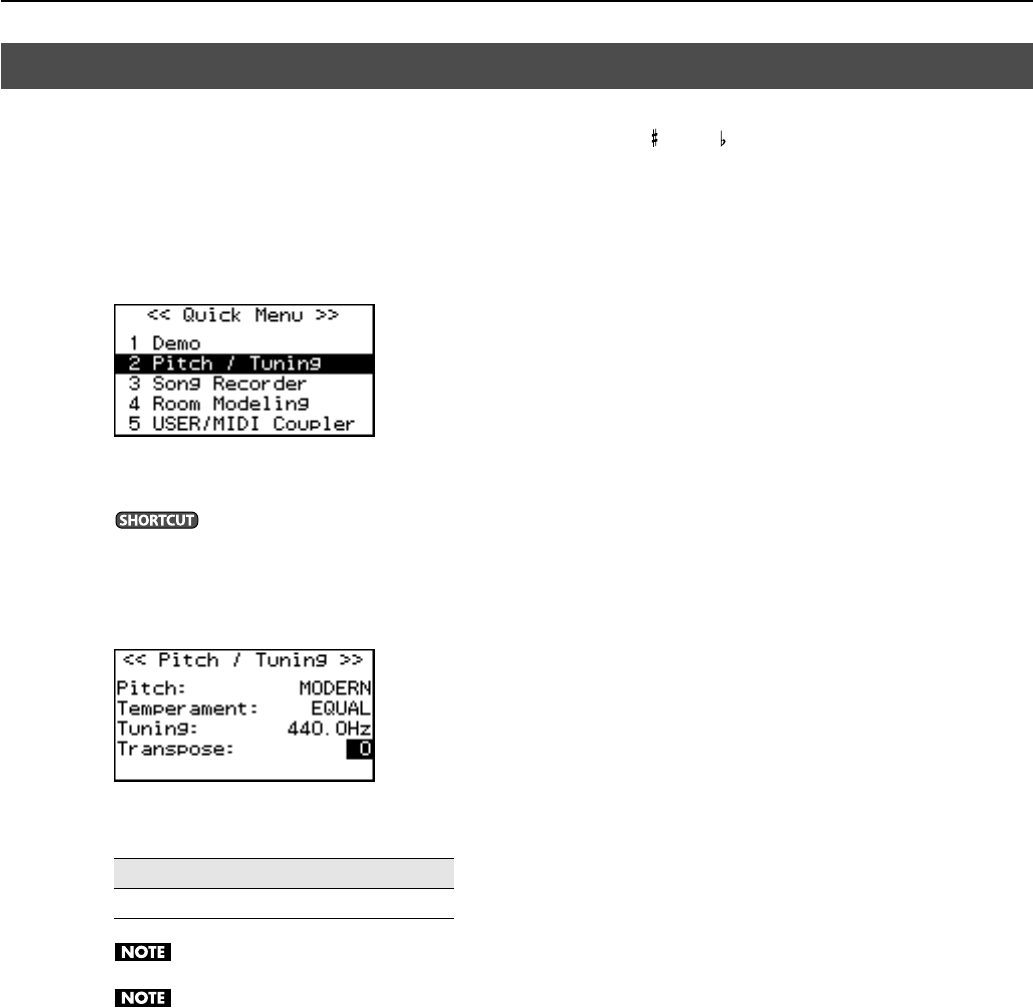
Changing the Tuning (Temperament).............................................................................................................................38
Using Baroque Pitch...............................................................................................................................................................39
Tuning to Match the Pitch of Another Instrument......................................................................................................40
Transposing the Key...............................................................................................................................................................41
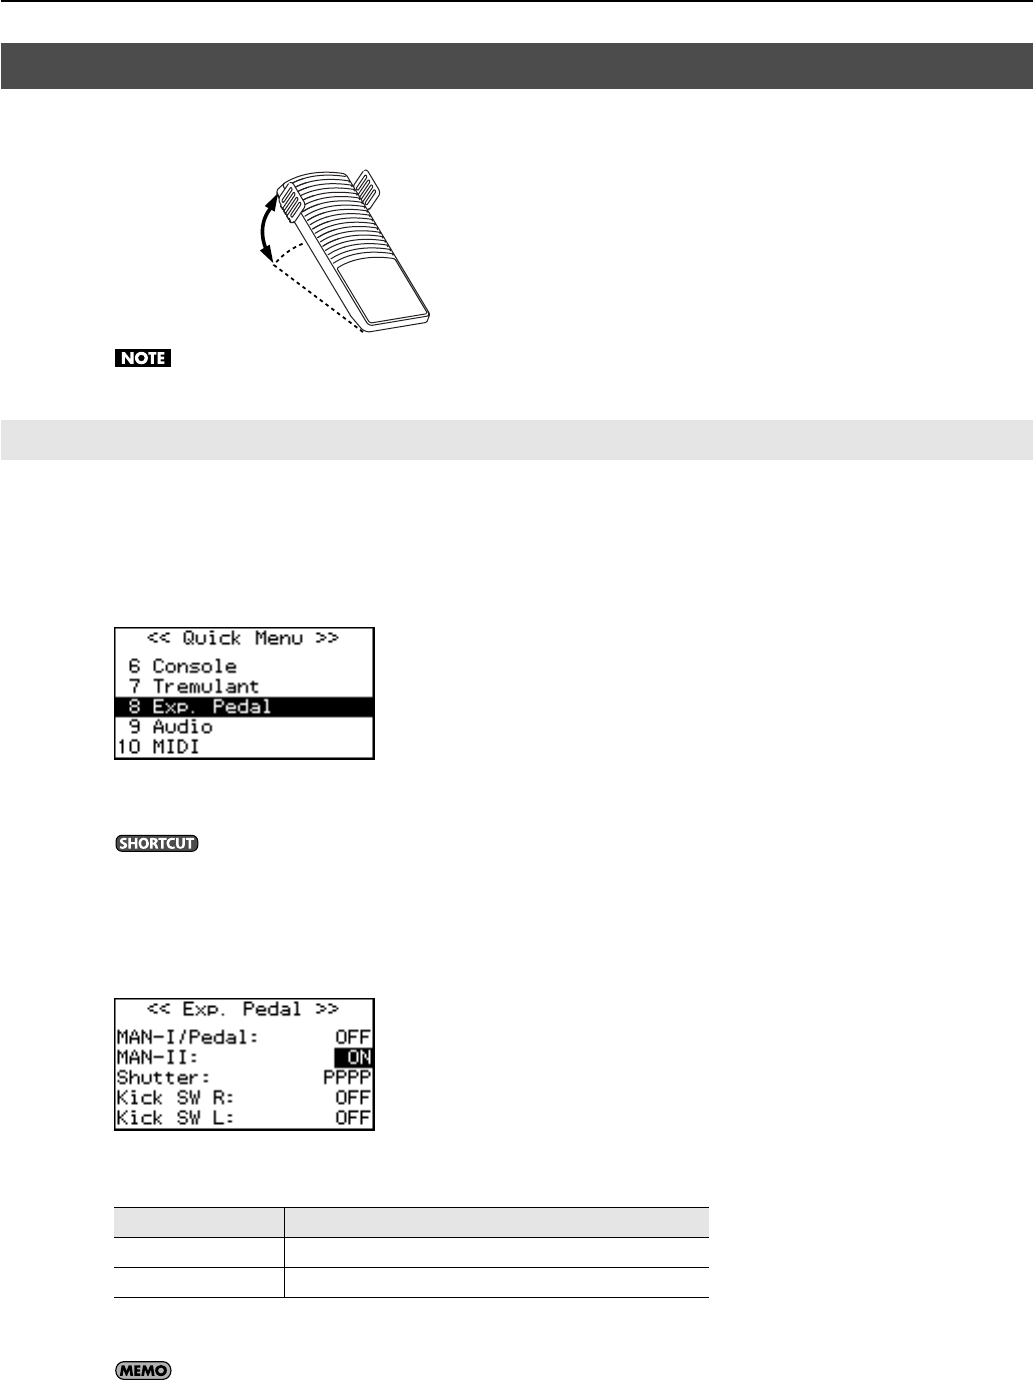
Using the Expression Pedal to Adjust the Volume of the Organ............................................................................42
Specifying the Divisions Affected by the Expression Pedal .......................................................................42
Storing the Division for which the Volume is to be Adjusted ...................................................................43
Setting the Minimum Volume of the Expression Pedal...............................................................................44
Using the Kick Switches.........................................................................................................................................................45
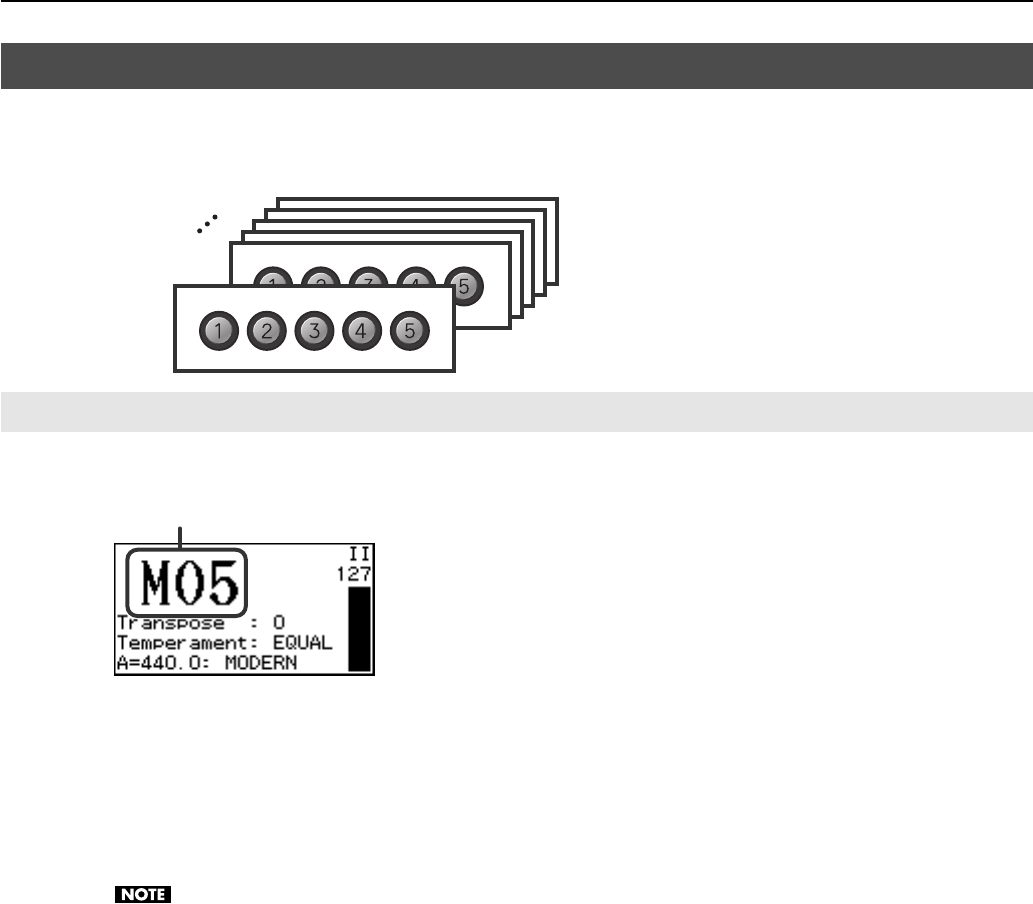
Storing a Combination of Stops .................................................................46
Storing or Recalling a Registration....................................................................................................................................47
Storing a Registration...............................................................................................................................................47
Recalling a Registration...........................................................................................................................................47
Resetting the Sound Settings (General Cancel) ...........................................................................................................47
Using Memory Banks..............................................................................................................................................................48
Storing the Combination of Memory Pistons as a Memory Bank............................................................48
Recalling a Registration from a Different Memory Bank.............................................................................49
Practicing Along with a Preset Song or Performance Data......................50
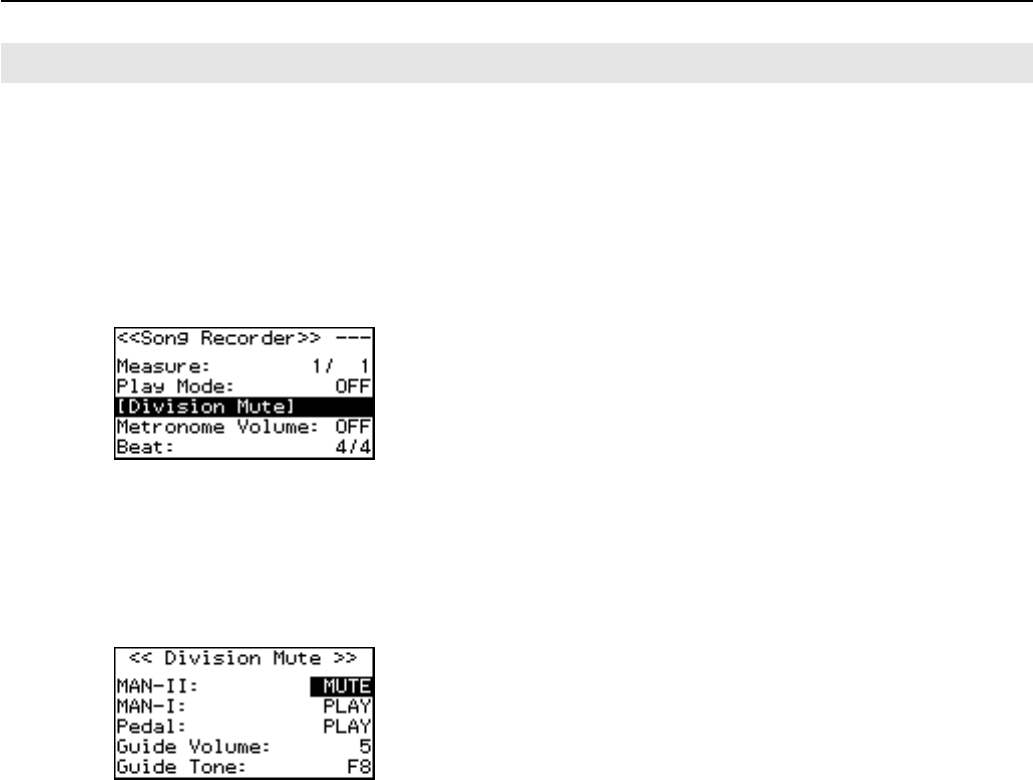
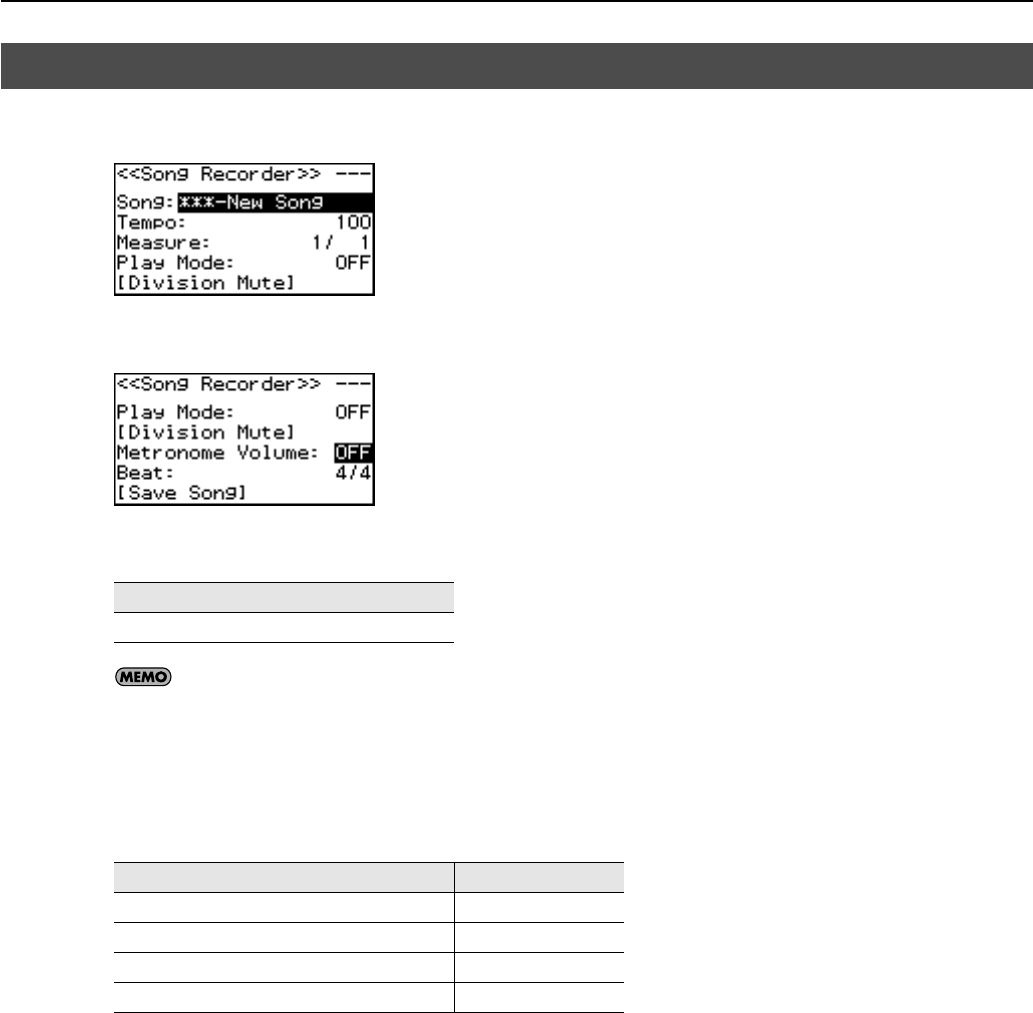
Selecting and Playing Back a Song ...................................................................................................................................50
Muting a Specific Division During Playback ....................................................................................................52
Playing Back a Specific Division as a Guide Tone...........................................................................................53
Changing the Tempo.............................................................................................................................................................54
Using the Metronome............................................................................................................................................................55
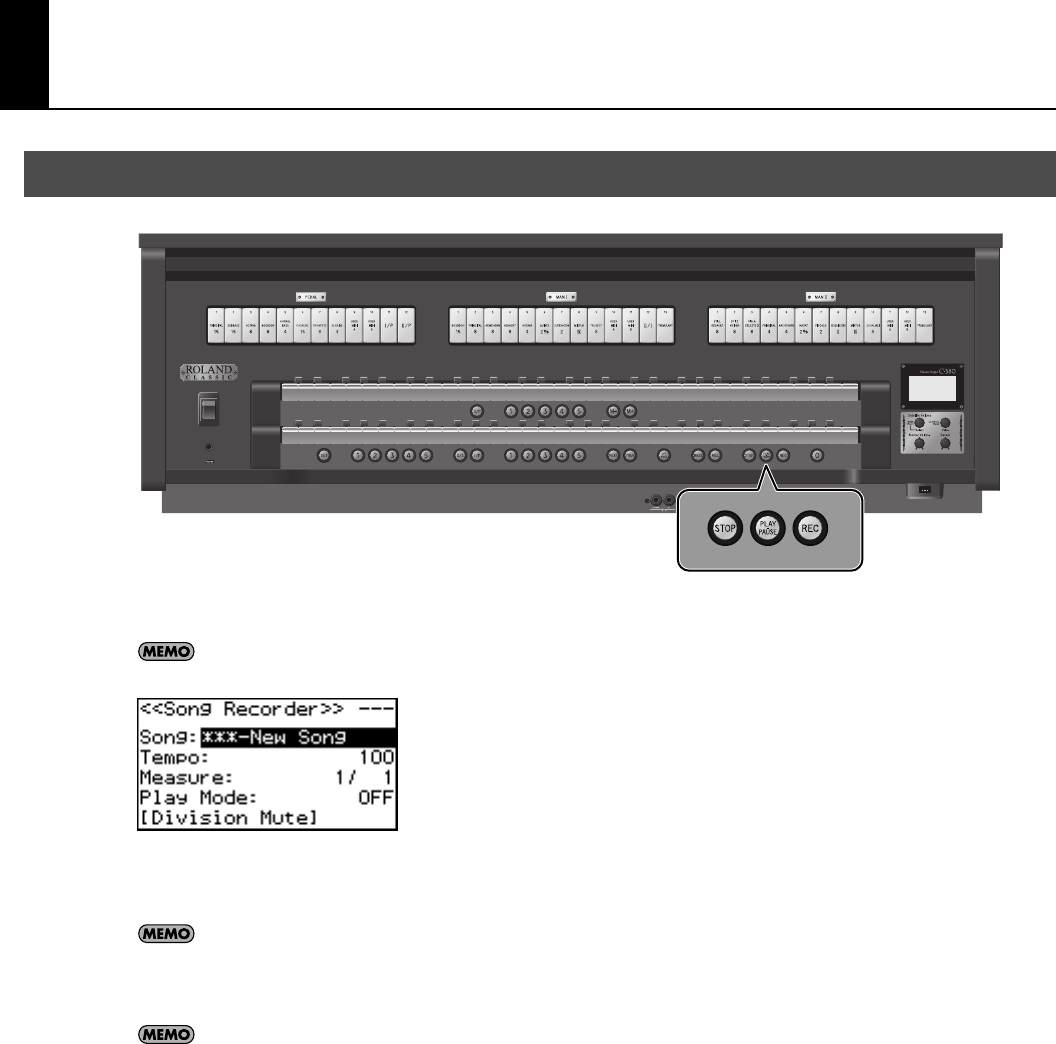
Recording Your Performances....................................................................56
Recording a Song ....................................................................................................................................................................56
Play Back the Recorded Song..............................................................................................................................................57
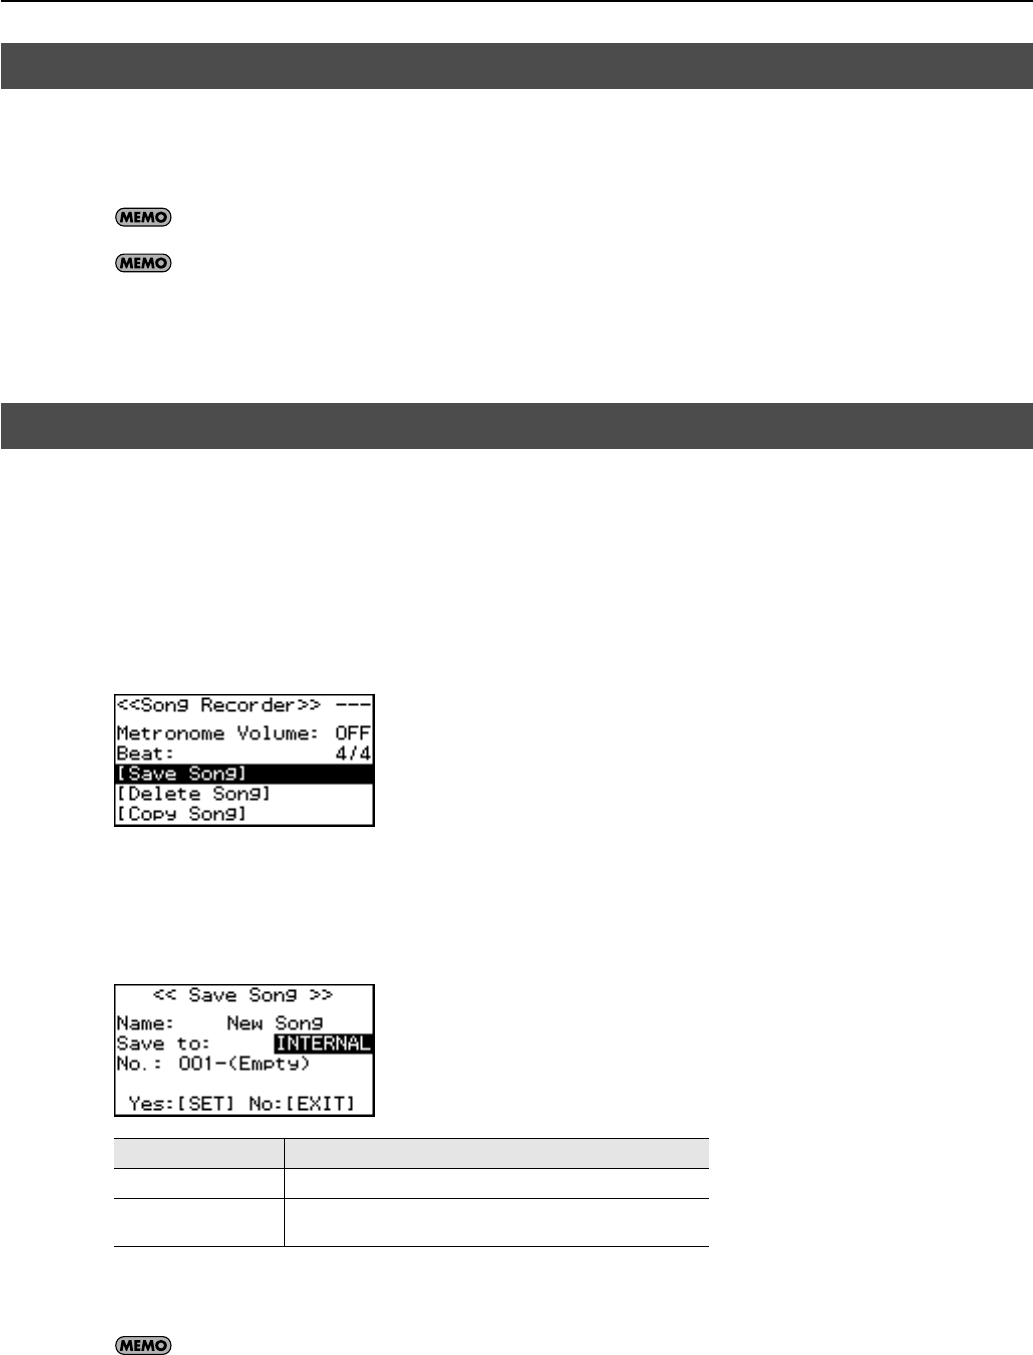
Saving a Recorded Song.......................................................................................................................................................57
Deleting a Recorded Song ...................................................................................................................................................59
Copying a Saved Song...........................................................................................................................................................60
C-380_330_e.book9ページ2010年4月28日 水曜日 午後10時11分
10
Contents
Saving and Loading Settings on USB Memory..........................................62
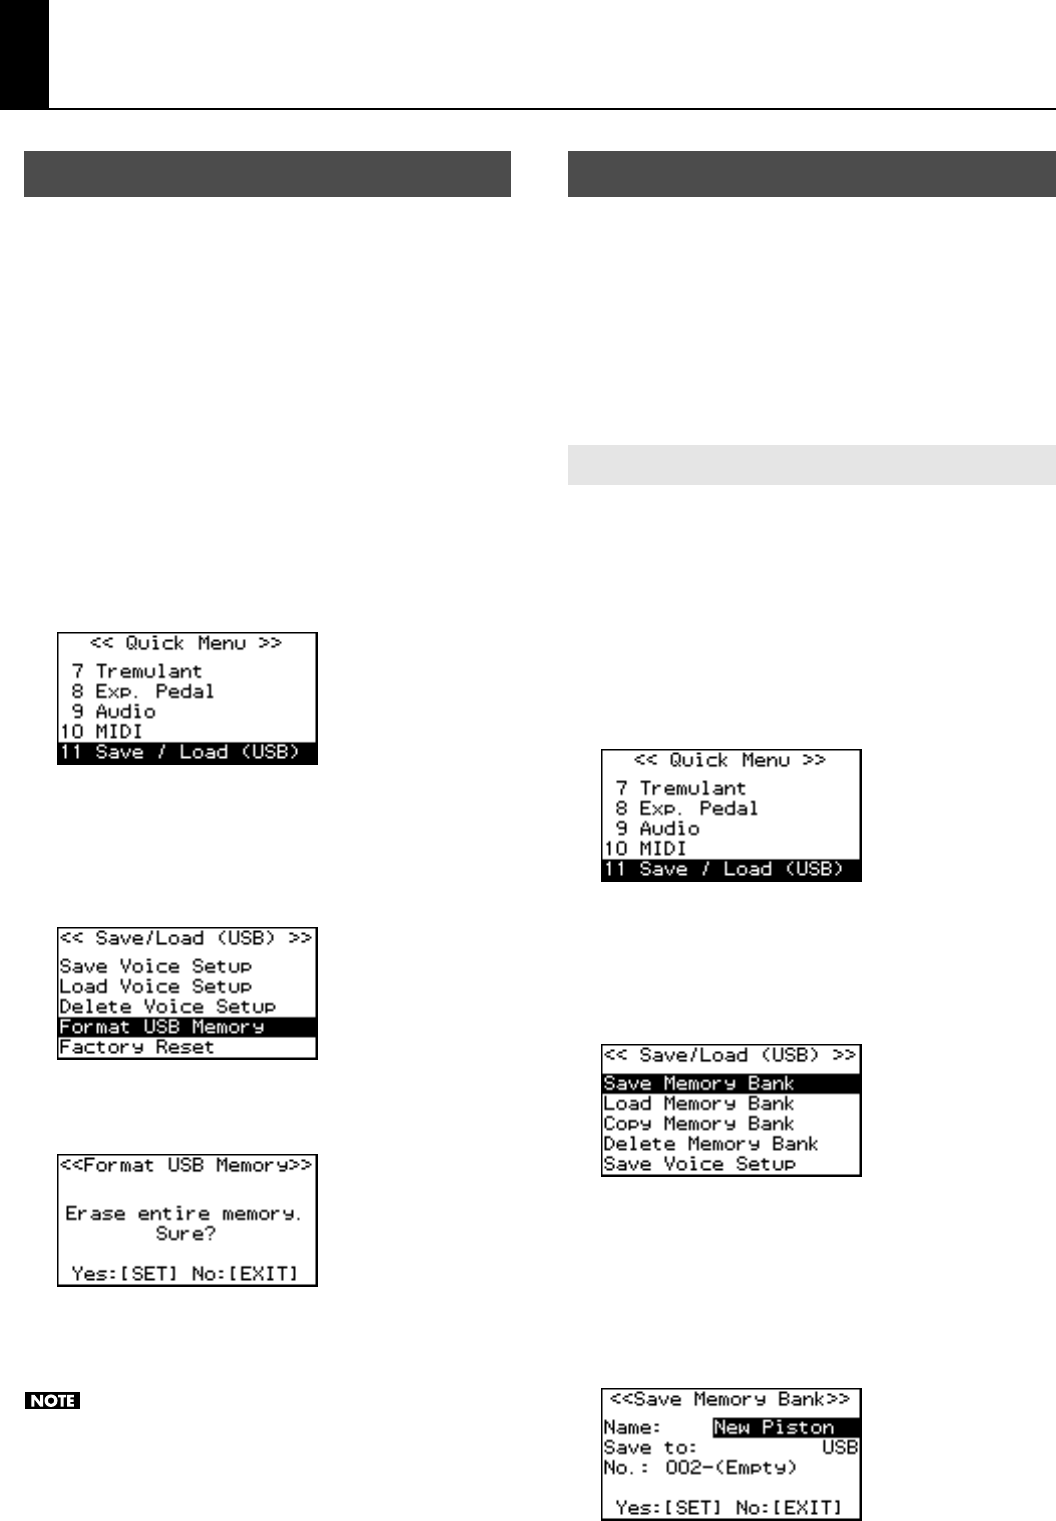
Formatting USB Memory......................................................................................................................................................62
Saving and Loading Memory Banks.................................................................................................................................62
Saving to USB Memory............................................................................................................................................62
Loading from USB Memory into Internal Memory........................................................................................63
Deleting a Memory Bank from USB Memory...................................................................................................63
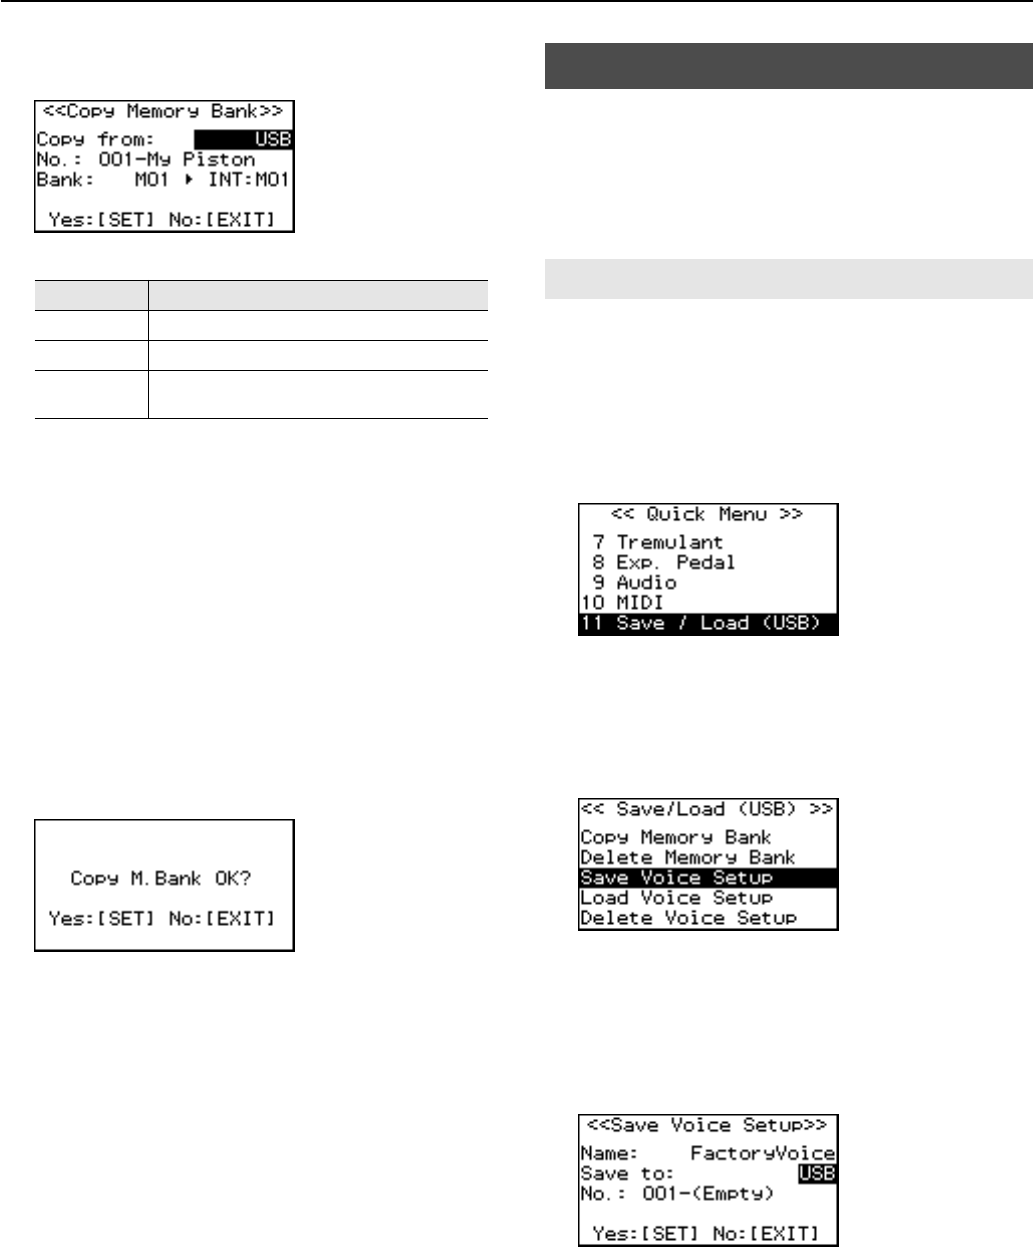
Copying a Memory Bank.......................................................................................................................................................64
Saving and Loading Voice Setup.......................................................................................................................................65
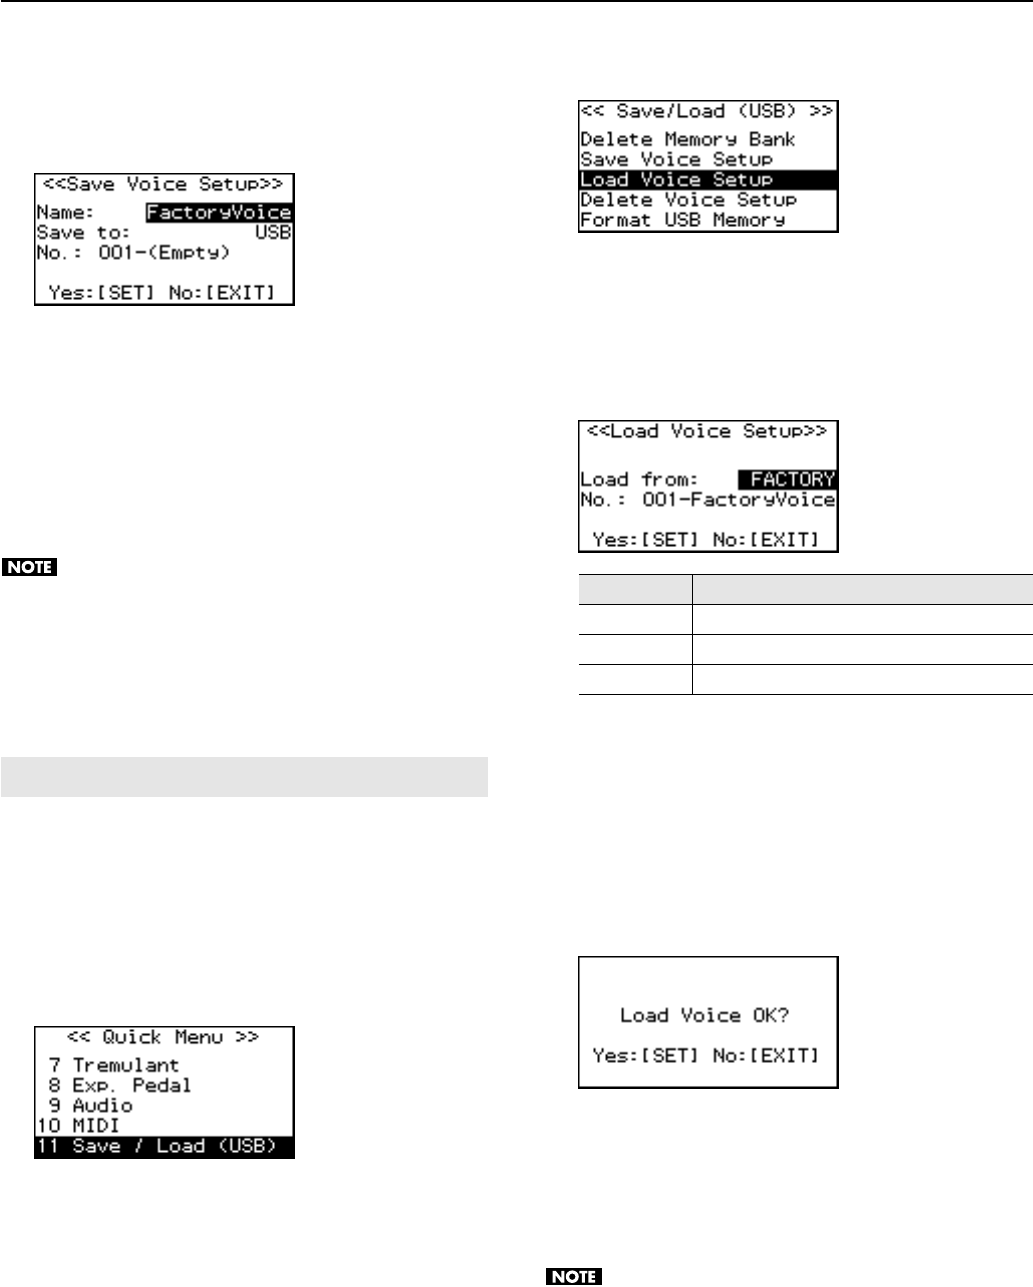
Saving to USB Memory............................................................................................................................................65
Loading a Voice Setup.............................................................................................................................................66
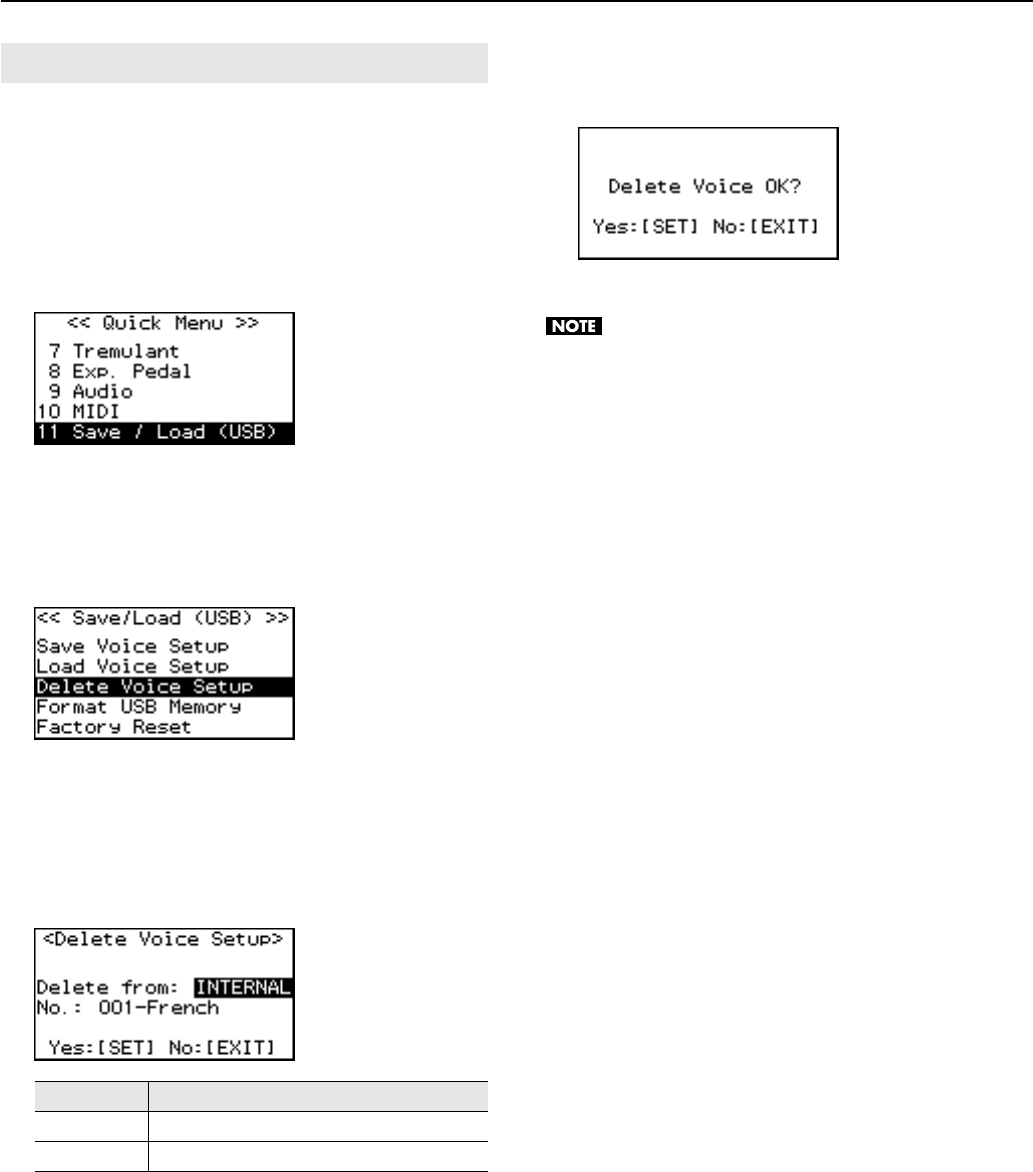
Deleting a Voice Setup.............................................................................................................................................67
Other Settings..............................................................................................68
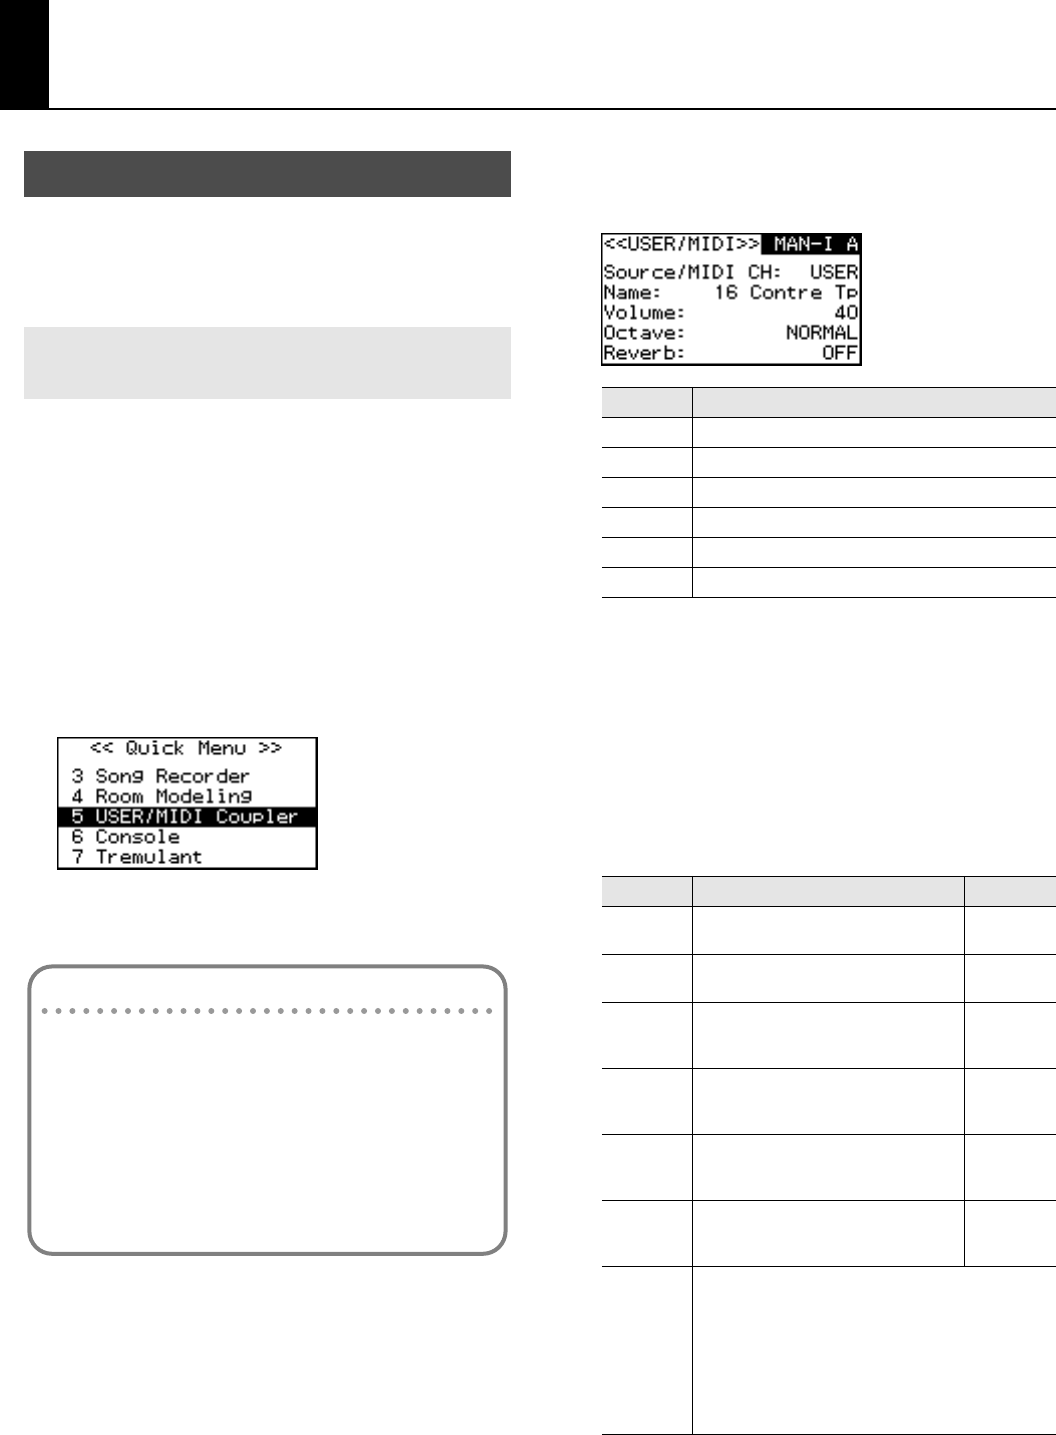
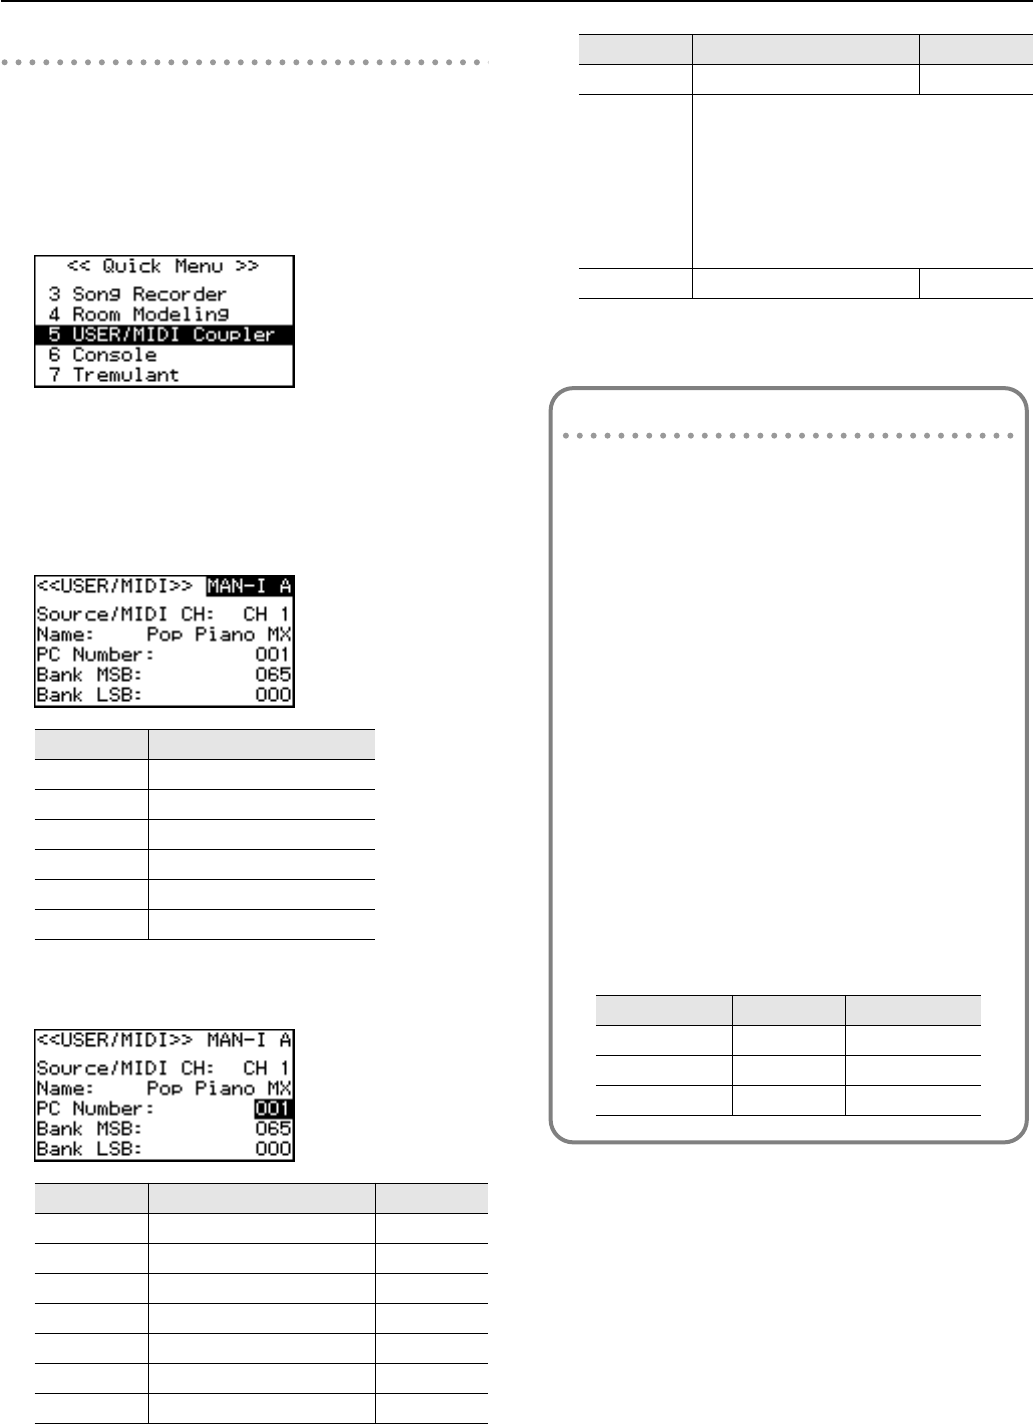
Settings for the USER/MIDI Couplers................................................................................................................................68
Playing Sounds that are not in the Sound Tablets (USER Sound Coupler)...........................................68
Playing Sounds on an External MIDI Sound Module (MIDI Coupler)......................................................69
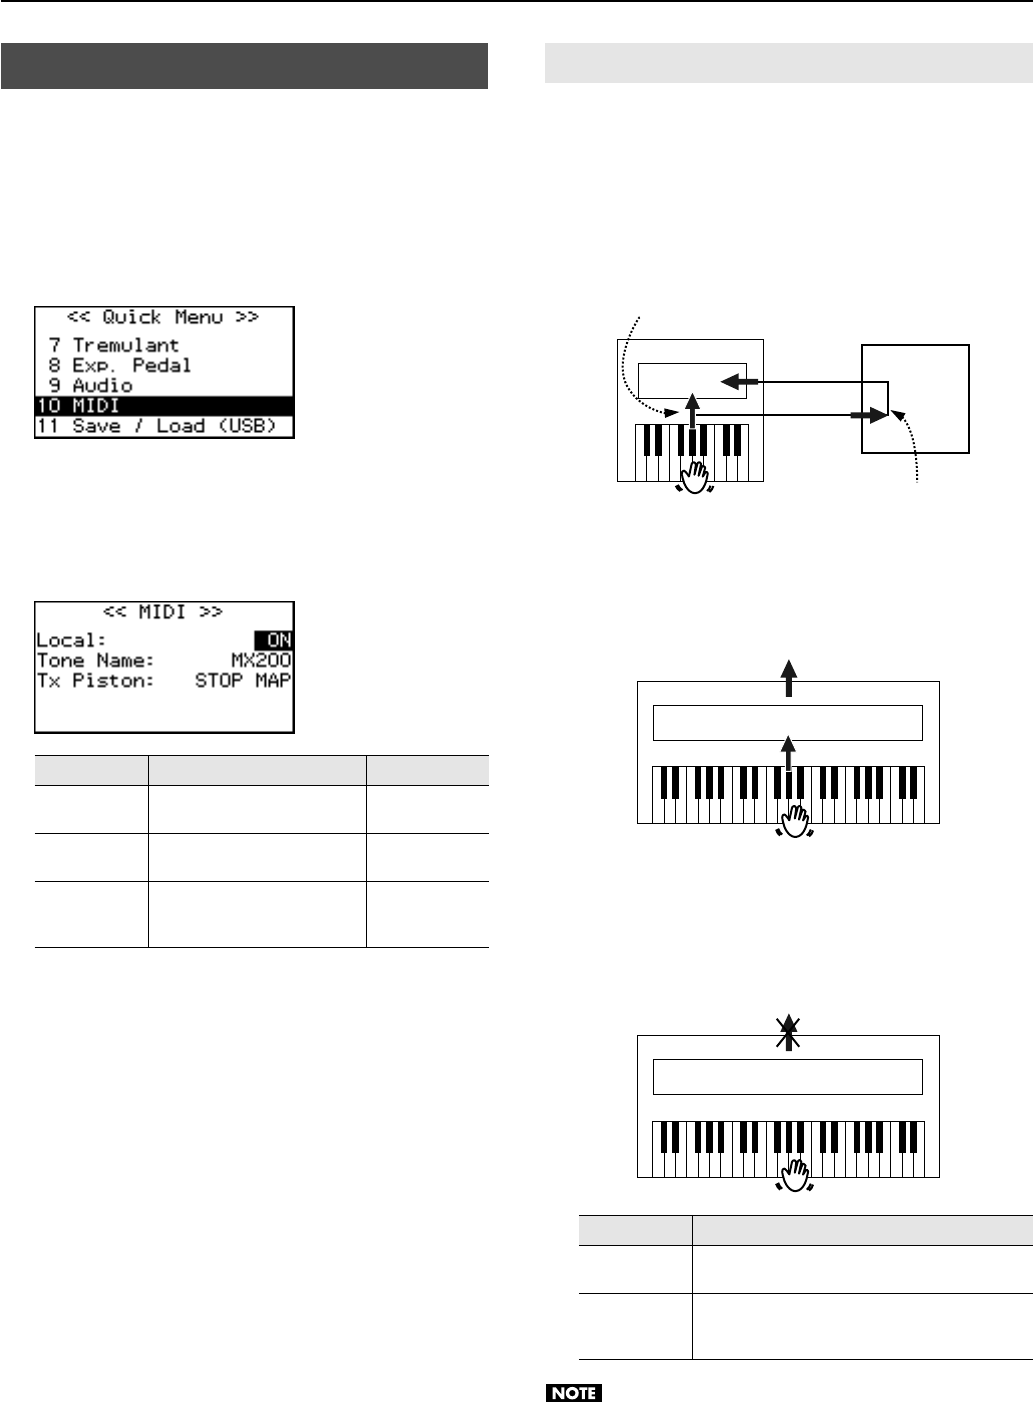
Local Control Setting (Local)..................................................................................................................................71
Specifying the Type of External MIDI Sound Module (Tone Name)........................................................72
Specifying the MIDI Data Output format for the General Memory Pistons (Tx Piston)....................72
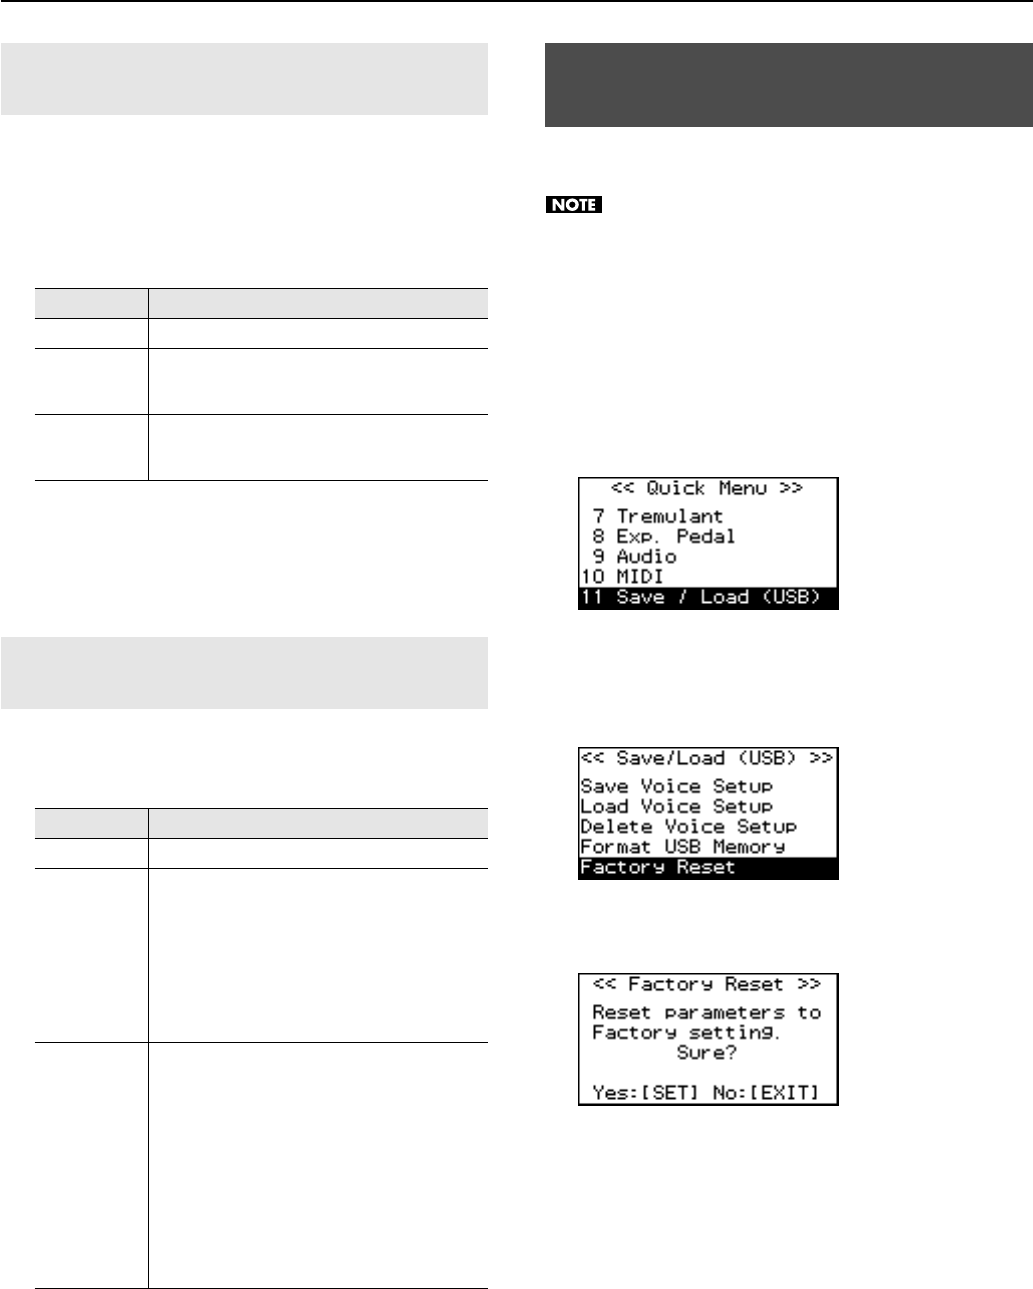
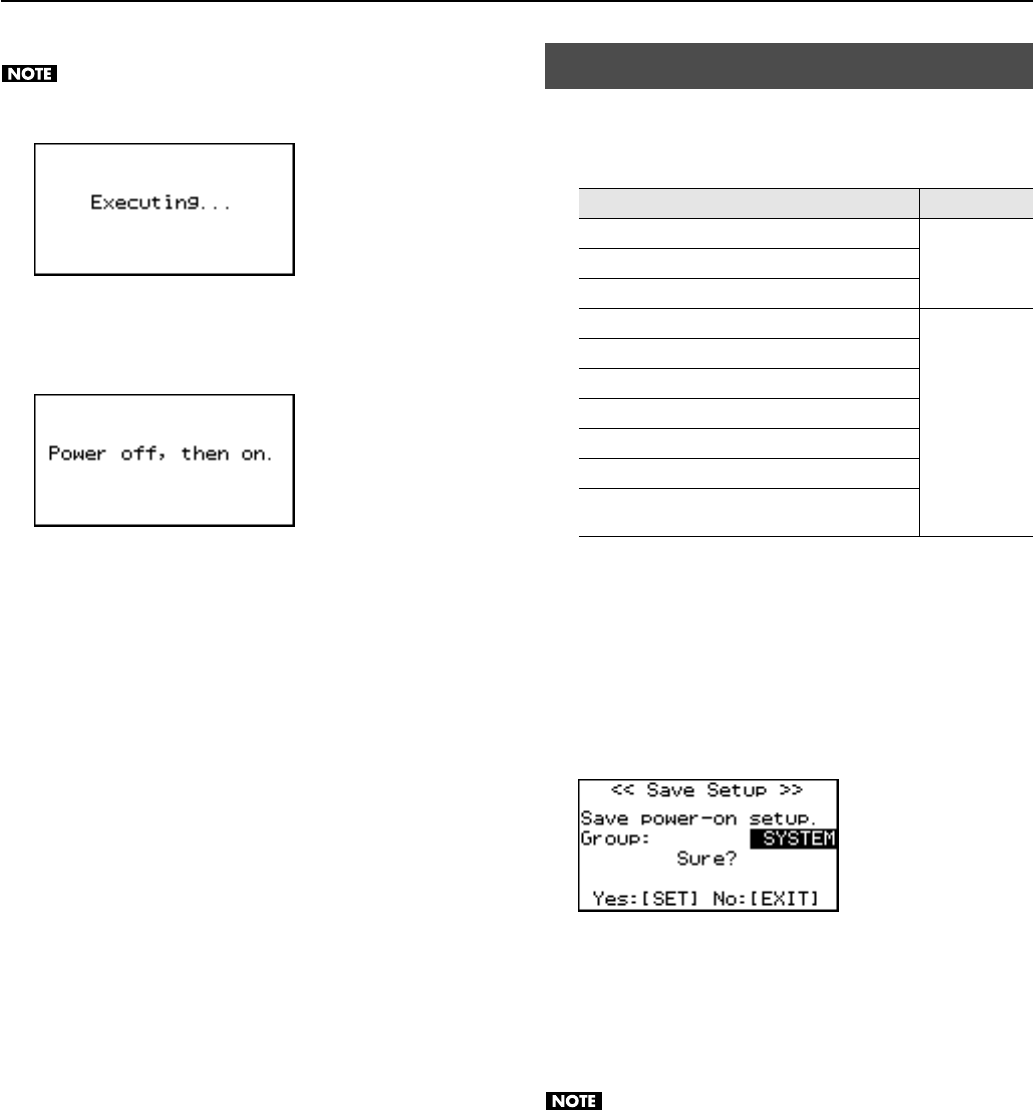
Returning all Settings to the Factory-Set State (Factory Reset)..............................................................................72
Storing Your Settings (Customize)....................................................................................................................................73
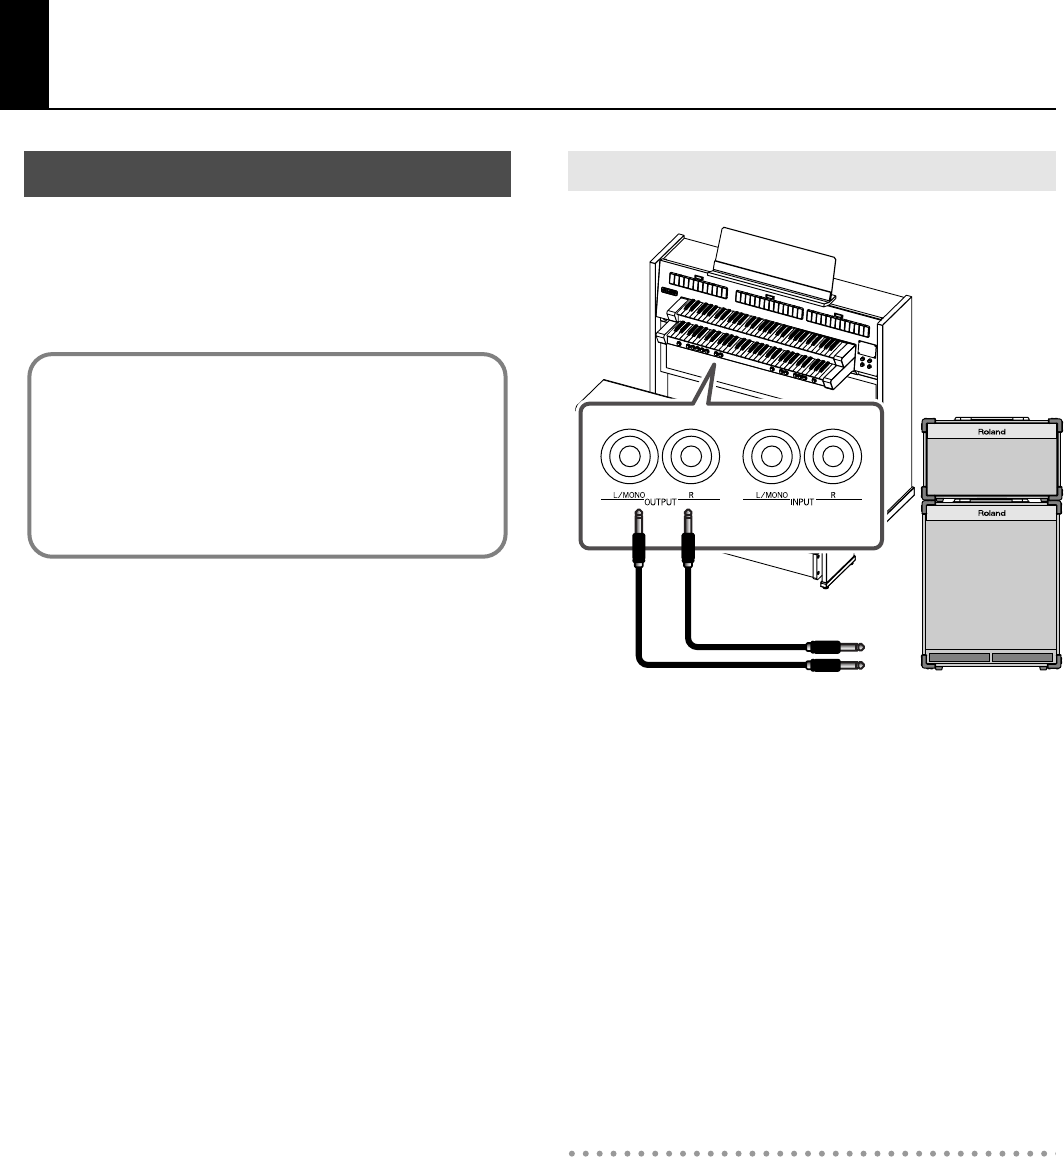
Connecting to Audio Equipment.......................................................................................................................................74
Connecting to Amplified Speakers......................................................................................................................74
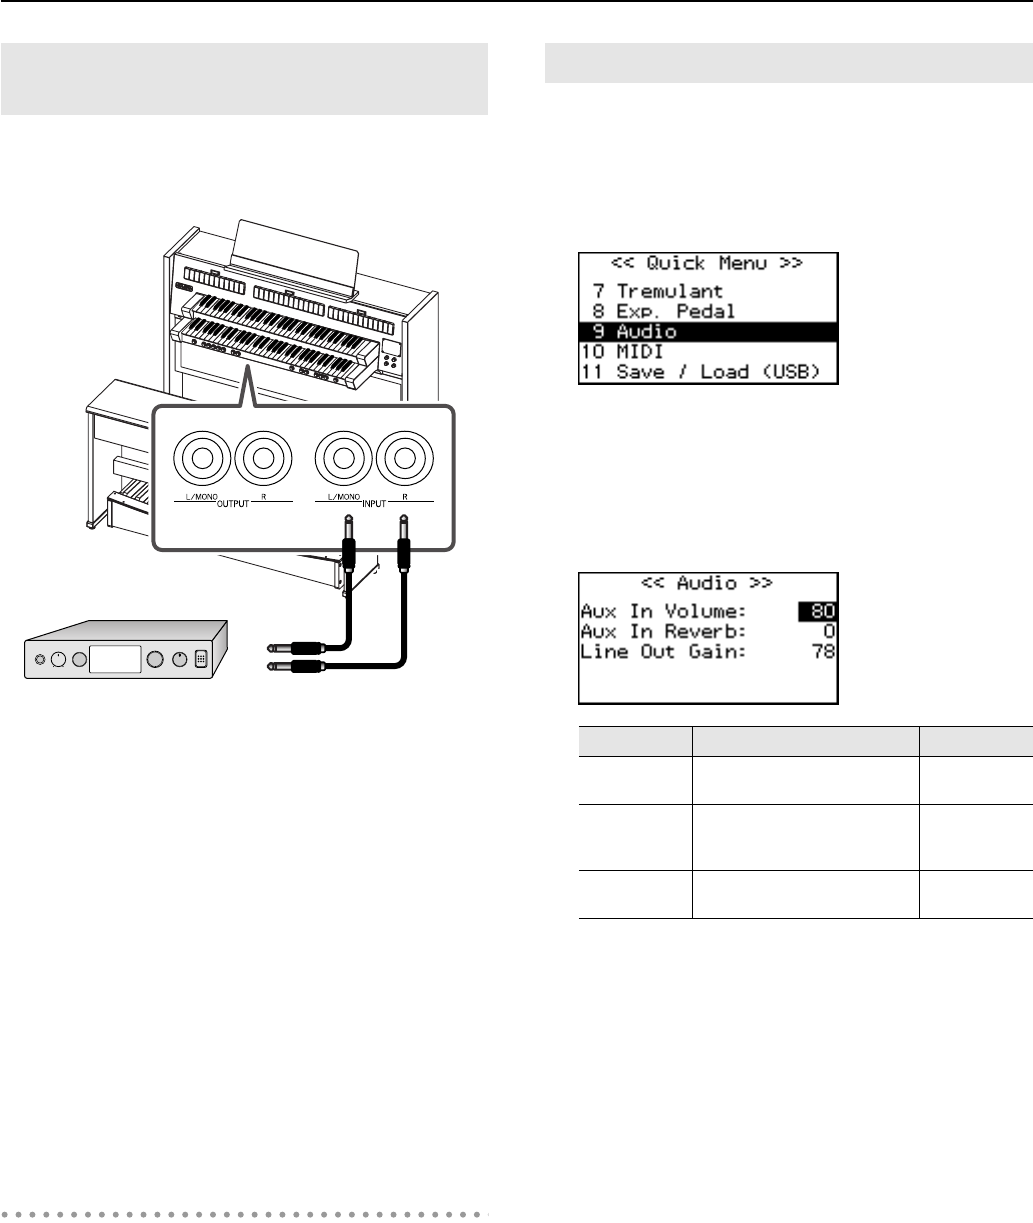
Playing the Sounds of an External MIDI Sound Module or an Audio Device.......................................75
Adjusting the Volume of your Audio Device...................................................................................................75
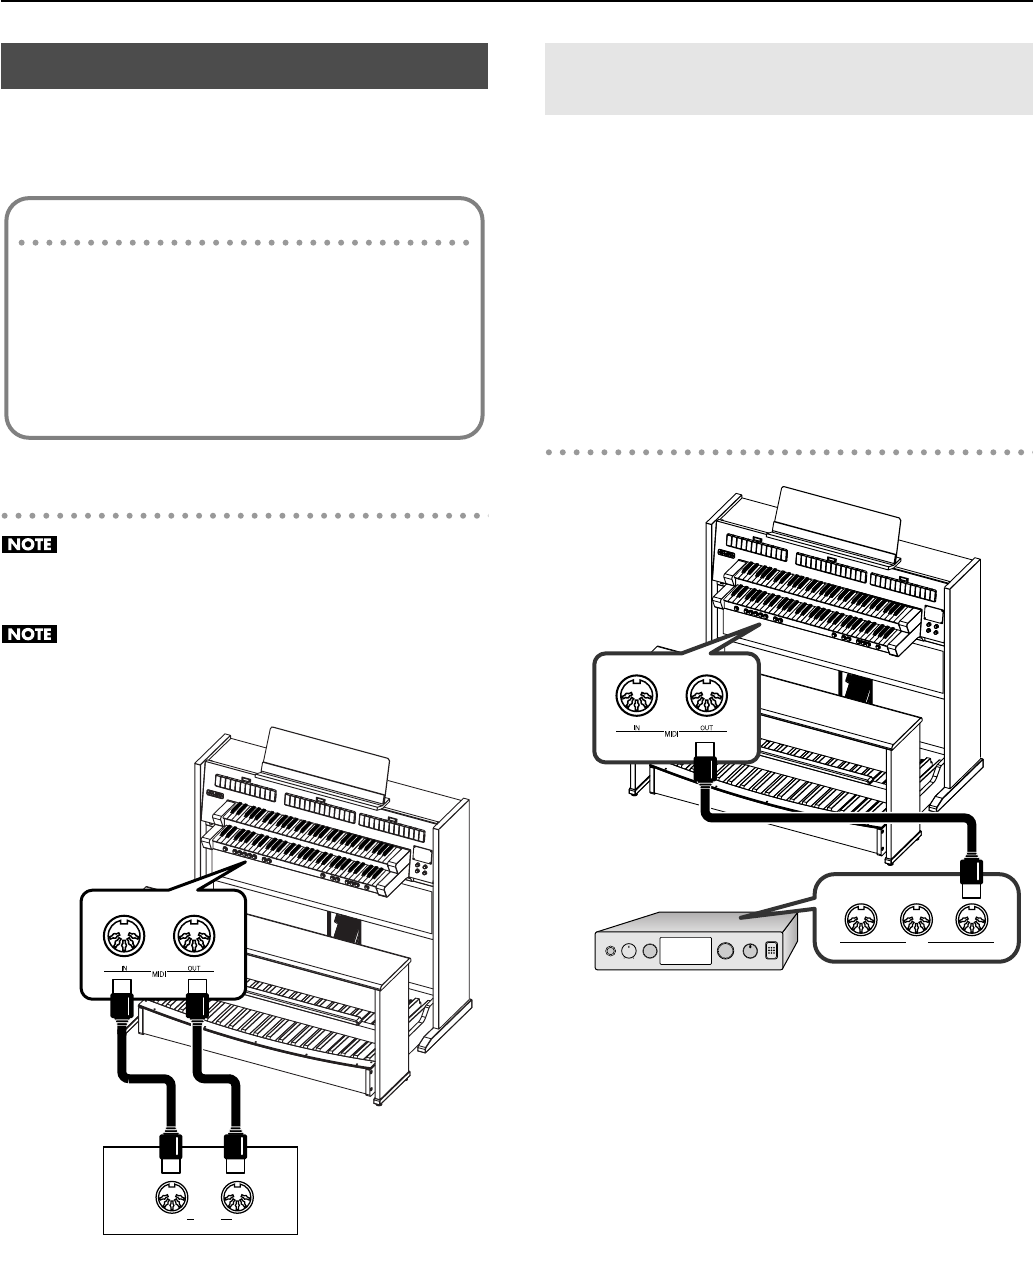
Connecting to MIDI Equipment.........................................................................................................................................76
Using the Organ to Play the Sounds of a MIDI Sound Module.................................................................76
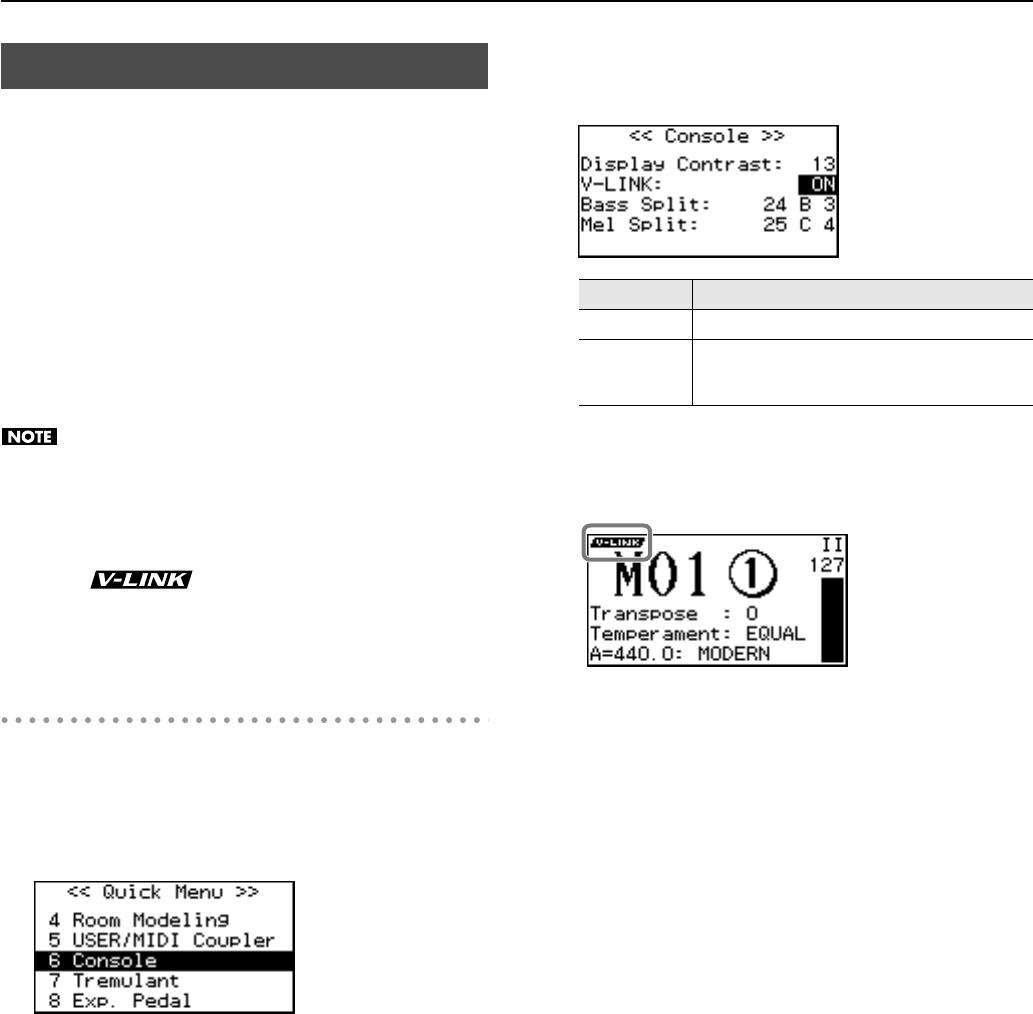
Using V-LINK..............................................................................................................................................................................77
C-380_330_e.book10ページ2010年4月28日 水曜日 午後10時11分
11
Contents
List of Preset Song/Demo Song..................................................................78
List of Voices (Stops)....................................................................................79
MAN I Division (Lower Keyboard)......................................................................................................................................79
MAN II Division (Upper Keyboard).....................................................................................................................................79
Gebruikershandleiding.com neemt misbruik van zijn services uitermate serieus. U kunt hieronder aangeven waarom deze vraag ongepast is. Wij controleren de vraag en zonodig wordt deze verwijderd.
Product:
Spelregels forum
Om tot zinvolle vragen te komen hanteren wij de volgende spelregels:
lees eerst de handleiding door;
controleer of uw vraag al eerder door iemand anders is gesteld;
probeer uw vraag zo duidelijk mogelijk te stellen;
heeft u een probleem en al geprobeerd om dit op te lossen, vermeld dit erbij aub;
heeft u een oplossing gekregen van een bezoeker dan horen wij dat graag in dit forum;
wilt u een reactie geven op een vraag of antwoord, gebruik dan niet dit formulier maar klik op de knop 'reageer op deze vraag';
uw vraag wordt direct op de website gezet; vermijd daarom persoonlijke gegevens in te vullen;
Belangrijk! Als er een antwoord wordt gegeven op uw vraag, dan is het voor de gever van het antwoord nuttig om te weten als u er wel (of niet) mee geholpen bent! Wij vragen u dus ook te reageren op een antwoord.
Belangrijk! Antwoorden worden ook per e-mail naar abonnees gestuurd. Laat uw emailadres achter op deze site, zodat u op de hoogte blijft. U krijgt dan ook andere vragen en antwoorden te zien.
Abonneren
Abonneer u voor het ontvangen van emails voor uw Roland C-330 bij:
nieuwe vragen en antwoorden
nieuwe handleidingen
U ontvangt een email met instructies om u voor één of beide opties in te schrijven.
Ontvang uw handleiding per email
Vul uw emailadres in en ontvang de handleiding van Roland C-330 in de taal/talen: Engels als bijlage per email.
De handleiding is 10,44 mb groot.
U ontvangt de handleiding per email binnen enkele minuten. Als u geen email heeft ontvangen, dan heeft u waarschijnlijk een verkeerd emailadres ingevuld of is uw mailbox te vol. Daarnaast kan het zijn dat uw internetprovider een maximum heeft aan de grootte per email. Omdat hier een handleiding wordt meegestuurd, kan het voorkomen dat de email groter is dan toegestaan bij uw provider.
Uw handleiding is per email verstuurd. Controleer uw email
Als u niet binnen een kwartier uw email met handleiding ontvangen heeft, kan het zijn dat u een verkeerd emailadres heeft ingevuld of dat uw emailprovider een maximum grootte per email heeft ingesteld die kleiner is dan de grootte van de handleiding.
Er is een email naar u verstuurd om uw inschrijving definitief te maken.
Controleer uw email en volg de aanwijzingen op om uw inschrijving definitief te maken
U heeft geen emailadres opgegeven
Als u de handleiding per email wilt ontvangen, vul dan een geldig emailadres in.
Uw vraag is op deze pagina toegevoegd
Wilt u een email ontvangen bij een antwoord en/of nieuwe vragen? Vul dan hier uw emailadres in.