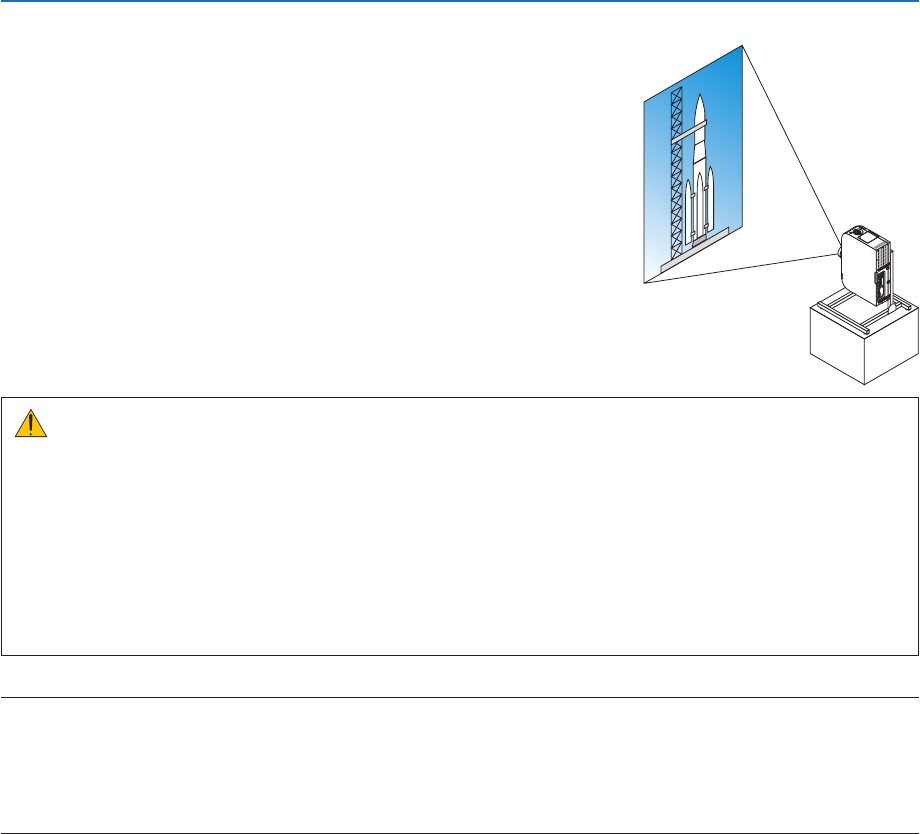
Portrait screens from a computer can be projected by installing the projector in
a vertical orientation. All the screens such as the on-screen menu will be rotated
in an counter-clockwise direction.
The projector is equipped with a sensor to automatically detect the installation
state.
When the projector is installed in a portrait configuration for the first time with
the lamp lit up, a caution message to indicate that the operating time of the
lamp may be shortened will be displayed.
This message will automatically disappear when the installation state of the
projector is returned to the original state.
Precautions during installation
• Please do not install the projector in a vertical orientation on top of the floor or table on its own. The intake vent may be
obstructed, resulting in the projector getting warm and the possibility of fire and malfunction occurring.
• For vertical installation, install the projector with the intake vent (filter) facing downwards. A stand for supporting the
projector needs to be made for this purpose. In this case, the stand must be designed such that the center of gravity of
the projector is located well within the legs of the stand. If not, the projector may fall over and result in injury, damage
and malfunction.
• Do not use the lens shift function when performing portrait projection. Use the position of the lens shift mechanism in
the center (lens center).
NOTE:
• The lamp replacement time (as a guide)* is about 2000 hours for portrait projection.
* Replacement time is not guaranteed.
• When installing in a portrait conguration for the rst time, portrait projection cannot be used when the number of lamp hours used shown under [INFO.] → [USAGE
TIME] → [LAMP HOURS USED] in the on-screen menu exceeds 1900 hours.
• When the [FAN MODE] is set to a mode other than [AUTO], portrait projection cannot be used.
Design and manufacturing conditions for the stand
Please engage an installation service provider for the design and manufacture of the customized stand to be used for portrait
projection. Please ensure that the following are complied with when designing the stand.
1. Maintain an opening of at least 310 × 170 mm so as not to obstruct the intake vent / filter of the projector.
2. Maintain a distance of at least 130 mm between the projector intake vent and the floor (for the opening of the filter cover).
3. Use the four screw holes at the back of the projector to secure it to the stand.
Screw hole center dimension: 200 × 250 mm
Screw hole dimension on the projector: M4 with a maximum depth of 8 mm.
* Please design the stand such that the rear legs at the back of the projector do not contact the stand. The front legs can
be turned and removed.
4. Horizontal adjustment mechanism (for example, bolts and nuts in four locations)
5. Please design the stand such that it does not topple over easily.
Gebruikershandleiding.com neemt misbruik van zijn services uitermate serieus. U kunt hieronder aangeven waarom deze vraag ongepast is. Wij controleren de vraag en zonodig wordt deze verwijderd.
Product:
Spelregels forum
Om tot zinvolle vragen te komen hanteren wij de volgende spelregels:
lees eerst de handleiding door;
controleer of uw vraag al eerder door iemand anders is gesteld;
probeer uw vraag zo duidelijk mogelijk te stellen;
heeft u een probleem en al geprobeerd om dit op te lossen, vermeld dit erbij aub;
heeft u een oplossing gekregen van een bezoeker dan horen wij dat graag in dit forum;
wilt u een reactie geven op een vraag of antwoord, gebruik dan niet dit formulier maar klik op de knop 'reageer op deze vraag';
uw vraag wordt direct op de website gezet; vermijd daarom persoonlijke gegevens in te vullen;
Belangrijk! Als er een antwoord wordt gegeven op uw vraag, dan is het voor de gever van het antwoord nuttig om te weten als u er wel (of niet) mee geholpen bent! Wij vragen u dus ook te reageren op een antwoord.
Belangrijk! Antwoorden worden ook per e-mail naar abonnees gestuurd. Laat uw emailadres achter op deze site, zodat u op de hoogte blijft. U krijgt dan ook andere vragen en antwoorden te zien.
Abonneren
Abonneer u voor het ontvangen van emails voor uw Ricoh PJ WU6181N bij:
nieuwe vragen en antwoorden
nieuwe handleidingen
U ontvangt een email met instructies om u voor één of beide opties in te schrijven.
Ontvang uw handleiding per email
Vul uw emailadres in en ontvang de handleiding van Ricoh PJ WU6181N in de taal/talen: Engels als bijlage per email.
De handleiding is 17,37 mb groot.
U ontvangt de handleiding per email binnen enkele minuten. Als u geen email heeft ontvangen, dan heeft u waarschijnlijk een verkeerd emailadres ingevuld of is uw mailbox te vol. Daarnaast kan het zijn dat uw internetprovider een maximum heeft aan de grootte per email. Omdat hier een handleiding wordt meegestuurd, kan het voorkomen dat de email groter is dan toegestaan bij uw provider.
Uw handleiding is per email verstuurd. Controleer uw email
Als u niet binnen een kwartier uw email met handleiding ontvangen heeft, kan het zijn dat u een verkeerd emailadres heeft ingevuld of dat uw emailprovider een maximum grootte per email heeft ingesteld die kleiner is dan de grootte van de handleiding.
Er is een email naar u verstuurd om uw inschrijving definitief te maken.
Controleer uw email en volg de aanwijzingen op om uw inschrijving definitief te maken
U heeft geen emailadres opgegeven
Als u de handleiding per email wilt ontvangen, vul dan een geldig emailadres in.
Uw vraag is op deze pagina toegevoegd
Wilt u een email ontvangen bij een antwoord en/of nieuwe vragen? Vul dan hier uw emailadres in.