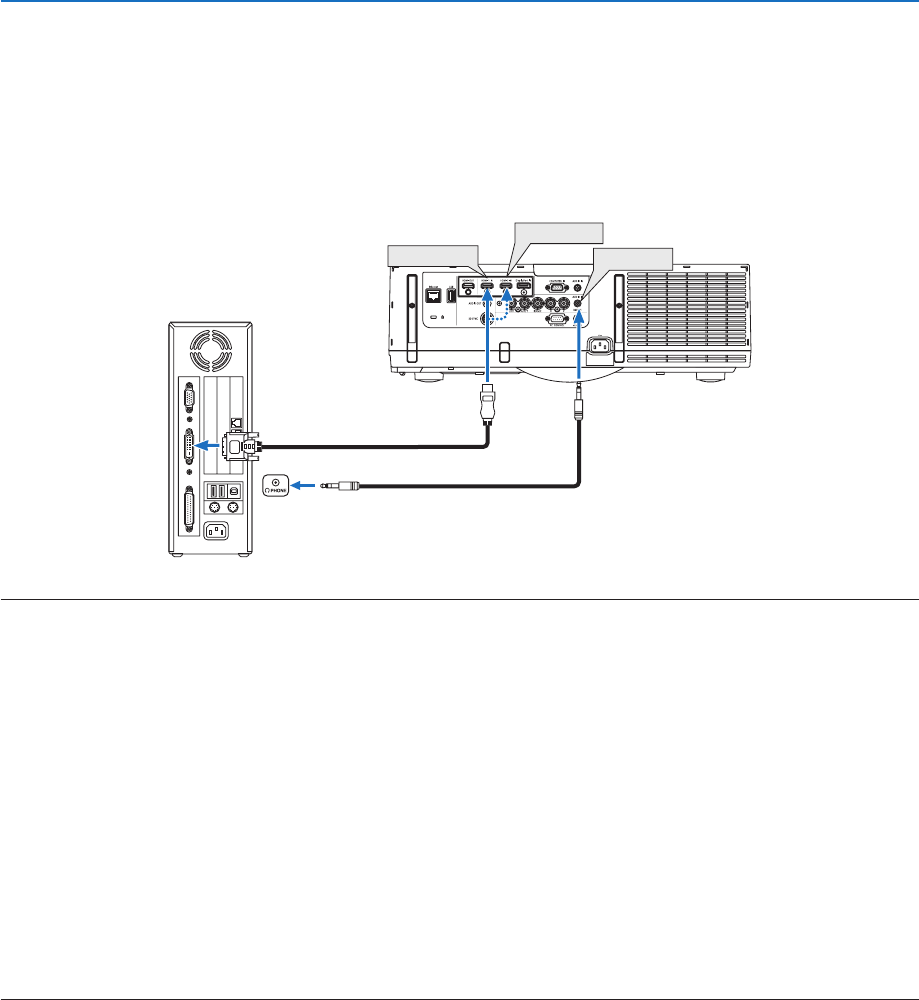
• When the computer has a DVI output connector, use a commercially available converter cable to connect the computer to
the projector’s HDMI 1 or HDMI 2 input connector (only digital video signals can be input). Also, connect the computer’s audio
output to the projector’s BNC audio input connector. In this case, switch the HDMI1 or HDMI2 setting at on-screen menu’s
audio selection on the projector to [BNC]. (→ page 125)
To connect the computer’s DVI output connector to the projector’s DisplayPort input connector, use a commercially available
converter.
HDMI1 IN
HDMI2 IN
AUDIO IN
NOTE: When Viewing a DVI Digital Signal
• Turn o the power of the computer and projector before connecting.
• Lower the computer’s volume setting before connecting an audio cable to the headphones connector. When using with a computer connected to the projector, adjust
the volume of both the projector and computer to set the appropriate volume level.
• If the computer has a mini-jack type audio output connector, we recommend connecting the audio cable to that connector.
• When a video deck is connected via a scan converter, etc., the display may not be correct during fast-forwarding and rewinding.
• Use a DVI-to-HDMI cable compliant with DDWG (Digital Display Working Group) DVI (Digital Visual Interface) revision 1.0 standard. The cable should be within 197"/5
m long.
• Turn o the projector and the PC before connecting the DVI-to-HDMI cable.
• To project a DVI digital signal: Connect the cables, turn the projector on, then select the HDMI input. Finally, turn on your PC.
Failure to do so may not activate the digital output of the graphics card resulting in no picture being displayed. Should this happen, restart your PC.
• Some graphics cards have both analog RGB (15-pin D-Sub) and DVI (or DFP) outputs. Use of the 15-pin D-Sub connector may result in no picture being displayed from
the digital output of the graphics card.
• Do not disconnect the DVI-to-HDMI cable while the projector is running. If the signal cable has been disconnected and then reconnected, an image may not be correctly
displayed. Should this happen, restart your PC.
• The COMPUTER video input connectors support Windows Plug and Play. The BNC video input connector does not support Windows Plug and Play.
• A Mac signal adapter (commercially available) may be required to connect a Mac computer.
To connect a Mac computer equipped with a Mini DisplayPort to the projector, use a commercially available Mini DisplayPort → DisplayPort converter cable.
Gebruikershandleiding.com neemt misbruik van zijn services uitermate serieus. U kunt hieronder aangeven waarom deze vraag ongepast is. Wij controleren de vraag en zonodig wordt deze verwijderd.
Product:
Spelregels forum
Om tot zinvolle vragen te komen hanteren wij de volgende spelregels:
lees eerst de handleiding door;
controleer of uw vraag al eerder door iemand anders is gesteld;
probeer uw vraag zo duidelijk mogelijk te stellen;
heeft u een probleem en al geprobeerd om dit op te lossen, vermeld dit erbij aub;
heeft u een oplossing gekregen van een bezoeker dan horen wij dat graag in dit forum;
wilt u een reactie geven op een vraag of antwoord, gebruik dan niet dit formulier maar klik op de knop 'reageer op deze vraag';
uw vraag wordt direct op de website gezet; vermijd daarom persoonlijke gegevens in te vullen;
Belangrijk! Als er een antwoord wordt gegeven op uw vraag, dan is het voor de gever van het antwoord nuttig om te weten als u er wel (of niet) mee geholpen bent! Wij vragen u dus ook te reageren op een antwoord.
Belangrijk! Antwoorden worden ook per e-mail naar abonnees gestuurd. Laat uw emailadres achter op deze site, zodat u op de hoogte blijft. U krijgt dan ook andere vragen en antwoorden te zien.
Abonneren
Abonneer u voor het ontvangen van emails voor uw Ricoh PJ WU6181N bij:
nieuwe vragen en antwoorden
nieuwe handleidingen
U ontvangt een email met instructies om u voor één of beide opties in te schrijven.
Ontvang uw handleiding per email
Vul uw emailadres in en ontvang de handleiding van Ricoh PJ WU6181N in de taal/talen: Engels als bijlage per email.
De handleiding is 17,37 mb groot.
U ontvangt de handleiding per email binnen enkele minuten. Als u geen email heeft ontvangen, dan heeft u waarschijnlijk een verkeerd emailadres ingevuld of is uw mailbox te vol. Daarnaast kan het zijn dat uw internetprovider een maximum heeft aan de grootte per email. Omdat hier een handleiding wordt meegestuurd, kan het voorkomen dat de email groter is dan toegestaan bij uw provider.
Uw handleiding is per email verstuurd. Controleer uw email
Als u niet binnen een kwartier uw email met handleiding ontvangen heeft, kan het zijn dat u een verkeerd emailadres heeft ingevuld of dat uw emailprovider een maximum grootte per email heeft ingesteld die kleiner is dan de grootte van de handleiding.
Er is een email naar u verstuurd om uw inschrijving definitief te maken.
Controleer uw email en volg de aanwijzingen op om uw inschrijving definitief te maken
U heeft geen emailadres opgegeven
Als u de handleiding per email wilt ontvangen, vul dan een geldig emailadres in.
Uw vraag is op deze pagina toegevoegd
Wilt u een email ontvangen bij een antwoord en/of nieuwe vragen? Vul dan hier uw emailadres in.