3
b) Attaching the lament .................................................................................................................................. 30
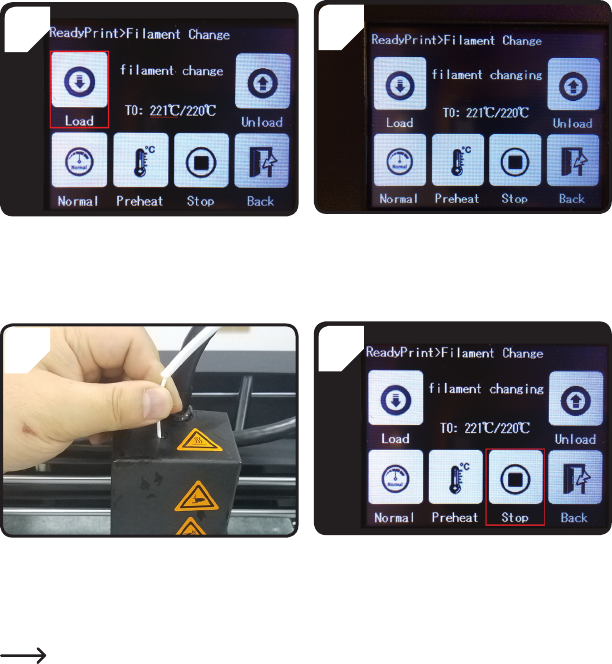
c) Loading the lament ....................................................................................................................................30
d) Removing the lament .................................................................................................................................32
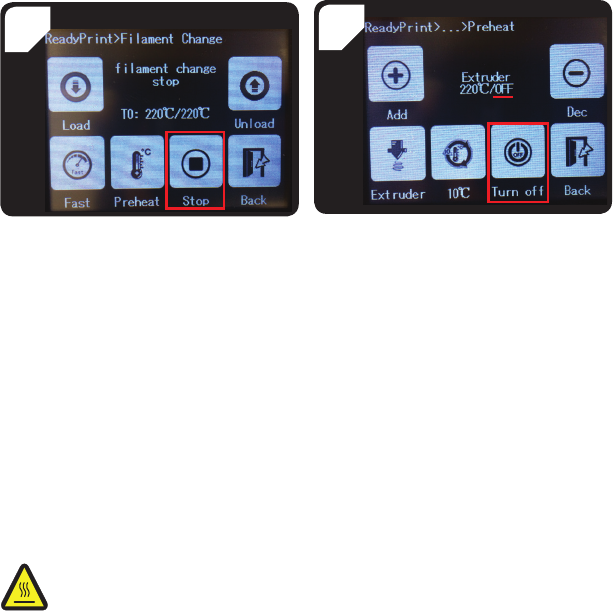
e) Changing/replacing the lament .................................................................................................................. 33
f) Installing the "Cura" software (optional) ......................................................................................................33
15. Printing from the SD card/USB stick .................................................................................................................. 34
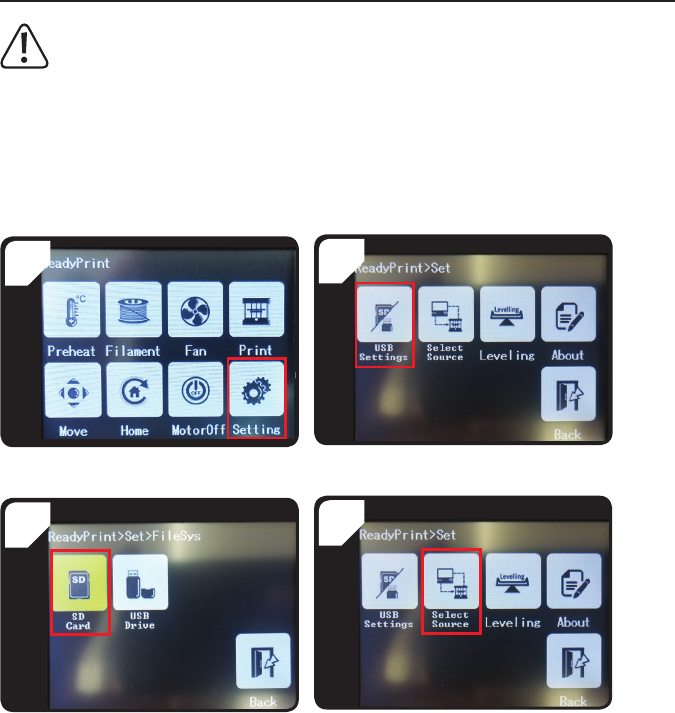
a) Printing from the SD card ............................................................................................................................34
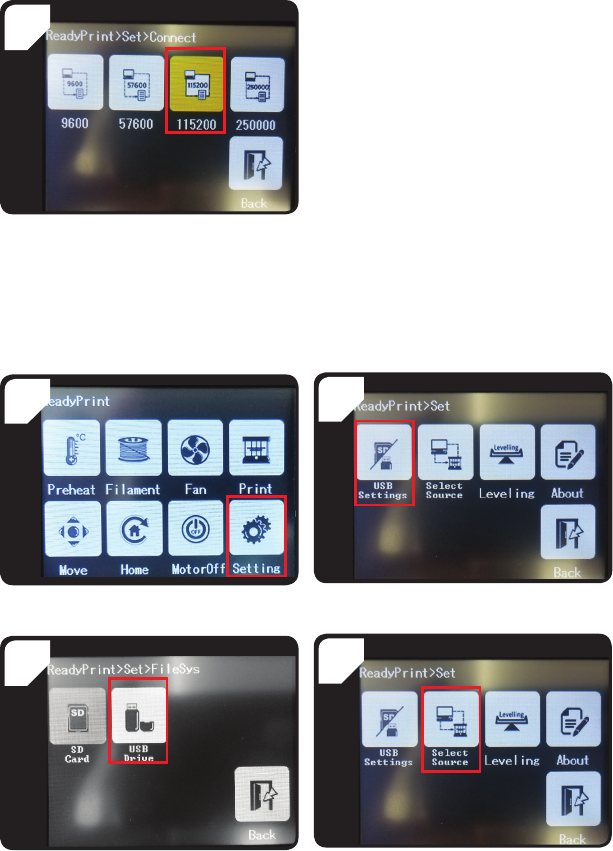
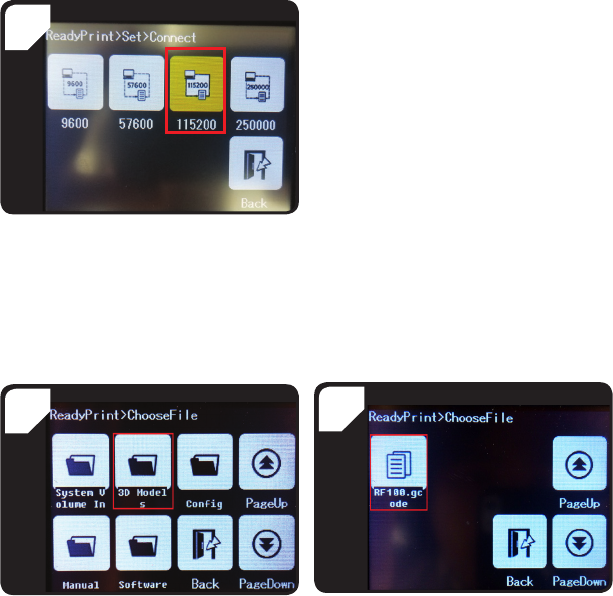
b) Printing from a USB stick .............................................................................................................................35
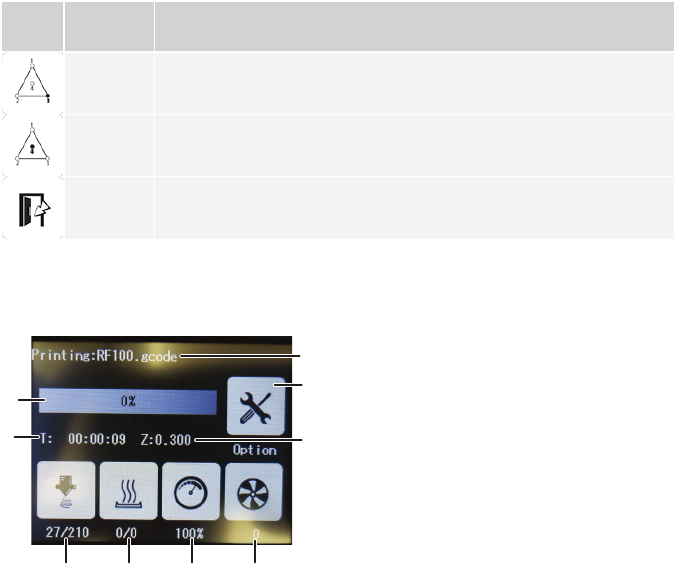
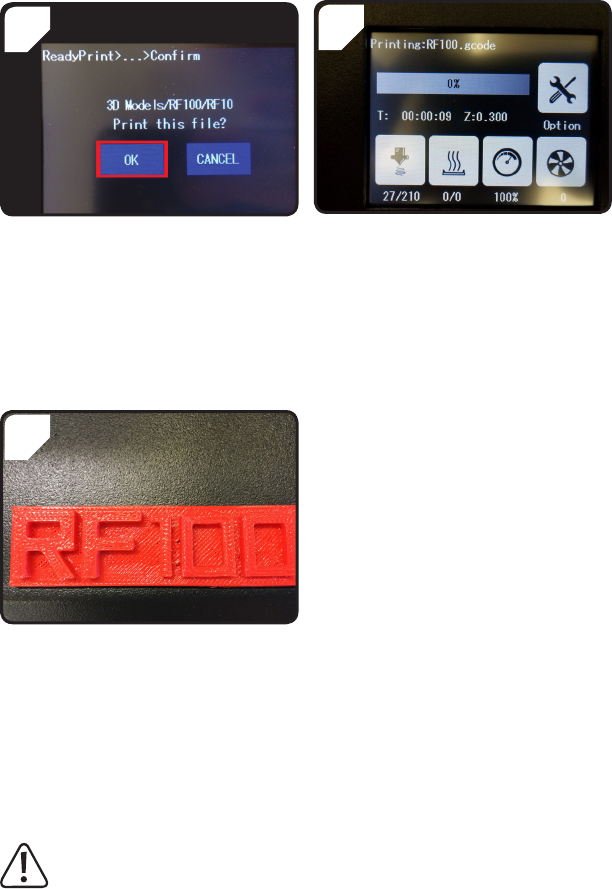
c) Starting the printing process .......................................................................................................................36
d) Pausing the printing process .......................................................................................................................37
e) Conguring parameters during the printing process ....................................................................................38
f) Restarting the 3D printer .............................................................................................................................38
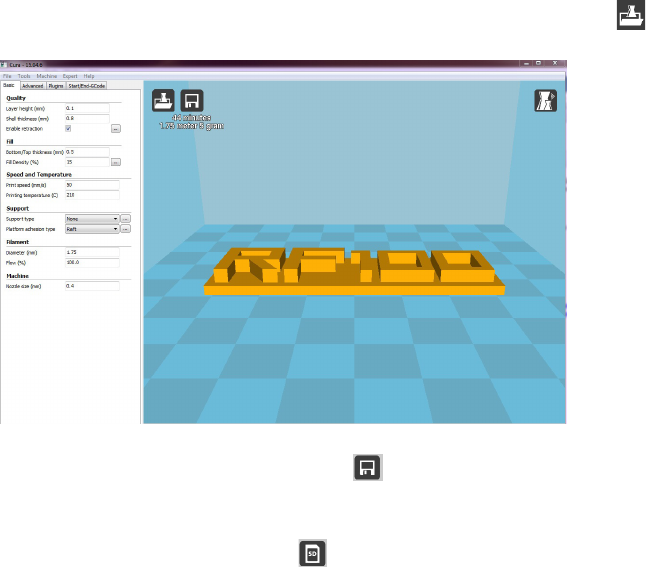
16. Printing with the "Cura" software .......................................................................................................................39
a) Installation ...................................................................................................................................................39
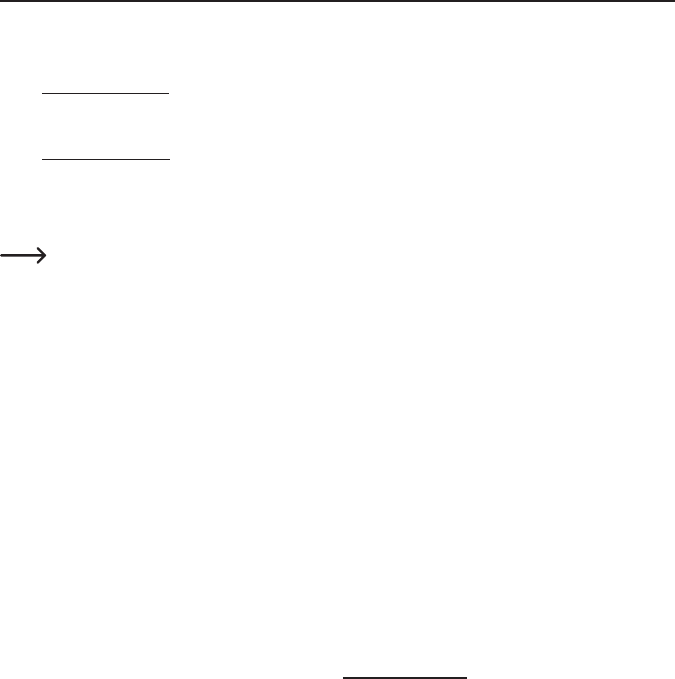
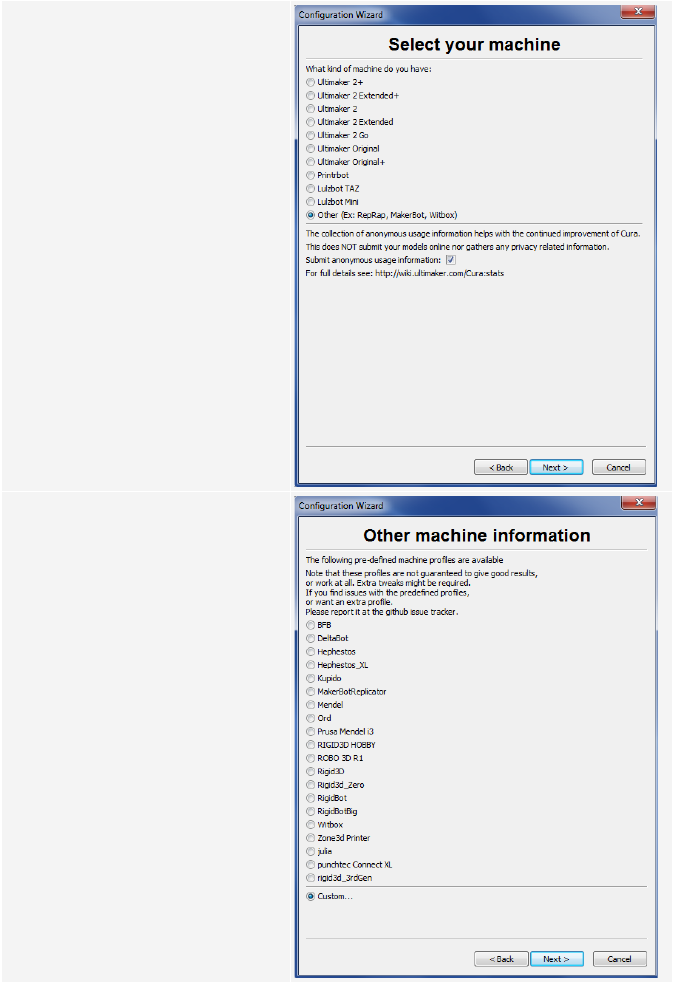
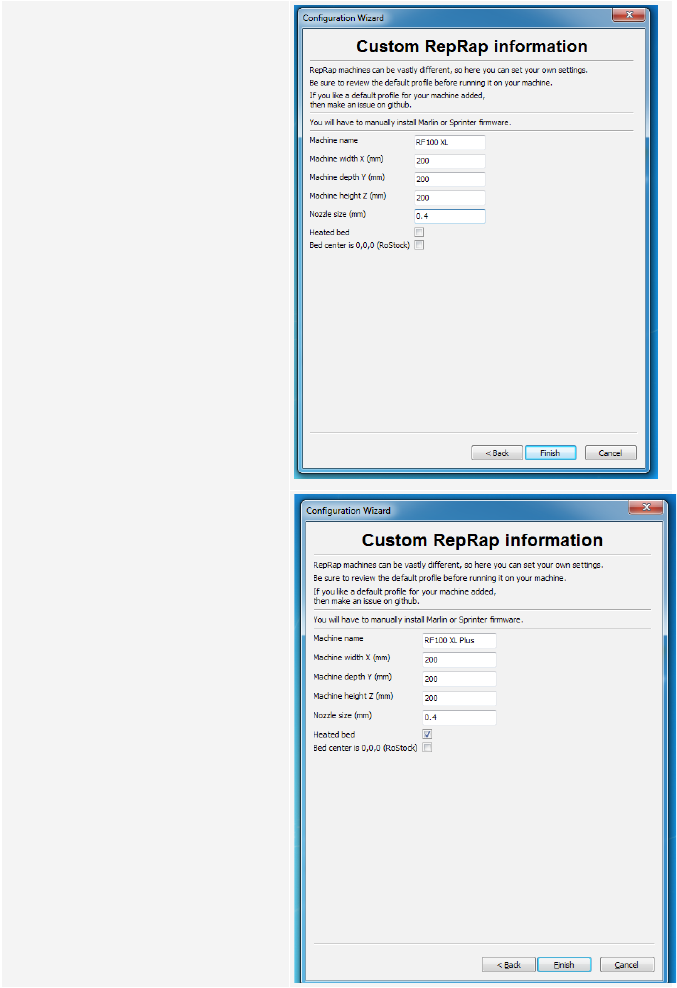
b) Setting up the software (Windows
®
) ............................................................................................................40
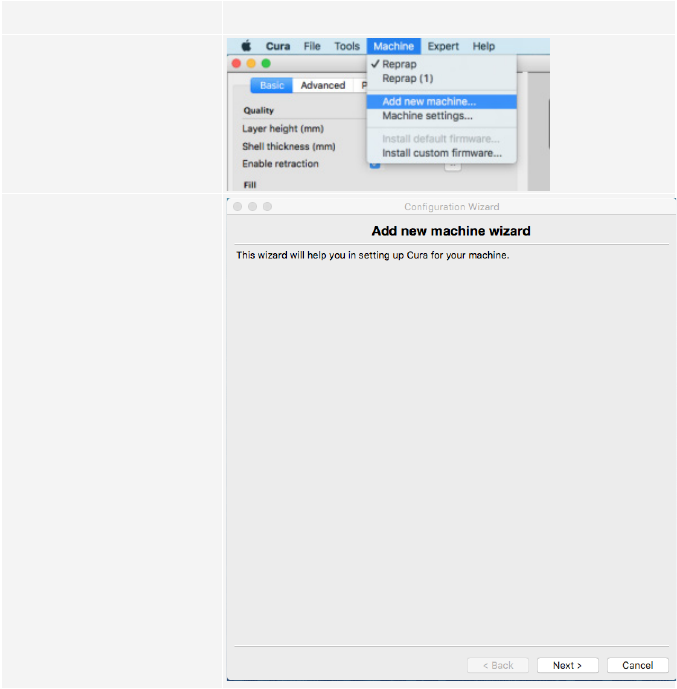
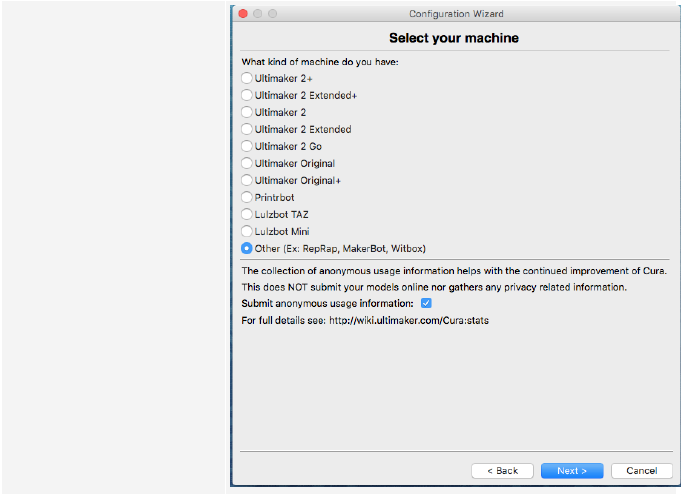
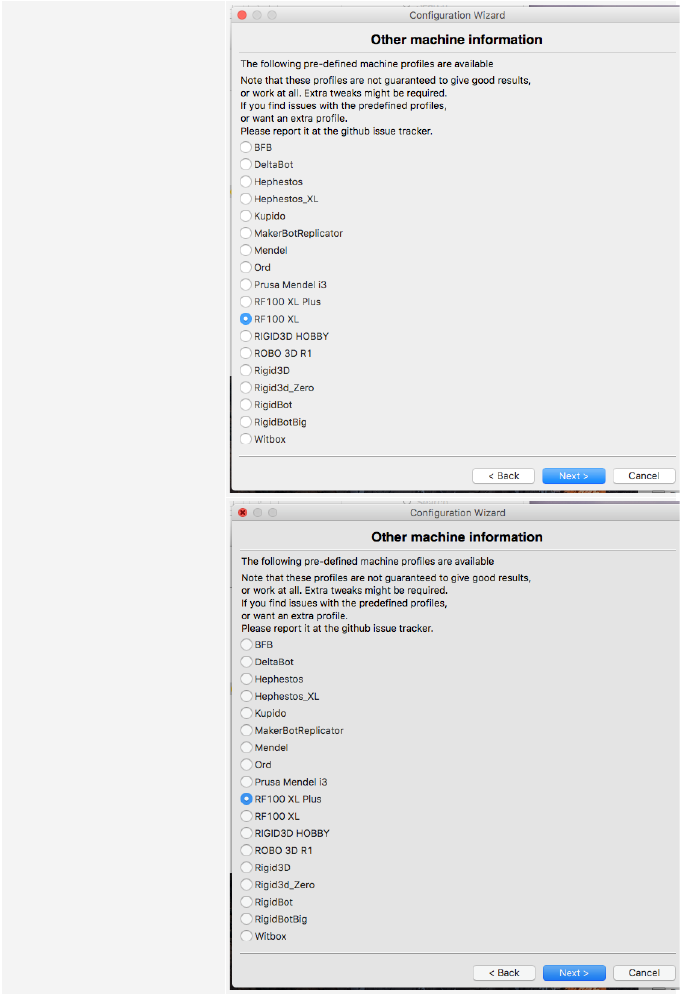
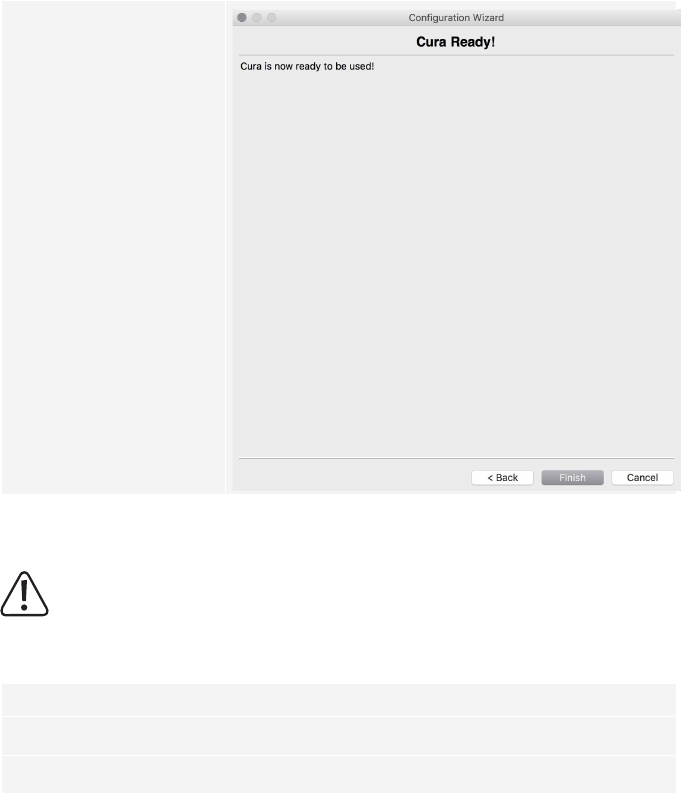
c) Setting up the software (Mac OS) ...............................................................................................................44
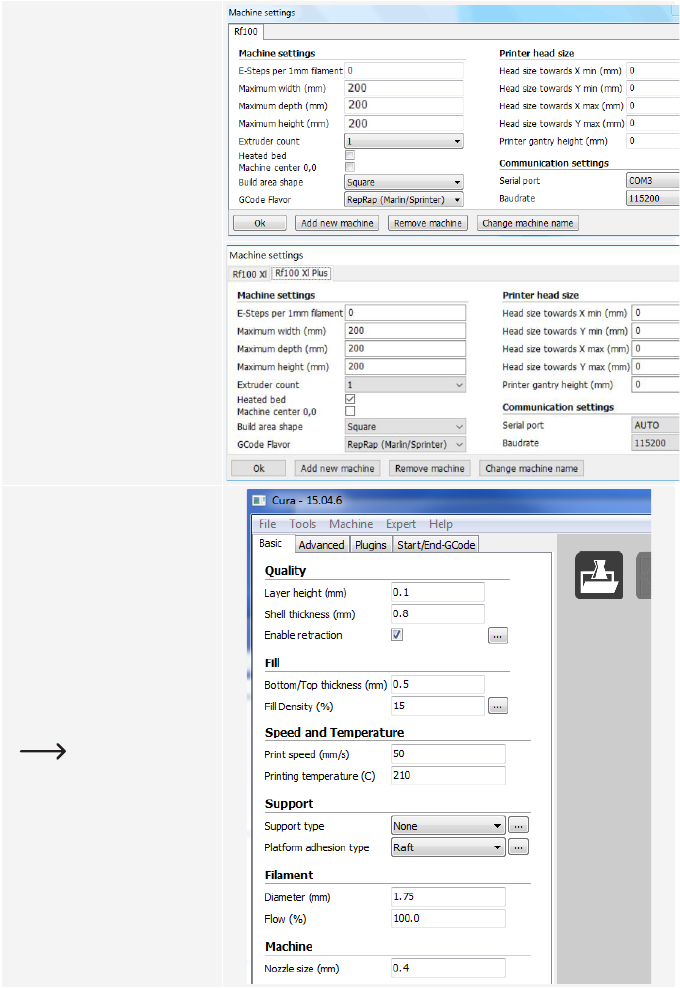
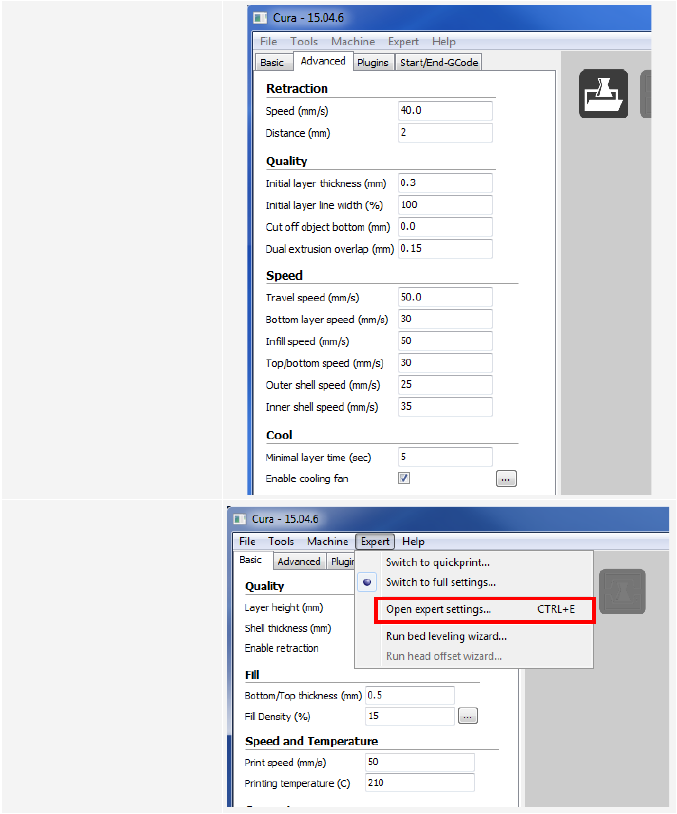
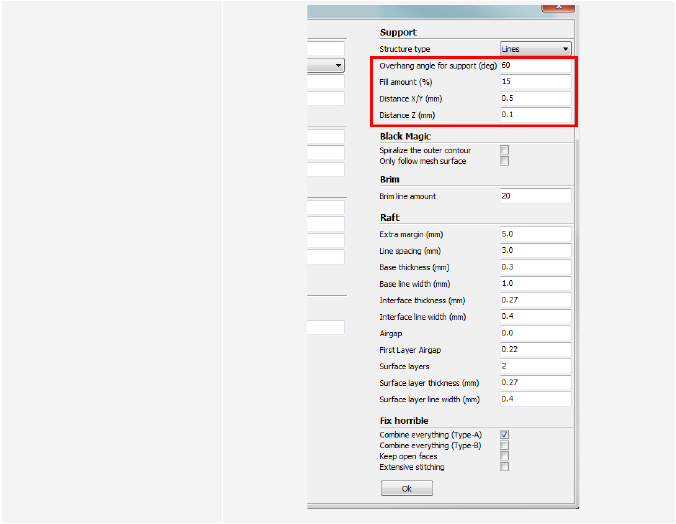
d) Software settings (Windows
®
) .....................................................................................................................48
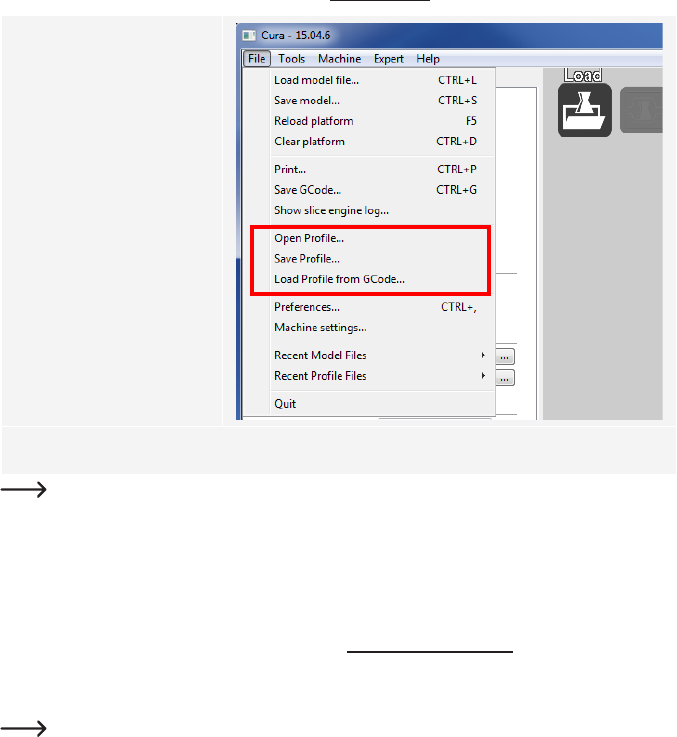
e) Loading conguration les (Windows
®
) .......................................................................................................52
f) Loading conguration les (Mac OS) ..........................................................................................................52
g) Loading model les (Windows
®
and Mac OS) ............................................................................................. 53
h) Disabling the control icons on the 3D printer ...............................................................................................54
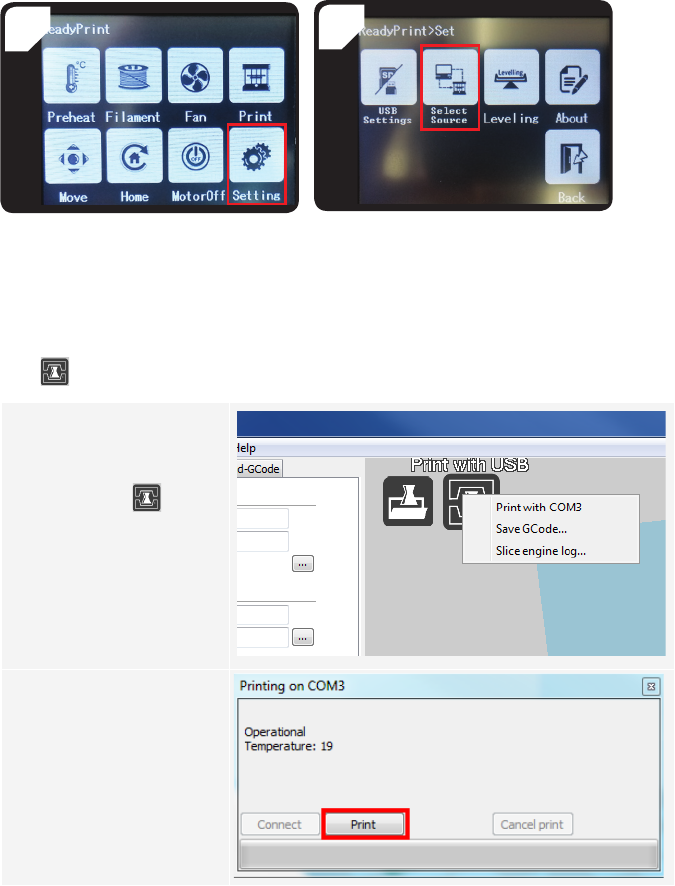
i) Starting the printing process ........................................................................................................................54
j) Stopping the printing process ...................................................................................................................... 55
17. Updating the 3D printer rmware ....................................................................................................................... 55
a) Displaying the rmware version ...................................................................................................................55
b) Performing a rmware update ...................................................................................................................55
18. Cleaning and maintenance ................................................................................................................................ 56
a) Cleaning the printer .....................................................................................................................................56
b) Cleaning the nozzle ..................................................................................................................................... 56
c) Cleaning the inside of the extruder ..............................................................................................................57
d) Cleaning the print bed .................................................................................................................................57
e) Removing the lament .................................................................................................................................57
f) Storing the 3D printer ..................................................................................................................................57
19. Troubleshooting .................................................................................................................................................58
20. Disposal ............................................................................................................................................................. 60
21. Technical data .................................................................................................................................................... 60
a) General information ..................................................................................................................................... 60
b) RF100 XL Plus (item no. 1592461) .............................................................................................................61
c) RF100 XL r2 (item no. 1891634) .................................................................................................................61