5.1 General
- NOTE! Make sure that the hip strap has been put on properly and is tight. The hip
clasp should be fastened.
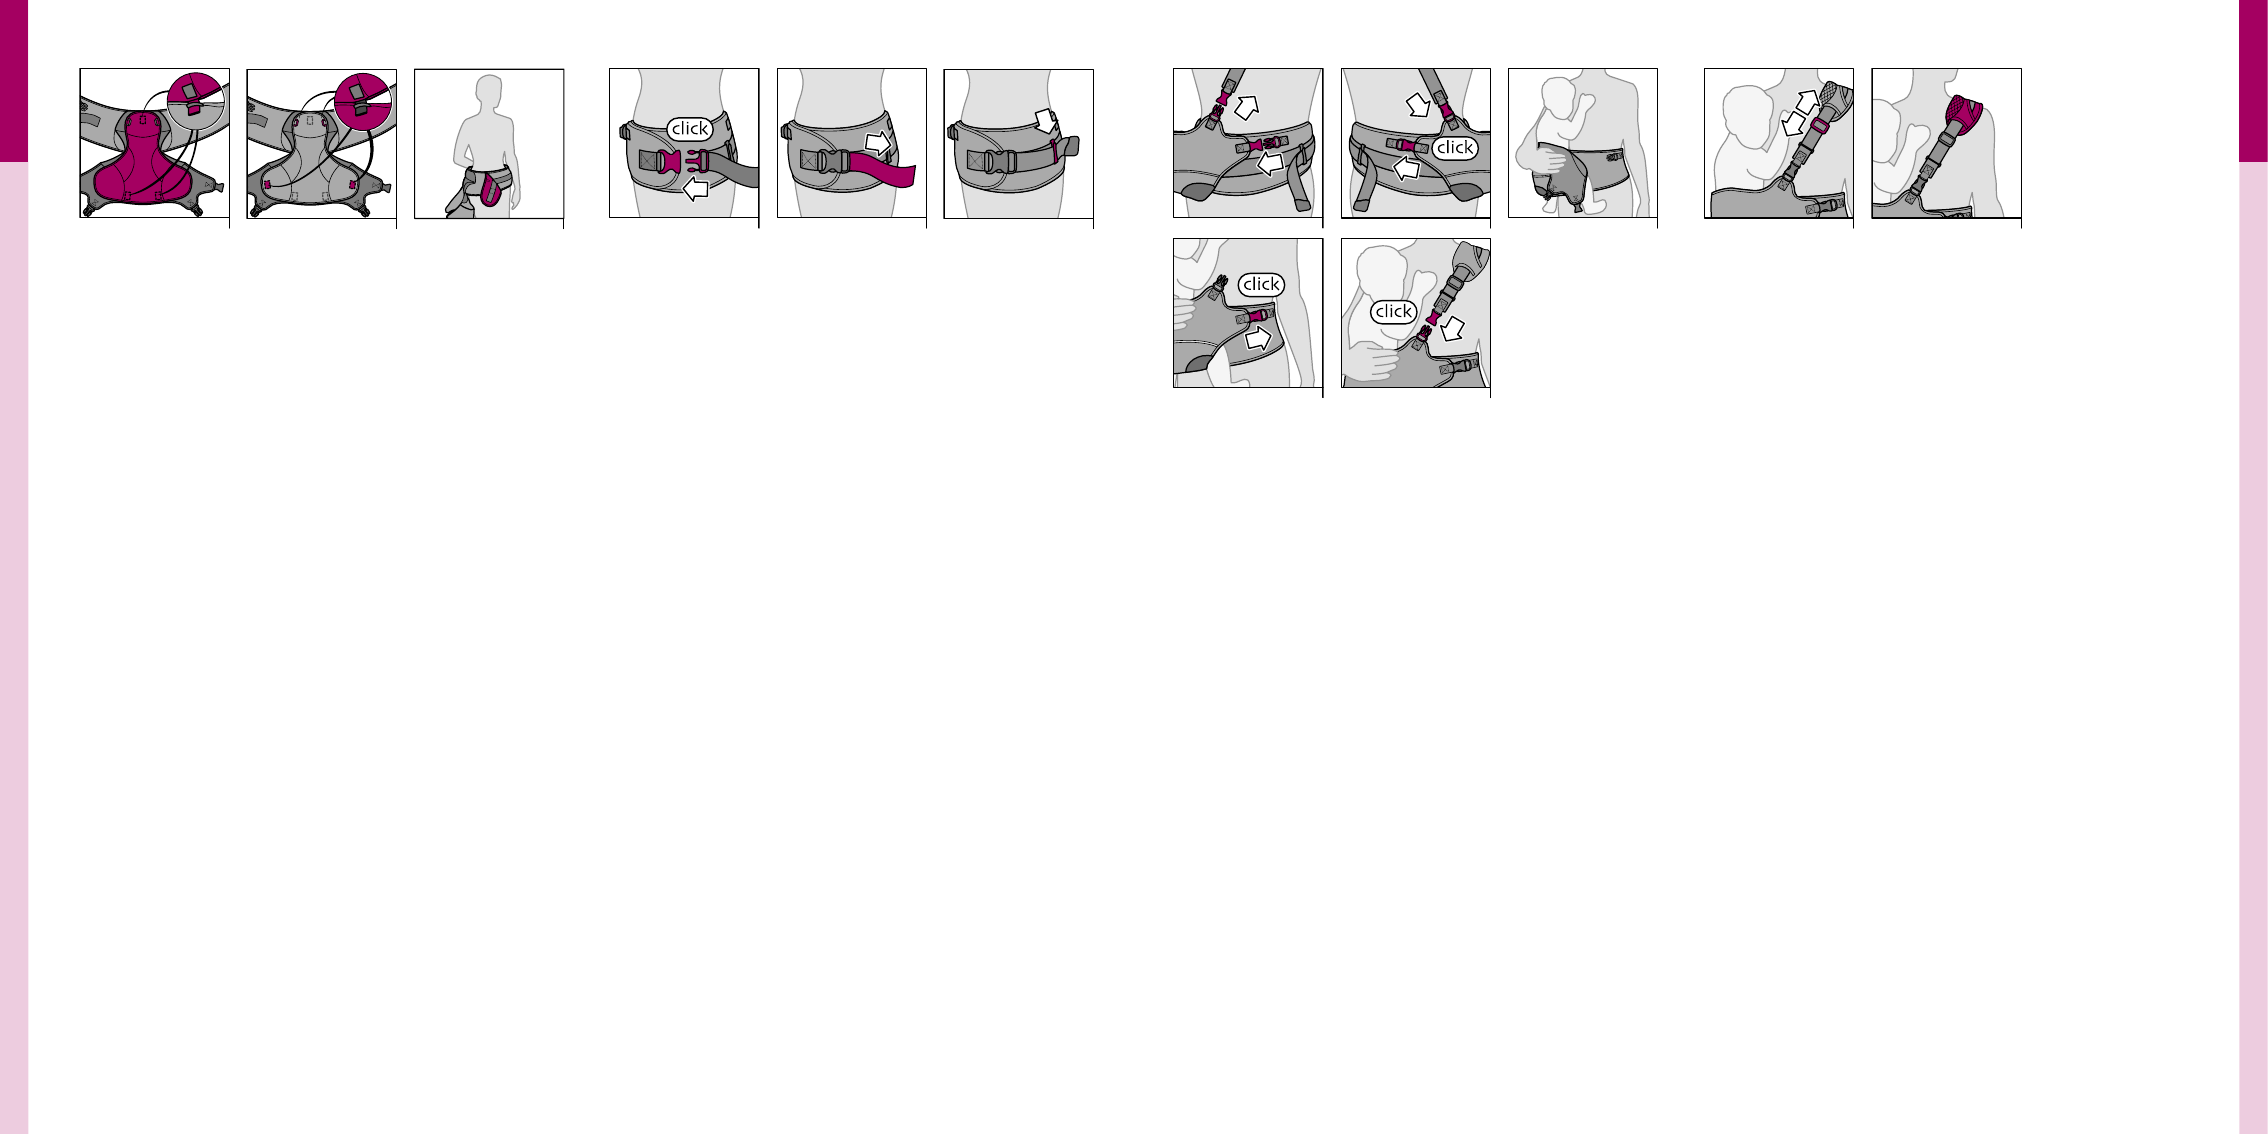
1. On the stomach side, open both the seat clasp (ill. 7.1) and the shoulder clasp
(ill. 7.2) Do this before the child is put in the carrier (ill. 7).
2. On the back fasten both the seat clasp and the shoulder clasp. The seat clasp fits
on the hip strap (ill. 8.1) and the shoulder clasp on the shoulder strap (ill. 8.2) Do
this before the child is put in the carrier (ill. 8).
-
NOTE! The child should always sit with the stomach towards you!
3. Lift the child up and place him/her on the hip on which the seat is positioned.
Put 1 leg through the leg opening on the back (ill. 9).
4. Make sure that the child is sitting in the middle and fasten the front hip clasp on
the hip strap.When using the seat insert, the leg opening may be decreased in size.
While the child is in the carrier, push the Velcro fastenings through the loops on
the sides of the seat insert and close them. Do this on both sides (ill. 10).
5. If the carrier is placed on the right hip, place the shoulder strap over the left
shoulder and if the child is to be carried on the left, the strap over the right
shoulder. Attach the front shoulder clasp to the shoulder strap (ill. 11).
- NOTE! Make sure that the shoulder strap is not twisted.
6. Check that the shoulder strap is the right length, if necessary adjust with the
sliding part on the shoulder strap (ill. 12).
7. The shoulder protector should always be in the centre of the shoulder with the
hollow, soft side towards the neck. Make sure that the shoulder strap is at the
top (ill. 13).
5.2 Checklist
After fitting for safety purposes and for the optimum safety of the child
check once more that:
- the hip strap has been tightened properly, is not twisted and the hip clasp is
fastened,
- the child is sitting properly in the middle of the seat,
- all clasps are fastened securely,
- the shoulder strap is not twisted and has been adjusted to the correct length,
- the shoulder protector is positioned properly in the centre of the shoulder.
Warning:
- If the carrier strap and the child are positioned correctly, the weight should be
distributed properly. If the shoulder weight is too great, it may be the case that either
the hip strap is not tight enough or that the shoulder strap has been adjusted too
tightly. The hip strap should also not be positioned too high up the waist.
- If you are unable to fasten the clasps properly, under no circumstances should the
Quinny Curbb be used.
- Always use the shoulder protector; this is important for the weight distribution.
- Never let your child play with the fasteners.
5 CARRYING THE CHILD
4.1 Getting ready
How to use the seat insert
- Important! Make the carrier smaller for babies from 6 months up to 1 year of
age using the seat insert.
1. The seat part can be made smaller by the use of the seat insert. Attach the seat
insert at the top by putting the Velcro fastenings through the loops and fastening
them. Do the same at the bottom (ill. 1).
2. When using the seat insert, the leg opening may be decreased in size. While the
child is in the carrier, push the Velcro fastenings through the loops on the sides of
the seat insert and close them. Do this on both sides (ill. 3).
Adjusting the Quinny Curbb
The Quinny Curbb has been developed for carrying on the left or the right hip.
Warning: Only use the Quinny Curbb as a hip carrier. Always carry the child in the
manner specified!
Warning: The correct fitting of the adjustment straps is vital for the safety of your
child. For this see also the label on the inside of the carrier strap.
- NOTE! When using the Quinny Curbb the child should be able to support
his/her own head.
3. Fold the hip strap around the hips. The Velcro fastening should be on the left to
carry the child on the right hip (ill. 3).
4. Pull the hip strap tight (ill. 4).
4. Fasten the clasp and then tighten the strap again securely (ill. 5).
6. Hook the strap into the strap clip (ill. 6).
- NOTE! Make sure that the hip strap is not twisted.
- NOTE! If the hip strap is fitted properly on the hip, the seat part of the child is
turned slightly forward, at the height of the hip bone.
4 USE OF THE QUINNY CURBB