605084
1
Verklein
Vergroot
Pagina terug
1/92
Pagina verder
QUICK
START
PAU SE/
RESET
ENTER
CLEAR
1
2
3
45
6
7
8
9
0
PROGRAMSPROGRAMS
MANUAL
HEART
RAT
E
PERFORMANCE
INTERVAL
VA RIETY
WEIGHT L
OSS
B
efo
re
b
e
g
i
n
n
in
g
an
y
fitn
e
s
s
p
ro
g
r
a
m
,
s
ee
y
o
u
r ph
y
sic
ia
n
for a tho
rou
g
h
p
h
y
s
ic
a
l
e
x
a
m
in
a
ti
o
n
. S
e
e
k
ad
v
ic
e
fro
m
y
o
ur p
h
y
s
ic
ia
n
to lea
rn
th
e
ta
rg
et
h
e
a
rt rate ap
propria
te
for y
o
u
r
fitn
es
s
le
v
e
l. D
o
n
o
t
a
l
lo
w
c
h
ild
re
n
o
r th
o
s
e
u
n
fam
il
ia
r w
ith
its
o
pera
t
io
n
o
n or
n
ea
r
th
is e
q
u
i
p
m
e
n
t. R
e
a
d
th
e
p
ro
d
u
c
t o
w
n
e
r's
ma
n
u
a
l o
r c
o
n
s
u
l
t a
q
u
a
lifie
d
ins
tru
c
to
r b
e
f
o
re
o
p
e
r
a
ti
n
g
th
is
eq
u
i
p
m
e
n
t.
Im
p
r
o
p
e
r u
s
e
o
f
th
is
e
q
u
ip
men
t
c
an
resu
lt
in s
e
riou
s
in
ju
ry
. If
y
o
u feel p
a
in
, fa
in
tn
es
s
,
o
r
d
izzine
s
s
, s
to
p
e
x
e
r
c
is
in
g
im
m
ed
ia
tel
y
.
HEART RATE
SmartRate
OK
Product Owner's Manual
Commercial Products
Treadmills:
•954i
•932i
Ellipticals:
•EFX536i
EFX532i
Bike:
•842i
Product Owner's Manual: Important Safety Instructions 1
Important: Save these instructions for future reference.
Read all instructions in the documentation provided with your
exercise equipment, including all assembly guides, user guides,
and owners manuals, before installation of this device.
Note: This product is intended for commercial use.
The display apparatus (hereinafter referred to as the console) is
intended to be shipped with new Precor exercise equipment
(hereinafter referred to as the base unit). It is not packaged for
individual sale.
WARNING
To prevent injury, the console must be
attached securely to the base unit following
all assembly and installation instructions
shipped with the base unit. The console is
intended to be connected to AC mains power
through the furnished power supply ONLY. It
should be powered on only when installed as
described in the assembly and installation
instructions shipped with the base unit. The
console is intended for use only with Precor
fitness equipment, not as a standalone
device.
Safety Precautions
Always follow basic safety precautions when using this equipment
to reduce the chance of injury, fire, or damage. Other sections in
this manual provide more details of safety features. Be sure to read
these sections and observe all safety notices. These precautions
include the following:
Read all instructions in this guide before installing and using the
equipment and follow any labels on the equipment.
Make sure all users see a physician for a complete physical
examination before they begin any fitness program, particularly if
they have high blood pressure, high cholesterol or heart
disease; have a family history of any of the preceding
conditions; are over the age of 45; smoke; are obese; have not
exercised regularly in the past year; or are taking any
medication.
French equivalent of the above notice, for Canadian markets: Il
est conseillé aux utilisateurs de subir un examen médical
complet avant d’entreprendre tout programme d’exercice, en
particulier s’ils souffrent d’hypertension artérielle, ou de
cardiopathie ou ont un taux de cholestérol élevé, s’ils ont des
antécédents familiaux des précédentes maladies, s’ils ont plus
de 45 ans, s’ils fument, s’ils sont obèses, s’ils n’ont pas fait
d’exercices réguliers au cours de l’année précédente ou s’ils
prennent des médicaments. Si vous avez des étourdissements
ou des faiblesses, arrêtez les exercices immédiatement.
Important Safety Instructions
Product Owner's Manual: Important Safety Instructions 2
Do not allow children, or people unfamiliar with the operation of
this equipment, on or near it. Do not leave children
unsupervised around the equipment.
Make sure all users wear proper exercise clothing and shoes for
their workouts and avoid loose or dangling clothing. Users
should not wear shoes with heels or leather soles, and they
should check the soles of their shoes to remove any dirt and
embedded stones. They should also tie long hair back.
Never leave the equipment unattended when it is plugged in.
Unplug the equipment from its power source when it is not in
use, before cleaning it, and before providing authorized service.
Note: The optional power adapter is considered a power
source for self-powered equipment.
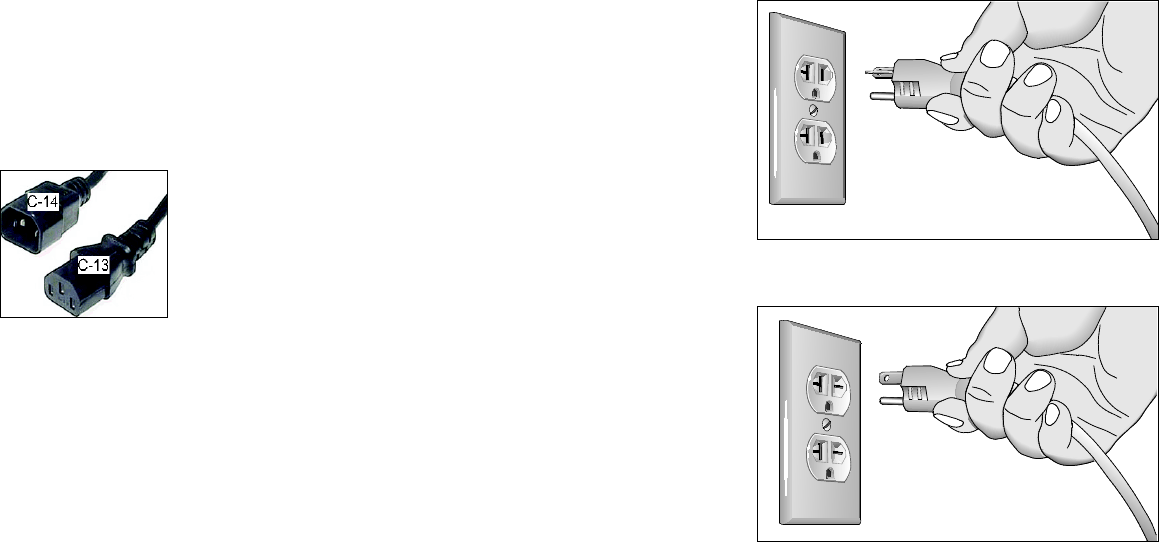
Use the power adapter provided with the equipment. Plug the
power adapter into an appropriate, grounded power outlet as
marked on the equipment.
Care should be taken when mounting or dismounting the
equipment.
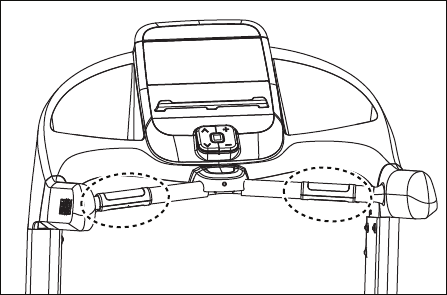
For Treadmills: Do not use typing or web surfing features while
walking at speeds that exceed a slow and relaxed leisurely
pace. Always stabilize yourself by holding a stationary handle
bar while using typing or web surfing features.
For AMT and EFX: Always stabilize yourself by holding a
stationary handle bar while using typing or web surfing features.
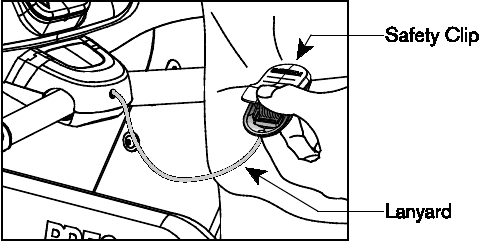
Read, understand, and test the emergency stop procedures
before use.
Keep the power cord or optional power adapter and plug away
from heated surfaces.
Route power cables so that they are not walked on, pinched, or
damaged by items placed upon or against them, including the
equipment itself.
Ensure the equipment has adequate ventilation. Do not place
anything on top of or over the equipment. Do not use on a
cushioned surface that could block the ventilation opening.
Assemble and operate the equipment on a solid, level surface.
SPACINGThe below minimum spacing recommendations are
based on a combination of the ASTM (U.S.) voluntary standards
and EN (European) regulations as of October 1, 2012, for
access, passage around, and emergency dismount:
Treadmills—a minimum of 0.5 m (19.7 in.) on each side of
the treadmill and 2 m (78 in.) behind the machine.
Cardio equipment other than treadmillsa minimum of 0.5
m (19.7 in.) on at least one side, and 0.5 m (19.7 in.) behind
or in front the machine.
Careful consideration should be given to the requirements
of the Americans with Disabilities Act (ADA), US Code 28
CFR (see Section 305). ASTM standards are voluntary and may
not reflect current industry standards. The actual area for
access, passage around, and emergency dismount is the
responsibility of the facility. The facility should consider the total
space requirements for training on each unit, voluntary and
industry standards, and any local, state, and federal regulations.
Standards and regulations are subject to change at any time.
Important: These spacing recommendations should be used
when positioning equipment away from sources of heat, such
as radiators, heat registers, and stoves. Avoid temperature
extremes.
Product Owner's Manual: Important Safety Instructions 3
Keep equipment away from water and moisture. Avoid dropping
anything on or spilling anything inside the equipment to prevent
electric shock or damage to the electronics.
When using the treadmill, always attach the safety clip to your
clothing before beginning your workout. Failure to use the safety
clip may pose a greater risk of injury in the event of a fall.
Keep in mind that heart rate monitors are not medical devices.
Various factors, including the users movement, may affect the
accuracy of the heart rate readings. The heart rate monitors are
intended only as exercise aids in determining heart rate trends
in general.
Do not operate electrically powered equipment in damp or wet
locations.
Never operate this equipment if it has a damaged cord or plug,
if it is not working properly, or if it has been dropped, damaged,
or exposed to water. Call for service immediately if any of these
conditions exist.
Maintain the equipment to keep it in good working condition, as
described in the Maintenance section of the owners manual.
Inspect the equipment for incorrect, worn, or loose components,
and then correct, replace or tighten prior to use.
If you plan to move the equipment, obtain help and use proper
lifting techniques.
Equipment Weight Restrictions: Do not use the treadmill if you
weigh more than 400 pounds (180 kg). If you weigh more than
350 pounds (160 kg), do not run on the treadmill. For all other
fitness equipment, the weight limit is 350 pounds (160 kg).
Use the equipment only for its intended purpose as described in
this manual. Do not use accessory attachments that are not
recommended by Precor. Such attachments may cause injuries.
Do not operate the equipment where aerosol (spray) products
are being used or where oxygen is being administered.
Do not use outdoors.
Do not attempt to service the equipment yourself, except to
follow the maintenance instructions in the owners manual.
Never drop or insert objects into any opening. Keep hands away
from moving parts.
Do not set anything on the stationary handrails, handlebars,
control console, or covers. Place liquids, magazines, and books
in the appropriate receptacles.
Do not lean on or pull on the console at any time.
CAUTION: DO NOT remove the cover, or you may risk injury
due to electric shock. Read the assembly and maintenance
guide before operating. There are no user-serviceable parts
inside. Contact Customer Support if the equipment needs
servicing. For use with single phase AC power only.
Product Owner's Manual: Important Safety Instructions 4
Educating Users
Take time to educate users about the Important Safety Instructions
found in both the User Reference Manual and Product Owners
Manual. Explain to your club or facility patrons that they should
observe the following precautions:
Hold onto a stationary handrail or handlebar while assuming the
starting position on the equipment.
Face the console at all times.
On treadmills, straddle the running belt and attach the safety
clip to clothing at waist level before touching the control
console.
Important: For safety, make sure users step onto the running
belt while it is moving at or below 1 mile per hour (1.6
kilometers per hour).
Hold on to a stationary handrail or handlebar with one hand
whenever you operate the console keys with the other hand.
Hazardous Materials and Proper
Disposal
The batteries within self-powered equipment contain materials that
are considered hazardous to the environment. Federal law requires
proper disposal of these batteries.
If you plan to dispose of your equipment, contact Precor
Commercial Products Customer Support for information regarding
battery removal. Refer to Obtaining Service.
Product Owner's Manual: Important Safety Instructions 5
Product Recycling and Disposal
This equipment must be recycled or discarded according to
applicable local and national regulations.
Product labels, in accordance with European Directive
2002/96/EC concerning waste electrical and electronic equipment
(WEEE), determine the framework for the return and recycling of
used equipment as applicable throughout the European Union. The
WEEE label indicates that the product is not to be thrown away,
but rather reclaimed upon end of life per this Directive.
In accordance with the European WEEE Directive, electrical and
electronic equipment (EEE) is to be collected separately and to be
reused, recycled, or recovered at end of life. Users of EEE with the
WEEE label per Annex IV of the WEEE Directive must not dispose
of end of life EEE as unsorted municipal waste, but use the
collection framework available to customers for the return,
recycling, and recovery of WEEE. Customer participation is
important to minimize any potential effects of EEE on the
environment and human health due to the potential presence of
hazardous substances in EEE. For proper collection and treatment,
refer to Obtaining Service.
Regulatory Notices for Cardiovascular
Exercise Equipment
The regulatory information in this section applies to the exercise
equipment and its control console.
Safety Approvals for Cardiovascular Equipment
Precor equipment has been tested and found to comply with the
following applicable safety standards.
Cardiovascular Type Equipment:
CAN/CSA, IEC, EN 60335-1 (Household and similar electrical
appliances - Safety)
EN 957 (Stationary training equipment, class S/B compliant
equipment)
PVS Regulatory Notice
This Precor equipment has been tested and found to comply with
the following applicable safety standards.
CAN/CSA, UL, IEC, EN 60065 (Audio, video and similar
electronic apparatus - Safety)
Product Owner's Manual: Important Safety Instructions 6
Radio Frequency Interference (RFI)
This Precor exercise equipment conforms to the following national
standards defining acceptable limits for radio frequency
interference (RFI).
Federal Communications Commission, Part 15
This equipment has been tested and found to comply with the
limits for a Class A digital device, pursuant to Part 15 of the FCC
Rules. These limits are designed to provide reasonable protection
against harmful interference in a commercial installation. The
equipment generates, uses, and can radiate radio frequency energy
and, if not installed and used in accordance with the owner’s
manual instructions, may cause harmful interference to radio
communications.
WARNING
Per FCC rules, changes or modifications not
expressly approved by Precor could void the
user’s authority to operate the equipment.
Industry Canada
This Class A digital apparatus complies with Canadian ICES-003.
Cet appareil numérique de la classe A est conforme à la norme
NMB-003 du Canada.
ATTENTION: Haute Tension
Débranchez avant de réparer
European Applications
CE compliance is claimed to the following directives:
2004/108/EC EMC Directive
2006/95/EC LVD Directive
2002/95/EC RoHS Directive
Directive compliance has been verified to the following standards:
EN 55022
EN 55024
EN 60335-1
EN 60065 (P80 and PVS)
Product Owner's Manual: Important Safety Instructions 7
Electrical Recommendations: All
Equipment Excluding Treadmills
Note: This is a recommendation only. NEC (National Electric
Code) guidelines or local region electric codes must be followed.
For equipment fitted with a P80 console or Personal Viewing
System (PVS) screen a separate power connection is required. For
a 20 amp branch circuit up to 10 screens can be connected. If the
branch circuit has any other devices plugged into the circuit, then
the number of screens must be reduced by the wattage of the
other devices.
Note: The typical splitter power cords that have IEC-320 C13 and
C14 plugs have a recommended maximum capacity of five
screens.
Figure 1: IEC-320 C13 and C14 plugs
Electrical Recommendations: 120 V and
240 V Treadmills
Note: This is a recommendation only. NEC (National Electric
Code) guidelines or local region electric codes must be followed.
You should have received a power cable that meets your local
electrical code requirements along with the equipment. Precor
treadmills must be connected to a 20 amp individual branch circuit
that can be shared only with one PVS. If you need additional help
with the power connections contact your Precor authorized dealer.
Important: An individual branch circuit provides a hot conductor
and neutral conductor to a receptacle. The conductors must not
be looped, "daisy-chained", or connected to any other conductors.
The circuit must be grounded according to NEC guidelines or
local region electric codes.
Figure 2: North American 120-volt, 20-amp power receptacle
Figure 3: North American 240-volt, 20-amp power receptacle
Product Owner's Manual: Important Safety Instructions 8
Obtaining Service
Do not attempt to service the equipment except for maintenance
tasks. If any items are missing, contact your dealer. For more
information regarding customer support numbers or a list of Precor
authorized service centers, visit the Precor web site at
http://www.precor.com.
Product Owner's Manual: Table of Contents 9
Important Safety Instructions ............................................ 1
Safety Precautions ......................................................................... 1
Educating Users ............................................................................. 4
Hazardous Materials and Proper Disposal ............................... 4
Product Recycling and Disposal ................................................ 5
Regulatory Notices for Cardiovascular
Exercise Equipment ....................................................................... 5
Electrical Recommendations: All Equipment
Excluding Treadmills ..................................................................... 7
Electrical Recommendations: 120 V and
240 V Treadmills ............................................................................ 7
Obtaining Service........................................................................... 8
Treadmill Safety Features ............................................... 11
Entering the Safety Code ...........................................................11
Using the Safety Clip ...................................................................12
Turning the Treadmill On and Off .............................................12
Weight Limit ..................................................................................12
Location ..........................................................................................12
Self-Powered Features ..................................................... 13
Informational Displays Prior to Shutdown ...............................13
Symptoms of a Low Battery .......................................................14
Using the Optional Power Adapter ..........................................14
The Optional Power Adapter Kit ...............................................14
Replacing the Battery ..................................................................14
Club Features ....................................................................... 15
Club Programming Tips .............................................................. 17
Changing the Product Settings ................................................ 18
Treadmill: Selecting Safety Code Protection ........................ 21
Choosing a Language ................................................................. 21
Selecting a U.S. Standard or Metric Display ......................... 22
Setting a Workout Session Time Limit ................................... 22
Setting a Pause Time Limit ........................................................ 23
Setting a Cool Down Time Limit ............................................... 23
Treadmill: Determining the Club Speed Limit ....................... 24
Treadmill: Setting an Incline Limit ............................................ 24
Treadmill: Accessing Performance Programs ....................... 25
Treadmill: Changing Remote Control Access ....................... 25
EFX: Changing the Auto-Level Setting ................................... 26
Bike: Setting a Resistance Range ........................................... 26
Informational Displays ................................................................. 27
User ID Entry with CSAFE Equipment .................................... 30
Table of Contents
Product Owner's Manual: Table of Contents 10
Maintenance ........................................................................ 31
Daily Inspection ............................................................................31
Daily Cleaning ...............................................................................31
EFX: Cleaning the Ramp ............................................................32
Storing the Chest Strap ..............................................................32
Treadmill: Checking the Alignment of the Running Belt ......33
Treadmill: Adjusting the Running Belt .....................................34
Recumbent Bike: Realigning the Seat ....................................35
Moving the Equipment ................................................................36
Long-Term Storage ......................................................................36
Product Owner's Manual: Treadmill Safety Features 11
Before allowing users on Precor equipment, review the Important
Safety Instructions found at the beginning of this manual. You
should also teach your patrons how to safely use the equipment
following the guidelines in Educating Users.
Entering the Safety Code
When the equipment is shipped from the factory, the safety code
protection feature is disabled. If you wish to enable the safety
code, refer to Club Features. Inform users that the equipment
requests a safety code to help prevent unauthorized use. When
users select a program or press QUICKSTART at the PRECOR
banner, the following prompt appears:
ENTER SAFETY CODE
Users have two minutes to press the following number key
sequence and continue their workout: 1, 2, 3, 4.
Important: Tell users to hold onto the handrail with one hand
before entering the safety code with the other hand.
If the correct keys are pressed, the program selection process
begins. If the code is incorrect, the display prompts the user to
reenter the code after a 2-minute time out.
Note: On the treadmill, a 3-second countdown appears on the
display, and then the running belt starts moving. Refer to Workout
Options in the User’s Reference Manual.
Treadmill Safety Features
Product Owner's Manual: Treadmill Safety Features 12
Using the Safety Clip
Instruct users how important it is to use the safety clip while
exercising on the treadmill. Instruct them on how to attach it to their
clothing near their waistline. If any complications occur, a strong
tug on the safety lanyard will stop the running belt.
If the safety switch trips while users are exercising, have them
reattach the safety clip, press the SPEED up key or QUICKSTART
and reenter the safety code, if necessary.
Note: The treadmill retains users’ workout statistics if they resume
their workout within the limit set for pause mode.
Figure 4: Attaching the safety clip
Turning the Treadmill On and Off
To turn the treadmill On and Off, use the power switch located
beneath the hood, near the power cord receptacle.
Important: When it is not being used, turn the treadmill Off.
Weight Limit
You should not allow runners over 350 lb. (160 kg) or walkers
heavier than 500 lb. (225 kg) on the treadmill.
Location
It is important to keep the area around the treadmill open and free
from encumbrances such as other equipment. The minimum space
requirements needed for user safety and proper maintenance are
as follows:
An area three feet wide by six feet long (one meter wide by two
meters long) must be left open directly behind the running belt.
Three feet (one meter) of space should be available on either
side of the equipment.
Product Owner's Manual: Self-Powered Features 13
On self-powered equipment, the battery initializes and displays the
Precor banner when a user starts exercising. A minimum rate of
motion must be maintained for the banner to appear, as shown in
the following table. When a person meets the requirements, the
power that is generated allows the equipment to function properly.
Table 1. Minimum requirements for operation
Rate of Motion
40 strides per minute (SPM)
20 revolutions per minute (RPM)
Informational displays appear when the battery is low or when the
rate of motion drops below the minimum requirements. The display
explains what to do to retain power. If the messages are ignored,
the equipment begins shutdown procedures to maintain the charge
of the battery. Refer to Informational Displays Prior to Shutdown.
An optional power adapter can be purchased and provides
sustained power to the equipment. If you plan to change the
program settings, the power adapter is highly recommended. To
purchase the optional power adapter, check with your dealer.
Informational Displays Prior to
Shutdown
The equipment saves its battery charge by moving into a shutdown
mode. If the user does not maintain the minimum rate of motion, a
30-second shutdown process begins.
Dots appear in the display and all key presses are ignored. If no
movement is detected or the rate of motion remains below the
minimum, the dots steadily disappear as the countdown continues.
Note: The user can resume exercising if he or she begins before
the countdown period elapses.
Important: If the equipment is connected to a CSAFE master
device, a slightly different scenario occurs. When ten seconds
remain before the equipment shuts off, the exercise session ends.
RESETTING appears in the display while the equipment
disconnects from the CSAFE master device. All key presses are
ignored.
Self-Powered Features
Product Owner's Manual: Self-Powered Features 14
Symptoms of a Low Battery
If no one has used the equipment for an extended period of time,
the battery may need recharging.
Symptoms of a low battery include:
A flickering or erratic display
User and workout information is lost once the user stops
exercising. No workout summary or notification of pending
shutdown occurs.
Important: To maintain a constant power source, use the optional
power adapter.
Using the Optional Power Adapter
After connecting the power adapter to the equipment, plug the
opposite end into the appropriate power source 120 V or 240 V.
CAUTION: When the optional power adapter is in use, make sure
that the power supply cord does not create a safety hazard. Keep
it out of the way of traffic and moving parts. If the power supply
cord or power conversion module is damaged, it must be
replaced.
The display functions differently when the power adapter is
connected. Because the power adapter provides a constant
source of power, a user can pause for brief periods without
initiating shutdown procedures. When the pause time limit expires
and the user has not resumed exercising, the display returns to the
Precor banner. Refer to Setting a Pause Time Limit. To learn how
to install the power adapter, refer to The Optional Power Adapter
Kit.
The Optional Power Adapter Kit
If you purchase the optional power adapter, you must also
purchase the internal cable kit. The kit supplies the cable, bracket,
and fasteners that connect the power adapter to the lower
electronics board.
CAUTION: The internal cable kit must be installed by authorized
service personnel. Do not attempt installation on your own as
you could void the Precor Limited Warranty. For more
information, refer to Obtaining Service.
Once the internal cable kit is installed, you can plug the optional
power adapter into the equipment. Plug the opposite end into the
appropriate power source for your equipment 120 V or 240 V.
Review the safety instructions found at the beginning of this
manual before using the power adapter.
Replacing the Battery
The equipments battery is built to last for a long time. However, if
you feel that the battery may need replacing, check with an
authorized service technician. Refer to Obtaining Service.
CAUTION: The battery stored inside the equipment contains
hazardous materials and must be disposed of according to
Hazardous Waste Regulations. Refer to Hazardous Materials
and Proper Disposal.
Product Owner's Manual: Club Features 15
This section is designed to show you how to customize the
equipment for your users and view useful product information. All
these features remain hidden to the users and can only be
accessed using special keypresses. These custom settings allow
you to
Enable or disable the safety code (treadmill)
Change the display to a different language
Change the display to show U.S. standard or metric
measurements
Set the maximum exercise and pause times
Set a cool down time limit
Set the maximum speed and incline (treadmill)
Enable or disable hidden programs or remote access (treadmill)
Change the auto-level setting (EFX)
Set the resistance range (bike)
View the odometer
Display the number of hours the equipment has been in use
View the software versions and part numbers
Display the serial number
Check the program usage and error logs
Note: To review the product programming prompts and factory
default settings that can be changed through product
programming mode, refer to the following table.
Club Features
Product Owner's Manual: Club Features 16
Table 2. Club custom features and settings for the treadmill and EFX
Club
Programming
Prompt
Factory
Default
Setting
Changes you can make
SAFETY CODE
Disabled
An enabled safety code
requires a 4-digit entry
code before users can
access any exercise
programs.
SELECT
LANGUAGE
English
Several languages affect
the display prompts.
Choose one.
SELECT
UNITS
U.S.
Two standard units of
measure affect the display
prompts. Choose between
U.S. or Metric.
SET MAX
WORKOUT
TIME
60 minutes
Exercise session time
limits range from 1 to 240
minutes.
NO LIMIT is
accessible beyond 240
minutes.
SET MAX
PAUSE TIME
120
seconds
Pause time limits range
from 1 to 120 seconds (2
minutes). Restrictions exist
for self-powered
equipment.
SET COOL
DOWN TIME
5 minutes
Cool-down time limits
range from 1 to 5 minutes.
Club
Programming
Prompt
Factory
Default
Setting
Changes you can make
SET SPEED
LIMIT
Maximum
speed
available.
Refer to Treadmill:
Determining the Club
Speed Limit
.
SET INCLINE
LIMIT
Maximum
grade
possible.
Refer to Treadmill: Setting
an Incline Limit.
HIDDEN
PROGRAMS
Hide
programs
Two options are available:
Show Programs or Hide
Programs. Choose one.
REMOTE
SPEED
CONTROL
Disabled
A computer must be
connected through the
CSAFE port to enable this
feature and change the
speed or incline for a
specific user.
SET
CROSSRAMP
AUTO-LEVEL
Mid-level of
ramp
incline
range
This prompt appears on
equipment with adjustable
ramps. Settings range
from 1 to 20. Refer to
EFX: Changing the Auto-
Level Setting.
SET
RESISTANCE
RANGE
High
Settings range from High,
Medium, and Low. Refer to
Bike: Setting a Resistance
Range.
* This feature is available in all Precor club equipment.
Note: When you make changes in club programming mode, the new settings
replace the factory defaults.
Product Owner's Manual: Club Features 17
Club Programming Tips
Always start at the Precor banner.
Electrical power must be supplied. For self-powered equipment,
a constant power source is available if you use the optional
power adapter. Otherwise, users have to maintain the minimum
rate of motion. If you plan to program self-powered equipment,
purchasing the optional power adapter is highly recommended.
Note: If you do not use the optional power adapter during
programming mode, and the rate of motion falls below the
minimum requirements, no warning is given when the equipment
moves into its 30-second shutdown procedure.
The club programming mode is accessed by pressing the
RESET key at the Precor banner. The remaining key presses
must occur quickly and without pause.
Note: Treadmill keys that can be used interchangeably in club
programming mode are: PAUSE/RESET and the red STOP
button. On the EFX, the CLEAR and ENTER keys perform
specific functions, but the number keypad is disabled once you
enter club programming mode.
Changes made in the programming mode become the default
settings when the display resets to the Precor banner.
Product Owner's Manual: Club Features 18
Changing the Product Settings
You must be in the Programming mode before you can change the
settings.
To access the programming mode:
1. At the Precor banner, press the following keys in sequence
without pausing between selections:
RESET, 5, 6, 5, 1, 5, 6, 5
Note: A PAUSE/RESET key appears on some products and
functions the same as the RESET key.
The programming prompts appear sequentially and in a menu
format.
Figure 5: Keys used in programming mode
2. The following table describes how to use the keys to navigate
the programming mode menus.
Table 3. Programming mode keys
Key
Description
or
Navigational arrows: Move you through the menu
and can also be used to increase or decrease
time units.
OK
Press to choose or accept the displayed
selection.
Number keypad
CLEAR
Returns user to the previous menu level without
saving changes.
PAUSE/RESET
Exits Programming mode and returns to the
Precor banner.
Note: The number keypad is disabled once you enter
programming mode.
Product Owner's Manual: Club Features 19
Use the following flowchart to navigate through the menu settings on treadmills.
Product Owner's Manual: Club Features 20
Use the following flowchart to navigate through the menu settings
on ellipticals.
Use the following flowchart to navigate through the menu settings
on bikes.
Product Owner's Manual: Club Features 21
Treadmill: Selecting Safety Code
Protection
When the equipment is shipped from the factory, the safety code
protection feature is disabled. If you enable the safety code, your
patrons will need to enter four number keys in sequence to begin
their exercise session and, on the treadmill, start the running belt. If
the correct keys are not pressed within two minutes, further access
is denied. For more information, refer to Entering the Safety Code.
1. At the SAFETY CODE prompt, press OK. Use the navigational
arrow keys to alternate between the two selections.
Setting
Description
ENABLED
Causes the safety code prompt to appear prior to a
workout and when returning from pause mode.
DISABLED
Does not require a safety code to operate.
CAUTION: Do not assume the equipment is safe because of
safety code protection. Never leave children unsupervised
around the equipment.
2. When you are ready, press OK to accept the displayed setting
and move to the next feature. For further options, refer to the
table in Changing the Product Settings.
Choosing a Language
The equipment can display user prompts, text, and user entries in
several different languages. When the equipment is shipped from
the factory, the default language is English.
Note: Programming prompts are not affected by language
selection. The prompts in this section continue to appear in
English.
To choose a language:
1. At the SELECT LANGUAGE prompt, press OK. Use the
navigational arrow keys to choose a language.
2. Press OK again to accept the displayed setting and move to the
next feature.
Product Owner's Manual: Club Features 22
Selecting a U.S. Standard or Metric
Display
The equipment can display measurements in either Metric or U.S.
Standard. The default factory setting is U.S. Standard.
To change the display measurement:
1. At the SELECT UNITS prompt, press OK.
Use the navigational arrow keys to select a unit of measure (US
or METRIC).
CAUTION: If you change the Unit of Measure display on a
treadmill, be sure to check the speed setting to verify that it is
correct.
2. Press OK to accept the displayed setting and move to the next
feature.
Setting a Workout Session Time Limit
You can limit how long a user can exercise on the equipment. For
example, if you set the time limit to 20 minutes, users can only
enter a session time between 1 and 20 minutes.
Note: The automatic cool down period is appended to the end of
any time-based program, so adjust the time limit accordingly.
To set a maximum workout time:
1. At the SET MAX WORKOUT TIME prompt, press OK. Use
the navigational arrow keys to change the displayed time limit.
Note: When you press and hold a navigational arrow key, the
number increments by five, for example, 1, 5, 10, 15, 20. When
you tap an arrow key, the number increments by one.
2. When you have selected a maximum workout time, press OK to
accept the displayed setting and move to the next feature.
You can also let a user exercise indefinitely by selecting NO LIMIT.
If you choose the NO LIMIT setting, you will need to provide the
following instructions to your users.
To exercise without a time limit:
1. Select a program. The workout time appears in the display.
2. On the number keypad, type 240.
3. Press the UP arrow key to display NO LIMIT, and press OK.
The exercise session times available are between 1 and 240
minutes.
Product Owner's Manual: Club Features 23
Setting a Pause Time Limit
You can limit how long a user can pause while exercising on the
equipment by entering a time between 1 and 120 seconds (two
minutes). For example, if you set a pause time limit of 60 seconds,
the display automatically resets to the Precor banner if no
movement is detected and no key press occurs for one minute.
Important: The optional power adapter must be connected on
self-powered equipment to establish a definitive pause time limit.
If the optional power adapter is not attached and the rate of
motion drops below the minimum requirements, the equipment
begins its 30-second shutdown, effectively eliminating pause
mode.
To set a maximum pause time:
1. At the SET MAX PAUSE TIME prompt, press OK. Use the
navigational arrow keys to select a time limit between 1 and 120
seconds (two minutes).
2. Press OK to accept the displayed setting and move to the next
feature.
Setting a Cool Down Time Limit
Use this setting to select the maximum amount of time the machine
will remain in the cool down mode. Cool down time is the period of
time following the completion of a program when the user
exercises at a reduced work rate.
To set a cool down time:
1. At the SET COOL DOWN TIME prompt, press OK.
2. Use the navigational arrow keys to display the available time
limits and choose a time between 0 and 5 minutes.
Note: The default setting is 5 minutes.
3. Press OK to accept the displayed setting and move to the next
feature.
Product Owner's Manual: Club Features 24
Treadmill: Determining the Club Speed
Limit
You can set a maximum speed for the treadmill. This limits how fast
the running belt moves and, consequently, the number of speed
settings that are available to the user. The speed is displayed in
miles per hour (mph) or kilometers per hour (kph) depending upon
the units of measure (U.S. standard or Metric) selected earlier. The
speed ranges from 0.5 to 12 mph (0.8 to 20kph).
Important: If you select a number that limits the miles per hour,
your change will not affect the kilometers per hour (and vice
versa). The treadmill does not convert the speed entered in mph
(U.S. standard) to kph (Metric). It stores separate numbers for the
different units of measure. To enter both values, you must first
reset the display to the appropriate unit of measure, and then
change the speed limit in this program. Refer to Selecting a U.S.
Standard or Metric Display.
1. At the SET SPEED LIMIT prompt, press OK. Use the
navigational arrow keys to select the desired running belt speed
limit.
2. When you are ready, press OK to accept the displayed setting
and move to the next feature. For other options, refer to the
table in Changing the Product Settings.
Treadmill: Setting an Incline Limit
You can set the maximum grade (percent of incline) for the
treadmill. This limits the degree of incline and, consequently, the
number of incline settings that are available to the user. The
available range is 0% to 15% grade.
1. At the SET INCLINE LIMIT prompt, press OK. Use the
navigational arrow keys to select the desired grade.
2. When you are ready, press OK to accept the displayed setting
and move to the next program. For other options, refer to the
table in Changing the Product Settings.
Product Owner's Manual: Club Features 25
Treadmill: Accessing Performance
Programs
The performance-based Gerkin Fitness Test on the treadmill can
be hidden from the users view and, consequently, be unavailable
during an exercise session.
If you keep the default factory setting, the Track program appears
when the PERFORMANCE key is pressed.
If you wish to change this setting, perform the following steps:
1. Press OK to review the current HIDDEN PROGRAMS
selection. Use the navigational arrow keys to alternate between
the two selections.
Setting
Description
SHOW
PROGRAMS
Causes the Fitness Test to appear and replace
the Track program when a user presses the
PERFORMANCE key.
HIDE
PROGRAMS
Hides the Fitness Test and makes it inaccessible
to the user. The Track Program appears when a
user presses the PERFORMANCE key.
2. When you are ready, press OK to accept the displayed setting
and move to the next program. For other options, refer to the
table in Changing the Product Settings.
Treadmill: Changing Remote Control
Access
Important: To affect this setting, the treadmill must be connected
to a computer and you will need to be familiar with CSAFE
commands.
When you enable this program, you can set a user’s speed and
incline through a computer software program which interfaces with
the CSAFE port on the treadmill.
The default factory setting is set to DISABLED. To change this
setting, perform the following steps:
1. At the REMOTE SPEED CONTROL prompt, press OK. Use
the navigational arrow keys to alternate between the two
selections.
Setting
Description
ENABLED
Lets you set the speed and incline for individual
users and their selected program using CSAFE
commands through a computer connection.
DISABLED
Disconnects remote access so you cannot use the
remote capabilities of a CSAFE connection. You
would also use this setting when the treadmill is not
connected to a computer.
2. When you are ready, press OK to accept the displayed setting
and move to the next program. For other options, refer to the
table in Changing the Product Settings.
Product Owner's Manual: Club Features 26
EFX: Changing the Auto-Level Setting
You can set a specific ramp incline so that the EFX automatically
returns to it at the end of a workout session. Whatever incline you
set, the EFX ramp returns to the setting if a user continues
pedaling, once the program session has ended, and presses
RESET to return to the Precor banner.
Note: This setting is available on equipment with adjustable ramps.
Important: If you use this feature, connecting the optional power
adapter is recommended. Instruct users about the auto-leveling
feature and ask that they hold onto a stationary handrail with one
hand while the equipment automatically moves to the set incline.
1. At the SET CROSSRAMP AUTO- LEVEL prompt, press OK.
2. XRAMP n appears, where n is the ramp incline setting. Some
displays only show a number without prefacing it with XRAMP.
Use the navigational arrow keys to select the desired ramp
incline setting from 1 to 20.
3. When you are ready, press OK to accept the displayed setting
and move to the next feature. For other options, refer to the
table in Changing the Product Settings.
Bike: Setting a Resistance Range
The bike resistance levels are low, medium, and high. Within each
setting, 25 levels of resistance are available, but the chosen setting
affects the overall resistance range.
To set a resistance range:
1. At the SET RESISTANCE RANGE prompt, press OK and
use the navigational arrow keys to choose LOW, MEDIUM or
HIGH (LO, MED, or HI on some equipment).
2. Press OK to accept the displayed setting and move to the next
feature.
The following table provides more information about each setting.
Table 4. Resistance settings on bikes
Setting
Description
HI
or
HIGH
Provides the full range of resistance available.
Provides enough resistance to simulate sprinting or hill
climbing or for users who want to stand on the bike
while pedaling.
Provides enough resistance for elite riders that are
capable of spinning at high speed with high resistance.
MED
or
MEDIUM
Provides approximately two thirds of the resistance that
is available within the high group setting.
Select the medium range for recumbent bikes.
A medium range allows users to make easier resistance
changes in the preset programs.
LO
or
LOW
Provides approximately one third of the resistance that
is available within the high group setting.
Appropriate in special situations where poorly
conditioned users are anticipated.
Product Owner's Manual: Club Features 27
Informational Displays
Use the information displays to locate information about equipment
use (odometer and hour meter), software versions and part
numbers, serial number, usage log, and error log. In general, you
would only access this information if directed to do so by Precor
Customer Support.
To navigate through the informational displays, use the following
flowchart. A table located after the flowchart provides more
information about each more display.
Note: The CLEAR key is located on the number keypad. If your
product has a PAUSE/RESET key, use it in place of the RESET
key called out in the flowchart.
Product Owner's Manual: Club Features 28
Table 5. Informational Displays for all products
Product
Display
Description
All
HOUR
METER
The number of hours that the equipment
has been in use.
The equipment tracks the elapsed
minutes, but the value that appears is
truncated to the nearest full hour.
All
U-BOOT
SW
Upper board application software part
number and version.
Note: Some displays show UPPER
BOOT SW PART NUMBER.
All
U- BASE
SW
Upper base application software version.
Note: Some displays show UPPER
BASE SW PART NUMBER.
All
LOWER SW
Lower application software version.
Note: Some displays show LOWER
BASE SW PART NUMBER.
All
SER.
NUMBER
The serial number is helpful when you
contact Customer Support.
Note: Some displays show SERIAL
NUMBER.
Product
Display
Description
All
USAGE
LOG
The number of times each program has
been used and displays the associated
cumulative minutes.
Helpful in determining user preferences
in program selection.
All
ERROR
LOG
Displays any error codes that may have
been detected by the software.
All
ODOMETER
The odometer value correlates to the type of
Precor product and the standard of units,
U.S. or Metric, selected in the programs.
Treadmill shows the number of
cumulative miles or kilometers logged to
date.
EFX or AMT shows the number of total
strides logged to date.
Cycle shows the number of total
revolutions logged to date.
Climber indicates the number of floors
climbed.
Table 6. Informational Displays for specific equipment or special cases
Product
Display
Description
534i, 532i,
AMT
METRICS BOARD SW
PART NUMBER
Metrics board software part
number and version.
AMT
STRIDE DIAL SW
PART NUMBER
Stride dial software part
number.
Product Owner's Manual: Club Features 29
Viewing the Error Log
Quick access to the informational display is available if error
messages appear on the display and have been recorded in the
error log. This feature is usually reserved for service personnel.
To view the error log:
1. At the Precor banner, press and hold PAUSE/RESET for 4
seconds.
2. If DIAGS - INFORMATION DISPLAY or ERROR LOG
appears, then press OK.
If any errors are logged, they appear on the display. If no errors
are logged, a message such as STOP KEY or STUCK KEY
appears instead.
3. Release the PAUSE/RESET key to return to the Precor banner.
Note: On treadmills, the red STOP button can be used instead of
the PAUSE/RESET key.
Erasing the Error Log
When you no longer need the error log information, you can erase
the entries.
To erase the error log entries:
1. Press QUICKSTART while any error description is scrolling
across the display.
2. Continue to maintain light pressure on the key until the message
HOLD TO CLEAR ERRORS scrolls off the display.
3. When you release Quickstart, the message NO ERRORS will
appear in the display if the error log has been deleted.
Important: You cannot retrieve the error log once you have
deleted it. You may want to resolve any issues you are
experiencing with the equipment before erasing the error log.
4. Press RESET to return to the Precor banner.
Product Owner's Manual: Club Features 30
User ID Entry with CSAFE Equipment
The equipment is fully compatible with CSAFE protocols. When
the equipment is connected to a CSAFE master device, the user is
prompted to press ENTER and begin an identification process.
The user ID is displayed as five zeros and indicates the starting
point. The following table describes key functions while in CSAFE
mode.
Table 7. CSAFE access keys
Keypad
Description
Number keypad
Use the number keys to enter a user ID. The number
that is pressed appears on the right. As the user
continues, the numbers fill in the display from right to
left. When all five numbers are in place, the user
must press ENTER or OK to submit the user ID.
CLEAR or
BACK
Erases individual numbers in the user ID from right to
left.
ENTER or OK
Submits the user ID.
Note: User ID entry is bypassed when the user
enters five zeros. No workout statistics are recorded.
RESET or
PAUSE/RESET
Resets the display to the banner.
A message appears on the display and indicates when the user ID
is accepted by the CSAFE master device. Once program selection
is complete, the user can begin exercising.
To review information about CSAFE specifications, visit the web
site at: www.fitlinxx.com/csafe
If you have questions or need technical support, refer to Obtaining
Service.
Product Owner's Manual: Maintenance 31
It is important to perform the minor maintenance tasks described
below. Failure to maintain the equipment as described in this
section could void the Precor Limited Warranty.
DANGER
To reduce the risk of electrical shock, always
unplug the equipment from its power source (an
optional power adapter in the case of self-
powered equipment) before cleaning it or
performing any maintenance tasks.
Daily Inspection
Look and listen for slipping belts, loose fasteners, unusual noises,
worn or frayed power cords, and any other indications that the
equipment may be in need of service. If you notice any of these,
obtain service.
On treadmills, check for worn, frayed or missing safety lanyards.
Replace missing or worn safety lanyards immediately. Make sure
users attach the safety clip to their clothing before exercising on
the treadmill.
Important: If you determine that the equipment needs service,
disconnect any power connections and move the equipment away
from the exercising area. Place an OUT OF SERVICE sign on it
and make sure all patrons and users know that they must not use
the equipment.
Daily Cleaning
Precor recommends the equipment be cleaned before and after
each exercise session. Use mild soap and water to dampen a
clean, soft cloth and wipe all exposed surfaces. This helps remove
dust and dirt.
CAUTION: Do not use any acidic cleaners. Doing so will weaken
the paint or powder coatings and void the Precor Limited
Warranty. Never pour water or spray liquids on any part of the
equipment. Allow the equipment to dry completely before using.
Frequently vacuum the floor underneath the equipment to prevent
the accumulation of dust and dirt, which can affect the smooth
operation of the equipment. Use a soft nylon scrub brush to clean
the running belt on treadmills or the grooves on equipment with
foot pedals.
CAUTION: On treadmills, as you clean the hood or side rails, be
aware of the handrail extensions so you do not inadvertently hit
your head or injure yourself.
Maintenance
Product Owner's Manual: Maintenance 32
EFX: Cleaning the Ramp
Whenever the ramp becomes soiled, clean the exposed surfaces
of the ramp and roller wheels by performing the following steps.
Note: If your equipment has a ramp cover, remove it before
performing the following steps. Refer to the EFX Assembly Guide.
1. Moisten a clean, soft cloth in a mild solution of soap and water.
2. Position one foot pedal at the top of the ramp (the other will
automatically be positioned at the bottom).
3. Clean the exposed portions of the ramp.
4. Gently lift the roller wheels. Rotate each wheel while wiping it
with the clean, soft cloth.
5. Switch the foot pedal position and finish cleaning the ramp.
Storing the Chest Strap
If you purchased the optional heart rate chest strap, store it in a
place where it remains free of dust and dirt (for example, in a closet
or drawer). Be sure to protect the chest strap from extremes in
temperature. Do not store it in a place that may be exposed to
temperatures below 32° F (0° C).
To clean the chest strap, use a sponge or soft cloth dampened in
mild soap and water. Dry the surface thoroughly with a clean towel.
WARNING
Signals used by the Chest Strap Transmitter
(or heart rate strap) may interfere with
pacemakers or other implanted devices.
Consult your physician and the manufacturers
of your Chest Strap Transmitter and
implanted device before using a Chest Strap
Transmitter.
Note: To receive an accurate reading, the strap needs to be in
direct contact with the skin on the lower sternum (just below the
bust line for women).
Product Owner's Manual: Maintenance 33
Treadmill: Checking the Alignment of
the Running Belt
Proper belt alignment allows the belt to remain centered and
ensures smooth operation. Realigning the belt takes a few simple
adjustments. If you are unsure about this procedure, call Precor
Customer Support. Refer to Obtaining Service.
CAUTION: Special care must be taken when aligning the running
belt. Turn Off the treadmill while adjusting or working near the
rear roller. Remove any loose clothing and tie back your hair. Be
very careful to keep your fingers and any other object clear of the
belt and rollers, especially in front of the roller and behind the
deck. The treadmill will not stop immediately if an object
becomes caught in the belt or rollers.
1. Make sure that the running surface is level. To operate correctly,
the treadmill needs to be as level as possible. If needed, the
rear feet can be adjusted to level the treadmill (refer to the
Assembly Guide).
2. Turn the equipment On.
3. Stand beside the treadmill and press QUICKSTART.
4. If needed, enter the safety code by pressing the number keys in
sequence: 1, 2, 3, 4.
The running belt starts automatically after a 3-second
countdown appears on the display.
5. Press the SPEED up key until the display shows a speed of
3 mph (5 kph).
CAUTION: If you hear any chafing or the running belt appears
to be getting damaged, stop the running belt immediately by
pressing the red STOP button. Contact Precor Customer
Support.
6. Walk around to the rear of the equipment and observe the belt
for a few minutes. The belt should run centered along the
running bed. If the belt drifts off center, you must make
adjustments. Refer to Treadmill: Adjusting the Running Belt.
Important: Failure to align the belt may cause the belt to tear
or fray, which is not covered by the Precor Limited Warranty.
7. To stop the running belt, press the red STOP button.
8. Turn the treadmill Off.
Product Owner's Manual: Maintenance 34
Treadmill: Adjusting the Running Belt
If you are unsure about adjusting the running belt, call Precor
Customer Support (refer to Obtaining Service).
CAUTION: For your safety, use the power switch to turn Off the
treadmill before making any adjustments. Do not adjust the
running belt when someone is standing on the equipment.
1. Locate the right belt adjustment bolt in the rear end cap of the
treadmill as shown in the following figure.
Figure 6: Location of the adjustment bolt
To determine left and right, stand at the rear of the treadmill and
face the display. Make all belt adjustments on the right rear
corner bolt using the hex key provided.
If the belt is off center to the LEFT, turn the adjusting bolt ¼
turn counterclockwise, which moves the running belt to the
right.
If the belt tracks off center to the RIGHT, turn the bolt ¼ turn
clockwise; this moves the belt to the left.
Important: Do not turn the adjusting bolt more than ¼ turn at a
time. Over tightening the bolt can damage the treadmill.
2. Recheck the alignment of the running belt by repeating the
steps found in Treadmill: Checking the Alignment of the
Running Belt.
Product Owner's Manual: Maintenance 35
Recumbent Bike: Realigning the Seat
If the seat rocks side-to-side, you need to realign the center wheel
underneath the seat. Adjustment screws are located on the left
side of the seat rail.
To remove seat wobble (side-to-side movement), perform the
following steps.
1. Obtain a ³⁄₁₆-inch and ₁₆-inch hex key.
2. Use the ³⁄₁₆-inch hex key to loosen the two adjustment screws
as shown in the following figure.
Figure 7: Loosening the two adjustment screws
3. Use the ⁵⁄₁₆-inch hex key to turn the wheel lock adjustment key
clockwise ¼ turn as shown in the following figure. This process
realigns the center wheel inside the top rail. Leave the ⁵⁄₁₆-inch
hex key in place while you tighten the adjustment screws with
the ³⁄₁₆-inch hex key.
Figure 8: Realigning the center wheel
4. Remove the hex keys and check that the seat no longer rocks
side-to-side. If the rocking movement continues, you need to
repeat steps 2 and 3.
Product Owner's Manual: Maintenance 36
Moving the Equipment
It is important, if you plan to move the equipment, that you obtain
adult help and use proper lifting techniques. The equipment is very
heavy. Take advantage of the roller wheels on the equipment when
moving it to a new location.
Important: The plastic end cap, on the treadmill, is specifically
designed for lifting. To avoid injury to yourself or damage to the
equipment, ask for help in placing the treadmill where you plan to
use it. Place a hand under each end of the end cap and, using
proper lifting techniques, lift the rear of the treadmill so that it rolls
on its front wheels.
Long-Term Storage
When the equipment is not in use for any length of time, make sure
it is turned Off (treadmill only) and the power cord or optional
power adapter (self-powered equipment) is unplugged from its
power source and is positioned so that it will not become damaged
or interfere with people or other equipment.
POM C-V 49336-341 rev D, en
30 November 2014
Precor, C, CrossRamp, EFX, M, Move Beyond, and SmartRate are registered trademarks of Precor Incorporated.
Crosstrainer, QuickStart, and StretchTrainer are trademarks of Precor Incorporated.
Copyright 2014 Precor Incorporated.
Specifications subject to change without notice.
www.precor.com
NOTICE:
Precor is widely recognized for its innovative, award winning designs of exercise equipment. Precor aggressively
seeks U.S. and foreign patents for both the mechanical construction and the visual aspects of its product design.
Any party contemplating the use of Precor’s product designs is hereby forewarned that Precor considers the
unauthorized appropriation of its proprietary rights to be a very serious matter. Precor will vigorously pursue all
unauthorized appropriation of its proprietary rights.
Precor Incorporated
20031 142nd Ave NE
P.O. B ox 7202
Woodinville, WA USA 98072-4002
1-800-347-4404
932i
954i
User's Reference Manual
Commercial Treadmills
Important Safety Instructions
When using Precor equipment, always take basic precautions,
including the following:
y
y
y
y
y
y
y
y
y
y
y
y
y
Read all instructions before using the equipment. These
instructions are written for your safety and to protect the
equipment.
Other sections in this manual provide more details of safety
features. Be sure to read these sections and observe all safety
notices.
Take time to discuss proper safety and exercise equipment
etiquette with the fitness facility manager.
Before beginning any fitness program, see your physician for a
complete physical examination.
Il est conseillé de subir un examen médical complet avant
d’entreprendre tout programme d’exercise. Si vous avez des
étourdissements ou des faiblesses, arrêtez les exercices
immédiatement.
Do not overexert yourself or work to exhaustion. If you feel any
pain or abnormal symptoms, stop your workout immediately and
consult your physician.
Do not allow children or people unfamiliar with its operation on
or near the equipment. Do not leave children unsupervised
around the equipment.
Wear proper exercise clothing and shoes for your workout and
avoid loose clothing. Do not wear shoes with heels or leather
soles. Check the soles of your shoes and remove any dirt and
embedded stones. Tie long hair back.
For safety, hold onto a stationary handrail or handlebar while
using the equipment.
Keep your body and head facing forward. Never attempt to turn
around on the equipment.
Do not rock the equipment. Do not stand on the handrail(s),
display console, or hood.
Use care when getting on or off the treadmill. Always grasp the
handrail when stepping on the running belt and keep the initial
speed at or below 1 mile per hour (mph) or 1 kilometer per hour
(kph). Never step off the treadmill while the running belt is
moving.
Before the running belt begins moving (before your workout),
and after it stops (at the end of your workout), straddle the
running belt by placing your feet firmly on the right and left trim
strips.
The safety clip must be attached at waist level before your
workout. A lanyard connects the safety clip to the red STOP
button on the display console. If you encounter difficulties, a
strong tug on the lanyard stops the running belt.
User's Reference Manual: Important Safety Instructions 1
User's Reference Manual: Important Safety Instructions 2
Safety Code
The fitness facility you are using has the option to enable a safety
code. The code involves entering four number keys in sequence. If
the correct keys are not pressed within two minutes, further access
is denied and the running belt will not move. For more information,
refer to Entering the Safety Code.
Obtaining Service
The fitness facility manager can help you with most questions
regarding the equipment. For additional information about product
operation or exercise routines, refer to the Precor web site at
www.precor.com.
Table of Contents
Important Safety Instructions............................................1
Safety Code.....................................................................................2
Obtaining Service .......................................................................... 2
Treadmill Safety Features ..................................................4
Using the Safety Clip.....................................................................4
Entering the Safety Code............................................................. 5
Using the Stationary Handrails....................................................5
Turning the Treadmill On and Off...............................................5
Heart Rate Features .............................................................6
Important Use and Safety Information .......................................6
Wearing a Chest Strap.................................................................8
Using the Touch-Sensitive Grips................................................ 9
Using SmartRate ............................................................................ 9
Exercise to Your Target Heart Rate .........................................10
Heart Rate Analysis .....................................................................11
Troubleshooting Heart Rate.......................................................11
Display Console...................................................................12
More Information about the Upper Display ............................14
More Information about the Lower Display ..................... ......15
.
Keypads..........................................................................................16
Workout Options.................................................................21
Choosing QUICKSTART ...........................................................22
Selecting a Program....................................................................23
Storing Workout Statistics ........................................................24
Changing Programs in Mid-session ........................................25
Cooling Down After a Workout................................................25
Pausing During a Workout or the Cool-Down Period.........26
Ending a Workout........................................................................26
Programs...............................................................................28
Choosing a Program...................................................................28
Program Tips.................................................................................28
Manual Program...........................................................................29
Interval Program ...........................................................................29
Random Program.........................................................................30
Heart Rate Program ....................................................................30
954i Aerobic Program ................................................................32
932i Weight Loss Program.......................................................32
Track Program ..............................................................................33
Fitness Test...................................................................................33
User's Reference Manual: Table of Contents 3
Treadmill Safety Features
The treadmill is equipped with certain items that, when used
properly, help sustain an enjoyable workout. These items include:
y
y
y
y
Safety clip
Safety code
Handrails
Power switch
Important: Before exercising, review the Important Safety
Instructions found at the beginning of this manual.
Using the Safety Clip
Attach the safety clip to your clothing before each workout. A tug
on the lanyard trips the safety switch inside the display console and
stops the running belt.
Safety Clip
Lanyard
Figure 1: Attaching the safety clip
If the safety switch trips while you are exercising, the running belt
stops and the treadmill assumes you are pausing your workout. To
resume exercising, take the following steps:
1.
2.
3.
4.
Reattach the safety clip to your clothing.
Straddle the running belt.
Press QUICKSTART.
Important: Hold onto the handrail when you step onto the
running belt and while you adjust the speed.
Enter the safety code (if necessary).
Note: The facility can set a limit on the amount of time you can
pause during a workout. Check with the manager to find out
about the pause time limit. If you exceed the time limit, the
display returns to the Precor banner.
User's Reference Manual: Treadmill Safety Features 4
User's Reference Manual: Treadmill Safety Features 5
To turn the treadmill On and Off, use the power switch located
beneath the hood, near the power cord receptacle. Refer to the
following figure.
Turning the Treadmill On and Off
Entering the Safety Code
The fitness facility has the option to require a safety code. If the
safety code prompt appears, press the following number keys
sequence:
1,2,3,4.
An asterisk appears on the display with each key press. Hold onto
the handrail and straddle the running belt. The running belt starts
moving after a 3-second countdown.
Note: If the correct keys are not pressed within two minutes, the
Precor banner appears on the display and the running belt does
not move.
Using the Stationary Handrails
To maintain your balance, always grasp a stationary handrail when
you step on or off the equipment and when you use the keypads.
To learn more about the touch-sensitive grips, refer to Heart Rate
Features.
Figure 2: Power switch location
Heart Rate Features
HEART RATE
SmartRate
Heart rate and SmartRate
®
features are available when you wear
the chest strap or grasp both touch-sensitive grips. When a
heartbeat is detected, the HEART RATE display shows your heart
rate and, if your age has been entered, the SmartRate LED blinks
and indicates your target zone.
Important Use and Safety Information
Read the following before using the heart rate or SmartRate
features.
y
y
y
Consult your physician before engaging in any vigorous
exercise. Do not use the heart rate programs until authorized by
your physician.
Know your heart rate and your physician-recommended heart
rate target zone. Individual heart rates vary according to several
physiological factors and may not correspond directly with the
following figure.
Always face forward on the equipment and use the stationary
handrail or handlebars for balance.
User's Reference Manual: Heart Rate Features 6
20 25 30 35 40 45 50 55 60 65 70 75
70
80
90
100
120
130
140
150
160
170
180
190
200
110
Heart Rate Target Zones
Yo ur Heart Rate
High
Peak
Cardio
Fat Burn
Warmup
Yo ur Age
Recommended Cardiovascular Zone
Recommended Weight Loss Zone
Figure 3: Heart rate target zones
y
y
y
y
y
The calculation used for the heart rate target zone is:
(220 minus your age) multiplied by a percent.
For example:
Warmup range: (220 minus your age) multiplied by 55%
Peak range: (220 minus your age) multiplied by 85%
After you put on the chest strap, face the display console for a
minimum of 15 seconds. This allows the receiver in the console
to recognize the signal from the chest strap.
If Hr blinks in the HEART RATE display, it is detecting a signal,
but has not yet determined your heart rate. Make sure the chest
strap is positioned properly around your chest and against your
skin.
If you prefer to use the touch-sensitive grips, grasp both and
wait five to ten seconds. Make sure both hands are moist (not
dry).
When a signal is detected, a number flashes in the
HEART RATE display and indicates your heart rate.
User's Reference Manual: Heart Rate Features 7
3.
Wearing a Chest Strap
During a workout, the heart rate features appear on the display
when you wear a chest strap. To receive an accurate reading, the
chest strap needs to be in direct contact with your skin.
1. Carefully dampen the back of the strap with tap water Refer to
the following figure.
Note: Do not use deionized water. It does not have the proper
minerals and salts to conduct electrical impulses.
Figure 4: Moisten chest strap
2. Adjust the strap and fasten it around your chest. The strap
should feel snug, not restrictive. Refer to the following figure.
Figure 5: Adjust chest strap
Make sure that the chest strap is right side up, lies horizontally
across your chest, and is centered in the middle of your chest.
Refer to the following figure.
Figure 6: Fasten chest strap
After you put on the chest strap, face the display console for a few
seconds. This allows the receiver in the console to recognize the
signal from the chest strap.
User's Reference Manual: Heart Rate Features 8
Using the Touch-Sensitive Grips
While exercising, you must grasp both touch-sensitive grips for a
minimum of five to ten seconds to transmit your heart rate to the
display. Refer to the following figure.
Figure 7: Touch-sensitive grips
Usually, the concentration of salts in a person’s perspiration
provides enough conductivity to transmit a signal to the receiver
inside the display console. However, some people, because of
body chemistry or erratic heart beats, cannot use the
touch-sensitive grips. A chest strap may provide better results.
Important: While exercising, do not wear a chest strap and grasp
the touch-sensitive grips at the same time. Using both features may
cause erratic heart rate readings.
Using SmartRate
The SmartRate feature helps you monitor and maintain your heart
rate in the target zone best suited to your specific needs. When a
heart rate signal is detected, a single LED blinks and indicates the
zone that your heart rate is in.
Important: To use the SmartRate feature, you must enter your age
during program selection. Refer to Selecting a Program.
The following table shows the percents used in calculating the
heart rate target zones. While your heart rate remains within these
zones, the corresponding light blinks and provides a visual cue.
CAUTION: Your heart rate should never exceed 85% of your
maximum aerobic heart rate or go above PEAK. If it does,
immediately reduce the intensity of your workout to return your
heart rate to your physician-recommended target zone.
User's Reference Manual: Heart Rate Features 9
Table 1. Heart rate target zones and SmartRate LEDs
Heart Rate Zone
Percent
LED Lit Target Zone Label
Below 55 First WARMUP
55 to 61 Second FAT BURN
62 to 69 Third FAT BURN
70 to 77 Fourth CARDIO
78 to 84 Fifth CARDIO
85 to 87 Sixth PEAK
Above 87 Seventh HIGH
The SmartRate indicator lights do not blink when:
y
y
You do not wear or improperly position the chest strap. Or, you
fail to grasp both touch-sensitive grips for five to ten seconds.
You do not enter your age during an exercise session.
For example, pressing QUICKSTART at the Precor banner
causes the Manual Program to begin. Your age has not been
entered and is considered a null value. Your heart rate will
appear in the HEART RATE display when you hold onto the
touch-sensitive grips or wear a chest strap, but none of the
SmartRate LEDs blink because the appropriate calculations
have not been made.
Note: You can remedy this situation by choosing a program
using one of the PROGRAMS keys and entering your time,
weight, and age.
Exercise to Your Target Heart Rate
A dedicated window displays your heart rate while you exercise. To
view your heart rate (beats per minute) on the display, either wear a
chest strap or grasp both touch-sensitive grips.
The Precor web site (www.precor.com) has several suggestions for
workouts with varying levels of intensity. It provides many workout
details that include the appropriate target heart rate.
The equipment includes one or more heart rate programs that let
you exercise based on a specified target heart rate. As you
exercise, the programs monitor your heart rate and automatically
maintain it within a few beats per minute of your selected target. To
use these programs, press the PROGRAMS HEART RATE key.
For more information, refer to Programs.
User's Reference Manual: Heart Rate Features 10
User's Reference Manual: Heart Rate Features 11
Heart Rate Analysis
Every time you complete a program using the chest strap or
touch-sensitive grips, the display provides a heart rate analysis after
the workout summary. Refer to Ending a Workout.
Your average heart rate appears followed by the maximum heart
rate achieved during your workout. A third display appears, if you
entered your age, and indicates the amount of time your heart rate
remained between the target zones shown.
The heart rate analysis is based on how often your heart rate signal
is received while exercising. If you use the chest strap, the average
heart rate will be more accurate than if you occasionally grasp the
touch-sensitive grips.
Troubleshooting Heart Rate
The following table may help you understand and troubleshoot
erratic heart rate readings.
Important: A heart rate can only be detected when the Precor
heart rate receiver is properly installed in the display. A user must
wear the chest strap or grasp both touch-sensitive grips.
Table 2. Erratic heart rate readings
What
appears
on the
display
Cause What to do
Nothing
The heart rate receiver is
not installed or it has
been disconnected.
Call Customer Support. Refer to
Obtaining Service.
HR or Hr
A signal is being
detected through the
chest strap or the
touch-sensitive grips, but
a valid heart rate is not
yet established.
Be sure that the chest strap is
moist, centered, and in direct
contact with your skin. If you are
using the touch-sensitive grips,
continue to grasp both of them.
Wait a few moments for your
heart rate to appear.
Note: To conduct electrical impulses from a user’s heart, both
touch-sensitive grips must be grasped firmly for five to ten seconds.
Usually, the concentration of salts in a person’s perspiration
provides enough conductivity to transmit a signal to the receiver in
the display console. However, because of body chemistry or erratic
heartbeats, some people cannot use the touch-sensitive grips. A
chest strap may provide better results.
Display Console
ENTER
CLEAR
1
2
3
45
6
7
8
9
0
TIME ELAPSED
TIME REMAINING
CALORIES
DISTANCE
PAC E
AVERAGE SPEED
HEART RATE
SmartRate
PROGRAMSPROGRAMS
MANUAL
HEART
RATE
PERFORMANCE
INTERVAL
VARI ET Y
WEIGHT LOSS
PAUSE/
RESET
Before beginning any tness program, see your
physician for a thorough physical examination. Seek advice from your
physician to learn the target heart rate appropriate for your tness level.
Do not allow children or those unfamiliar with its operation on or near
this equipment. Read the product owner's manual or consult a
qualied instructor before operating this equipment. Improper use of
this equipment can result in serious injury. Before exercising, attach the
safety clip to your clothing. Do not stand on the belt when starting the
treadmill. Do not attempt to turn around on the moving belt. Keep hands
and clothing away from the belt and rear roller. If you feel pain,
faintness, or dizziness, stop exercising immediately.
I
N
C
L
I
N
E
S
P
E
E
D
OK
QUICK
START
User's Reference Manual: Display Console 12
HEART RATE display: Your heart rate appears when you
wear a chest strap or grasp both touch-sensitive grips. The
heart rate indicator blinks in rhythm to your heart rate.
Upper display: Initially shows the Precor banner. It changes
to the program profile when you select a program or press
QUICKSTART. A blinking column in the profile indicates
your position.
PROGRAMS keypad: To begin an exercise session, press
the PROGRAMS keys to view a menu of programs within
each category. For program descriptions, refer to Programs.
Navigational arrow keys: These keys let you display
exercise information prior to selecting it with the OK key.
Left selection key: Press the key to select which item you
wish to display during your session. Indicator lights appear
next to the item that is displayed. You can perform the same
function with the Right selection key.
INCLINE & SPEED keys: Use these keys to adjust the
incline or speed.
SmartRate display: When you enter your age after
selecting a program and wear a chest strap or grasp both
touch-sensitive grips, one LED blinks and indicates the zone
that you are exercising in.
Number keys: During an exercise session, use the number
keys to answer prompts or update information. If the
entertainment option is attached, the number keys act as TV
channel controls.
Lower display: While you exercise, four sets of numbers
show information about your session.
Right selection key
QUICKSTART: Press QUICKSTART to begin your workout
immediately.
Red STOP button: Press to pause or end a workout.
User's Reference Manual: Display Console 13
More Information about the Upper
Display
HEART RATE
SmartRate
The upper display includes the HEART RATE, SmartRate, and a
program profile display. The following descriptions explain what
appears in the displays.
HEART RATE–displays your heart rate when you wear a chest
strap or grasp both touch-sensitive grips. Refer to Heart Rate
Features.
SmartRate–displays your heart rate as a blinking segment which
indicates the zone your heart rate is in when you enter your age
after choosing a program and hold on to the touch-sensitive grips
or use a chest strap. Use this display as a visual aid to keep your
heart rate in your preferred zone. Refer to Using SmartRate.
Program profile—appears during your exercise session. A blinking
segment in the profile indicates your position. In most programs,
the INCLINE setting affects the column height as shown in the
following diagram. The profile raises or lowers according to which
INCLINE key is pressed.
During an exercise session, the display becomes a message bar
showing additional information depending on user selections and
program interludes.
0.0 — 0.5
1 — 1.5
2 — 2.5
3 — 5.5
6 — 8.5
9 — 11.5
12 — 15
Column height Incline settings
Figure 8: Column height in the program profile
User's Reference Manual: Display Console 14
More Information about the
Lower Display
QUICK
START
PAUSE/
RESET
TIME ELAPSED
TIME REMAINING
DISTANCE
PAC E
AVERAGE SPEED
I
N
C
L
I
N
E
S
P
E
E
D
CALORIES
The lower display provides information about your workout session.
Pressing the keys beneath each window affects what appears in
the displays. Each display provides information about your workout
statistics and is described in the list below.
Note : If you choose to rest a book or magazine on the display, you
can still view these workout statistics.
TIME ELAPSED, TIME REMAINING, and
CALORIES
TIME ELAPSED—displays time in minutes and seconds and
indicates the amount of time you have been exercising.
When you exceed 60 minutes during a single session, the
display converts to hours and minutes.
Note : The fitness facility can place limits on workout time.
TIME REMAINING—shows the amount of time remaining in
a workout. If the selected time is less than 60 minutes, the
display shows time in minutes and seconds. If you select a
time greater than 60 minutes, the display reflects hours and
minutes until the countdown reaches 60 minutes, at which
time the display reverts to minutes and seconds.
Note : If you select a
NO LIMIT
time goal, the TIME
REMAINING display appears blank. Press the left selection
key if you wish to display elapsed time.
CALORIES—indicates the estimated cumulative number of
calories being burned.
INCLINE
INCLINE—displays the percentage of incline during your
workout. The INCLINE keys affect the lift and let you set an
incline between 0% and 15%. The values displayed can
change in 0.5% increments.
User's Reference Manual: Display Console 15
SPEED
SPEED—displays the running belt speed in miles per hour
(mph) or kilometers per hour (kph). The running belt speed
ranges between 0.5 and 12 mph (0.8 to 20 kph). The speed
can be changed in 0.1 increments using the SPEED keys.
Note : You can press the SPEED down key to stop the
running belt. When
0
appears in the SPEED display, the
running belt stops.
DISTANCE, PACE, and AVERAGE SPEED
DISTANCE—shows linear distance in either miles or
kilometers. The distance is calculated based on your speed.
PACE—displays your target speed in minutes and seconds
per mile (or kilometer). For example, the number
4 :23
indicates that your pace (speed at which you are moving) is
4 minutes and 23 seconds per mile.
AVERAGE SPEED—indicates the average speed associated
with your workout.
Keypads
Use the keypads to enter your exercise session selections and
display preferences.
Distinct keypads exist on the display and are discussed in this
section :
y
y
y
y
Lower Display keypad and the selection keys
Navigational keypad in the center of the display
PROGRAMS keypad
Number keypad with the ENTER and CLEAR keys
User's Reference Manual: Display Console 16
Lower Display Keypad and the Selection Keys
QUICK
START
DISTANCE
PAC E
AVERAGE SPEED
PAUSE/
RESET
I
N
C
L
I
N
E
S
P
E
E
D
TIME ELAPSED
TIME REMAINING
CALORIES
Figure 9 : Lower Display keypad and the Selection keys
Left selection key : Every time you press this key, the
display reflects the amount of time elapsed since you began
your exercise session, your time remaining, or your estimated
number of calories burned. An LED lights and indicates
which information is being displayed.
INCLINE : Press and hold an INCLINE key to increase or
decrease the incline from 0% to 15% in 0.5% increments.
Changes to the incline are not immediate. It takes time for
the lift to reach the target incline shown on the display.
QUICKSTART: Press QUICKSTART to start your exercise
session immediately using the Manual Program. Refer to
Choosing QUICKSTART.
STOP: A firm tap on the red STOP button slows the running
belt to a stop and the treadmill enters pause mode. To
resume, press QUICKSTART and enter the safety code, if
necessary. Refer to Pausing During a Workout or the
Cool-Down Period.
SPEED: Press and hold a SPEED key to increase or
decrease the running belt speed in 0.1 increments.
When you press a SPEED key, a target speed appears in
the display. The running belt speed changes to meet the
target, but the change occurs gradually so the transition is
smooth.
PAUSE/RESET: This key has several functions during an
exercise session. Press it once to enter pause mode. Press
it again to display a workout summary. Press it a third time to
end your session and return to the Precor banner. Refer to
Pausing During a Workout or the Cool-Down Period.
Right selection key: Every time you press this key, the
display reflects the distance traveled since you began your
exercise session, your current pace, or your average speed.
An LED lights and indicates which information is being
displayed.
User's Reference Manual: Display Console 17
Navigational Keypad
OK
The navigational keypad provides several ways to change your
exercise session and to display various workout statistics. The OK
key, which allows you to confirm display selections, is also part of
the navigational keypad.
Up and Down Arrows: These keys present the available
selections and affect what appears on the display.
Throughout this manual they are referred to as the
navigational arrow keys.
OK: Use the OK key to confirm responses to specific
prompts.
PROGRAMS Keypad
PROGRAMSPROGRAMS
MANUAL
WEIGHT LOSS
HEART
RATE
PERFORMANCE
INTERVAL
VARIETY
The PROGRAMS keypad provides access to all the exercise
programs. Press the center of the key to view the top level program
in its menu. Pressing the key again displays the next program in the
menu, if one is available, as shown in the following table. For a
description of each program, refer to Programs.
Note: Use the OK key to confirm your selection. For more
information, refer to Workout Options.
User's Reference Manual: Display Console 18
Table 3. Available programs
PROGRAMS key Program Menu
MANUAL
MANUAL
INTERVAL
INTERVAL
VARIETY
RANDOM
HEART RATE
BASIC HRC*
WEIGHT LOSS
WEIGHT LOSS
PERFORMANCE
TRACK
FITNESS TEST
Number Keypad
ENTERCLEAR
123
456
789
0
* Use of chest strap or the touch-sensitive grips is required.
The fitness facility can change which programs appear in the
PERFORMANCE menu. If the Fitness Test appears, the Track Program is
unavailable and vice versa.
The number keypad has several functions depending on what is
connected to the equipment.
User's Reference Manual: Display Console 19
User's Reference Manual: Display Console 20
Connection Description
Computer
(CSAFE
compatible)
If a computer is attached to the CSAFE connection on
the equipment, the number keypad lets you enter your
user ID and answer other setup prompts.
Entertainment
Option
If an entertainment option is connected to the display,
the number keypad acts as a remote control which you
use to select the available channels. You can also enter
number values in answer to exercise session prompts.
Nothing
Whether or not peripheral devices are attached to the
equipment, the keypad lets you enter number values in
answer to exercise session prompts. You need to press
ENTER or OK to confirm the selection.
The CLEAR and ENTER keys provide the following functions:
CLEAR: Use the CLEAR key to remove the last number being
displayed.
ENTER: Use the ENTER key to accept the number being displayed.
Note: The OK and ENTER keys are usually interchangeable and
provide the same function when no peripheral devices are attached
to the equipment. However, when answering prompts that originate
from a CSAFE device or computer connection, use the ENTER key.
Workout Options
CAUTION: Before beginning any fitness program, see your
physician for a complete physical examination. Know your
physician-recommended heart rate target zone.
1.
2.
3.
4.
5.
6.
Turn the treadmill On. The Precor banner scrolls across the
display.
Hold on to a handrail while stepping on to the treadmill.
Face the display and then straddle the running belt by placing
your feet on the trim strips provided.
Attach the safety clip to your clothing.
Grip a handrail with one hand to steady yourself.
Select one of the following options:
Option... Steps...
To start exercising
immediately
y
y
Use the QUICKSTART key.
Refer to Choosing QUICKSTART.
To select a program
y
y
Press a PROGRAMS key.
Refer to Selecting a Program.
To enter a user ID
y
y
Use the ENTER key.
Refer to Storing Workout
Statistics.
Important: If the safety code is enabled, you will need to enter
a code to begin your workout. At the safety code prompt, press
the following number key sequence: 1, 2, 3, 4. If you make a
mistake, press any key a few times to reset to the safety code
prompt, or wait two minutes for the banner to return.
Note: The QUICKSTART key is disabled when you press a
PROGRAMS key. You need to confirm each exercise session
selection (program, time, weight, and age) using the OK key.
User's Reference Manual: Workout Options 21
Choosing QUICKSTART
QUICK
START
1. While the Precor banner scrolls, press QUICKSTART to begin
the Manual Program.
QUICKSTART applies the following defaults:
Prompts Default Value
Program Manual
Time Fitness Facility setting
Weight 150 lb (68 kg)
Age 0
2.
3.
4.
If needed, enter the safety code by pressing: 1, 2, 3, 4.
An asterisk appears on the display with each entry.
Hold onto a handrail and straddle the running belt.
A 3-second countdown appears on the display, and then the
running belt starts moving.
Step on to the running belt with the speed at or below 1 mph or
1 kph and begin your workout. Use the SPEED up key to
increase the speed of the running belt.
Note: To use the SmartRate feature, you need to specify your
age and wear a chest strap or grasp both touch-sensitive grips.
In this case, press MANUAL, and then press OK. Follow the
prompts to enter your weight and age. You can use the
navigational arrow keys or the number keypad to change the
blinking prompts. Press OK to confirm the entries. Refer to
Selecting a Program.
User's Reference Manual: Workout Options 22
Selecting a Program
PROGRAMSPROGRAMS
MANUAL
WEIGHT LOSS
HEART
RATE
PERFORMANCE
INTERVAL
VARIETY
1.
2.
3.
4.
5.
6.
While the Precor banner scrolls, press one of the PROGRAMS
keys, and then press OK. For a description of each program,
refer to Programs.
If needed, enter the safety code by pressing: 1, 2, 3, 4.
An asterisk appears on the display with each entry.
A workout time blinks in the display. Use the navigational arrow
keys or the number keys to adjust the minutes (1–240) and
then press OK. (Or, press CLEAR to return to the default time
limit.)
Note: The fitness facility can set limits for workout, pause, and
cool-down times. So, selecting an unlimited workout time may
not be allowed. Check with your fitness facility manager.
To access the
NO LIMIT
option at the time prompt, use the
number keypad and type in 240, then press the up arrow key.
When
NO LIMIT
appears, press OK.
If you choose this option, the automatic cool-down period is
eliminated. You will need to incorporate a cool-down period by
accessing the Manual Program.
Enter your weight (1–999) and then your age (1–99).
Note: To change a value (program, time, weight, or age) that
you have already entered press PAUSE/RESET to return to the
Precor banner. Select a program and re-enter the appropriate
values.
Hold onto a handrail and straddle the running belt after entering
your age.
A 3-second countdown appears on the display, and then the
running belt starts moving.
Step on to the running belt with the speed at or below 1 mph or
1 kph and begin your workout. Use the SPEED keys to adjust
the speed of the running belt.
Note: To use the SmartRate feature, you need to specify your
age and wear a chest strap or grasp both touch-sensitive grips.
In this case, press MANUAL, and then press OK. Follow the
prompts to enter your weight and age. You can use the
navigational arrow keys or the number keypad to address the
blinking prompts.
User's Reference Manual: Workout Options 23
Storing Workout Statistics
Many fitness facilities connect Precor equipment to a computer so
you can easily retrieve your workout statistics and determine how
well you are meeting your fitness goals. If you are interested in
maintaining workout statistic information, ask the manager to create
a user account and a user ID for you. A user ID entry is required to
store your statistics.
Note: If the display is blank, make sure that the equipment is turned
On. If the Precor banner appears, the equipment is not connected
to a computer. Refer to Selecting a Program or Choosing
QUICKSTART.
If the equipment is connected to a computer, the following
appears:
CHOOSE QUICKSTART, ENTER, OR A PROGRAM TO BEGIN
To save the statistics generated during your exercise session, take
the following steps:
1.
2.
3.
4.
Press ENTER.
Use the number keypad to specify your 5-digit user ID. If you
make a mistake, press the CLEAR key and reenter the correct
number.
When your user ID is shown, press ENTER.
A message appears and indicates when the user ID is accepted
by the computer.
To begin your exercise session, select a program. Refer to
Selecting a Program.
Note: To bypass the user ID entry, press ENTER while all five
zeros appear in the user ID field. The statistics generated during
your exercise session will not be added to your file.
User's Reference Manual: Workout Options 24
Changing Programs in Mid-session
You can change programs in the middle of a session by selecting a
new program from the PROGRAMS key menu and pressing OK.
All accumulated statistics are transferred to the new program as
you continue exercising.
Certain programs, such as Basic HRC and Fitness Test, are not
available for mid-session transfers due to set goals and program
preferences. If this occurs, a message scrolls across the center
display.
Note: You cannot select a different program if you are in the
cool-down period. Refer to Pausing During a Workout or the
Cool-Down Period.
Cooling Down After a Workout
Incorporate a cool-down period into your workout to help lower
your heart rate and minimize muscle stiffness or soreness.
When you complete a program with a time limit or specified goal,
you automatically enter a cool-down period. The settings change to
help reduce the intensity of your workout.
Note: You cannot switch to a different program during the
cool-down period. Any pressure on the PROGRAMS keys is
ignored.
A workout summary appears at the end of the cool-down period.
Refer to Ending a Workout.
A cool-down period will not be appended to your exercise session
if the following occurs:
y
y
y
The fitness facility allows an unlimited time goal. A user must
enter a time goal of
NO LIMIT
to access this option. Refer to
Selecting a Program.
The fitness facility sets a cool-down time of zero, which
eliminates the cool-down phase.
You exit a program before completing it.
If you specify an unlimited time or the fitness facility removed the
cool-down phase, remember to incorporate a cool-down period at
the end of your exercise session.
User's Reference Manual: Workout Options 25
Pausing During a Workout or the
Cool-Down Period
Press the red STOP button or the PAUSE/RESET key to pause
anytime during a workout or during a cool-down period. The pause
mode is limited to two minutes or less. If you do not resume
exercising during that time, the display returns to the banner.
1.
2.
3.
To pause, press the red STOP button or the PAUSE/RESET
key.
To resume exercising from pause mode, press QUICKSTART or
the SPEED up key.
Important: Hold onto the handrail when you step onto the
running belt and while you adjust the speed.
If needed, enter the password by pressing: 1, 2, 3, 4.
An asterisk appears on the display with each entry.
Note: In pause mode, you have the ability to change your program
selection. Refer to Changing Programs in Mid-session.
Ending a Workout
CAUTION: Hold on to a handrail when you near the end of your
exercise session. The incline automatically recalibrates to a
default grade. If the lift is moving, wait until it stops before
stepping off the treadmill.
The running belt stops when you complete the automatic
cool-down period. After the running belt stops, time stops accruing.
The workout summary appears and shows your cumulative workout
statistics including warm-up and cool-down periods. You can
review your statistics for two minutes before the display
automatically resets to the Precor banner.
If you hold onto the touch-sensitive grips or wear a chest strap
while exercising, a heart rate analysis appears during the workout
summary. Refer to Heart Rate Analysis.
If you choose to exercise with no set time limit, you must manually
end a program by pressing the red STOP button or the
PAUSE/RESET key. You can also press the SPEED down key until
the speed is reduced to zero and the running belt stops.
User's Reference Manual: Workout Options 26
User's Reference Manual: Workout Options 27
1.
2.
3.
4.
To stop the running belt or end a workout session, do the following:
Grasp a handrail with one hand.
Press the red STOP button or the PAUSE/RESET key with your
other hand. The treadmill enters pause mode.
Press PAUSE/RESET to view the workout summary.
While
WORKOUT SUMMARY
scrolls across the display, press
the selection keys to highlight more statistics.
Press PAUSE/RESET again to return to the Precor banner.
Note: The red STOP button and the PAUSE/RESET key can be
used interchangeably.
Programs
This section describes the programs available on the equipment.
Use this section as a reference tool to better understand each
program’s purpose.
Choosing a Program
Choosing a program depends on your goals. If you are a beginner
or returning to regular exercise, you can start a cardio-conditioning
program to slowly return your body to a comfortable level of
exercise. If you have been exercising and feel that you have an
intermediate or advanced fitness level, you probably have
established goals. The Precor web site (www.precor.com) can give
you many ideas about fitness routines and advice from the experts.
Several of the exercise choices on the equipment are
preprogrammed with recommended settings. However, you have
the option to override the suggested settings, with some
exceptions. If changes are not allowed, a message scrolls across
the display explaining your options.
If your level of exertion becomes too great, reduce your level of
intensity by overriding each upcoming segment in the program
profile. When you complete a program that contains a time limit or
goal period, an automatic cool-down period begins.
Program Tips
y
y
y
y
y
y
Begin at the Precor banner and choose a program by pressing
PROGRAMS or QUICKSTART. Hold onto a handrail as the
running belt begins moving after a 3-second countdown. Refer
to Workout Options.
A blinking column indicates your position as you progress
through a program.
To use the SmartRate feature, you need to specify your age and
wear a chest strap or hold on to the touch-sensitive grips.
In some programs, an unlimited time setting may be an available
option. Refer to Selecting a Program.
The fitness facility can set limits on time, incline, and speed.
Check with your manager to learn if any limits are in place that
might affect your program selections.
To pause during a program, press PAUSE/RESET. Refer to
Pausing During a Workout or the Cool-Down Period.
User's Reference Manual: Programs 28
Manual Program
The Manual Program profile, available by pressing the MANUAL
key, begins as a flat line. You control incline and speed using the
INCLINE or SPEED keys. The program profile reflects any changes.
The blinking column indicates your position in the program.
A cool-down period occurs automatically when you end your
workout. An exception to the cool-down period exists if the fitness
facility allows it. Refer to Cooling Down After a Workout for more
information.
Note: To use the SmartRate feature, you need to specify your age
by accessing the Manual Program through the PROGRAMS key
and answering the age prompt. If you use QUICKSTART to access
the Manual Program, your age has a zero or null value so the
SmartRate feature is not available.
Interval Program
The Interval Program, available by pressing the INTERVAL key,
helps in conditioning your cardiovascular system. The program
raises and lowers your level of exertion repeatedly for the specified
period of time. The program lets you choose the rest and work
intervals according to your training regimen.
While exercising, you can vary the speed and change the preset
incline using the INCLINE or SPEED keys. The settings are
repeated throughout the remainder of the program.
Initially, the rest interval is set to 0% grade and 1 mph or 1 kph. The
work interval is set at a 3% grade and the speed remains at 1 mph
or 1 kph.
Note: Incline changes are limited to +/ 5% grade variance from
the previous incline level.
-
The display lets you know when the speed or incline levels are
about to change and indicates the levels of the next interval.
User's Reference Manual: Programs 29
Random Program
The Random Program can be accessed by pressing the VARIETY
key. Every time the Random program is selected, a different
program profile appears. The columns that appear in the program
profile show the preprogrammed incline. You can override the
preprogrammed incline at any time using the INCLINE keys.
The running belt speed is completely under your control. You can
adjust the pace by pressing the SPEED keys.
Heart Rate Program
The Basic HRC Program, available by pressing the HEART RATE
key, lets you set a target for your heart rate. The program adjusts
the incline to maintain your heart rate within two beats per minute
of the target heart rate while you exercise. To use this program, you
must enter your age and wear a chest strap so your heart rate can
be monitored throughout the session.
Important: Consult your physician to determine the appropriate
target heart rate for your age and fitness level. If your physician
recommends a different target heart rate than the one that appears
on the display, use the navigational arrow keys to change the
target heart rate once you finish the warm-up period. Do not
exercise over the recommended range.
User's Reference Manual: Programs 30
Heart Rate Program Tips
The Basic HRC program enhances your overall cardiovascular
fitness levels to help you achieve your weight loss and fitness
goals. Read through the following tips before selecting the Basic
HRC program. These tips provide general information regarding
how the program functions. For more information and exercise
suggestions, refer to the Precor web site at www.precor.com.
y
y
y
y
y
The program provides a 3-minute warm-up period. During this
time, you may change the incline or speed.
Note: When your target heart rate is achieved or the 3-minute
period elapses, the warm-up period ends and the program
begins.
The program automatically adjusts the incline to keep your heart
rate at the selected target. After the warm-up period, pressing
the INCLINE keys no longer affects the incline motor. Check the
SmartRate display to see if you are maintaining your preferred
zone. Check the HEART RATE display to determine your actual
heart rate. For information about understanding your target heart
rate, refer to Heart Rate Features.
You can press the SPEED keys to adjust the speed and press
the navigational arrow keys to change the target heart rate
during your exercise session. The display lets you know when
changes to either are about to occur.
Note: Changing the target heart rate or speed affects the
treadmill’s ability to maintain your target heart rate in the
preferred zone. It takes time for the treadmill to readjust the
incline so that your heart rate remains on target.
If you wish to quit a heart rate program, you can make a
mid-session transfer to another program. If you try to return or
transfer mid-session to a heart rate program, messages scroll
across the display stating your options.
A cool-down period is automatically added to the end of each
program.
If you are having difficulty with the heart rate features, talk to your
fitness facility manager.
User's Reference Manual: Programs 31
954i Aerobic Program
The Aerobic Program, available by pressing the WEIGHT LOSS
key, provides varying incline levels to induce fat burn and weight
loss conditioning.
For the ideal weight loss range, your heart rate should remain
between 55% and 70% of your maximum aerobic heart rate. If you
wear a chest strap or grasp both touch-sensitive grips, you can use
SmartRate as a visual cue.
You can override the incline settings for each column by pressing
the INCLINE keys. The changes raise or lower the columns on the
remaining portion of the program profile. You can adjust the pace
by pressing the SPEED keys.
932i Weight Loss Program
The Weight Loss Program, available by pressing the WEIGHT
LOSS key, is similar to the Interval Program in that it provides
intervals at set inclines to induce weight loss conditioning.
For the ideal weight loss range, your heart rate should remain
between 55% and 70% of your maximum aerobic heart rate. If you
wear a chest strap or grasp both touch-sensitive grips, you can use
SmartRate as a visual cue.
You can override the incline settings for each column by pressing
the INCLINE keys. The changes raise or lower the columns on the
remaining portion of the program profile. You can adjust the pace
by pressing the SPEED keys.
User's Reference Manual: Programs 32
Track Program
The Track Program can be accessed by pressing the
PERFORMANCE key. An oval track appears on the display. One
lap around the track represents 440 yards (400 meters). A blinking
LED moves counterclockwise and indicates your position on the
track. You control incline and speed.
Fitness Test
The Fitness Test, available by pressing the PERFORMANCE key,
provides a means of comparing your fitness level with the official
fitness test of the International Association of Firefighters (IAFF). It
is written using the Gerkin Protocol, which is the basis for the
official IAFF fitness test and part of their Wellness and Fitness
Initiative.
During the test, the treadmill gradually increases the incline and
speed in specific stages. The keypads are disabled. Whatever
stage you are at when the test ends determines your aerobic
capacity and establishes your VO
2
max. Once you complete the
test, a fitness score appears as part of the workout summary. Use it
to compare to IAFF standards.
Note: The fitness facility has the option to remove the Fitness Test
from the PERFORMANCE key menu and replace it with the Track
Program. If you do not see the Fitness Test as part of the program
selections, ask the facility manager.
User's Reference Manual: Programs 33
Fitness Test Tips
Read through the following tips before selecting a fitness test.
y
y
y
y
y
y
y
y
y
Sit and rest for at least five minutes prior to taking the test.
You must wear the chest strap throughout the Fitness Test. If
the heart rate reception is erratic, incorrect readings can occur
and terminate the test.
You must enter your age, and in some cases, your gender and
the altitude to begin a fitness test.
The test provides a 3-minute warm-up period. During this time,
you may change the incline or speed. When your target heart
rate is achieved or the 3-minute period elapses, the warm-up
period ends and the test begins.
Important: If you need to stop the running belt to regain control
or reduce your heart rate, please do so. You can retake the
fitness test later. Complete the cool-down period and retake the
fitness test later.
All keypads, except the red STOP button and the
PAUSE/RESET key are disabled.
If you press the red STOP button or the PAUSE/RESET key
during the test, the test ends and the display indicates the test
was not completed.
You cannot change to another program while in the midst of
taking the fitness test.
The test ends if no heart rate is detected for 15 seconds, you
surpass your target heart rate (85% of your maximum aerobic
heart rate), or you complete the 13-minute time limit.
A cool-down period is appended to the end of the test.
Fitness Test Scores
When you finish a fitness test, a fitness score appears on the
display as part of the workout summary. Check with the facility
manager to compare your score with the appropriate fitness
indexes. The test results can help you gauge the effectiveness of
your current exercise routine and tailor it to meet your fitness goals.
User's Reference Manual: Programs 34
Notes:
User's Reference Manual: Programs 35
User's Reference Manual: Programs 36
Notes:
954i/932i URM 49334-104, en
03 March 2008
Precor, C, CrossRamp, EFX, M, Move Beyond, and SmartRate are registered trademarks of Precor Incorporated.
Crosstrainer, Crosstraining, QuickStart, and StretchTrainer are trademarks of Precor Incorporated.
Copyright 2008 Precor Incorporated.
Specifications subject to change without notice.
www.precor.com
NOTICE:
Precor is widely recognized for its innovative, award winning designs of exercise equipment. Precor aggressively seeks
U.S. and foreign patents for both the mechanical construction and the visual aspects of its product design. Any
party contemplating the use of Precor’s product designs is hereby forewarned that Precor considers the unauthorized
appropriation of its proprietary rights to be a very serious matter. Precor will vigorously pursue all unauthorized
appropriation of its proprietary rights.
Precor Incorporated
20031 142nd Ave NE
P.O. B ox 7202
Woodinville, WA USA 98072-4002
954i/932i Commercial Treadmill
Product Specifications
Product Features
954i 932i
Length 88 in (224 cm) 79 in (204 cm)
Width 35 in (89 cm) 34 in (86 cm)
Height 64 in (163 cm) 59 in (150 cm)
Weight 508 lb (231 kg) 331 lb (150 kg)
Shipping weight 549 lb (249 kg) 346 lb (157 kg)
Running surface 60 in x 20 in
(153 cm x 51 cm)
56 in x 22 in
(142 cm x 56 cm)
Motor 4.0 hp Peak duty 4.0 hp Peak duty
Power 120/240 VAC
50/60Hz
120/240 VAC
50/60Hz
Speed 0.5–12 mph
(0.8–20 kph)
0.5–12 mph
(0.8–20 kph)
Incline 0–15% grade 0–15% grade
Frame Powder-coated steel Powder-coated steel
Regulatory
Approvals
FCC, ETL, CE, EN957 FCC, ETL, CE, EN957
954i 932i
CSAFE
Entertainment Option Available ✓✓
Heart Rate Telemetry* ✓✓
QuickStart
TM
✓✓
SmartRate
®
✓✓
Touch Heart Rate* ✓✓
Safety Code ✓✓
Programs
954i 932i
Manual ✓✓
Interval ✓✓
Variety
Random ✓✓
Heart Rate
Basic HRC* ✓✓
Weight Loss
Aerobic
Weight Loss
Performance
Track ✓✓
Gerkin Fitness Test* ✓✓
Electronic Readouts
Use of a chest strap or the touch-sensitive
grips is required.
% Complete
Average Heart Rate*
Average Speed
Calories
Distance
Heart Rate*
Heart Rate Analysis*
Incline
Language
Maximum Heart Rate*
Pace
Profile
SmartRate*
Speed
Target He art Rate
Time
Time Elapsed
Time in Heart Rate Zone*
Time Remaining
Units
Workout Summary
932i
946i
Assembly Guide
Commercial Treadmills
946i
946i/932i Commercial Treadmill Assembly Guide 1
Thank you for choosing Precor. For proper installation, please read this guide
thoroughly and follow the assembly instructions. If you do not assemble the
treadmill according to these guidelines, you could void the Precor Limited
Warranty.
Obtaining Service
You should not attempt to service the treadmill except for maintenance tasks
as described in the Product Owner’s Manual. If any items are missing,
contact your dealer. Should you need more information regarding customer
support numbers or a list of Precor authorized service centers, visit the
Precor web site at www.precor.com/corp/contact.
Unpacking the Equipment
The unit is shipped in two boxes. Ask for help from two or more people to
unpack and assemble the treadmill.
Required Tools
Crescent wrench
Wire tie cutter
Cardio Theater PVS
Assembly Instructions
If the Cardio Theater Personal Viewing System (PVS) accompanies this Precor
unit, review the PVS assembly instructions found in the Cardio Theater box.
Alleviate additional assembly or disassembly steps by combining the two
assemblies as needed.
Installation Requirements
Follow these installation requirements when assembling the unit:
Assemble the unit near the location where you plan to use it.
Provide ample space around the unit.
The minimum space requirement needed for user safety and proper
maintenance is three feet wide by six feet deep (one meter wide by two
meters deep), directly behind the running belt.
Set up the unit on a solid, flat surface.
A smooth, flat surface under the unit helps keep it level. A level unit has
fewer malfunctions.
Open the box and assemble the components in the sequence
presented in this guide.
Insert all fasteners with your fingers.
Use your fingers to properly align and thread the fasteners. This helps
alleviate cross-threading. Do not fully wrench tighten fasteners until
instructed to do so.
Important: When wrench tightening, the head of the fastener should be
flush with the product. If it is not, cross-threading has occurred. Do not
attempt to rework the assembly as more damage to the equipment will
occur. Contact Customer Support. Refer to Obtaining Service.
946i/932i Commercial Treadmill Assembly Guide 2
Hardware Kit
Note: Additional fasteners exist in the hardware kit, but they are not used on
this product.
Fasteners Quantity
(A) Socket head screw (¾-inch) 8
(B) Buttonhead screw (¾-inch) 6
(C) Split washer (⁵⁄₁₆-inch) 6
1— ¼-inch hex key 1— ³⁄₁₆-inch hex key
946i/932i Commercial Treadmill Assembly Guide 3
Assembly Steps
CAUTION: The location of the On/Off switch is beneath the
cutout on the base frame. Make sure the power switch is in
the Off position. Make sure the power cord is disconnected
from its power source.
Loosen, but do not remove, the two front fasteners and two
side fasteners on the hood using the ³⁄₁₆-inch hex key.
Remove the hood and set it aside.
Slide the left upright support into the base frame bracket.
Ask your assistant to insert a socket head screw (A) into the
top mounting hole on the front of the bracket. Thread the
screw so the other mounting holes line up. Then, insert the
other three screws (A). To allow room for adjustments,
loosely tighten the screws with the ¹⁄₄-inch hex key.
Attach the right upright support by following the same
procedure as step 2 using four socket head screws (A). To
allow room for adjustments, loosely tighten the screws with
the ¹⁄₄-inch hex key.
Left Upright
Support
Right Upright
Support
946i/932i Commercial Treadmill Assembly Guide 4
Ask your assistant to hold the display console above the
upright supports while you unwrap the cable and feed the it
through the right upright support.
CAUTION: Be aware of the handrail extensions when you
are working around the front of the unit. It is easy to bump
your head or sustain other injuries if you ignore the location
of the handrail extensions.
Pull the cable out through the grommeted hole and connect
the cable to its receptacle on the electronics board. The tab
on the cable connector faces the front of the treadmill. An
audible click is heard when the cable is properly attached.
Important: Make sure the upright bracket and fasteners do
not pinch the cable. Cables damaged by improper installation
will not be covered by the Precor Limited Warranty.
Lower the display console. Avoid pinching the cable by
placing it along the front edge of the upright bracket. Align
the mounting holes and insert six buttonhead screws (B) and
six split washers (C).
Loosely tighten the screws with the
³⁄₁₆-inch hex key to allow room for adjustments.
Important: Do not wrench tighten the screws until the unit
has been fully assembled. Make sure the fasteners do not
pinch the cable. Cables damaged by improper installation
will not be covered by the Precor Limited Warranty.
Upright
bracket
946i/932i Commercial Treadmill Assembly Guide 5
Before using the unit, make sure it is level. If adjustments are needed,
adjust one rear foot at a time. Do not raise the unit more than ¾ inch
(2 cm) from the floor.
1. Ask a capable assistant to lift the rear portion of the treadmill
(using proper lifting techniques).
2. Loosen the upper lock nut with a crescent wrench and rotate the
rear feet as needed.
3. Retighten the lock nut and lower the treadmill to the floor.
Plug the power cord into an appropriate outlet.
Important: The treadmill requires a dedicated, grounded circuit. A
20-amp circuit is recommended. Refer to Grounding Instructions in
the Product Owner’s Manual.
Check the alignment and adjust the running belt. For instructions,
refer to Checking the Alignment and Adjusting the Running Belt. If
you wish to test the heart rate feature, refer to the owner’s manual.
Adjustable
rear foot
Tighten all mounting screws.
1. Start at the base and alternately tighten the eight fasteners that
secure the upright supports to the base assembly.
2. Wrench tighten the six screws that secure the display console to
the upright supports.
CAUTION: Be aware of the handrail extensions when you are
working around the front of the unit. It is easy to bump your head
or sustain other injuries if you ignore the location of the handrail
extensions.
Position the hood over the running belt so you can slide it through the
upright supports from the rear. Align the hood with its four fasteners. Use
the ³⁄₁₆-inch hex key to wrench tighten the two side fasteners before
wrench tightening the two fasteners that secure the front of the hood.
946i/932i Commercial Treadmill Assembly Guide 6
Checking the Alignment and Adjusting the Running Belt
Proper belt alignment allows the belt to remain centered and ensures smooth operation. Realigning the belt takes a few simple adjustments. If you are
unsure about this procedure, contact Precor Customer Support. Refer to Obtaining Service.
To check the alignment:
CAUTION: Special care must be taken when aligning the running belt.
Turn Off the treadmill while adjusting or working near the rear roller.
Remove any loose clothing and tie back your hair. Be very careful to keep
your fingers and any other object clear of the belt and rollers, especially in
front of the roller and behind the deck. The treadmill will not stop
immediately if an object becomes caught in the belt or rollers.
1. Turn the unit On.
2. Stand beside the treadmill and press QUICKSTART.
The running belt starts automatically after a 3-second countdown
appears on the display.
3. Press the SPEED up arrow key until the display shows a speed of
3mph(5kph).
CAUTION: If you hear any chafing or the running belt appears to be
getting damaged, stop the running belt immediately by pressing the
red STOP button. Contact Precor Customer Support.
4. Walk around to the rear of the unit and observe the belt for a few
minutes. The belt should run centered along the running bed. If the belt
drifts off center, you must make adjustments. Refer to Adjusting the
Running Belt.
Important: If the belt needs alignment, make the adjustments at once.
Failure to align the belt may cause the belt to tear or fray, which is not
covered by the Precor Limited Warranty.
5. To stop the running belt, press the red STOP button.
6. Turn the treadmill Off.
To adjust the running belt:
If you are unsure about adjusting the running belt, contact Precor Customer
Support. Refer to Obtaining Service.
CAUTION: For your safety, use the power switch to turn Off the treadmill
before making any adjustments. Do not adjust the running belt when
someone is standing on the unit.
1. Locate the right belt adjustment bolt in the rear end cap of the treadmill.
To determine left and right, stand at the rear of the treadmill and face the
display. Make all belt adjustments on the right rear corner bolt using
the ¼-inch hex key.
If the belt is off center to the LEFT, turn the adjusting bolt ¼ turn
counterclockwise, which moves the running belt to the right.
If the belt is off center to the RIGHT, turn the bolt ¼ turn clockwise,
which moves the belt to the left.
Important: Do not turn the adjusting bolt more than ¼ turn at a time.
Overtightening the bolt can damage the treadmill.
2. Recheck the alignment of the running belt.
Adjustment bolt location
946i/932i Commercial Treadmill Assembly Guide 7
Notes:
946i/932i Commercial Treadmill Assembly Guide 8
Notes:
©2008 Precor Incorporated
www.precor.com
946i/932i AG 49921-102, en
11 February 2008
Precor Incorporated
20031 142nd Avenue NE
P.O. B ox 7202
Woodinville, WA USA 98072-4002
1

Hulp nodig? Stel uw vraag in het forum

Spelregels

Misbruik melden

Gebruikershandleiding.com neemt misbruik van zijn services uitermate serieus. U kunt hieronder aangeven waarom deze vraag ongepast is. Wij controleren de vraag en zonodig wordt deze verwijderd.

Product:

Bijvoorbeeld antisemitische inhoud, racistische inhoud, of materiaal dat gewelddadige fysieke handelingen tot gevolg kan hebben.

Bijvoorbeeld een creditcardnummer, een persoonlijk identificatienummer, of een geheim adres. E-mailadressen en volledige namen worden niet als privégegevens beschouwd.

Spelregels forum

Om tot zinvolle vragen te komen hanteren wij de volgende spelregels:

Belangrijk! Als er een antwoord wordt gegeven op uw vraag, dan is het voor de gever van het antwoord nuttig om te weten als u er wel (of niet) mee geholpen bent! Wij vragen u dus ook te reageren op een antwoord.

Belangrijk! Antwoorden worden ook per e-mail naar abonnees gestuurd. Laat uw emailadres achter op deze site, zodat u op de hoogte blijft. U krijgt dan ook andere vragen en antwoorden te zien.

Abonneren

Abonneer u voor het ontvangen van emails voor uw Precor TRM 932I bij:


U ontvangt een email met instructies om u voor één of beide opties in te schrijven.


Ontvang uw handleiding per email

Vul uw emailadres in en ontvang de handleiding van Precor TRM 932I in de taal/talen: Engels als bijlage per email.

De handleiding is 5,75 mb groot.


U ontvangt de handleiding per email binnen enkele minuten. Als u geen email heeft ontvangen, dan heeft u waarschijnlijk een verkeerd emailadres ingevuld of is uw mailbox te vol. Daarnaast kan het zijn dat uw internetprovider een maximum heeft aan de grootte per email. Omdat hier een handleiding wordt meegestuurd, kan het voorkomen dat de email groter is dan toegestaan bij uw provider.

Stel vragen via chat aan uw handleiding

Stel uw vraag over deze PDF

Uw handleiding is per email verstuurd. Controleer uw email

Als u niet binnen een kwartier uw email met handleiding ontvangen heeft, kan het zijn dat u een verkeerd emailadres heeft ingevuld of dat uw emailprovider een maximum grootte per email heeft ingesteld die kleiner is dan de grootte van de handleiding.

Er is een email naar u verstuurd om uw inschrijving definitief te maken.

Controleer uw email en volg de aanwijzingen op om uw inschrijving definitief te maken

U heeft geen emailadres opgegeven

Als u de handleiding per email wilt ontvangen, vul dan een geldig emailadres in.

Uw vraag is op deze pagina toegevoegd

Wilt u een email ontvangen bij een antwoord en/of nieuwe vragen? Vul dan hier uw emailadres in.


Info