POWXG60240X EN
Copyright © 2022 VARO P a g e | 7 www.varo.com
5.3 Operation
▪ Do not operate the engine in a confined space where dangerous carbon monoxide fumes
can collect.
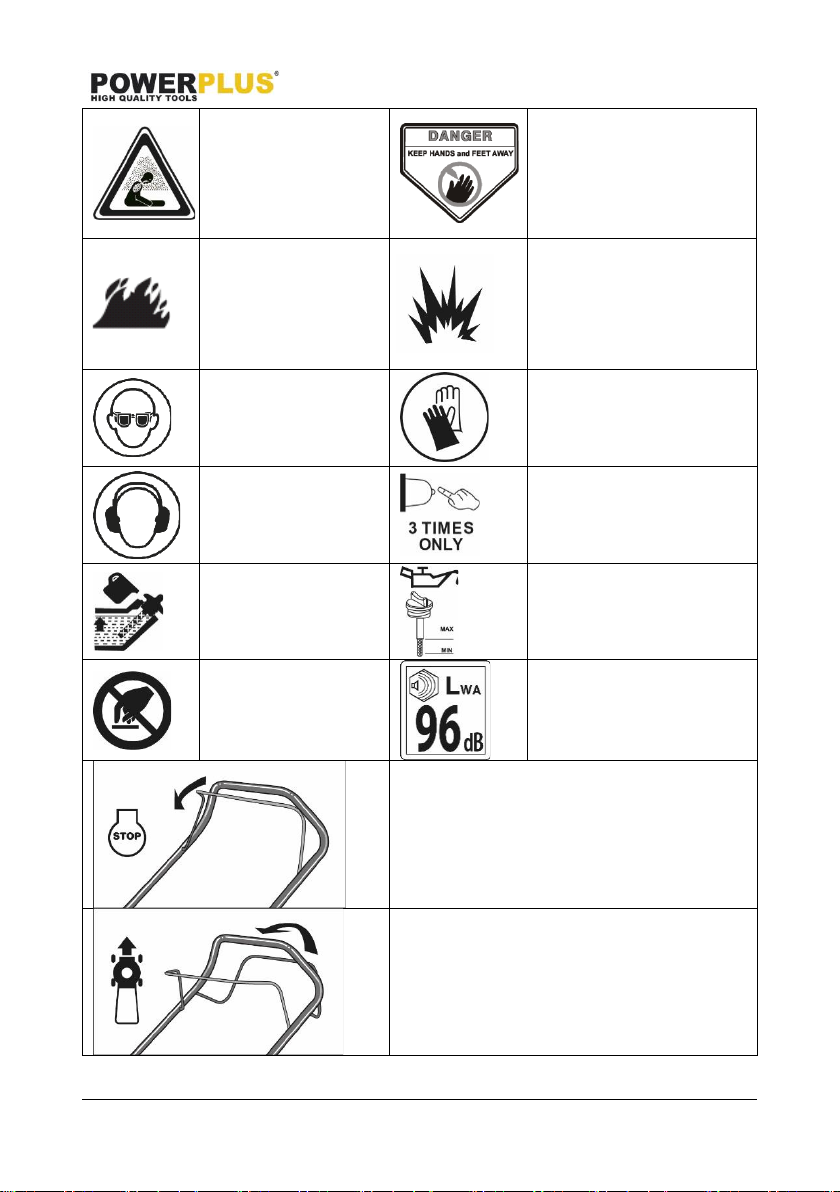
▪ Warning! Do not use the lawnmower when there is a risk for lighting.
▪ It is recommended to limit the duration of operation, in order to minimize the risks from
noise and vibration.
▪ Be careful when working with the lawn mower on slopes and nearby rubbish dumps,
ditches or embankments.
▪ Mow only in daylight or in good artificial light.
▪ Avoid operating the equipment in wet grass, where feasible.
▪ Always be sure of your footing on slopes.
▪ Walk, never run.
▪ For wheeled rotary machines, mow across the face of slopes, never up and down.
▪ Exercise extreme caution when changing direction on slopes.
▪ Do not mow excessively steep slopes.
▪ Use extreme caution when reversing or pulling the lawn mower towards you.
▪ Stop the blade(s) if the lawn mower has to be tilted for transportation when crossing
surfaces other than grass, and when transporting the lawn mower to and from the area to
be mowed.
▪ Never operate the lawn mower with defective guards, or without safety devices, for
example deflectors and/or grass catchers, in place.
▪ Caution: The lawnmower shall not be operated without either the entire grass catcher or
self-closing discharge opening guard in place.
▪ Do not change the engine governor settings or overspeed the engine.
▪ Do not alter or tamper with any sealed adjustment for the engine speed control.
▪ The lawnmower safety systems or features shall not be tampered with or disabled.
▪ Disengage all blades and drive clutches before starting the engine.
▪ Start the engine carefully according to instructions and with feet well away from the
blade(s).
▪ Do not tilt the lawn mower when starting the engine.
▪ Do not start the engine when standing in front of the discharge chute.
▪ Do not put hands or feet near or under rotating parts. Keep clear of the discharge opening
at all times.
▪ Never pick up or carry a lawn mower while the engine is running.
▪ Stop the engine and disconnect the spark plug wire, make sure that all moving parts have
come to a complete stop and, where a key is fitted remove the key:
Before clearing blockages or unclogging chute;
Before checking, cleaning or working on the lawn mower;
After striking a foreign object. Inspect the lawnmower for damage and make repairs before
restarting and operating the lawn mower;
If lawn mower starts to vibrate abnormally (check immediately).
▪ Stop the engine and disconnect the spark plug wire, make sure that all moving parts have
come to a complete stop and, where a key is fitted remove the key:
Whenever you leave the lawn mower;
Before refuelling.
▪ Go slow when using a trailing seat.
▪ Please note that the user should not modify or manipulate any sealed settings for engine
speed control.
▪ Check the machine regularly and make sure before each use that all start locks and push
buttons are working properly.
▪ Do not use the lawn mower when you are tired or under the influence of drugs, alcohol or
medication.
▪ Do not use the lawn mower in bad weather, especially if there is a risk of lightning.