POWDPG7576 EN
Copyright © 2022 VARO P a g e | 6 www.varo.com
▪ If devices are provided for the connection of dust extraction and collection facilities, ensure
these are connected and properly used. Use of these devices can reduce dust related
hazards.
5.4 Power tool use and care
▪ Do not force the power tool. Use the correct power tool for your application. The correct
power tool will do the job better and safer at the rate for which it was designed.
▪ Do not use the power tool if the switch does not turn it on and off. Any power tool that
cannot be controlled with the switch is dangerous and must be repaired.
▪ Disconnect the plug from the power source before making any adjustments, changing
accessories, or storing power tools. Such preventive safety measures reduce the risk of
starting the power tool accidentally.
▪ Store idle power tools out of the reach of children and do not allow persons unfamiliar with
the power tool or these instructions to operate the power tool. Power tools are dangerous
in the hands of untrained users.
▪ Maintain power tools. Check for misalignment or sticking of moving parts, breakage of
parts and any other condition that may affect the power tool’s operation. If damaged, have
the power tool repaired before use. Many accidents are caused by poorly maintained
power tools.
▪ Keep cutting tools sharp and clean. Properly maintained cutting tools with sharp cutting
edges are less likely to stick and are easier to control.
▪ Use the power tool, accessories and tool bits etc., in accordance with these instructions
and in the manner intended for the particular type of power tool, taking into account the
working conditions and the work to be performed. Use of the power tool for operations
different from intended could lead to a hazardous situation.
5.5 Service
▪ Have your power tool serviced by a qualified person using only identical replacement
parts. This will ensure that the safety of the power tool is maintained.
6 SAFETY
▪ DO NOT operate a chain saw with one hand! Serious injury to the operator, helpers,
bystanders, or any combination of these persons may result from one-handed operation. A
chain saw is intended for two-handed use.
▪ DO NOT operate a chain saw when you are fatigued, under the influence of drugs, alcohol
or medication.
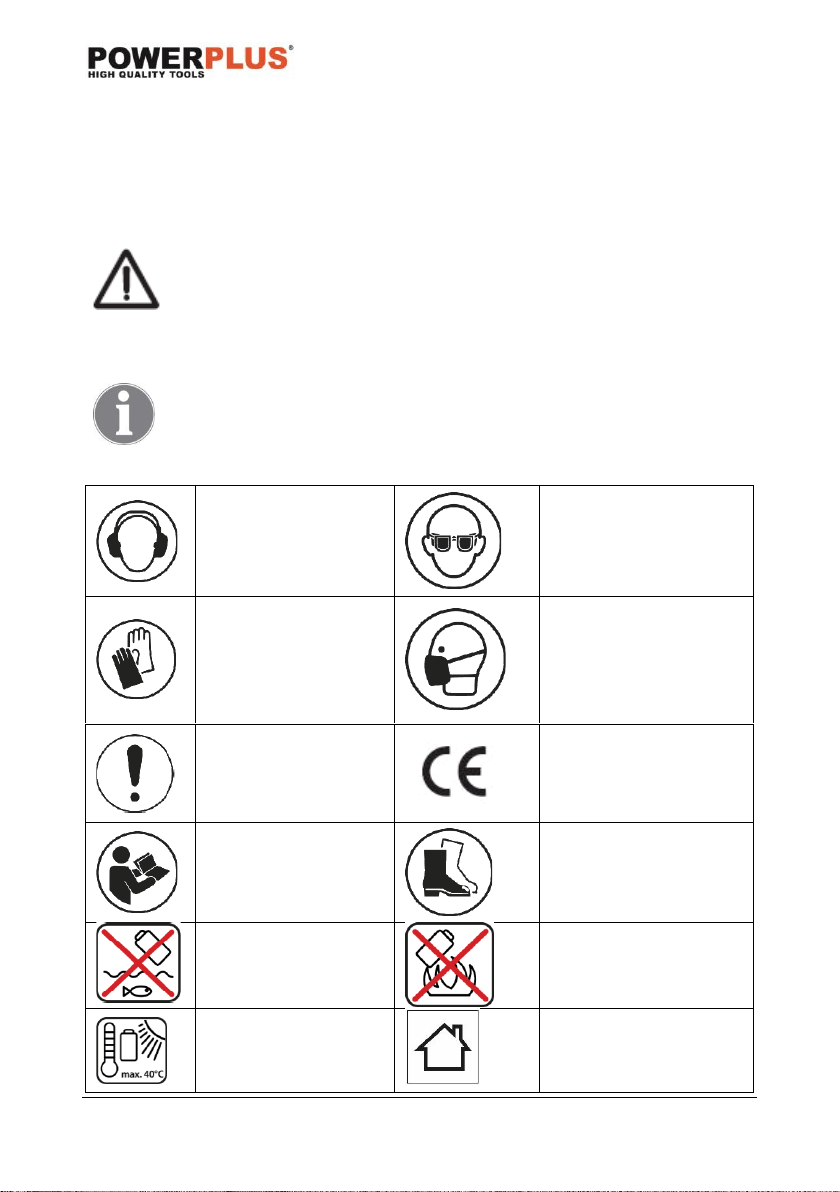
▪ Use safety footwear, snug-fitting clothing, protective gloves, and eye, hearing and head
protection devices.
▪ DO NOT allow other persons to be near when starting or cutting with the chain saw. Keep
bystanders and animals out of the work area.
▪ DO NOT start cutting until you have a clear work area, secure footing, and a planned
retreat path from the falling tree.
▪ Keep all parts of your body away from the saw chain when the engine is running.
▪ Before you start the engine, make sure that the saw chain is not contacting anything.
▪ Carry the chain saw with the engine stopped the guide bar and saw chain to the rear, and
the muffler away from your body.
▪ DO NOT operate a chain saw that is damaged, improperly adjusted, or not completely and
securely assembled. Be sure that the saw chain stops moving when the throttle control
trigger is released.
▪ Shut off the engine before putting the chain saw down.
▪ Use extreme caution when cutting small size brush and saplings because slender material
may catch the saw chain and be whipped toward you or pull you off balance.
▪ When cutting a limb that is under tension, be alert for spring back so that you will not be
struck when the tension in the wood fibers is released.
▪ Keep the handles dry, clean, and free of oil or fuel mixture.